If you export your orders to Excel, for example for your bookkeeping, you often want the invoice number as a column in the file as well. The invoice number is not in the list of export fields by default, because the invoicing module stores it separately with the order. You add it yourself as an extra field in a few clicks, and that works in every export, including one you have already set up to your own liking.
The order export in Autorespond is based on Advanced Order Export For WooCommerce, included in your package. Read the Advanced Order Export documentation
How to add the invoice number as an export column #
In the menu, go to Shop → Export orders and click the Set up fields button.
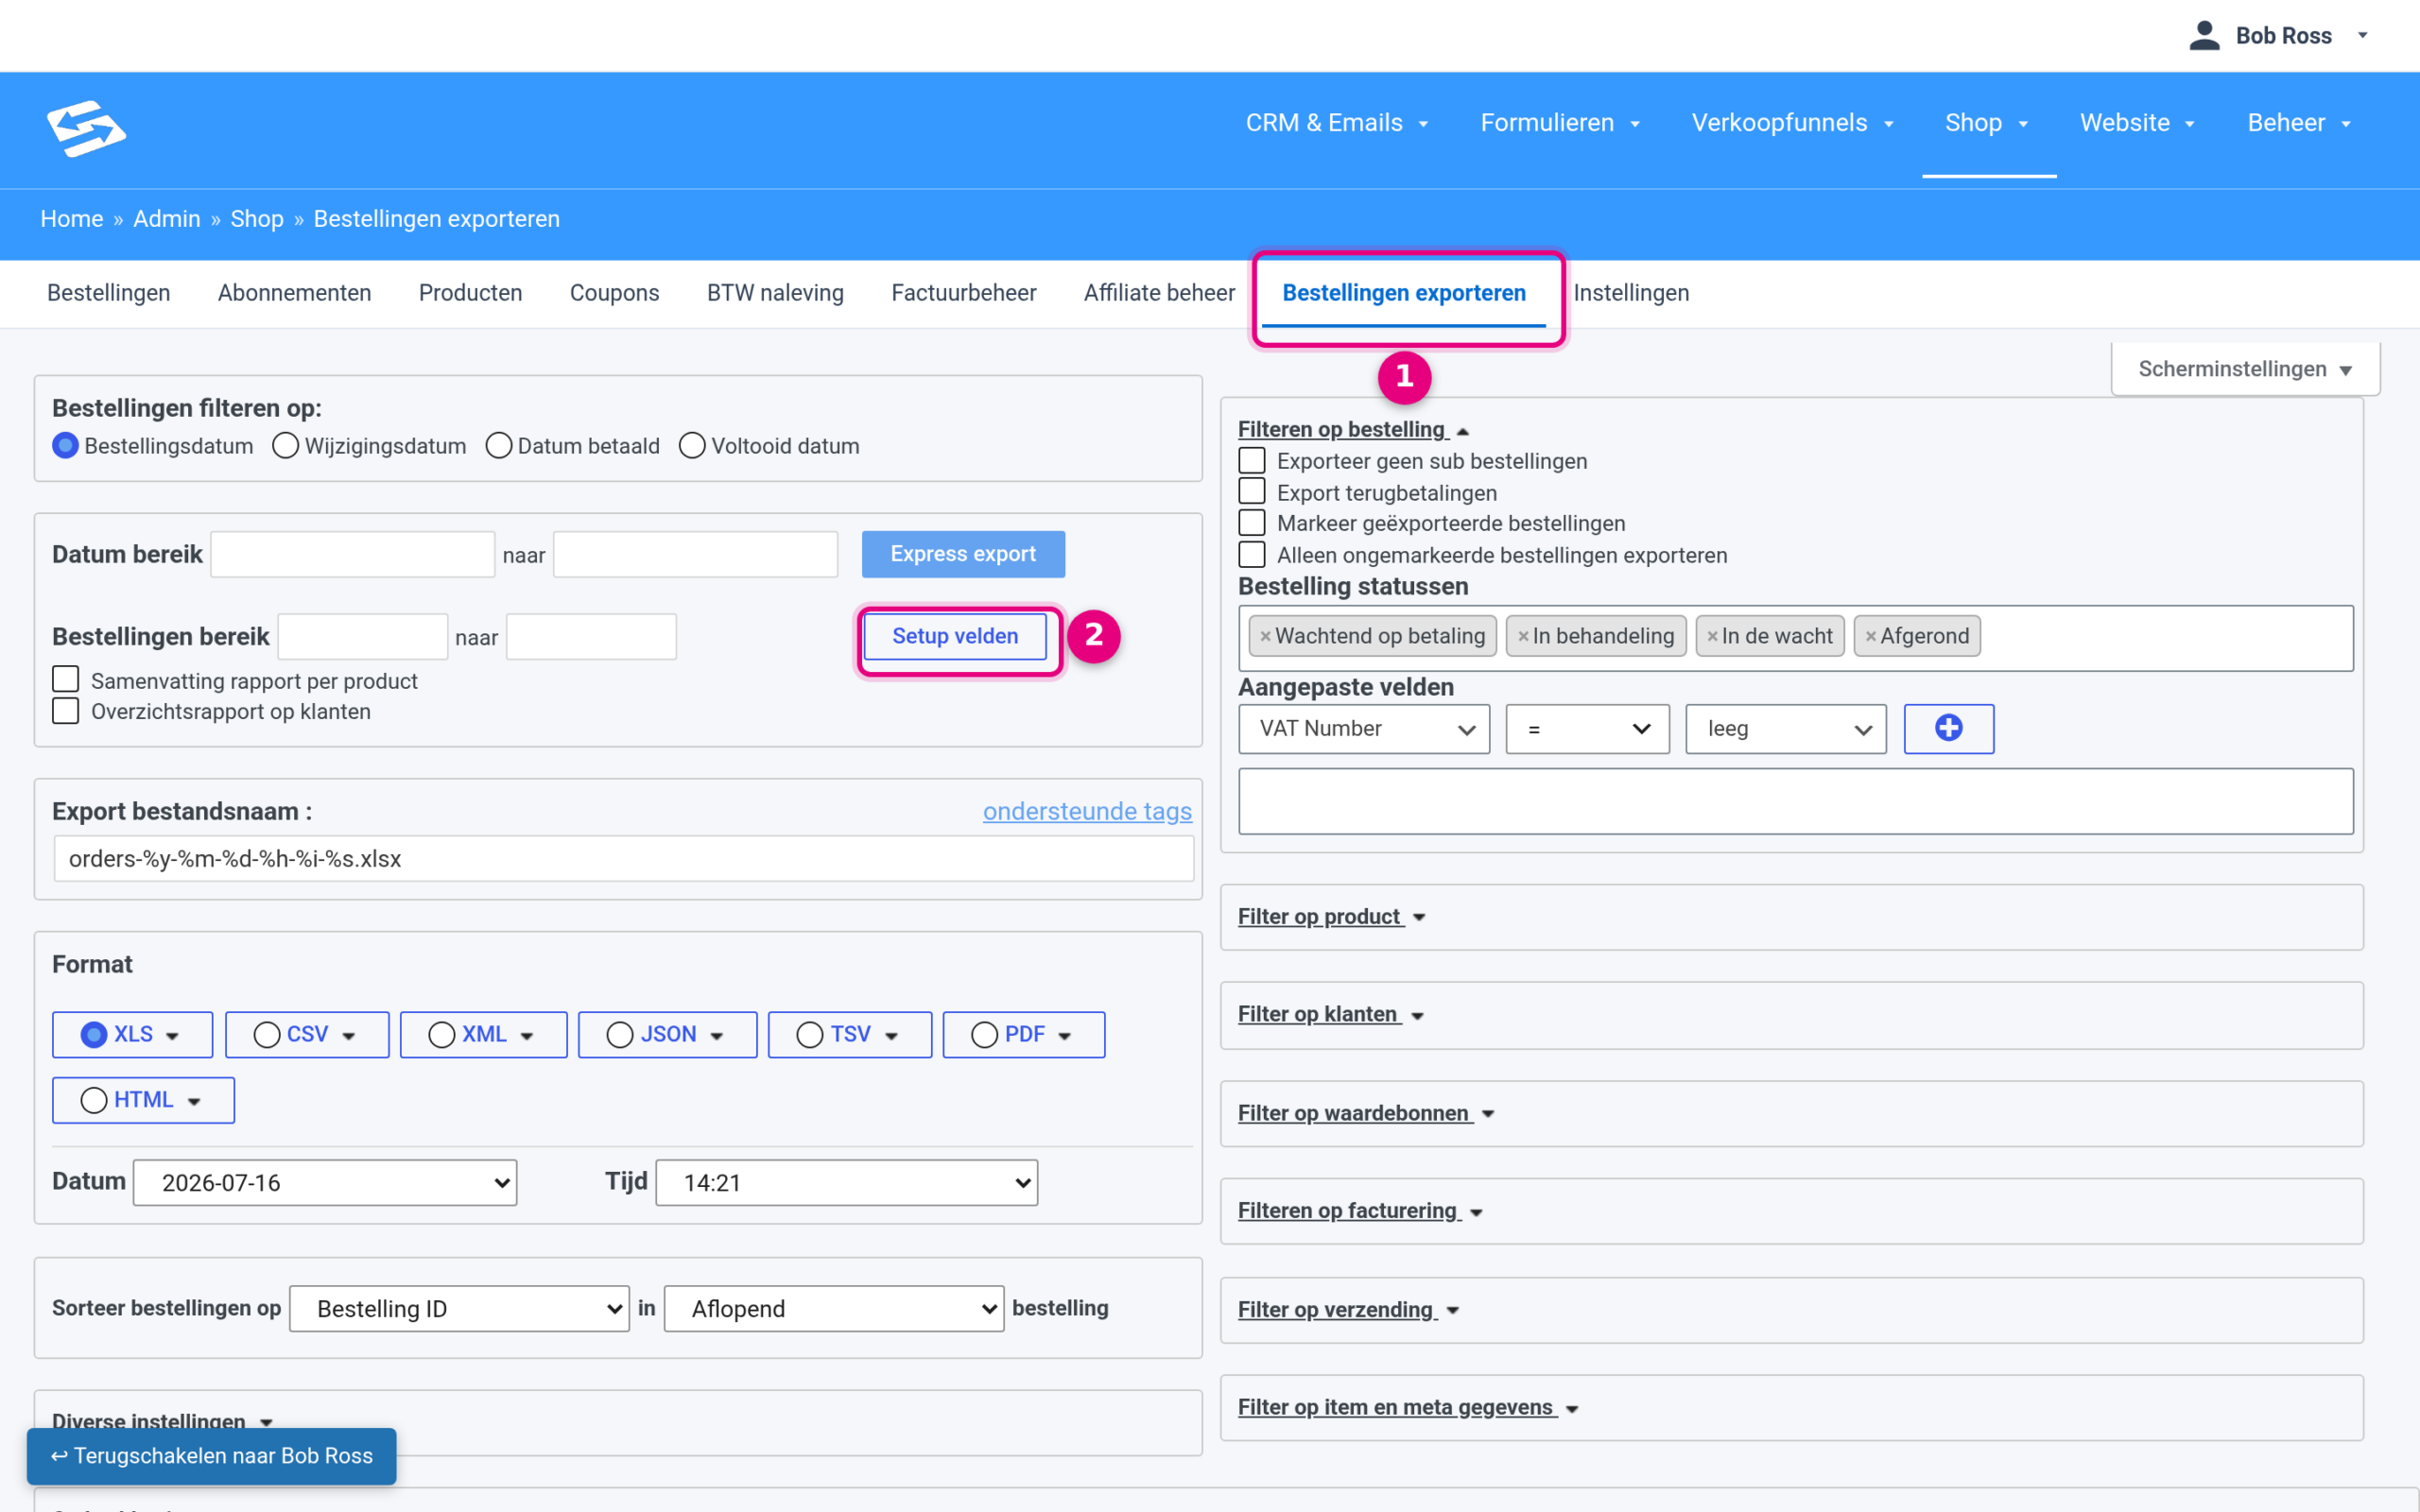
- The Export orders submenu under Shop. This is also where you set the date range, the file format (XLS, CSV, etc.) and the filters, for example on order status.
- The Set up fields button opens the panel in which you decide which columns end up in your export file.
The field panel consists of two parts: on the left the fields that are currently in your export, on the right the available extra fields.
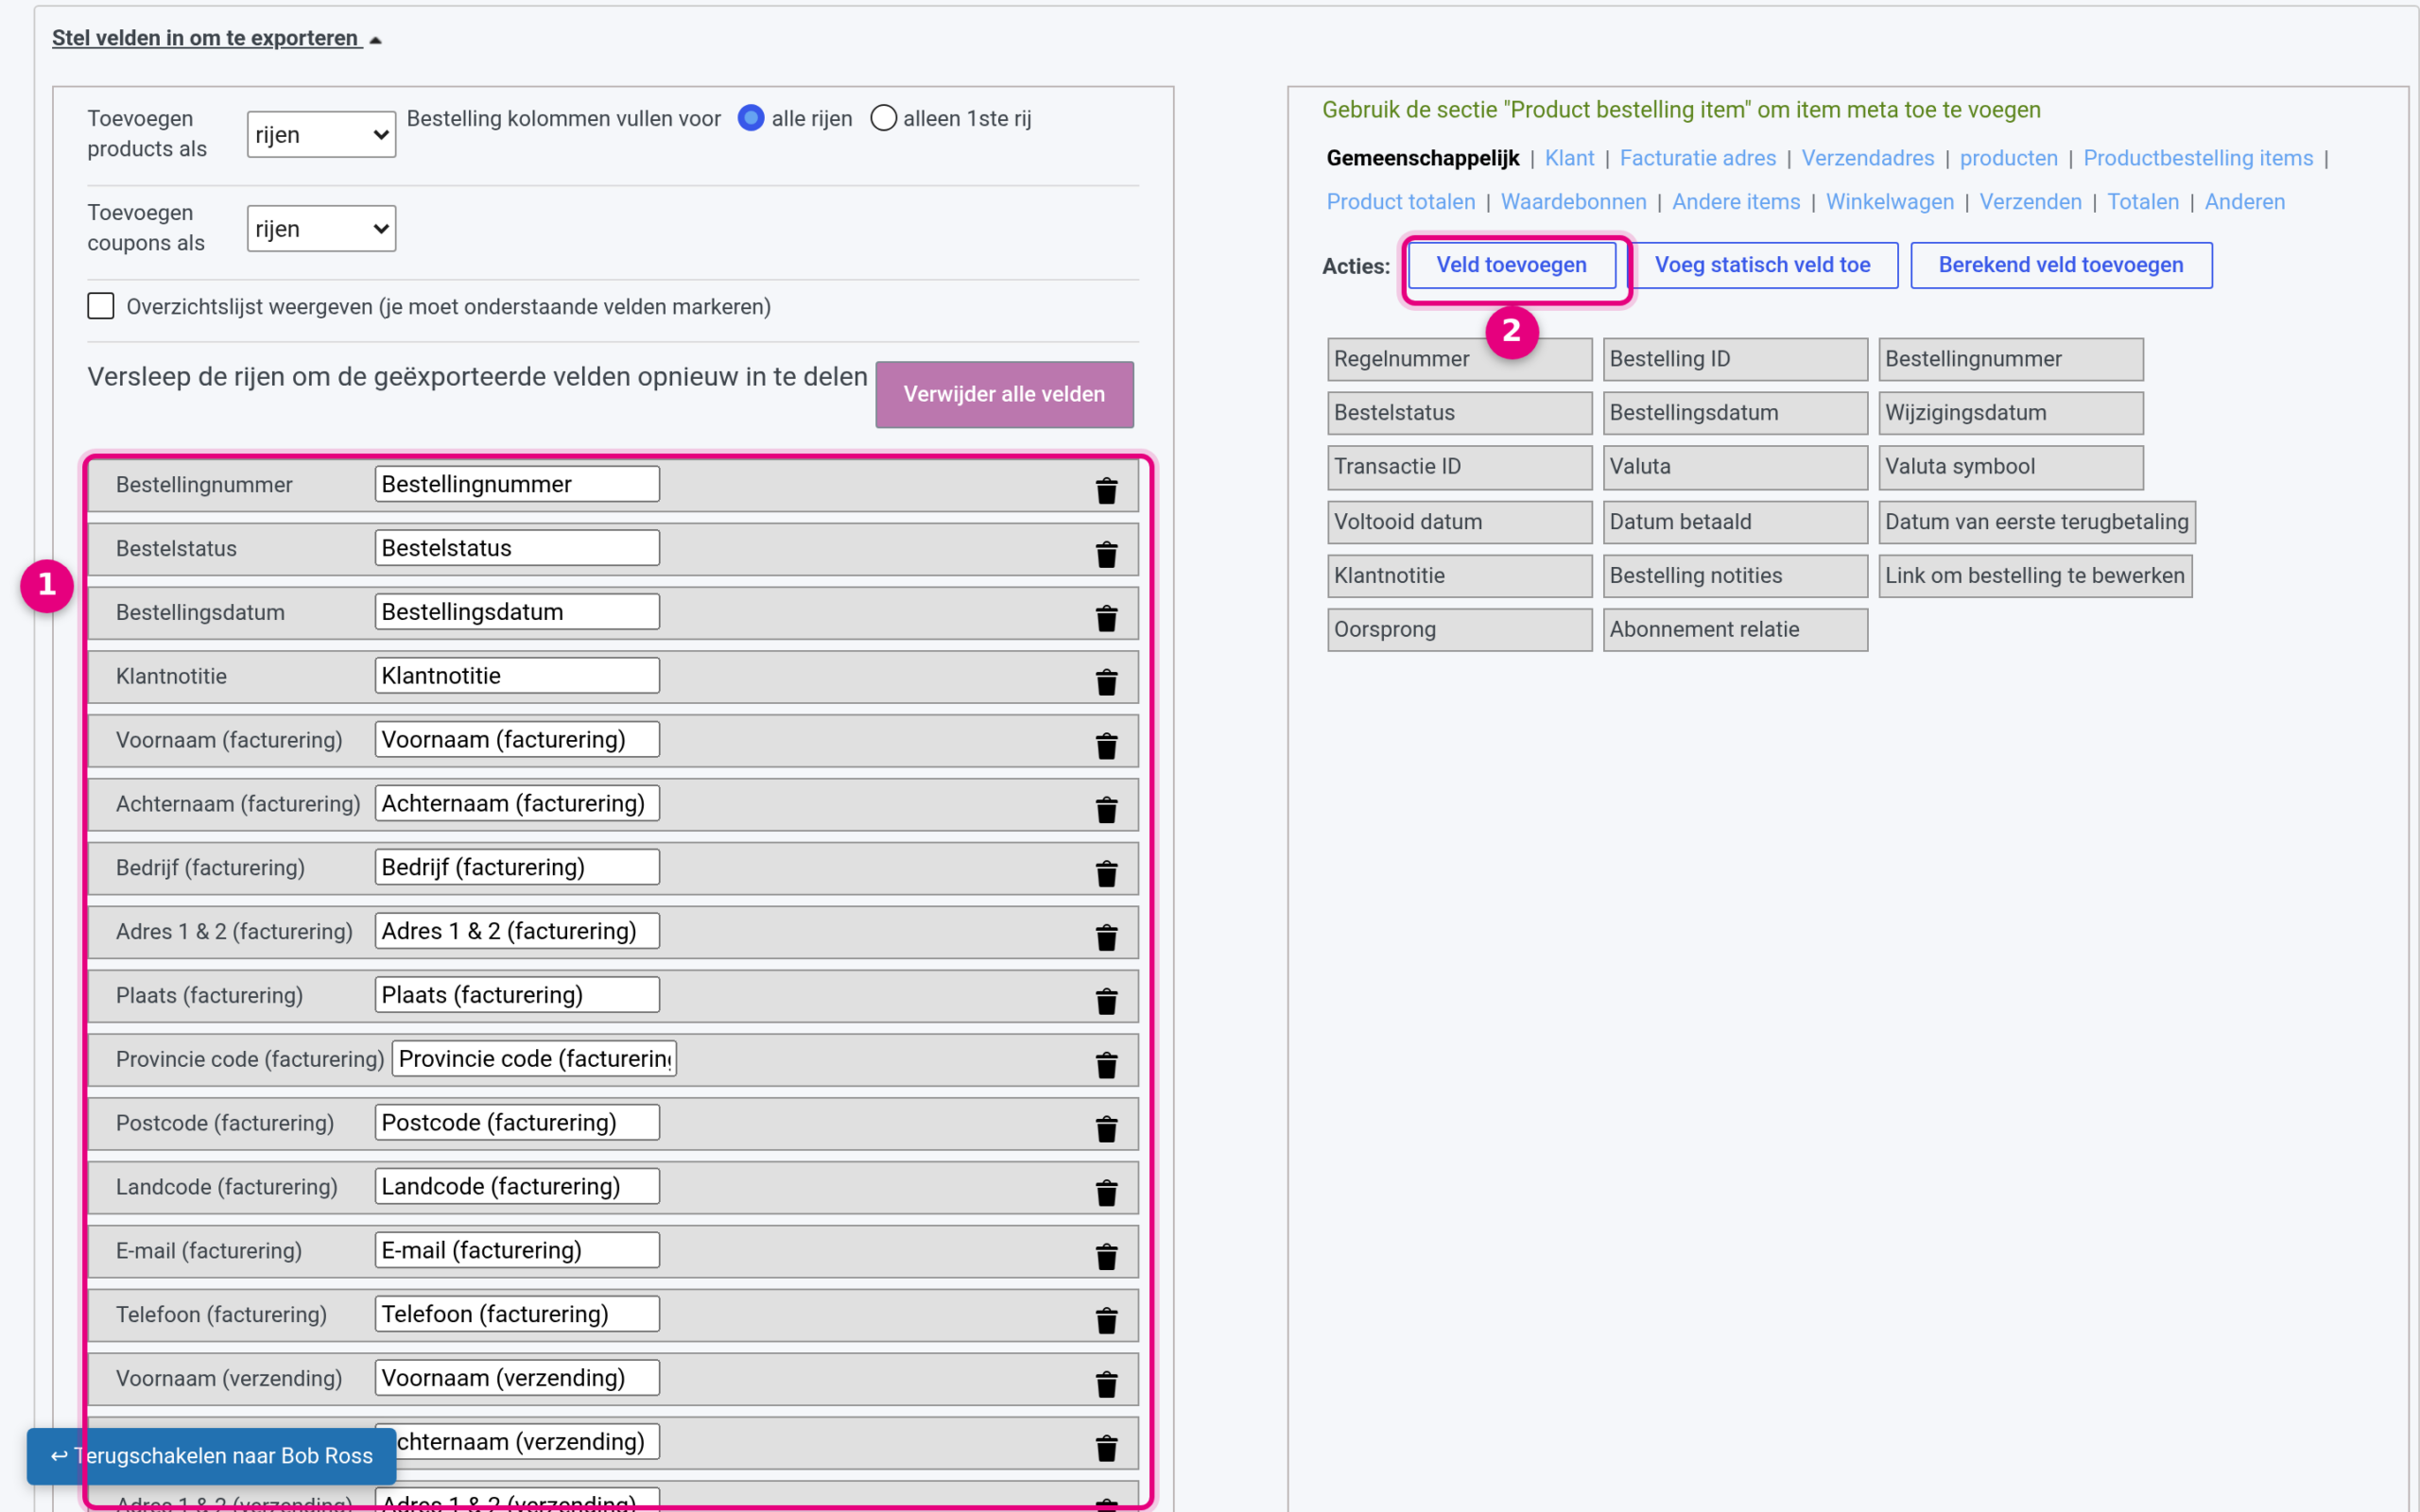
- The list of exported fields: every row becomes a column in your file. In the text box on each row you change the column name, with the bin icon you delete a field, and by dragging rows you determine the column order.
- The Add field button (under “Actions”): this is how you add a field that is not in the standard list, such as the invoice number. The sections above it (Common, Customer, Billing address, etc.) contain the other standard fields that you can drag to the left.
Click Add field and fill in the form as follows:
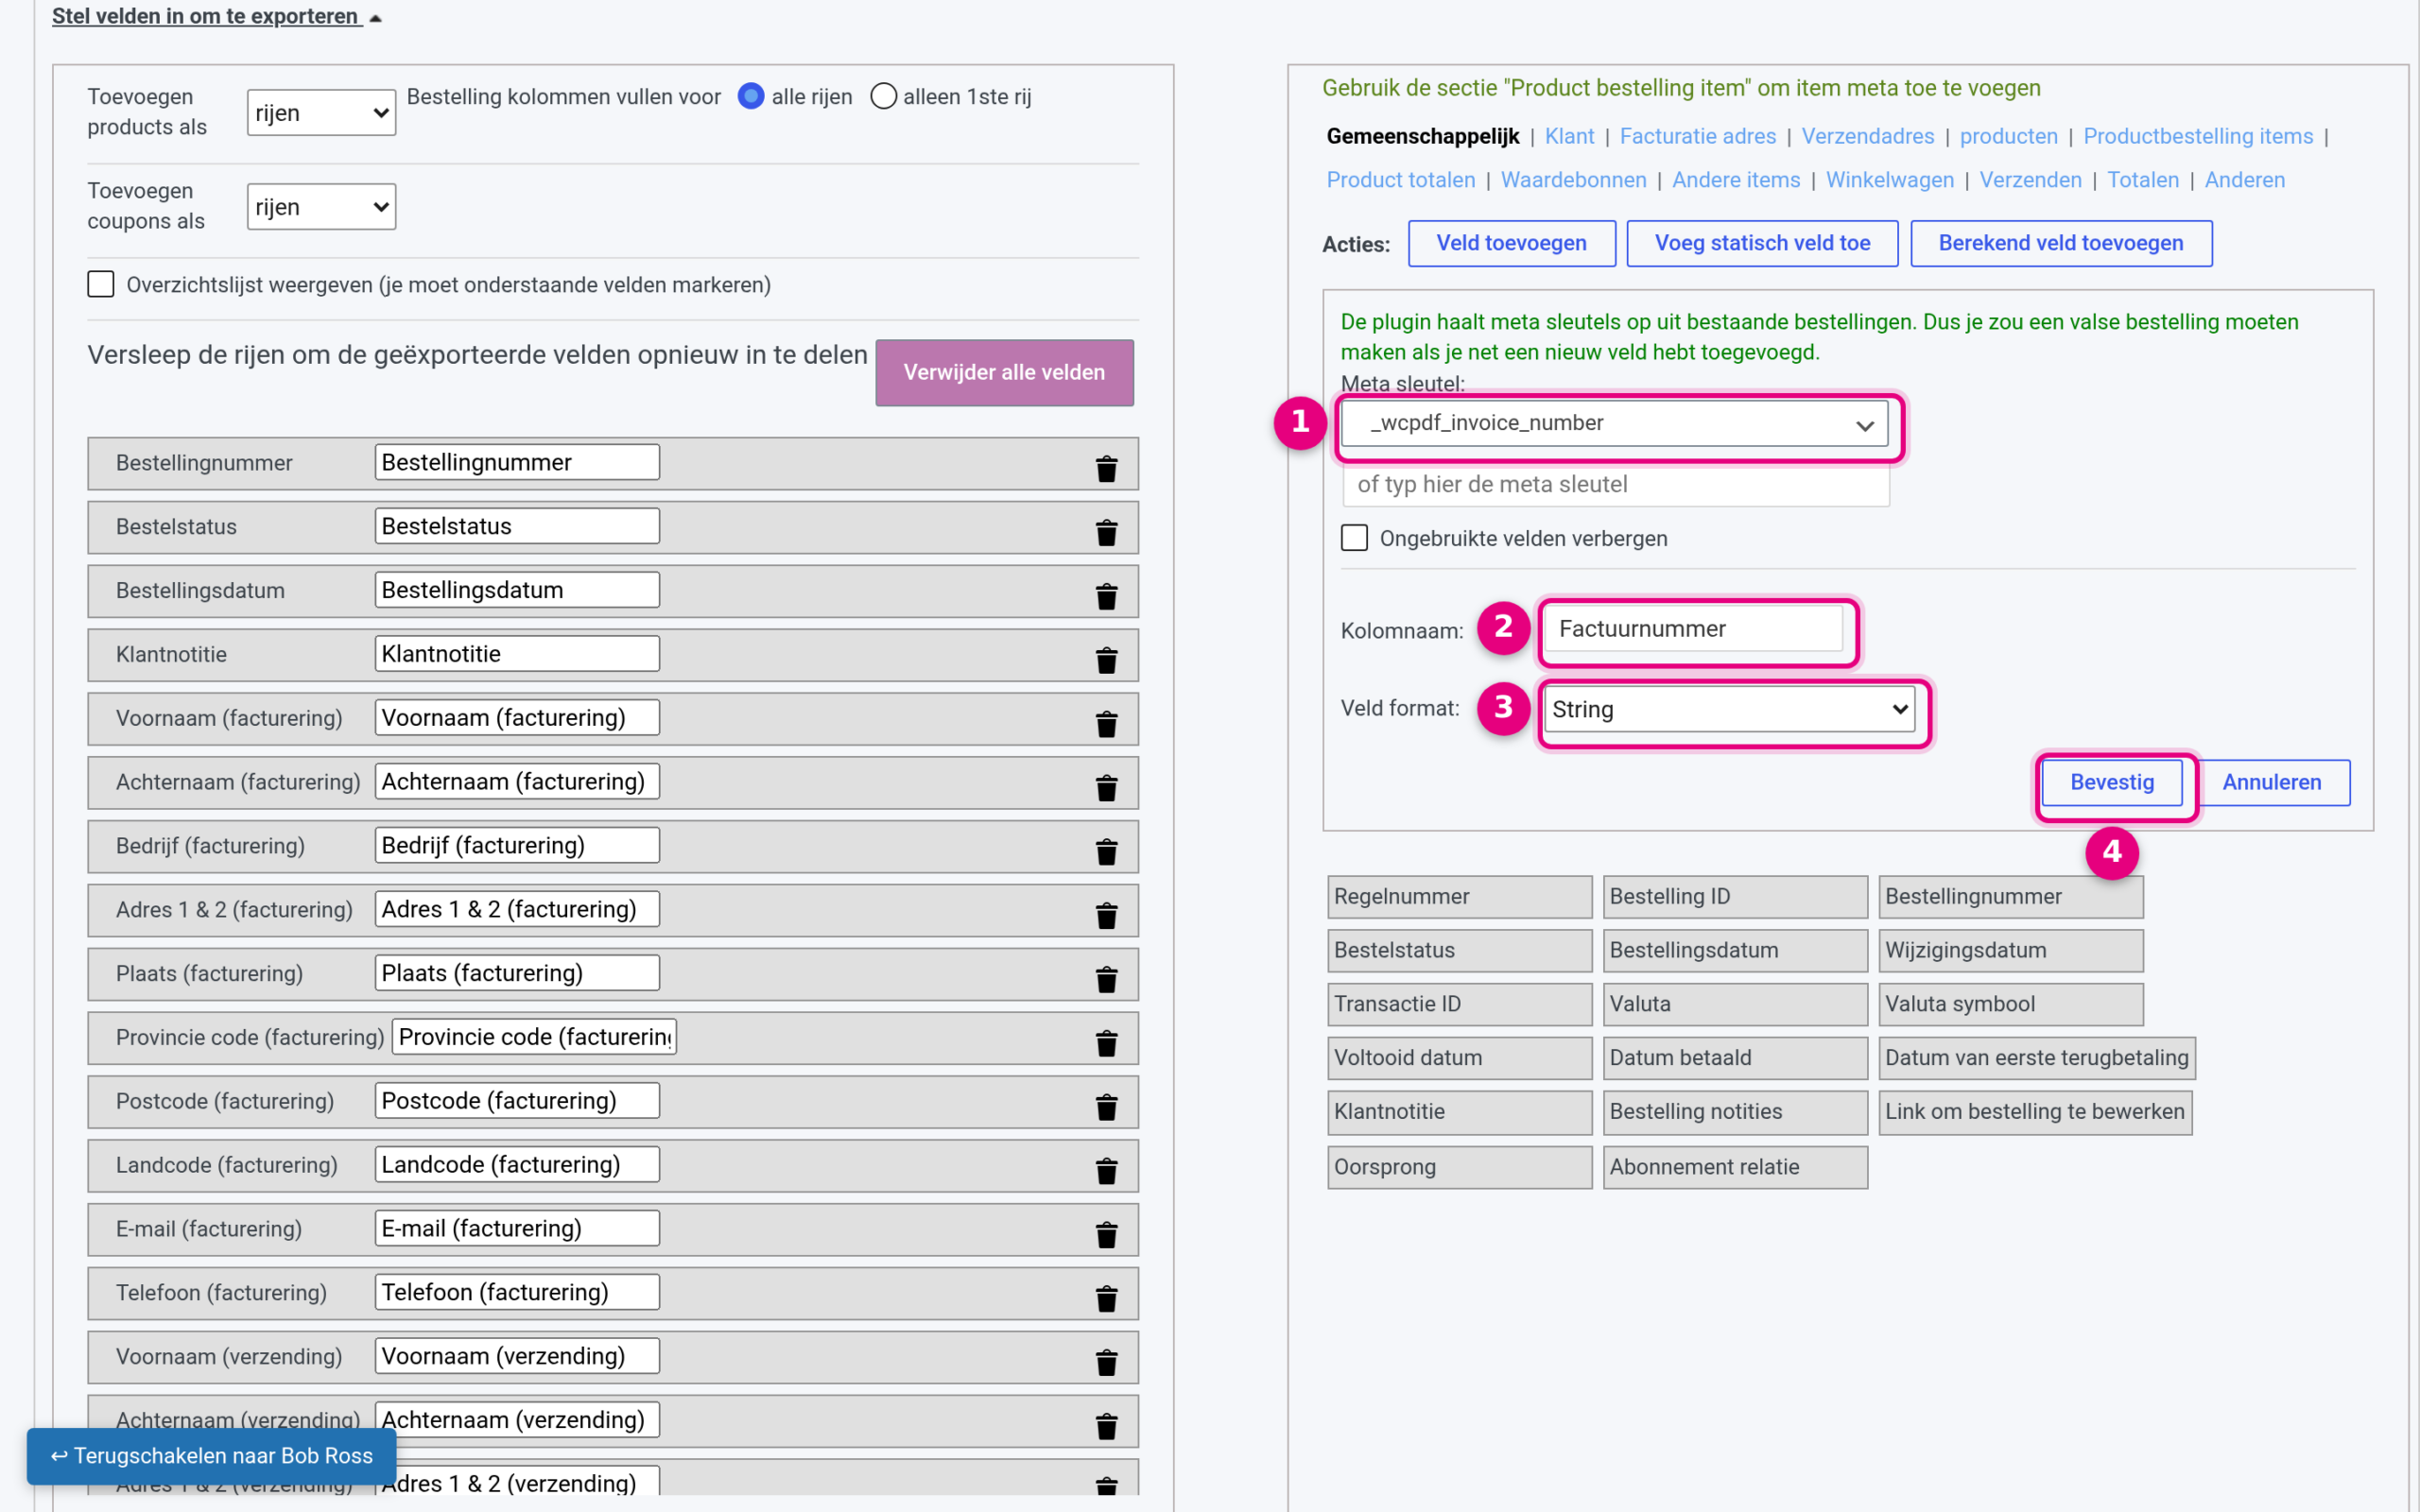
- Under Meta key choose the value
_wcpdf_invoice_numberfrom the list. Not there? Then type the key literally in the field “or type the meta key here” below it (this only happens if no invoice has been created yet in your environment). - Under Column name enter the name you want to see at the top of the column, for example Invoice number.
- Under Field format choose the option String (text). That also works well if your invoice numbers contain a prefix or a year.
- Click Confirm.
The field now appears (flashing) in the right-hand panel. Drag it to the list on the left, to the position where you want the column in the file.
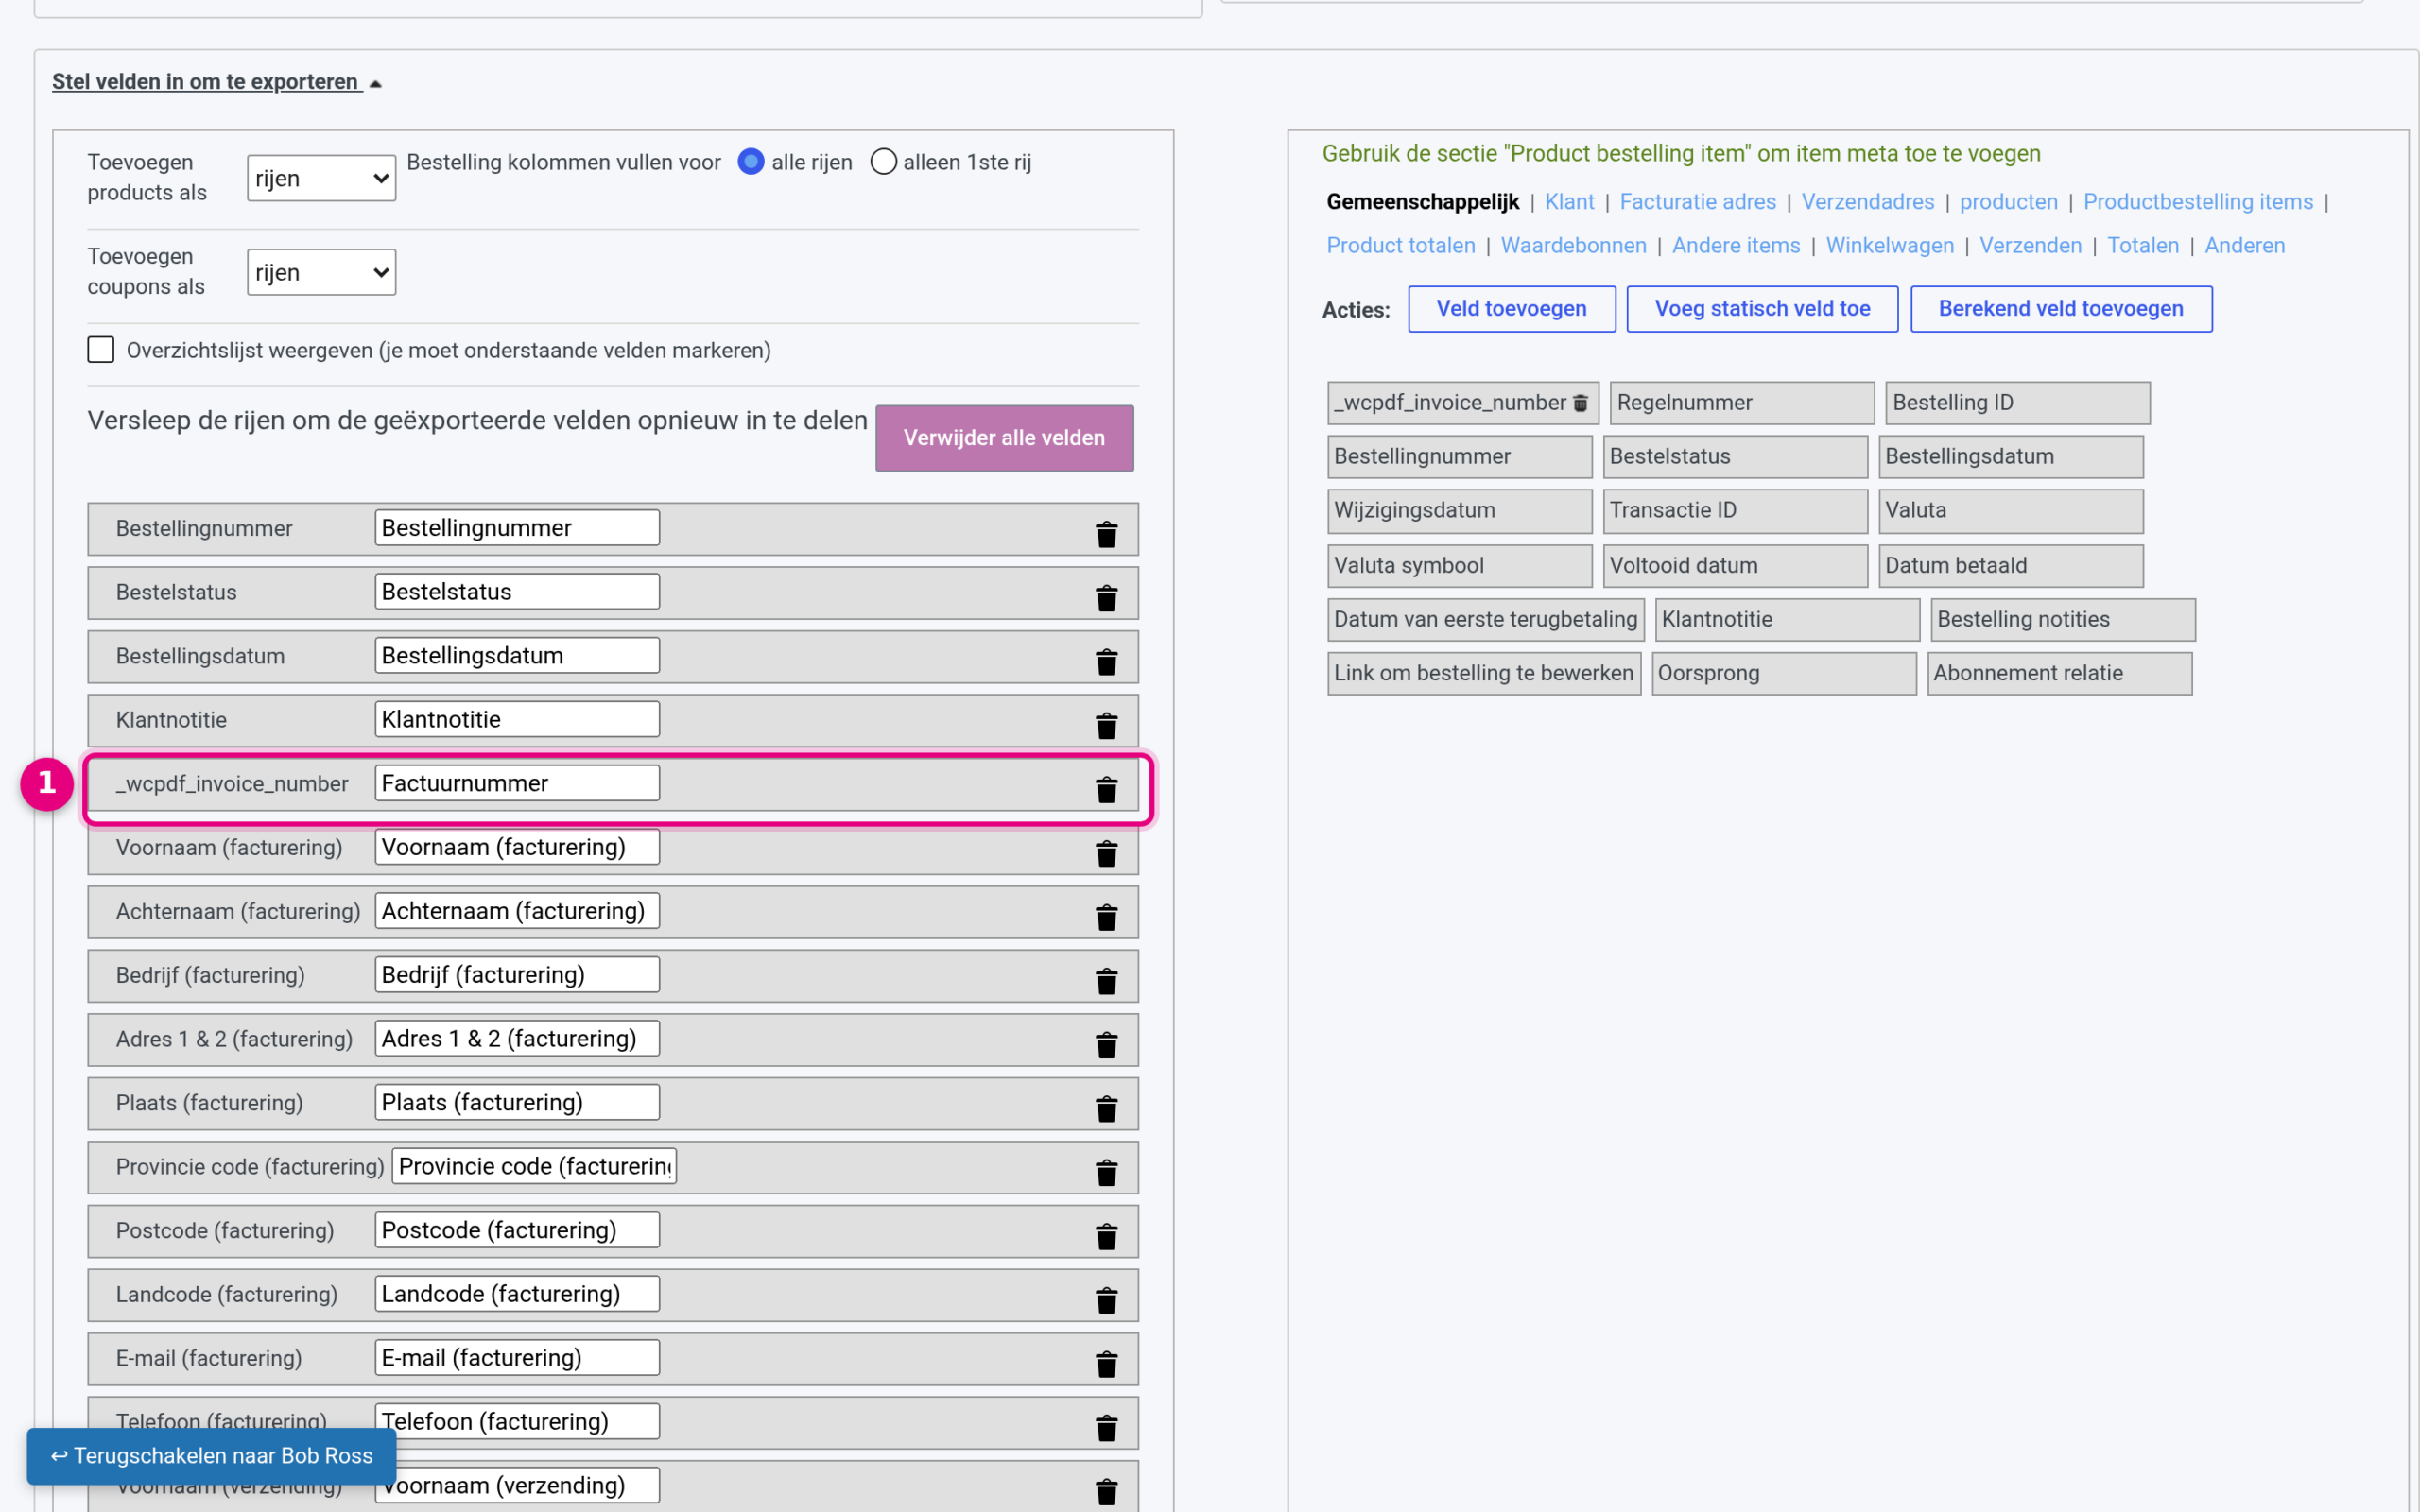
- The new field is a row in the list of exported fields, with the column name Invoice number. You can still drag the row or change the column name.
Then run your export as usual, with Express export or with a date range. The Invoice number column is in the file from now on, including in later exports: the field settings are remembered.
Tip: would you also like the invoice date as a column? Then add a field in the same way with the meta key _wcpdf_invoice_date_formatted.
When the column stays empty #
The invoice number is stored with the order at the moment the invoice is created. If an order does not (yet) have an invoice, the cell for that order stays empty. That is the case for free orders of €0, for example: no invoice is generated for those. You can read how invoice numbering works and where you set it in Setting up invoice numbering in Autorespond.
Frequently asked questions #
Why is the invoice number not in the standard list of export fields? #
The invoice number is not part of the standard order data but is stored separately with the order by the invoicing module. That is why you add it once as an extra field through “Add field”; after that it stays in your export.
Which meta key do I use for the invoice number? #
Use exactly _wcpdf_invoice_number. For the invoice date use _wcpdf_invoice_date_formatted and for the credit note number _wcpdf_credit_note_number.
The column is empty for some orders, what is going wrong? #
An empty cell means that no invoice has been created for that order, for example for a free order of €0 or an order that is still awaiting payment. You can still create a missing invoice from the order itself.


