By default all your customers pay through the same shop checkout. Sometimes you want a dedicated checkout page for one specific product: with a mandatory consent statement, extra questions, different wording or an order bump. You arrange that with an individual sales funnel: a funnel with its own checkout page that you link to that one product. In this article you create such a funnel and make sure it automatically replaces the standard checkout for that product. All other products simply keep using the standard checkout.
Sales funnels in Autorespond are based on FunnelKit Funnel Builder, included in your package. Read the FunnelKit Funnel Builder documentation
What do you use an individual sales funnel for? #
An individual funnel gives one product its own checkout experience. Common reasons:
- A mandatory checkbox or consent statement that belongs to this product only, for example for the right of withdrawal on digital products. See also adding a mandatory consent checkbox.
- Extra questions on the checkout page whose answers are stored in the CRM.
- Your own wording, terms and styling to match the product.
- Order bumps and upsells to increase the order value.
- Choice set-ups: let the customer pick one option from comparable products, let them tick several products separately, or sell several products together as a compulsory bundle.
Step 1: create an individual funnel #
Go to Sales funnels → Individual Funnels and click Create New Funnel at the top right. You arrive in the template gallery:
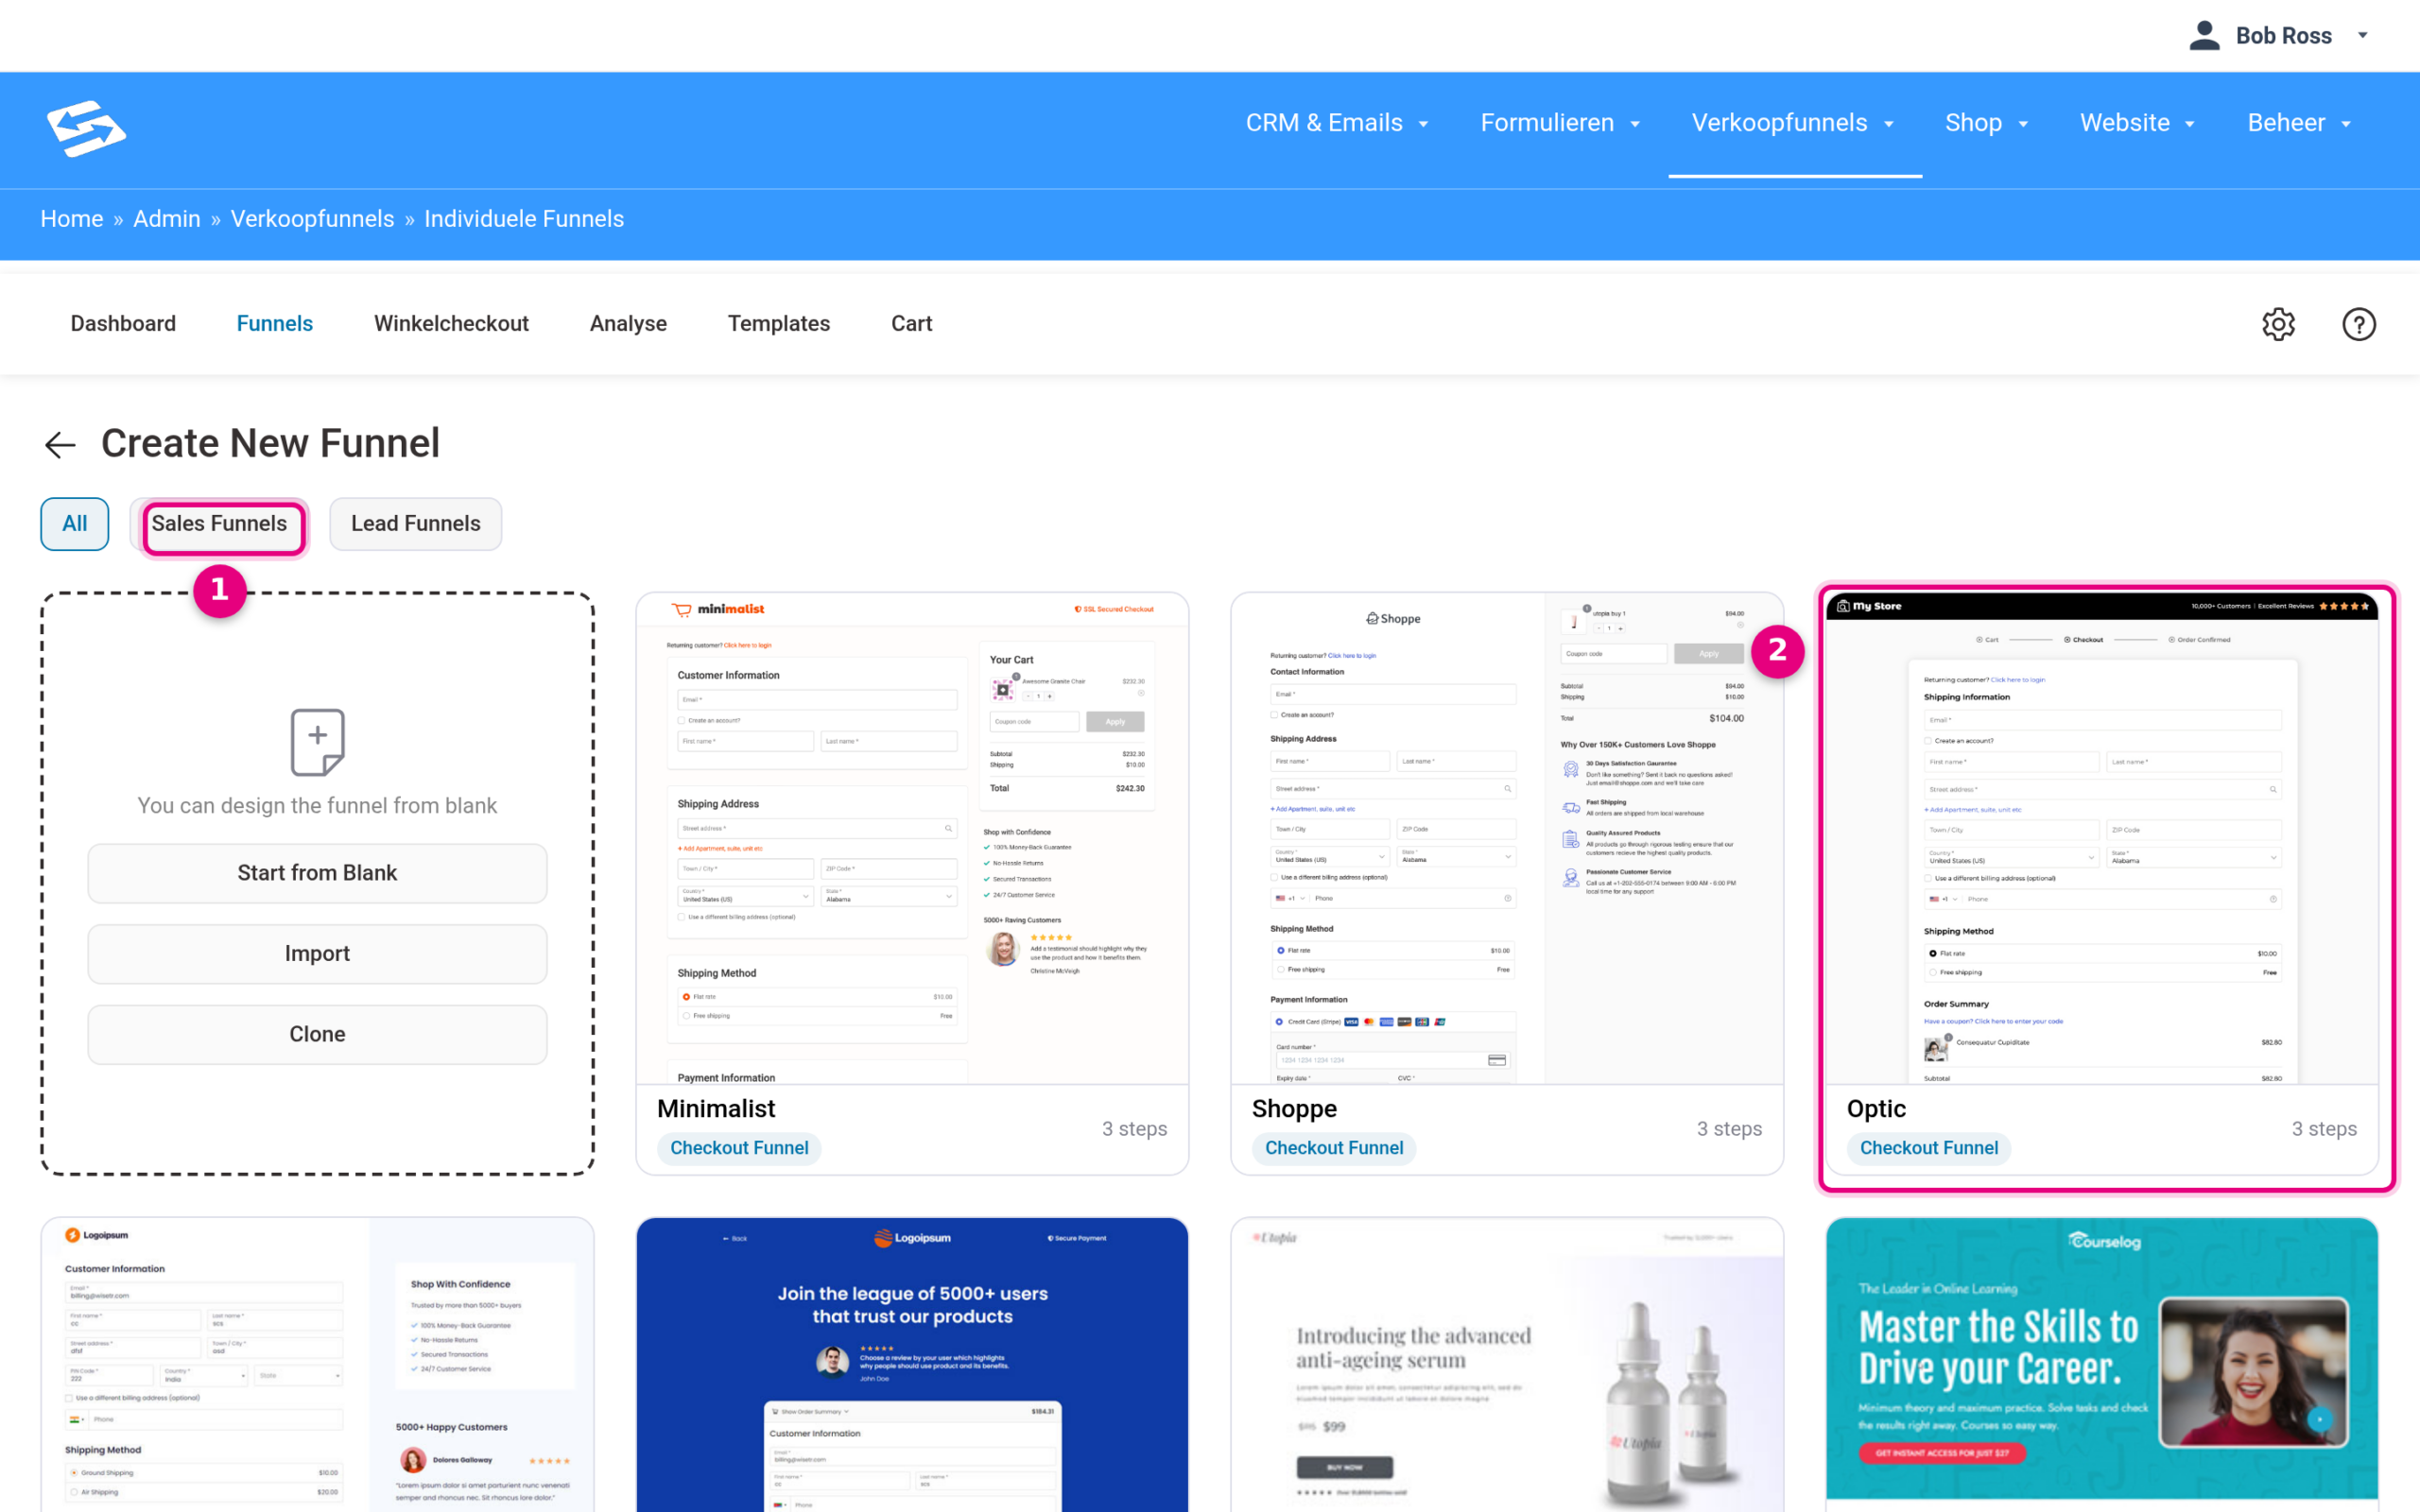
- The Sales Funnels tab filters on sales templates. Each card shows the type and the number of steps: a Checkout Funnel contains a checkout page and a thank-you page, a Sales Funnel also has a sales page on top of that. For a dedicated checkout per product a Checkout Funnel is usually enough.
- Click a template to view and import it, and give your funnel a recognisable name. On the left you can also start without a template using Start from Blank.
Step 2: link your product to the checkout page of the funnel #
In the funnel, open the Checkout page step (type Checkout) and go to the Products tab at the top. Here you decide which product this checkout page sells:
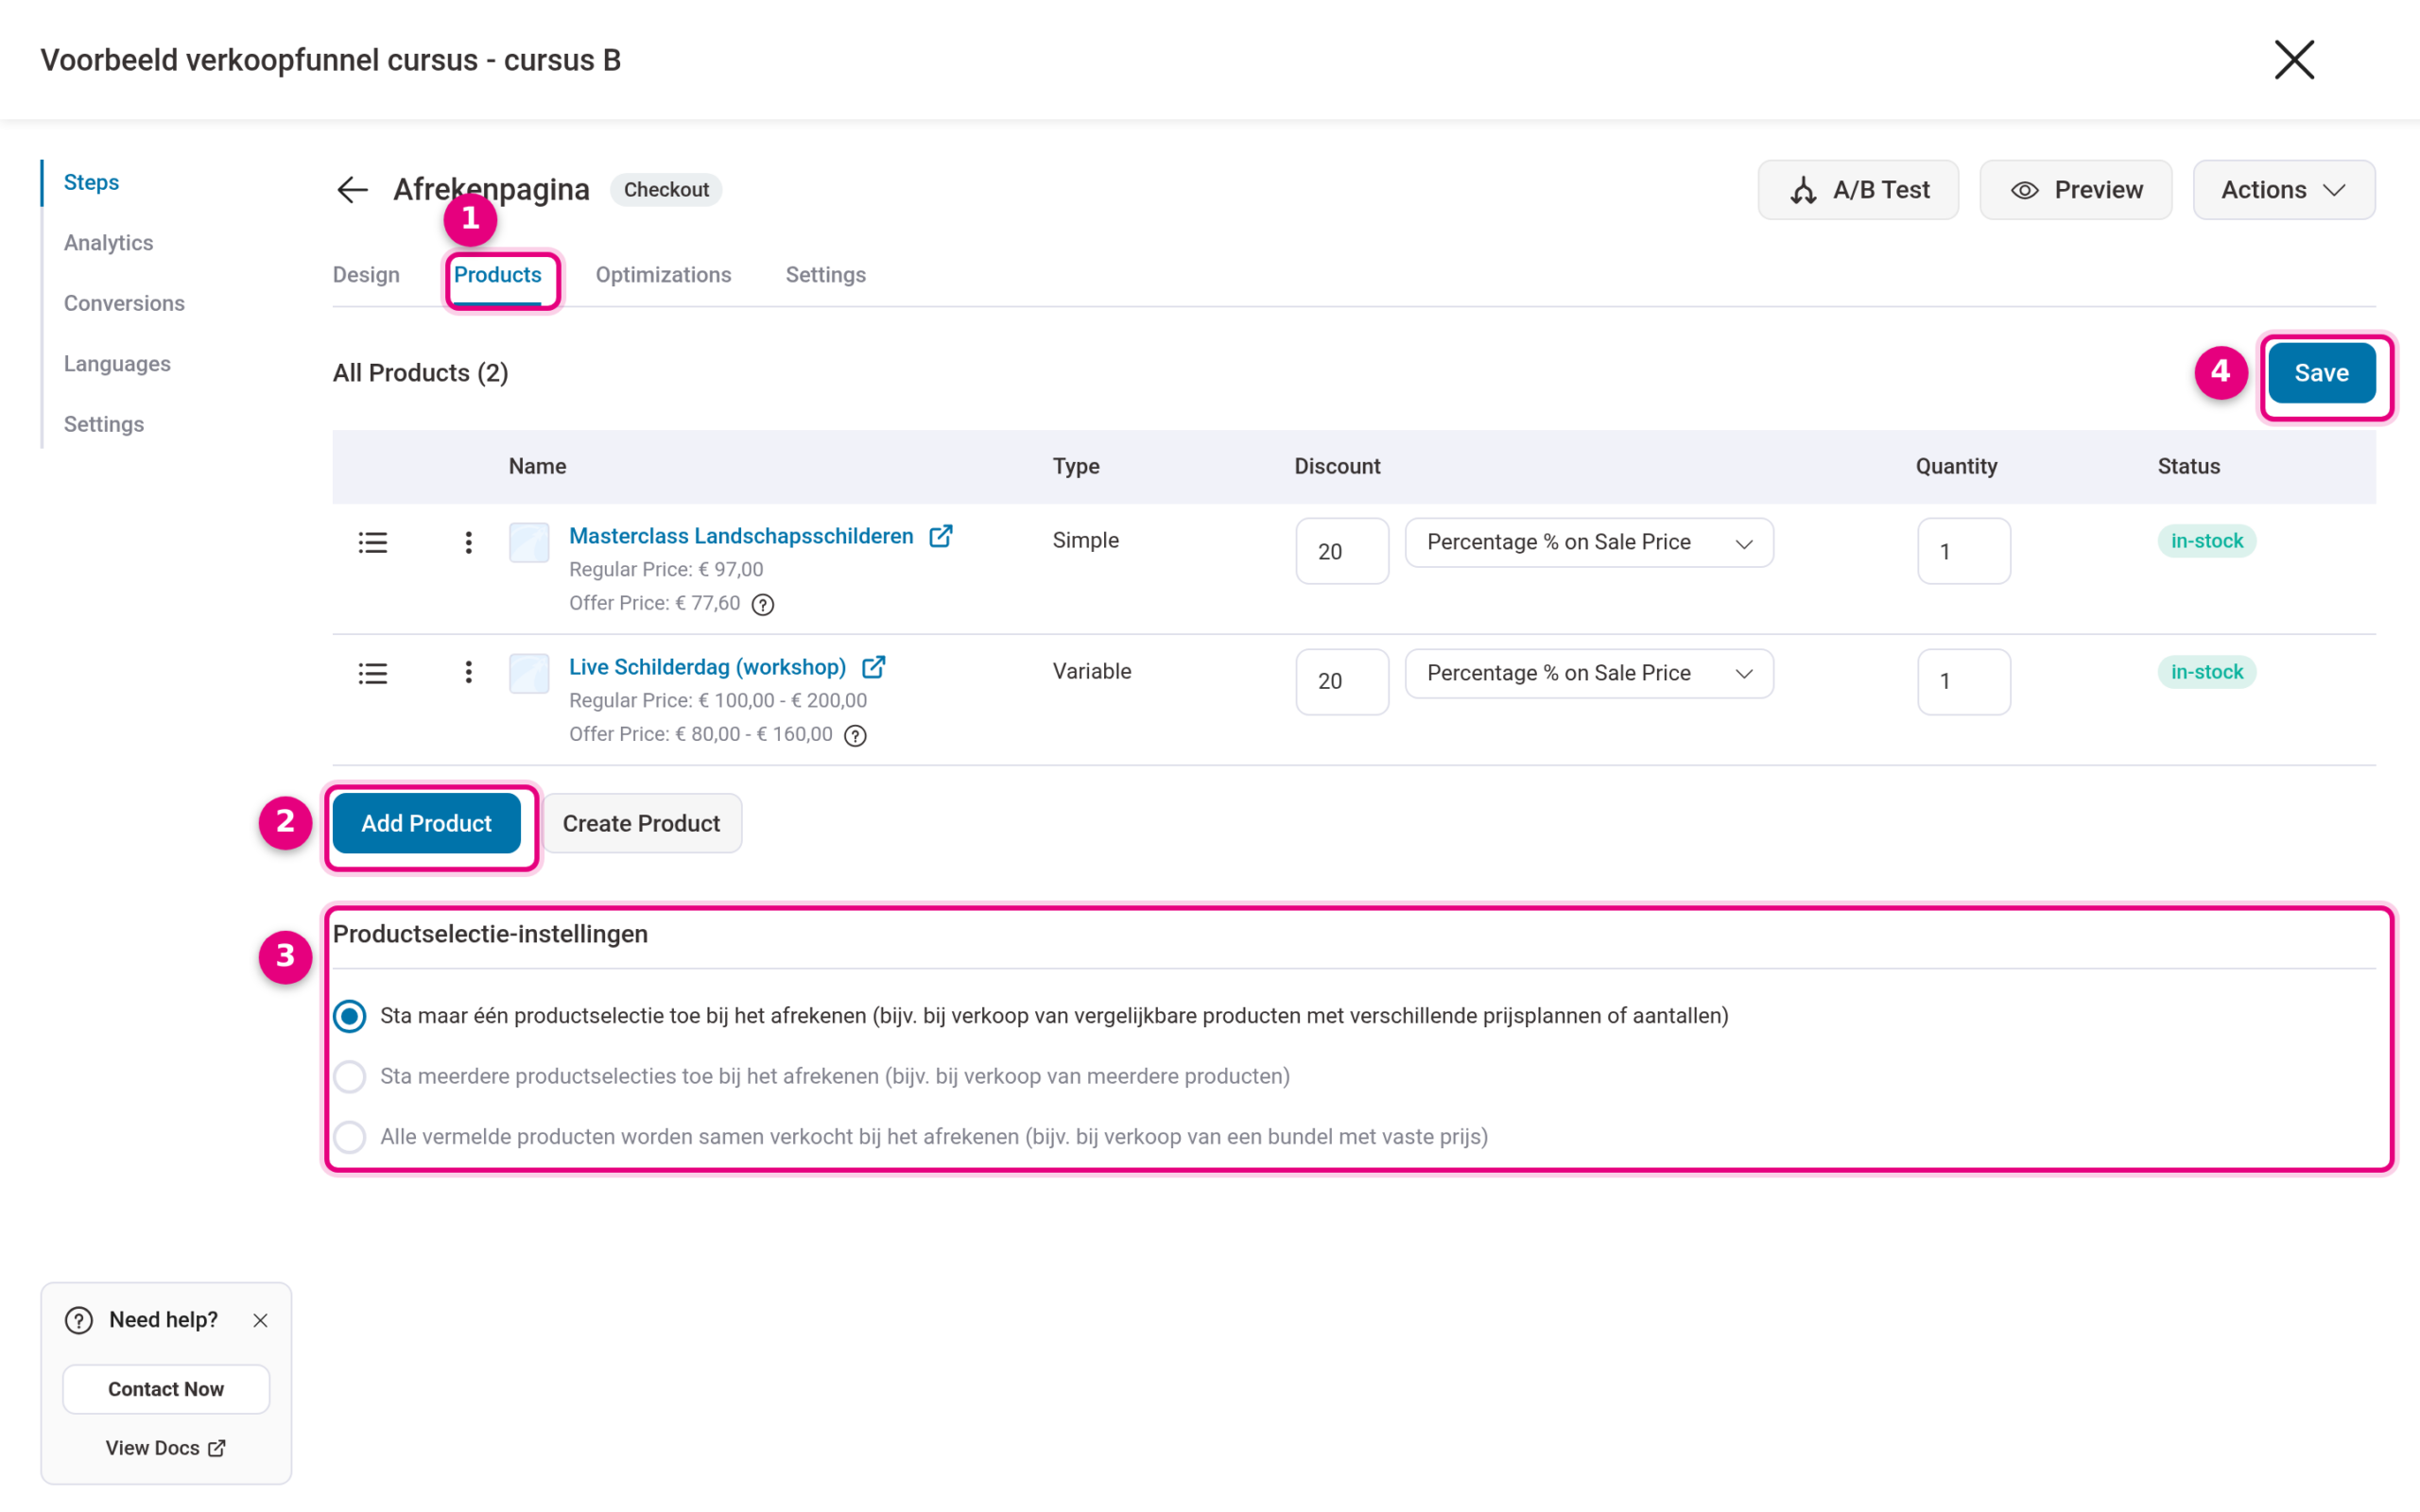
- The Products tab is where you manage the products of this checkout page.
- Click Add Product, search for your product and add it. Per product you can also set a discount on the regular price (Discount column).
- Under Product selection settings you decide how several products behave: the customer picks exactly one (handy for variations or price plans), the customer can tick several, or all products are sold together as a compulsory bundle. With a single product you do not have to change anything here.
- Click Save to save the changes.
Step 3: set up the checkout page (optional) #
On the Design tab of the checkout page you adjust the fields and the wording. If you want to add an extra field such as a mandatory checkbox or an open question, follow the steps in adding extra questions to the checkout of a sales funnel. Pay particular attention to the last step: a new field only appears on the checkout page after you have dragged it into a form section and clicked Save. You add order bumps through the steps in positioning order bumps.
Step 4: publish the steps of the funnel #
New funnel steps are listed as drafts (label Draft) in the step overview. Publish the checkout page in any case, otherwise the funnel stays invisible and orders simply use the standard checkout:
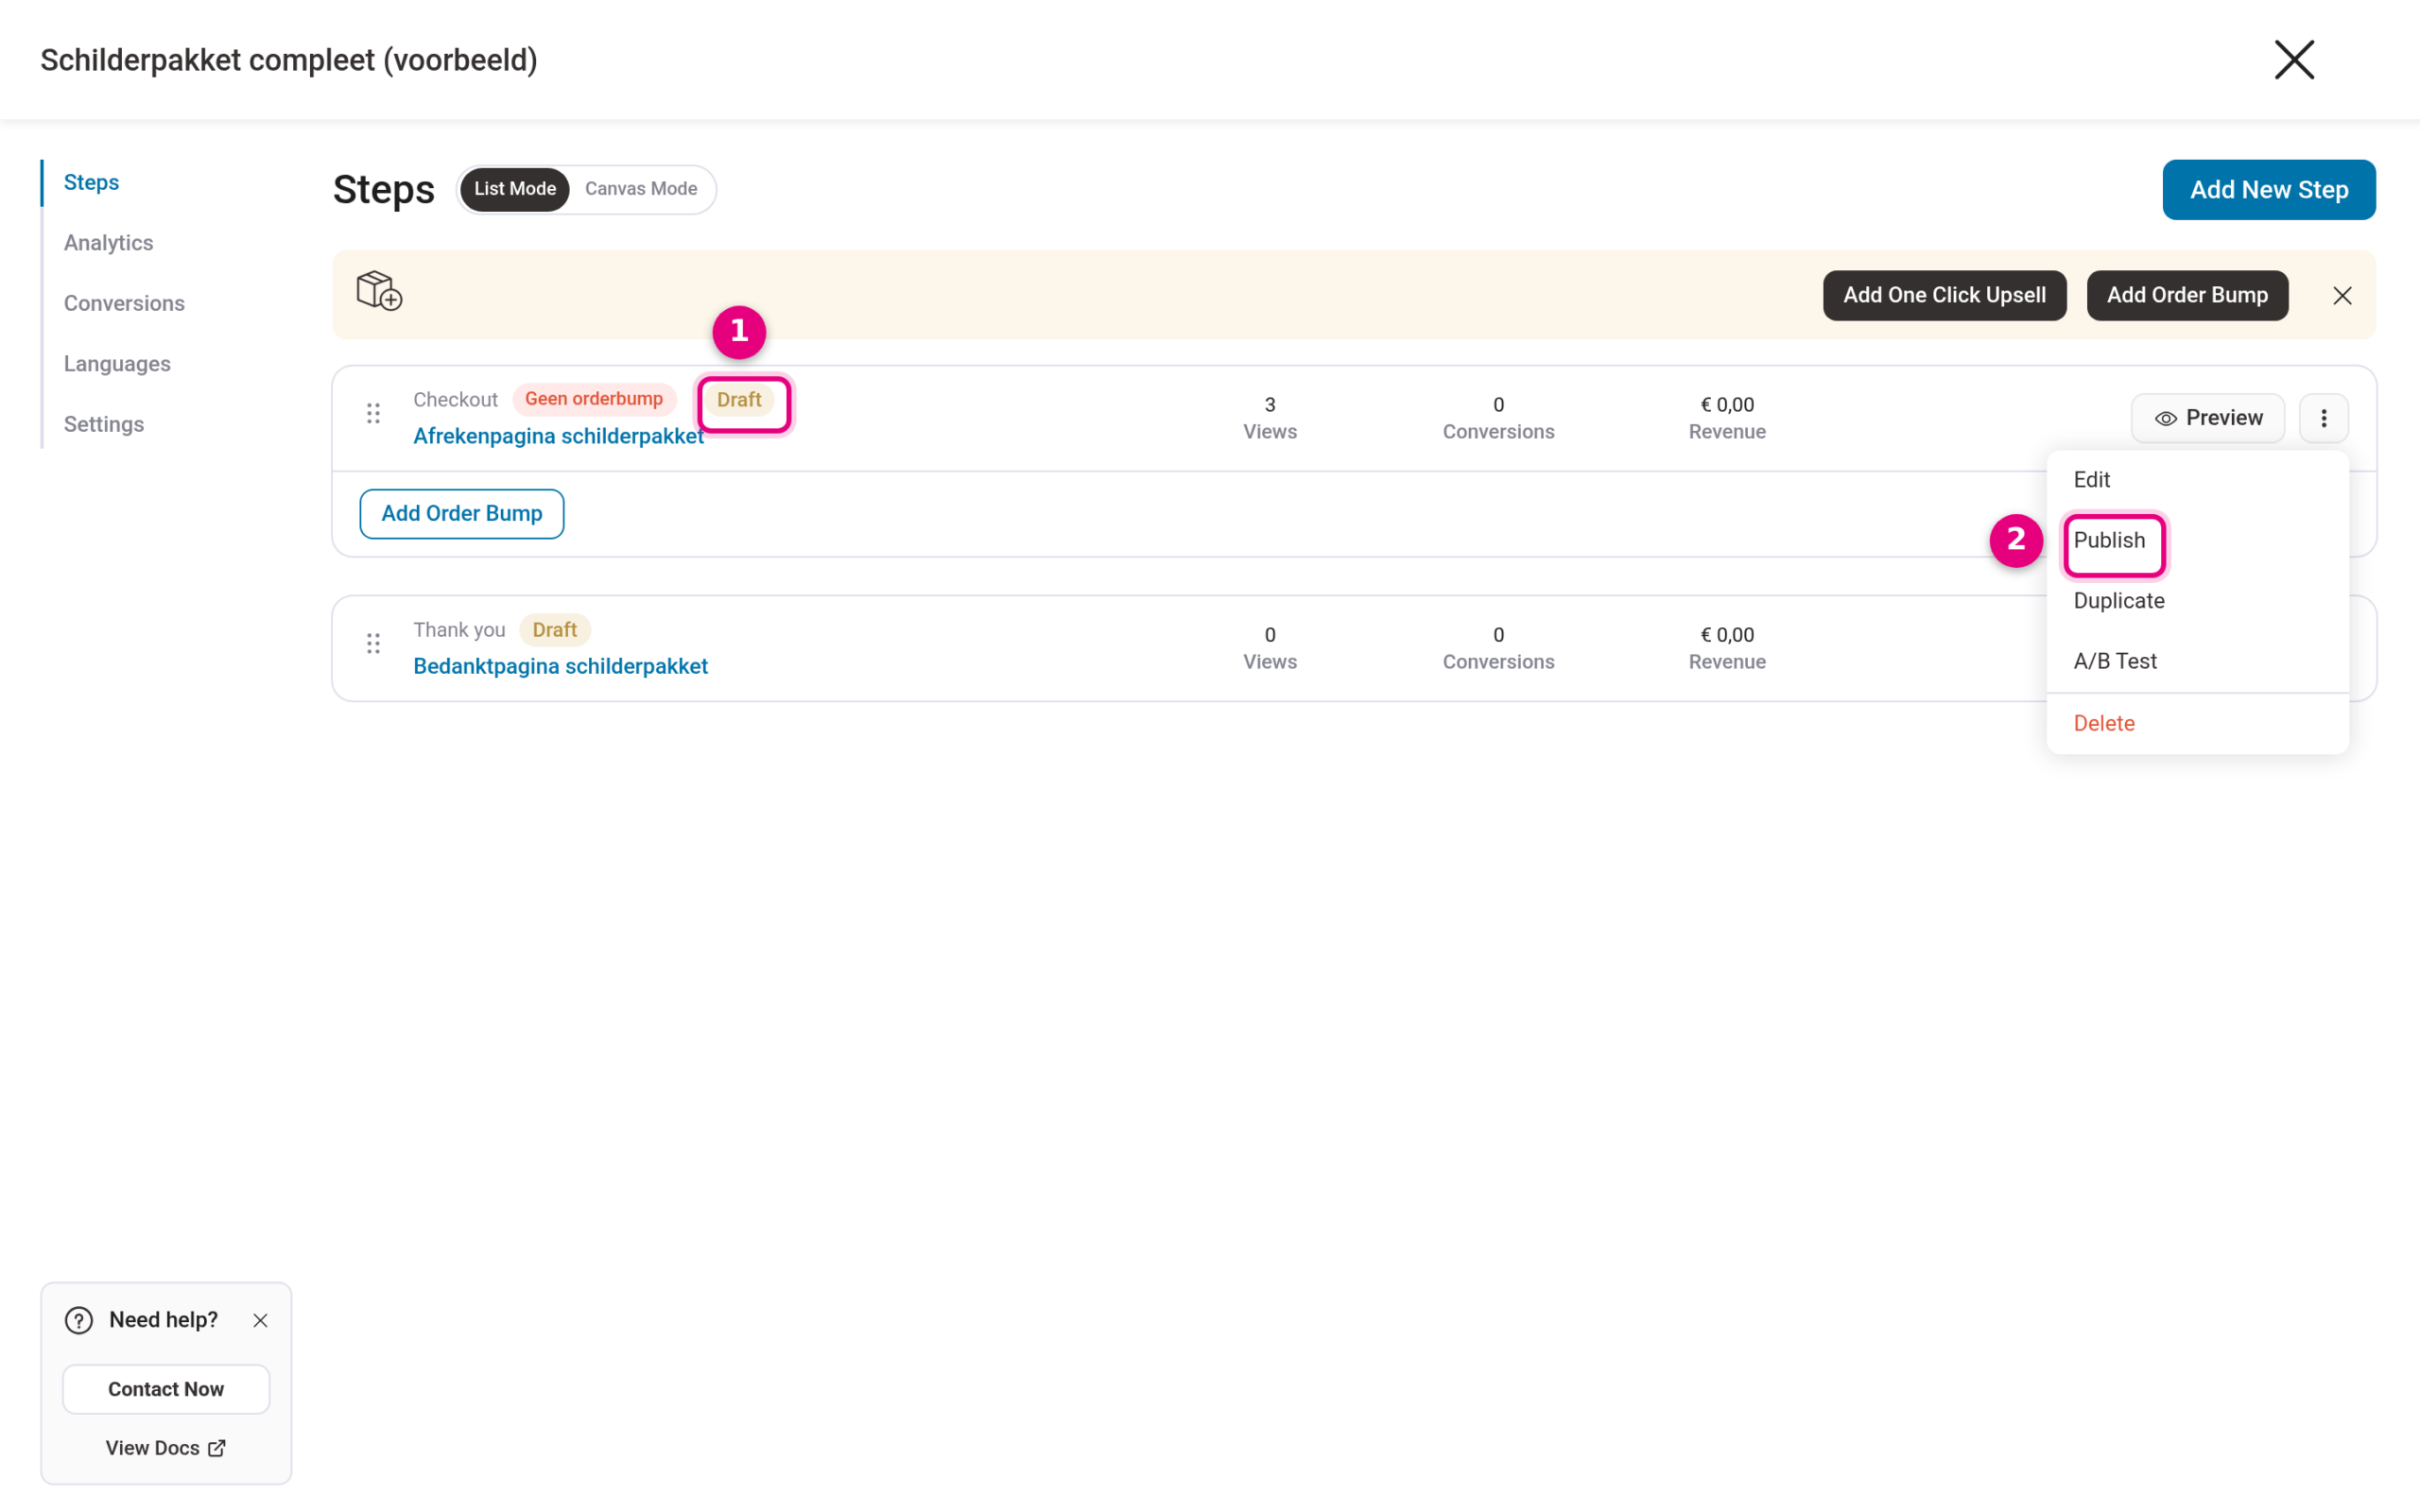
- The Draft label indicates that a step has not been published yet.
- Click the three-dots menu to the right of the step and choose Publish. Do this for every step of the funnel (at least the checkout page and the thank-you page).
Step 5: let the funnel take over the standard checkout for this product #
So far the funnel only has its own page with its own link. The core of this article is the link on the product itself: it makes the funnel checkout page automatically replace the standard checkout for that product. Go to Shop → Products, open the product and scroll to the Product data block:
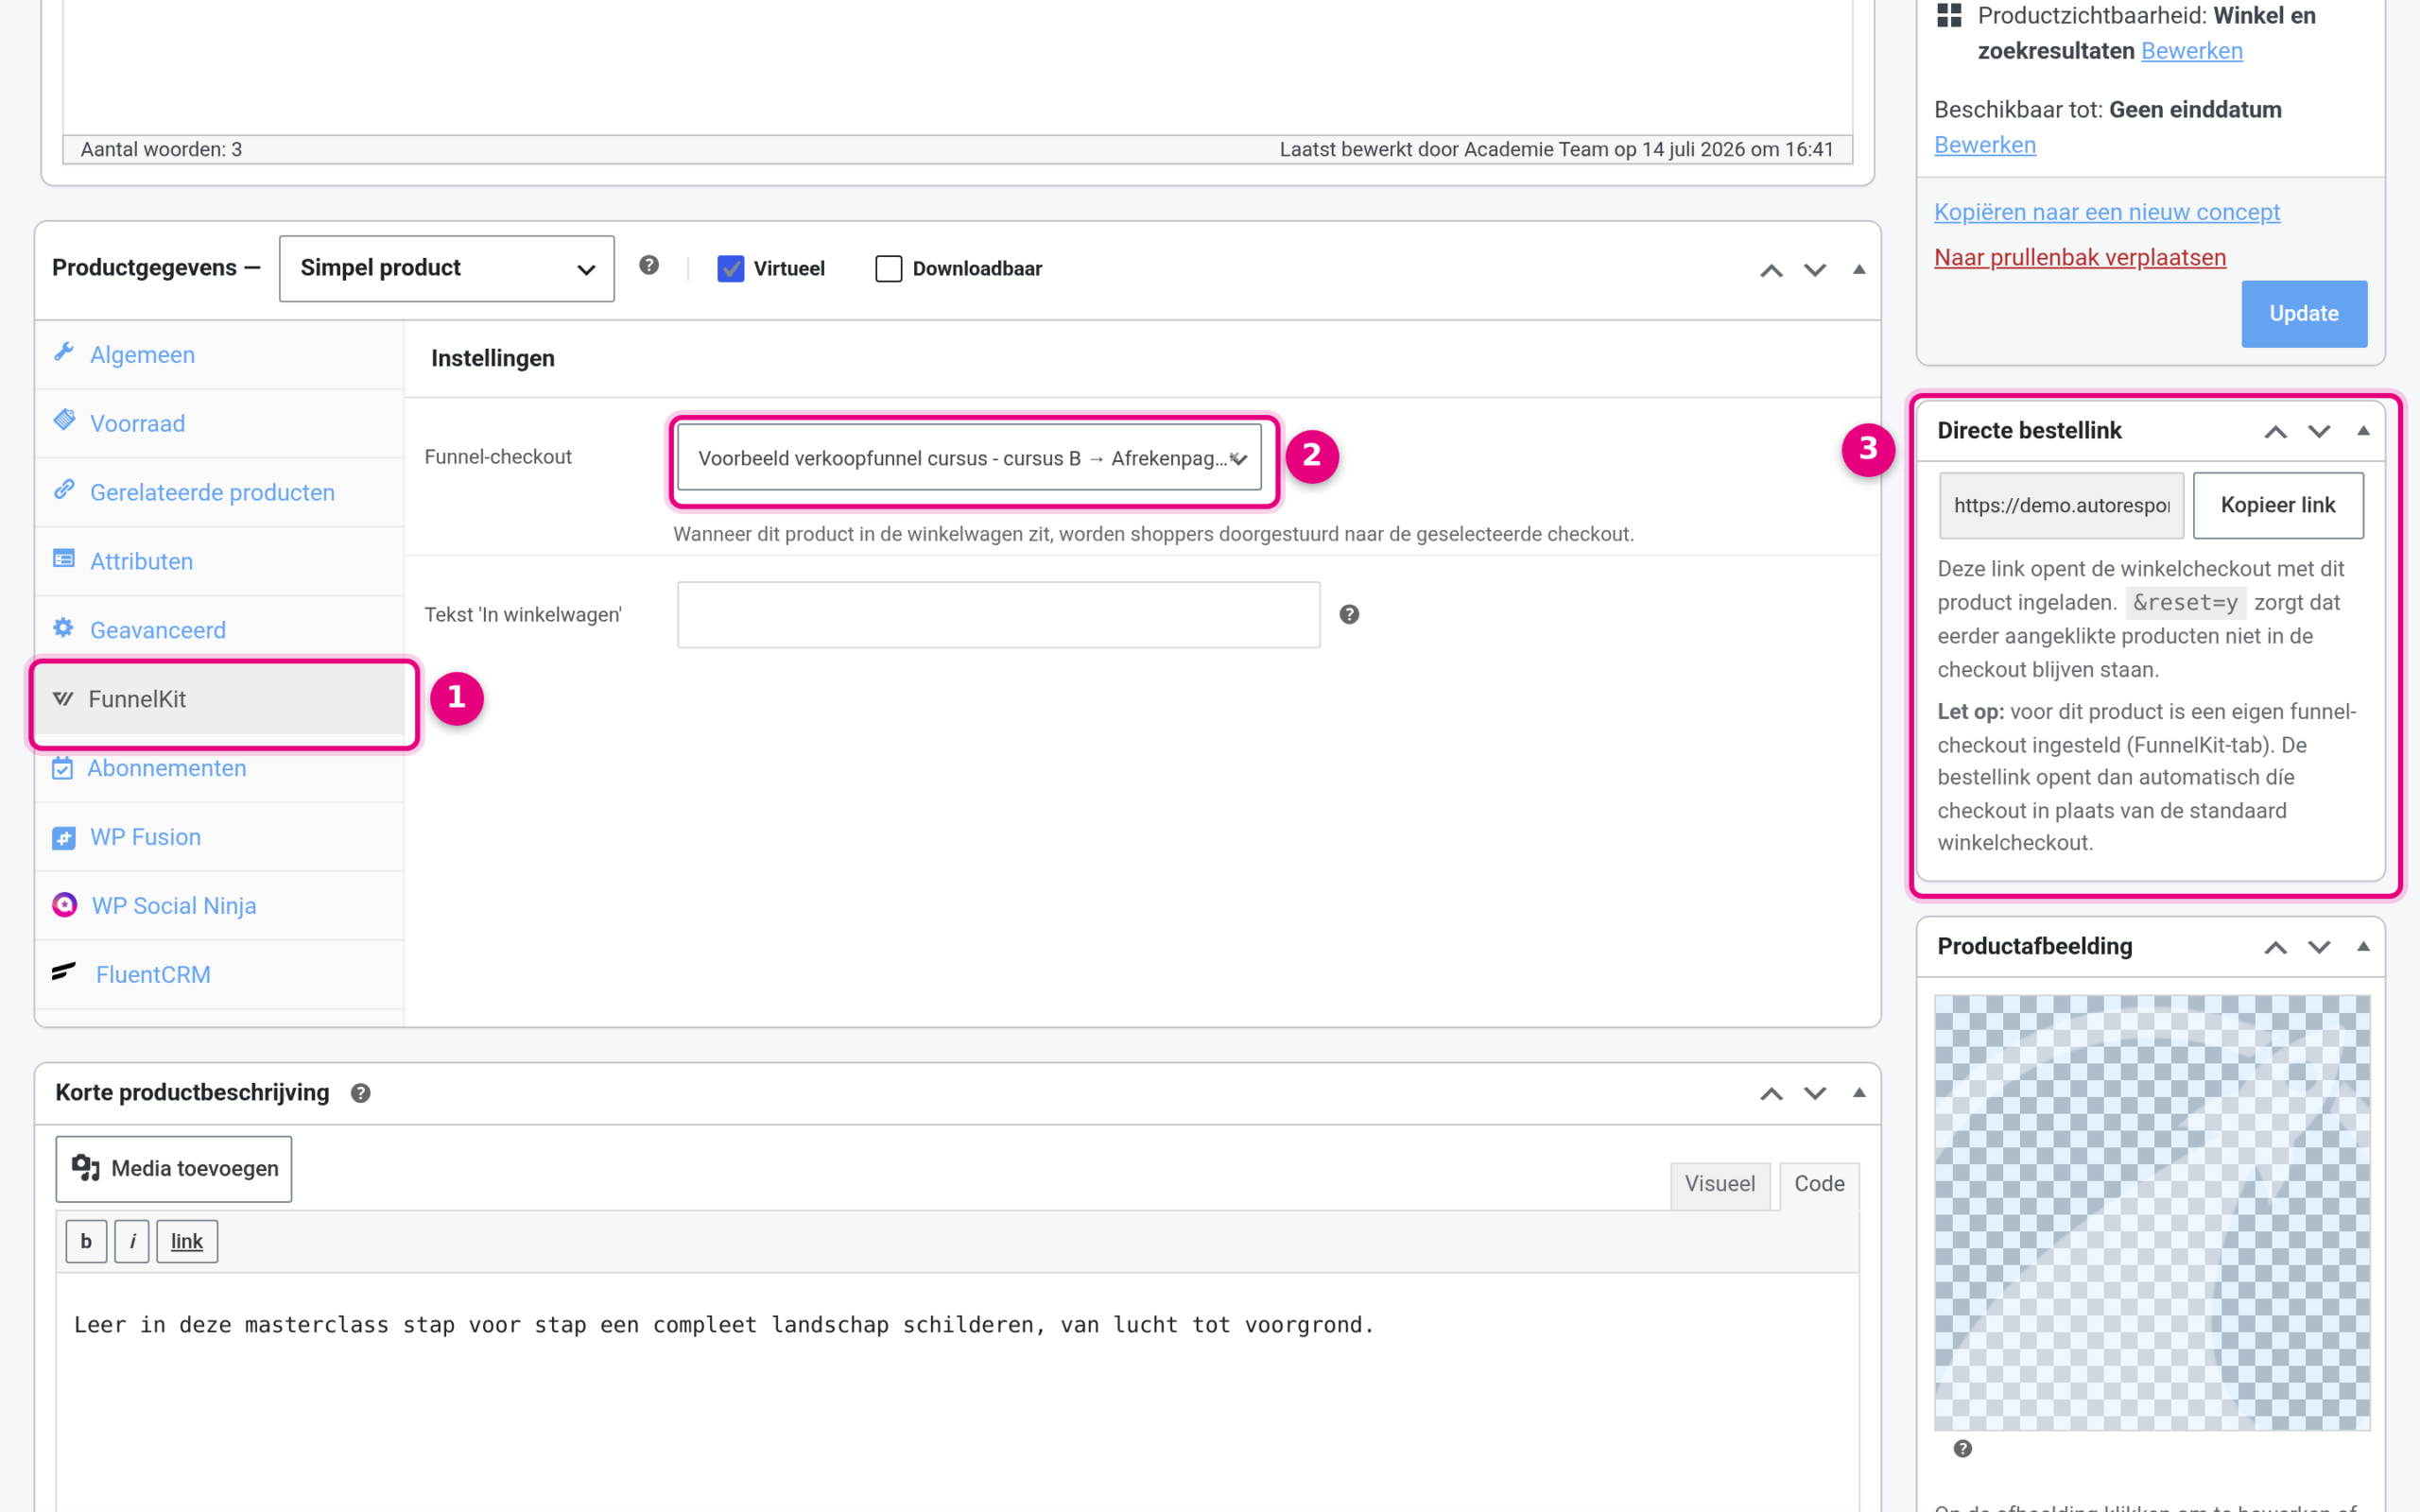
- In Product data, click the FunnelKit tab.
- In the Funnel checkout field, search for and select the checkout page of your funnel (you will see it as “funnel name → name of the checkout page”). As the description underneath says: when this product is in the cart, shoppers are redirected to the selected checkout. Then click Update at the top right to save the product. With the ‘Add to cart’ text field you can also change the button text for this product here.
- The Direct order link block at the top right of the product screen holds the ready-made order link for this product, with a button to copy it. As soon as a funnel checkout is linked, this block states that the order link automatically opens that checkout.
From now on, for this product every route to the checkout ends up on the funnel checkout page. That applies to the direct order link, but also when a customer puts the product in the cart themselves and goes to pay. So you do not have to share a separate funnel link; existing order links simply keep working. Products without a link keep using the standard checkout.
Good to know #
- The link only works if the checkout page of the funnel has been published (step 4). A draft checkout page is ignored and the customer then sees the standard checkout.
- You can also set the link per product category, via Shop → Product categories → edit category. If a product has both its own setting and a category setting, the setting on the product wins.
- If there are two products in the cart that point to different funnel checkouts, the order falls back to the standard checkout.
Testing #
Copy the link from the Direct order link block on the product screen and open it in a private window (incognito), so that you see the checkout as a customer. You end up straight on the checkout page of your funnel, with the product already loaded:
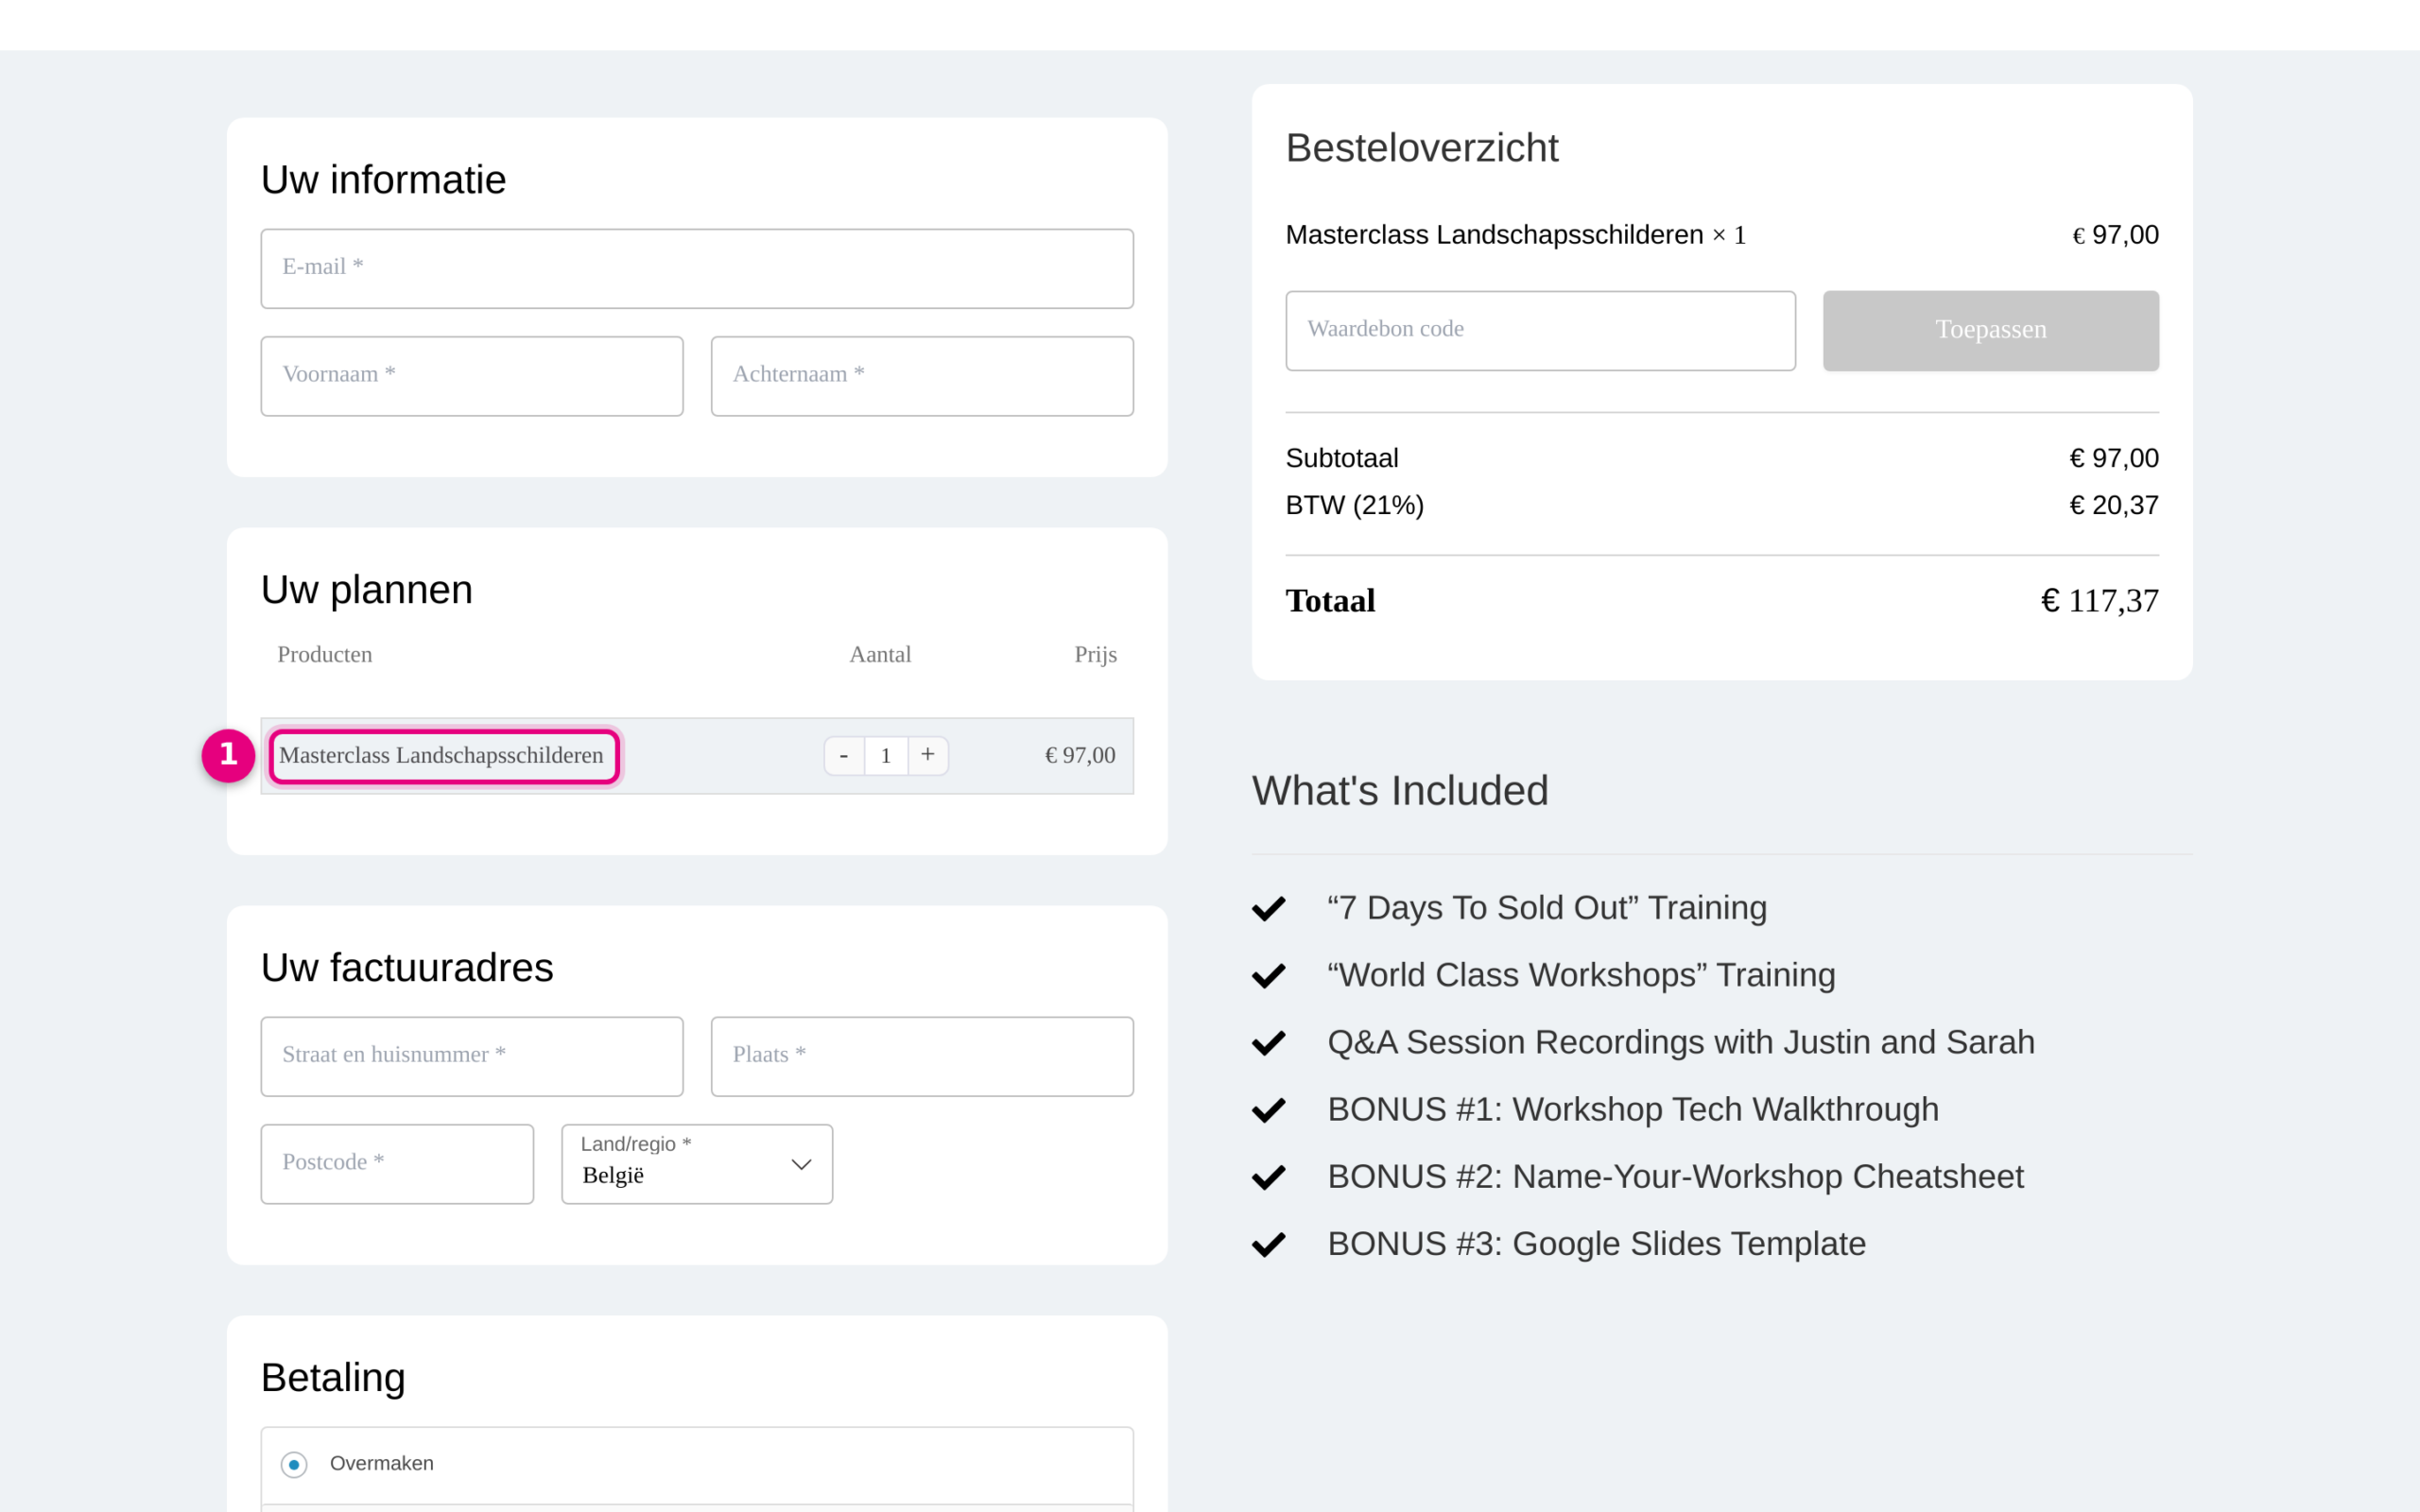
- The linked product is ready on the checkout page of the funnel, including all fields and extras you have set up in the funnel.
As a check, also open the order link of a product without a link: that one ends up on the standard shop checkout.


