What is a webhook? #
A webhook is a powerful feature that makes it possible to send real-time data from an external system to another application. It works like a reverse API, where the external system pushes information to your application without you having to ask for updates all the time. That is particularly handy for integrating different platforms and automating processes, such as adding new contacts to your CRM when they are created in another system.
A widely used program that can send data to your administration through a webhook is Zapier. Zapier can link an action in one program to actions in another program. In Zapier you could therefore use the webhook to pass data from another application through to your Autorespond administration.
In the new Autorespond system we use FluentCRM, among other things, as the basis for the email marketing system. You will find the English FluentCRM documentation on incoming webhooks here:
https://fluentcrm.com/docs/global-incoming-webhooks/
Using webhooks in the new Autorespond #
With FluentCRM you can easily set up webhooks to receive data from external services or applications. This is how you set a webhook up:
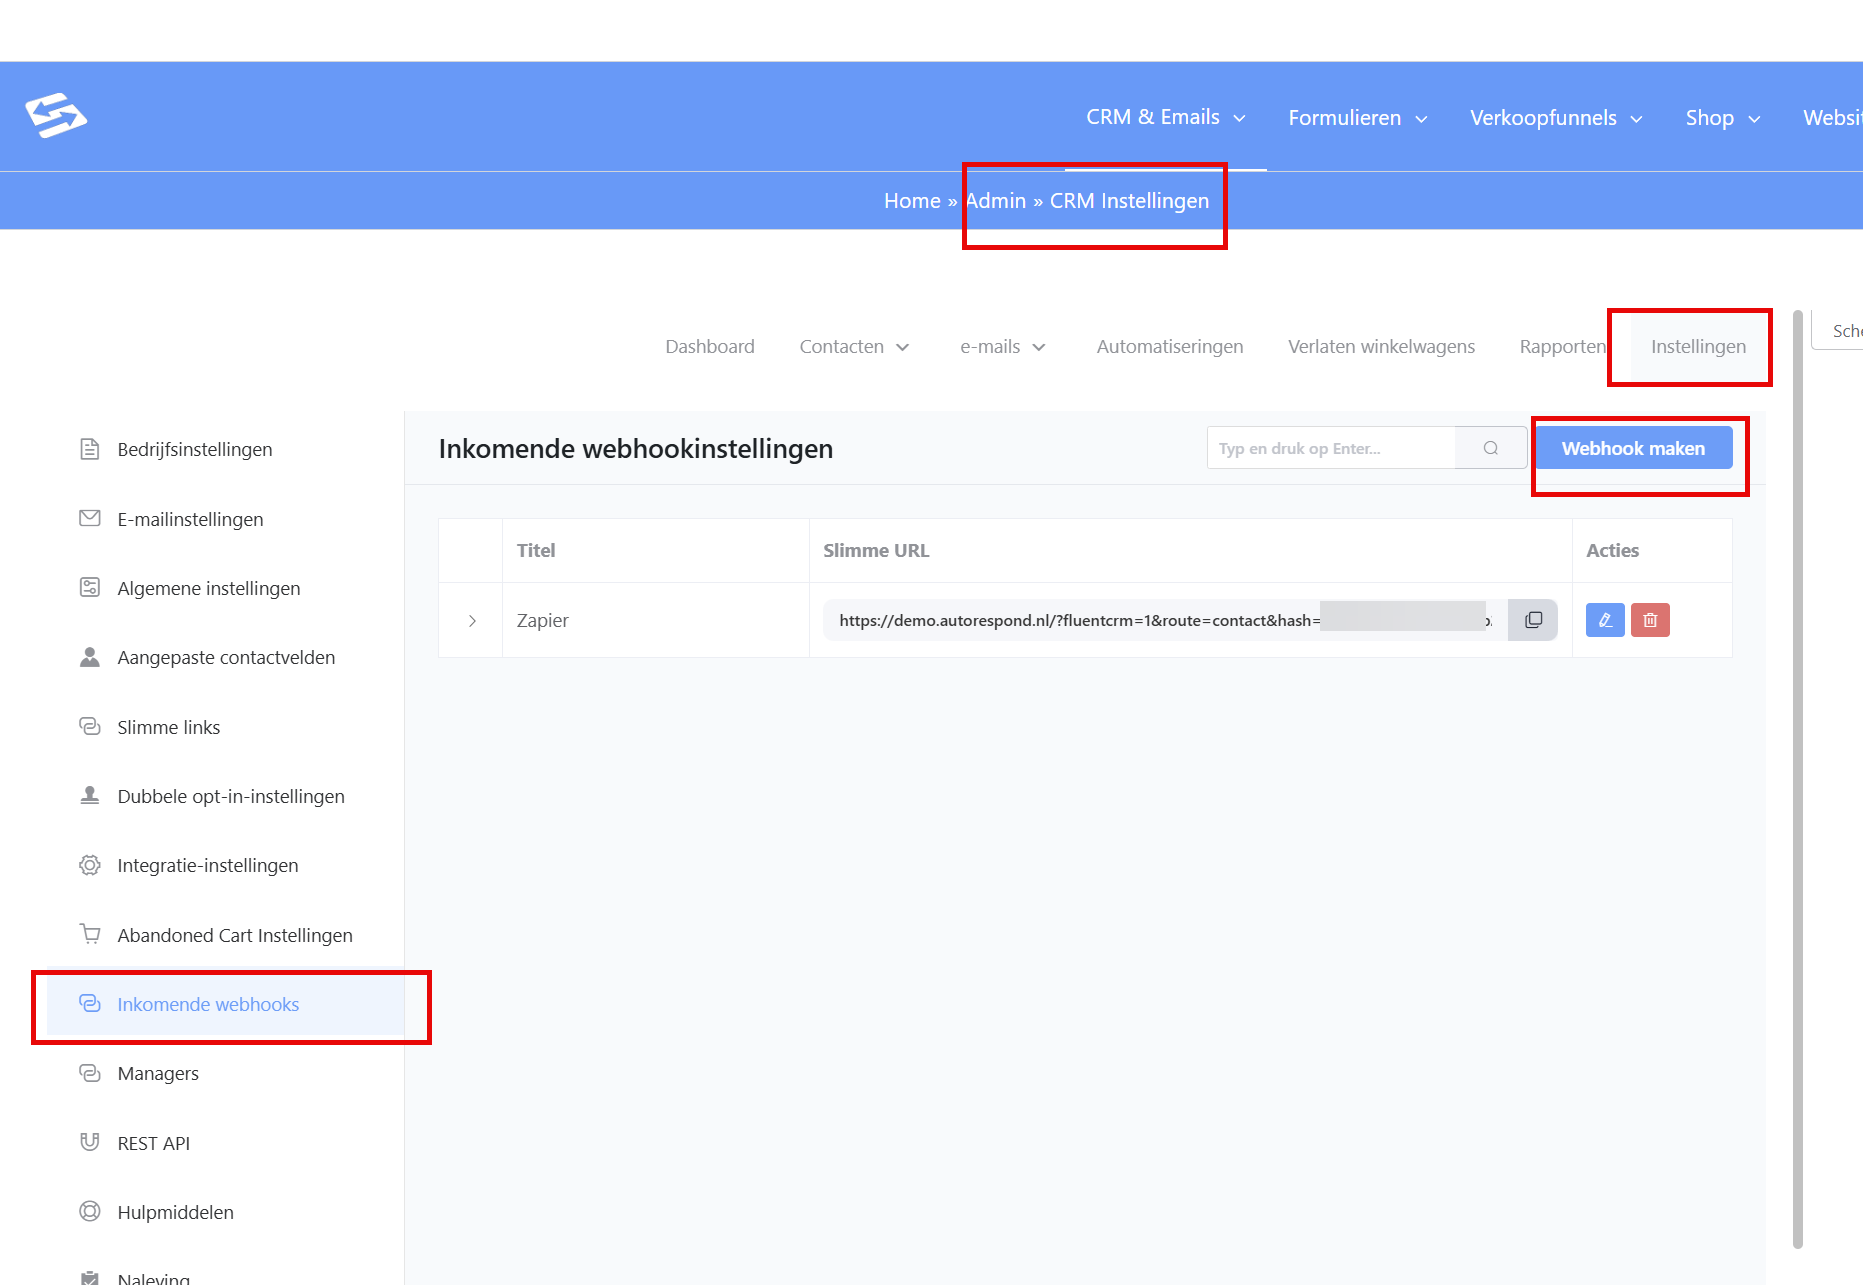
- Go to the menu CRM > Settings: click the ‘Incoming webhooks’ tab
- Select Incoming Webhooks: click “Incoming Webhooks” on the left to go to the right section.
- Create a new webhook: click the “Create webhook” button. A pop-up appears in which you enter the following details:
- Webhook name: this is an identifier for your webhook (so that you can see at a glance what the webhook is for)
- Lists and tags: choose the lists and tags that contacts coming in through the webhook should be added to.
- Subscription status: set the status of the user. Usually you choose “Subscribed”, which means they can receive emails from the CRM.
- Webhook URL: once you have filled in the required information, click the “Create” button. You receive a webhook URL that is ready to listen for incoming requests. You also get the keys you need for all the available fields to map.
- Sending data: external systems can now use the webhook URL to send structured data (in JSON format) to FluentCRM. Make sure you use the correct field names.
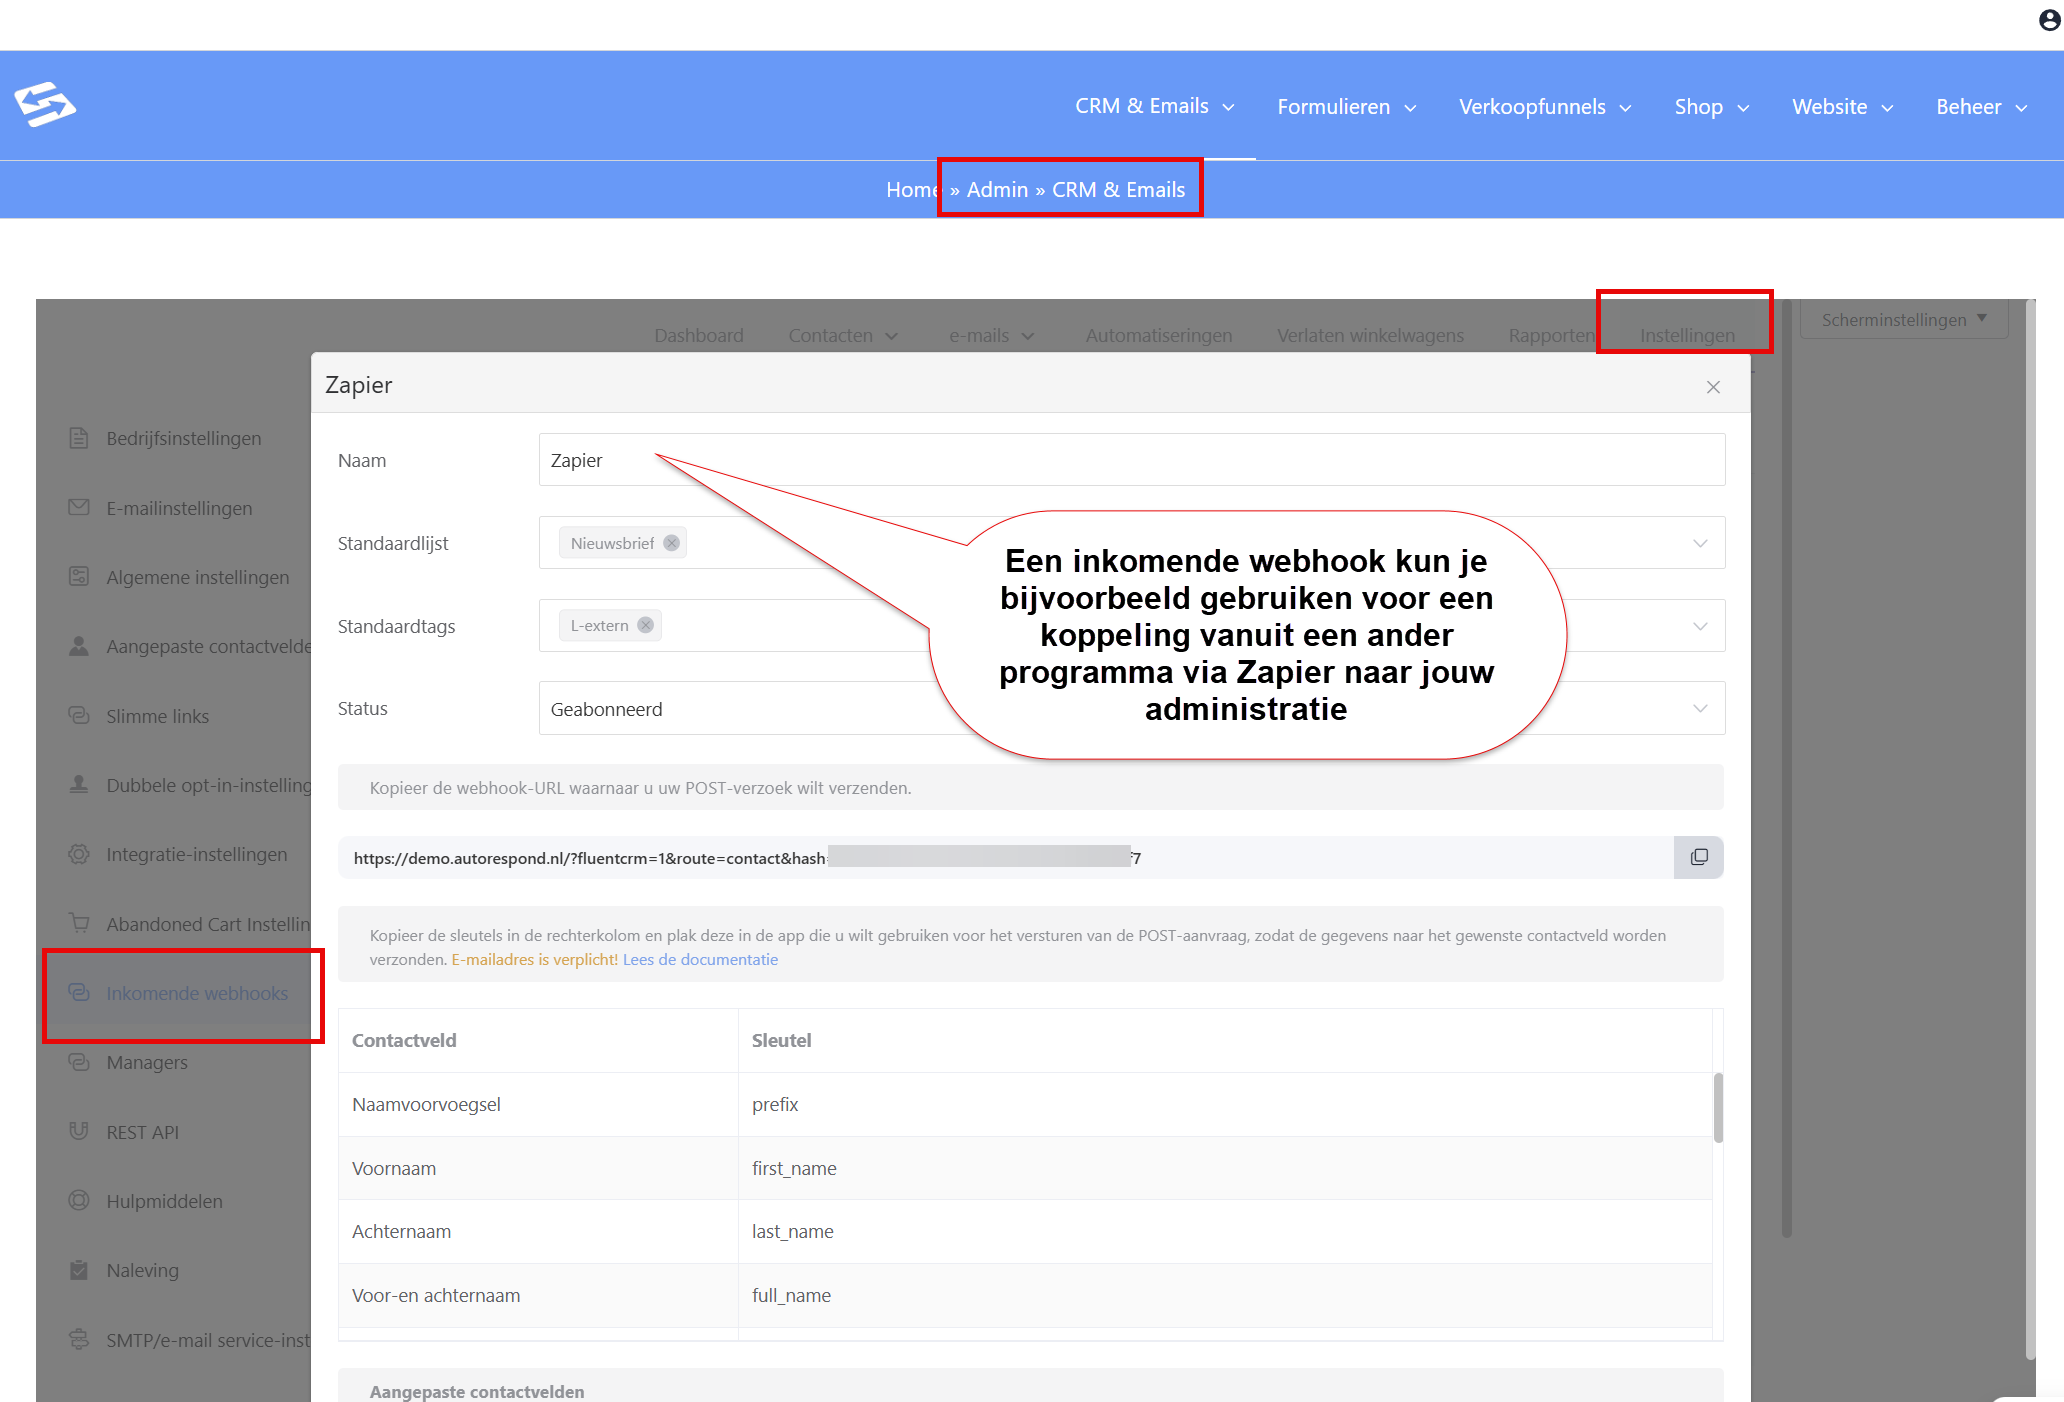
You can use the tag you set in the webhook as the trigger for an automation. That way you can start an automation straight away for a contact that is created through a webhook.
Available field names #
Here are some of the standard field names you can use when sending data:
| Field | Key |
|---|---|
| First name | first_name |
| Last name | last_name |
| Full name | full_name |
email |
|
| Time zone | timezone |
| Address line 1 | address_line_1 |
| Address line 2 | address_line_2 |
| City | city |
| State | state |
| Postcode | postal_code |
| Country | country |
| IP address | ip |
| Phone | phone |
| Source | source |
| Date of birth | date_of_birth |
If you have custom contact fields (also called ‘custom fields’ or ‘free fields’), you can see the key for those contact fields while creating the webhook.
You can always change the settings of the webhook at a later moment.
With these steps you can easily set up a webhook in FluentCRM and create a seamless integration with external systems. That makes managing your contacts and marketing campaigns more efficient and more effective.


