Build automations with the automation editor #
With the automation editor you build smart automations, funnels or workflows that run actions automatically based on what your contacts do. Think of email sequences such as a welcome series after a sign-up, follow-ups after a purchase, or adding tags when someone clicks a link. The visual editor makes building these workflows both clear and powerful.
The automation editor in Autorespond is based on FluentCRM Pro, included in your package. Read the FluentCRM documentation
Where to find the automation editor #
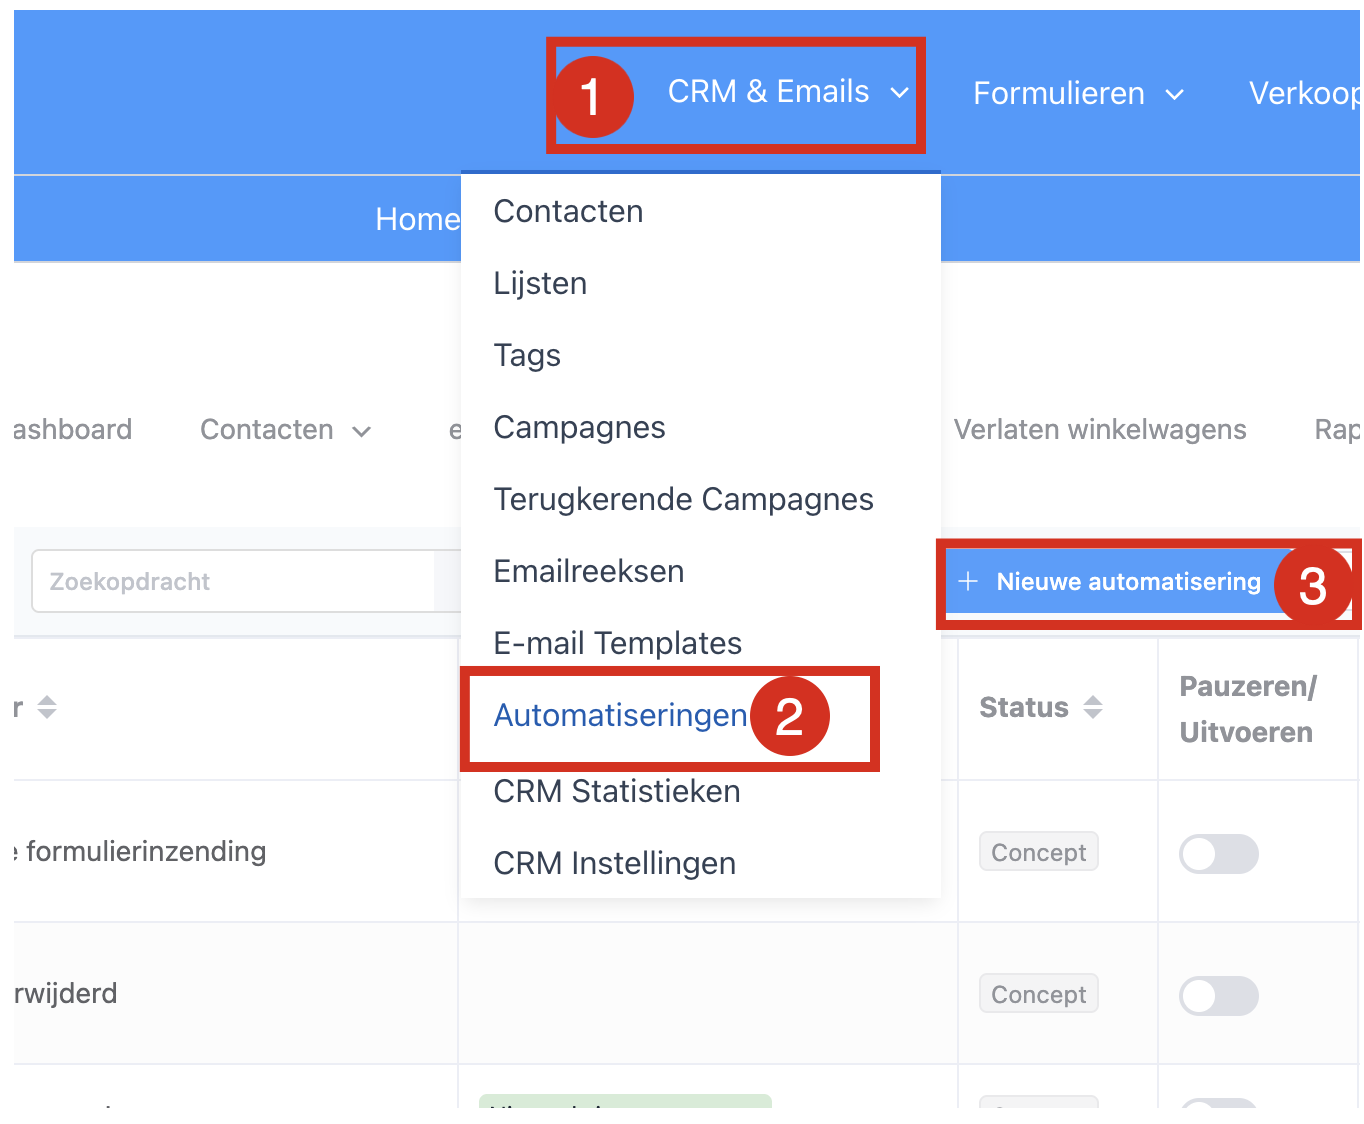
Image 1
Go to CRM & Emails → Automations (1 and 2) and click New Automation. (3) You can now choose between ready-made funnel templates or building a funnel from scratch yourself.
1. Using ready-made funnel templates #
Ready-made funnel templates are popular, pre-configured and standardised automations built around a common goal. Click the funnel that matches your goal to select it. You can then edit every step with your own (email) texts, your preferred wait steps and so on. To edit a step, click it.
2. Creating an automation from scratch #
Every automation starts with a trigger, followed by actions that run either straight away or under certain conditions, and/or after a wait step. Each step is shown as a block in a particular colour. You can move blocks with the arrows, and clone or delete them by right-clicking the three dots in a block). At the end you test and publish the automation you have built.
Step 1: Set the trigger #
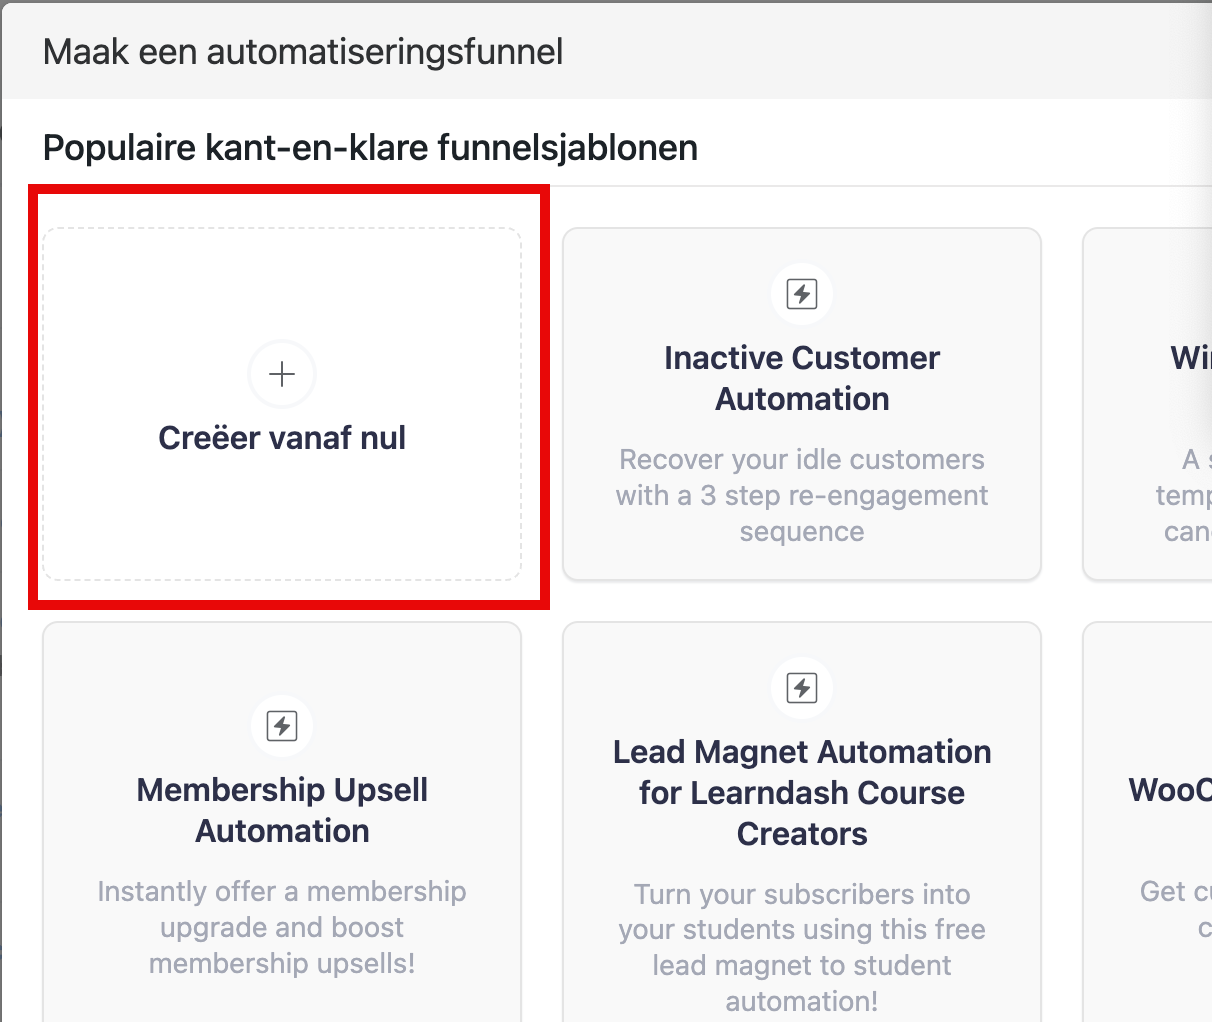
Image 2
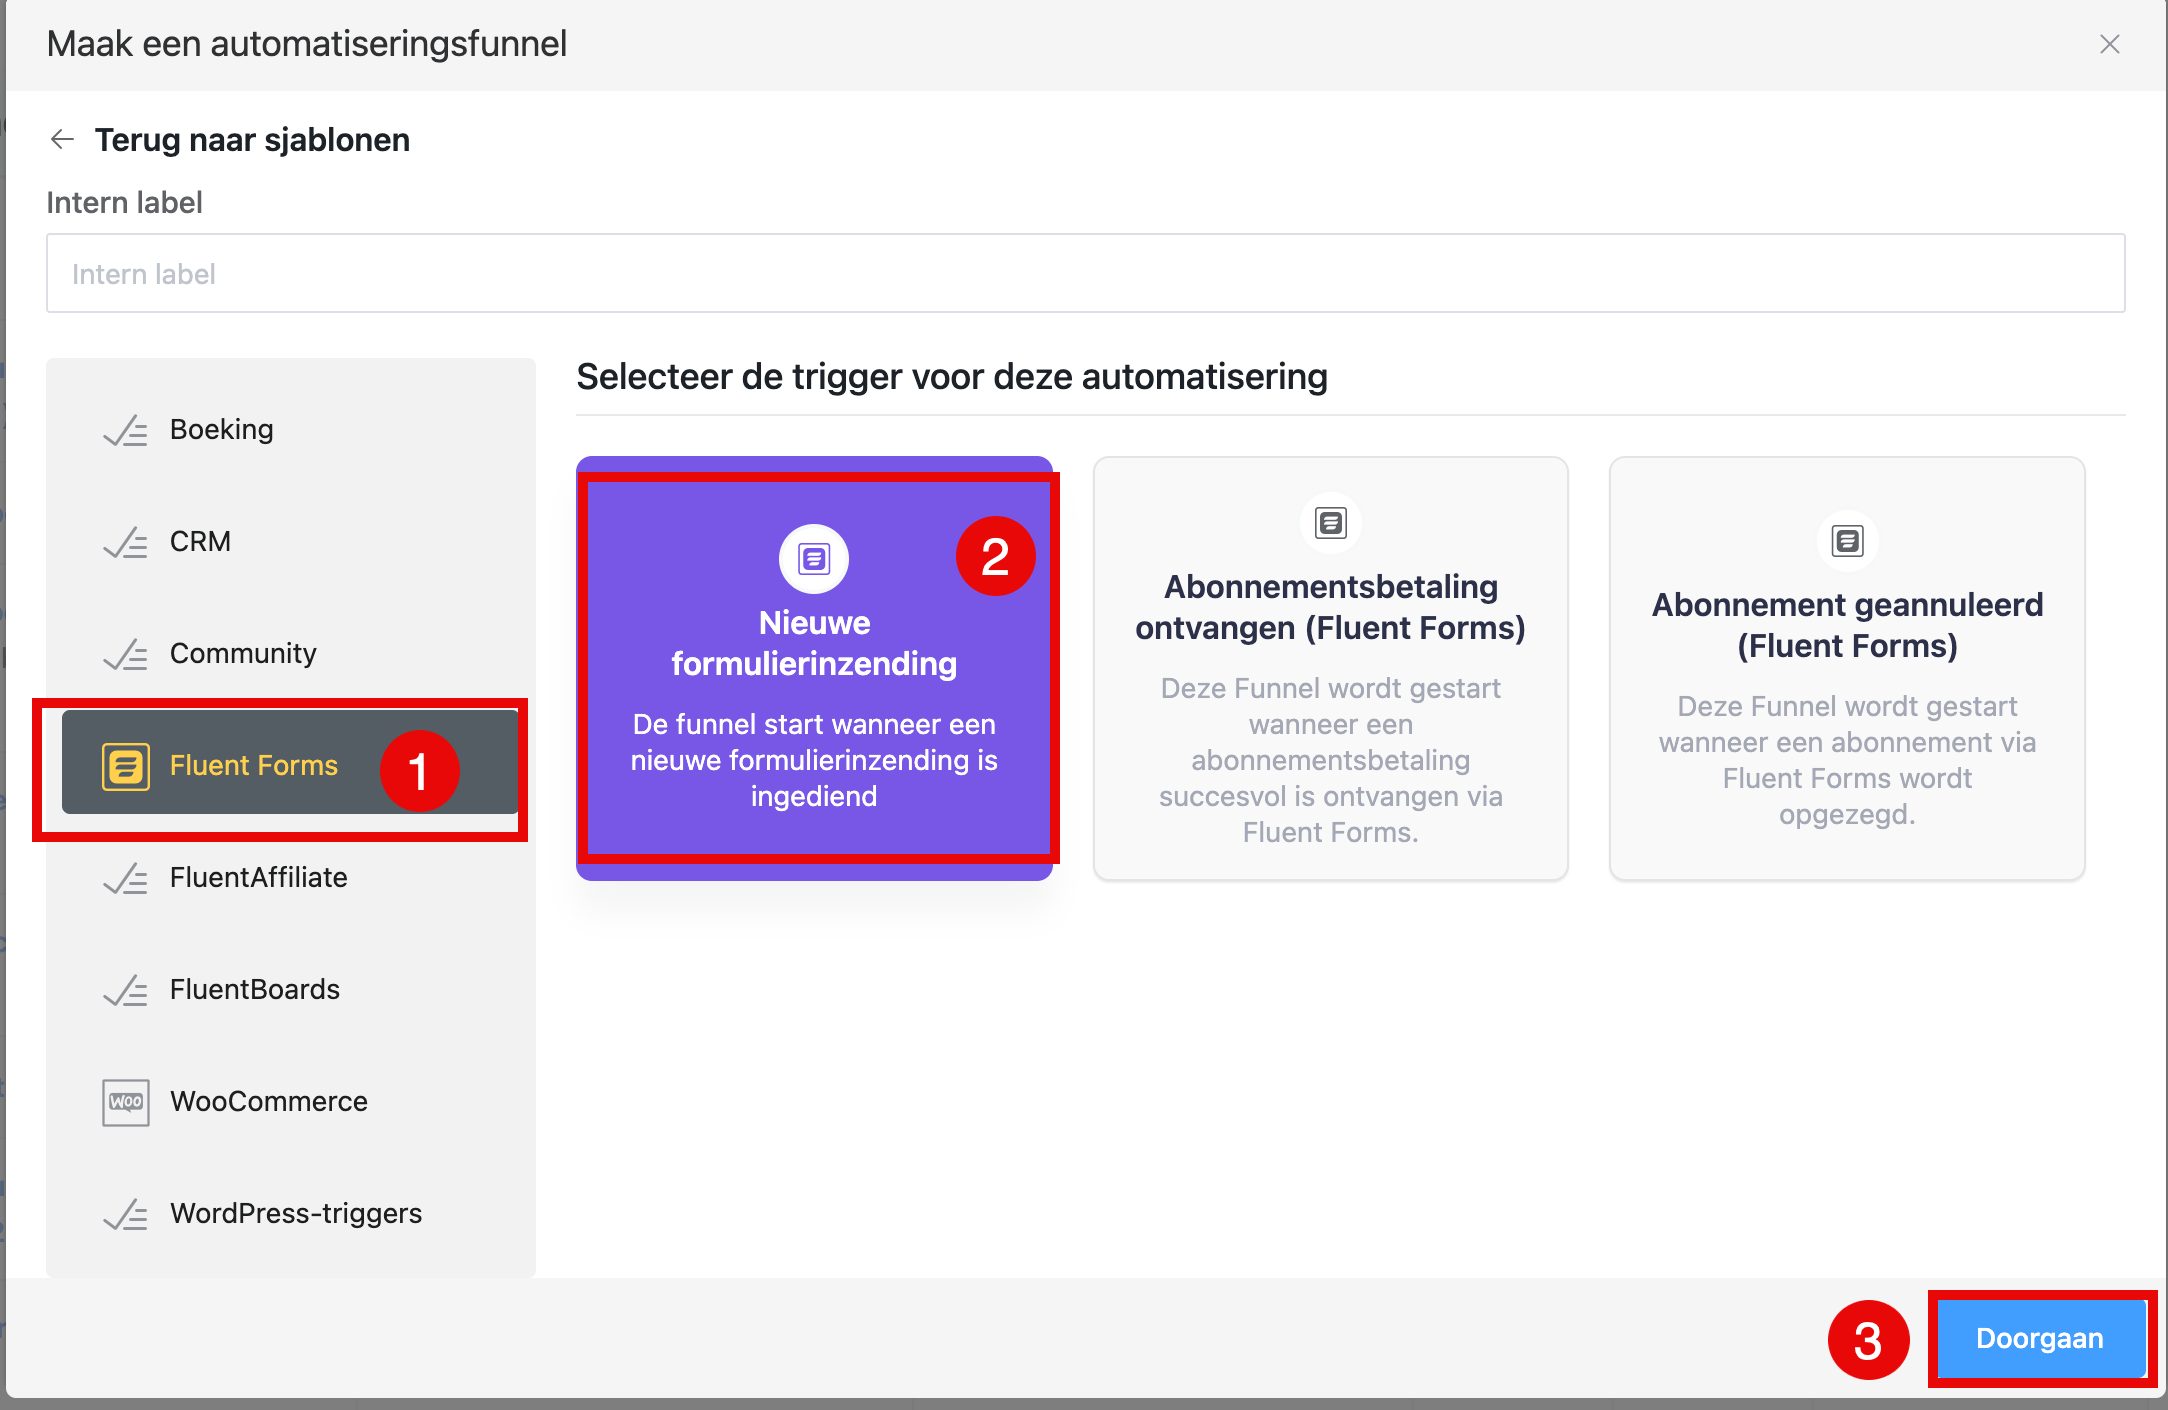
Image 3
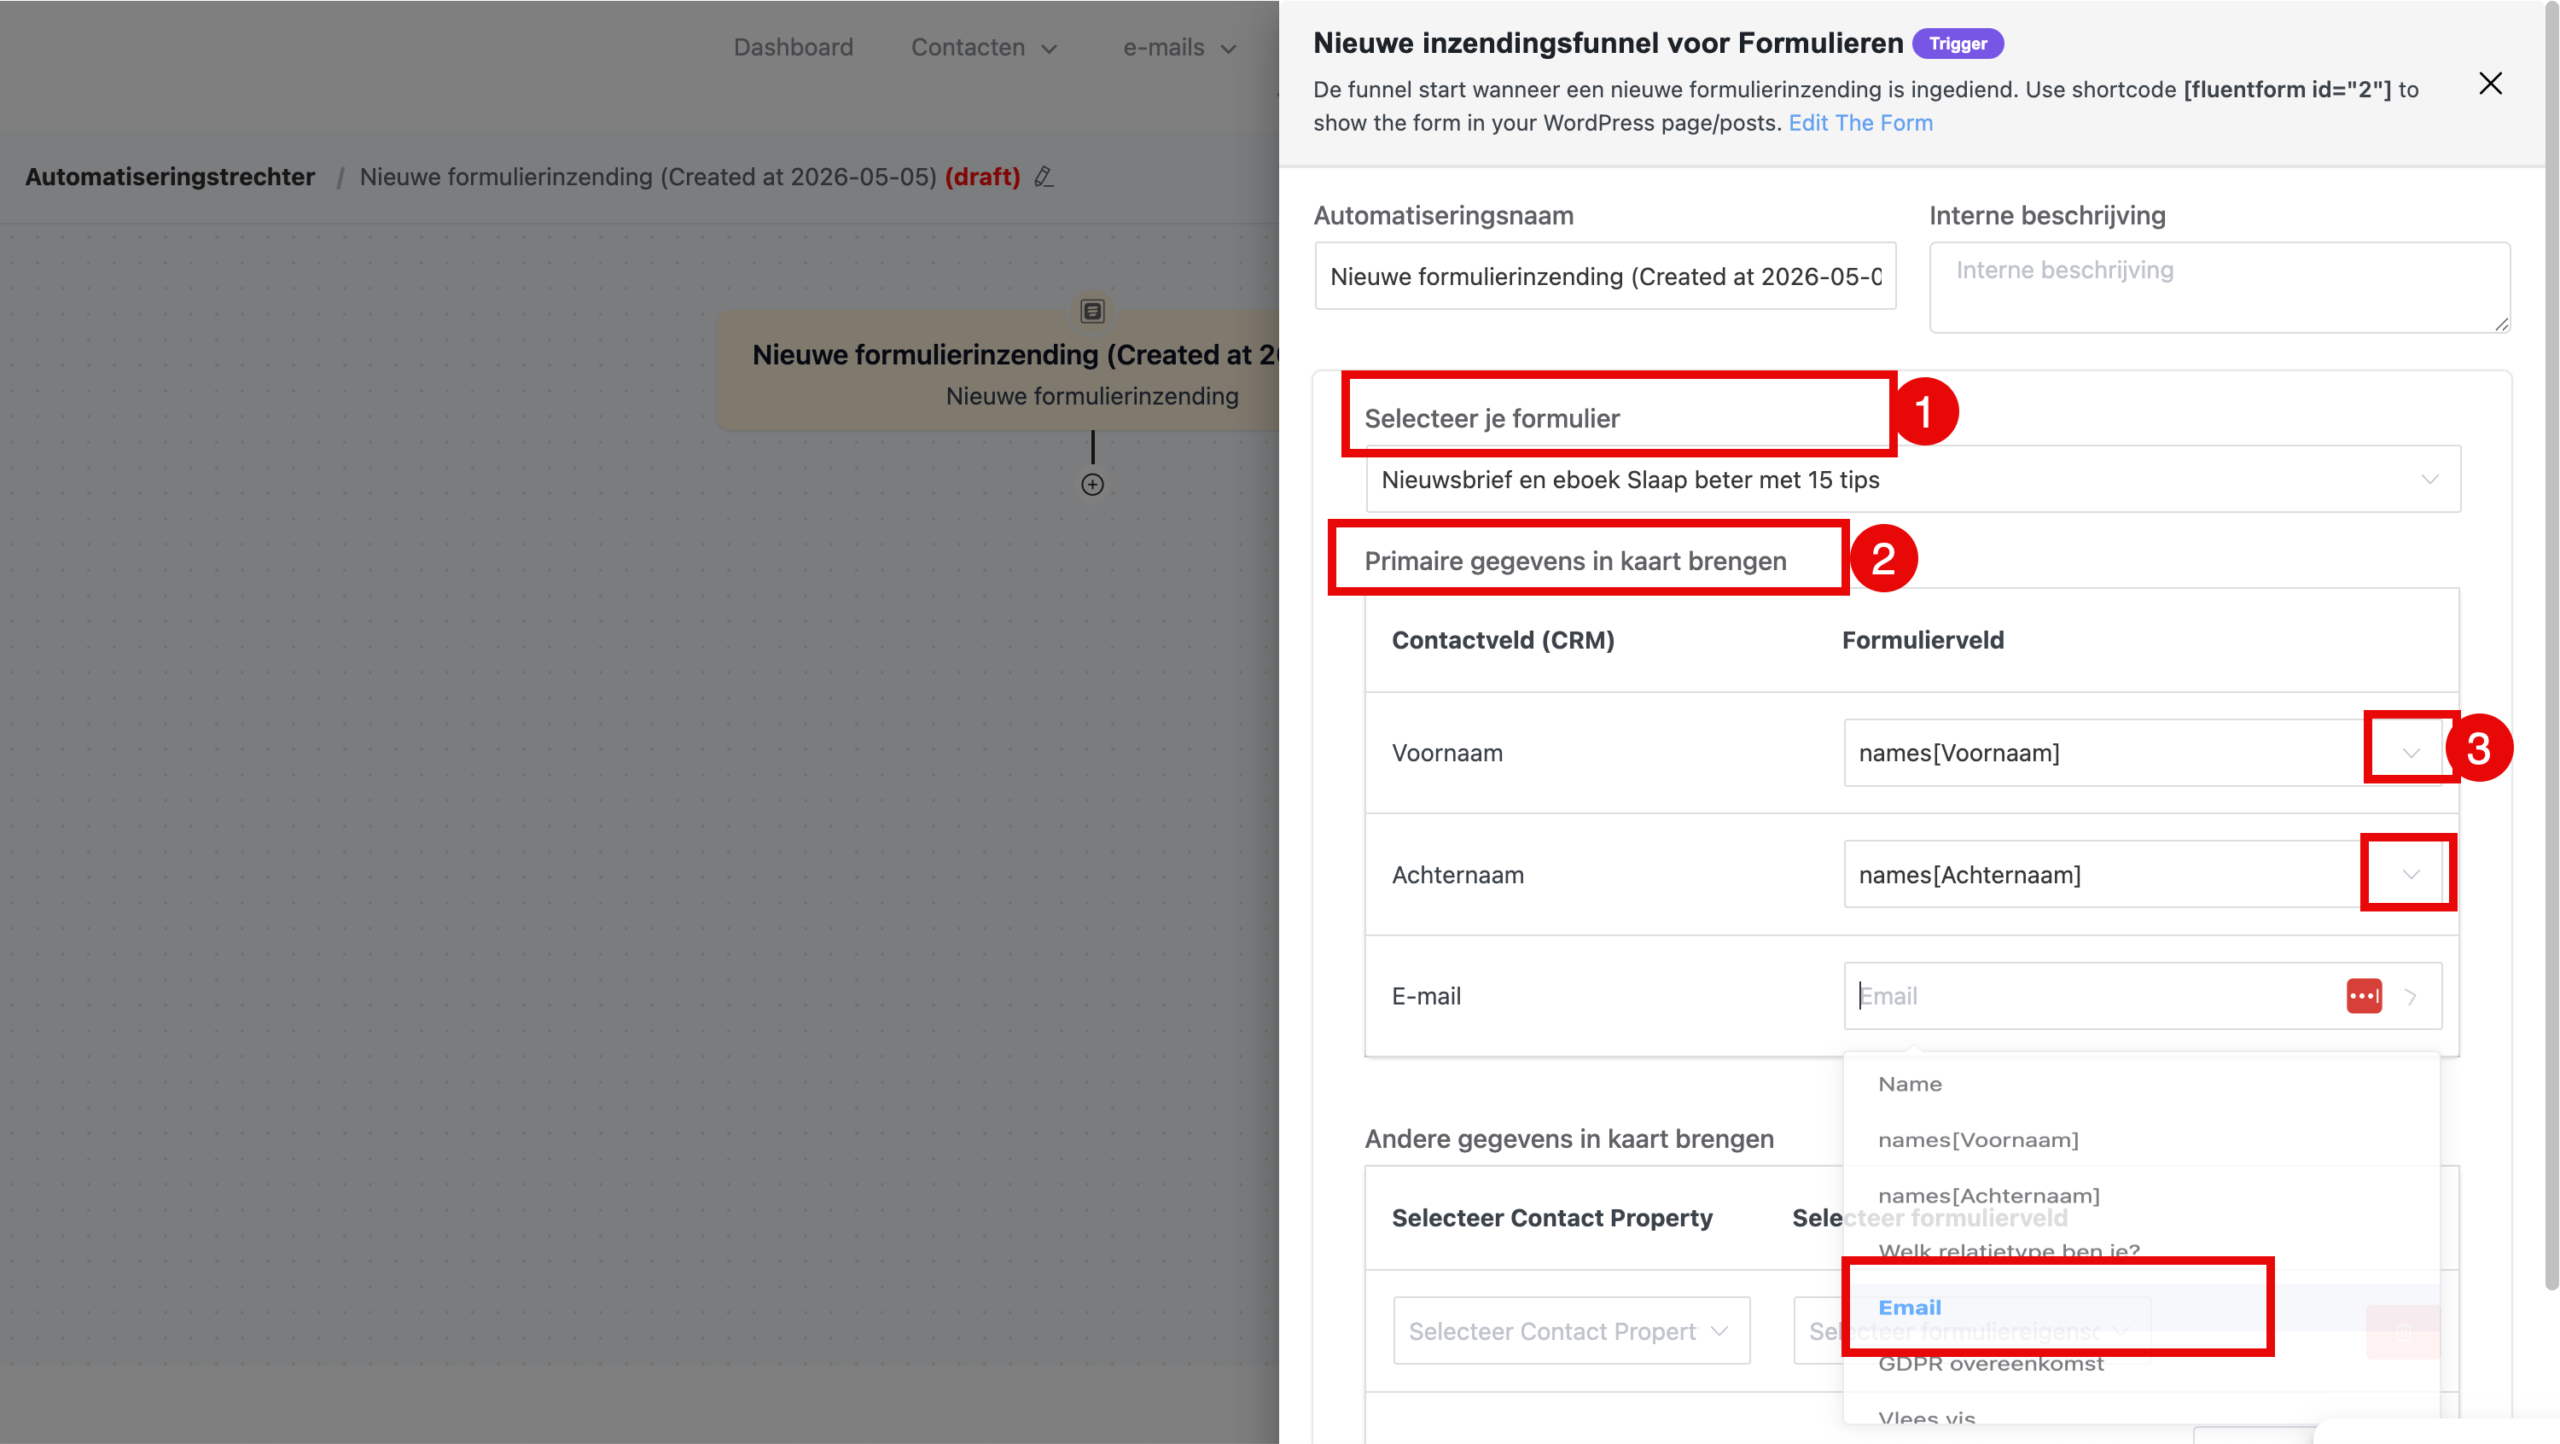
Image 4
- Click ‘New Automation’. Choose ‘Create from scratch’. (Image 2) A dropdown menu appears. As an example, we will build a funnel that starts with a request for an ebook through a form submission. Select ‘Fluent Forms’ (Image 3,1) and then ‘New form submission’. (Image 3,2) In this example we use an existing form for requesting an ebook.
Note: the email with the ebook download link that the requester receives can also be attached to the form itself. (To do so, go to the form in CRM & Emails → Forms → Settings & integrations →Email notifications)
Click Continue. (Image 3,3)
- You now arrive at the screen where you select the form. (Image 4, 1)
Next comes the ‘field matching’, under ‘Map primary data’. (Image 4,2) Every form has field names you chose yourself, and those fields first have to be matched to standard fields. Expand each field (Image 4,3) and select a standard field that fits. That way the data is stored correctly in the database after a submission. When you are finished, click ‘Save settings’ right at the bottom. - You now enter the editor, where you build the funnel. The trigger is already in place. Give the automation a clear name at the top left of the screen and save that name.
Step 2: Add actions #
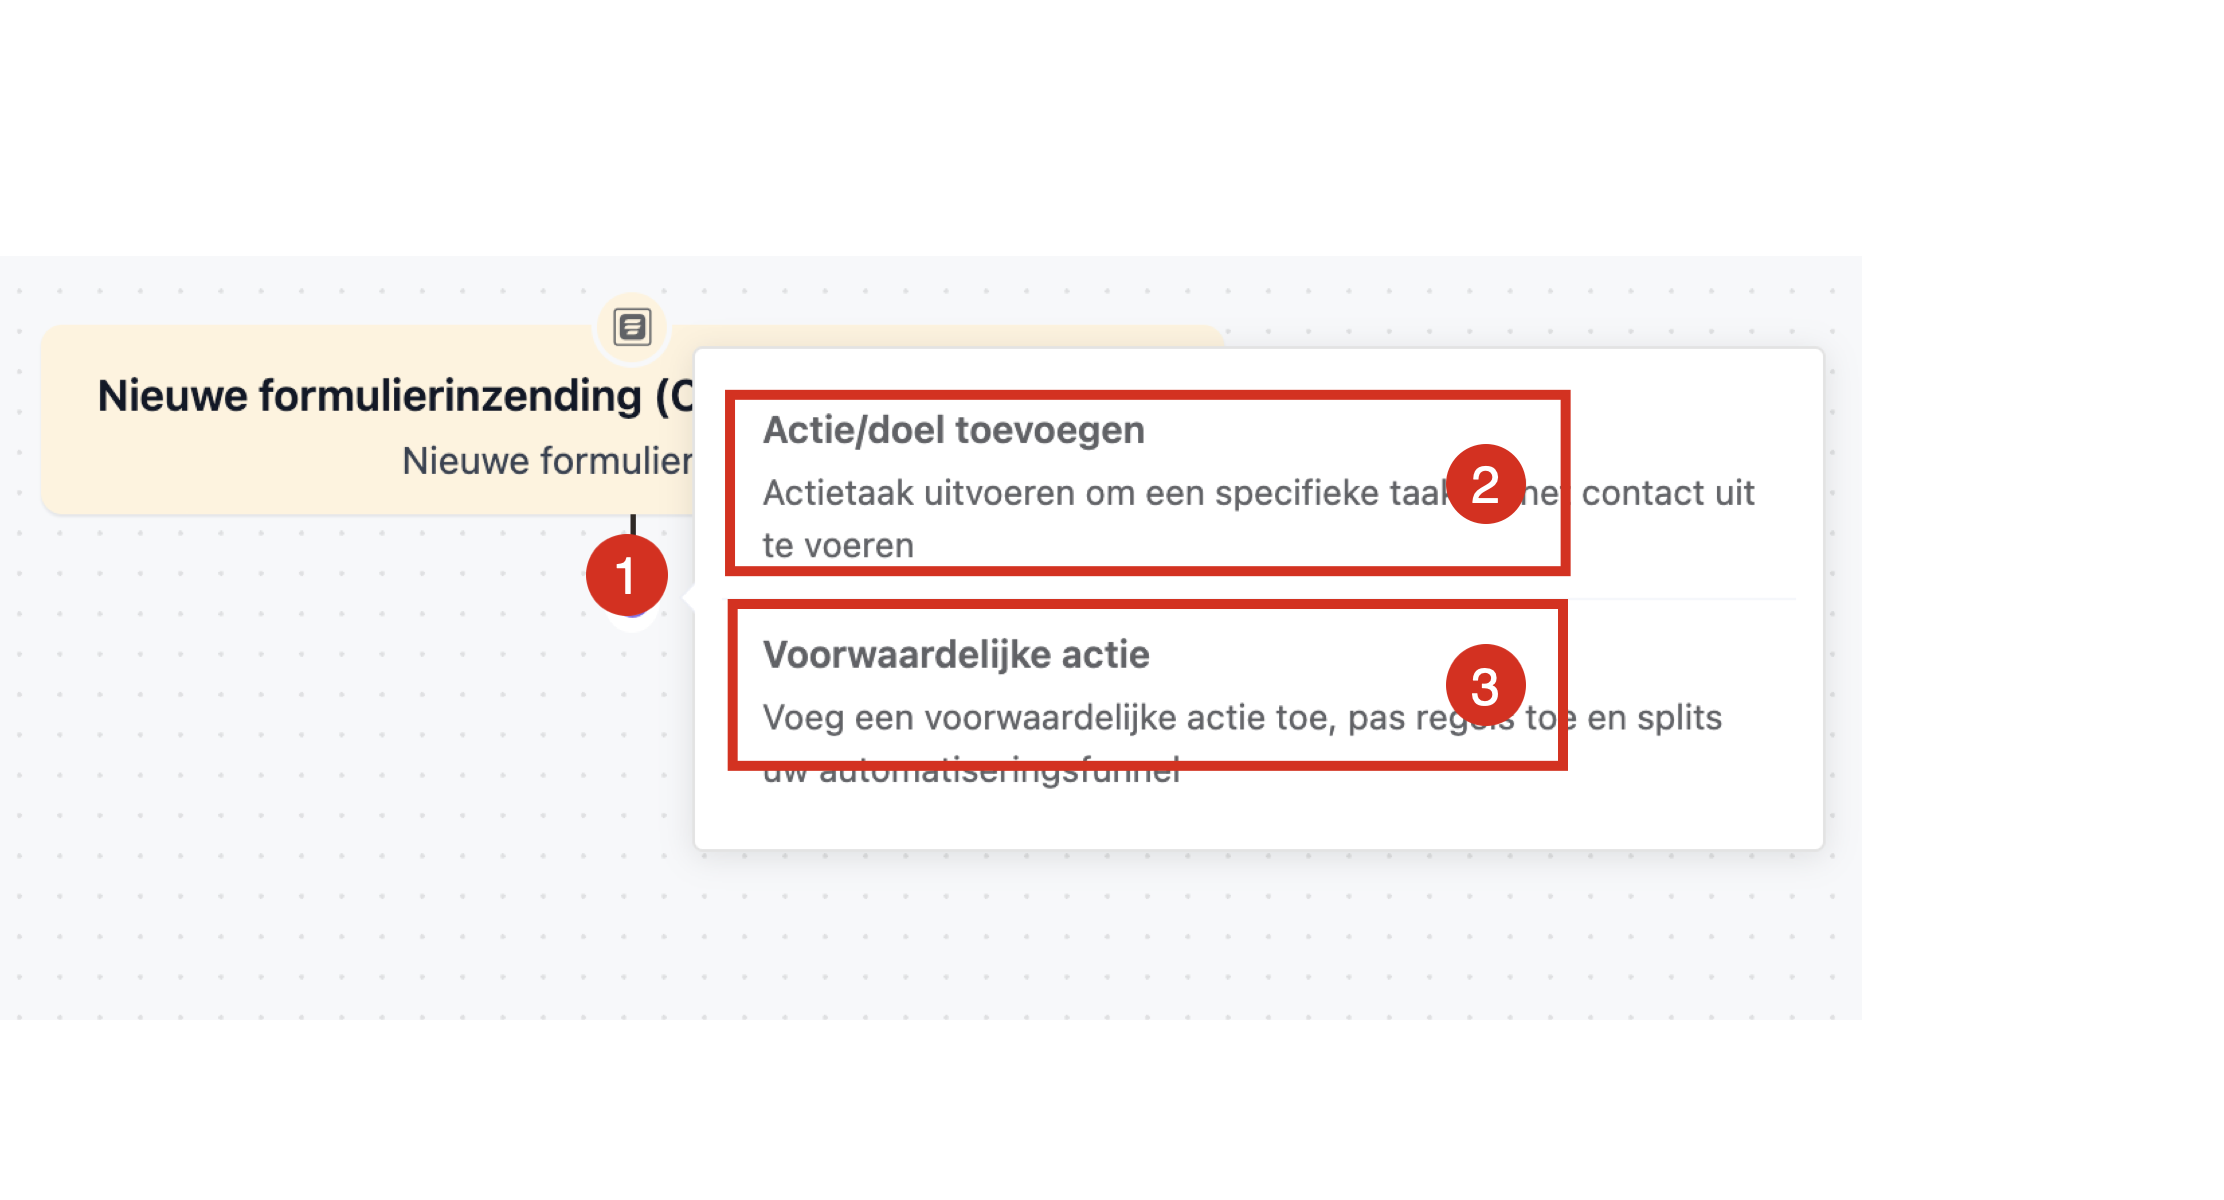
Image 5
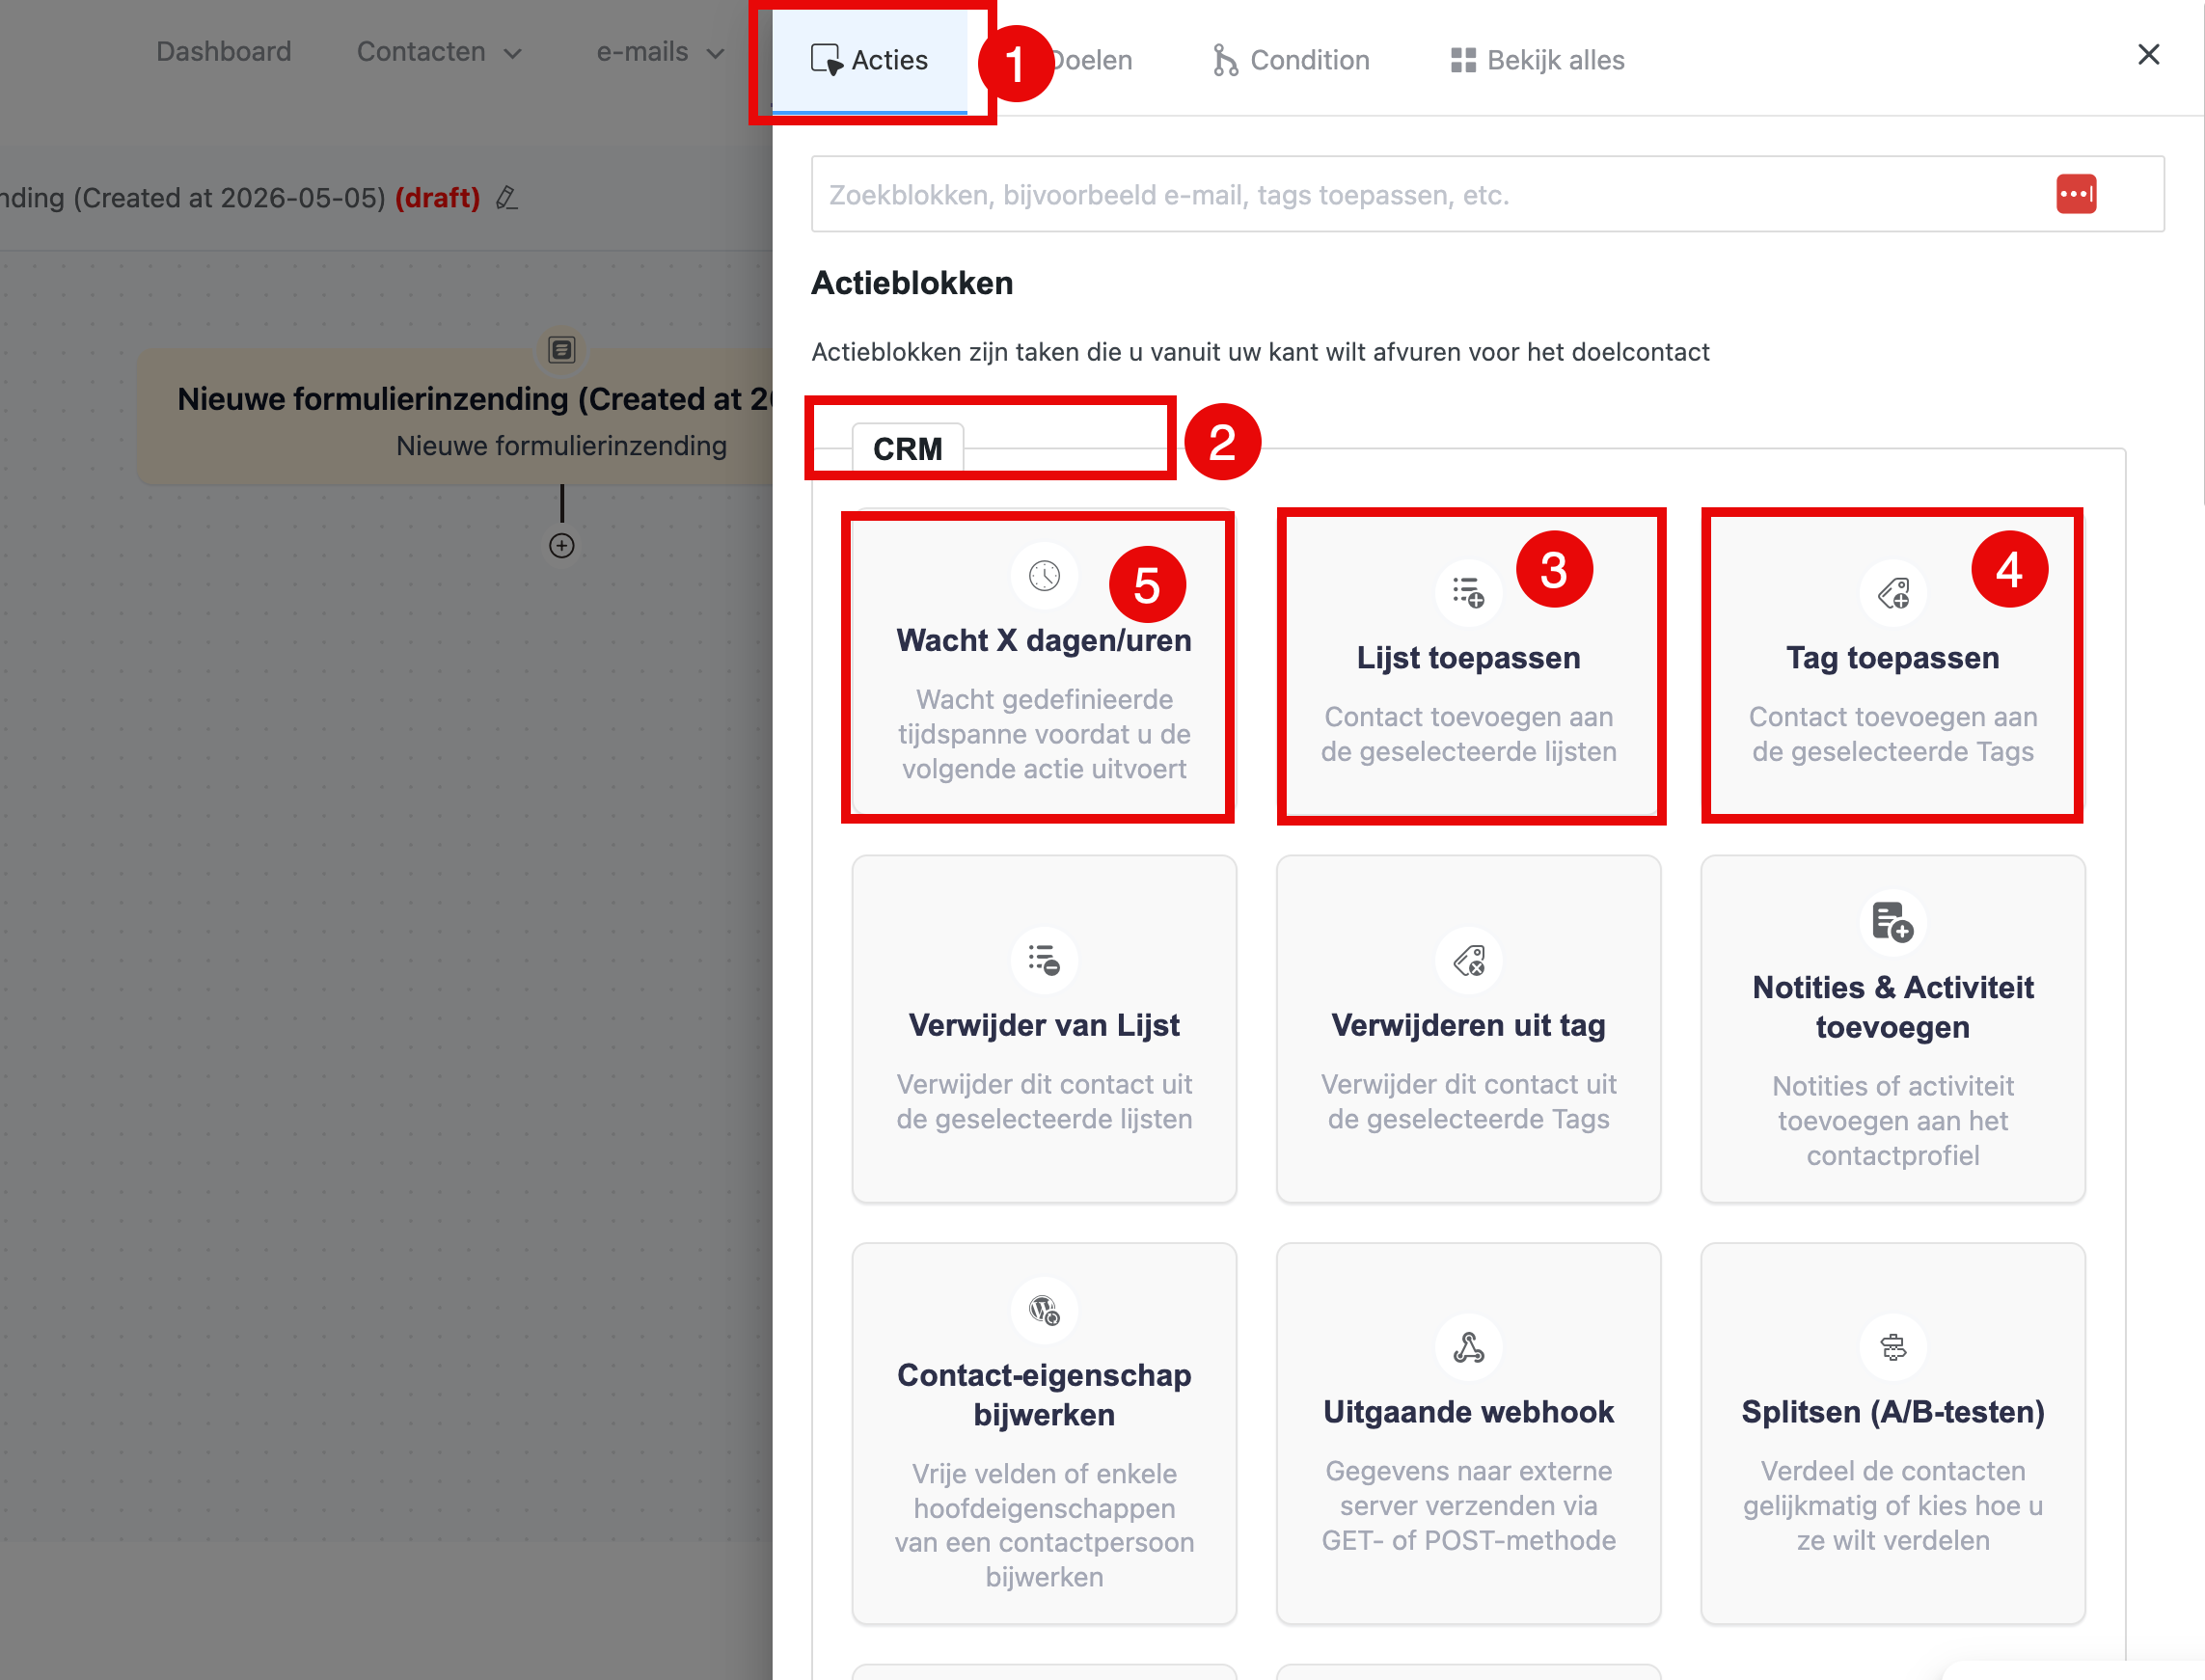
Image 6
- Hover over the plus sign below the trigger. Select Add action/goal. (see Image 5) Now you set the follow-up steps.
- Under the Actions tab (Image 6,1) we first set up a few CRM actions (Image 6,2), such as adding to a list (Image 6,3) and applying a specific tag (Image 6,4). Click ‘Add to list’ to add the ebook requesters to your newsletter list. You can place a wait step straight away as well (Image 6,5).
- Now you arrange for a number of emails to be sent, with a wait step between each of them. Scroll down and you will see the option to schedule emails. (Image 7, 1) Choose to send an ‘email sequence’ if that sequence already exists in your account. (Image 7,3) (Go to CRM & Emails → Email sequences to create such a reusable sequence. See https://autorespondhub.com/docs/creating-email-sequences/). If it does not, you can build an email sequence here with the required wait steps in between. For that, choose ‘Send custom email”, (Image 7,2) place a wait step (Image 6,5) and choose ‘Send custom email’ again. Complete the sequence this way.
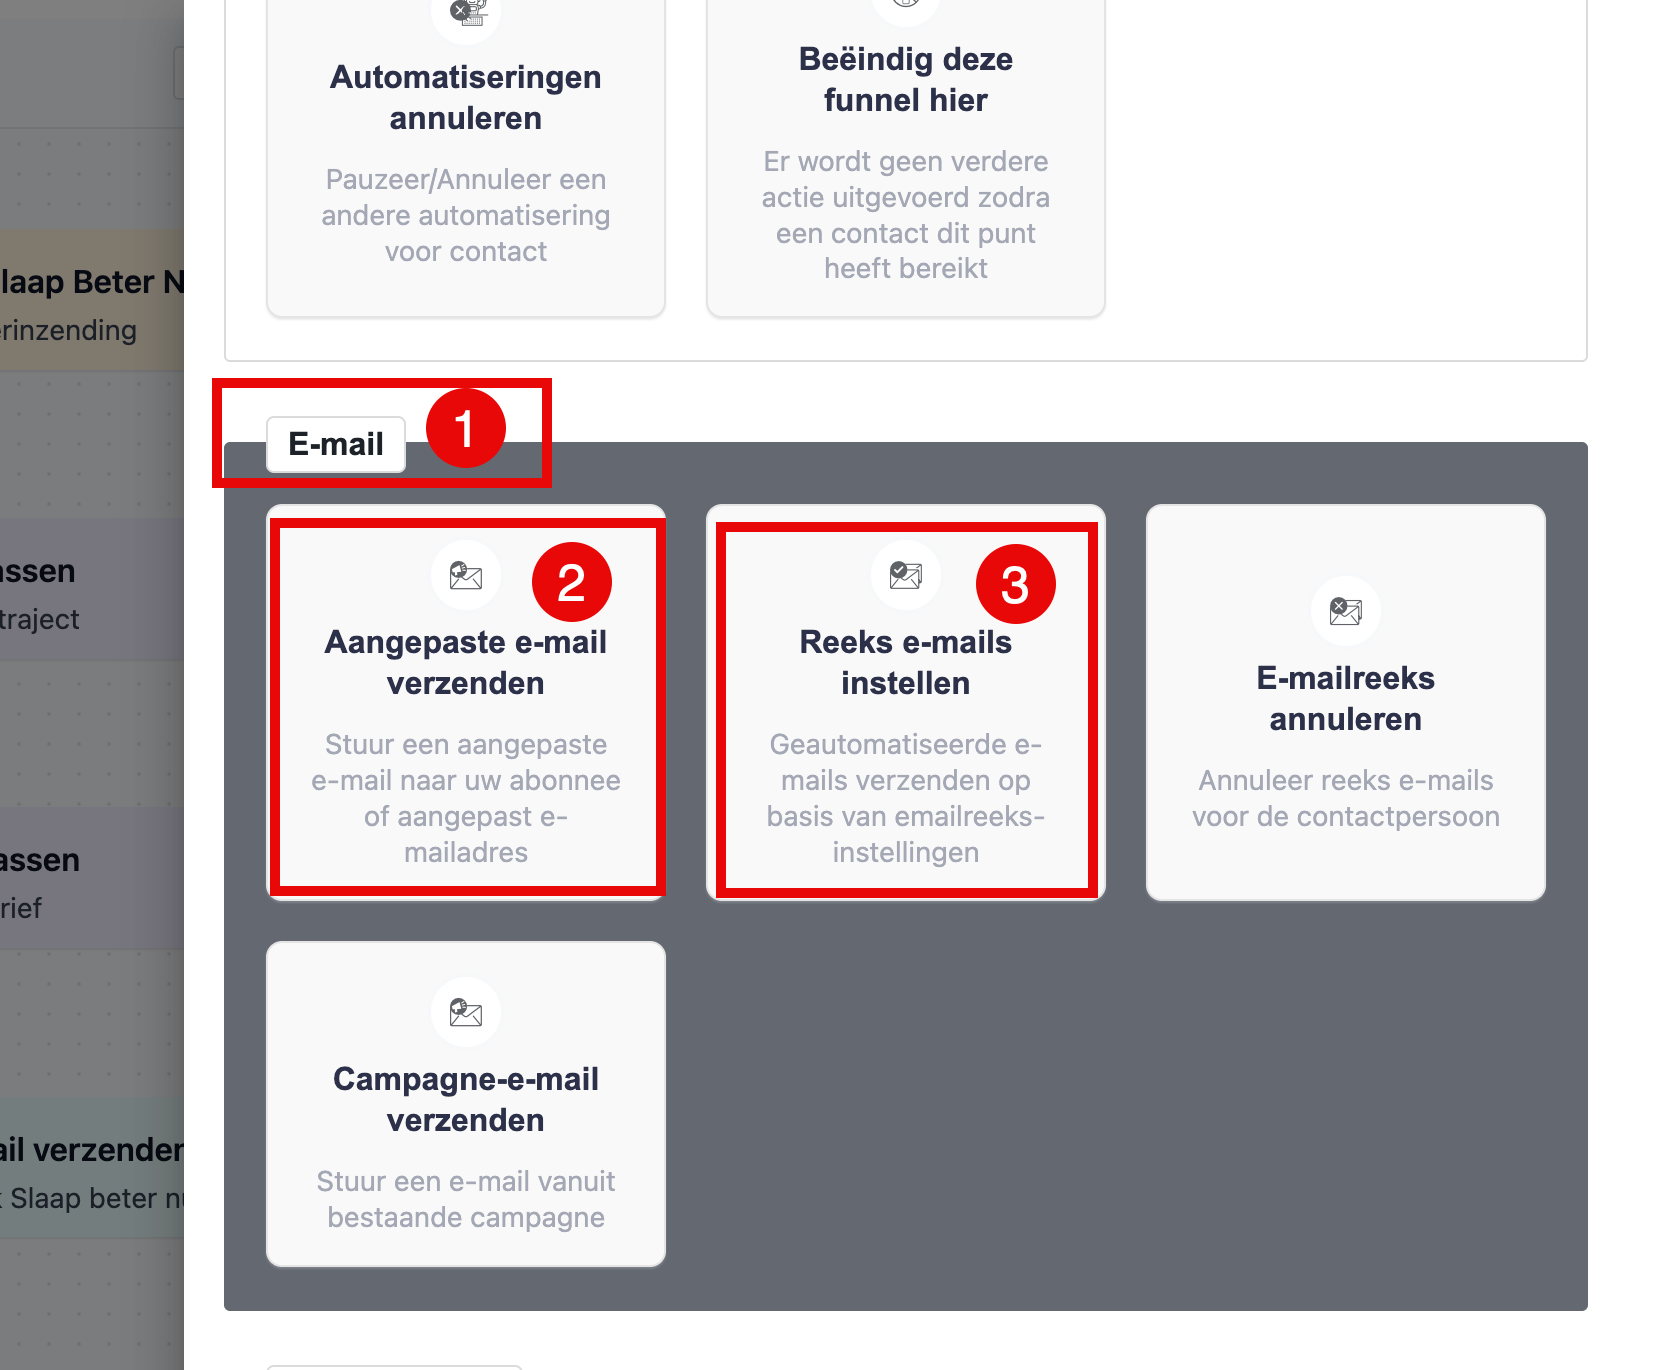
Image 7
Step 3: Set up wait steps #
Should the action run immediately, or after a certain time? Add a Wait step to build in a delay. For example: wait 2 days, then send the next email.
- Hover over the + button (Image 5,1) at the spot where the step should go. Select Add action/goal (Image 5,2) and then, among the action blocks, ‘CRM | Wait x days/hours’. (Image 6,5) Set the length of the wait step. With ‘Wait for weekdays’ you can make sure the email only goes out on a working day. There you also decide at what time the email is sent. Click ‘Save settings’ at the bottom of the screen.
Step 5: Add conditions #
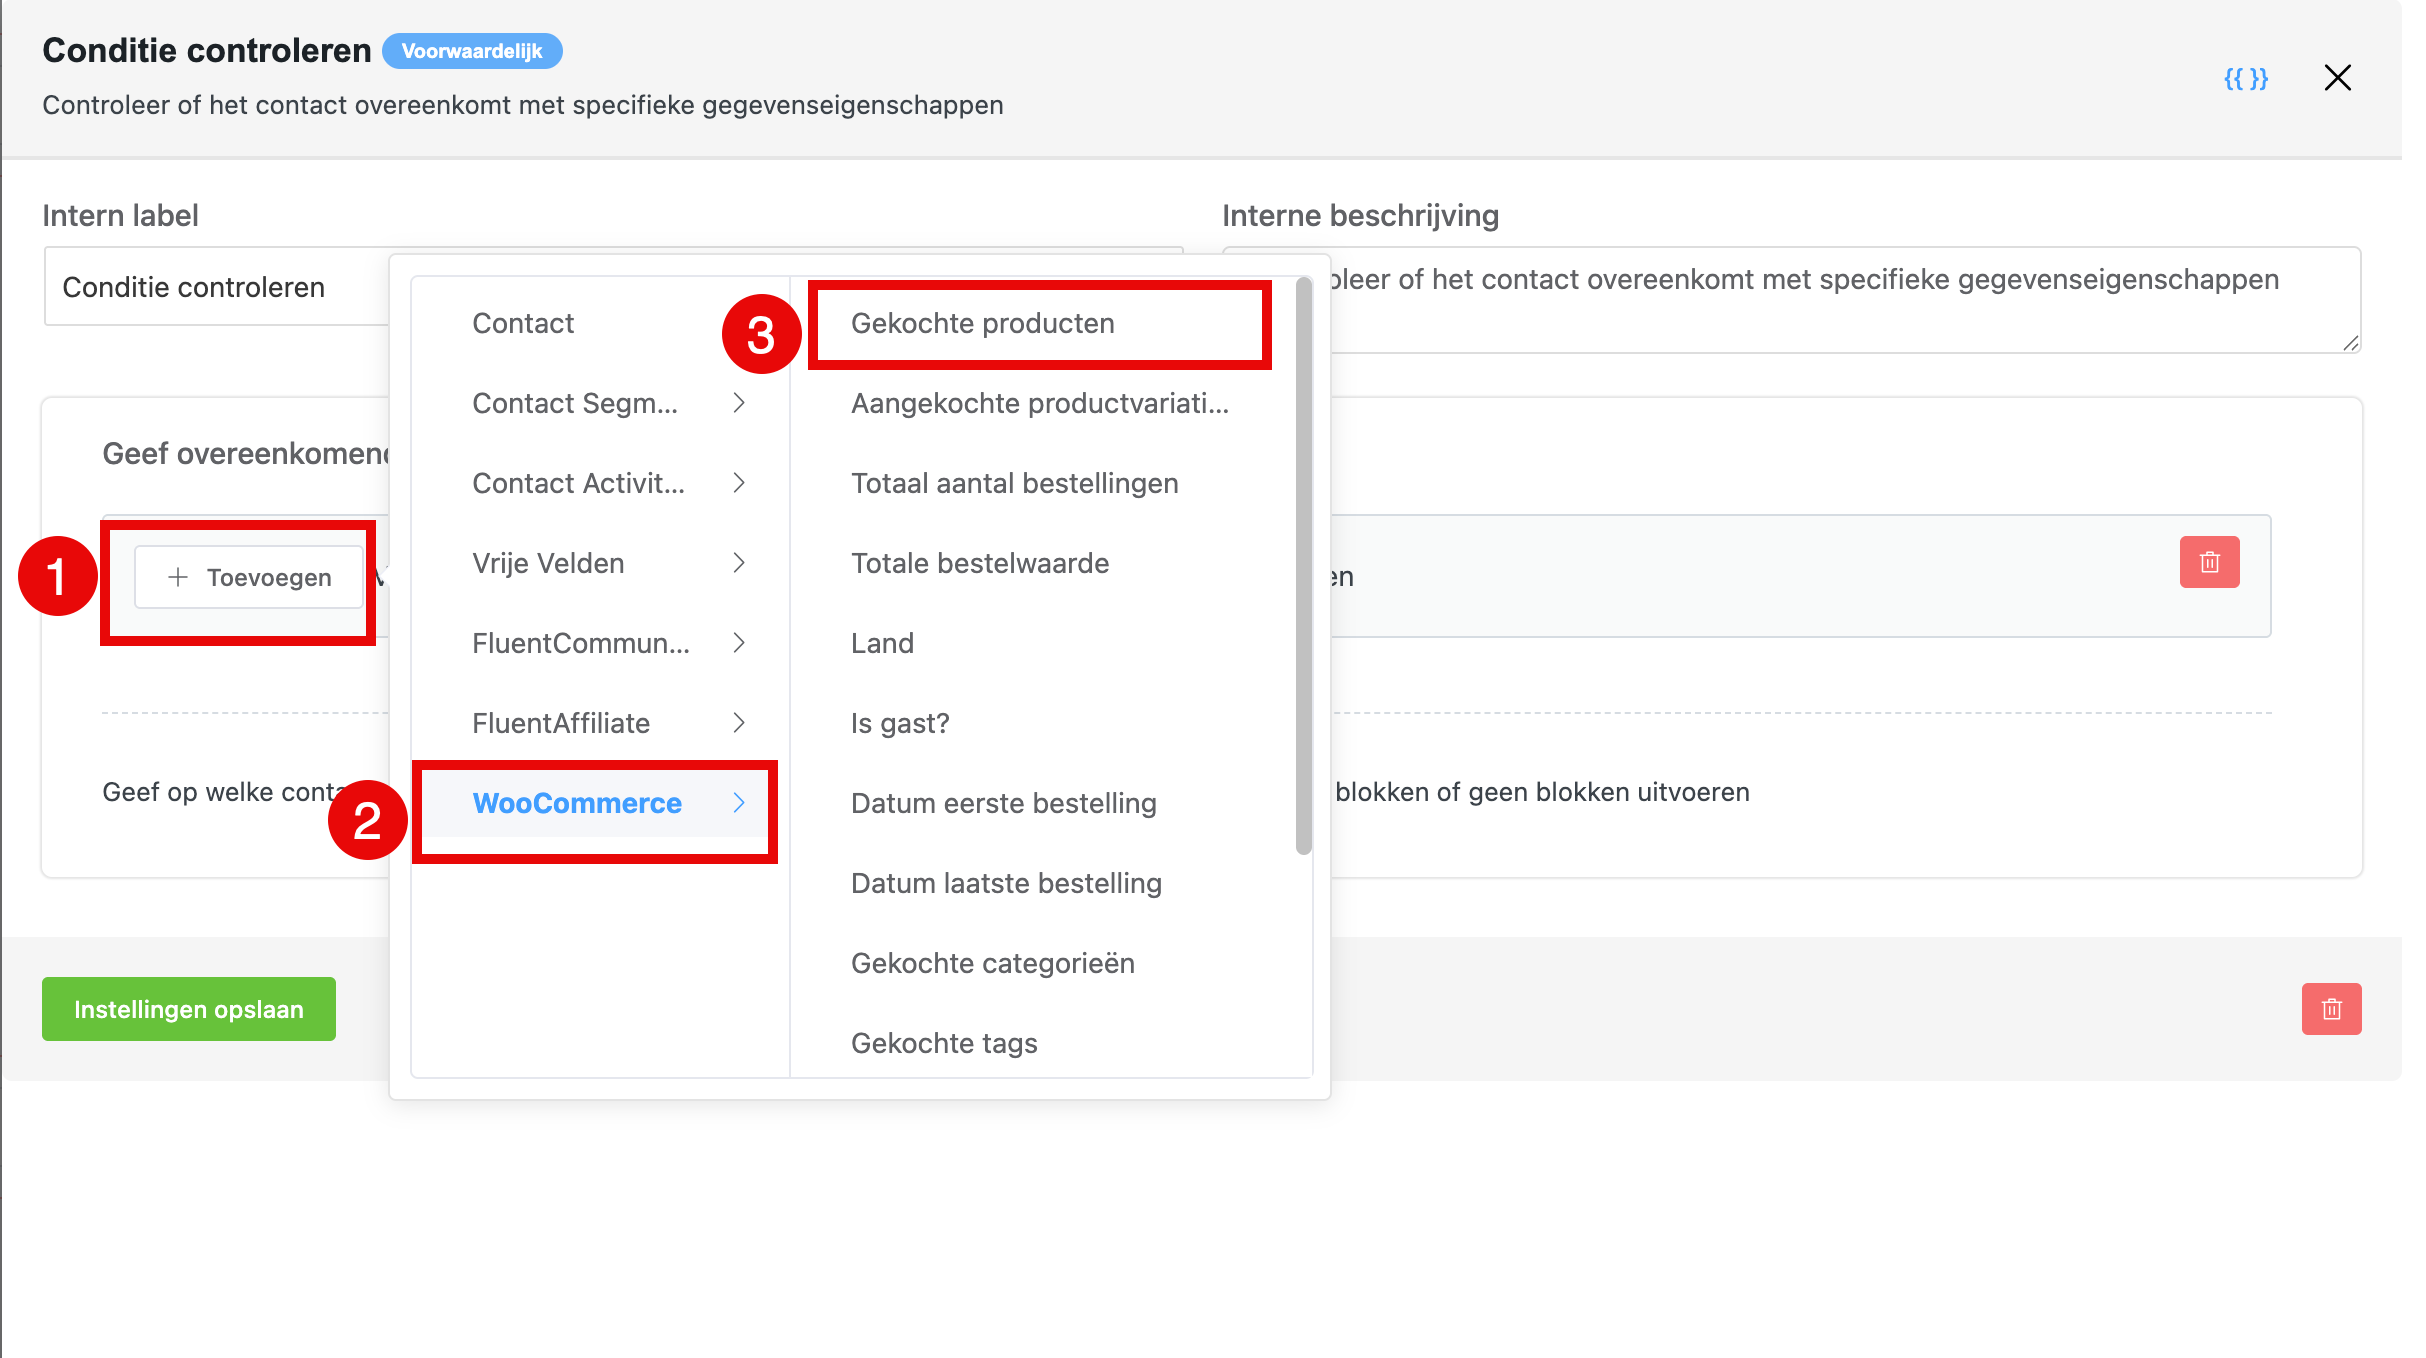
Image 8
Do you want a next action to run only for certain contacts? Say the emails offer a particular product. You want to continue the follow-up only for everyone who has NOT bought training x or training y. Add a condition by clicking the + and choosing Conditional Action (Image 5,3 ).
- Click Add. (Image 8,1) Choose WooCommerce (Image 8,2) | Purchased products.(Image 8,3)
- Select the product, or several products, that this funnel is meant to sell.
- Click ‘Save settings’ at the bottom. The automation has now been extended with a two-step condition, with a yes exit and a no exit.
- On the no branch you can continue with new actions by clicking the plus sign. That is how you schedule further emails. On the yes branch, the purchase of the product, you can set up a separate automation with that purchase as the trigger; here you can end the funnel.
Or do you want actions to run only for the contacts who have NOT downloaded the ebook, to nudge that group into doing so? That is possible by creating a smartlink to the download file and placing it in the email. In the smartlink you set a tag. If someone gets that tag, they clicked the link. You can then set that tag as a goal in the automation. When the goal trigger fires, the tag being applied in this case, the contact jumps straight to that goal step in the automation, so earlier steps are no longer carried out. This is useful for conversion: if an automation is focused on sales, you want earlier actions to stop the moment the purchase is made. See also the document on goals and benchmarks in automations.
Step 6: Testing #
Fill in the form, walk through the steps and check that everything works as expected.
Step 7: Publish the automation #

The automation is still set to ‘draft’. Tick the checkbox next to ‘Draft’. The automation is now published. Beside it, a button for statistics and a button to generate reports become available.
Managing and monitoring an automation #
Go to CRM & Emails → Automations for an overview of all active automations. It shows how many contacts have gone through each automation, and lets you pause or edit them.
Click an automation to view its statistics: how many people started, how many completed each step, and where people drop out. This data helps you optimise your automations.


