With the community module in Autorespond you build your own members area on your website: a portal where your members publish posts, follow courses, chat with each other and earn points, entirely in your own house style and without the distractions of social media. In this article you set up the basics: the name and logo of your portal, the colours and layout, the menu and which features you switch on or off.
The community and course features in Autorespond are based on FluentCommunity, included in your package. Read the English documentation
1. Opening the portal and the management area #
Your community runs as its own portal on your website, by default at https://yourwebsite.com/portal/. Visitors and members see the feed, the spaces and the courses there. As an administrator you have an extra option in that same portal:
- Log in with your administrator account and open the portal (for example https://yourwebsite.com/portal/).
- Click Settings at the bottom of the left-hand sidebar. You now enter the portal settings; ordinary members do not see this button.
- In the left-hand column of the settings you will find all the parts: General, Personalisations, Email settings, Features & add-ons, Space groups, Menu settings, Content moderation, Privacy settings, Access control and Course management.
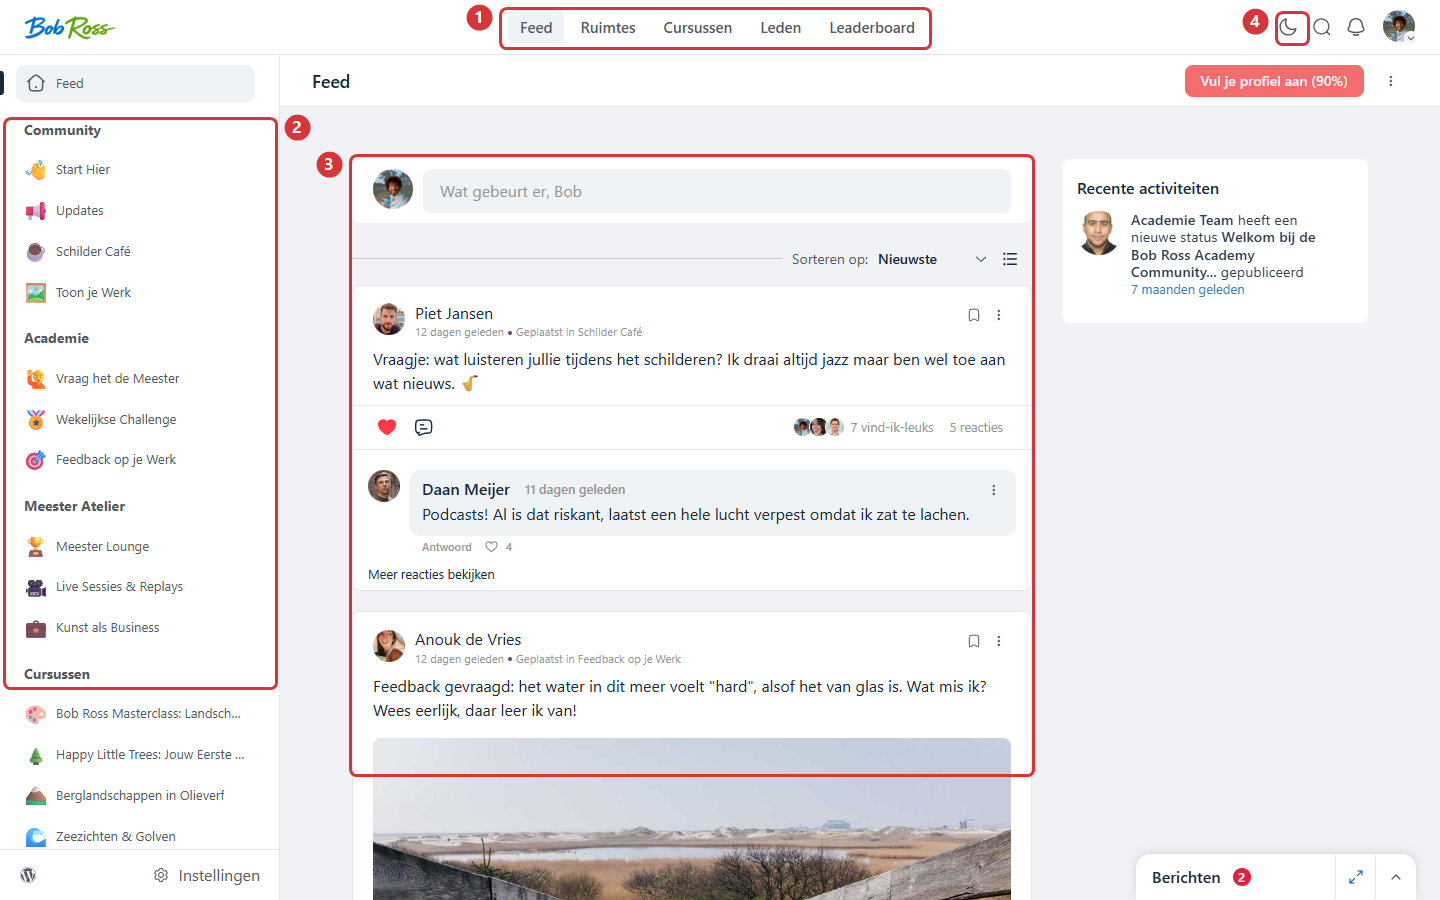
In the screenshot: 1) the main menu of the portal · 2) the sidebar with space groups · 3) the feed · 4) the dark mode button.
2. General: name, logo and access #
Open General. These are the settings every member sees first, so start here:
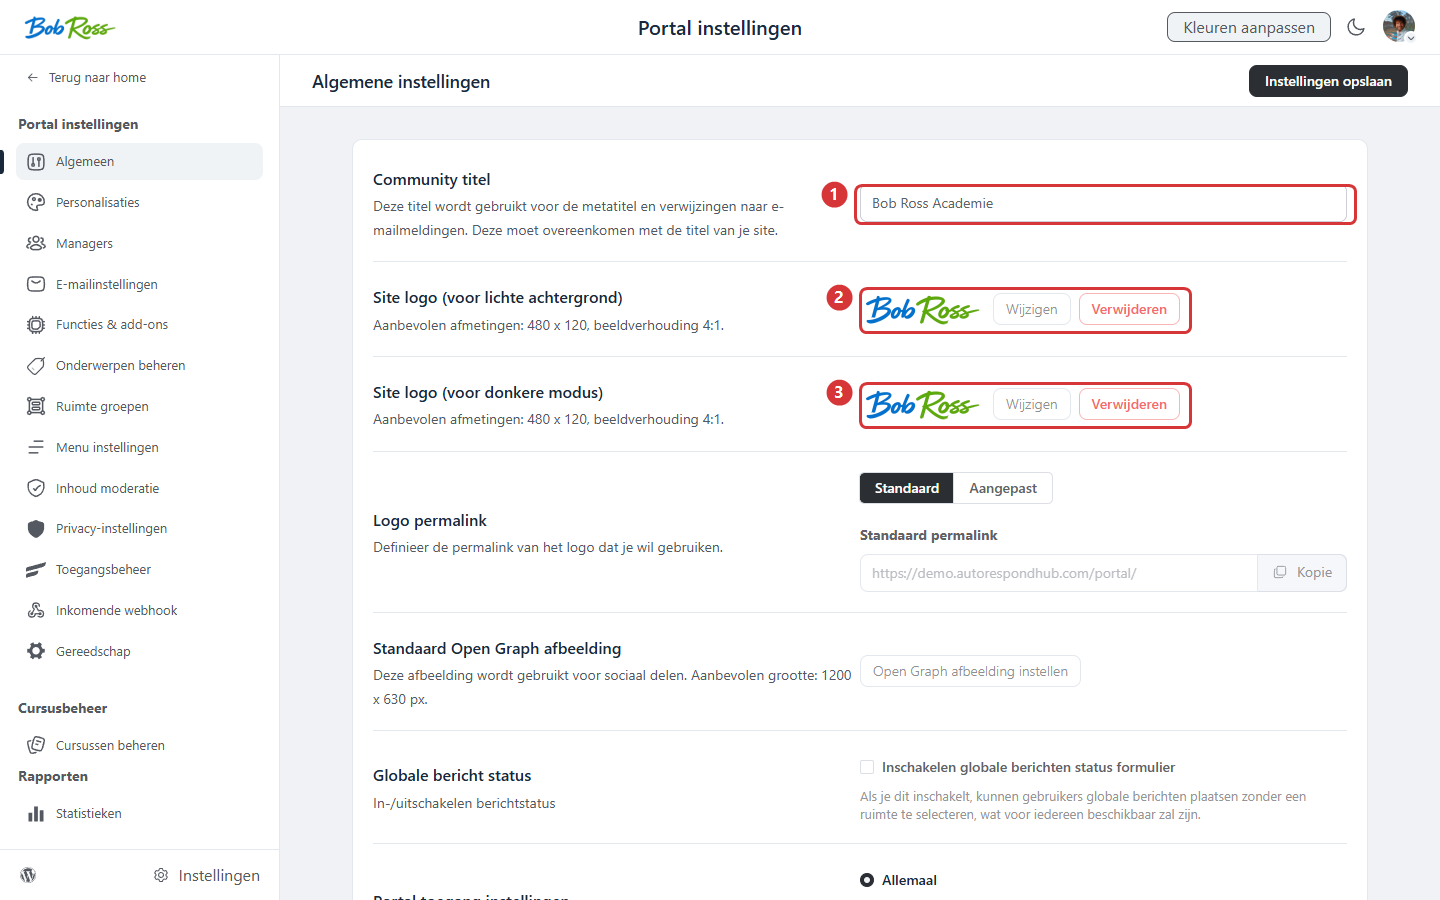
- Portal title, the name that appears at the top of the portal and in browser tabs. Choose the name of your academy or community, not your company name (“Jansen Academy” works better than “Jansen Ltd”).
- Logo, upload your logo for the light display. A landscape logo (wider than it is tall) works best in the bar at the top left.
- White/dark logo, also upload a light variant of your logo. It is used automatically as soon as a member switches on dark mode; without this variant a dark logo disappears against the dark background.
- Access, decide whether the portal is publicly visible (anyone can read along in public spaces, handy for findability and a first introduction) or accessible only to logged-in members. What people may see per space is set separately per space; see the article on access control below.
- Registration and login, set where new visitors create an account. If you use your own sign-up page with a form, enter it here so that the portal’s sign-up buttons point to it.
3. Personalisations: colours and dark mode #
Under Personalisations you set the colour scheme for both the light and the dark display. A few guidelines:
- Choose one accent colour from your house style for buttons and links, and keep the backgrounds calm (white or off-white). Your members’ content should stand out, not the interface.
- After setting it, also check dark mode: members can switch it on themselves with the moon icon at the top right of the portal. Test whether your accent colour stays readable there.
- If you do not see your changes straight away, clear the cache, see Changes not showing? How to clear the cache.
4. Features & add-ons: choose what your community needs #
Under Features & add-ons you switch individual parts of the community on or off. Start small: every feature that is switched on also has to be lived in. An empty chat or a leaderboard without activity looks worse than no chat or leaderboard at all.
- Courses, the course module with lessons, sections and progress. On in almost every case.
- Leaderboard, members earn points when others appreciate their posts and comments; the portal shows a ranking and levels. Strong for engagement in active communities.
- Member badges, award badges to members (for example for top contributors or certified participants), manually or automatically through an automation.
- CRM synchronisation, the link between your community and your CRM contacts. Needed for automatic access through tags, so leave this on.
- Invitations, members can invite others to the community.
5. Menu settings: decide what goes in the sidebar #
Under Menu settings you manage the navigation of the portal. By default it contains system items: Feed, Spaces, Courses, Members and Leaderboard. You can:
- switch items on or off (for example hiding the member list for a more private atmosphere);
- add your own links at the bottom of the sidebar, for example to your appointments page, a roadmap or a help page, including an emoji as a recognisable icon;
- decide per link who sees it: everyone, members only, or only members of a specific space (that way you show a link exclusively to your premium members, for instance).
6. Space groups: organise your community #
Spaces (the “channels” of your community) are grouped in the sidebar under headings: the space groups. Create groups that reflect your offer, for example a “Community” group for everyone, a group for your paid programme and a separate “Courses” group. Under Space groups you create groups, rename them and drag them into order. How to create and configure the spaces themselves is covered in the article on spaces and access control.
Frequently asked questions #
Can I change the address of the portal? #
Yes, the slug (/portal/ by default) can be changed in the portal settings under General. Preferably do this before you invite members: existing links to the old address stop working afterwards.
Do my members see the WordPress dashboard? #
No. Members only use the portal; the management area is visible to administrators only. The portal has its own login and profile experience.
Can I show the community on my home page? #
Yes, you can set the portal as the home page of your website. For most sites we recommend a separate home page with a clear sign-up button, so new visitors see your offer first.
My changes are not visible straight away. What now? #
Almost always this is caching. Clear the cache and refresh the page in an incognito window; see the cache article in the related links.


