With two-factor authentication (2FA) you protect access to your Autorespond dashboard with an extra step: alongside your password, you also enter a code you receive by email when logging in. That way, someone who gets hold of your password still cannot reach your administration. This article explains how to switch on 2FA, which user roles to set it for and what logging in looks like afterwards.
Security and 2FA in Autorespond is based on FluentAuth, included in your package. Read the English documentation
Which 2FA settings are the best choice? #
The short answer: there is little to choose, and that makes things simple. Autorespond has one 2FA method: a login code by email. An authenticator app (such as Google Authenticator) is not available and is not needed either, so you do not have to install anything or scan QR codes. The only thing you choose yourself is which user roles the extra check is compulsory for.
Our advice: switch on 2FA for the ARadmin role (administrator) in any case. If editors (Editor) or authors (Author) also have access to your environment, add those roles as well. For roles without administration rights, such as subscribers or course participants who only log in to your academy, 2FA is usually not necessary.
Step 1: open Security and 2FA #
- Log in to your Autorespond dashboard.
- Click the Administration menu at the top right.
- In the drop-down menu, choose Security and 2FA.
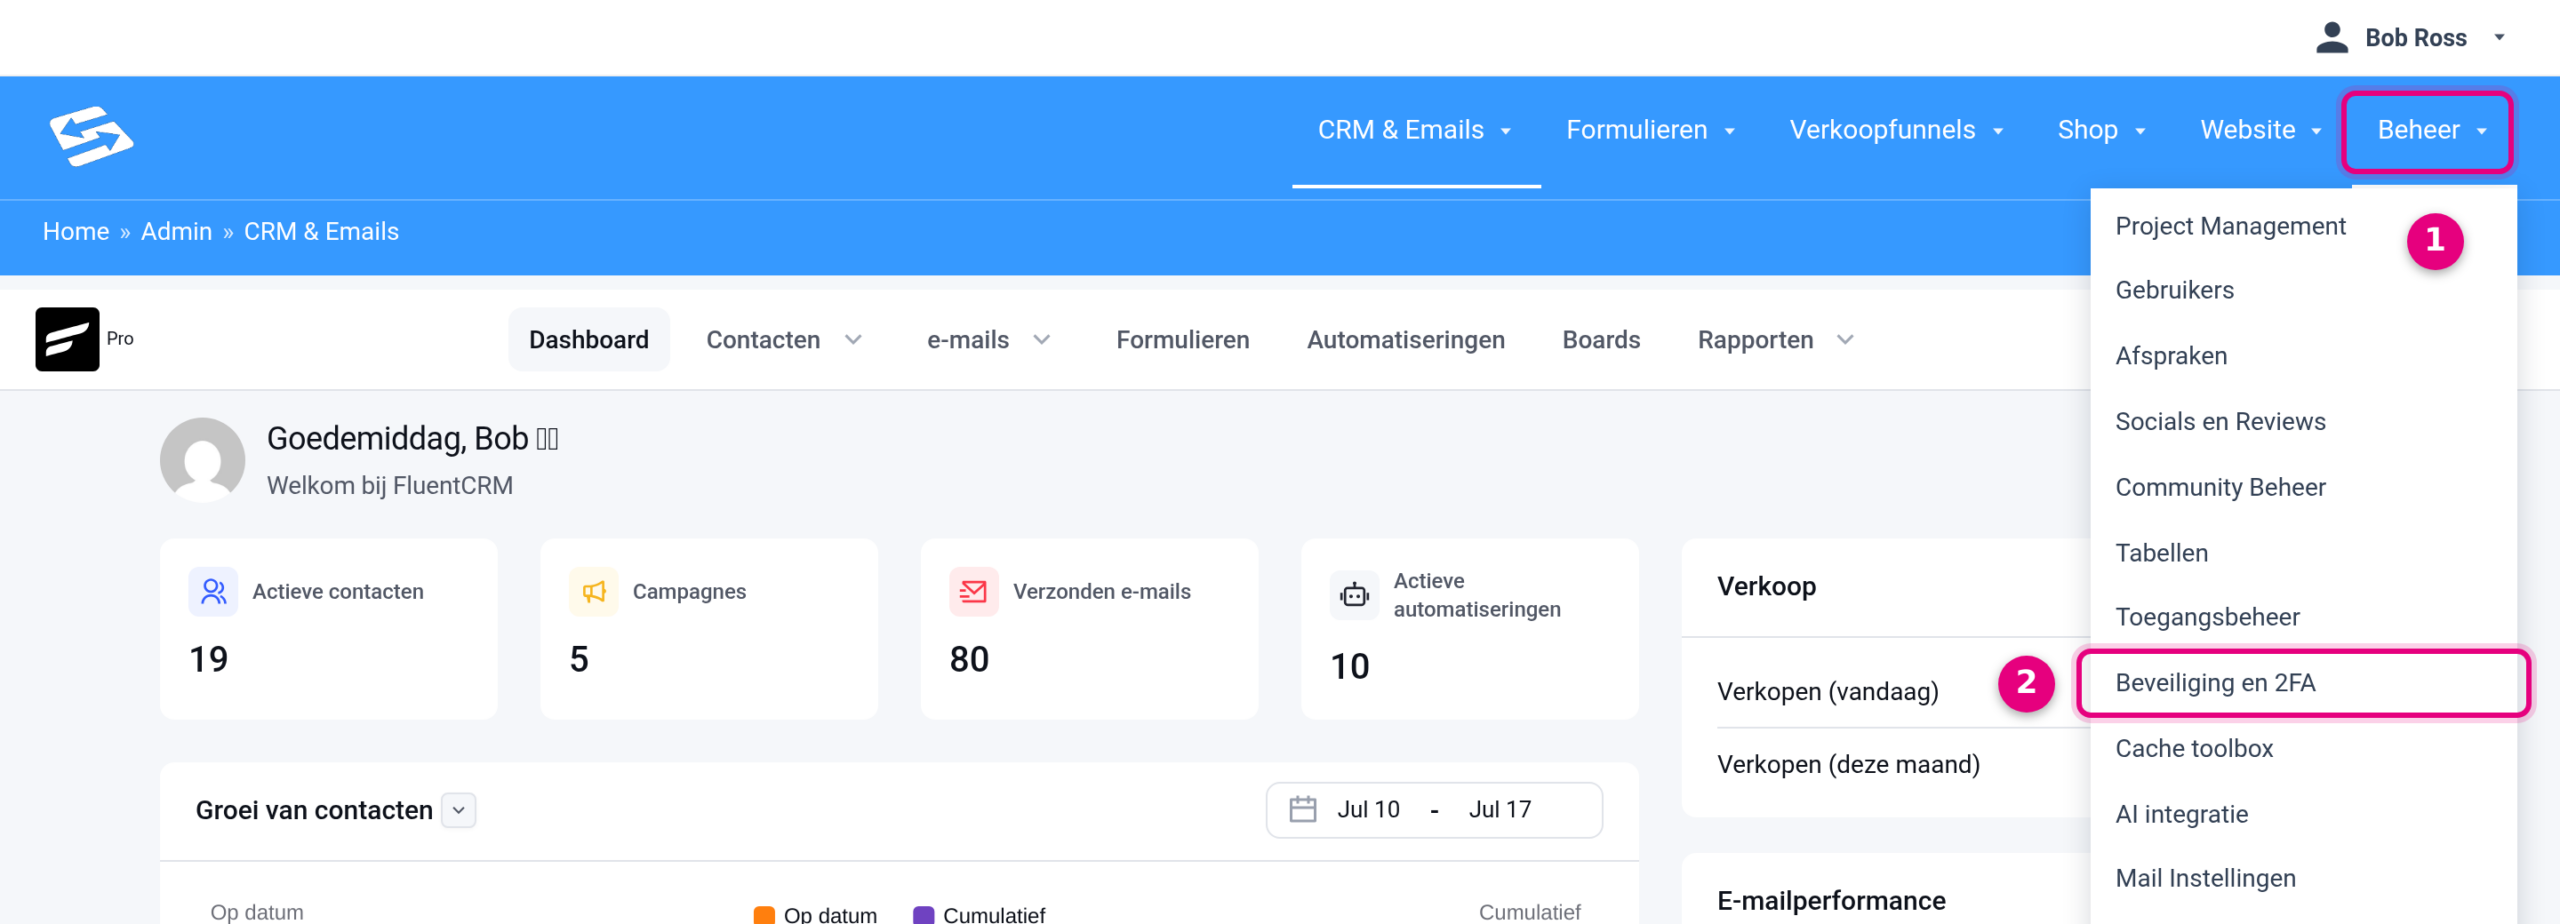
- Administration: the menu at the top right of your dashboard with all the administration items of your environment, such as Users, Access control and Mail Settings.
- Security and 2FA: opens the security settings of your environment, including two-factor authentication and the protection of the login form.
Step 2: switch on two-factor authentication by email #
You arrive on the Settings tab. Scroll to the heading Advanced login options.
- Tick Enable two-factor authentication by email.
- Under Select roles that require two-factor authentication, choose the roles the login code becomes compulsory for. Choose administrator in any case.
- Click Save settings at the bottom. The setting applies immediately: at the next login, the selected roles see the code screen.
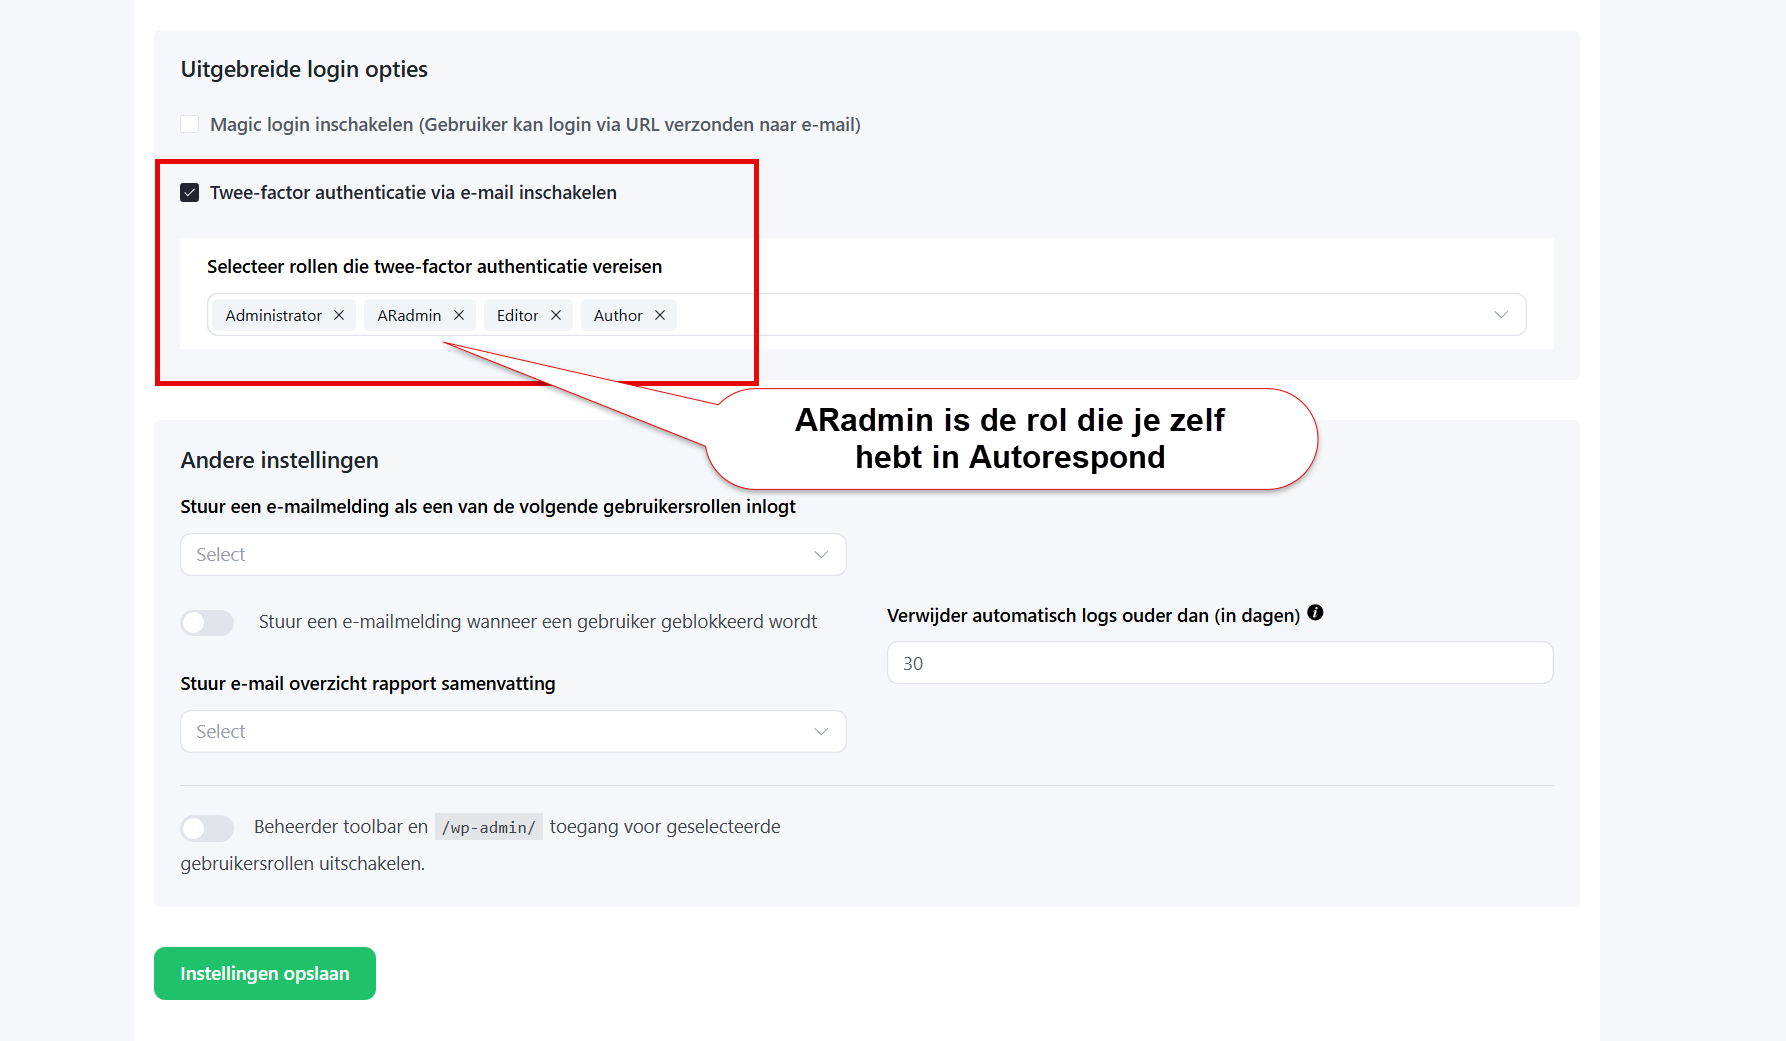
- Enable two-factor authentication by email: the main switch. Ticked means that when logging in, the login code from the email is required alongside the password.
- Select roles that require two-factor authentication: only users with a role in this field see the code screen. In the example, administrator, Editor and Author are set; the cross behind a role removes it, and the arrow on the right lets you add roles.
- Save settings: do not forget this button, because 2FA is only active once you have saved.
This screen shows more options that are not needed for 2FA: Enable magic login (logging in through a link in your email, switched off by default) and, under Other settings, you can set an email notification for when someone with a particular role logs in or is blocked, have old logs cleaned up automatically and switch off the admin toolbar for certain roles. You can simply leave those as they are.
Step 3: what logging in looks like from now on #
From now on, logging in changes for the roles you selected. After entering your username and password, an extra screen appears asking for a login code. That code is automatically emailed at that moment to the email address of the account you are logging in with.
- Log in with your username and password, as you are used to.
- Open the email with your login code. If you do not see it straight away, check your spam folder as well.
- Enter the code under Two-factor authentication code and click Login.
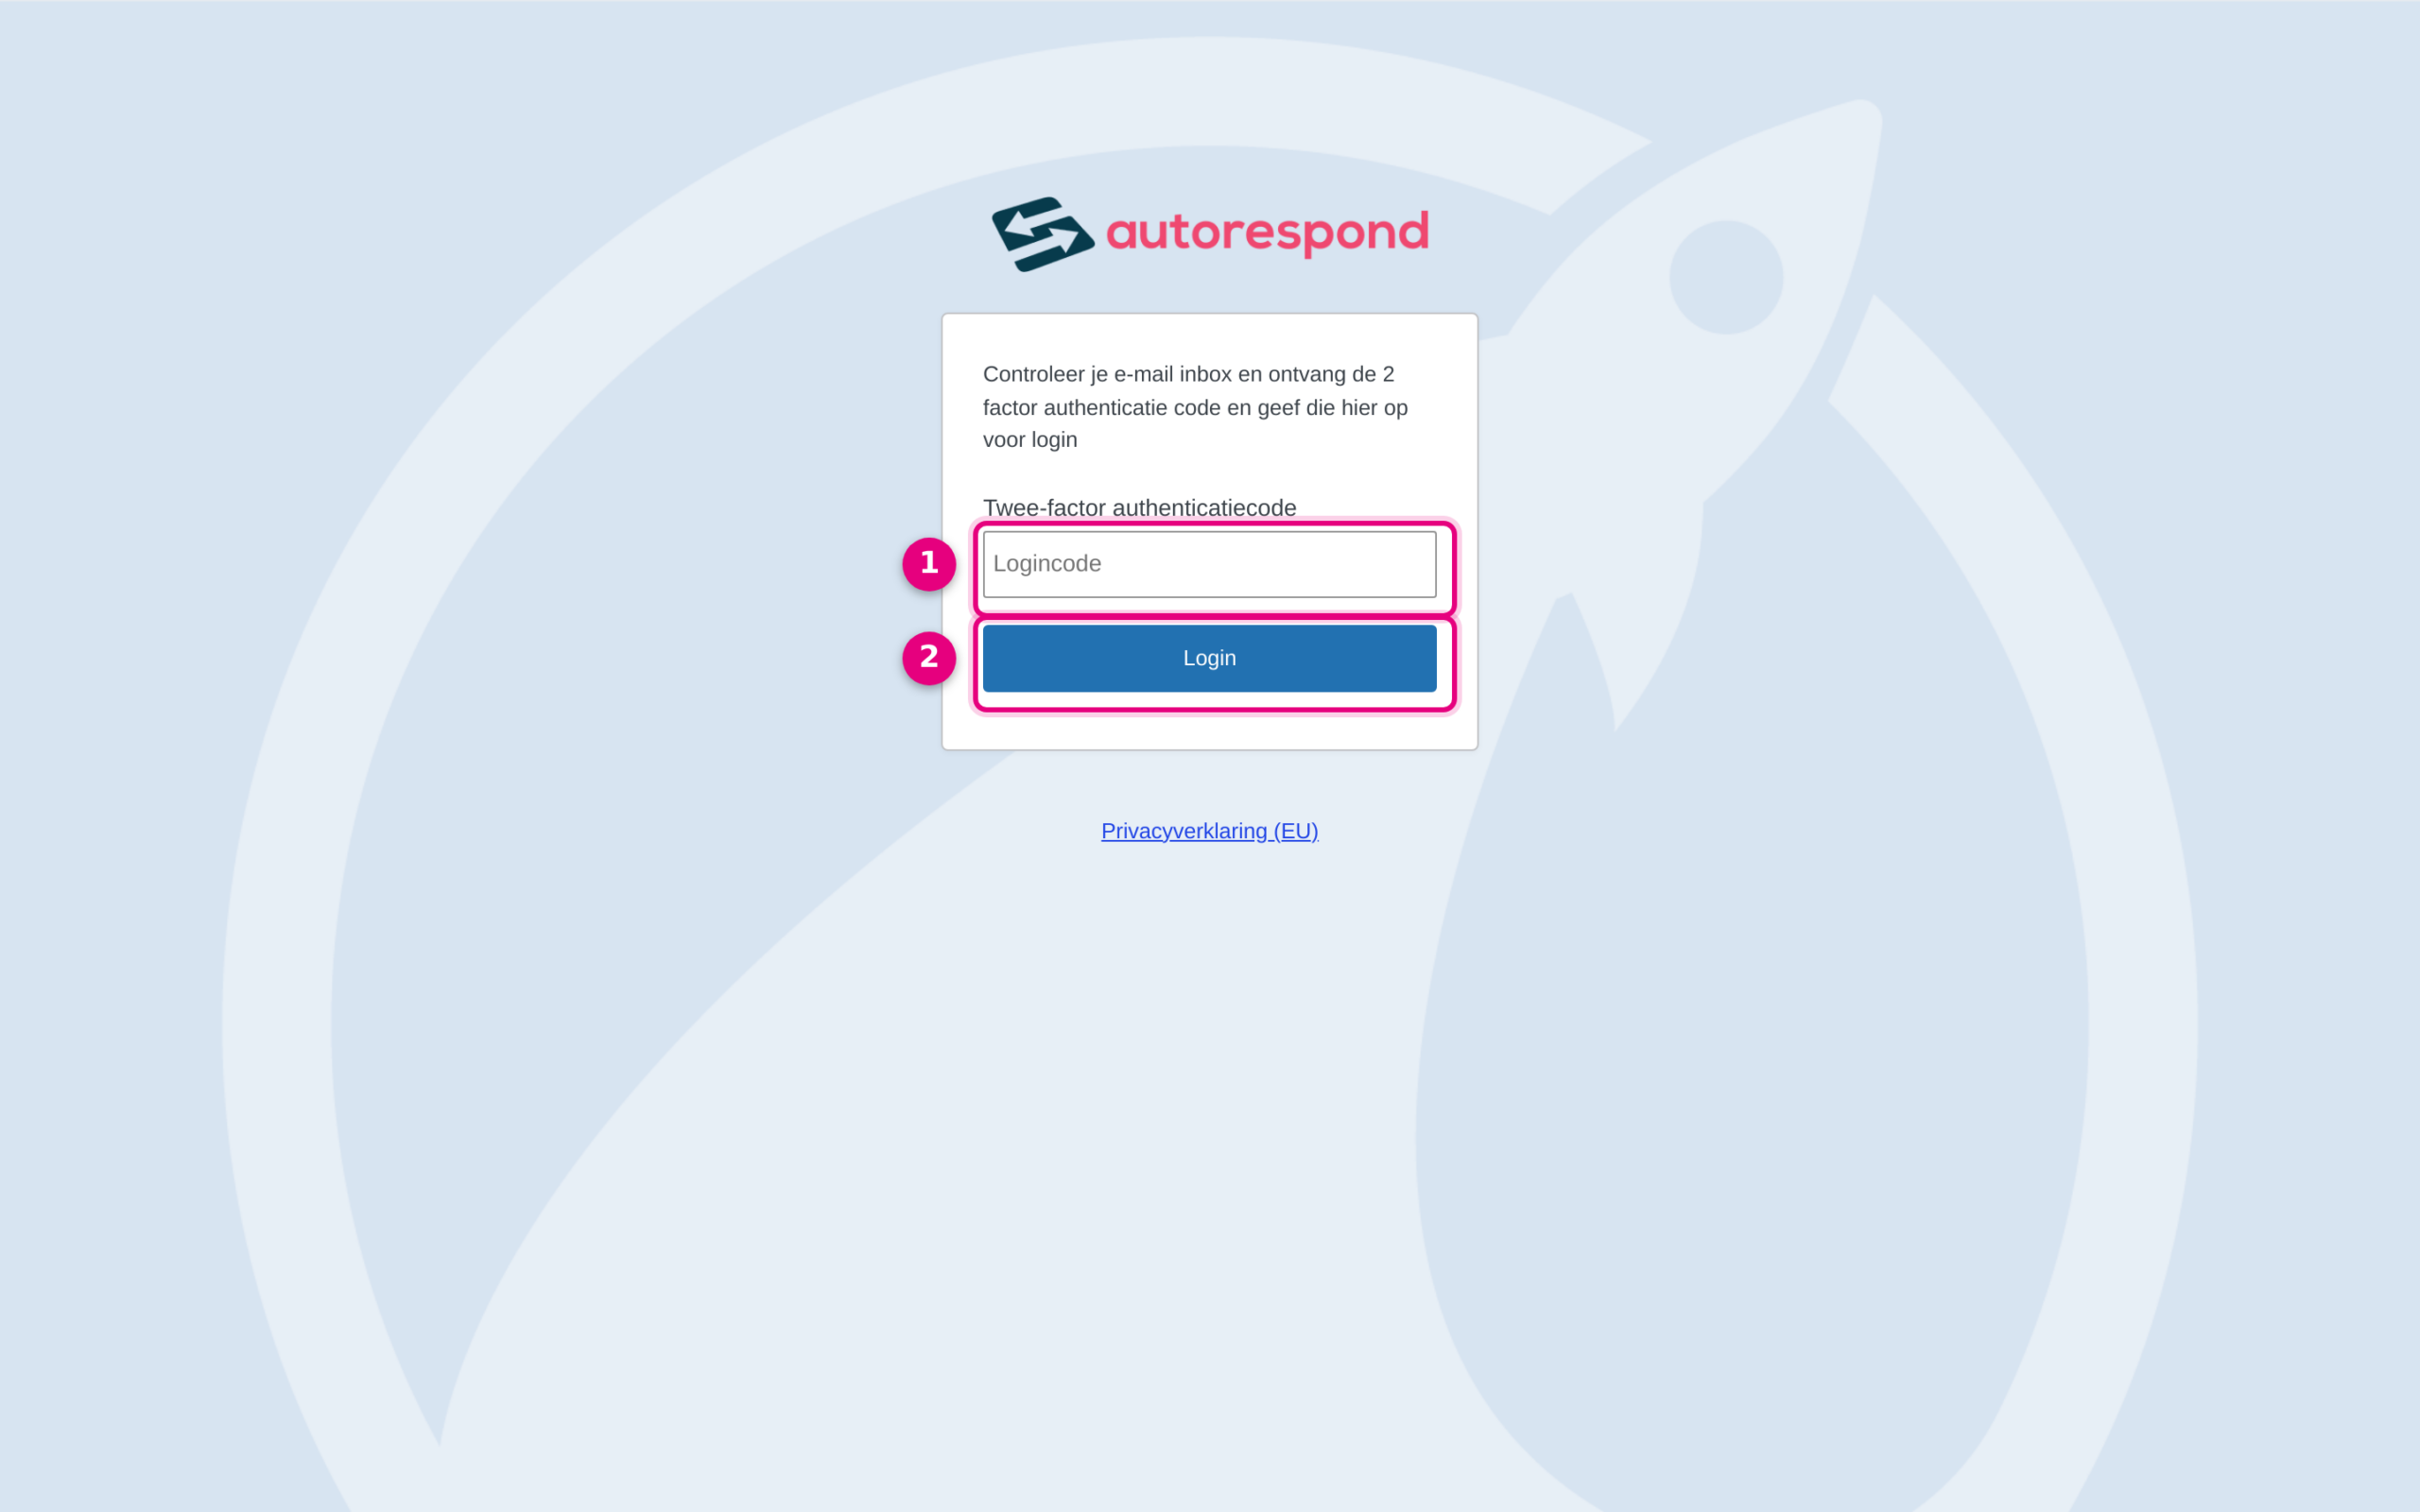
- Two-factor authentication code: enter the numeric code you have just received by email here. The code is valid temporarily and works only once.
- Login: confirms the code and logs you in to your dashboard.
Worth knowing #
- 2FA applies per user role, not per person. All users with a selected role see the code screen at their next login, so do let colleagues who also log in know about it.
- Test it straight after switching it on: log in again with your own account in a private or incognito window. Your current session stays open while you check that the code email arrives.
- Your password remains the first key. Use a strong, unique password; how to change it is explained in the article Changing a WordPress user account (such as the password).


