Video content #
This video describes the steps for setting up and customising PDF invoices in the system. Using this video you can adapt the invoices entirely to your own requirements.
Steps in the video #
Step 1: go to the Shop > Invoice management menu 0:00
- Go to the invoice settings via the ‘Shop’ > ‘Invoice management’ menu. If you are just starting out you will not see a sample invoice there yet, because no first invoice has been generated. In that case, generate one first.
Step 2: create a first order 0:24
- Place an order through the checkout or via the Shop > Orders menu.
- Put several different products in the order if you like. If you also sell physical products, test with a physical product too.
Step 3: fill in the customer details 1:13
- If you also receive business orders from other EU countries, create a test order with the VAT reverse-charged as well, so you can see how that is shown on the invoice.
- Check that the VAT is displayed correctly.
Step 4: enter a delivery address 2:02
- When testing with a physical product, it is worth ticking the option to deliver the product to a different address. That way you can see how this appears on the invoice.
Step 5: place the order 2:25
- Choose a payment method and confirm the order.
Step 6: view the invoice 2:47
- Once the order has been created and the invoice generated, check what the invoice looks like.
Step 7: adjust the general invoice settings as required 4:01
- Upload your logo.
- Enter the name of the shop and the address details.
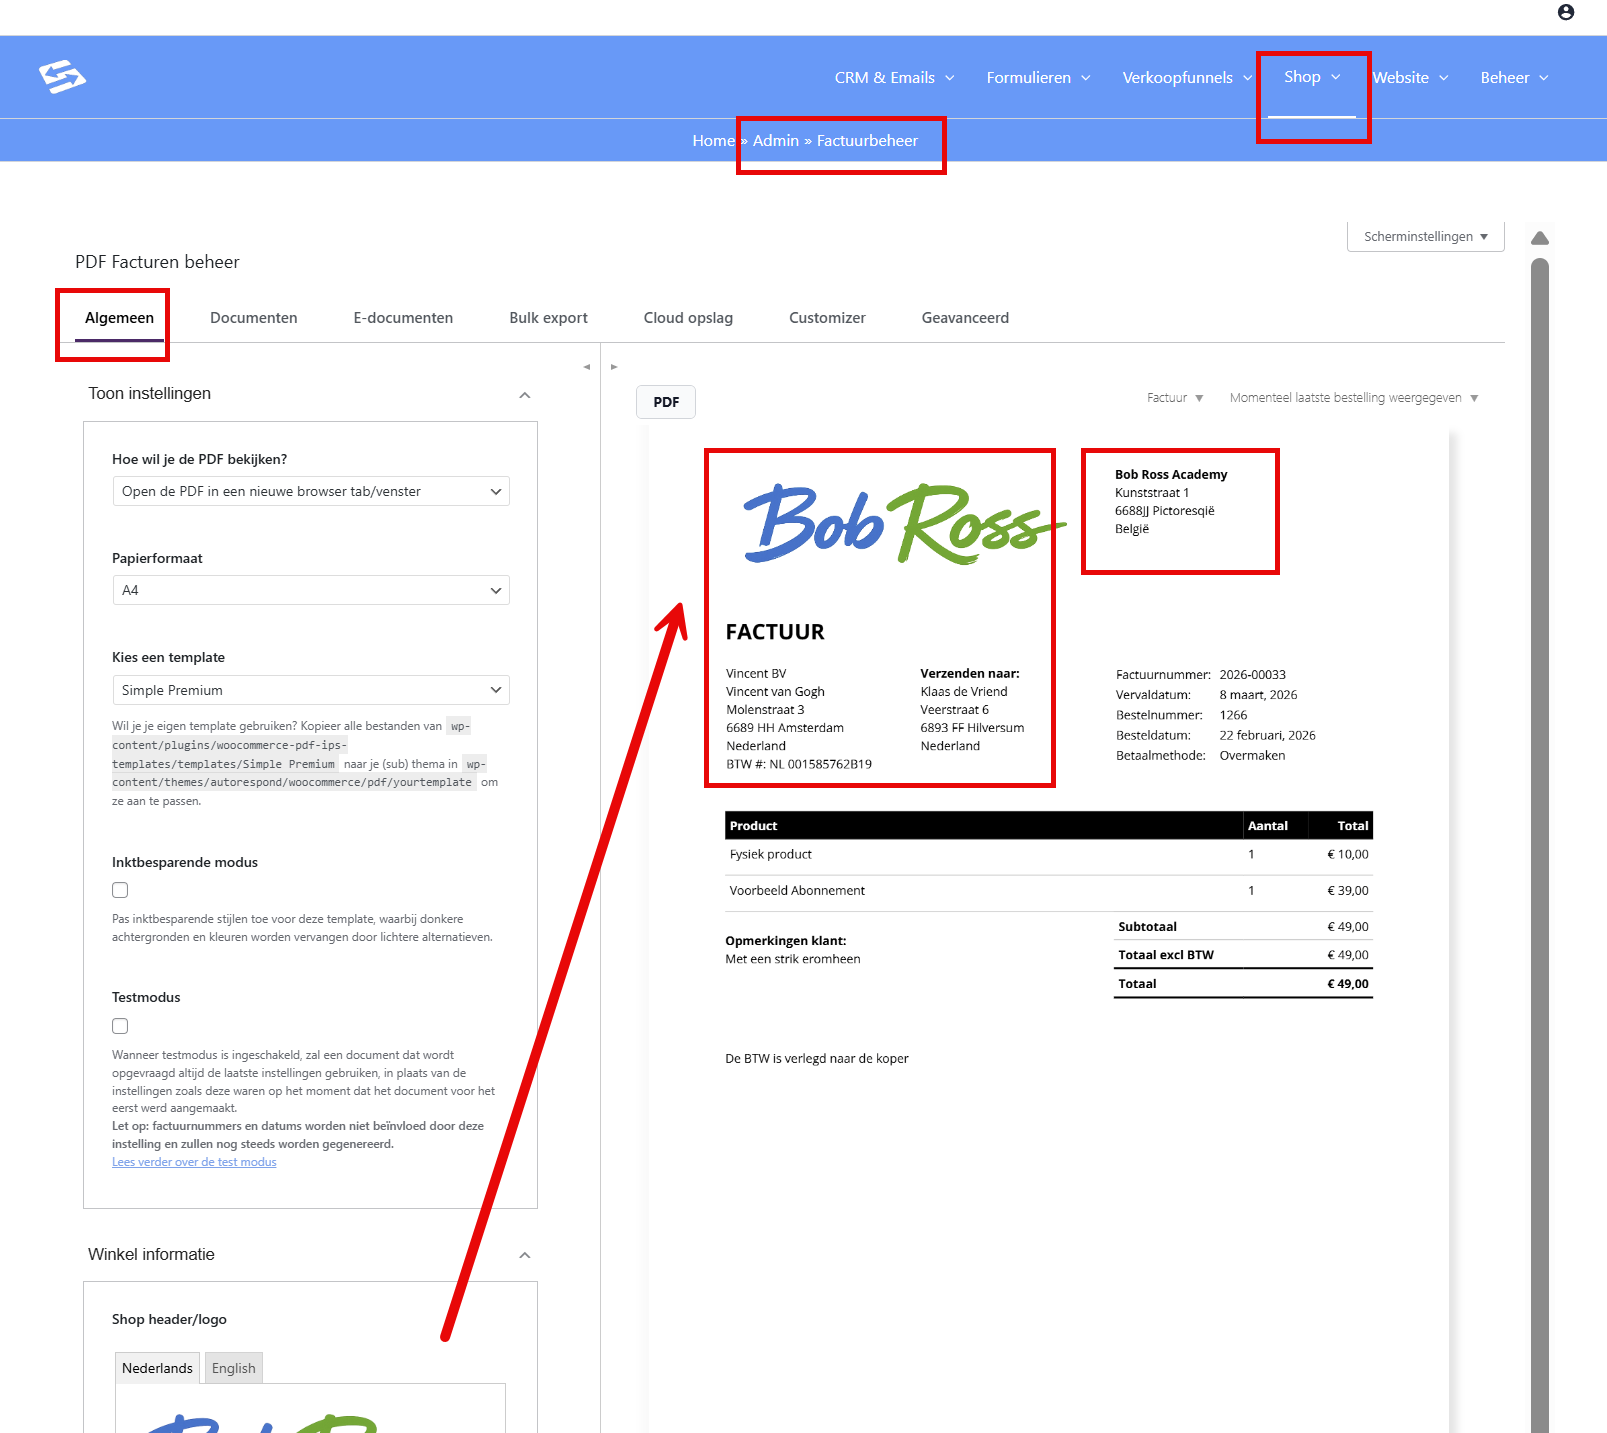
Step 8: add extra information 5:17
- Add any additional information such as a telephone number and IBAN (remember the footer text as well)
Step 9: adjust the customer details 6:08
- Check how the customer details are shown on the invoice by default and adjust this in the general invoice settings if required.
Step 10: save the settings as you go 8:44
- Make sure you save all your changes.
Step 11: then configure the PDF invoice settings under the ‘Documents’ tab 9:10
- Decide when the PDF invoice should be generated and which WooCommerce email it should be attached to.
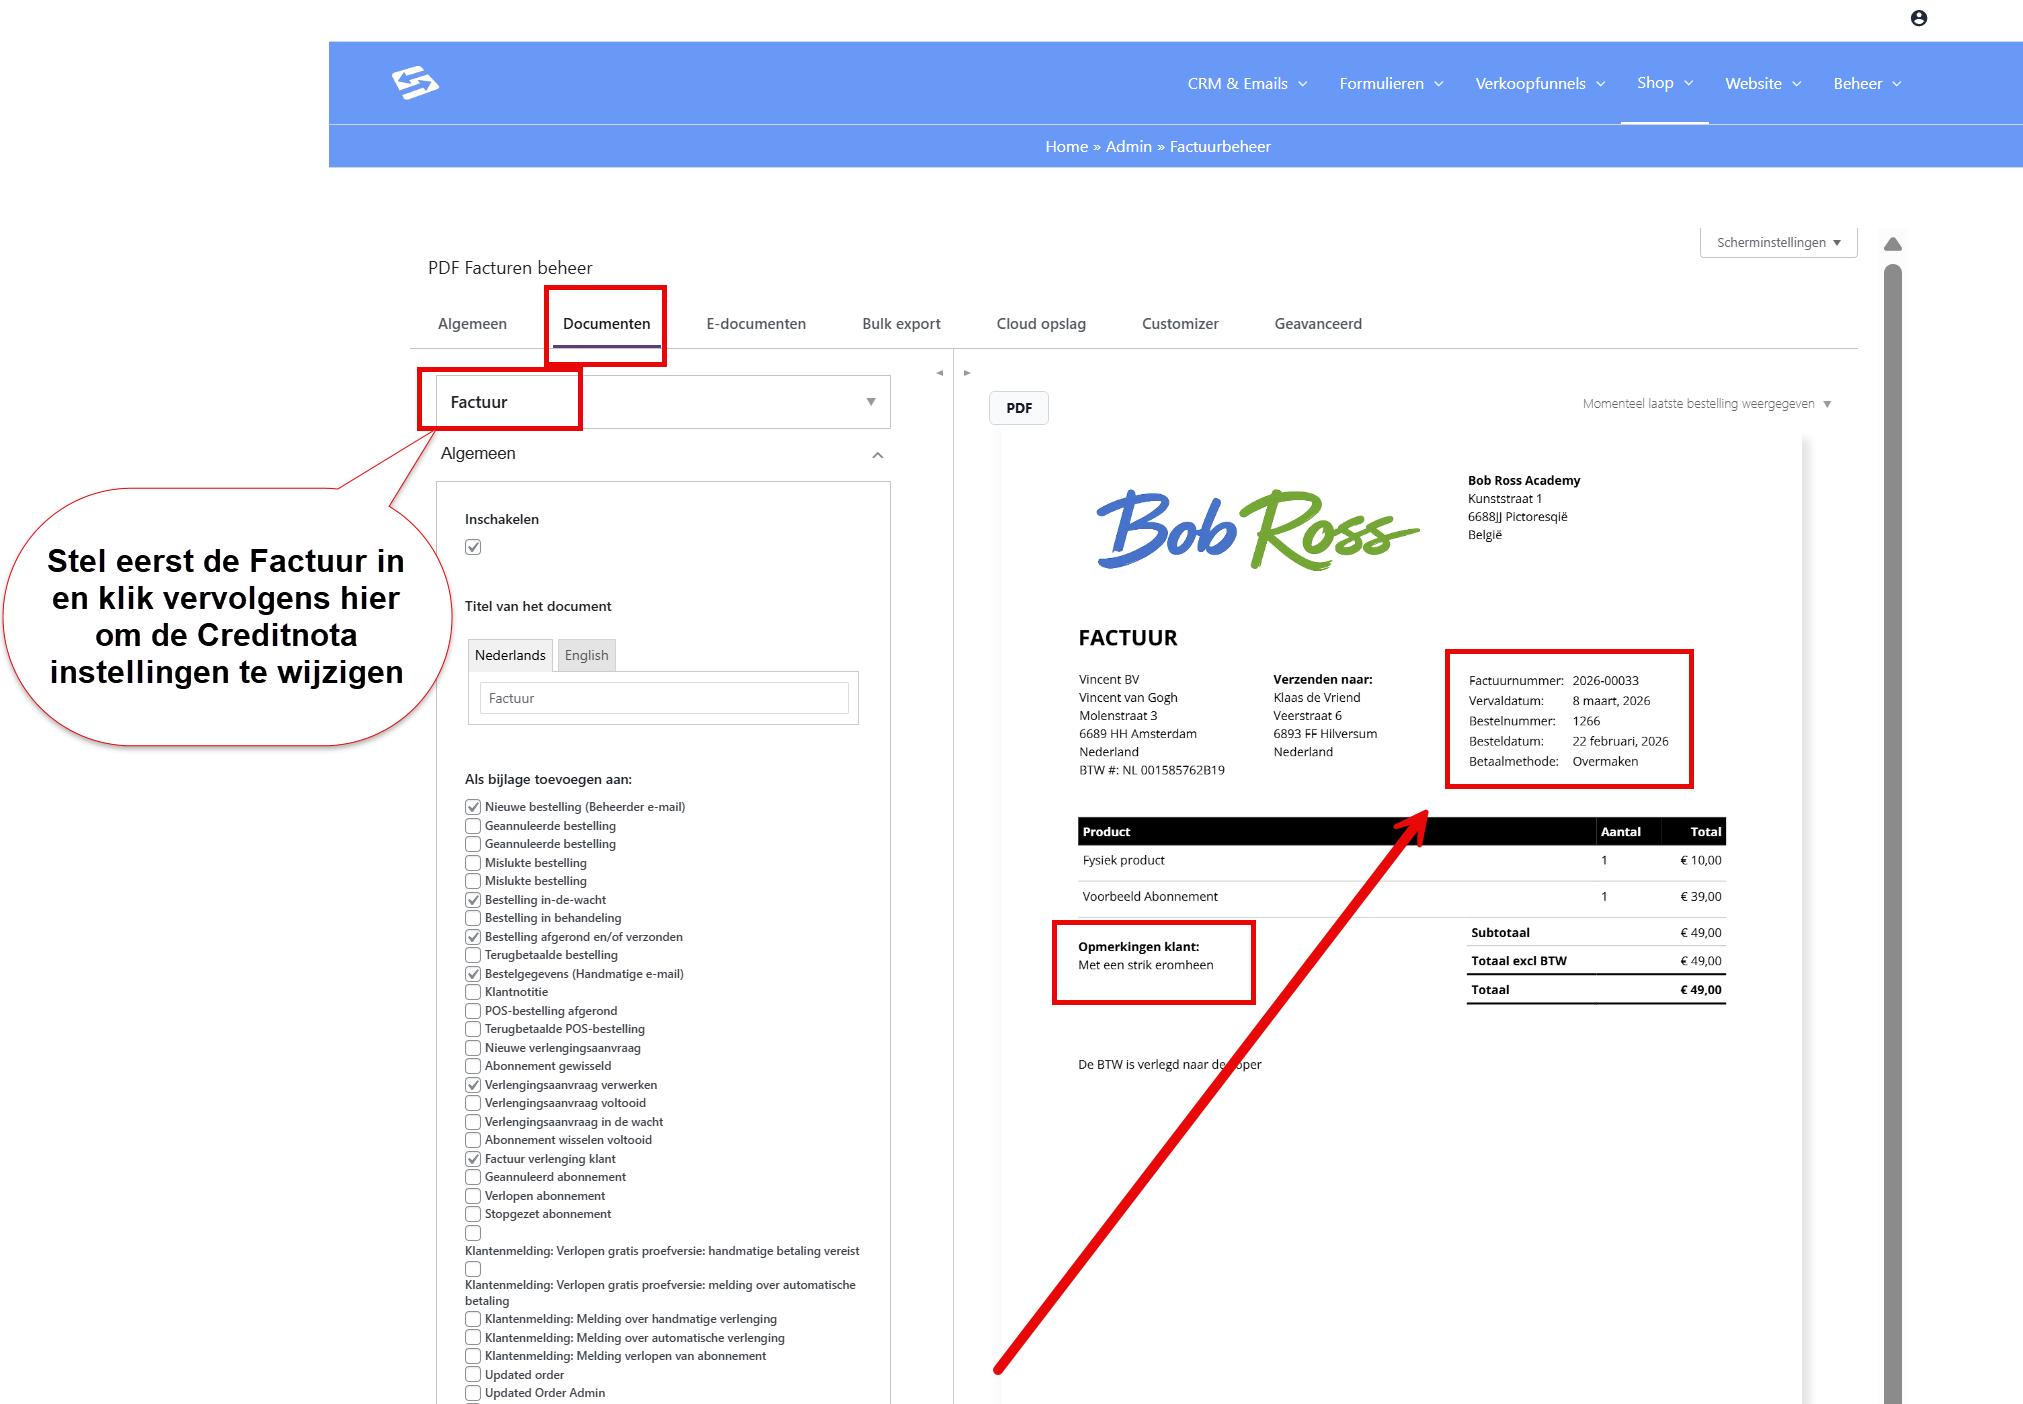
Step 12: configure the document details 12:08
- Adjust the document labels and fields that should appear on the invoice.
Step 13: then configure the credit note settings 18:32
- Configure the settings for credit notes as required.
Step 14: customise the invoice through the Customizer 22:22
- Use the customizer to adjust fields and columns.
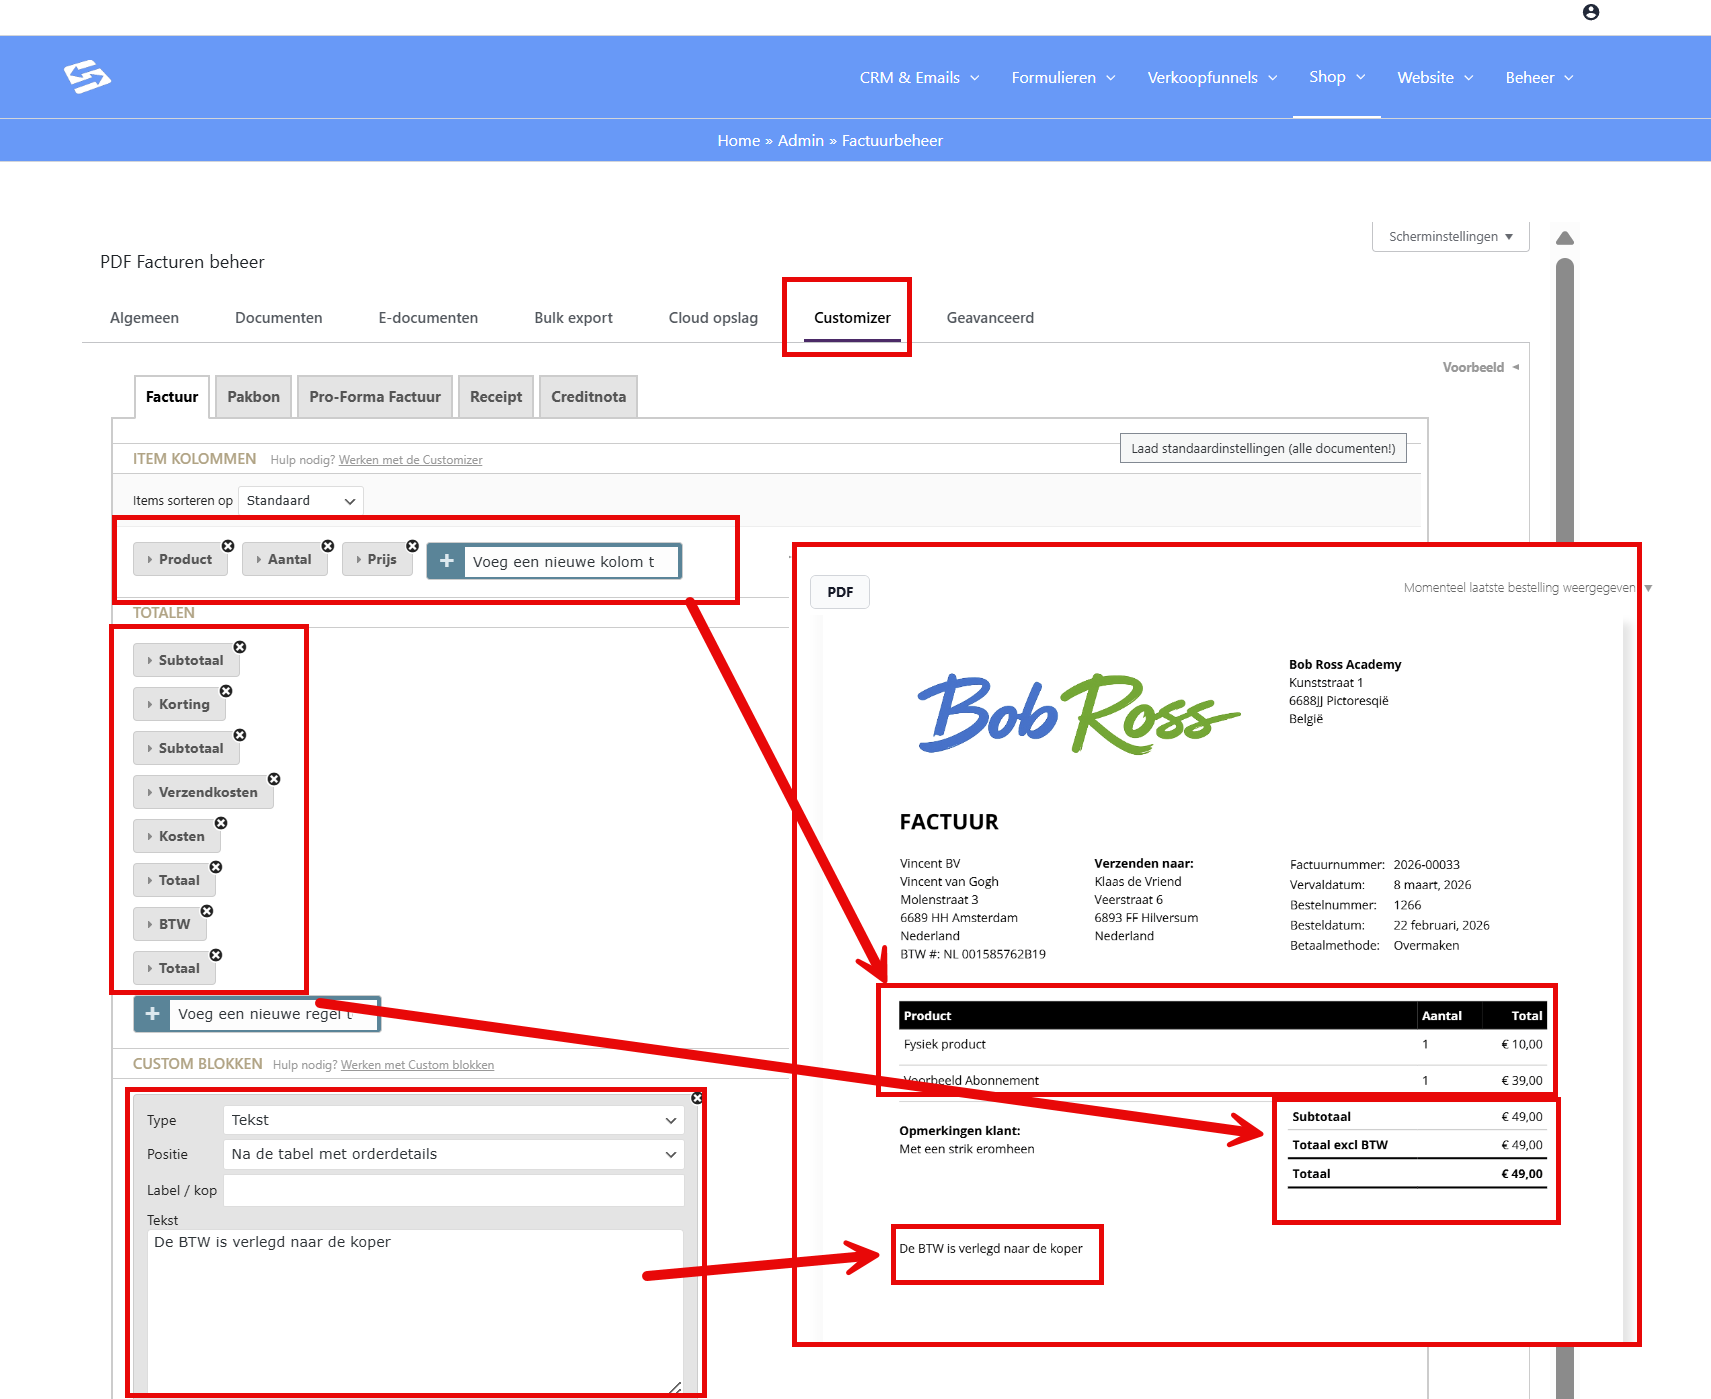
Step 15: test the invoice settings 27:09
- Place a test order to check that the invoice is displayed correctly.
Tips #
- Make sure you do not leave test orders in the system once you have finished testing.
- Always check that the VAT settings are correct before you go live and send the first invoice to a customer.
- Use the standard invoice templates to adjust the layout.
- Document any changes you make for future reference.


