Connect Zoom to your appointment scheduler so that every booking automatically creates a Zoom meeting. The host and the guest receive the Zoom link by email automatically, without you having to schedule meetings by hand.
Do you only want to connect your calendar to the appointment scheduler? Then have a look at this documentation: Connecting your calendar to the appointment scheduler
The Appointments module is an optional extension you can add to your Autorespond package. This module lets people book appointments online, comparable to Calendly. More information about this module Read the English documentation on the Zoom integration
Step 1: Create a Zoom Server-to-Server App #
You need your own Zoom Server-to-Server OAuth App to set up the connection. You create this in the Zoom Marketplace:
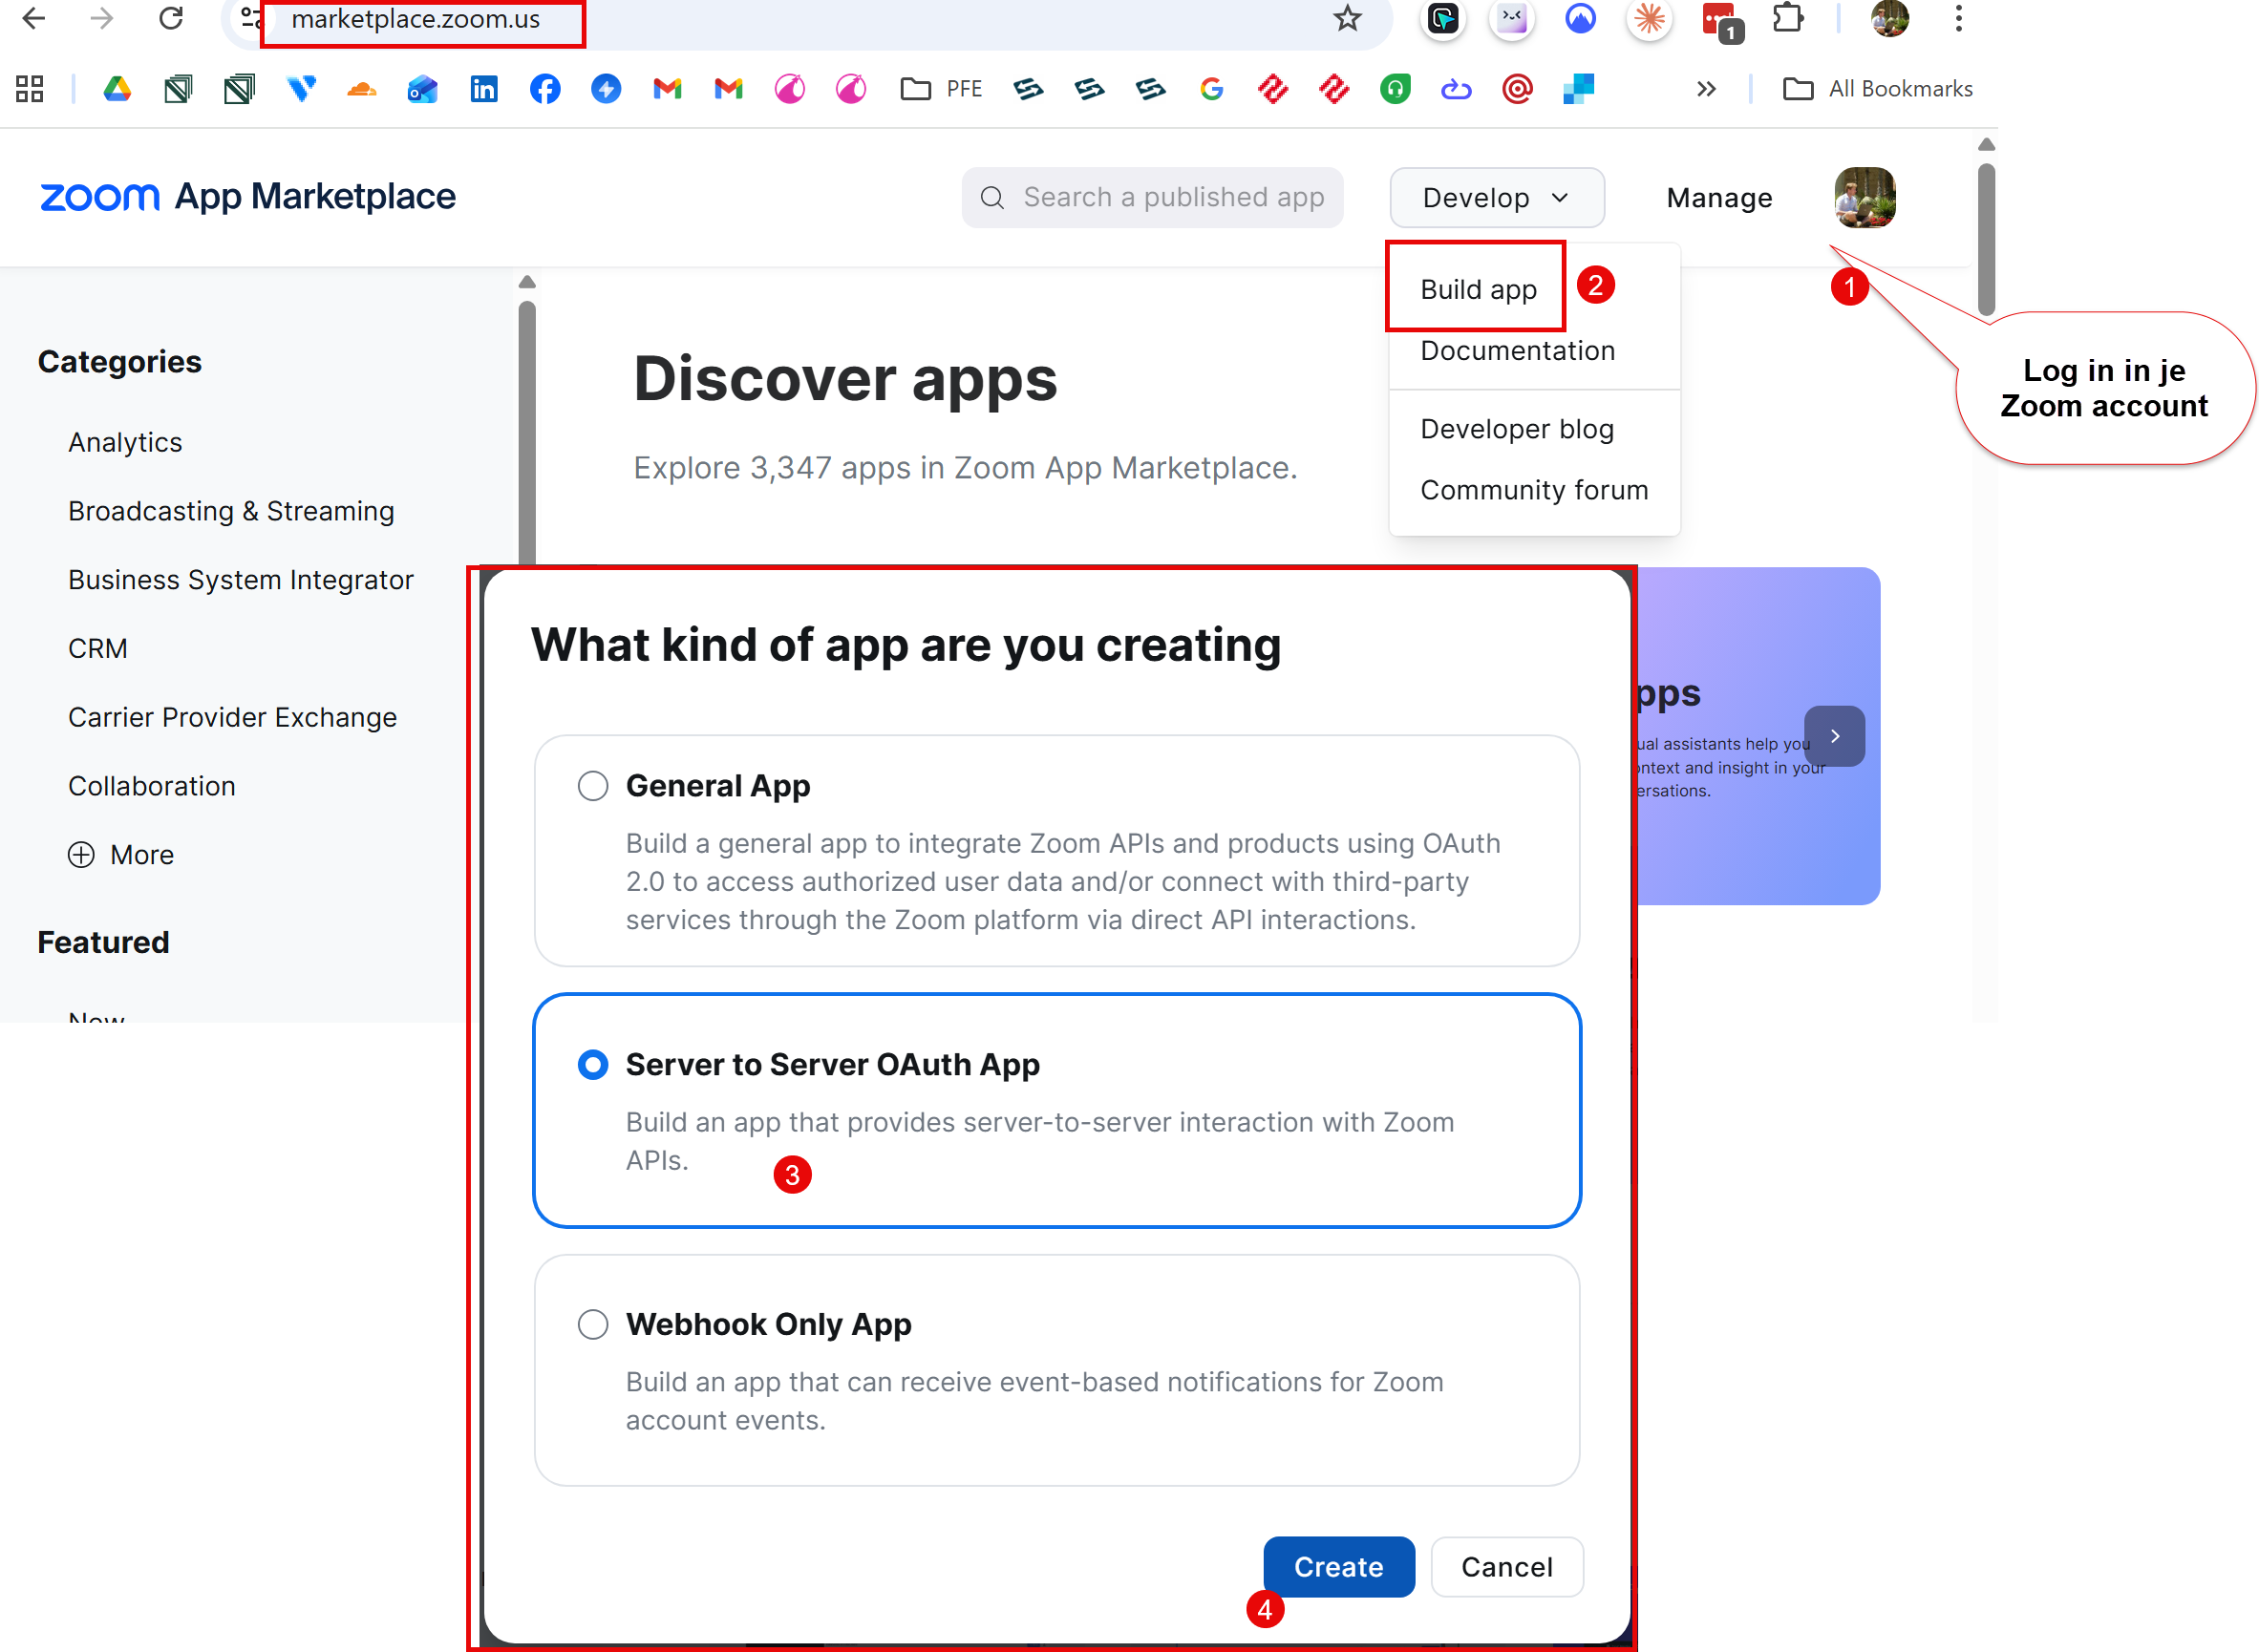
- Go to https://marketplace.zoom.us/ and sign in with your Zoom account
- At the top right, click Develop → Build App
- Choose the app type Server-to-Server OAuth App → click Create
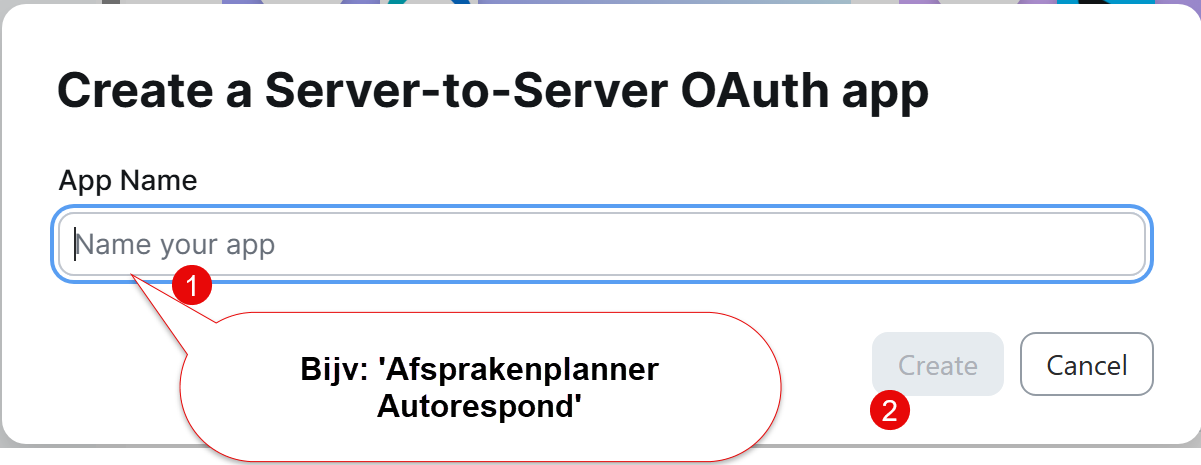
- Give your app a name (for example “Autorespond Appointments”) → click Create
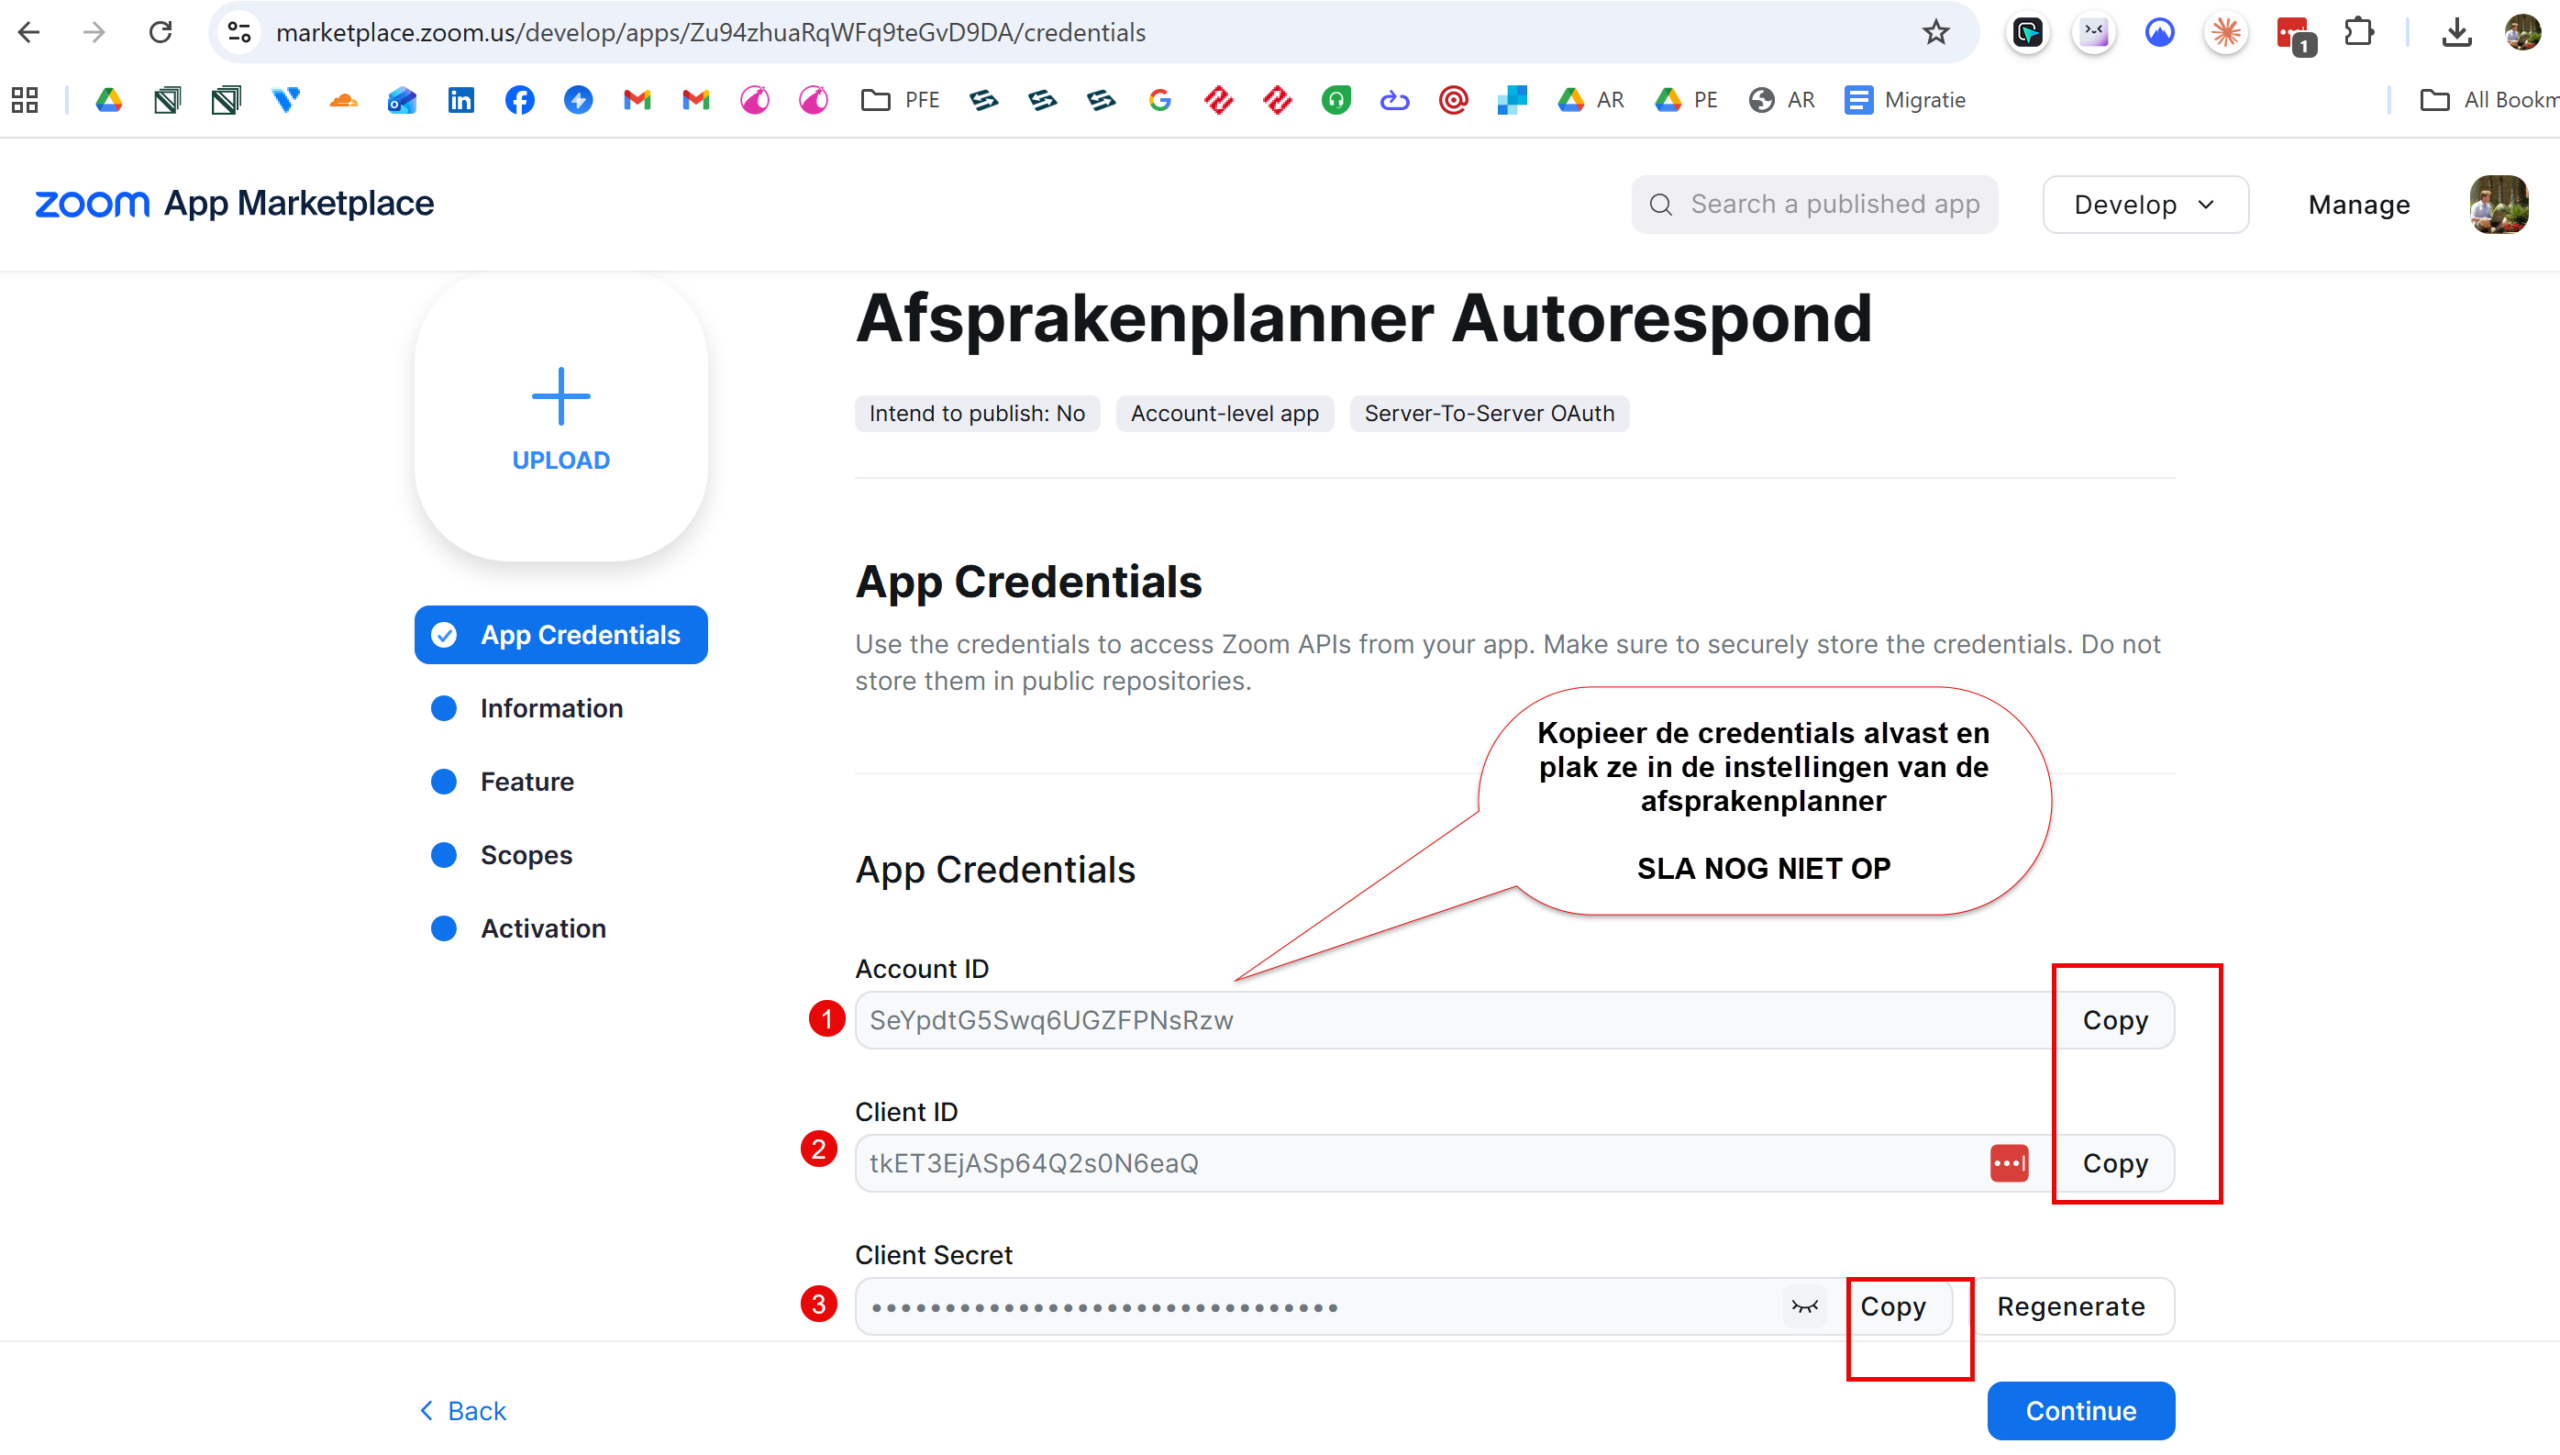
- You will now see the App Credentials page. Copy and save these three details:
- Account ID
- Client ID
- Client Secret
Step 2: Fill in the app information #
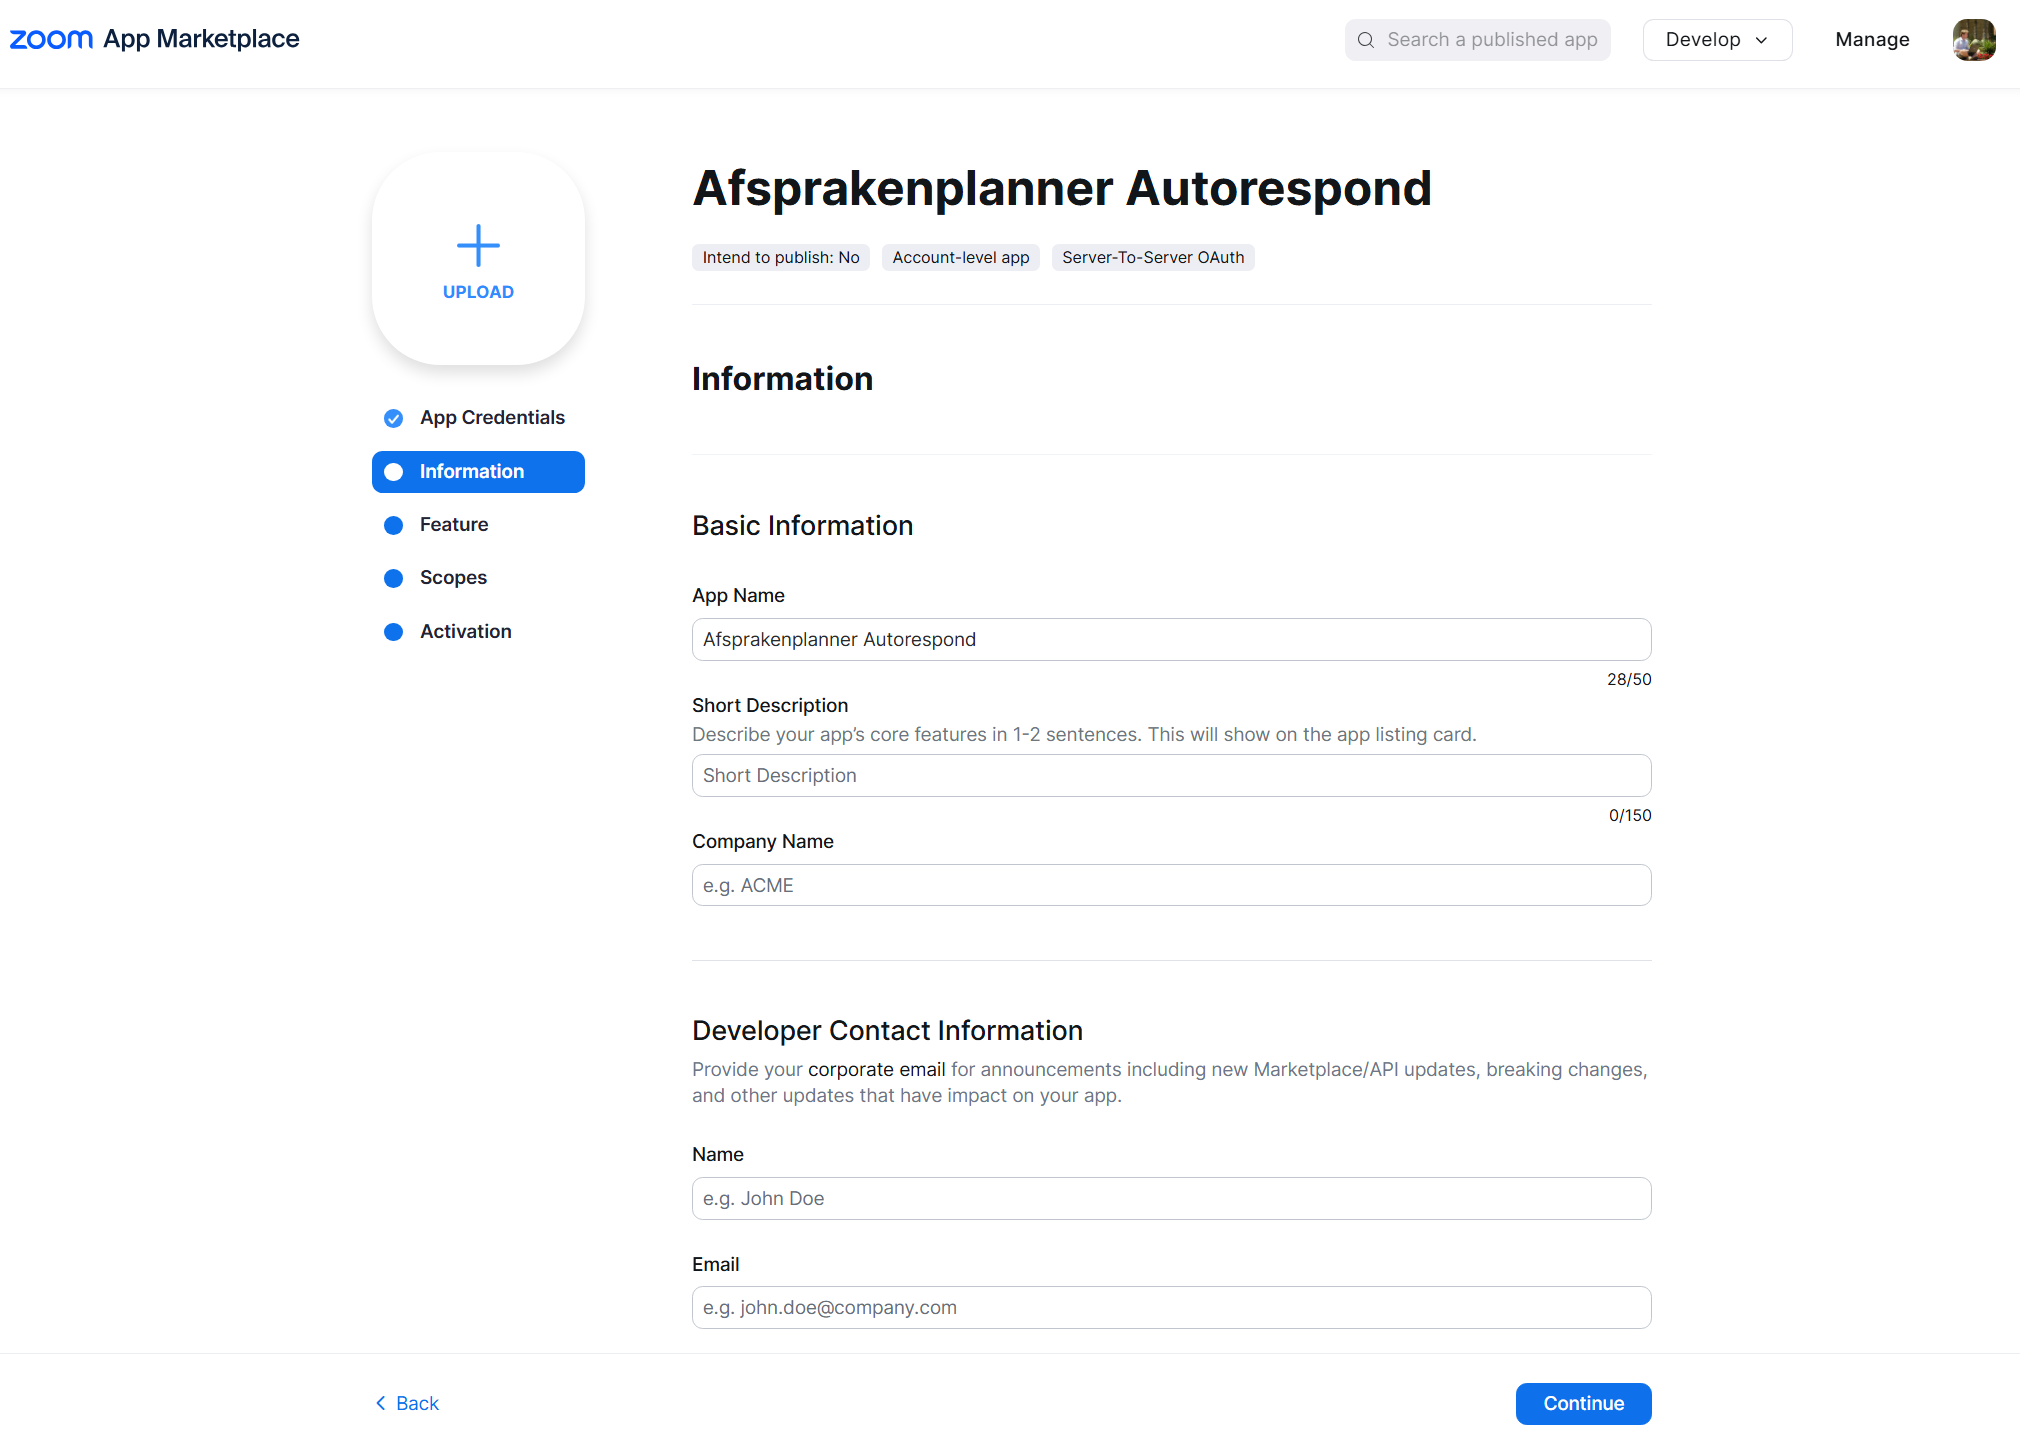
Zoom requires a few basic details for your app:
- Fill in the required fields:
- App Name: the name of your app
- Short Description: a short description (for example “Appointments connection”)
- Company Name: your company name
- Developer Contact: your name and email address
- Click Continue
Under Information you enter your own details:
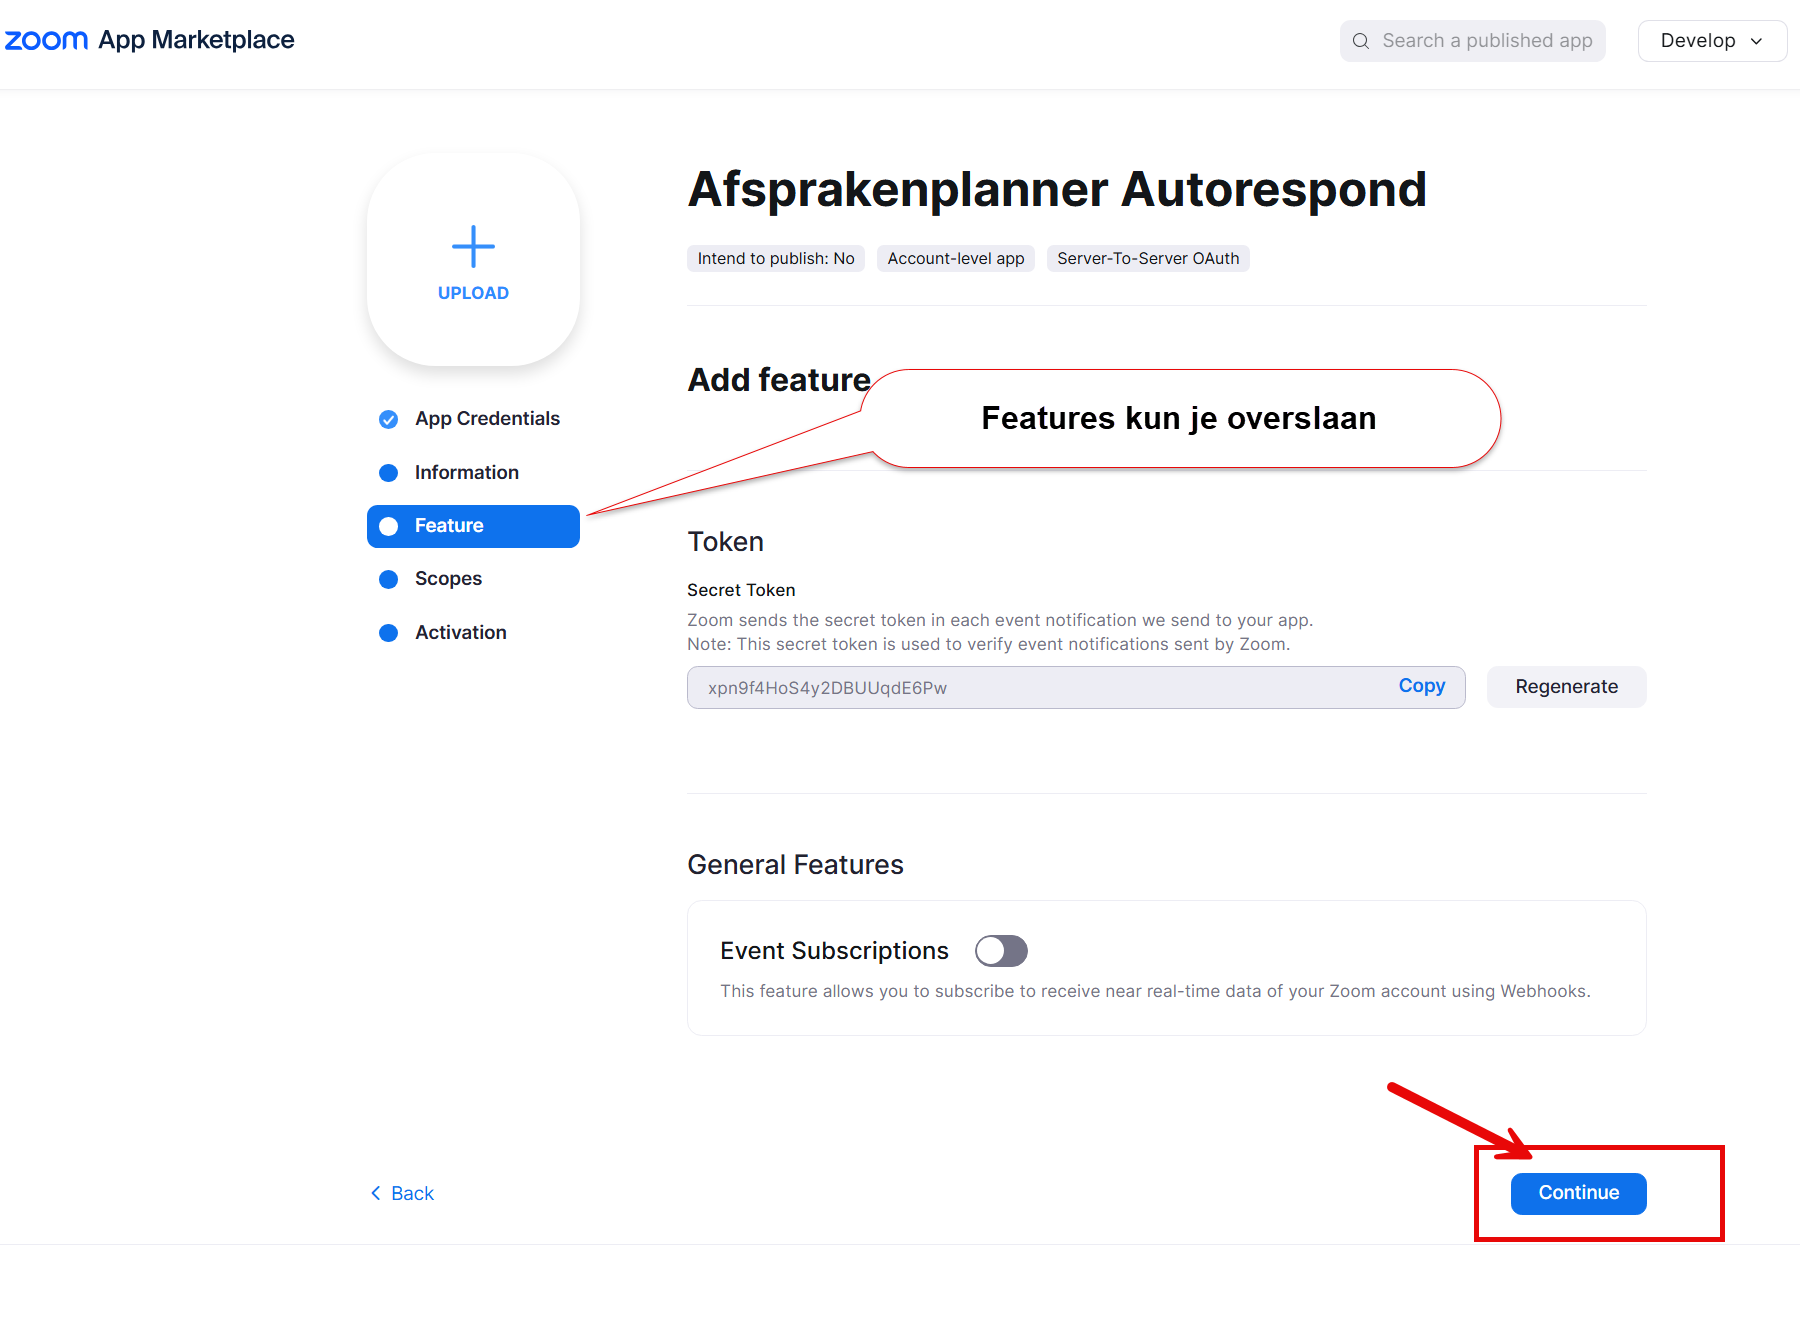
On the Features tab you click straight on ‘Continue:
Step 3: Set the permissions (scopes) #
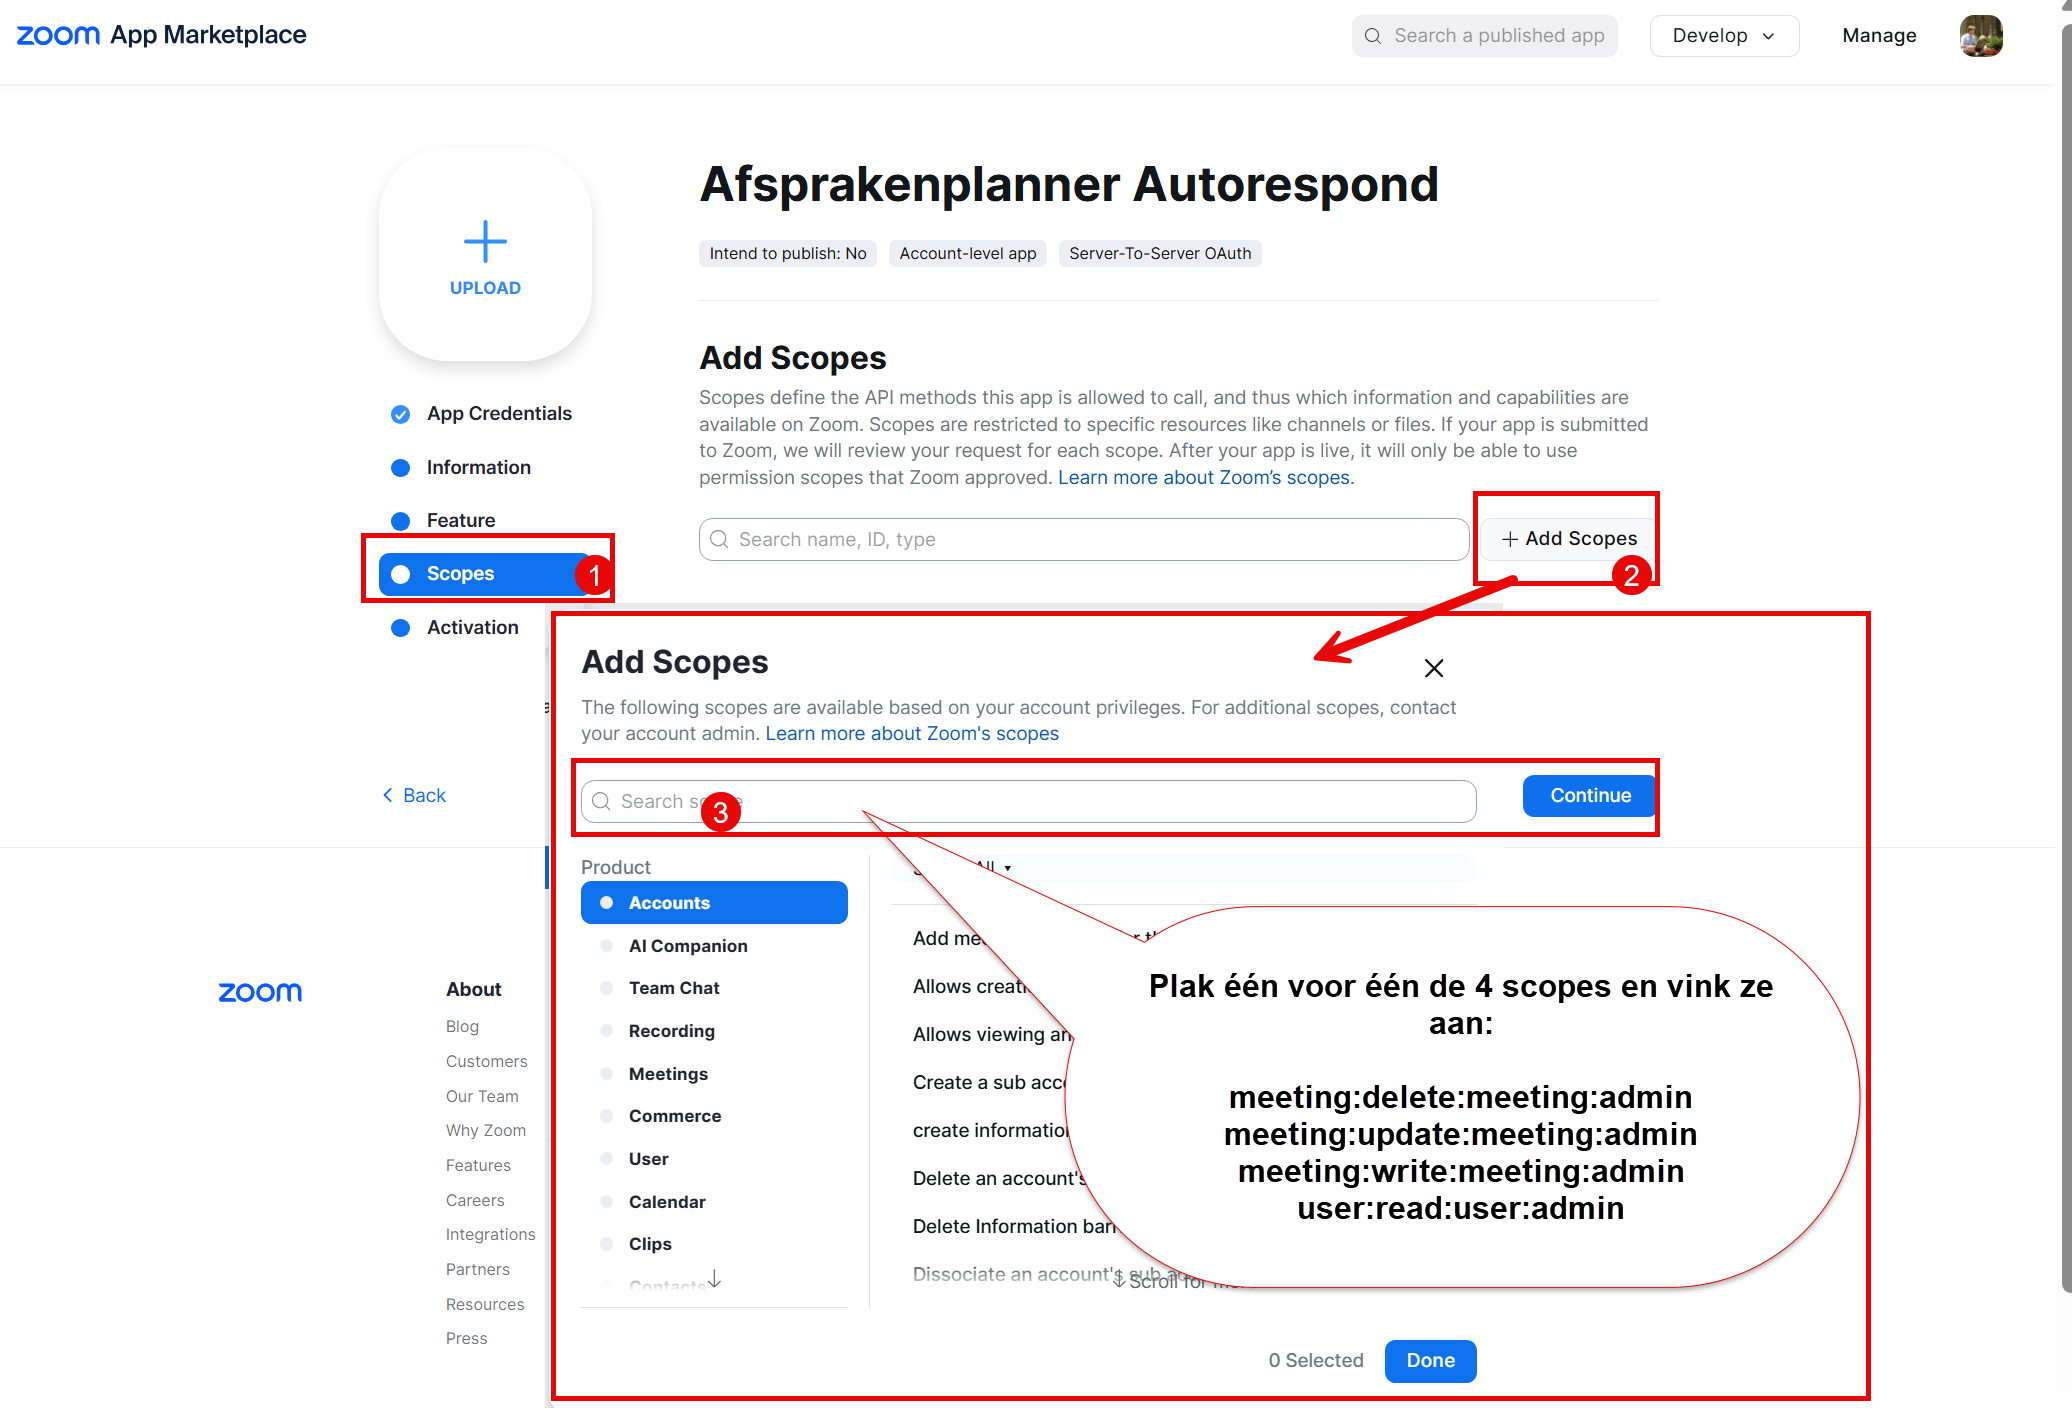
The app needs specific permissions to manage meetings. Skip the Feature step and go straight to Scopes:
- Click Add Scopes
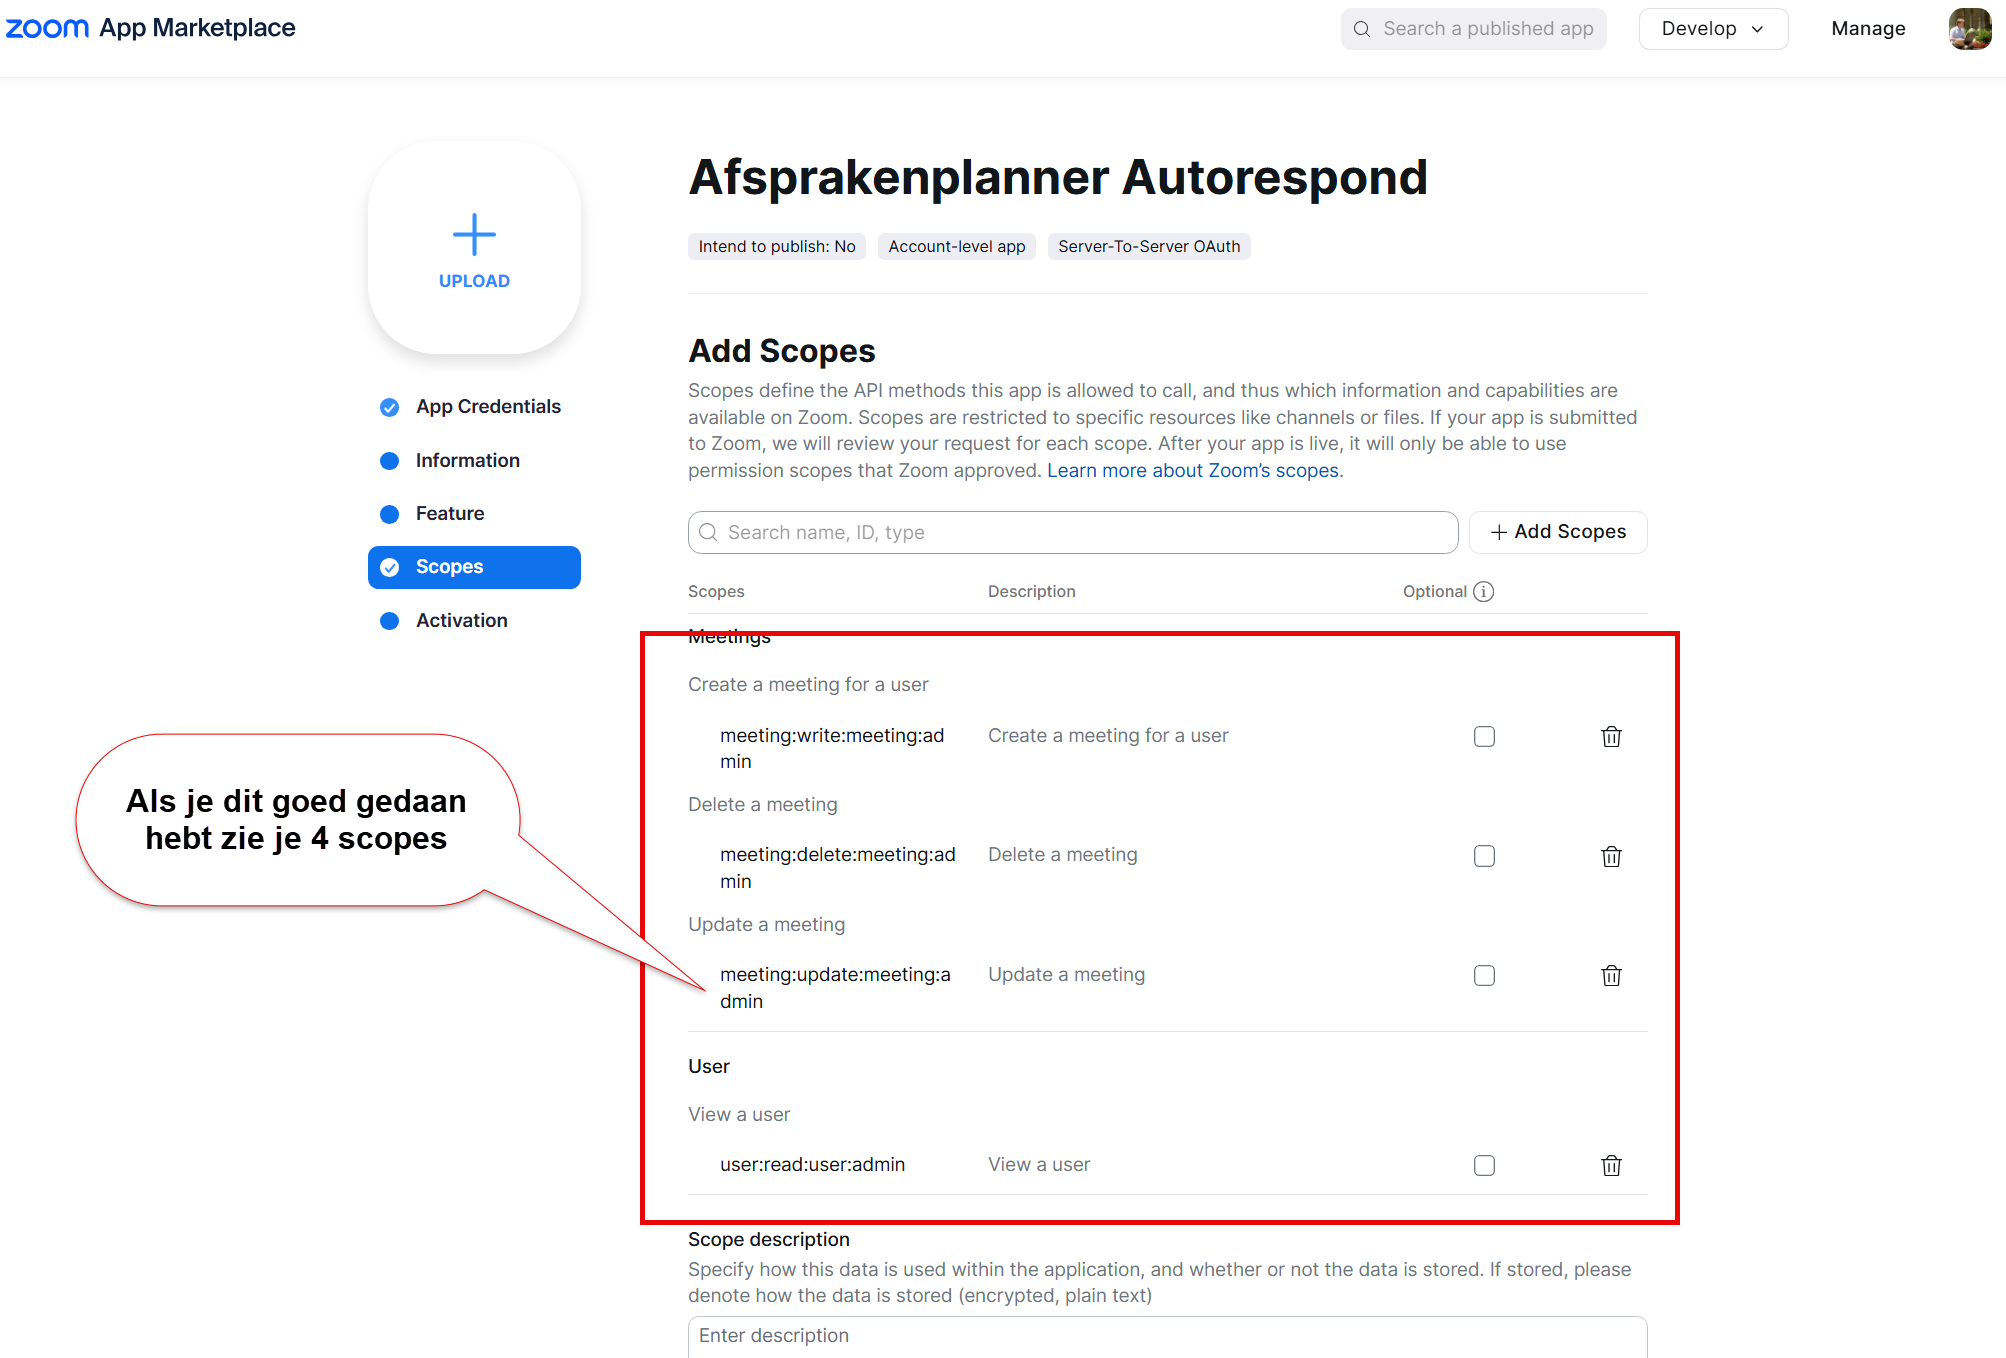
- Add these 4 permissions from the Meeting and User categories:
- meeting:delete:meeting:admin (Delete a Meeting)
- meeting:update:meeting:admin (Update a Meeting)
- meeting:write:meeting:admin (Create a meeting for a user)
- user:read:user:admin (View a user)
- Click Done and then Continue
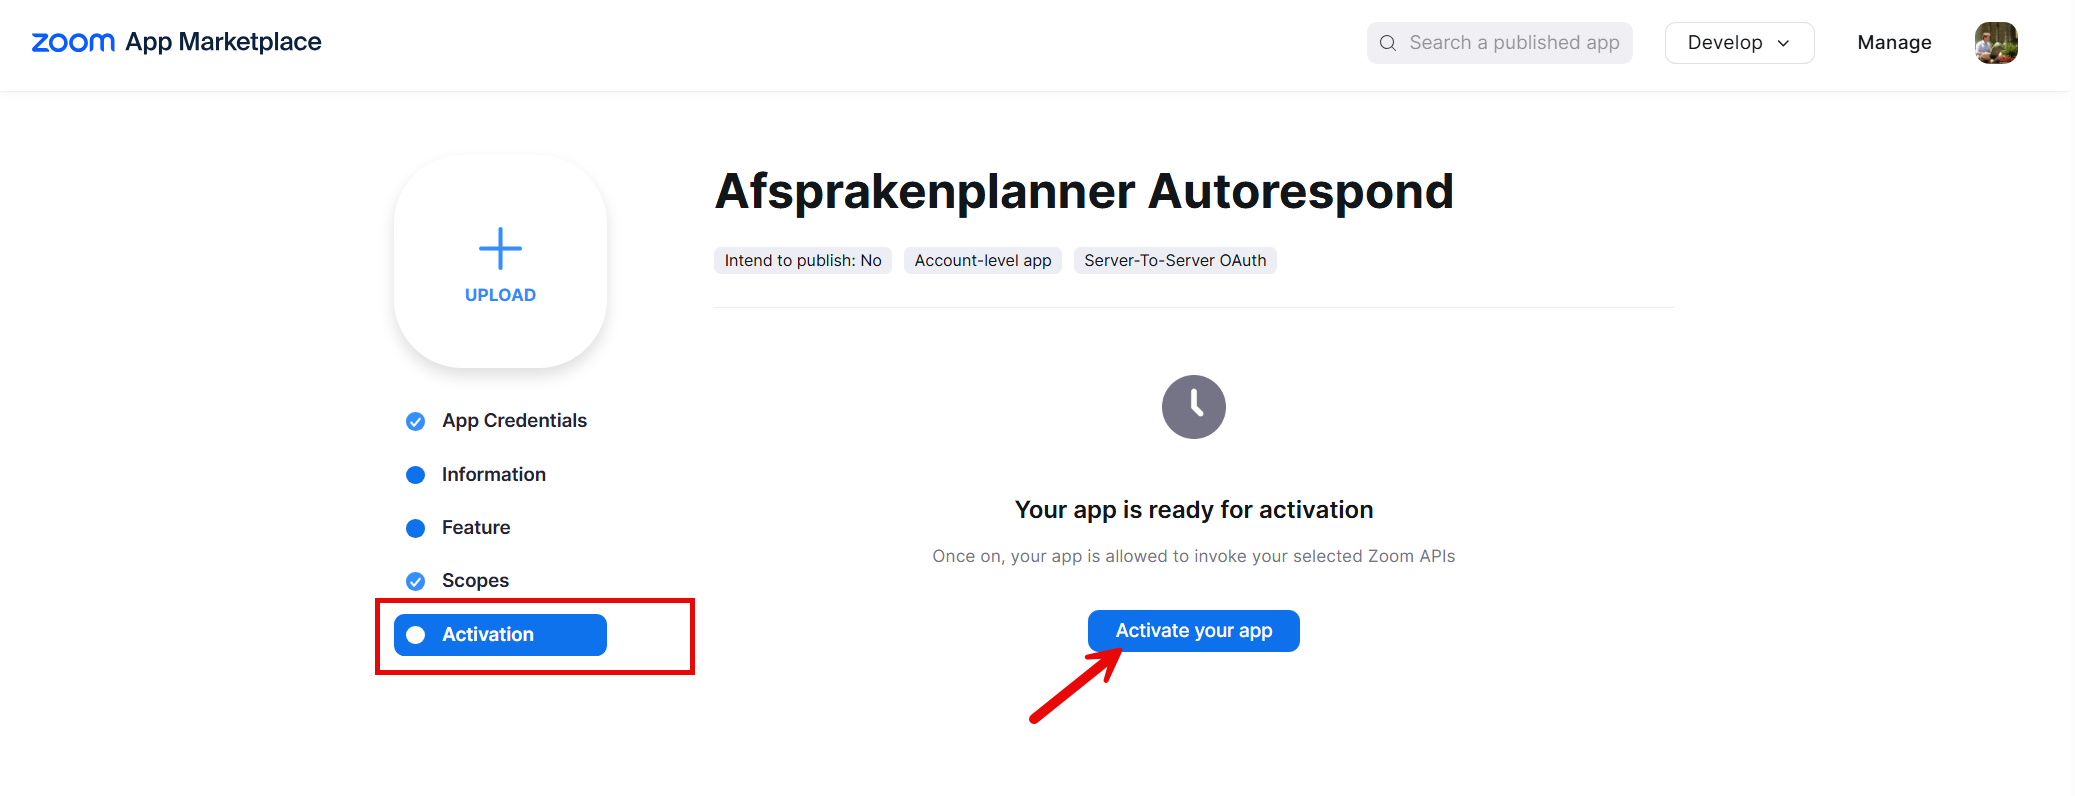
Step 4: Activate the app #
Click Activate your app to take the Zoom app live. Your app is now ready for use.
Step 5: Connect Zoom in Autorespond #
Now you can connect the Zoom app to your Autorespond appointment scheduler:
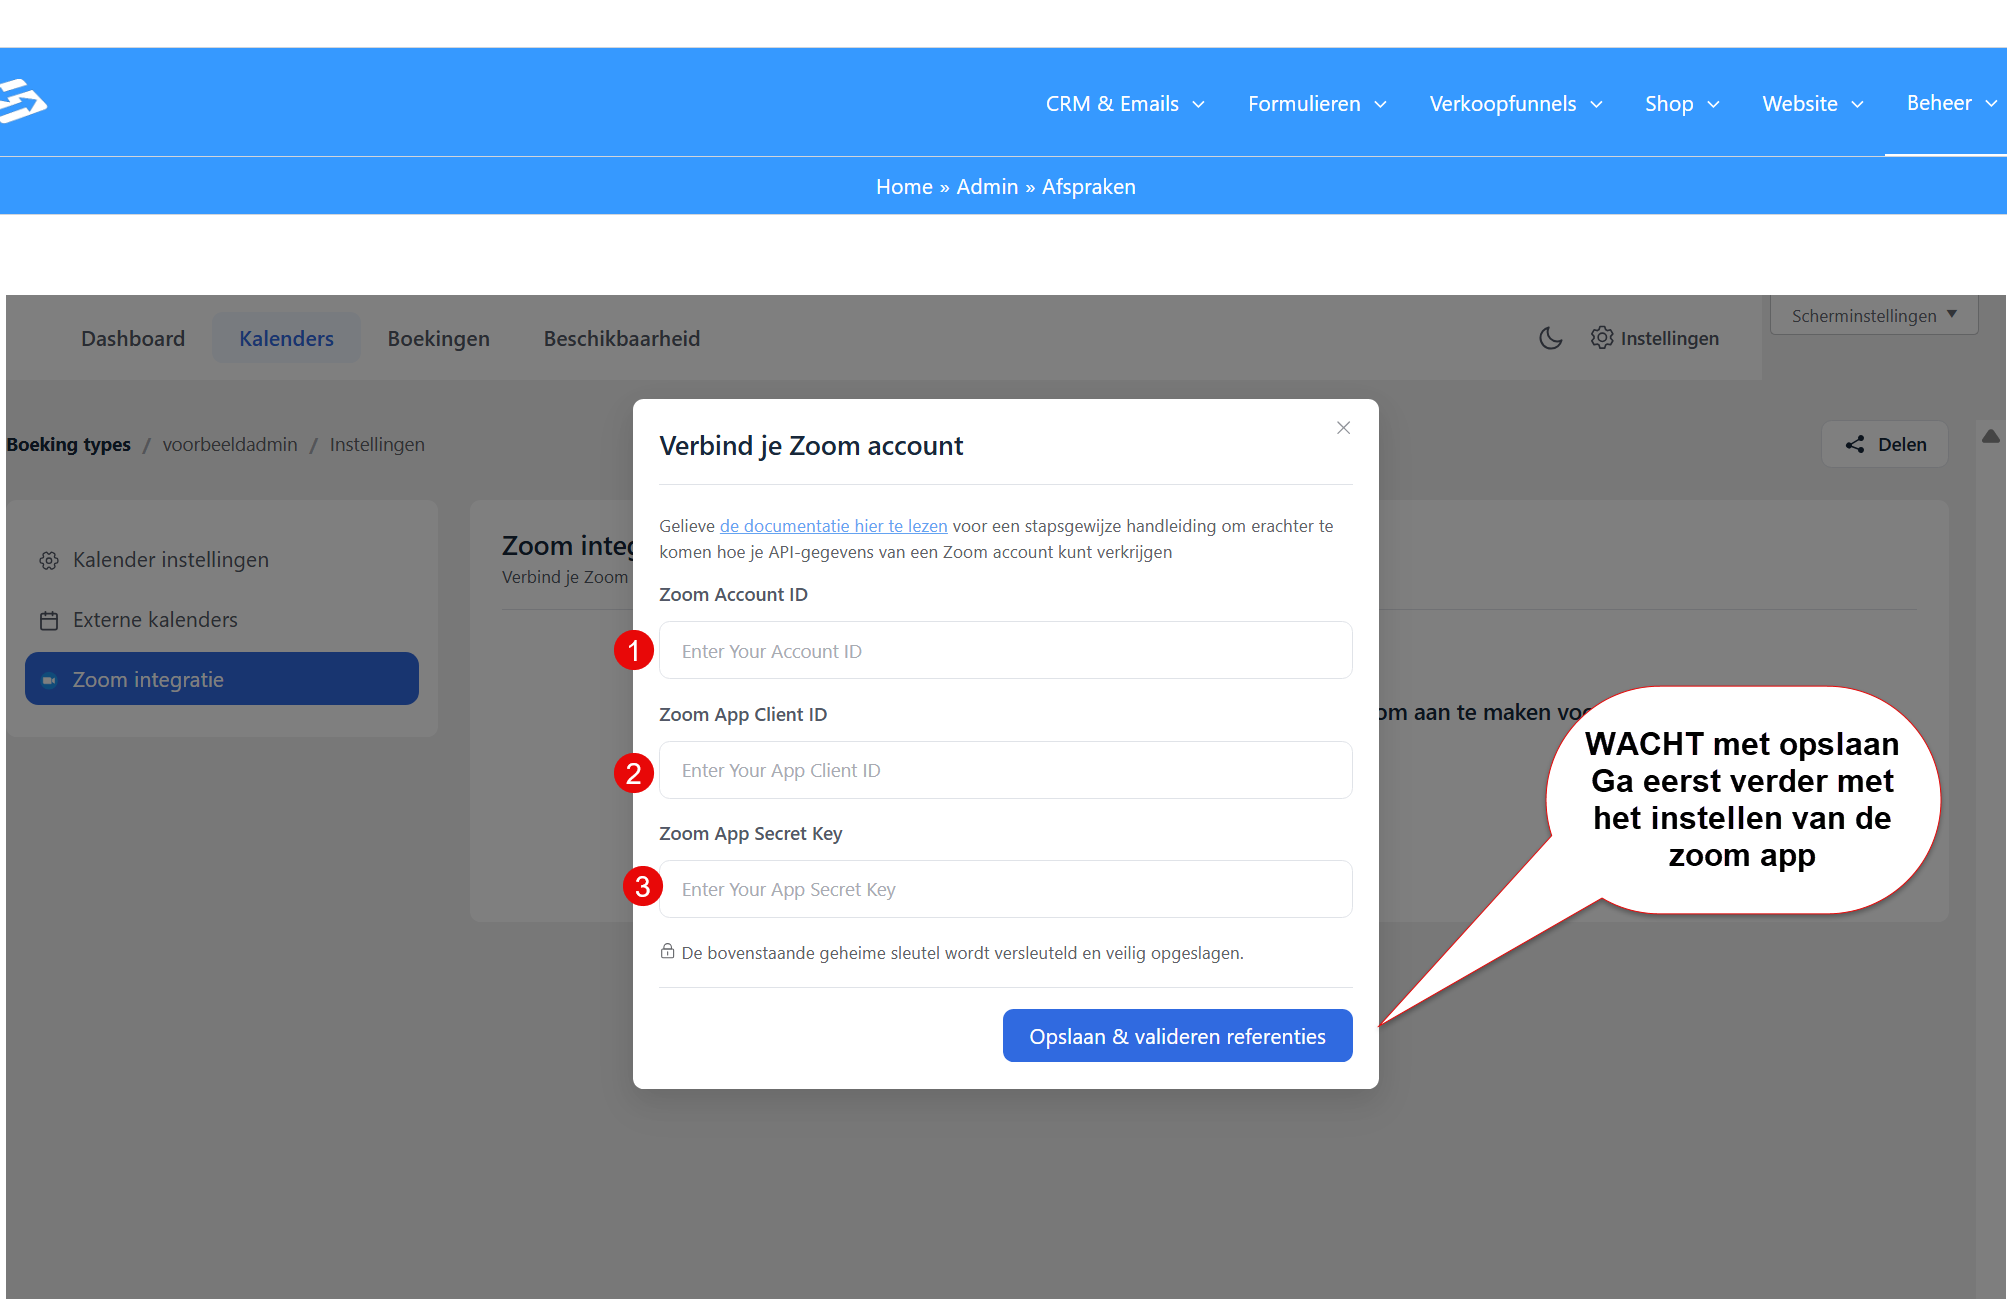
- In your Autorespond dashboard, go to Manage → Appointments
- Click Settings → Zoom
- Click Connect Your Zoom Account
- Paste your App Credentials into the pop-up window (already done in step 1):
- Account ID
- Client ID
- Client Secret
- Click Save & Validate Credentials
The connection is now active and you will see the connected host in the overview. For several Zoom accounts, you create a new app from the other account and add it via Add New User Account.
Step 6: Set up Zoom for an appointment type #
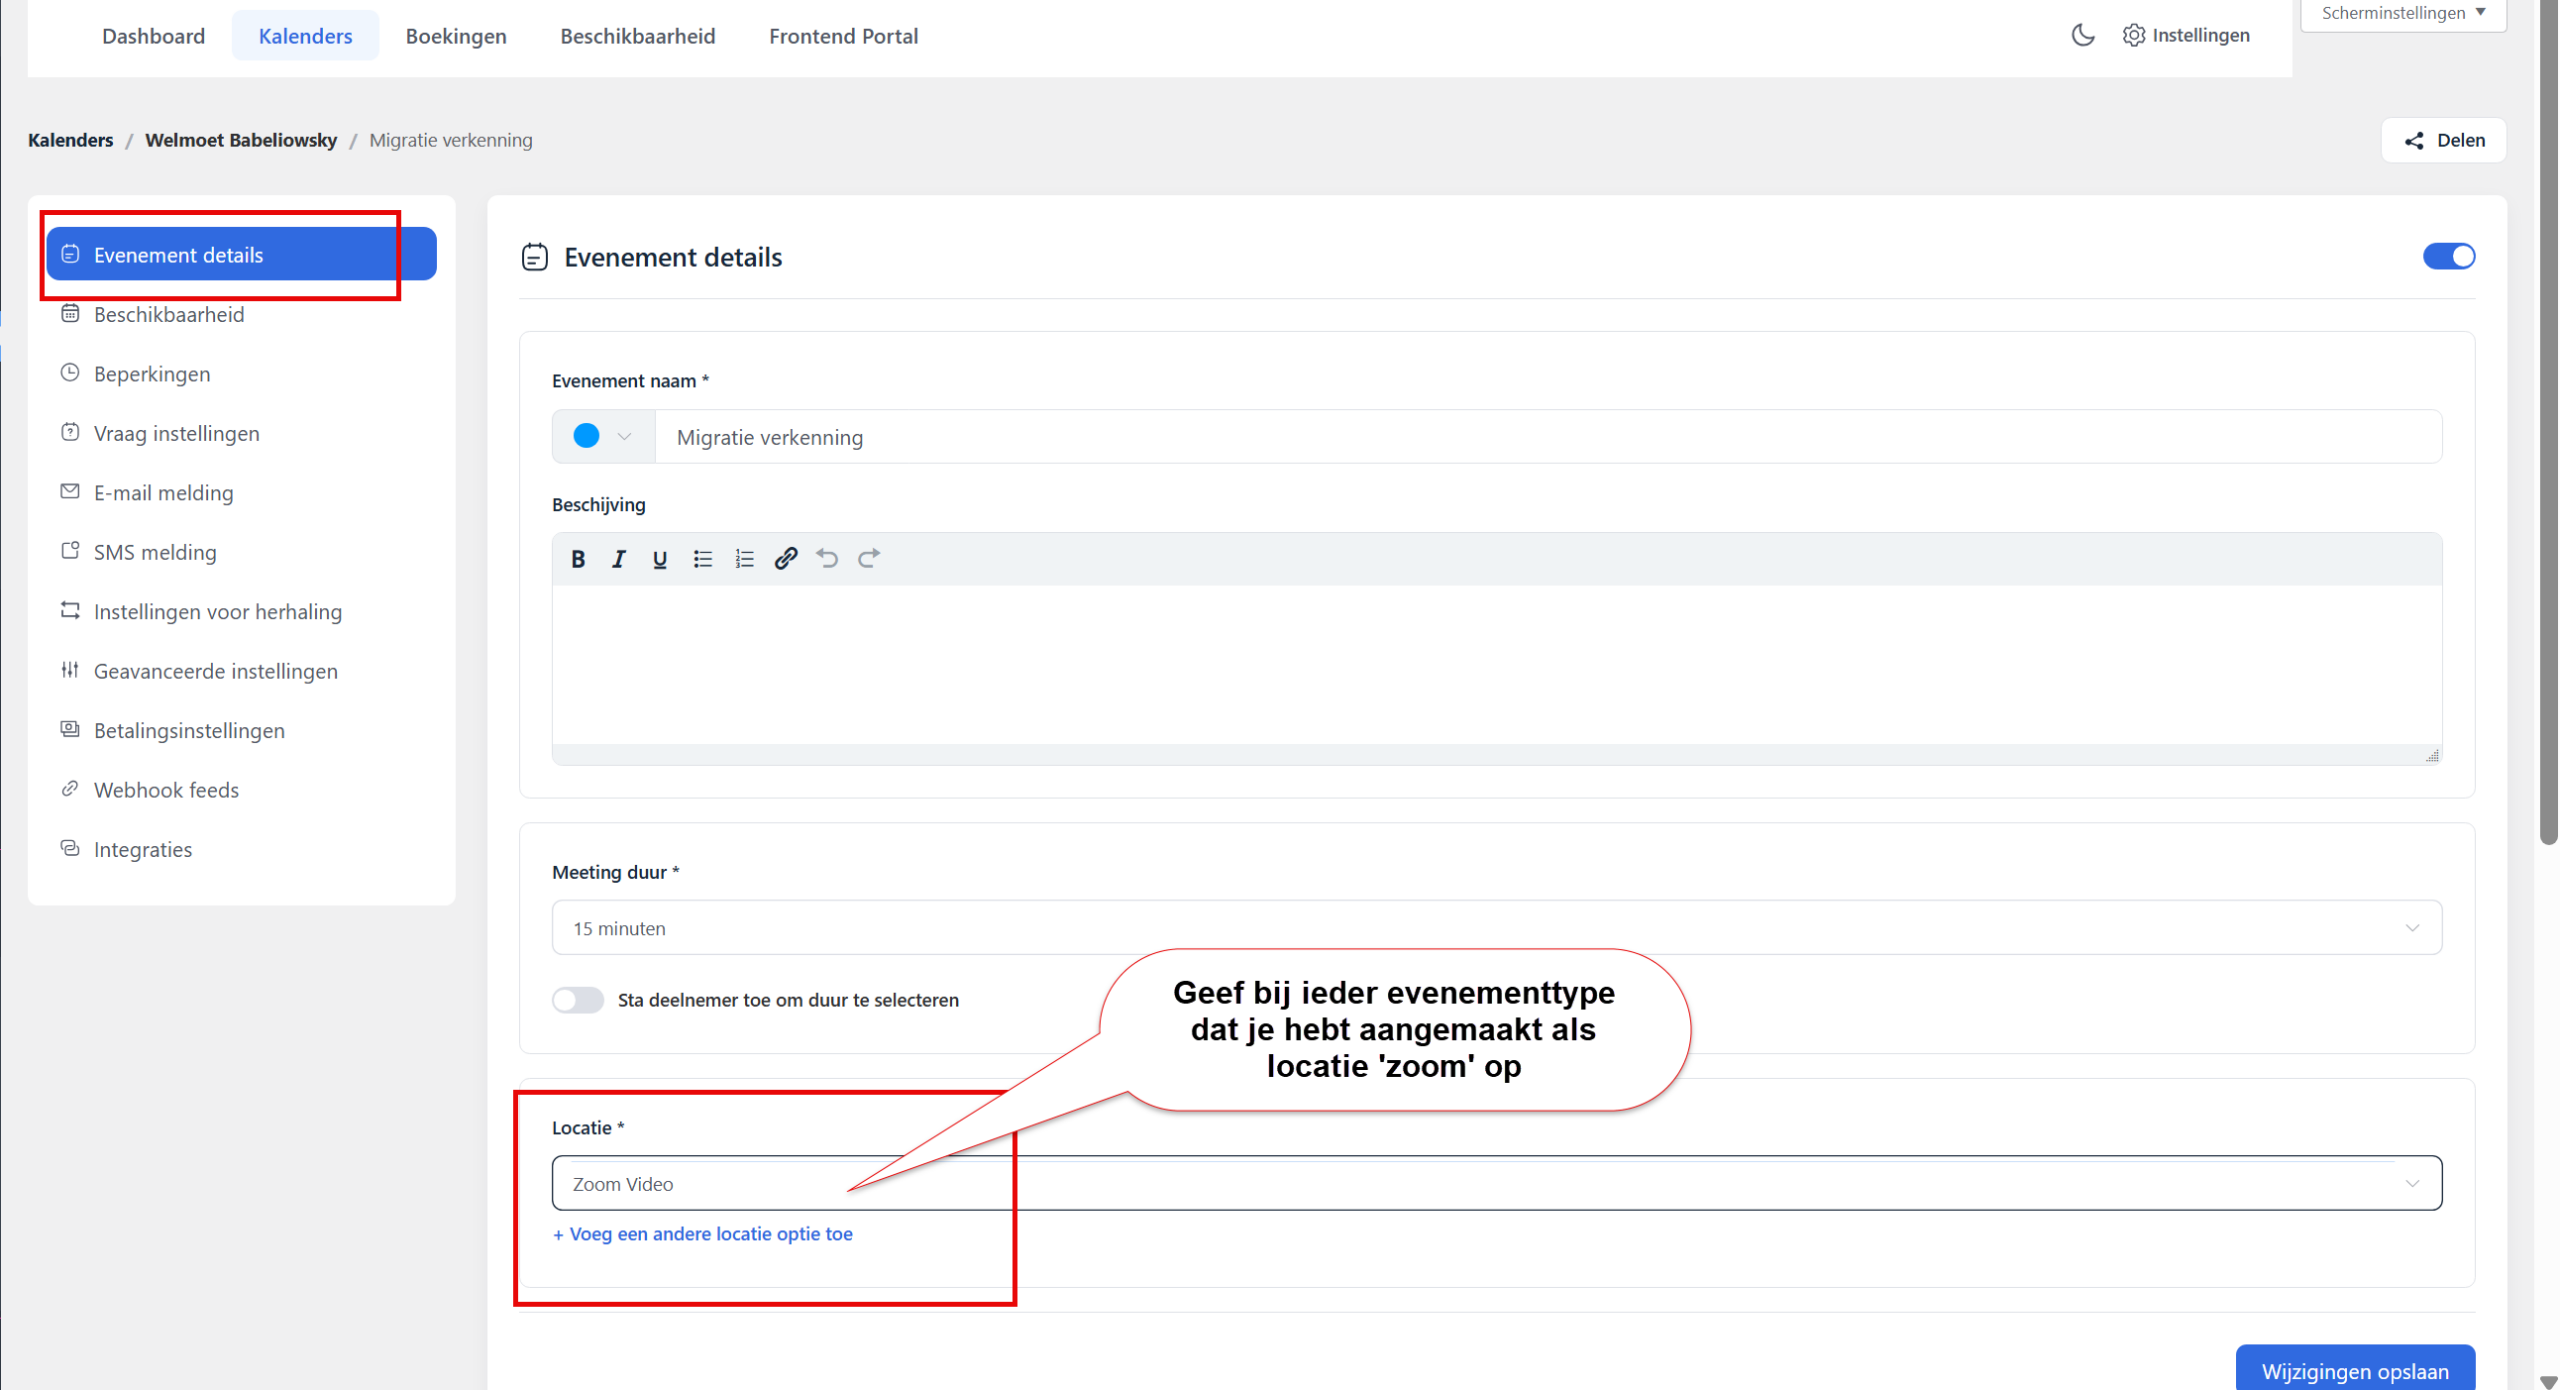
You can set Zoom as the location for every appointment type:
- Go to Manage → Appointments and open the appointment type you want
- Find the Location setting in the configuration
- Select Zoom as the location
- Save the settings
From now on, both you and your guest automatically receive the Zoom link by email as soon as an appointment is booked. The meeting is created in your Zoom account straight away.
This method is useful if you have several calendars with different Zoom accounts. For more information about setting up appointments, see Setting up paid appointments with automatic checkout.
Frequently asked questions #
Which Zoom permissions does the app need? #
The app needs four specific permissions: creating, updating and deleting meetings, plus viewing user information. You set these permissions in the Scopes section while creating your Zoom Server-to-Server OAuth App.
Can I connect several Zoom accounts? #
Yes, you can connect several Zoom accounts by creating a separate Server-to-Server OAuth App for each account. Add extra accounts via Add New User Account in the Zoom settings of Autorespond.
Do guests receive the Zoom link automatically? #
Yes, as soon as you set Zoom as the location for an appointment type, both you and the guest automatically receive the Zoom link by email after an appointment has been booked. The meeting is created in your Zoom account straight away.


