Your community and your CRM work as one in Autorespond. Everything a member does in the community, joining a space, starting a course, completing a course, can start an automation under CRM & Emails → Automations. And the other way round, an automation can add members to spaces and courses automatically. In this article you will find the available triggers and actions, plus three ready-made recipes: onboarding a new member, a follow-up offer after completing a course, and an upsell email flow that stops automatically as soon as the goal is reached.
This article is about automations around your community and courses. If you are new to the automation editor itself, first read Building automations with the automation editor.
The community and course features in Autorespond are based on FluentCommunity, included in your package. Read the English documentation
1. The community triggers and actions #
Create a new automation through CRM & Emails → Automations → New automation. In the trigger selection you will find, under the Community category, among others:
- Joined in a Space, a member joins a (specific) space.
- Left from a Space, a member leaves a space.
- Enrolled in a course, a member starts (or is enrolled in) a course.
- Lesson Completed and Section/Topic Completed, a member completes a lesson or section.
- Completed a course, a member completes a full course. The trigger for congratulations, certificates and follow-up offers.
- User Level (Leaderboard) Upgraded, a member reaches a higher leaderboard level, useful for reward emails.
For each trigger you choose in the conditions which space or spaces, or which course or courses, it responds to; leave that empty and it applies everywhere. As actions within an automation, the following are available among others:
- Add to Space or Course, add the contact to spaces and/or enrol them in courses.
- Remove from Space or Course, the opposite, for example when someone cancels.
- Add Badge To User and award a verification tick, reward members visibly in the community.
If you work with tag-based access control (recommended), you usually do not even need “Add to Space or Course”: the tag already arranges access. See the article on access control in the related links.
2. Recipe: onboarding a new paying member #
- Create an automation with the trigger Tag applied and choose your level tag (for example member-basic). This tag is awarded by your purchase automation.
- Add the action Add to Space or Course (if you do not work with tag linking) and select the spaces and courses for this level.
- Add an email: welcome the member, list what is waiting for them and give one clear first step (“Start with lesson 1” with a direct link).
- Add a wait step of a few days and then a second email that draws the member into the community itself, for example with an invitation to introduce themselves in your welcome space.
- Set the automation to Active and test it by giving your own test contact the tag. Check that the access is correct and the emails arrive, then remove the tag from your test contact again.
3. Recipe: course completed, congratulations and a follow-up offer #
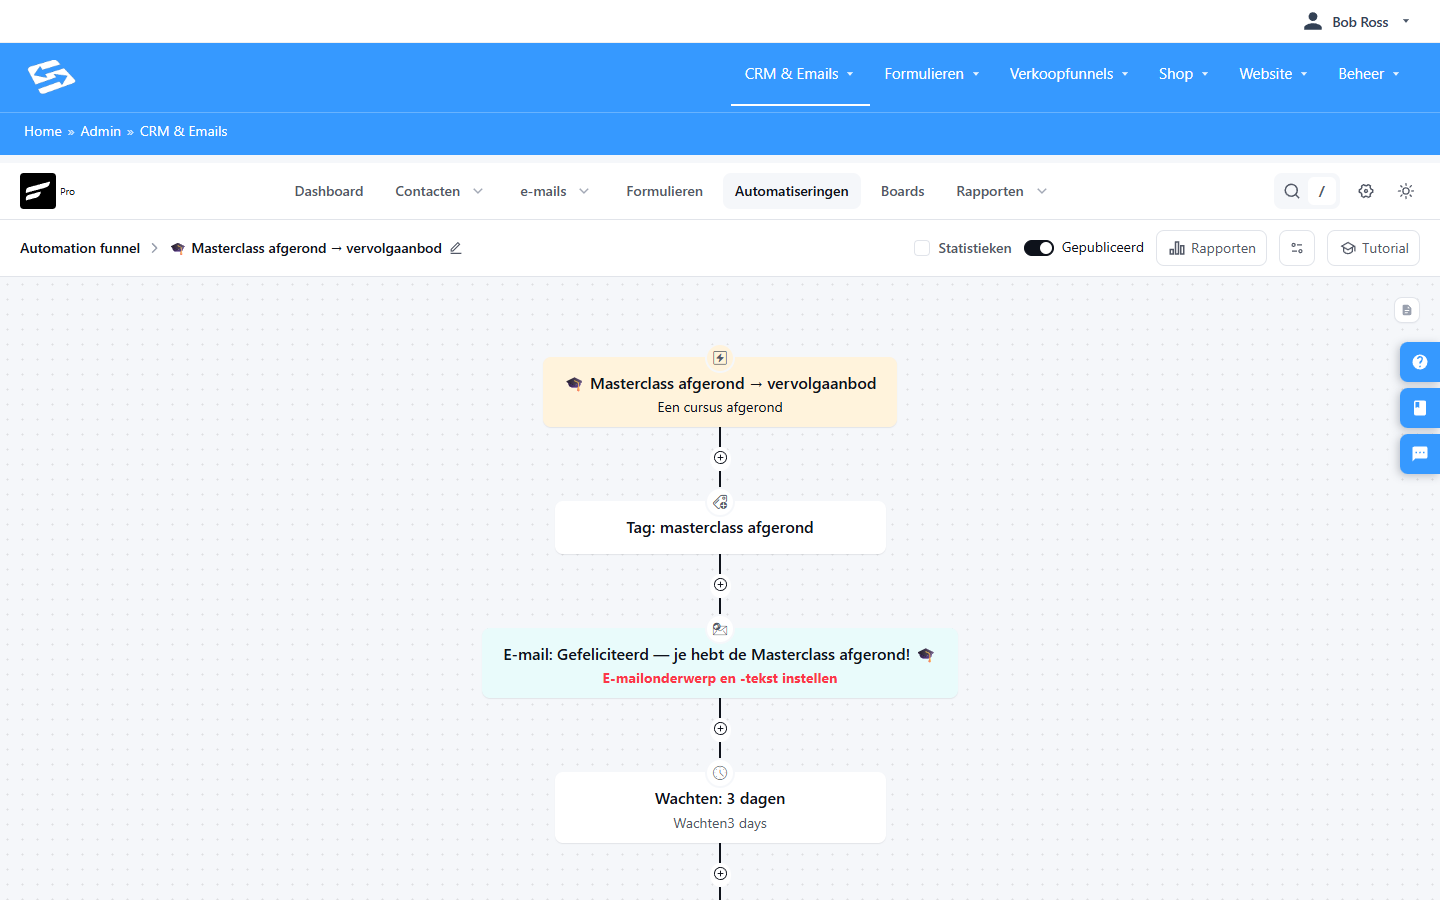
- Create an automation with the trigger Completed a course and select the course in question in the conditions.
- Add the action Apply tag, for example course-x-completed. That way you can always find your graduates later and email them specifically.
- Add a congratulations email. Celebrate the moment and invite the member to share the result in the community.
- Add a wait step of 2 to 3 days, followed by an email with the logical next step: the next course or your higher membership. An exclusive graduate discount (discount code) works well here.
- Activate and test: complete the last lesson of the course with your test account and check the whole chain.
4. Recipe: an upsell flow that stops as soon as the goal is reached #
If you send your free members a series of emails leading to your paid membership, you want that series to stop the moment someone buys: nobody is waiting for a “become a member!” email just after they have become one. You arrange this with a stop step in the onboarding automation of the higher level:
- Build your upsell series as an automation on the free tag (welcome email → wait step → value email → wait step → offer email).
- Open the onboarding automation of your paid level (the recipe from step 2).
- Add the action Remove from automation as the very first step there and select the upsell automation of the free level.
- The result: if someone buys halfway through the series, they are taken out of the upsell flow and only receive the onboarding for their new level.
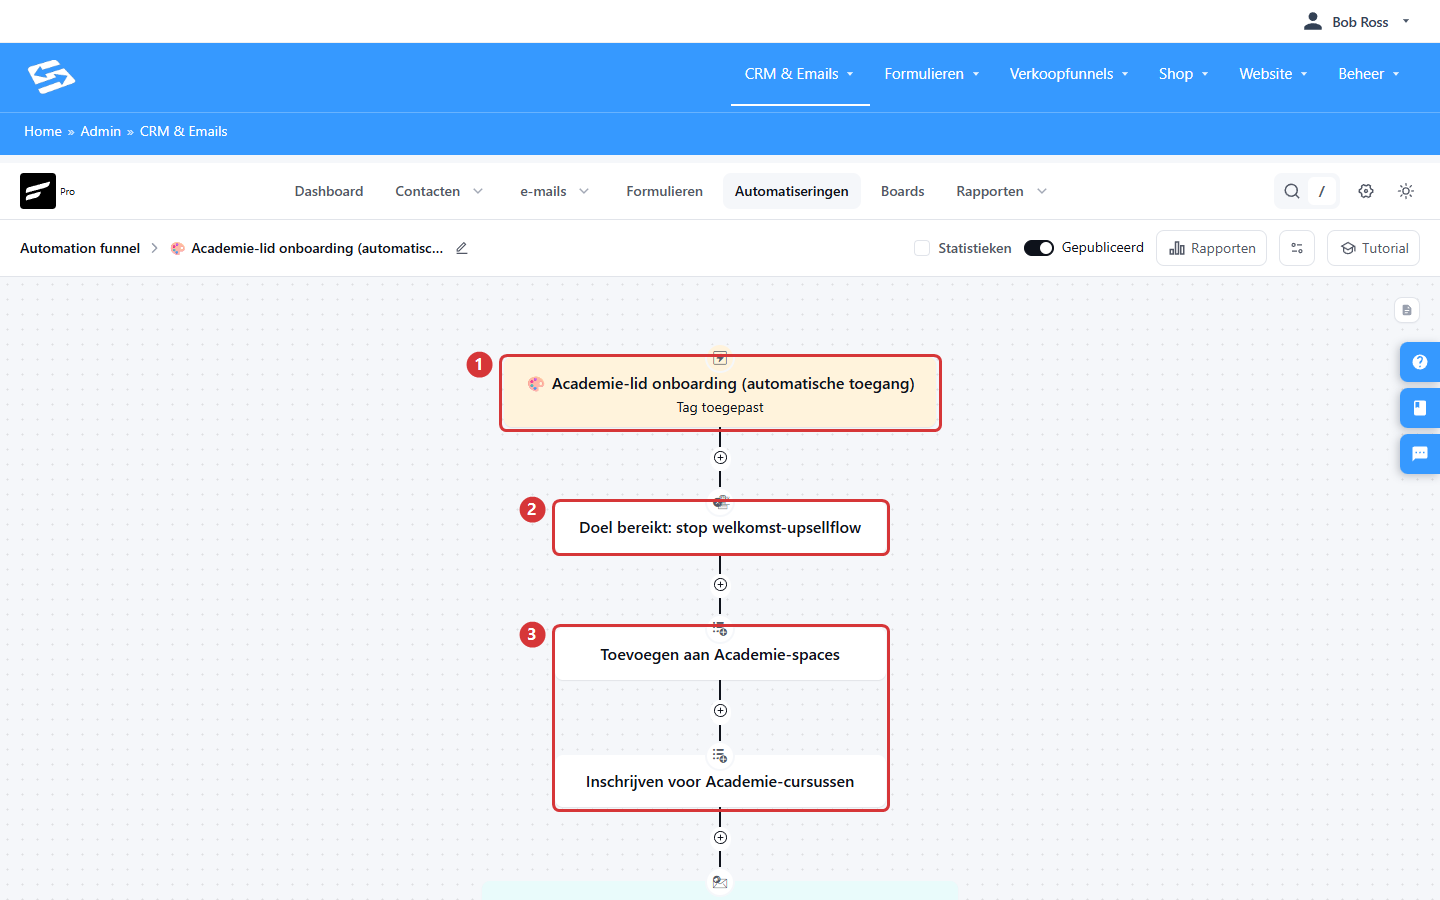
In the screenshot: 1) the trigger of the paid onboarding (Tag applied) · 2) the stop step that takes the contact out of the upsell flow · 3) the further onboarding steps that grant access.
Frequently asked questions #
Can an automation also hand out a certificate or badge? #
Yes. After the trigger “Completed a course”, use the action that awards a badge; it becomes visible on the member’s profile in the community. A certificate as a document is sent by email in the same automation.
Why does my automation not start on a second completion? #
By default a contact goes through an automation once. If you want it to start again for the same contact (for example for a course you run again every year), switch on the option in the trigger settings that lets the automation start more than once.
Can I see who is in the automation? #
Yes, open the automation and view the participants per step. That shows you exactly who is where in the flow and who has completed it; see also the article on automation reports.
How do I test without emailing my real members? #
Always test with your own test contact and an active automation: give only your test contact the trigger tag (or complete the course yourself with a test account). An automation in draft cannot run, so there is no such thing as “testing in draft”.


