Setting up automation workflows #
With automation workflows (‘automations’) in Autorespond you can automate repetitive marketing tasks and set up personalised customer journeys. An automation consists of a starting point (trigger), conditions and actions that run automatically when someone meets your criteria.
Automations are more powerful than ordinary email sequences because you can build logic into them: different paths based on customer behaviour, waiting times, conditions and actions (such as adding tags or starting other processes). Think of welcome sequences for new sign-ups, abandoned cart reminders or customer journeys that differ per product category.
Creating a new automation #
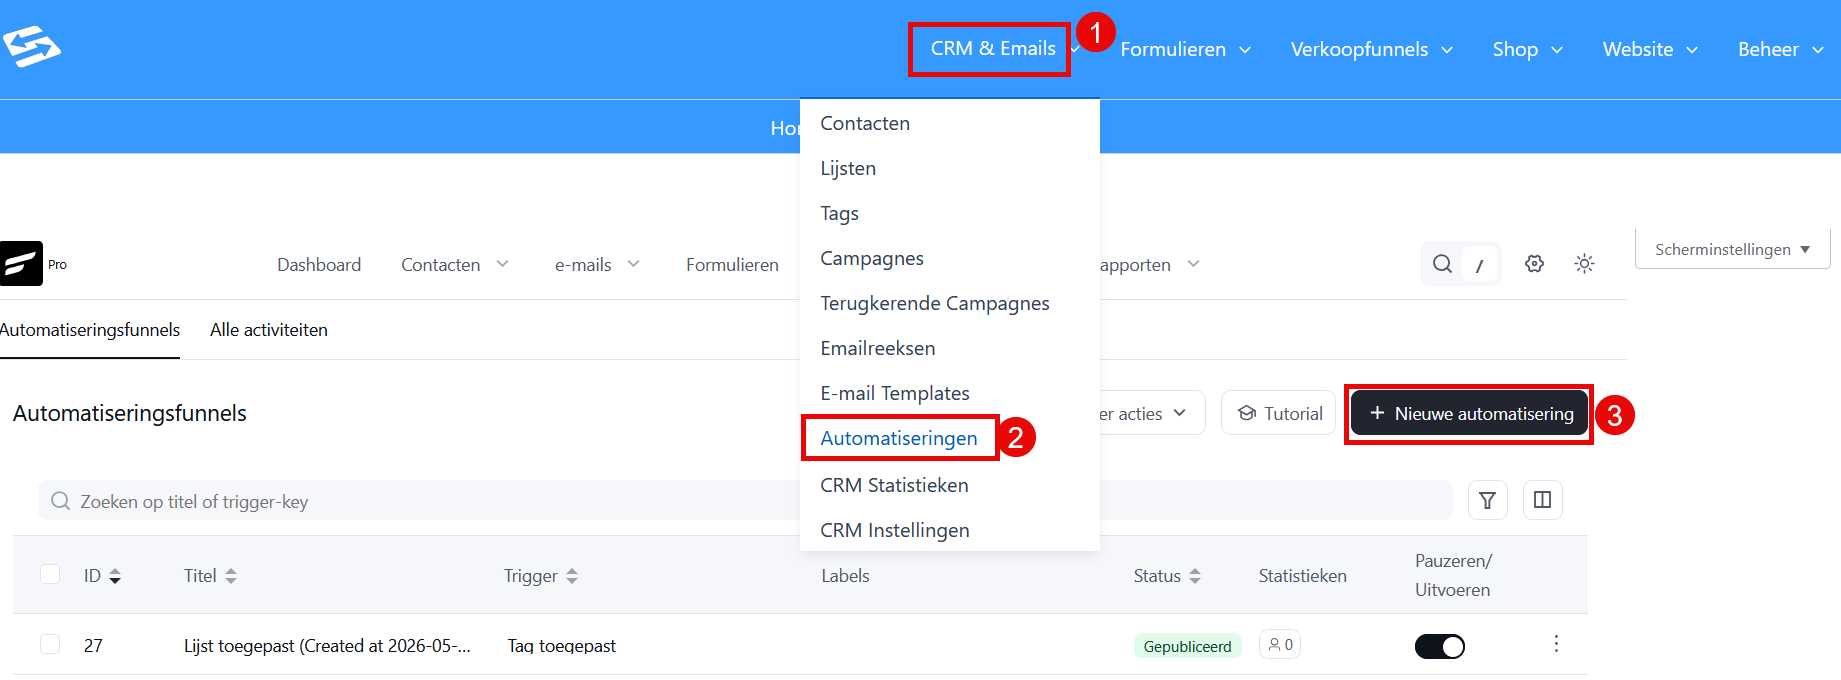
In your Autorespond admin area, go to CRM & Emails (1) → Automations (2) and click ‘New automation’ (3). Give your automation a clear name that describes what it does, for example ‘Welcome sequence new newsletter sign-ups’ or ‘Follow-up after product purchase’.
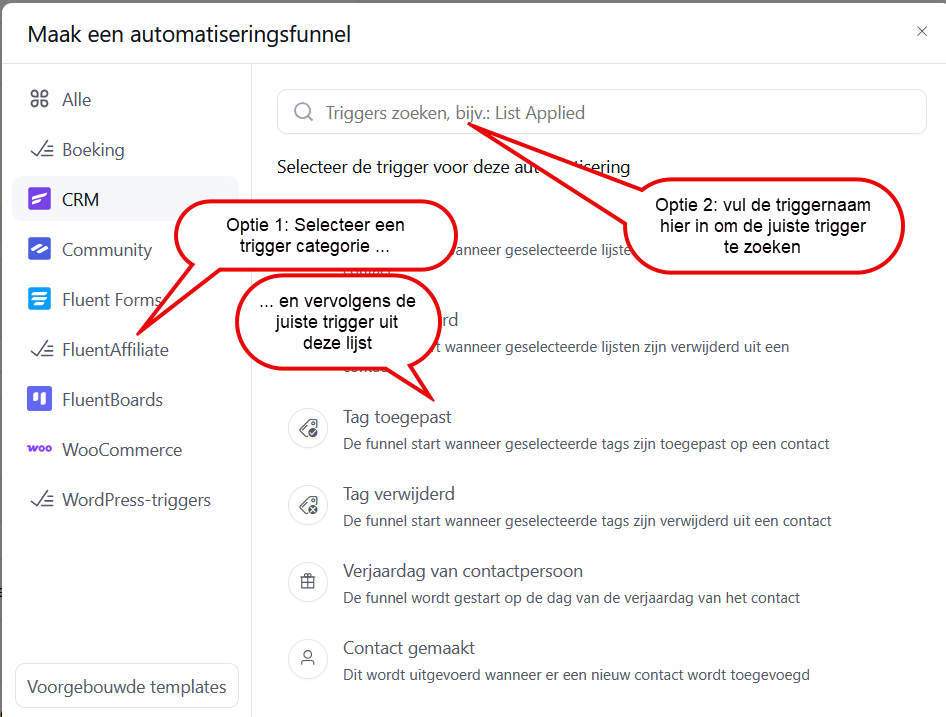
In the window that appears you start by choosing the right trigger to start the automation. First select the relevant trigger category on the left and then the right trigger from the list, or type the trigger name in the search bar at the top of the window.
Triggers: what starts an automation #
Every automation begins with a trigger: this determines the moment the workflow is activated. Choose from various triggers such as:
- Form sign-up: Starts when someone signs up through a specific form
- Tag added: Triggers when a contact is given a certain tag
- Product purchased: Triggered when a specific product is bought
- List member: Starts when someone is added to a contact list
- Custom field updated: Triggers when contact details change
Set the trigger as specifically as possible. Instead of ‘every form sign-up’ it is better to choose ‘sign-up newsletter form homepage’. That way you prevent the automation from being triggered unintentionally.
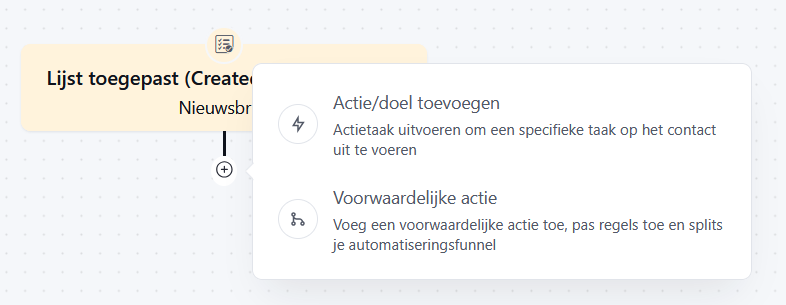
Once you have set the trigger you arrive in the automation screen. Hovering your cursor over the plus icon opens a small panel where you can always choose between 2 options:
- Add action / goal: this holds a step that determines what happens
- Conditional action: here you can define conditions that determine whether and when the automation should continue
You build your entire workflow by linking these elements together in the editor.
Adding actions to your workflow #
Commonly used actions are:
- Send email: Send a specific email or start an email sequence
- Add/remove tag: Organise your contacts with labels
- Add contact to list: Add people to segments
- Wait: Pause the workflow for a set period
- Send webhook: Connect with external tools
- Add internal note: Add a note to the contact
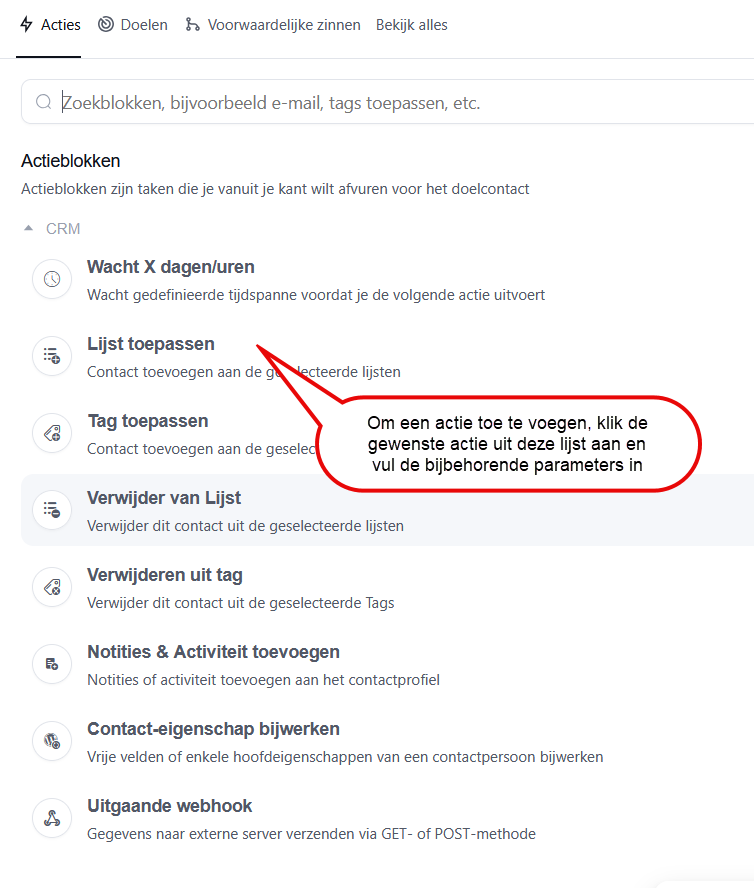
Click the action you want in the list of actions and fill in the requested parameters.
You can place several actions one after another or have them branch based on conditions.
Conditions and branches #
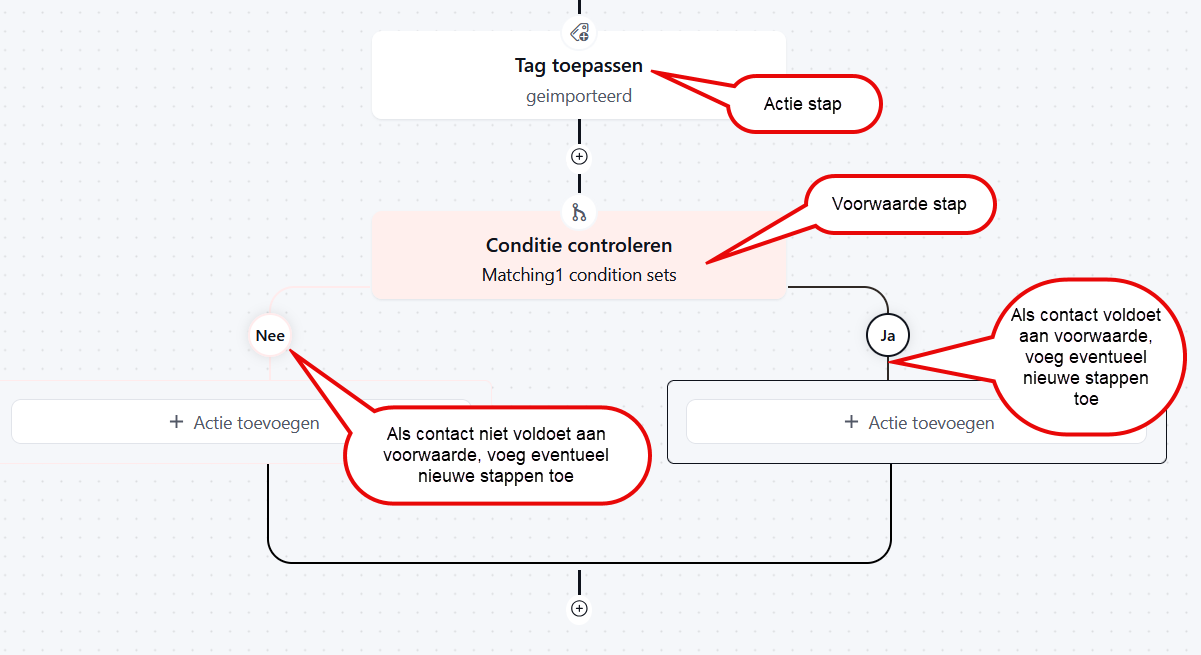
Conditions make your automation intelligent. A condition checks whether a contact meets certain criteria before the next step runs. For example:
- Does the contact have the tag ‘VIP customer’?
- Has the contact bought more than 3 products?
- Does the contact live in the Netherlands?
- Has the contact opened an email recently?
For every condition you decide what happens if the answer is ‘yes’ (green arrow) and what happens if it is ‘no’ (red arrow). That way you can create different paths for different types of contacts within the same automation.
Using waiting times strategically #
The ‘Wait’ action is crucial for natural timing in your workflows. Instead of sending all emails straight after one another, you build in realistic intervals: 1 day after sign-up, another tip 3 days later, an offer after a week, and so on.
You can wait based on time (minutes, hours, days) but also based on events. For example: wait until someone opens an email, or stop waiting when someone makes a purchase. You can also wait until a fixed date, for example: wait until 9 September 2026 at 10:15. This is useful for (one-off) product launches where people are on a waiting list and you want to email them on that date and time to say the product is available from then on.
Linking email sequences to automations #
Instead of individual emails you can also start complete email sequences from an automation. First create your sequence via CRM & Emails → Email sequences, then add the action ‘Set up email sequence’ in your automation. This is more efficient than several separate email actions.
A commonly used pattern: trigger on form sign-up → add the tag ‘new contact’ → start the email sequence ‘welcome sequence’ → wait 7 days → check whether the contact is active → if so: add to the main list.
Setting goals and benchmarks #
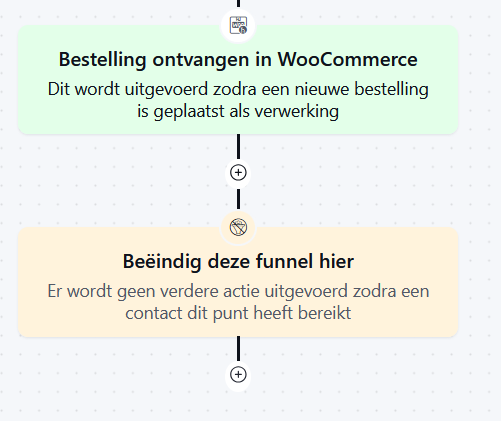
Goals are a kind of secondary trigger that you can insert anywhere in the automation. When a contact reaches a goal, the automation continues.
Example: in an automation with sales emails about a particular product you can set the goal that the contact has bought that product. The next step is to stop the automation. This prevents the contact from continuing to receive sales emails about that same product.
Testing an automation and taking it live #
Always test your automation with a test contact before you activate it. Create a test contact with your own email address and go through the whole process. Check that emails arrive at the right moments, that tags are added correctly and that conditions work as intended.
Set your automation to ‘Active’ (Published) when you are satisfied. You can always make changes to active automations, but existing contacts who are already halfway through will follow the original path.
Monitoring automation performance #
Go to CRM & Emails → Automations regularly to see how your workflows are performing. Look at how many contacts pass through each step, where people drop out and which paths are used most. These insights help you optimise your automations.
Detailed documentation on this is available at Viewing automation reports.
Automations in Autorespond are based on FluentCRM, included in your package. Read the FluentCRM documentation


