When you create an order manually you can choose a customer so the details are loaded automatically. That list only contains user accounts. Worth knowing: a contact in the CRM is not yet a user account. So if someone is among your contacts but you do not see them in the list on an order, that contact does not have an account yet. In this article you can read how to create a customer account quickly, including from an existing CRM contact.
The automation route in this article is based on FluentCRM, included in your package. Read the FluentCRM documentation
A one-off customer? Then an account is not needed #
For a one-off order you do not have to create a customer. Create a new order through Shop → Orders, click the pencil icon next to Billing and enter the customer’s details and email address there. Add the product, click Recalculate for the correct VAT and create the order at the top right, if you like straight away with an email containing the payment link. See also creating a new order and invoice manually.
An account is mainly useful if you create orders for the same customer regularly (the address details are then loaded automatically), or if the customer needs to be able to log in to view orders and invoices.
Route 1: creating a customer account through Users #
Go to Administration → Users and click Add new user. Choose the role Customer or Subscriber, which does not make much difference for orders. Untick the box for the account email if you do not want the customer to receive an email about the new account. After creating the user, edit them and enter the address details under Customer billing address.
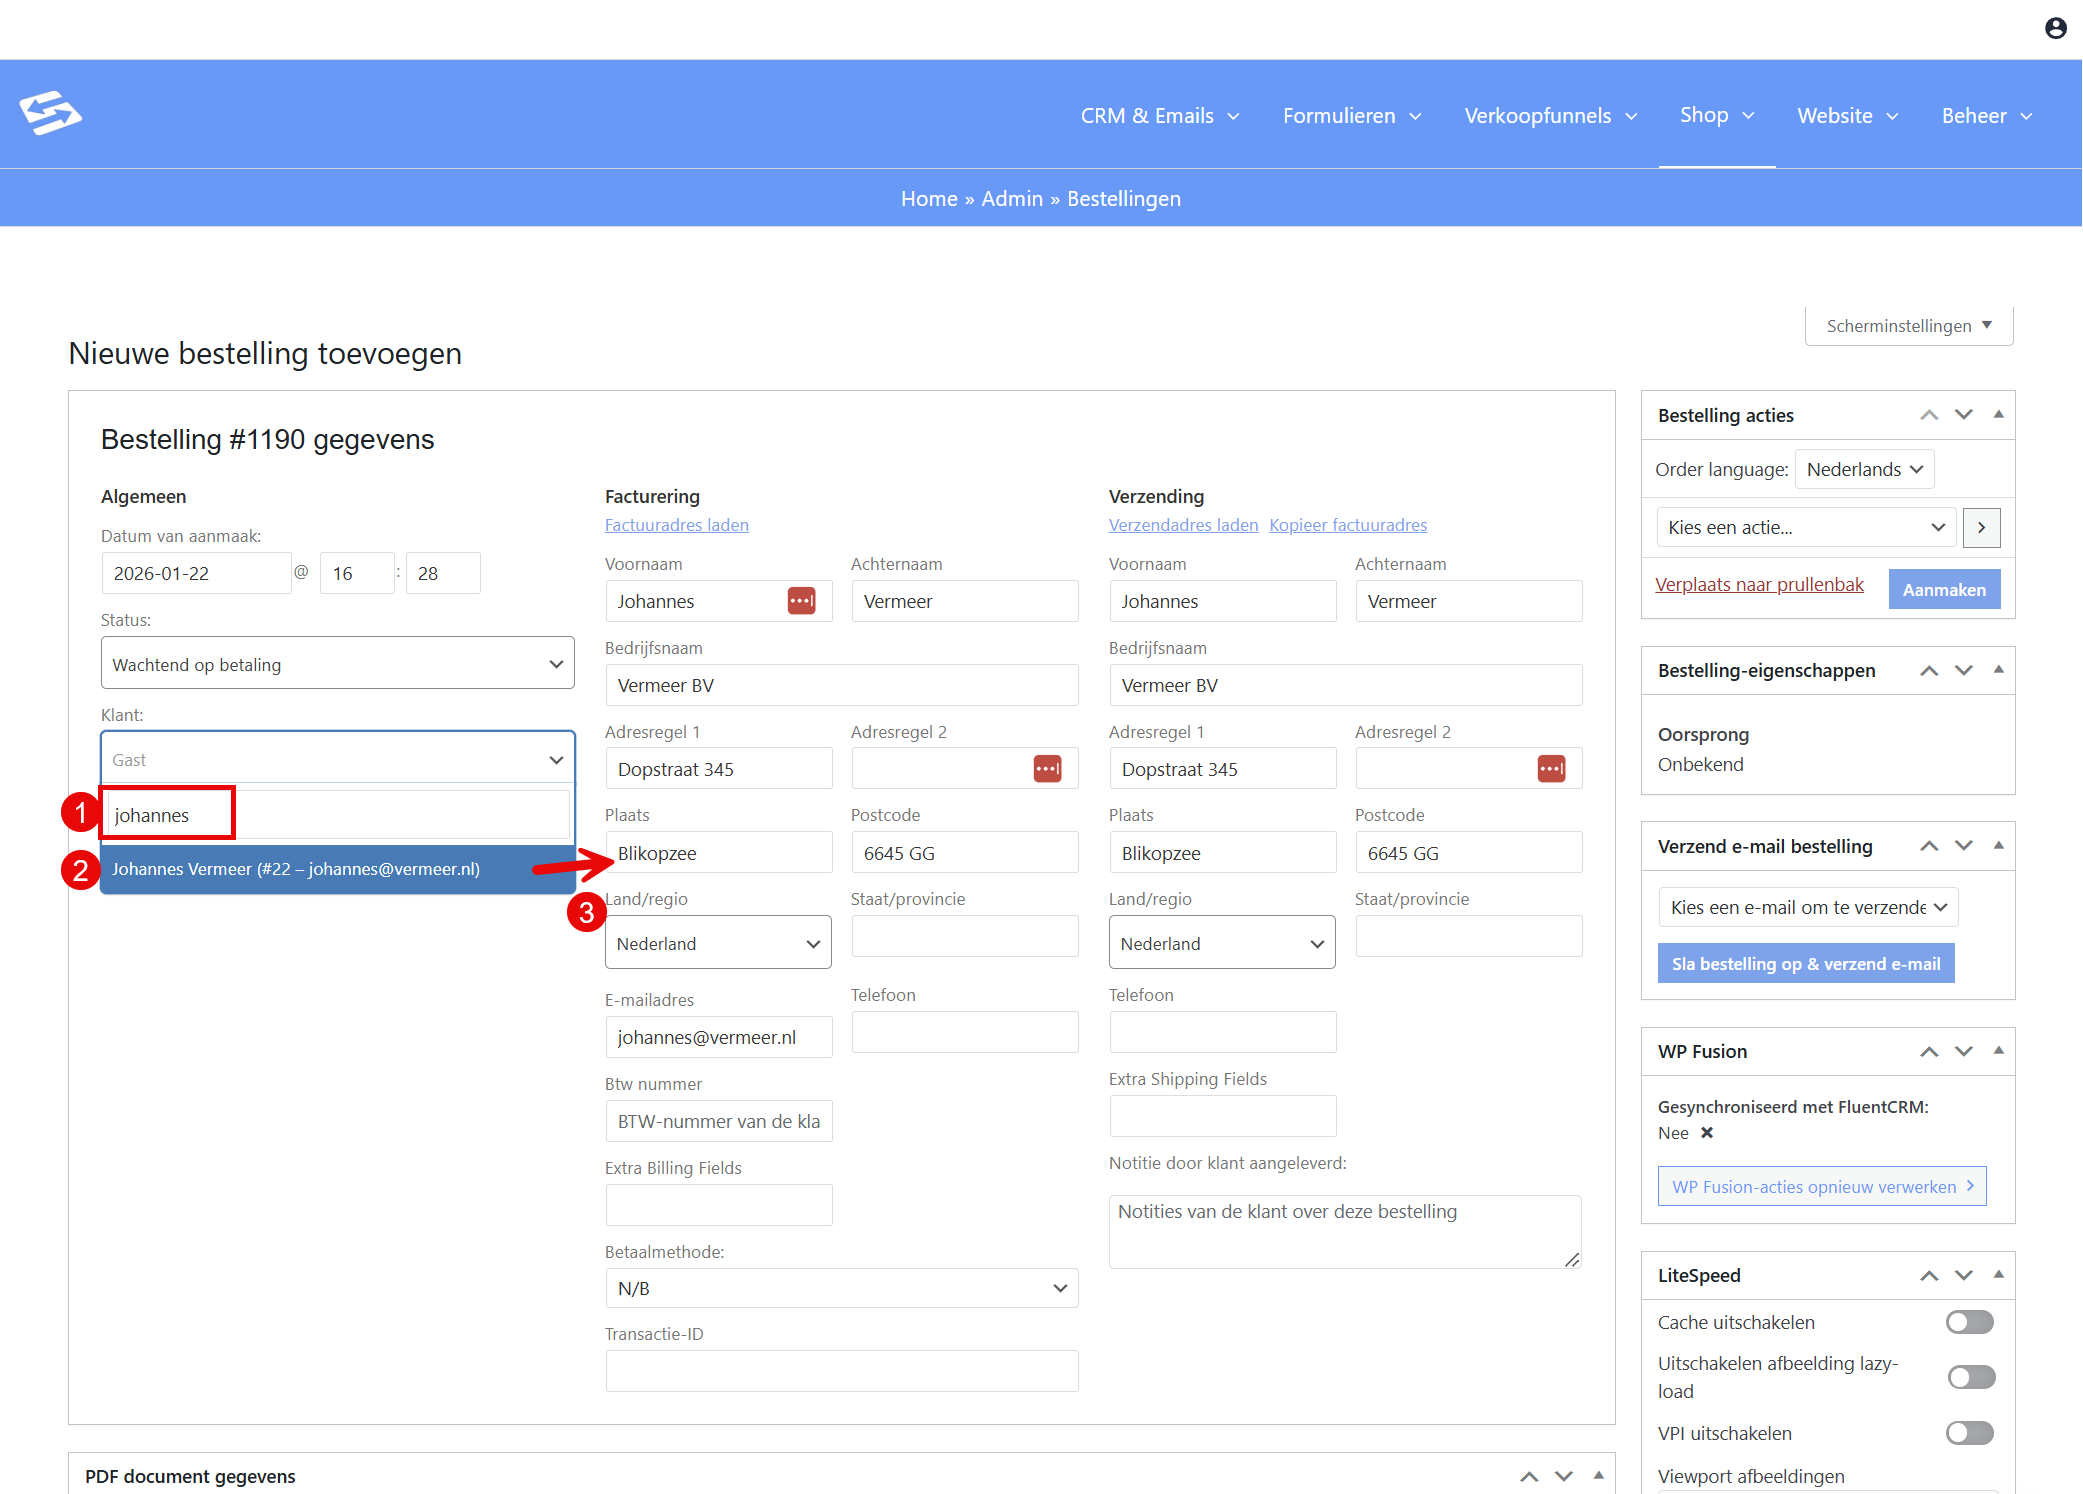
When you create an order you can now load this user and the known address details are filled in automatically.
Route 2: creating an account from an existing CRM contact #
Is someone already a contact in your CRM, address details and all? Then you can turn that into an account in seconds with a small automation. You set the automation up once. After that it is enough to give a contact one special tag: the automation then creates the account automatically with the details from the CRM.
Step 1: create a special tag #
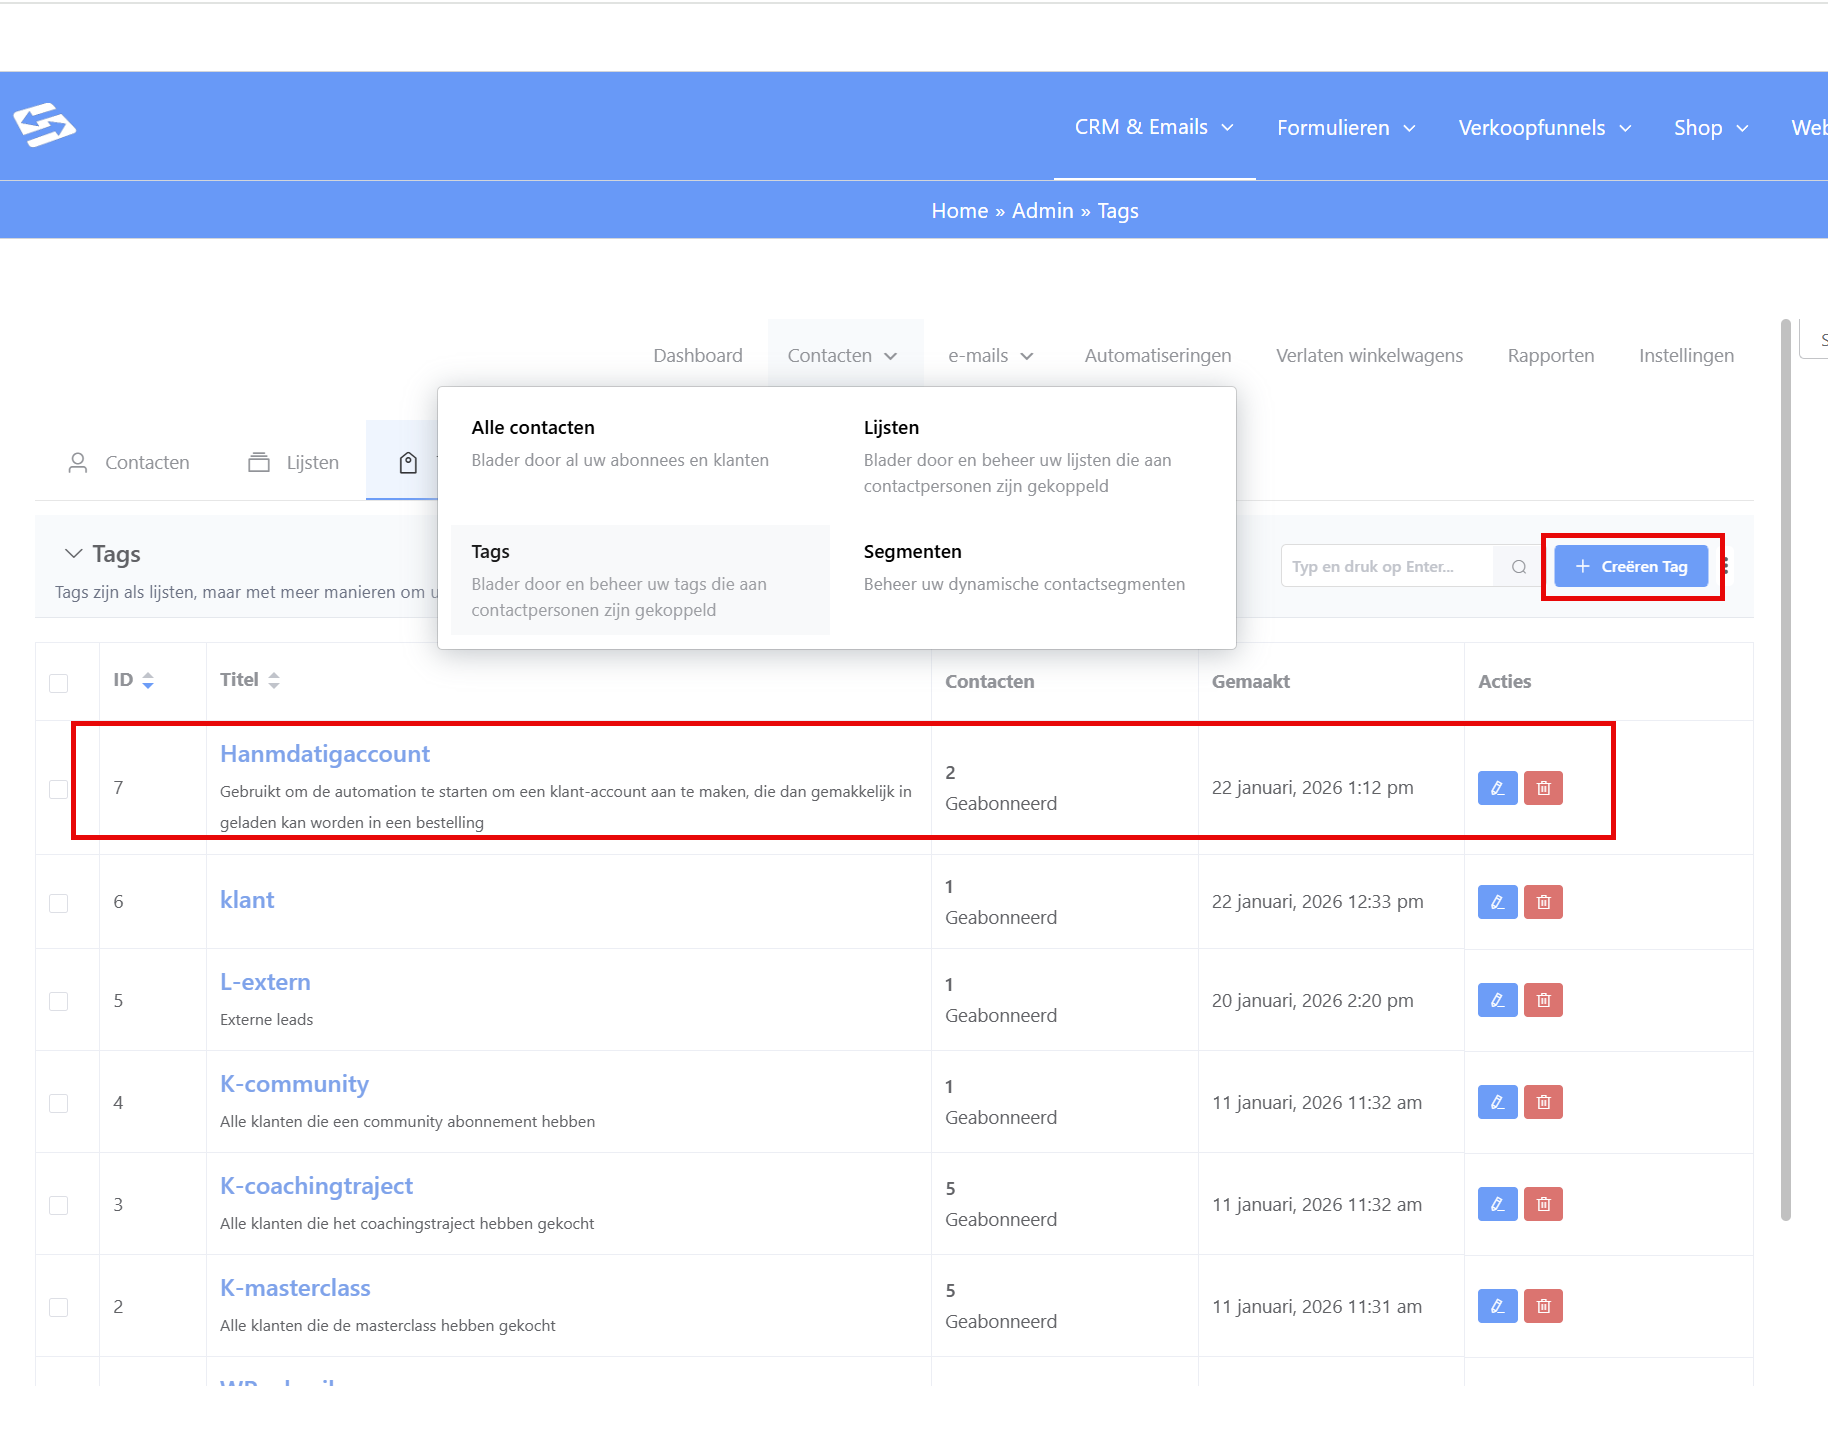
Go to CRM & Emails → Tags and create a tag that you reserve for this, for example Manual account.
Step 2: create the automation and choose the trigger #
Go to CRM & Emails → Automations and click New automation at the top right. First a selection screen appears with all the possible starting points (triggers) for an automation.
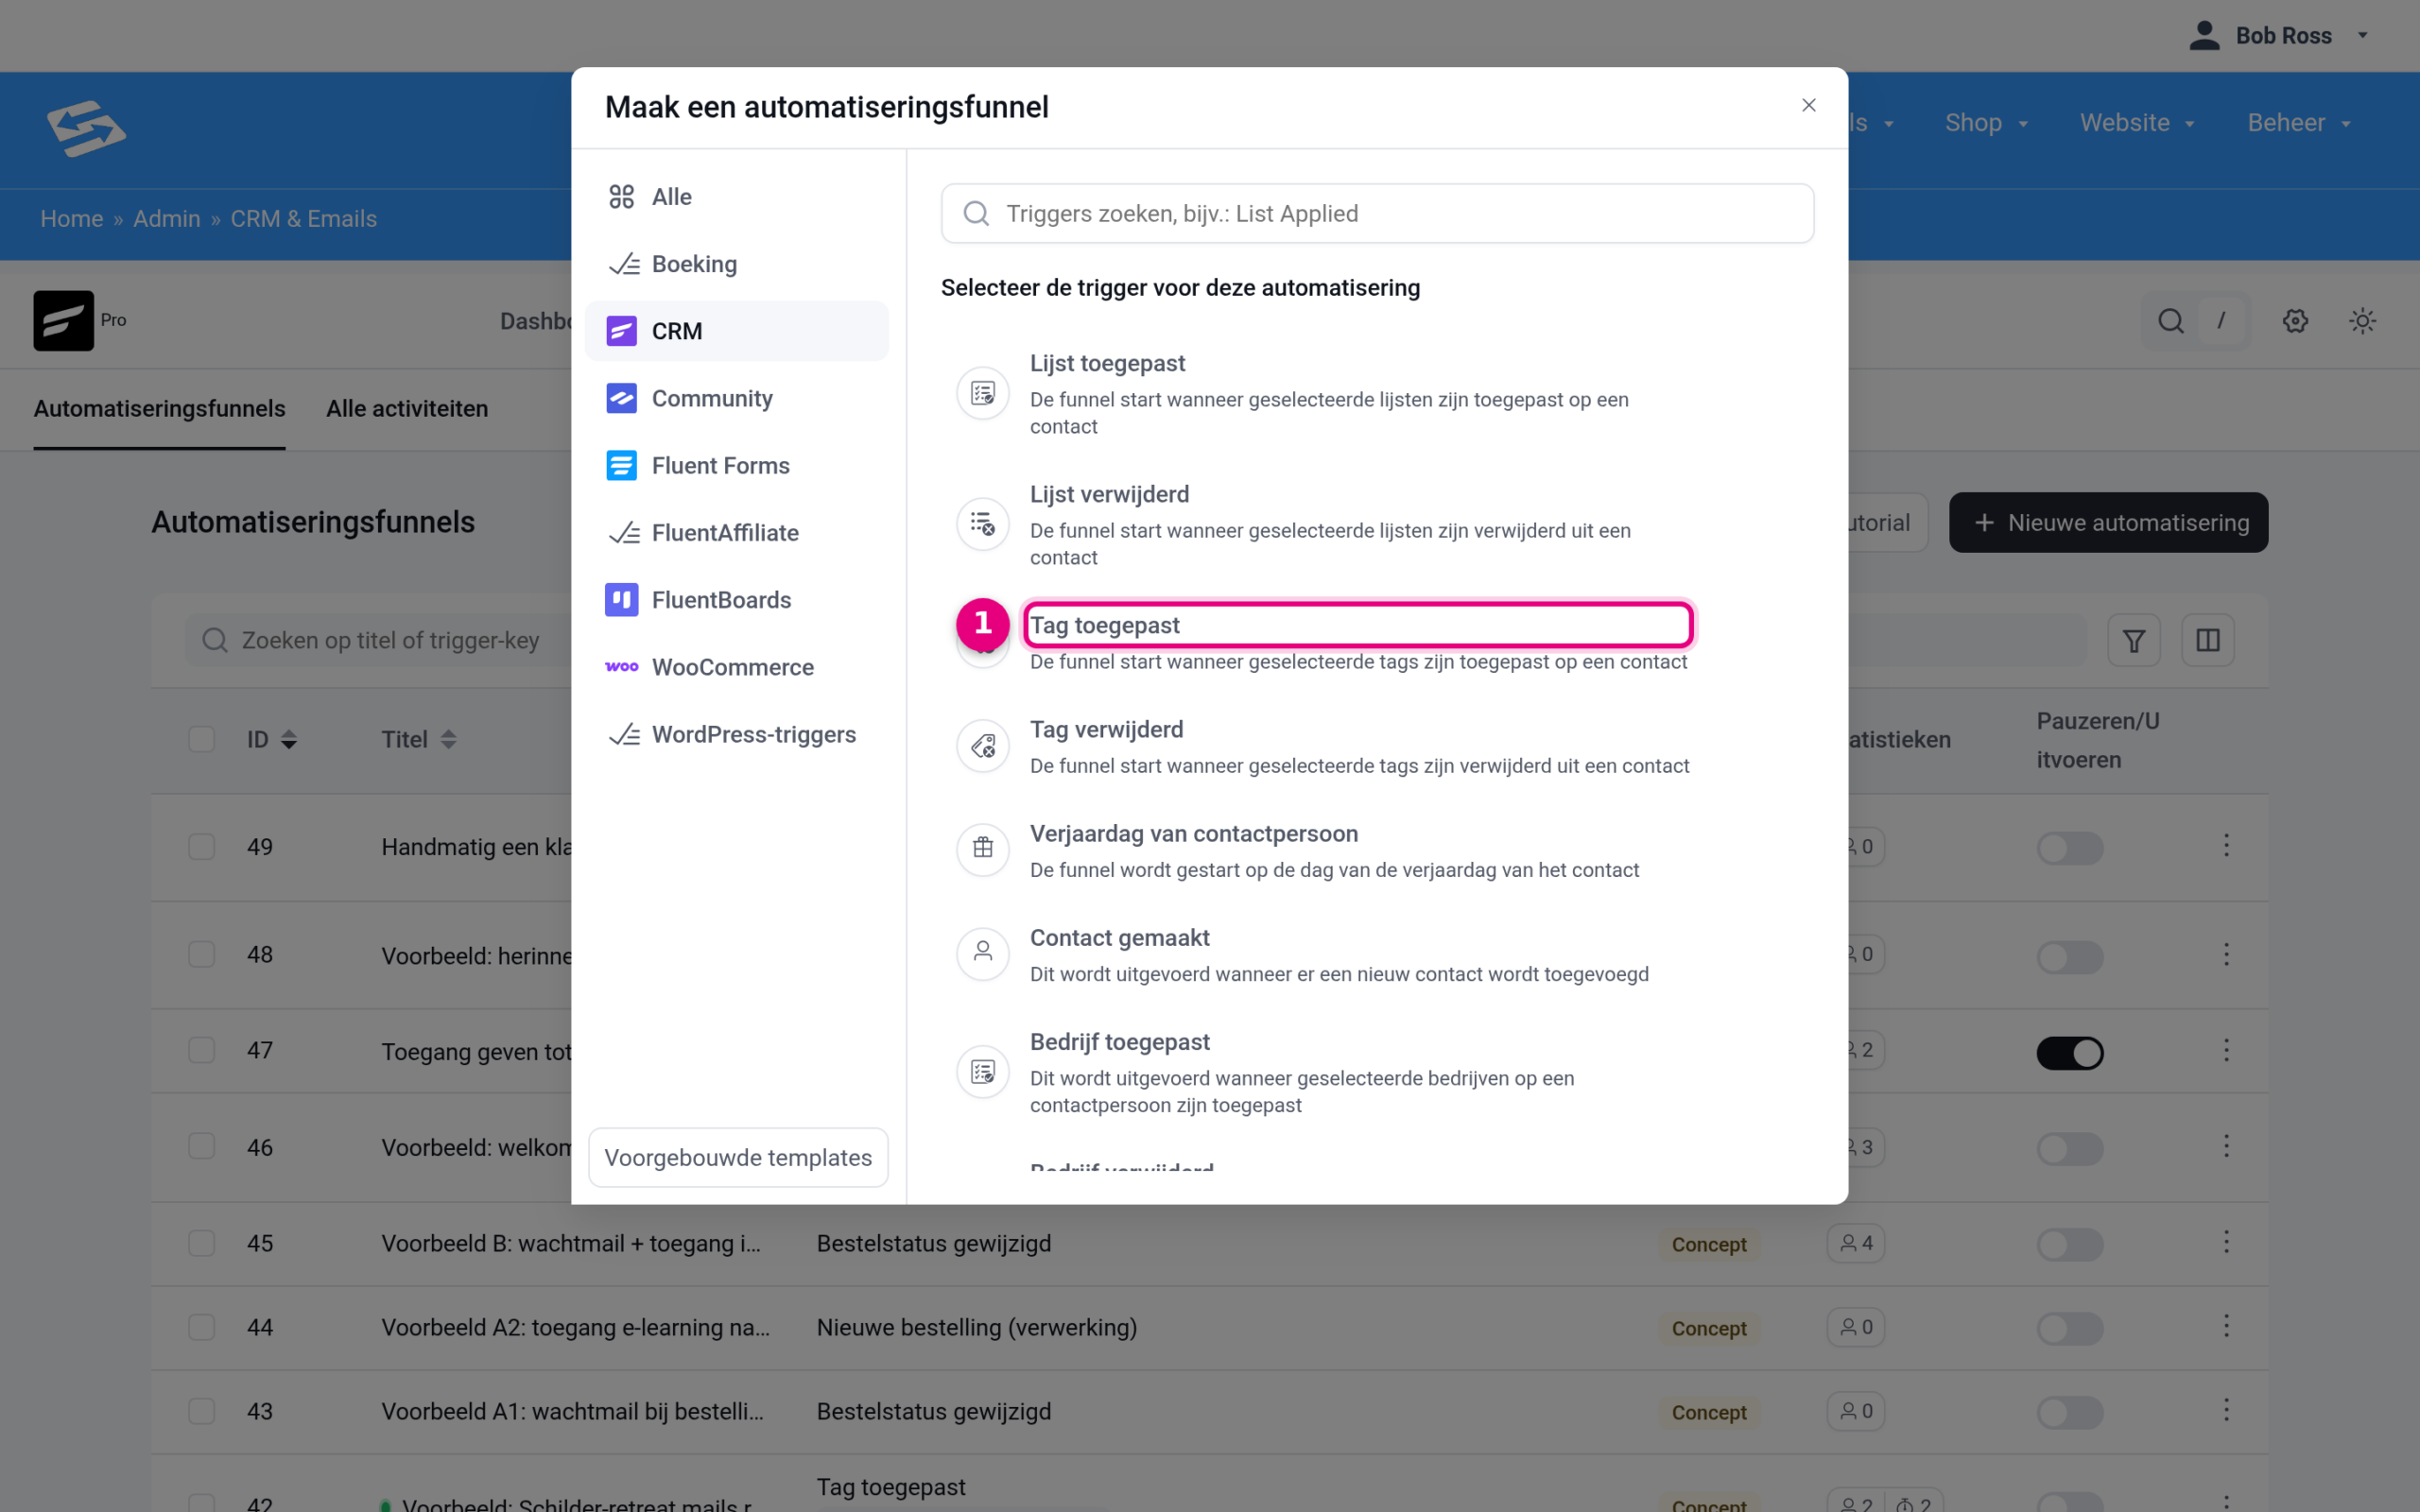
- In the CRM category, choose the trigger Tag applied. The automation then starts as soon as a contact gets the chosen tag.
Step 3: set up the trigger #
After choosing the trigger, the automation opens and the settings appear. Give the automation a recognisable name at the top, for example Create a customer manually.
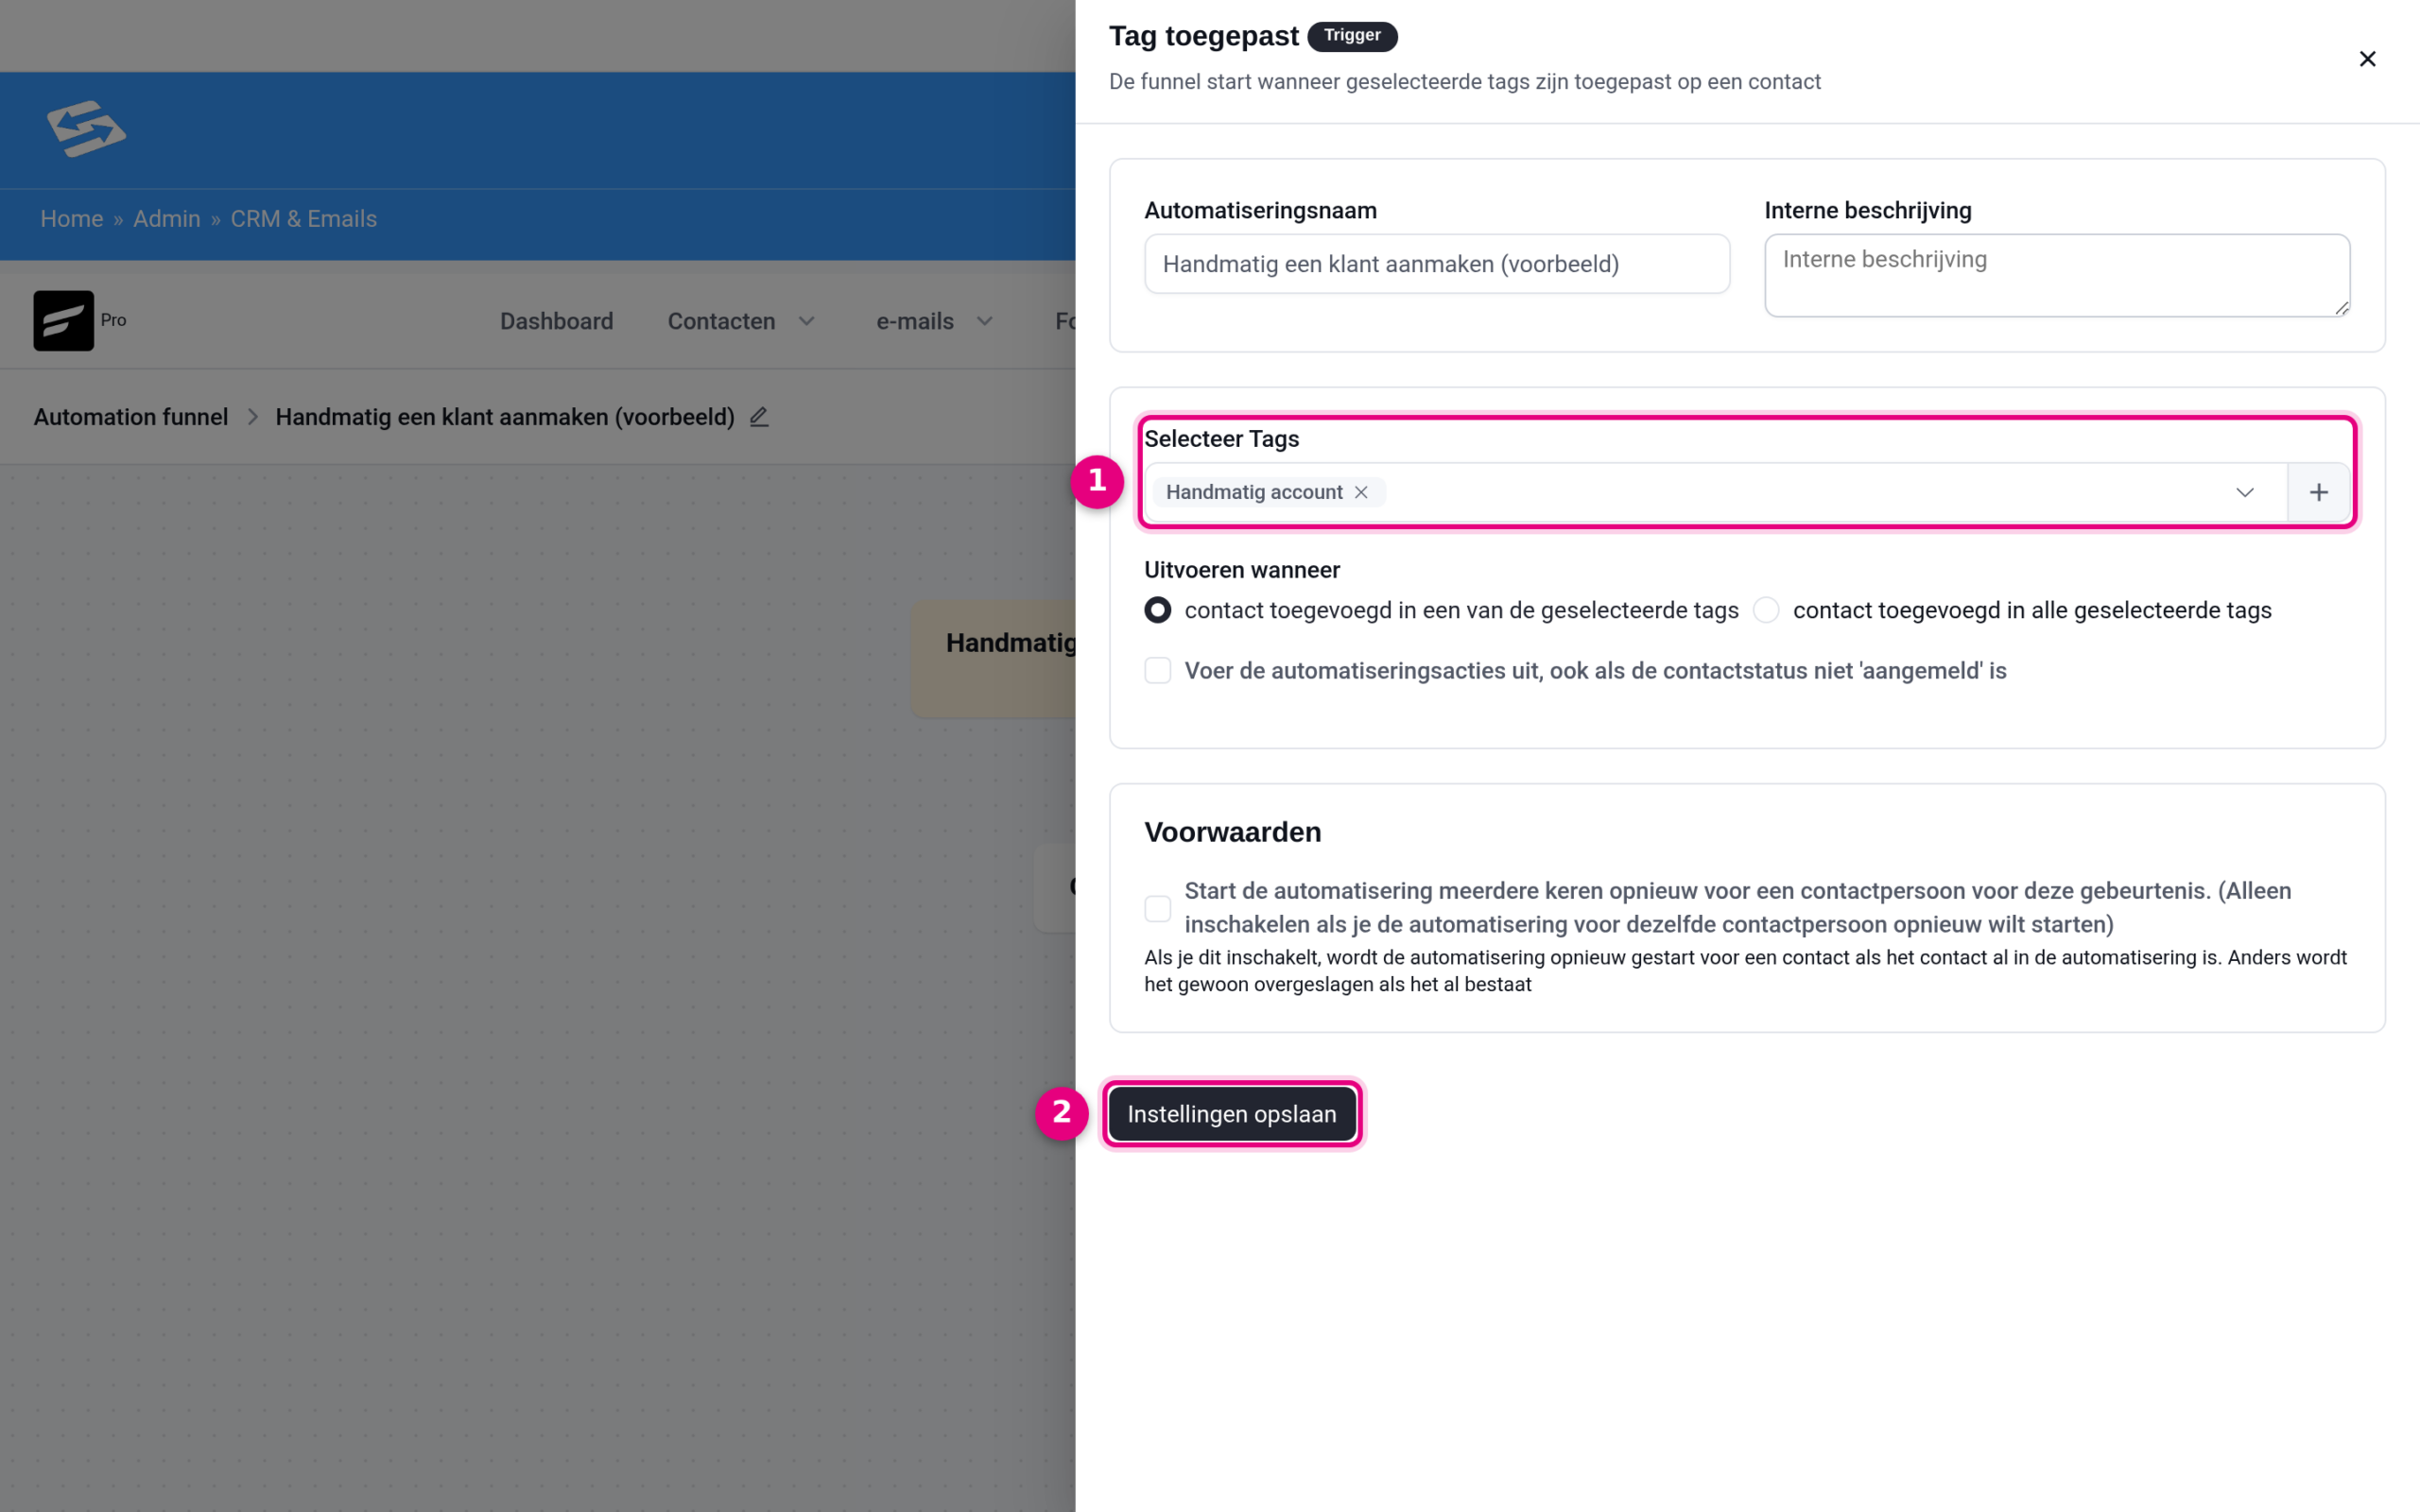
- Under Select Tags choose the tag from step 1.
- Click Save settings.
Step 4: add the action Create WordPress user #
In the canvas, click the plus sign below the trigger block and choose the action Create WordPress user in the WordPress category. Then configure the action:
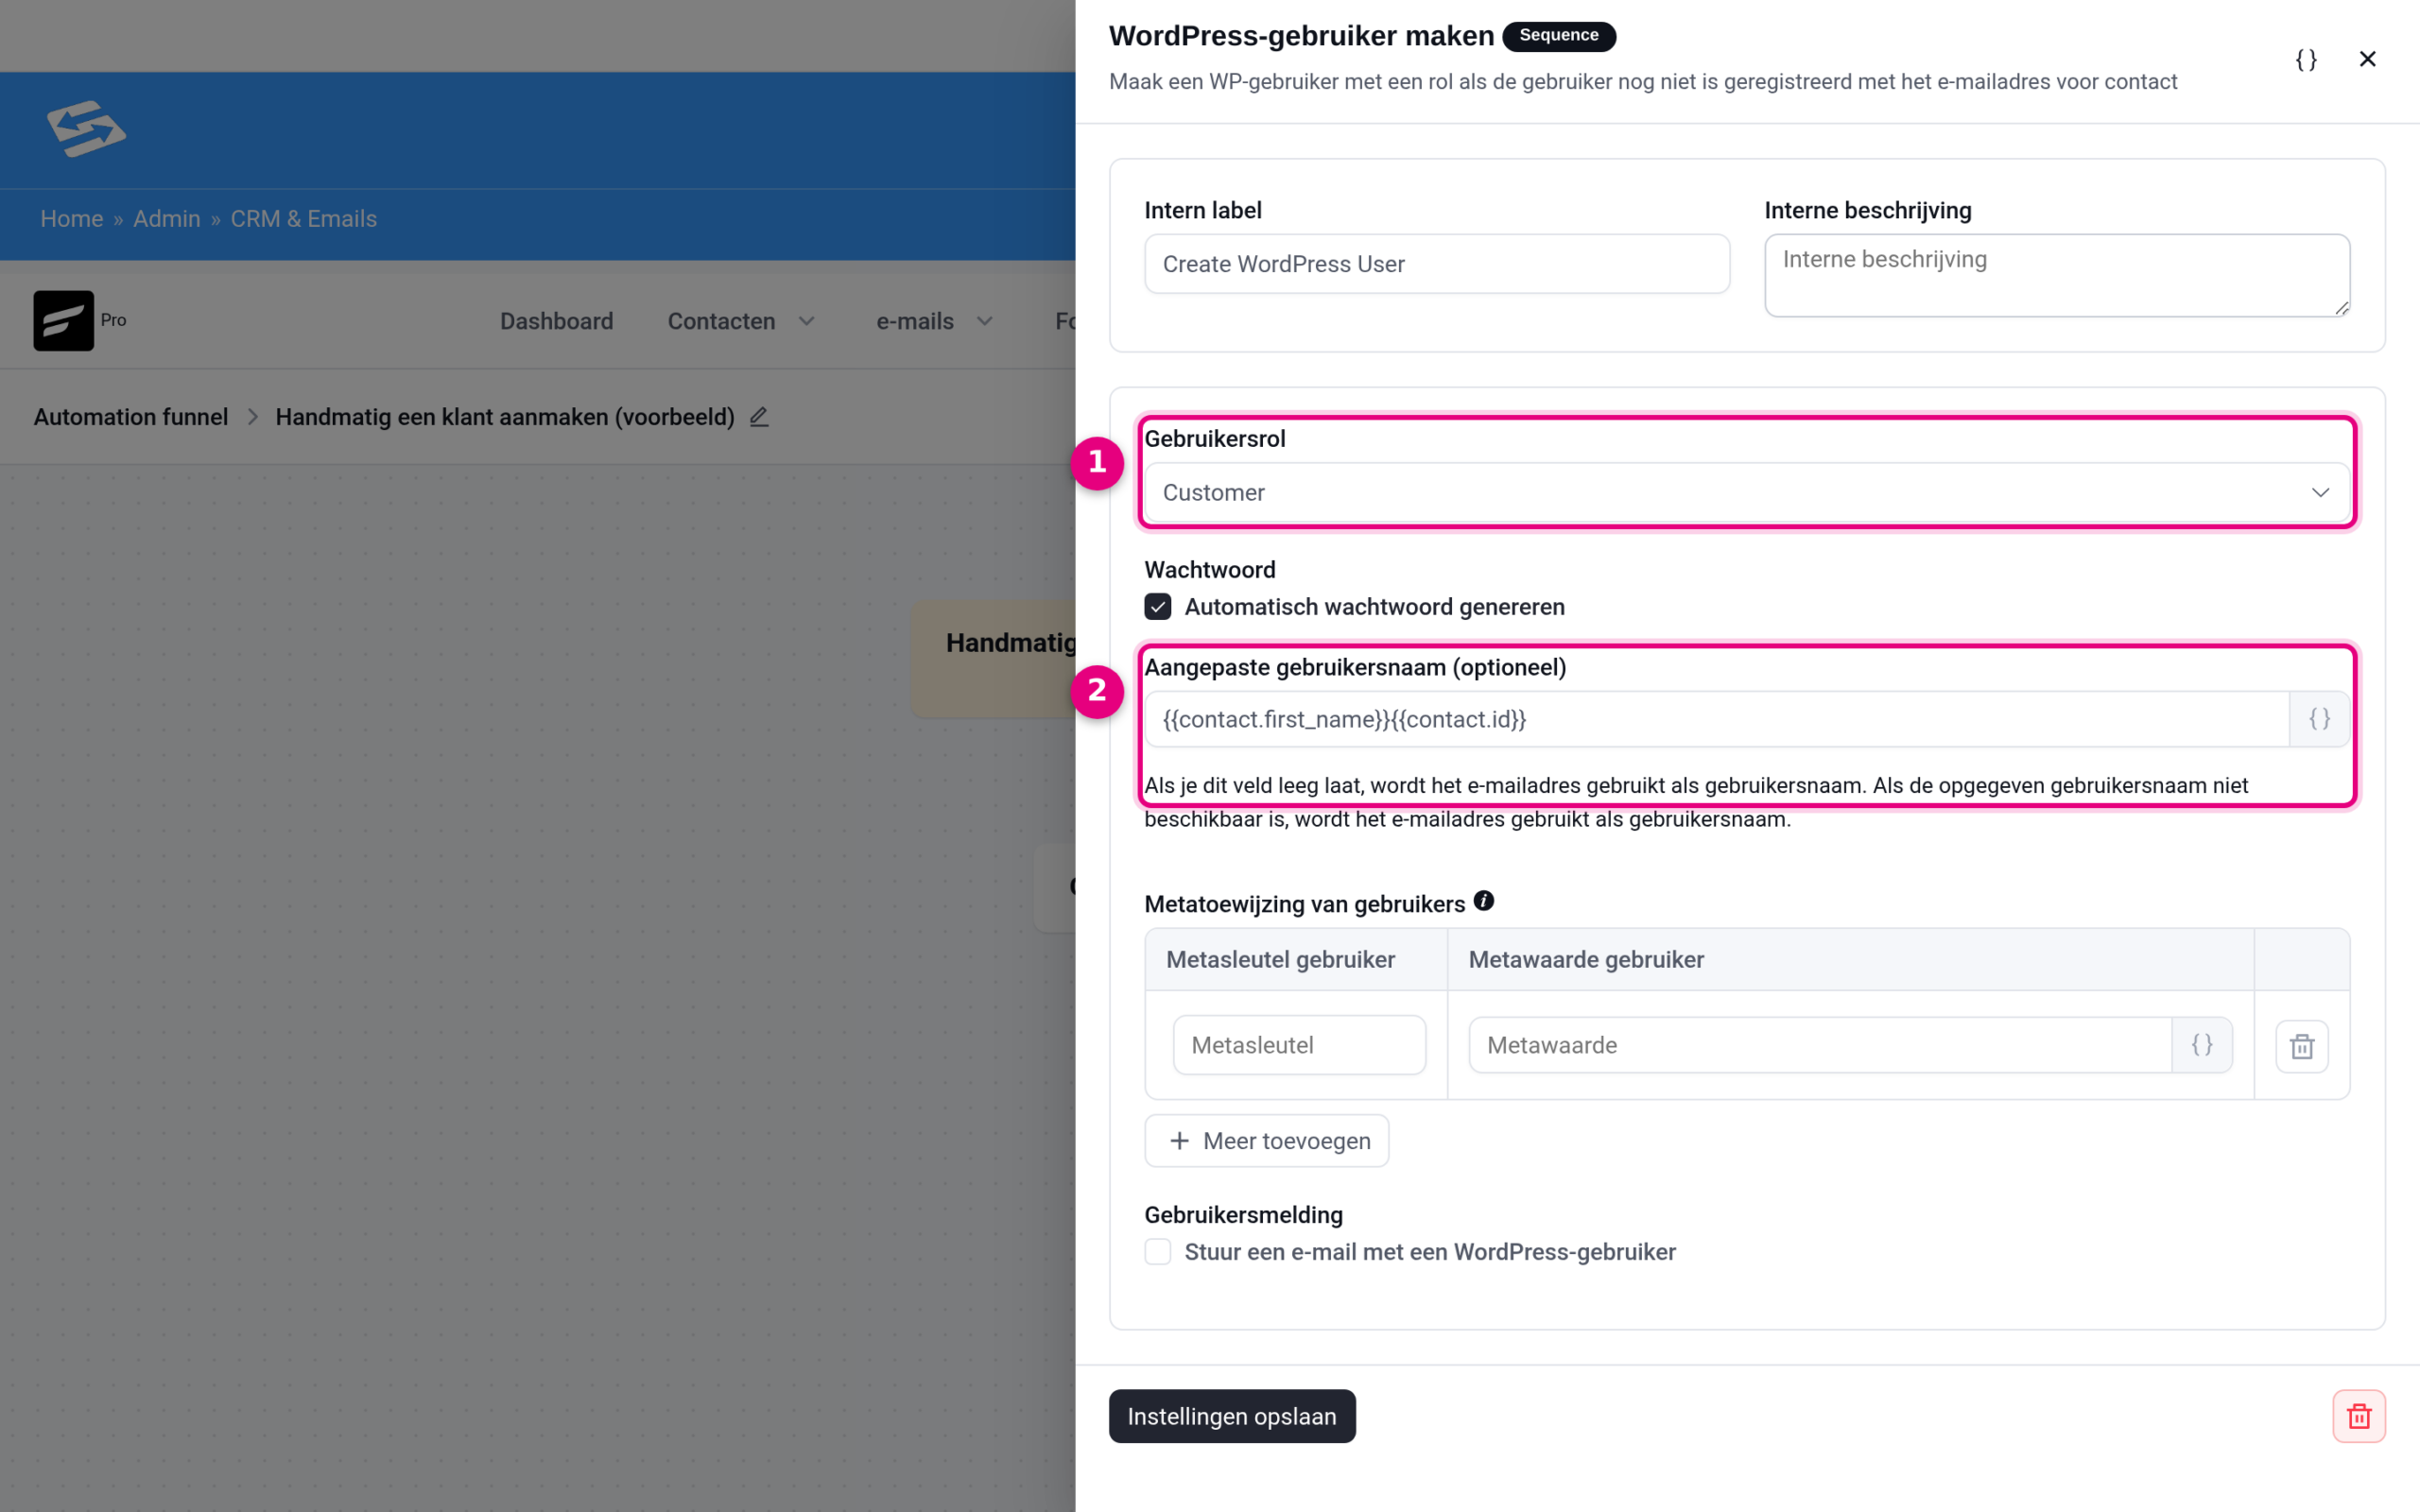
- Under User role choose Customer.
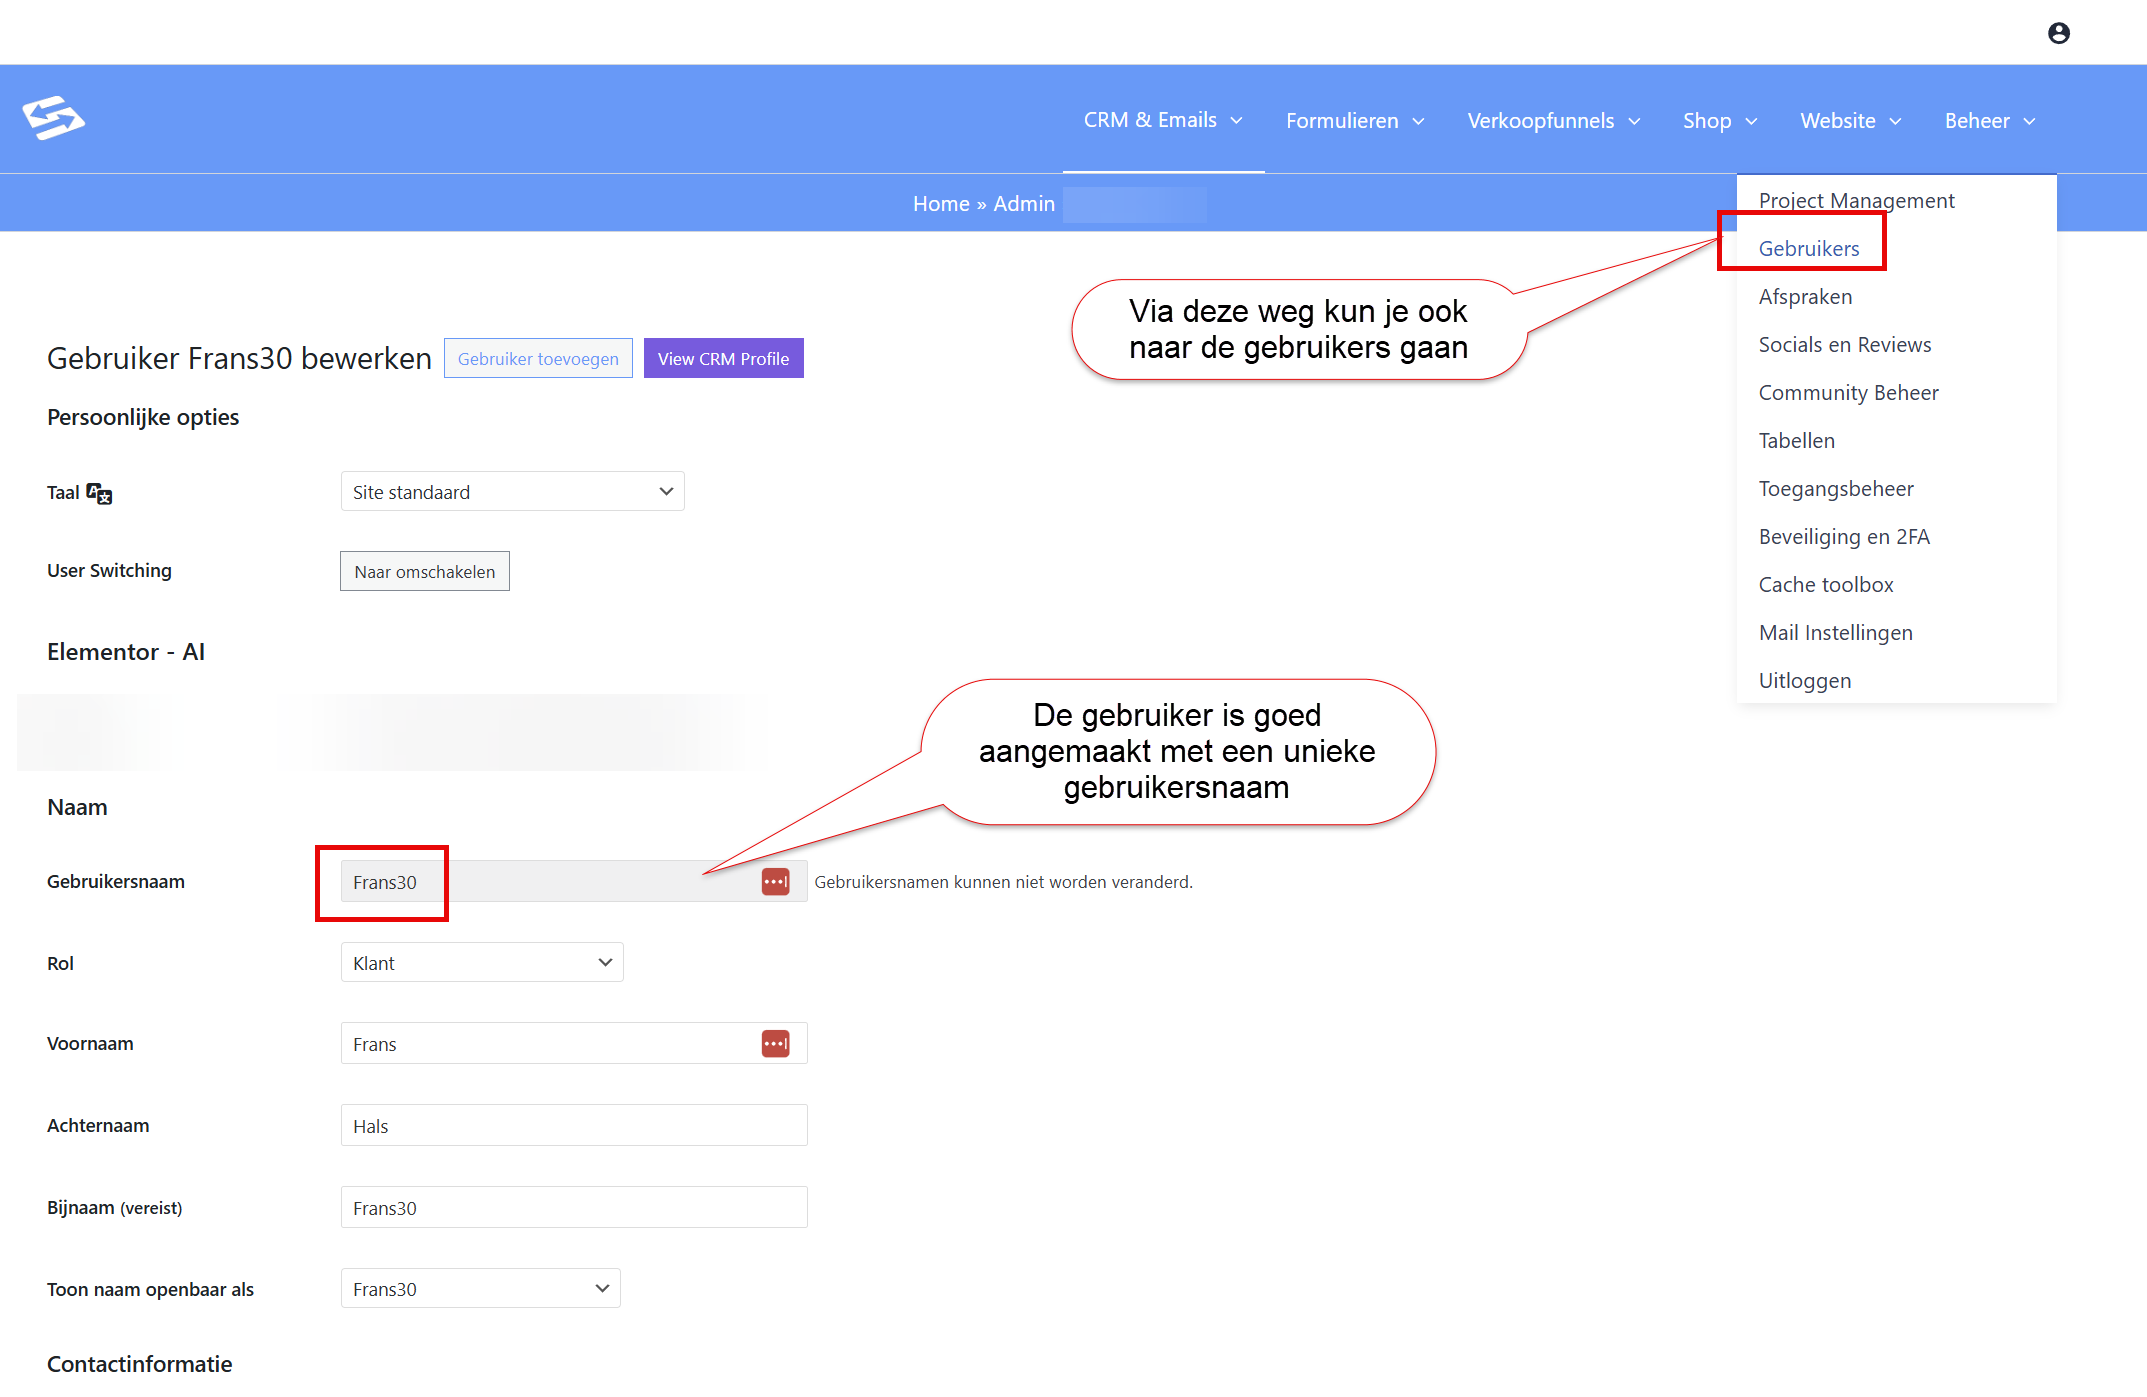
- Under Custom username enter a unique name without spaces. A handy default is {{contact.first_name}}{{contact.id}}: the first name plus the contact number, so that every username is unique. If you leave the field empty, the email address becomes the username.
Leave the box at the bottom for User notification unticked if the customer does not need to receive an email about the new account. Then click Save settings.
Step 5: check the whole thing and switch the automation on #
The automation now consists of two blocks:
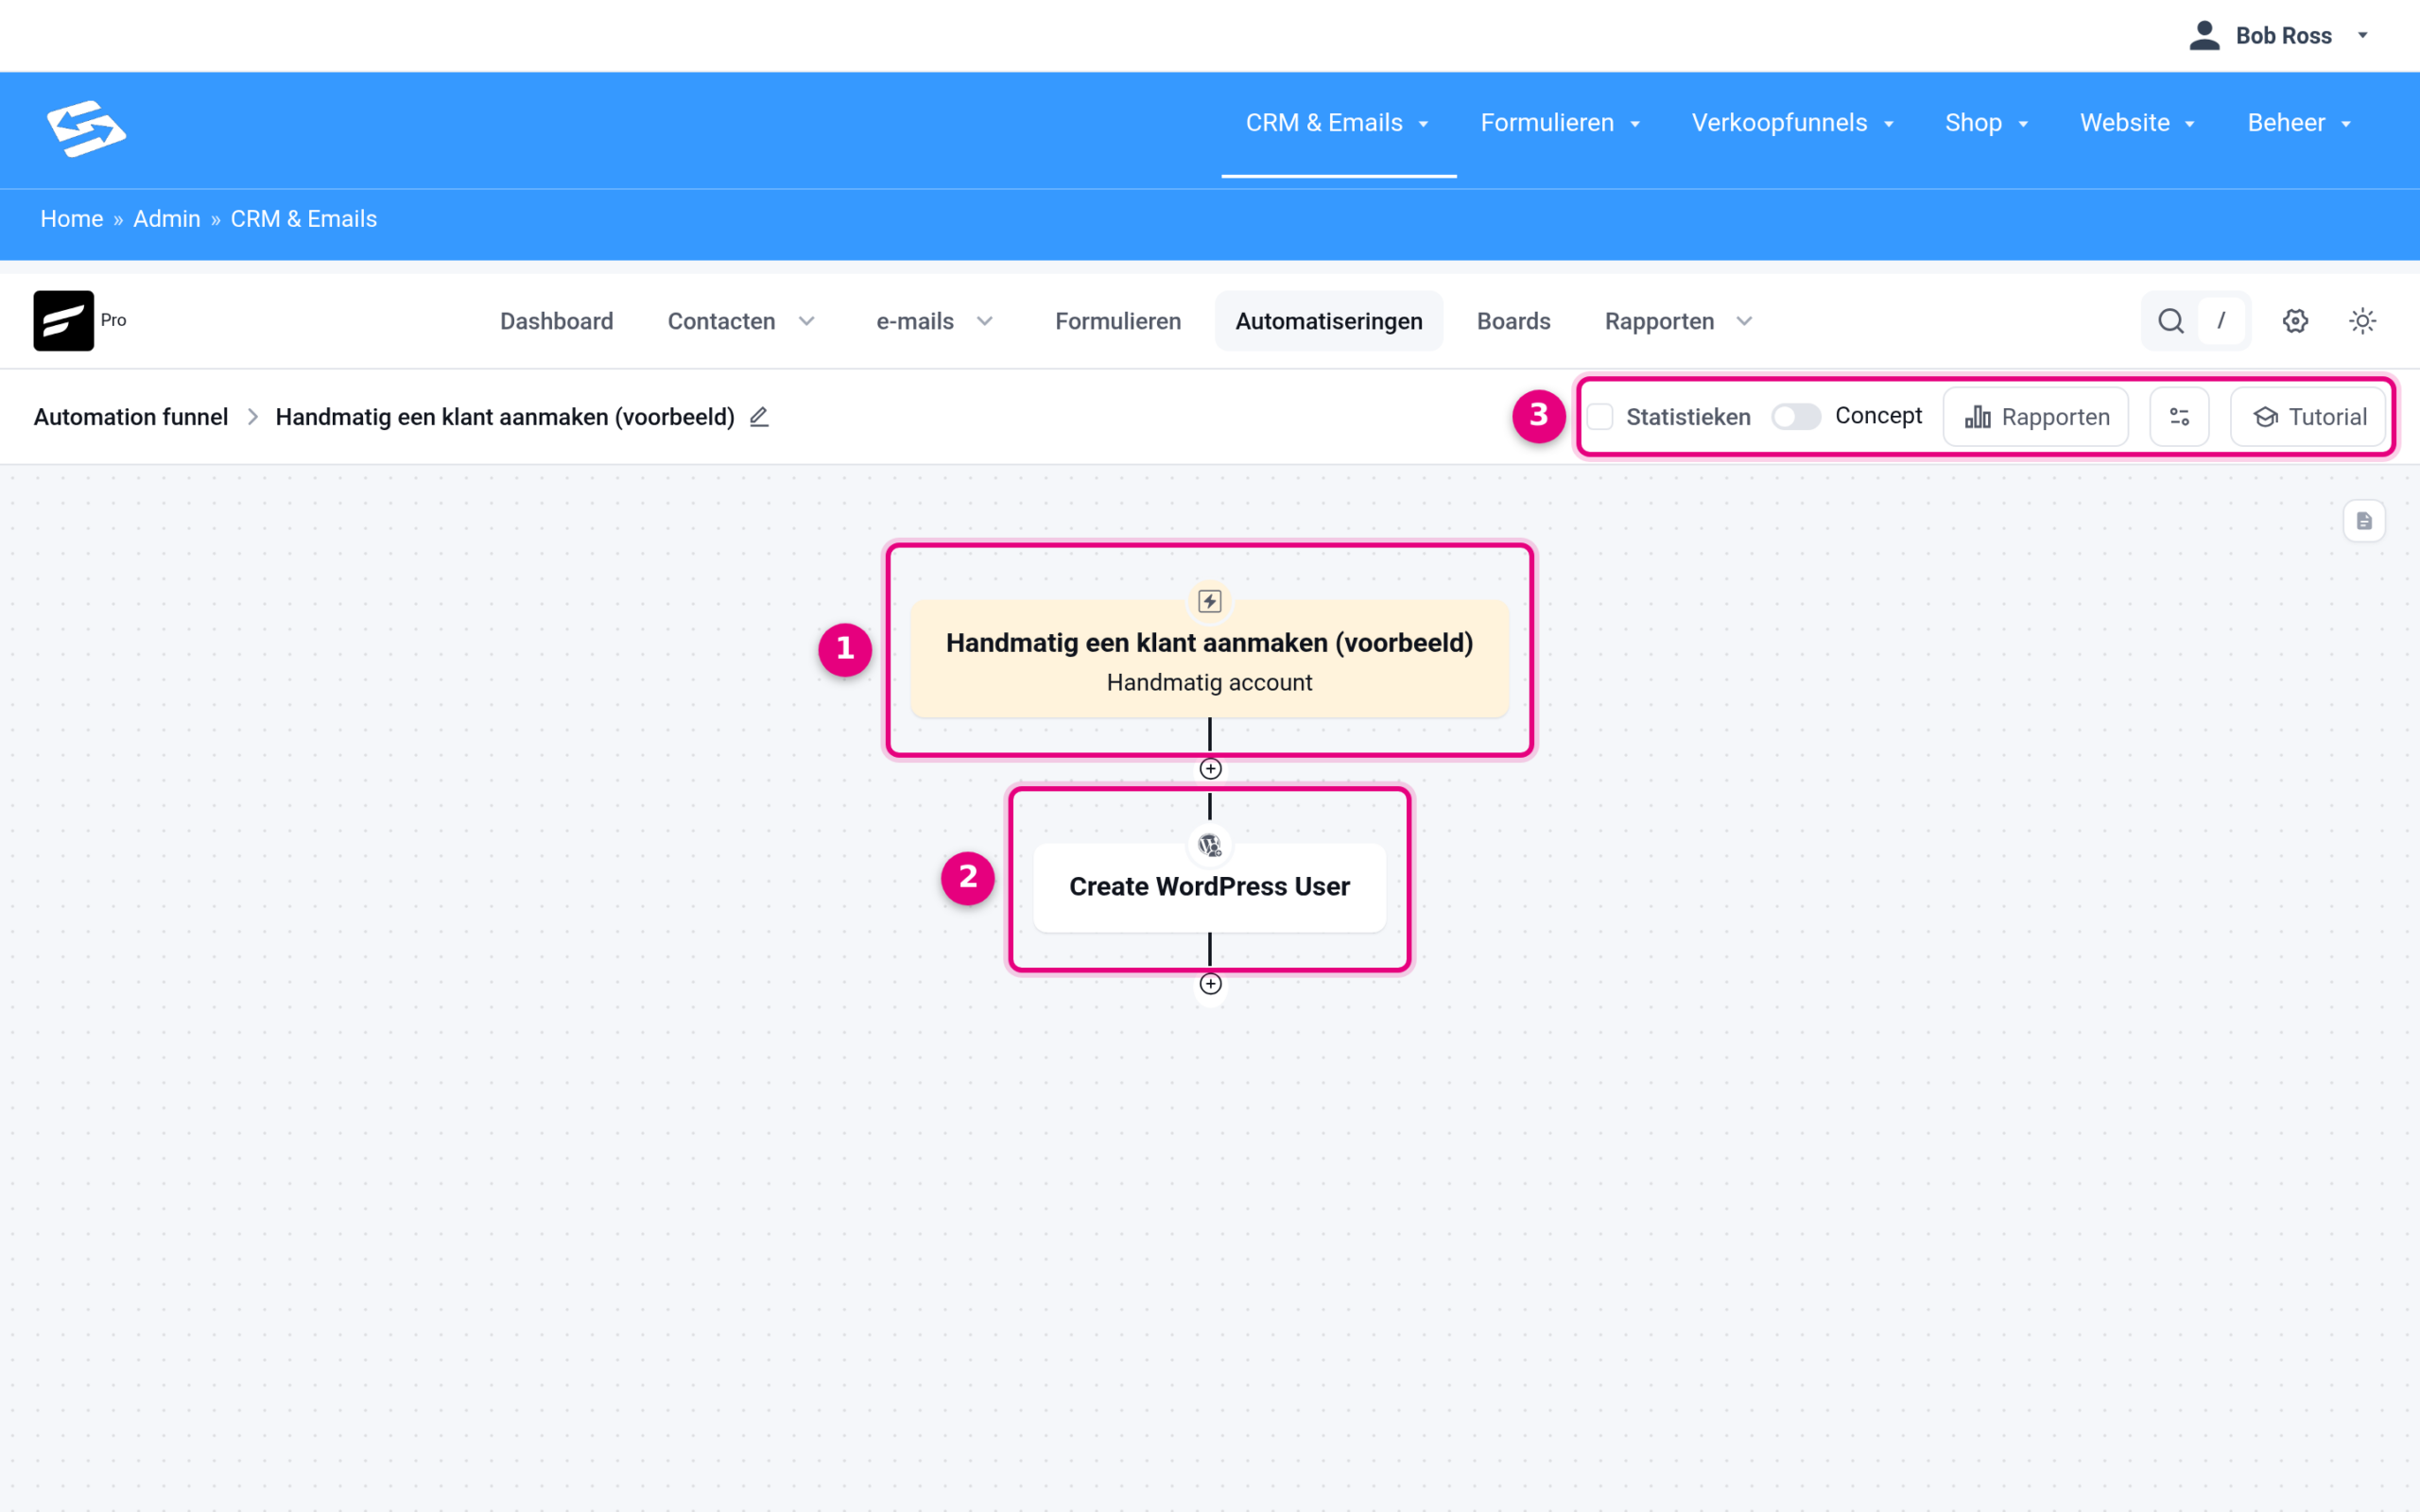
- The trigger: starts as soon as a contact gets the tag.
- The action: creates the user account.
- The status of the automation is shown at the top right. A new automation is set to Draft and does nothing yet.
Move the slider at the top right from Draft to Published. This is a step that is easy to skip: as long as the automation is set to Draft, nothing happens when you assign the tag.
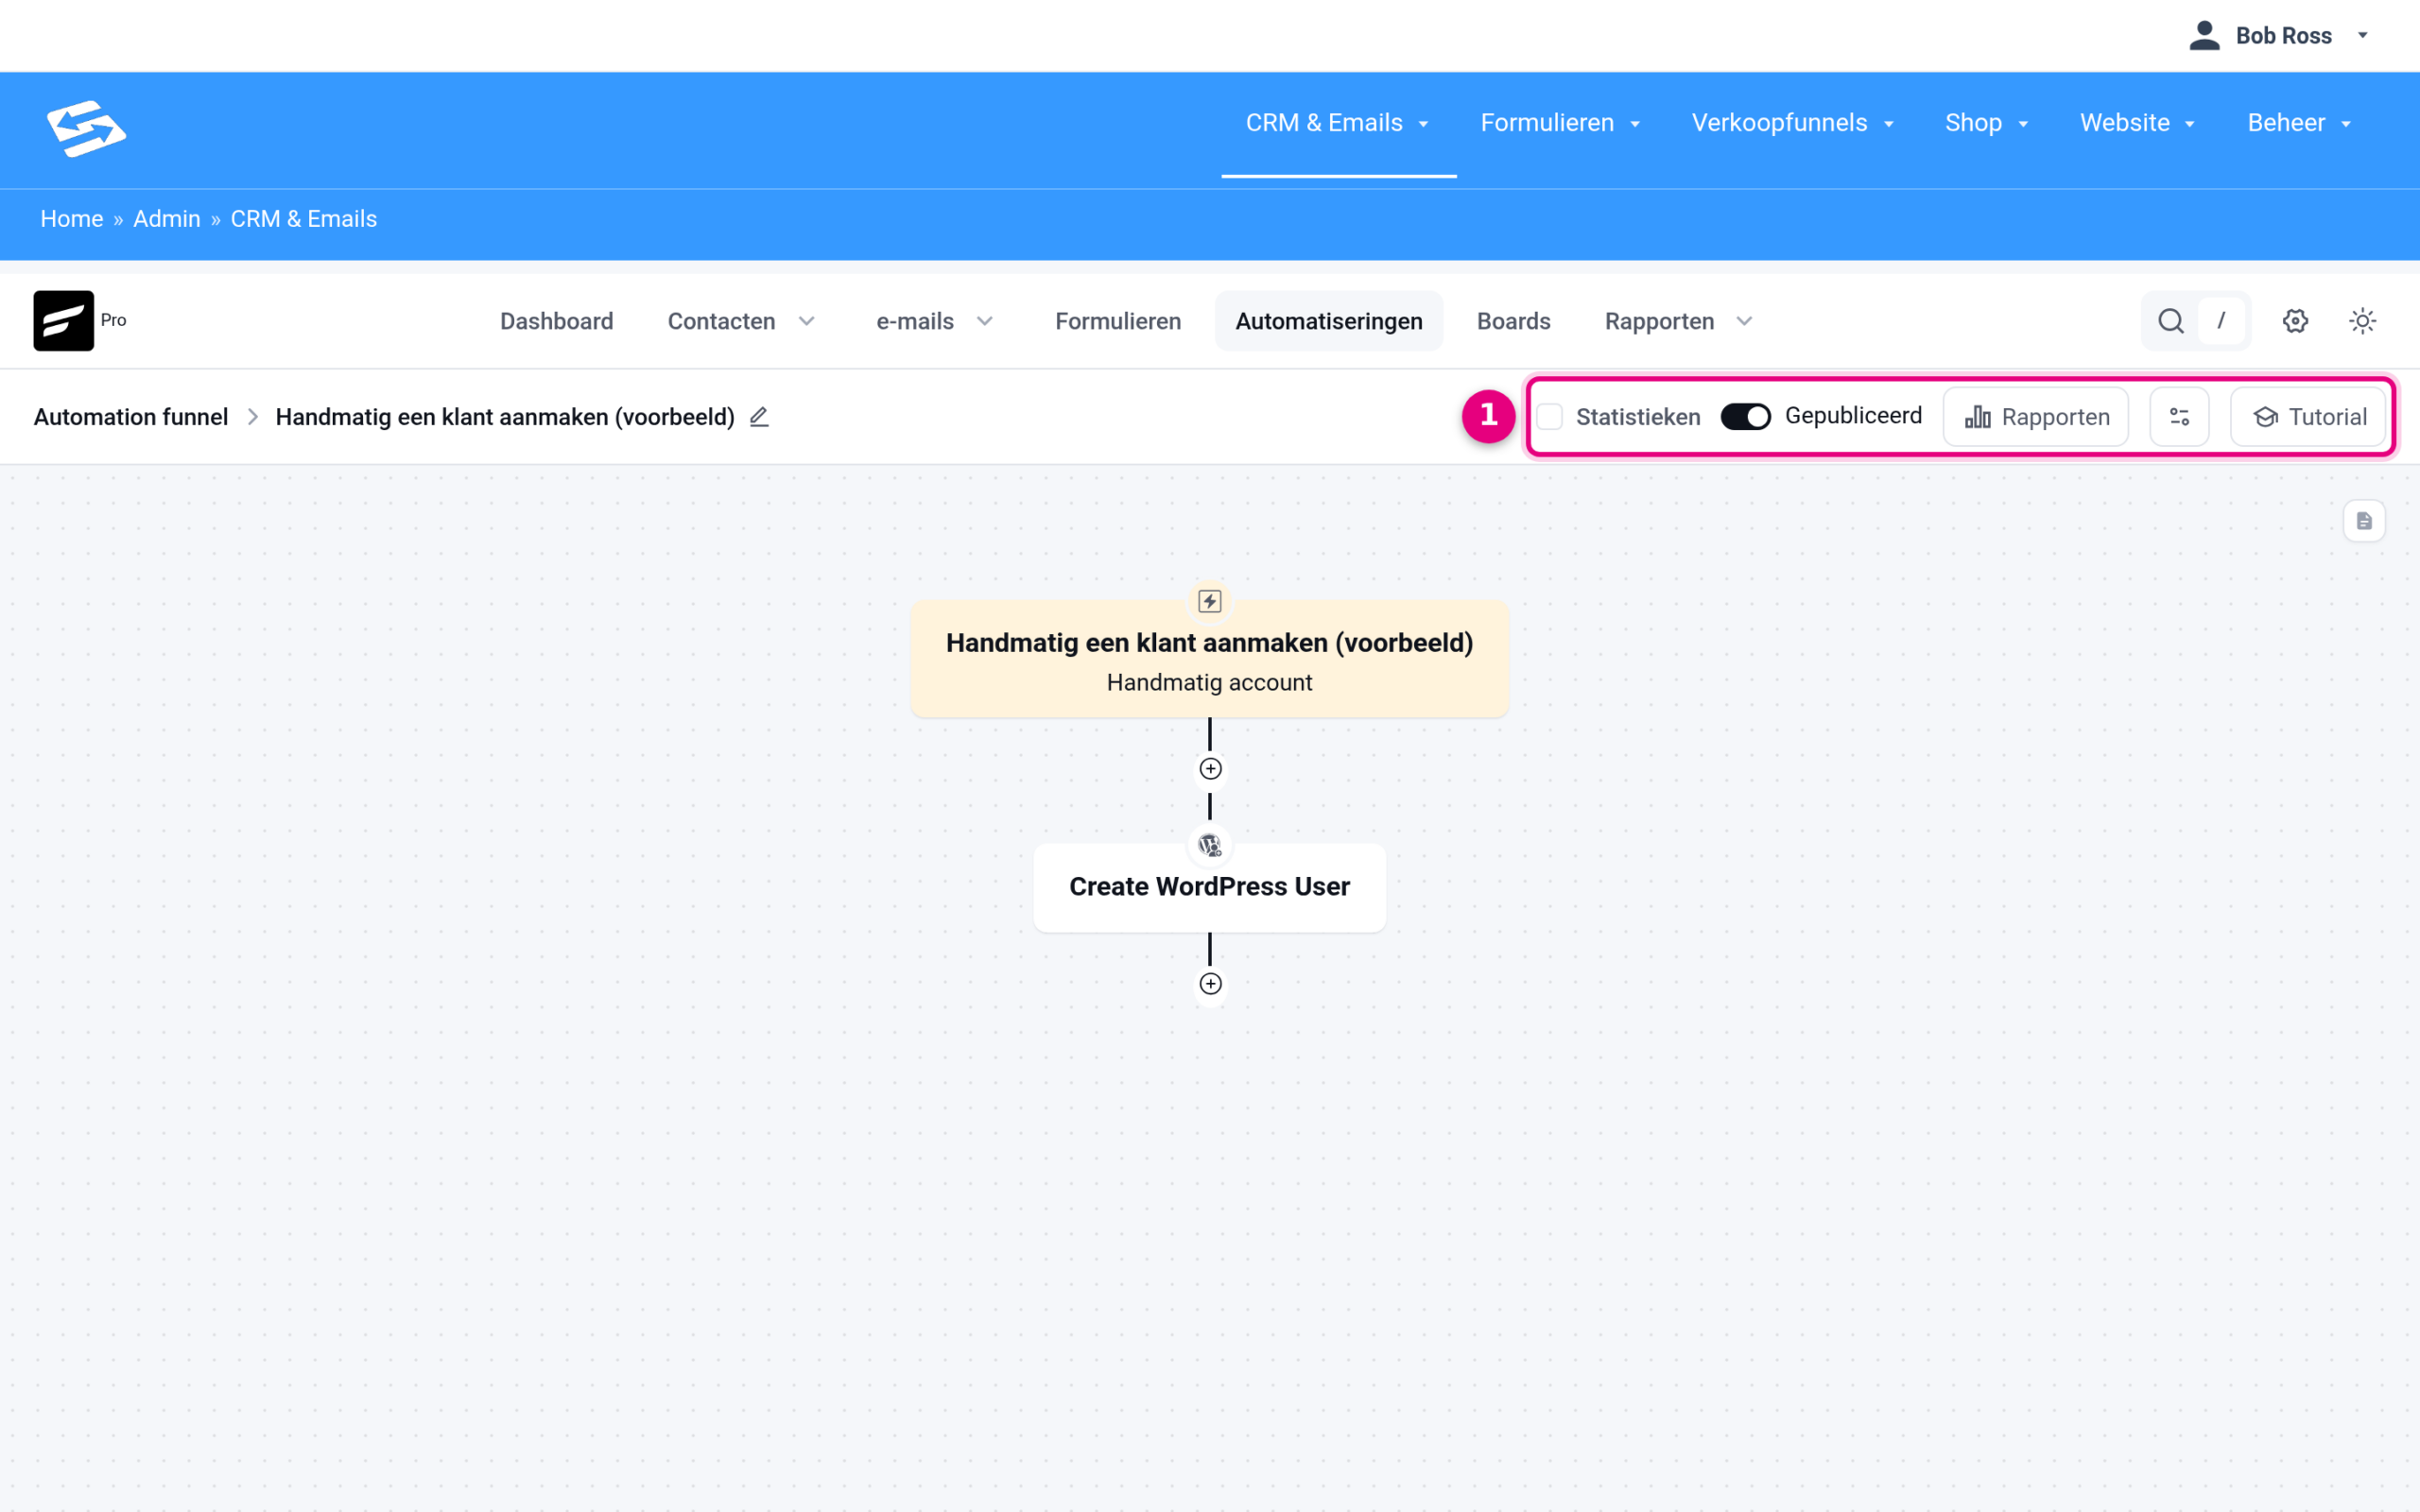
- The slider is now set to Published: the automation is active.
Step 6: give a contact the tag #
From now on you create a customer account in no time: open the contact in the CRM and give it the tag.
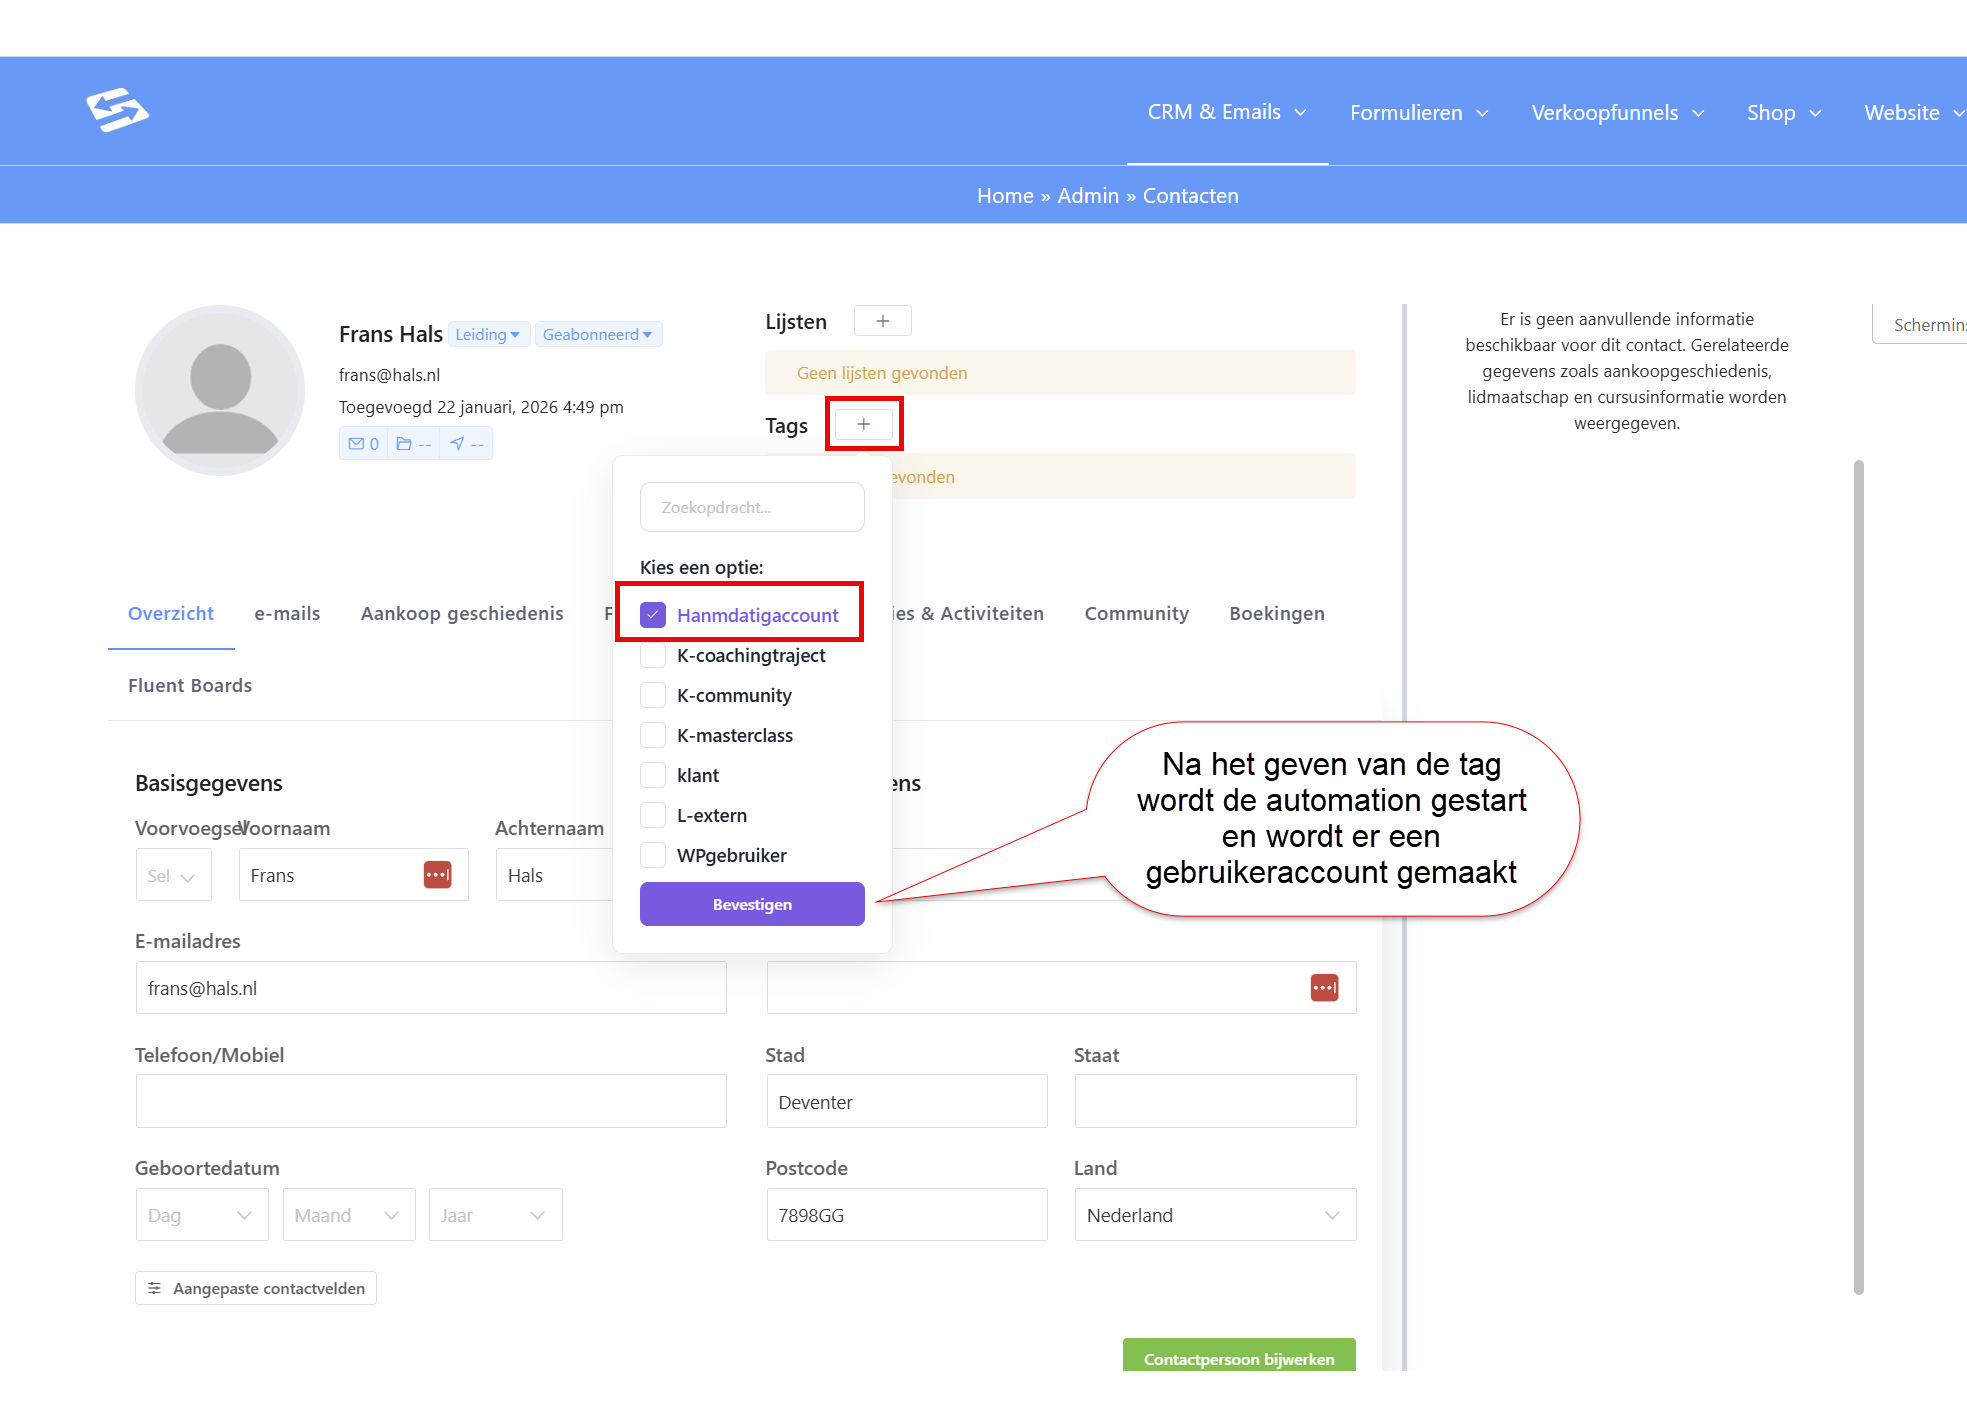
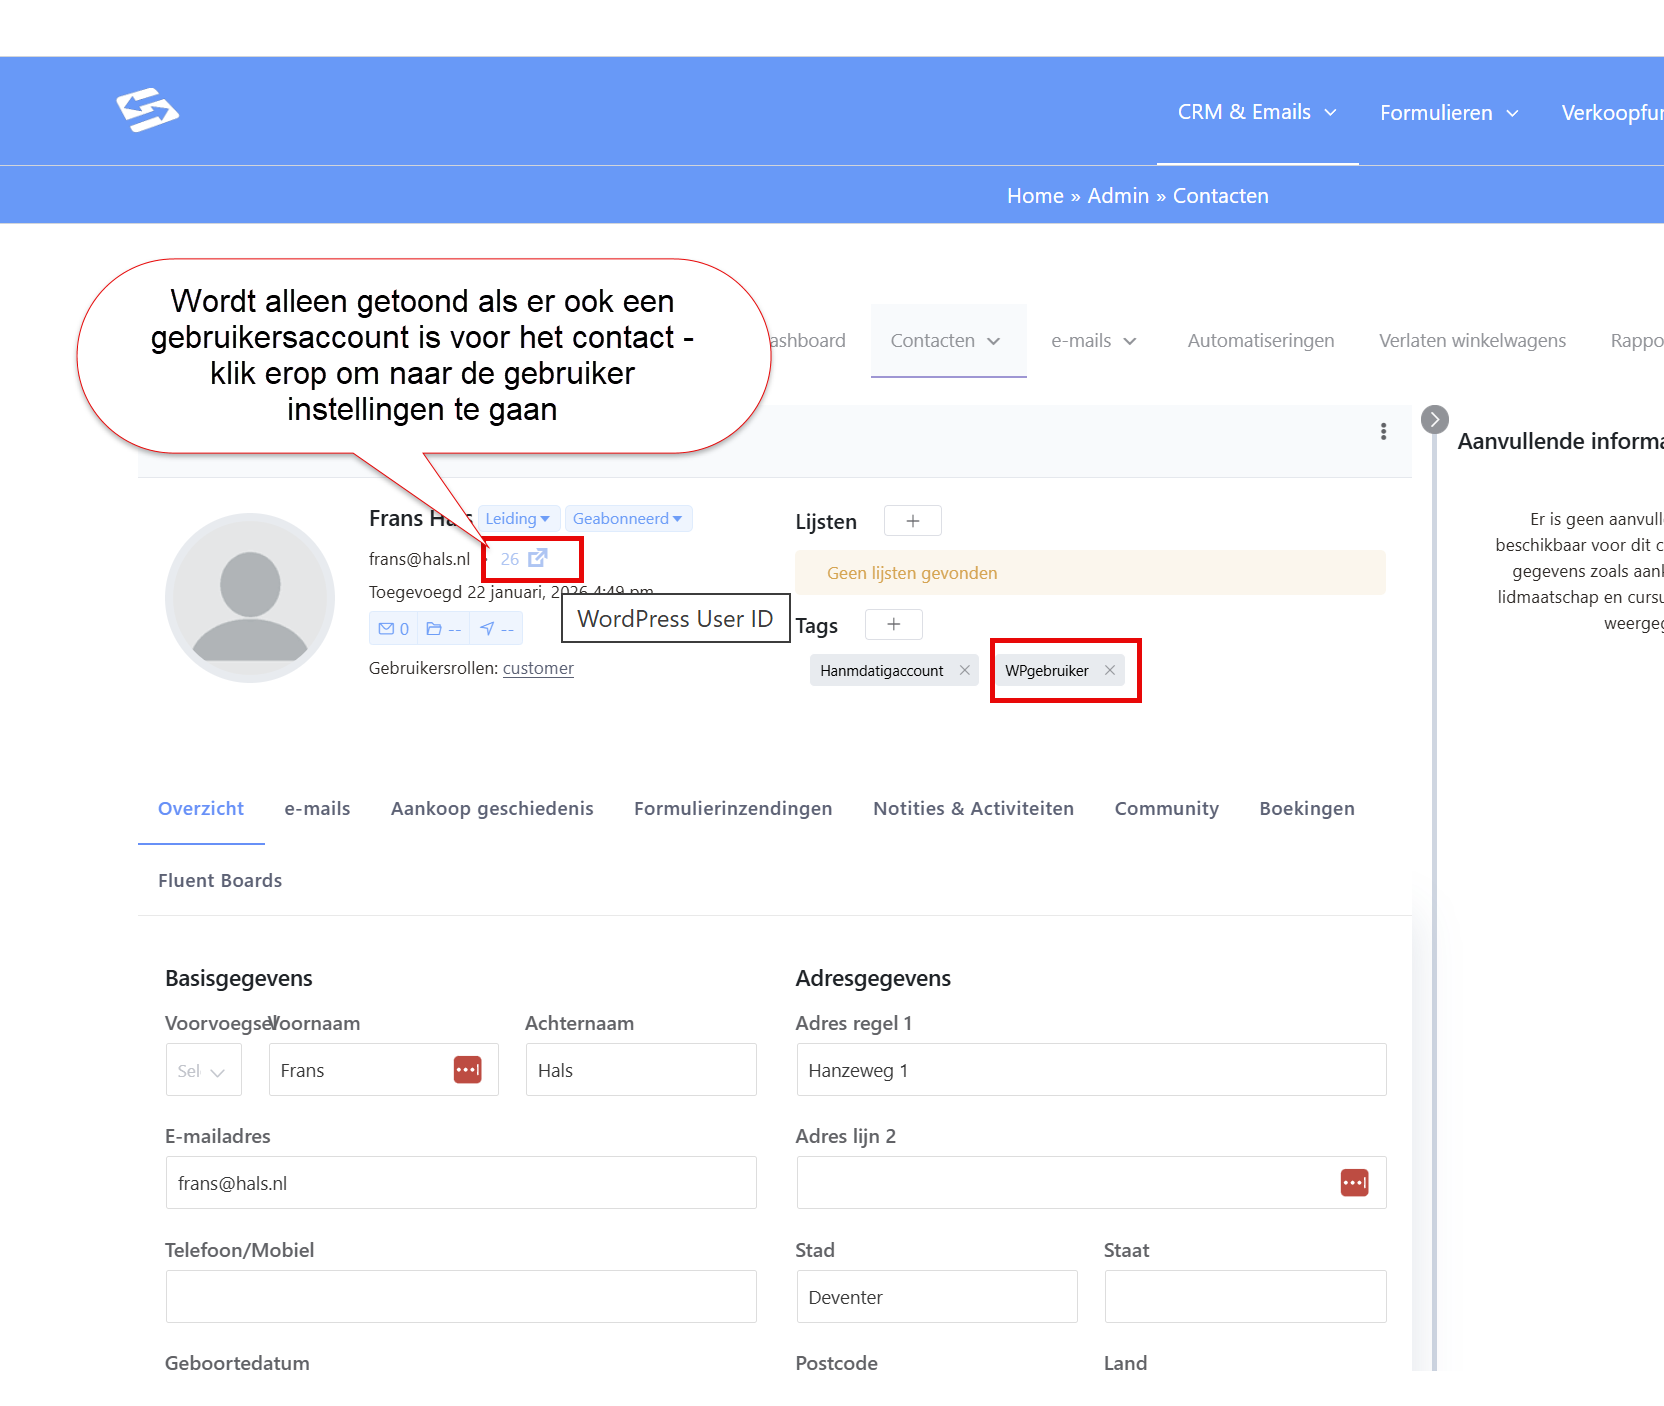
Through Administration → Users you can check whether the account has been created:
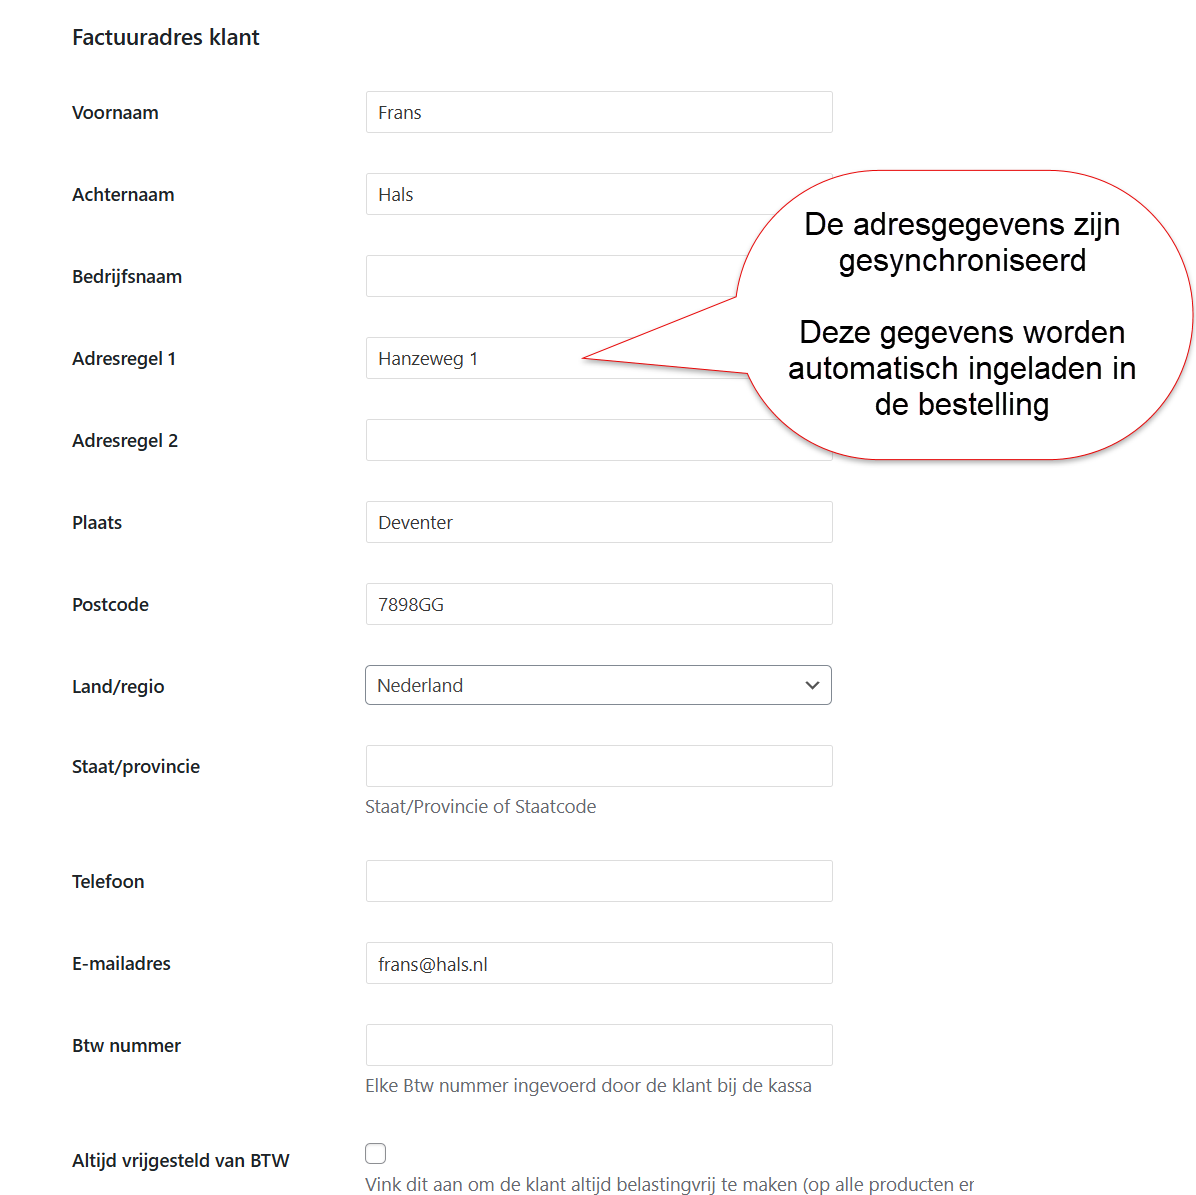
If you scroll down on the user, you can see that the address details have been taken over from the CRM:
Using the customer in an order #
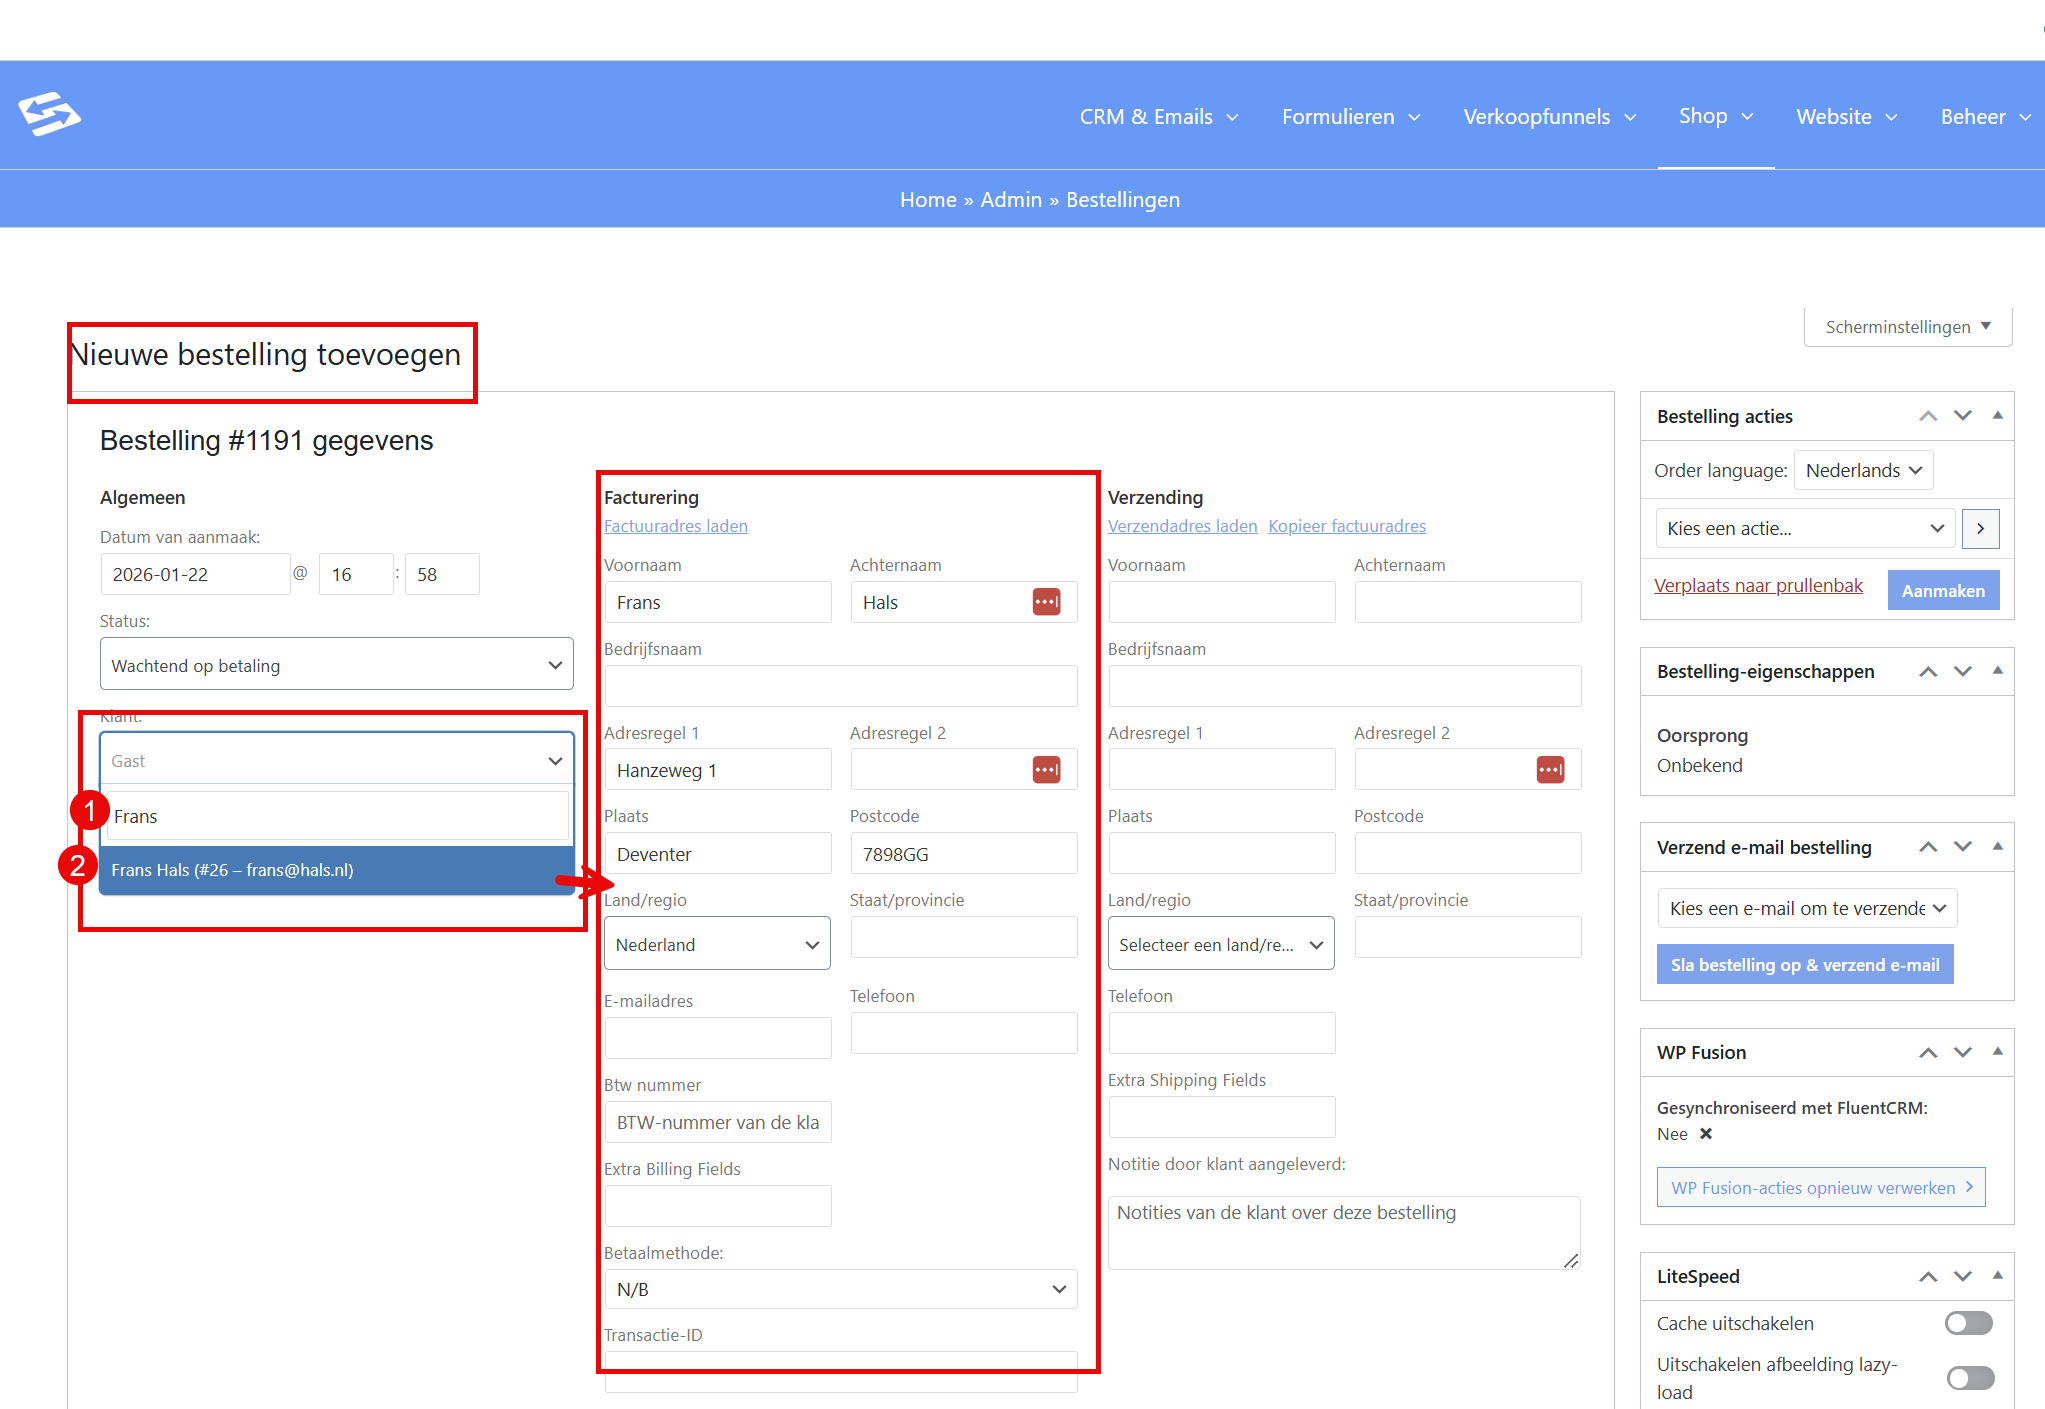
When you create an order you can now choose the customer and the billing details are loaded automatically:
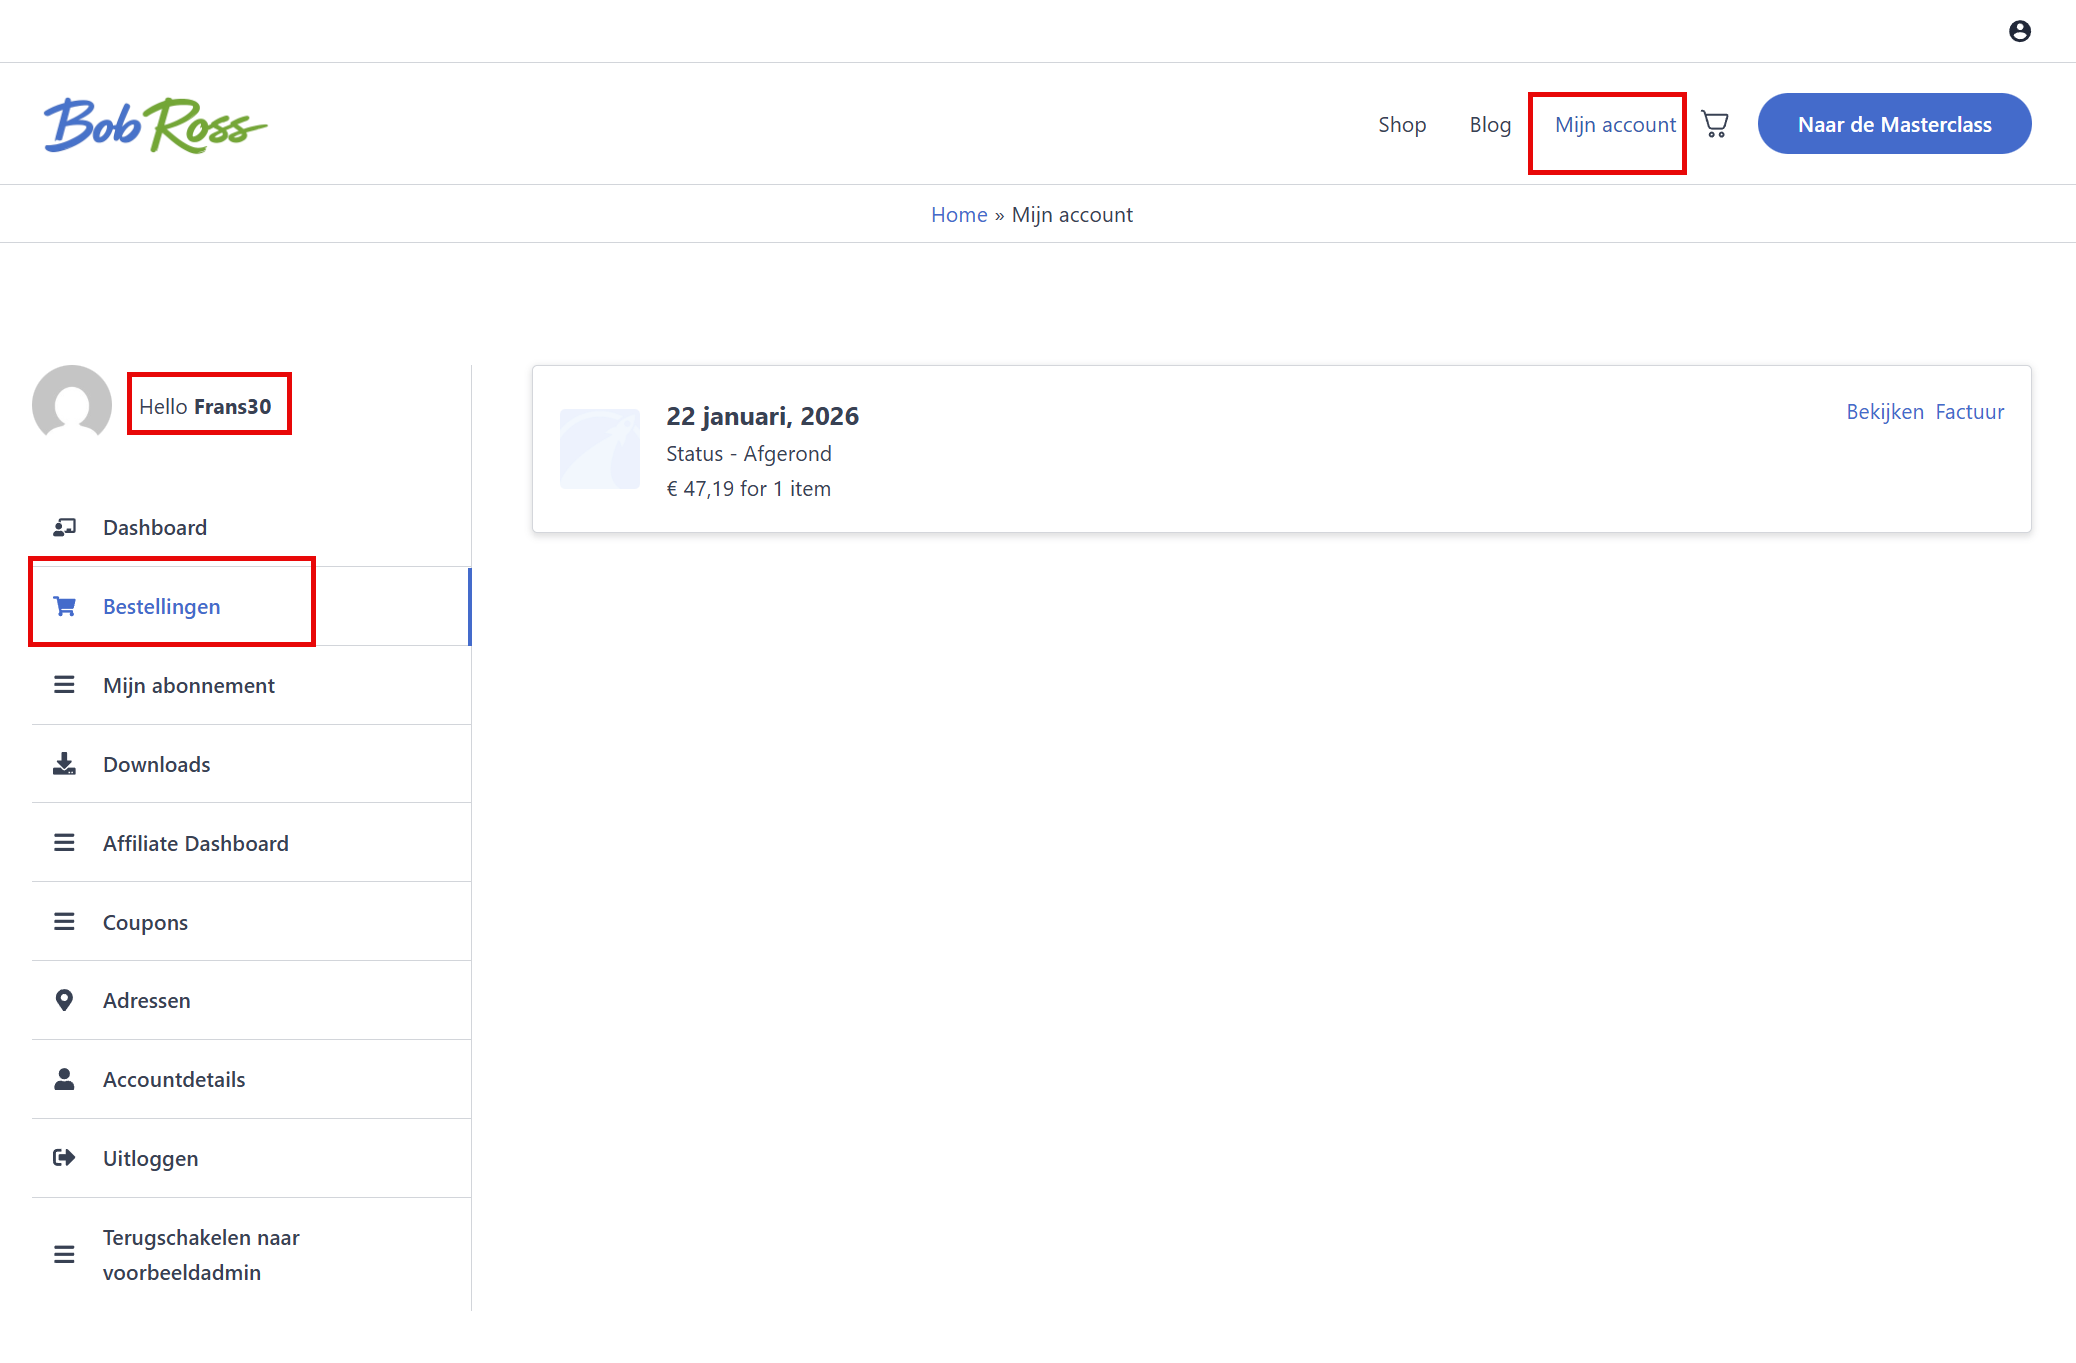
Customers with their own account can also log in and view their own orders and invoices:
Worth knowing #
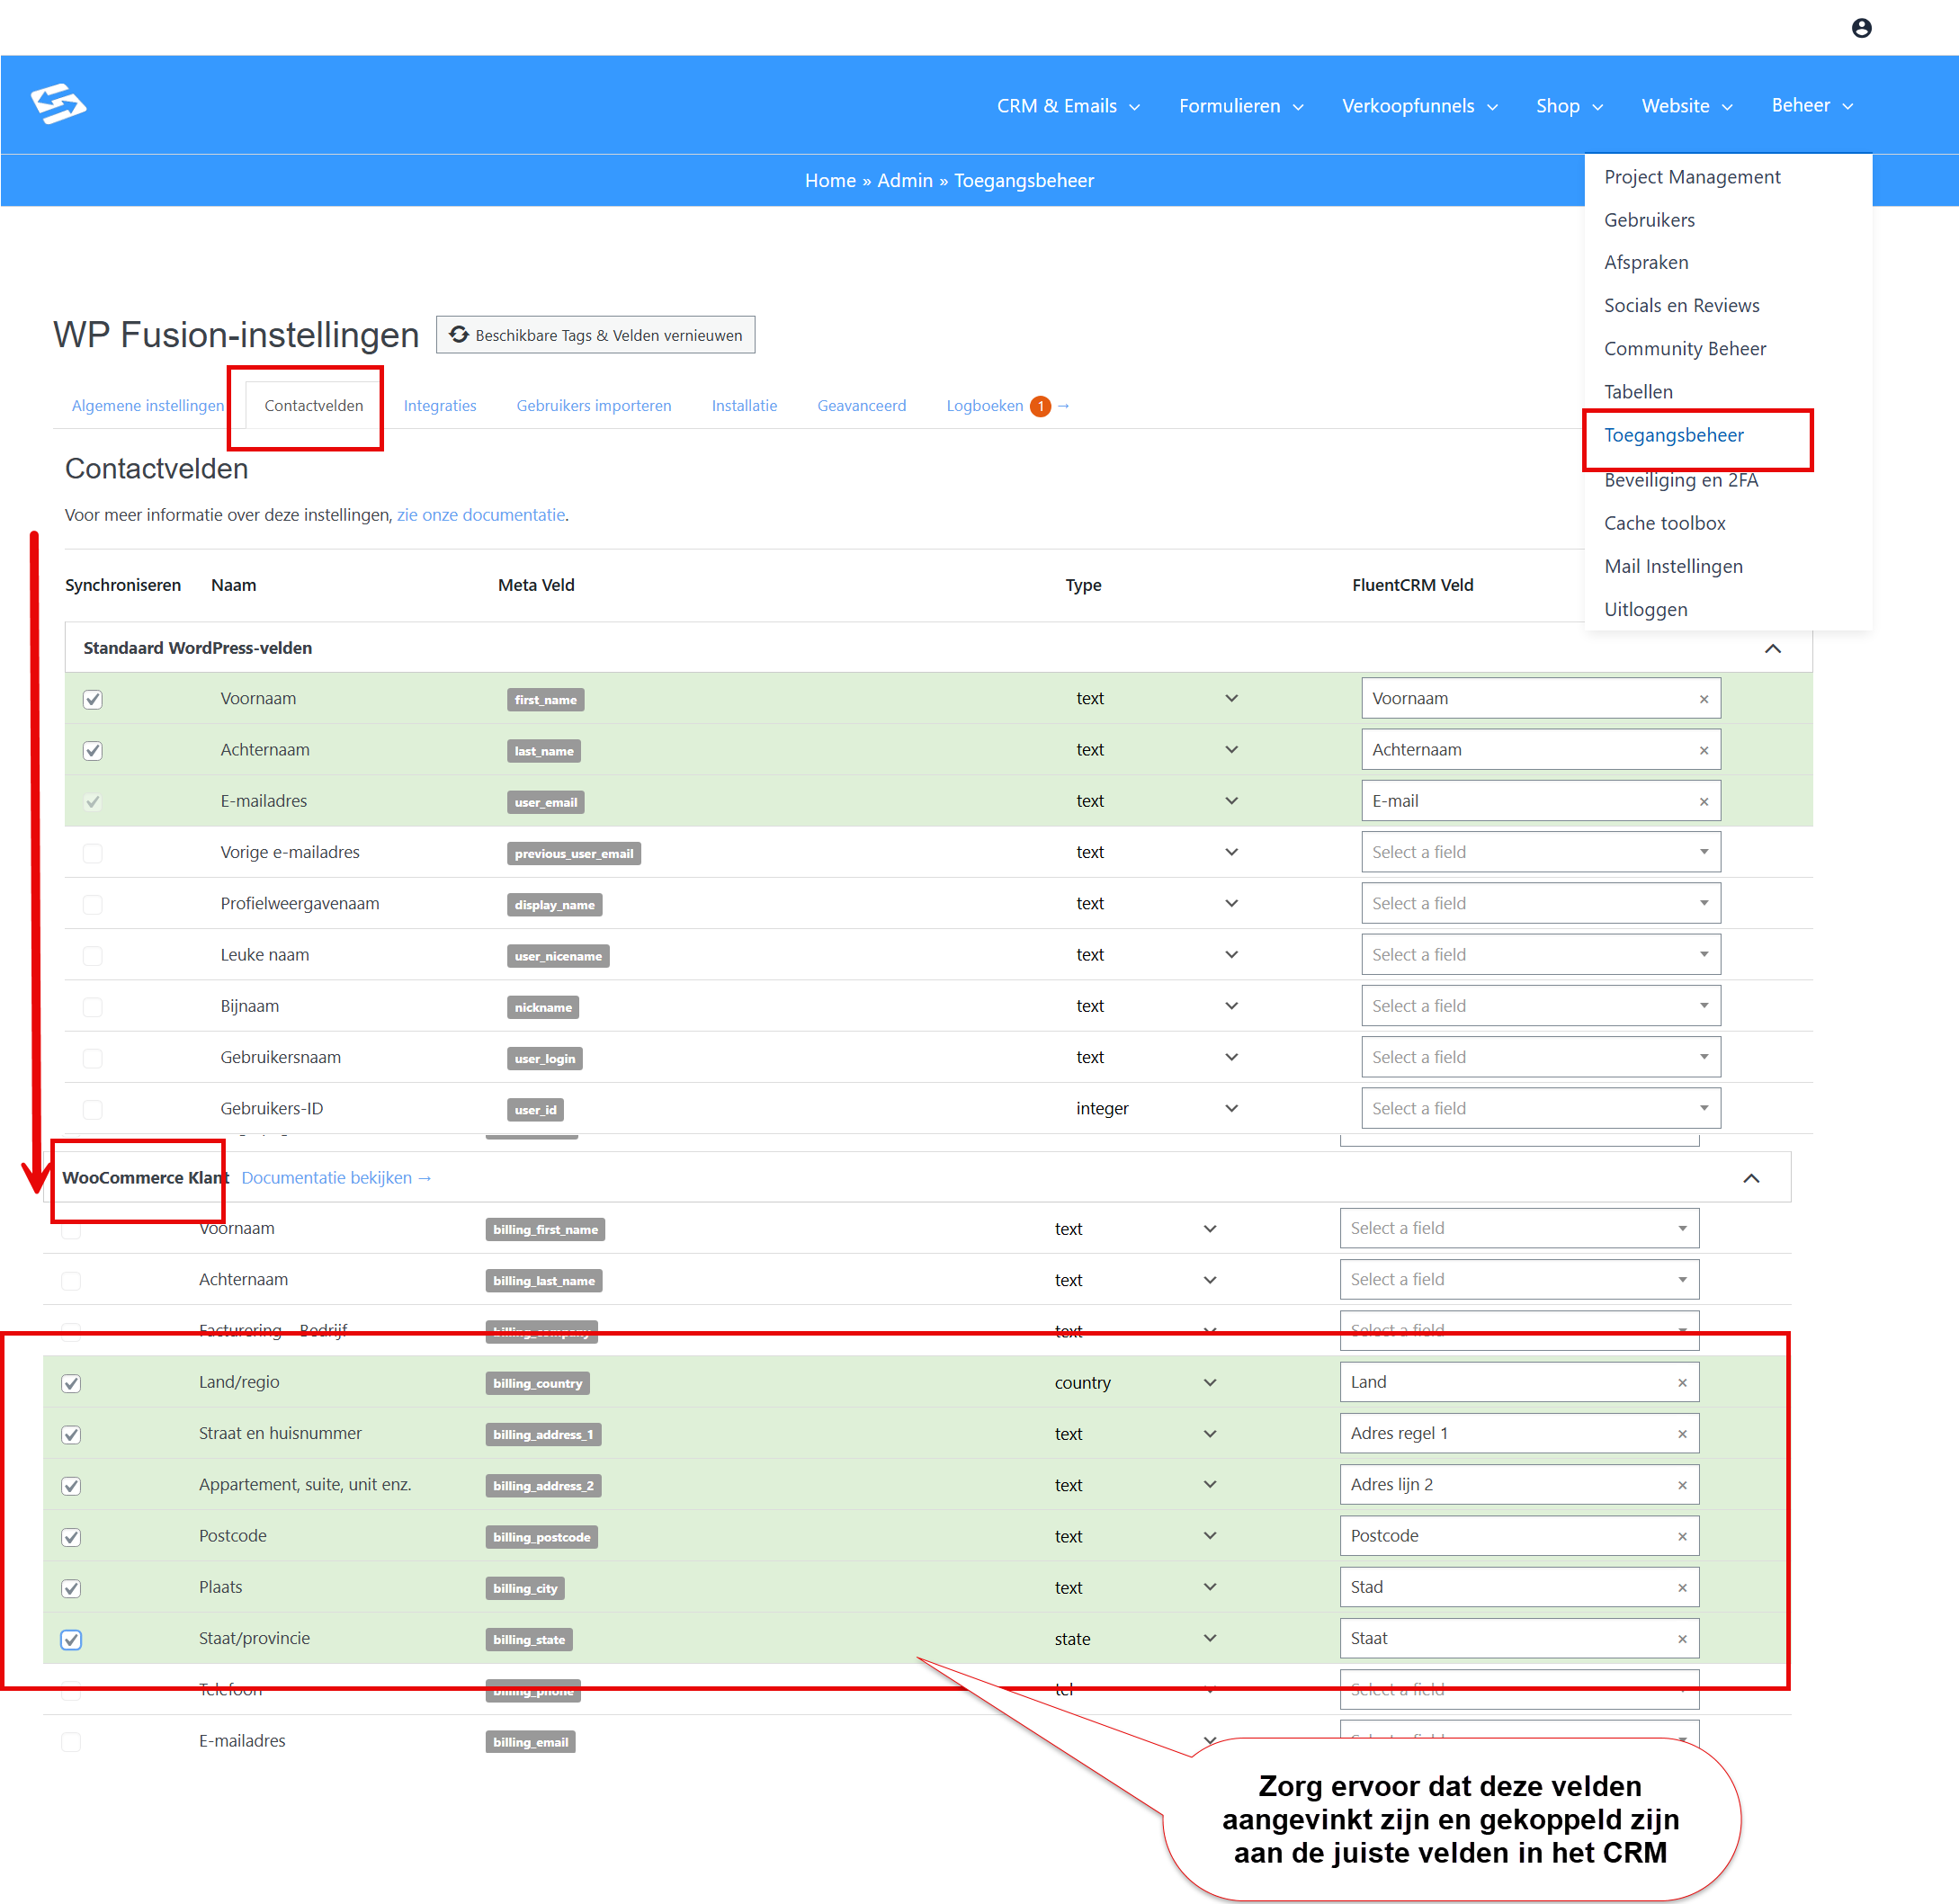
- Check through Administration → Access management whether the WooCommerce fields are linked to the CRM fields. This is correct by default, but if something has been changed here the address details are not carried over to the account properly.
- By default the automation runs once per contact. For creating an account that is exactly what you want: if the account already exists, nothing happens twice.