Do you already have your privacy statement and terms and conditions on your own website, or only as a PDF file? Then you do not have to retype those documents in your Autorespond environment. In all the important places (the cookie banner, the checkout and your menu or footer) you can simply refer to an external URL or to an uploaded PDF. That is particularly handy if you have just migrated and your legal documents are already neatly published somewhere else. In this article you read how to set that up for each place.
The cookie banner in Autorespond is based on Complianz, included in your package. Read the Complianz documentation
Step 1: Do you only have a PDF? Upload it to the Media Library first #
If your documents are already online on your own website, you can skip this step and use those URLs directly. If you only have them as PDFs, upload them first:
- Go to Media → Library and click Add media file.
- Upload your PDF (for example terms-and-conditions.pdf and privacy-statement.pdf).
- Click the uploaded file to open the details.
- Copy the file URL. You will use that URL in the next steps.
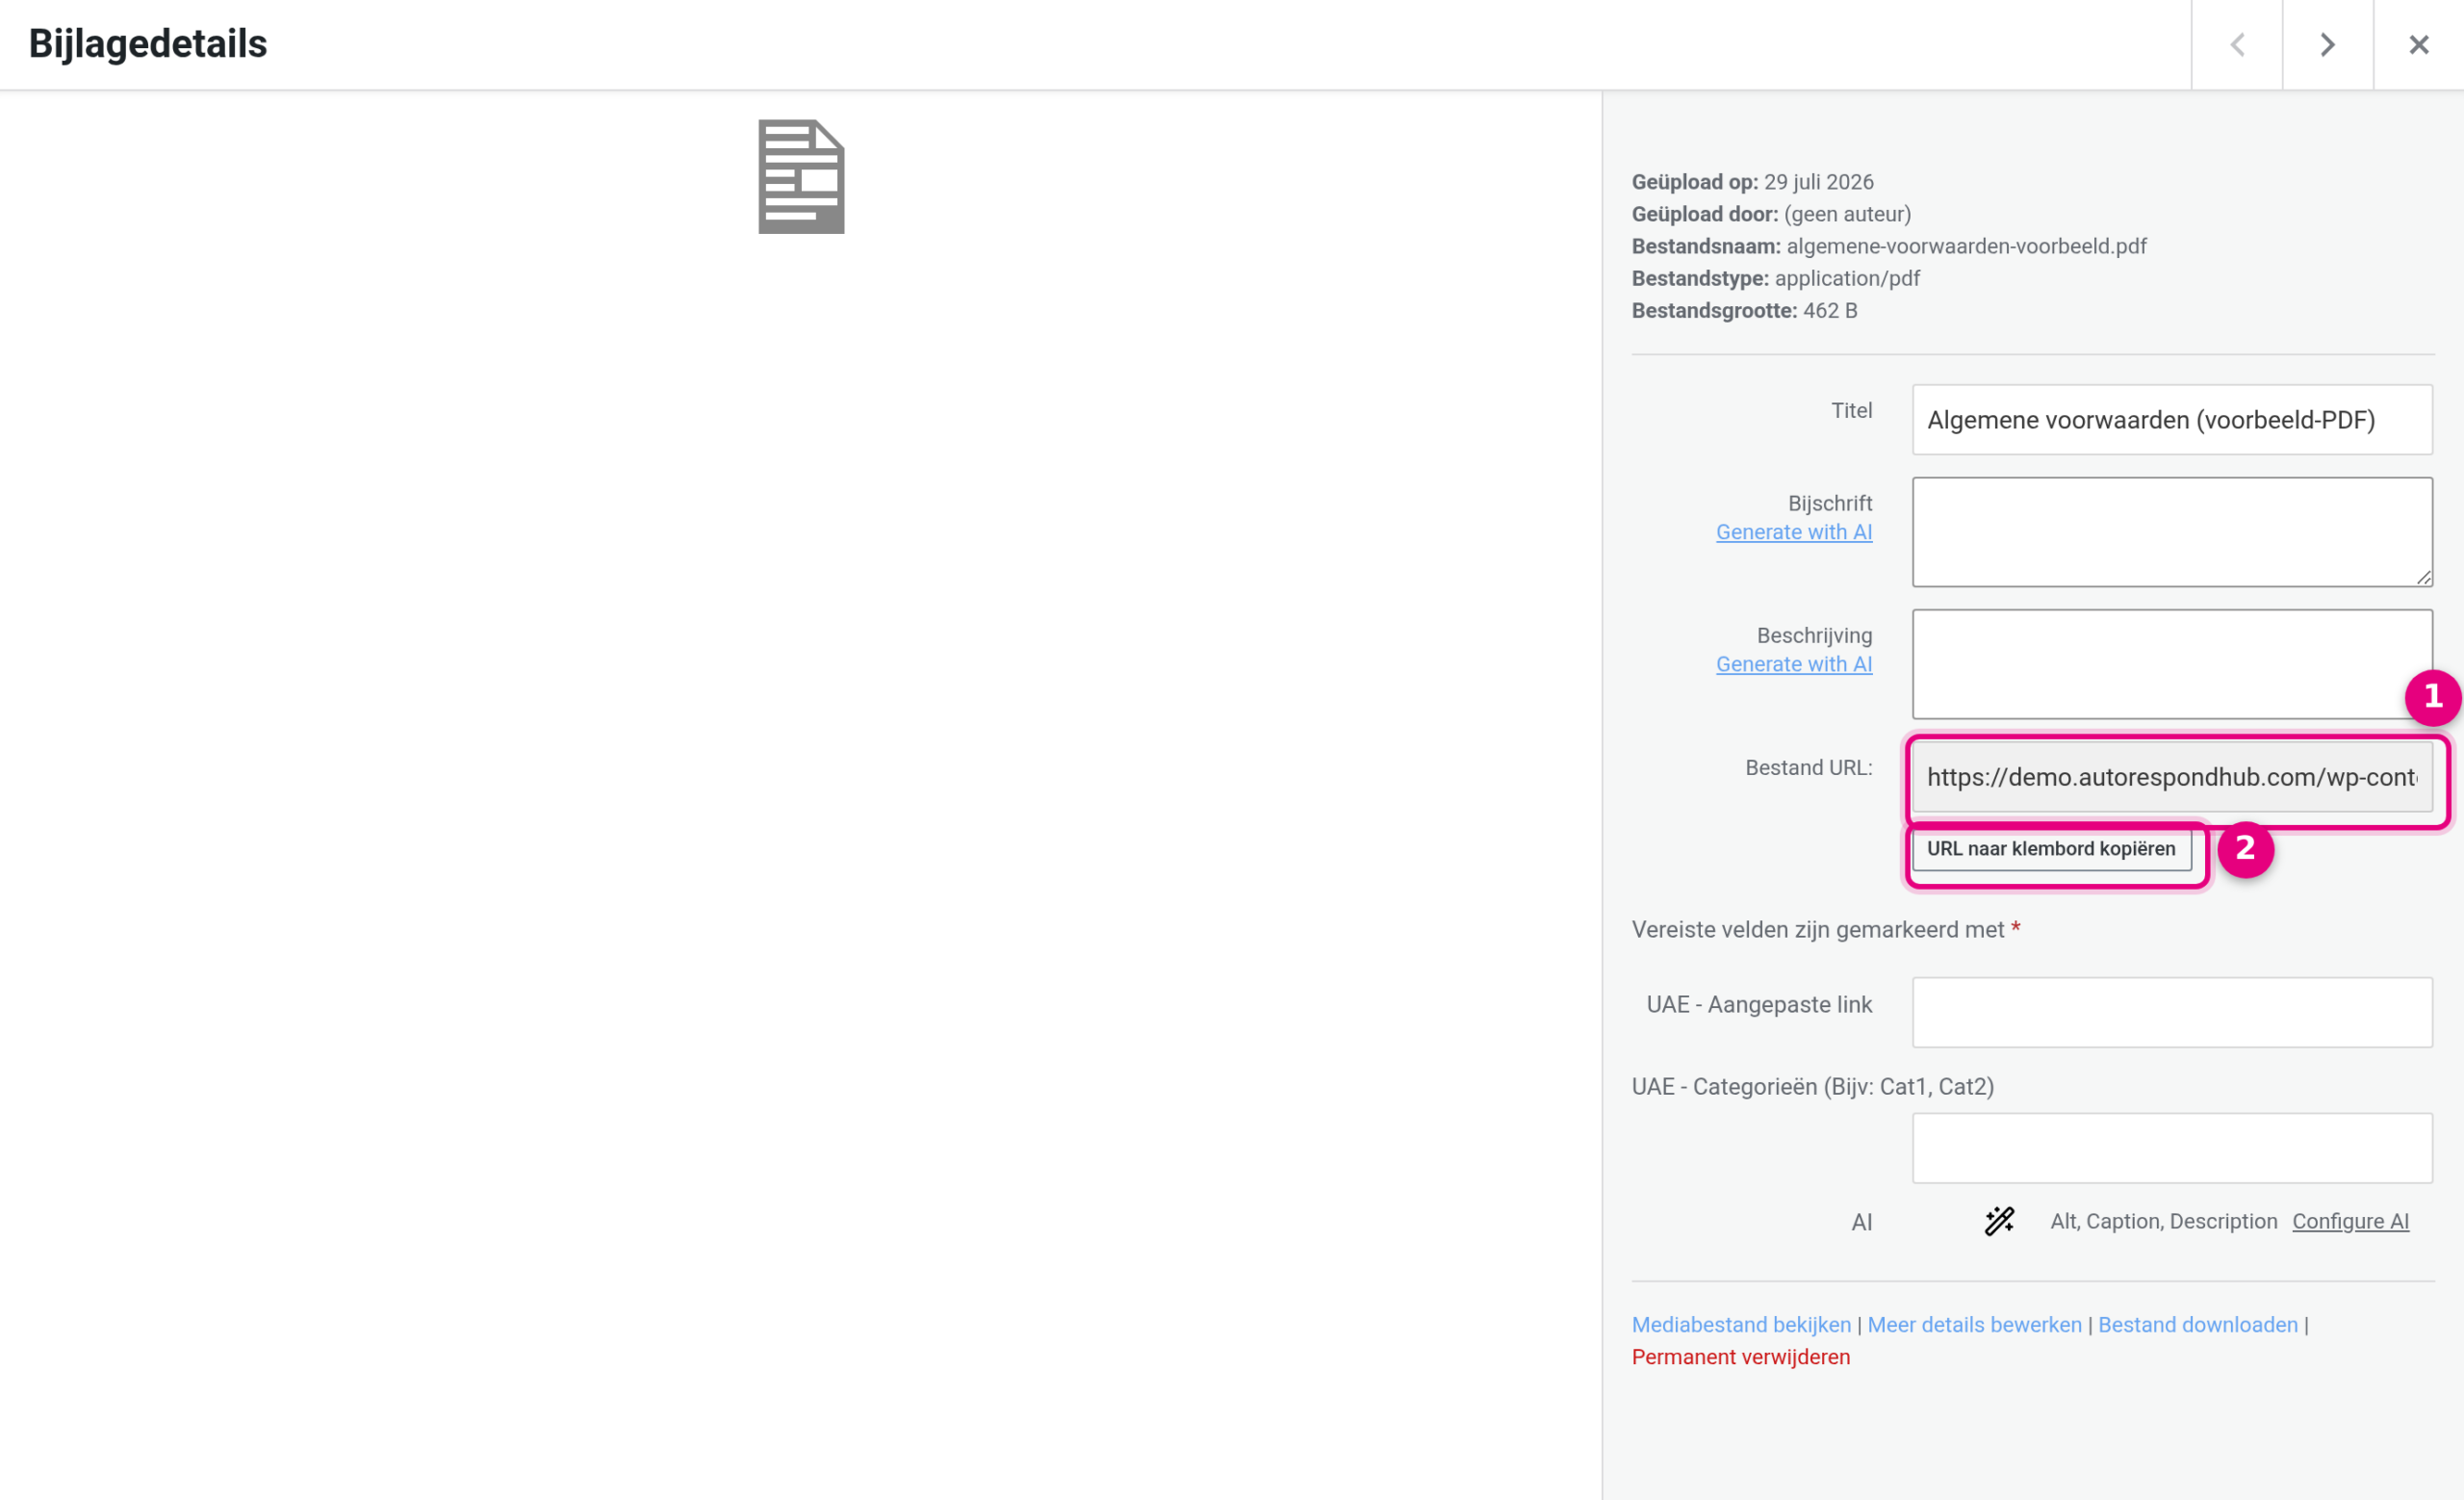
- The field next to File URL holds the full, public URL of your PDF. Anyone with this link can open the file, which is exactly what you want for terms and conditions and a privacy statement.
- The Copy URL to clipboard button copies the URL in one click, so you can paste it in the next steps.
Watch out with new versions: if you upload an updated PDF later, that file gets a new URL. Replace the link in the places where you use it as well (cookie banner, checkout, menu or footer). If you want to avoid that, refer instead to a fixed page URL on your own website that always holds the current version.
Step 2: Pointing the cookie banner to your own privacy statement #
At the bottom, the cookie banner shows a link to your privacy statement (and to the cookie policy). By default that points to a generated document, but you can set your own URL for each document:
- Go to Website → Privacy and Cookie banner.
- Open the Wizard tab and click Documents under General.
- For Privacy statement, choose the URL option.
- In the field that appears, enter the full URL of your own privacy statement (or of your uploaded PDF from step 1).
- Click Save.
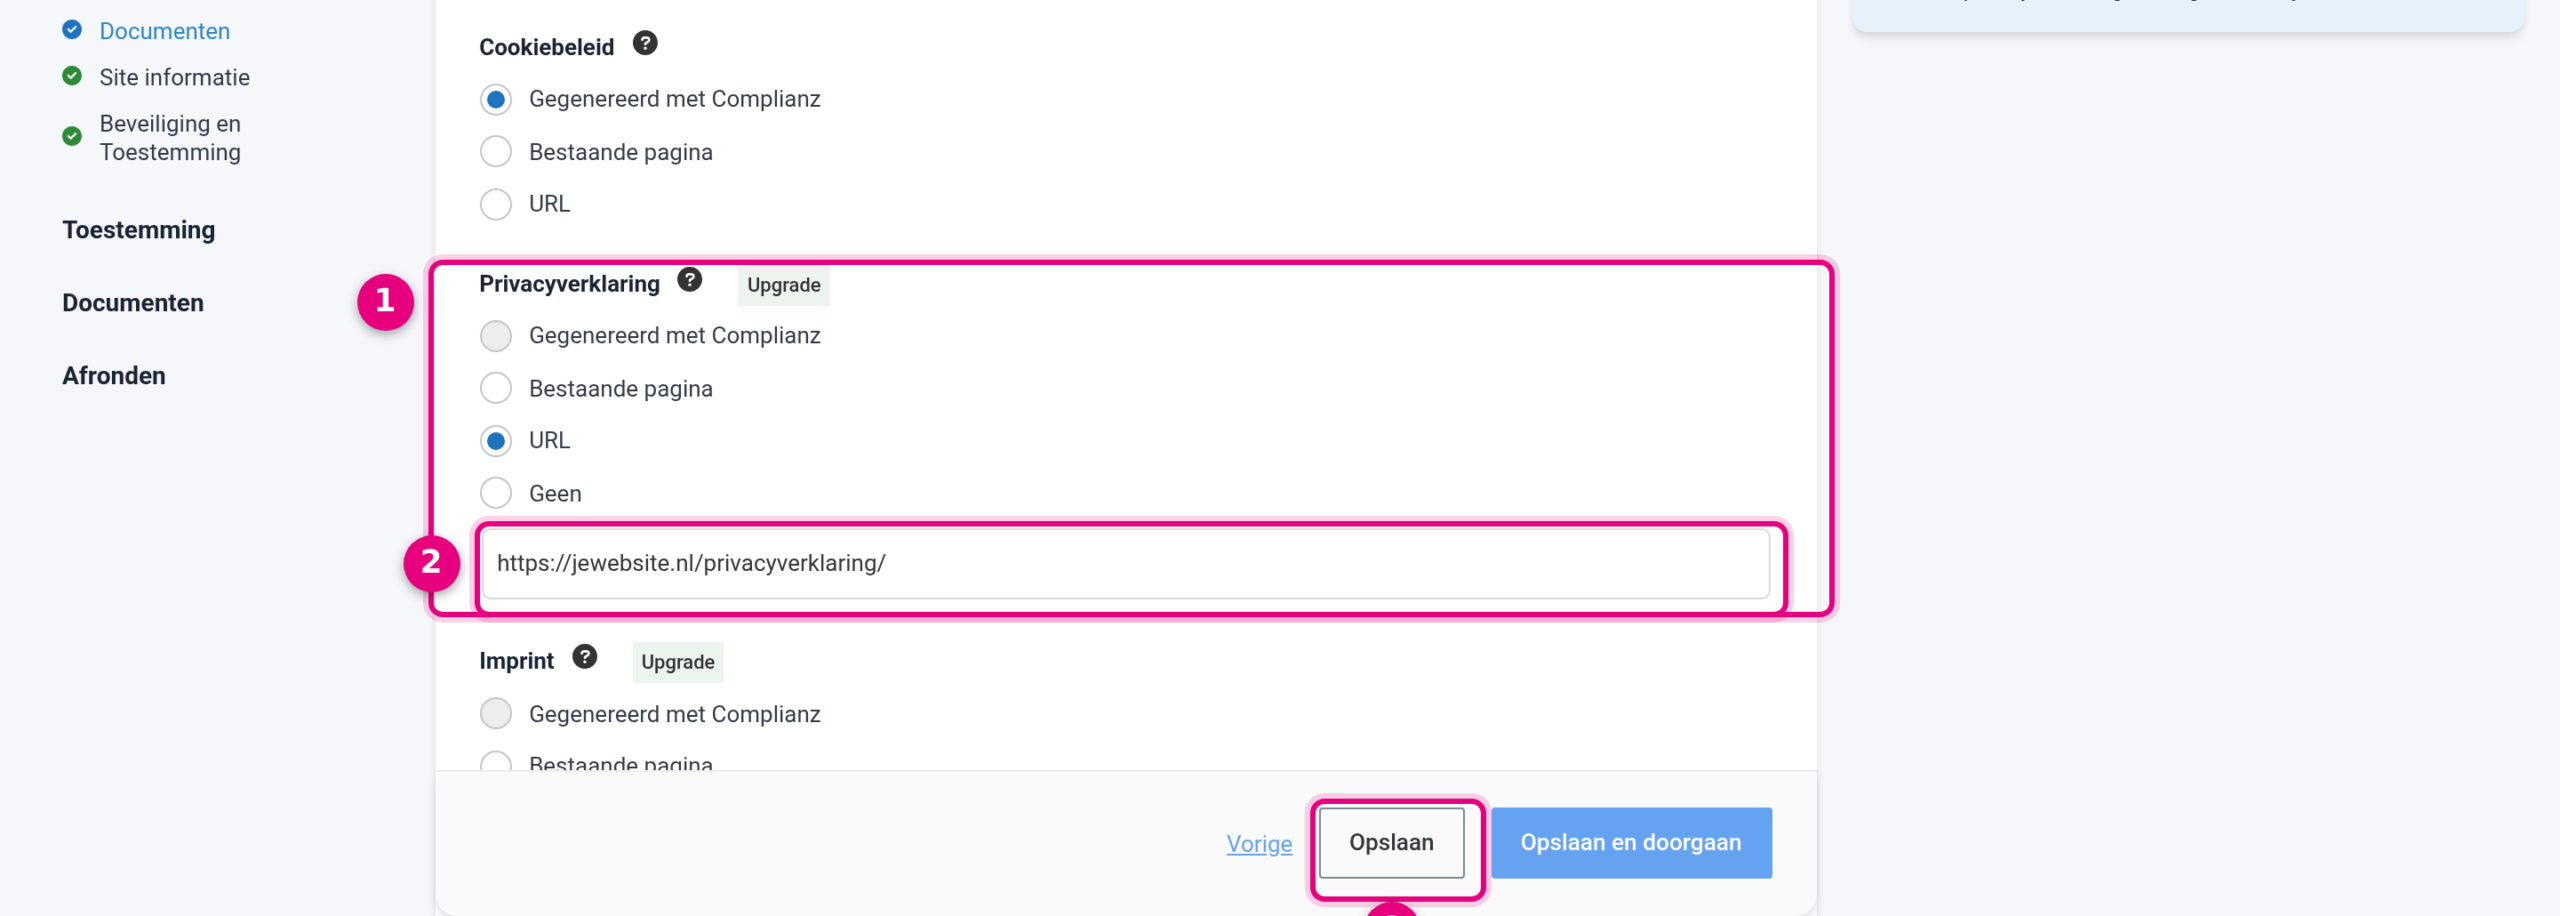
- The Privacy statement block has four options: Generated with Complianz (the built-in document), Existing page (a page within your own environment), URL (an external address, the option you choose here) and None.
- In the URL field you enter the full address, including https://. This may also be the URL of a PDF.
- Save only stores this step; Save and continue takes you to the next wizard step. For this change, Save is enough.
You can do the same for the Cookie policy, which sits directly above the Privacy statement. Good to know: because of caching it can take about ten minutes before the banner shows the new link. If you want to see it straight away, clear the cache of your site.
Then check on your site (in an incognito window, for example) that the link in the banner points to your own document:
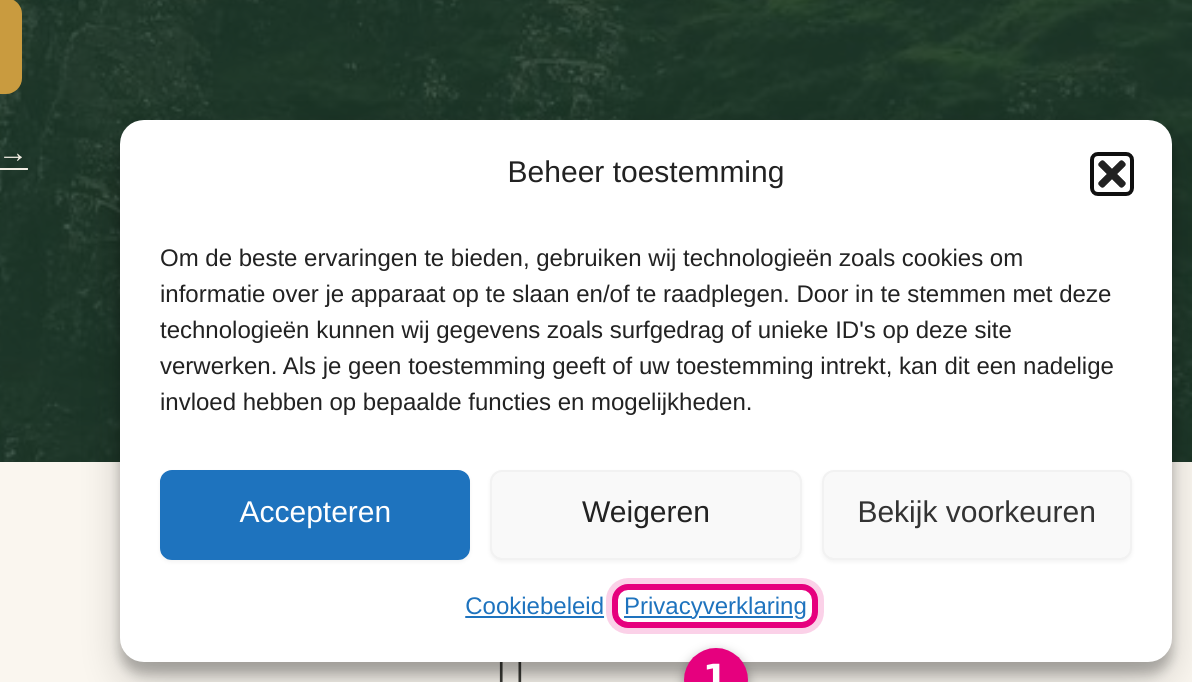
- The Privacy statement link at the bottom of the banner now opens your own external URL or PDF instead of the generated document.
Step 3: The terms and conditions in the checkout #
The standard field for the terms page (Shop → Settings → Advanced tab → Terms and conditions field) only accepts an internal WordPress page, not an external URL. For an external link or PDF you therefore use your own agreement checkbox in the checkout, with the link in the text of the checkbox. You manage the checkout fields through FunnelKit, which is part of your package:
- Go to Sales funnels → Store checkout and click your checkout page (for example General Checkout Page).
- On the Design tab, scroll to Checkout Form Fields and click Add New Field at the bottom of the field list.
- Fill in the window as described below and click Add.
- Then drag the new field from the field list to the place you want in the form, for example at the bottom of the billing details section.
- Click Save to save the checkout.
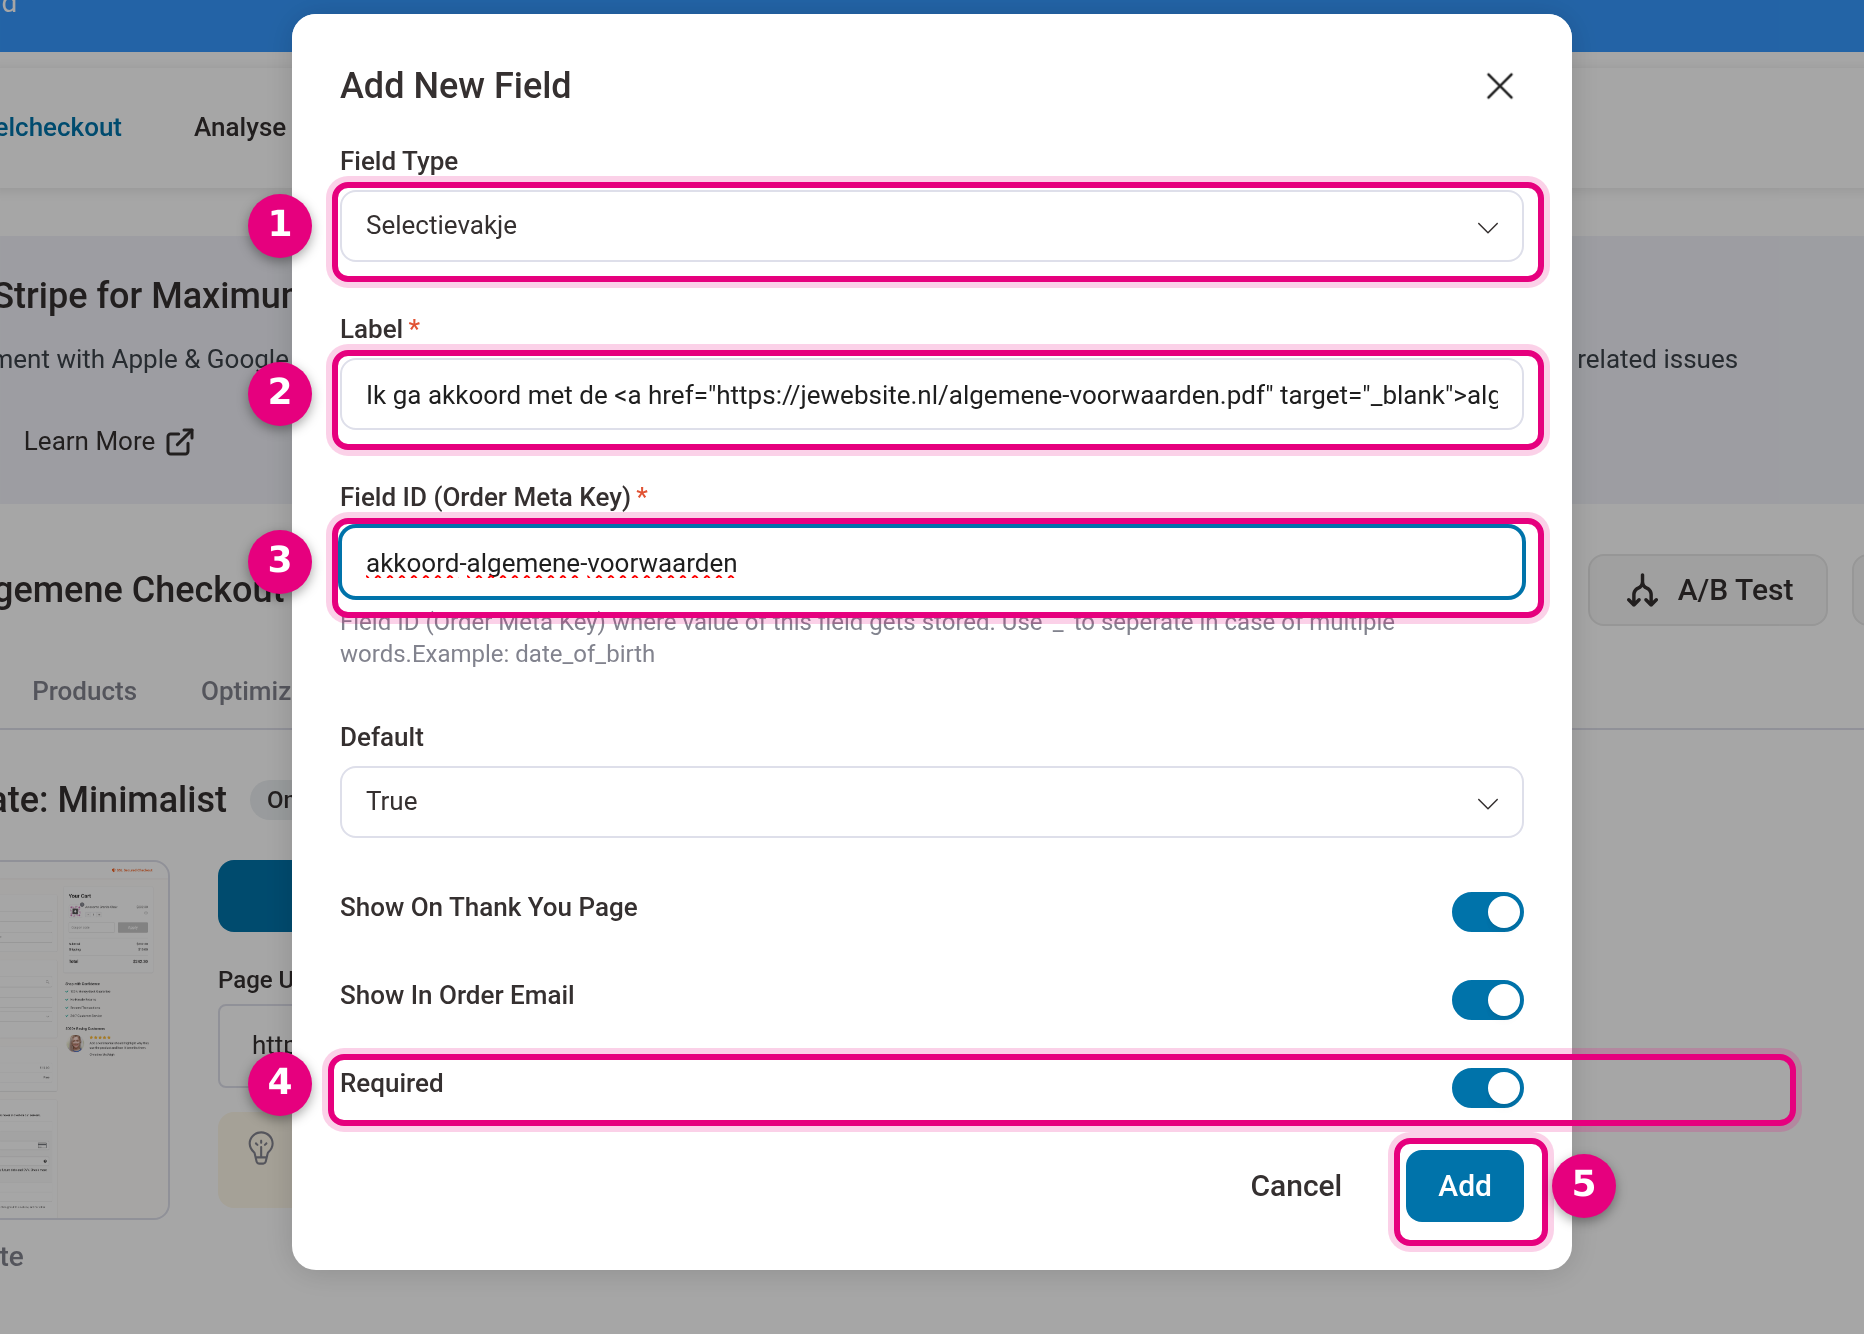
- Field Type: choose Checkbox, so that the customer has to tick a box.
- Label: the text next to the checkbox. This may contain an HTML link, for example: I agree to the <a href=”https://yourwebsite.com/algemene-voorwaarden.pdf” target=”_blank”>terms and conditions</a>. Replace the URL with the address of your own document or PDF.
- Field ID (Order Meta Key): a unique technical name, for example agree-terms-and-conditions. The customer’s choice is stored with the order under this name, so that you can find the agreement again later.
- Required: switch this on, so that the customer cannot check out without agreeing. Set Default to False if you want the customer to tick the box themselves.
- Add adds the field to the field list; after that, do not forget to drag it into place and click Save.
This is what it looks like in the checkout:
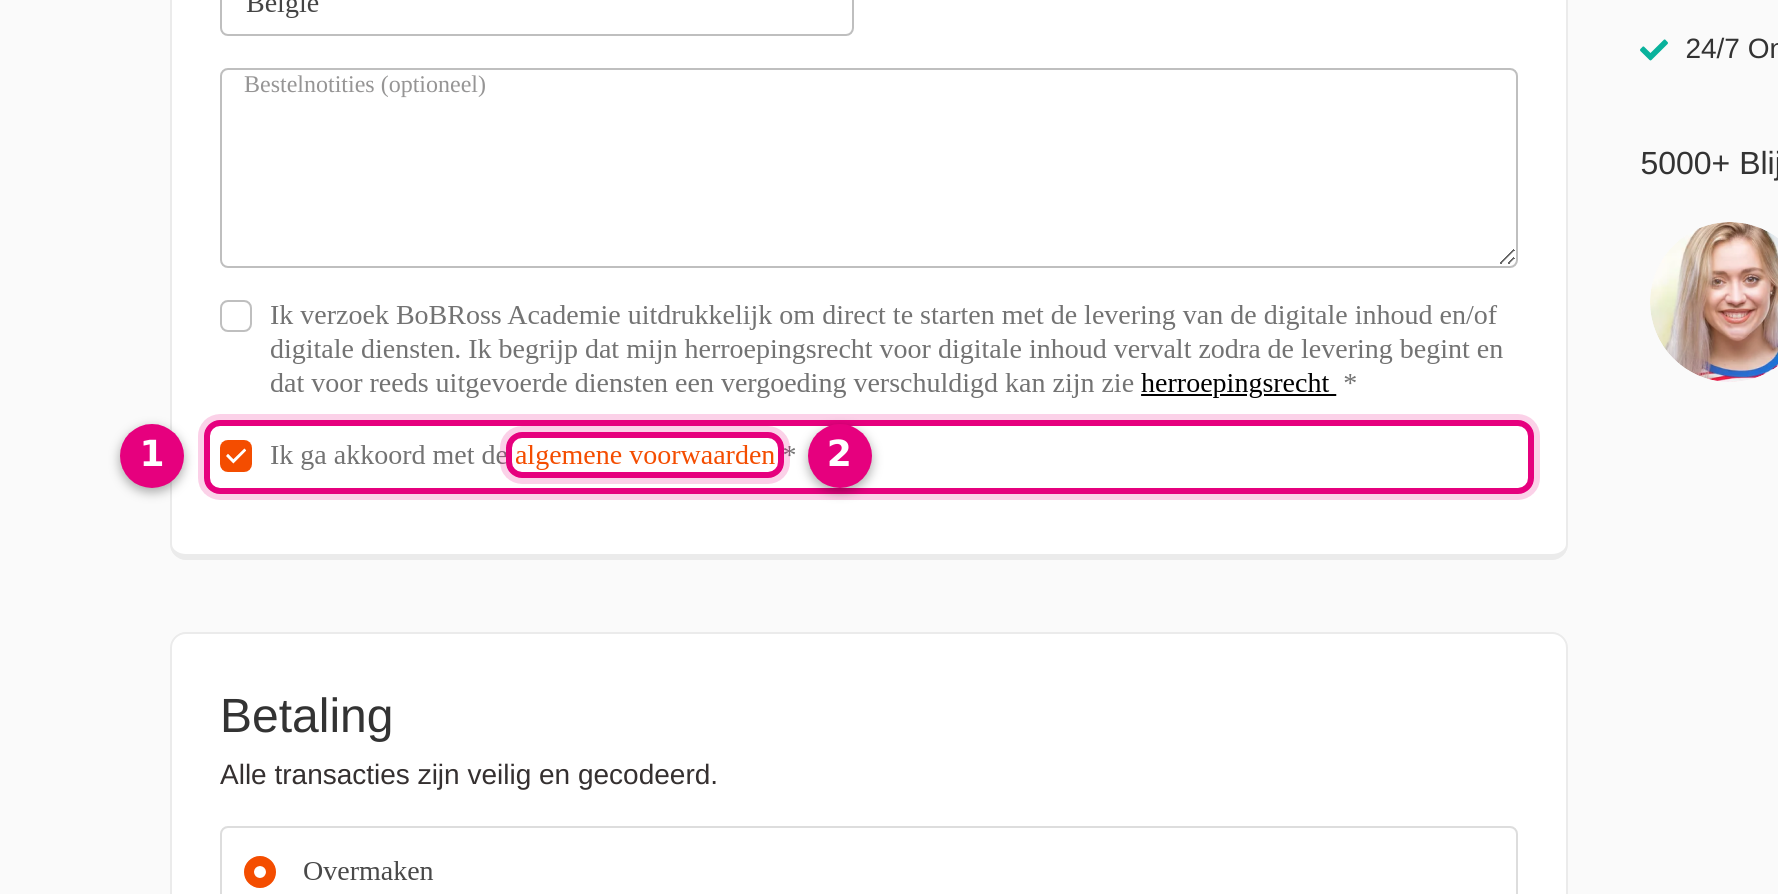
- The new agreement checkbox appears as a required field (with an asterisk) in the order form.
- The link in the text opens your external terms or PDF in a new tab, so that the customer does not leave the checkout.
In this case, leave the Terms and conditions field under Shop → Settings → Advanced empty, otherwise you get two agreement lines below each other. Two alternatives, if you would rather not use your own field:
- Create a small internal page “Terms and conditions” with just a short text and the link to your external document or PDF, and select that page as the terms page. You then use the standard agreement line of the shop.
- Do not use an agreement checkbox in the checkout and settle for a clear link in your footer or menu (see step 4). Consider for yourself (or with a lawyer) whether that fits what you want to record.
Step 4: A link in your menu or footer #
If you also want the documents to be findable through your menu or footer, add a custom link there:
- Go to Website → Menus and choose the menu that is in your footer or navigation.
- Click Custom links, enter the address of your external document or PDF under URL and for example “Terms and conditions” under Link text.
- Click Add to menu and then Save menu.
Do I need to change anything else? #
No. The WordPress privacy page (Settings → Privacy) only accepts an internal page and you can simply leave it as it is for this scenario; the cookie banner uses the setting from step 2 and does not look at it. There is no separate place where you enter external URLs for legal documents centrally: the cookie banner and the checkout each have their own setting, as described above.


