Your shop automatically sends emails to your customers, such as the order confirmation and the invoice email. Two addresses play a role in those emails: the sender address (the address the email technically comes from) and the reply address (the address a response from your customer goes to when they click Reply). This article explains how both work, what we have set up for you and what you can adjust yourself.
The shop in Autorespond is based on WooCommerce, included in your package. Read the WooCommerce documentation
How the sender address works #
We set the sender address for all emails from your environment through the mail settings (Administration → Mail settings). By default that is a noreply address on your own main domain, for example [email protected]. The mail servers that deliver your email are authenticated on precisely that address (with SPF and DKIM). That is why the option “Force email” is switched on in the mail settings: every email leaves with that authenticated address as its sender, including the shop emails. This way your order confirmations and invoice emails arrive reliably and do not end up in spam.
This also means that entering a different email address in your shop settings does not change the sender address. That is deliberate, because with a non-authenticated address as sender your emails could be refused or land in spam. What that field does control is explained below.
Setting the sender name and reply address #
The name your customer sees as the sender, and the address replies go to, are up to you. Go to Shop → Shop settings and open the Emails tab.
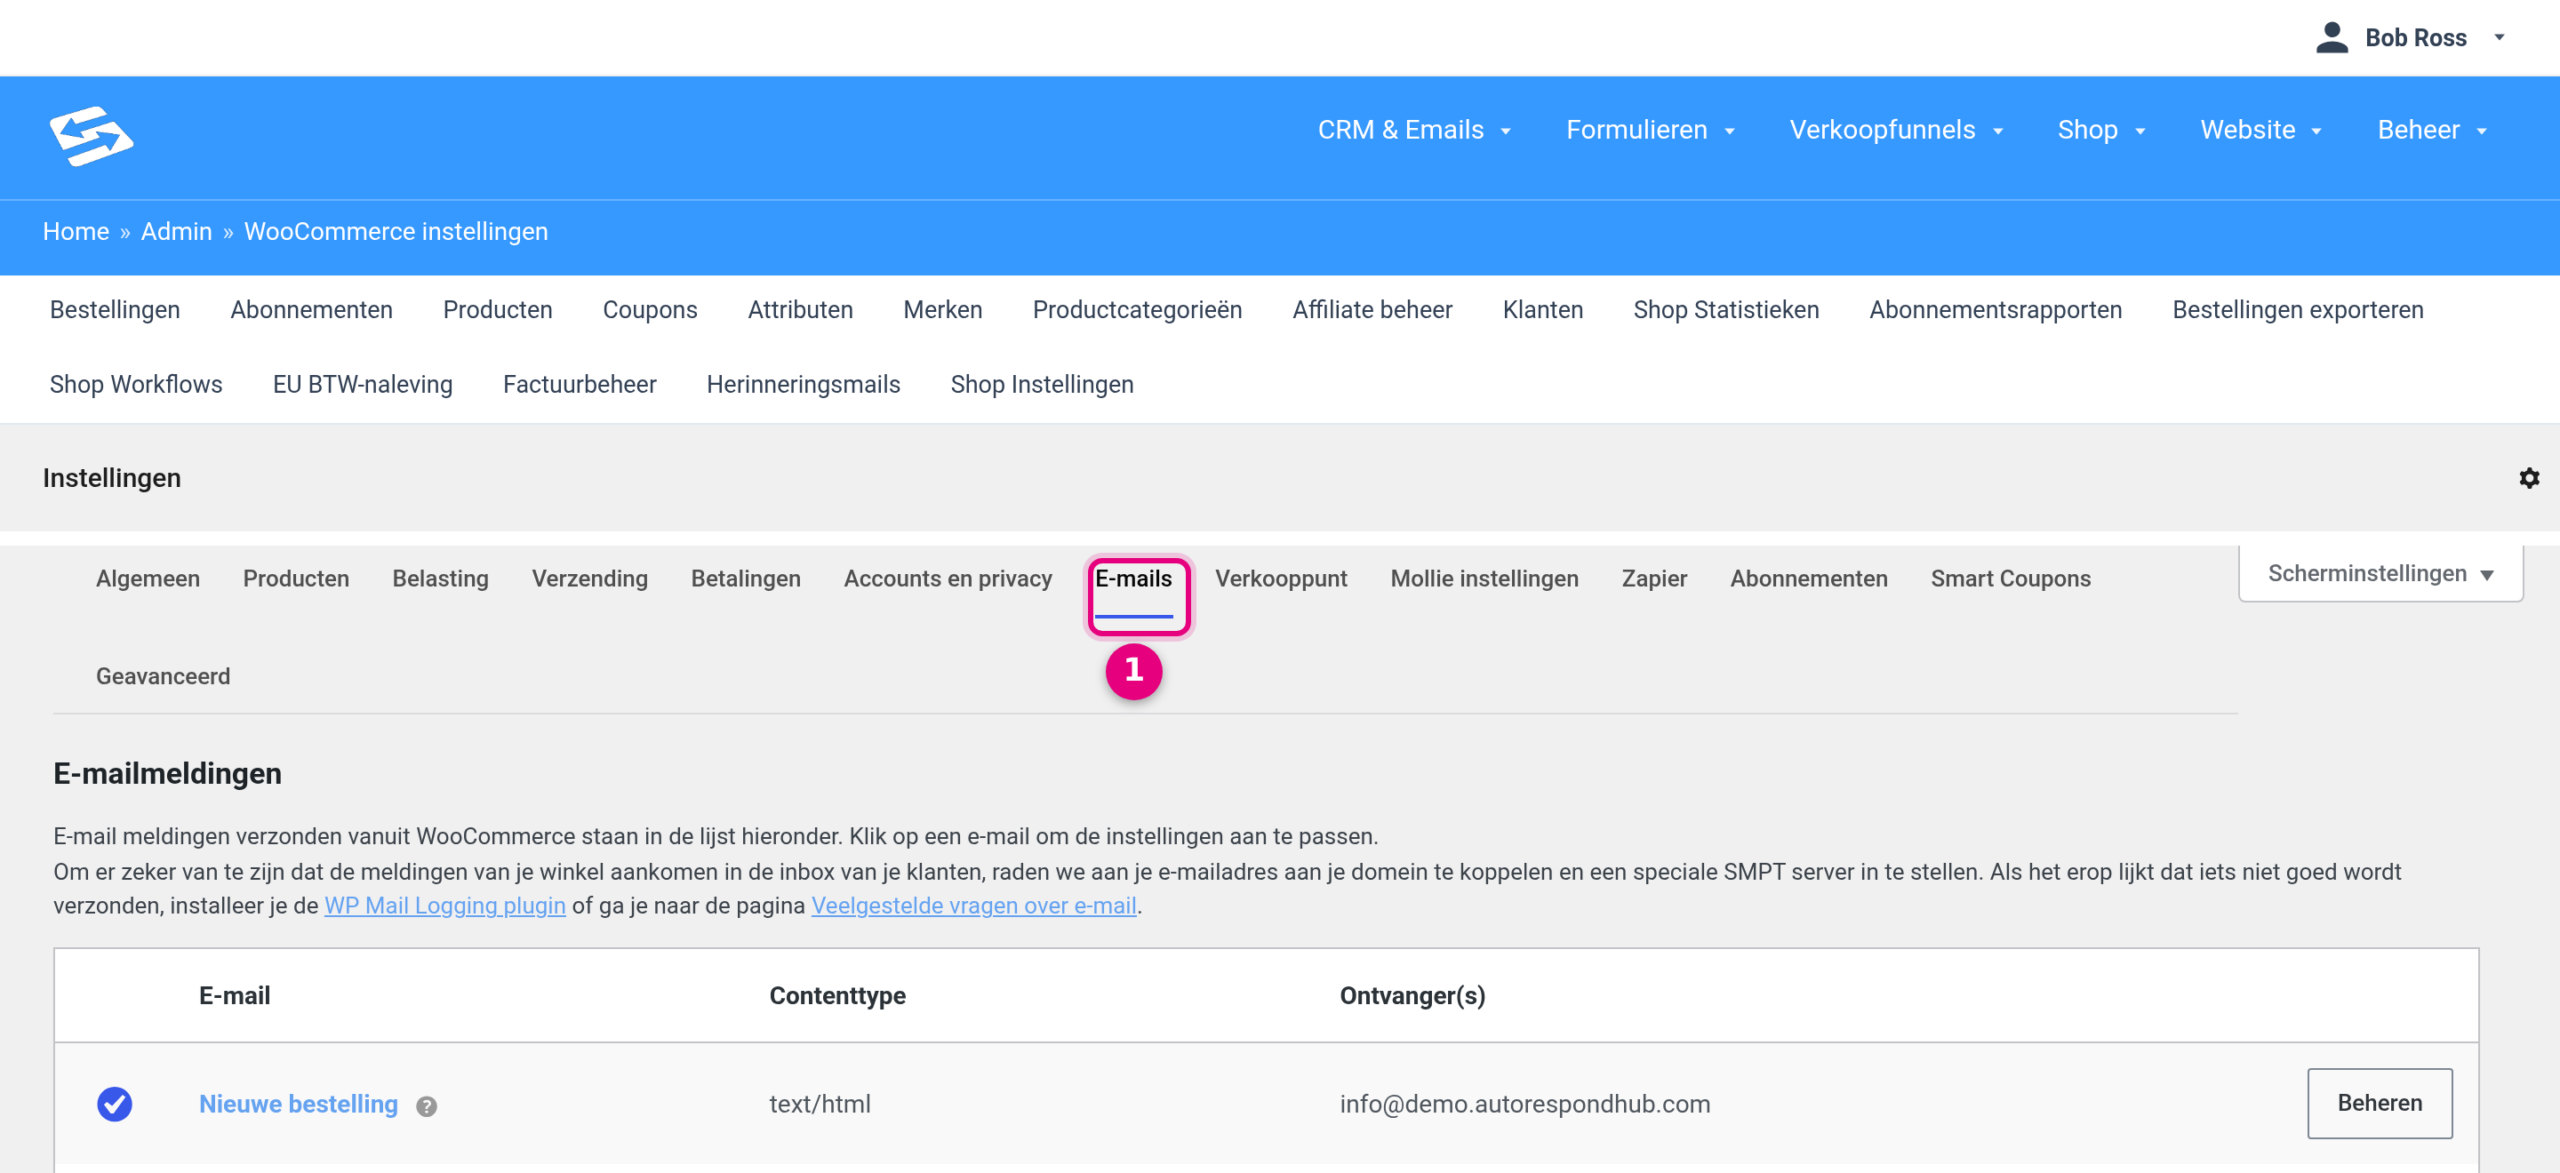
- Emails – open this tab. The sender options are at the bottom of the page, below the list of email notifications, in the Email sender options section.
Scroll to the Email sender options section at the bottom of the tab. There you will find these fields:
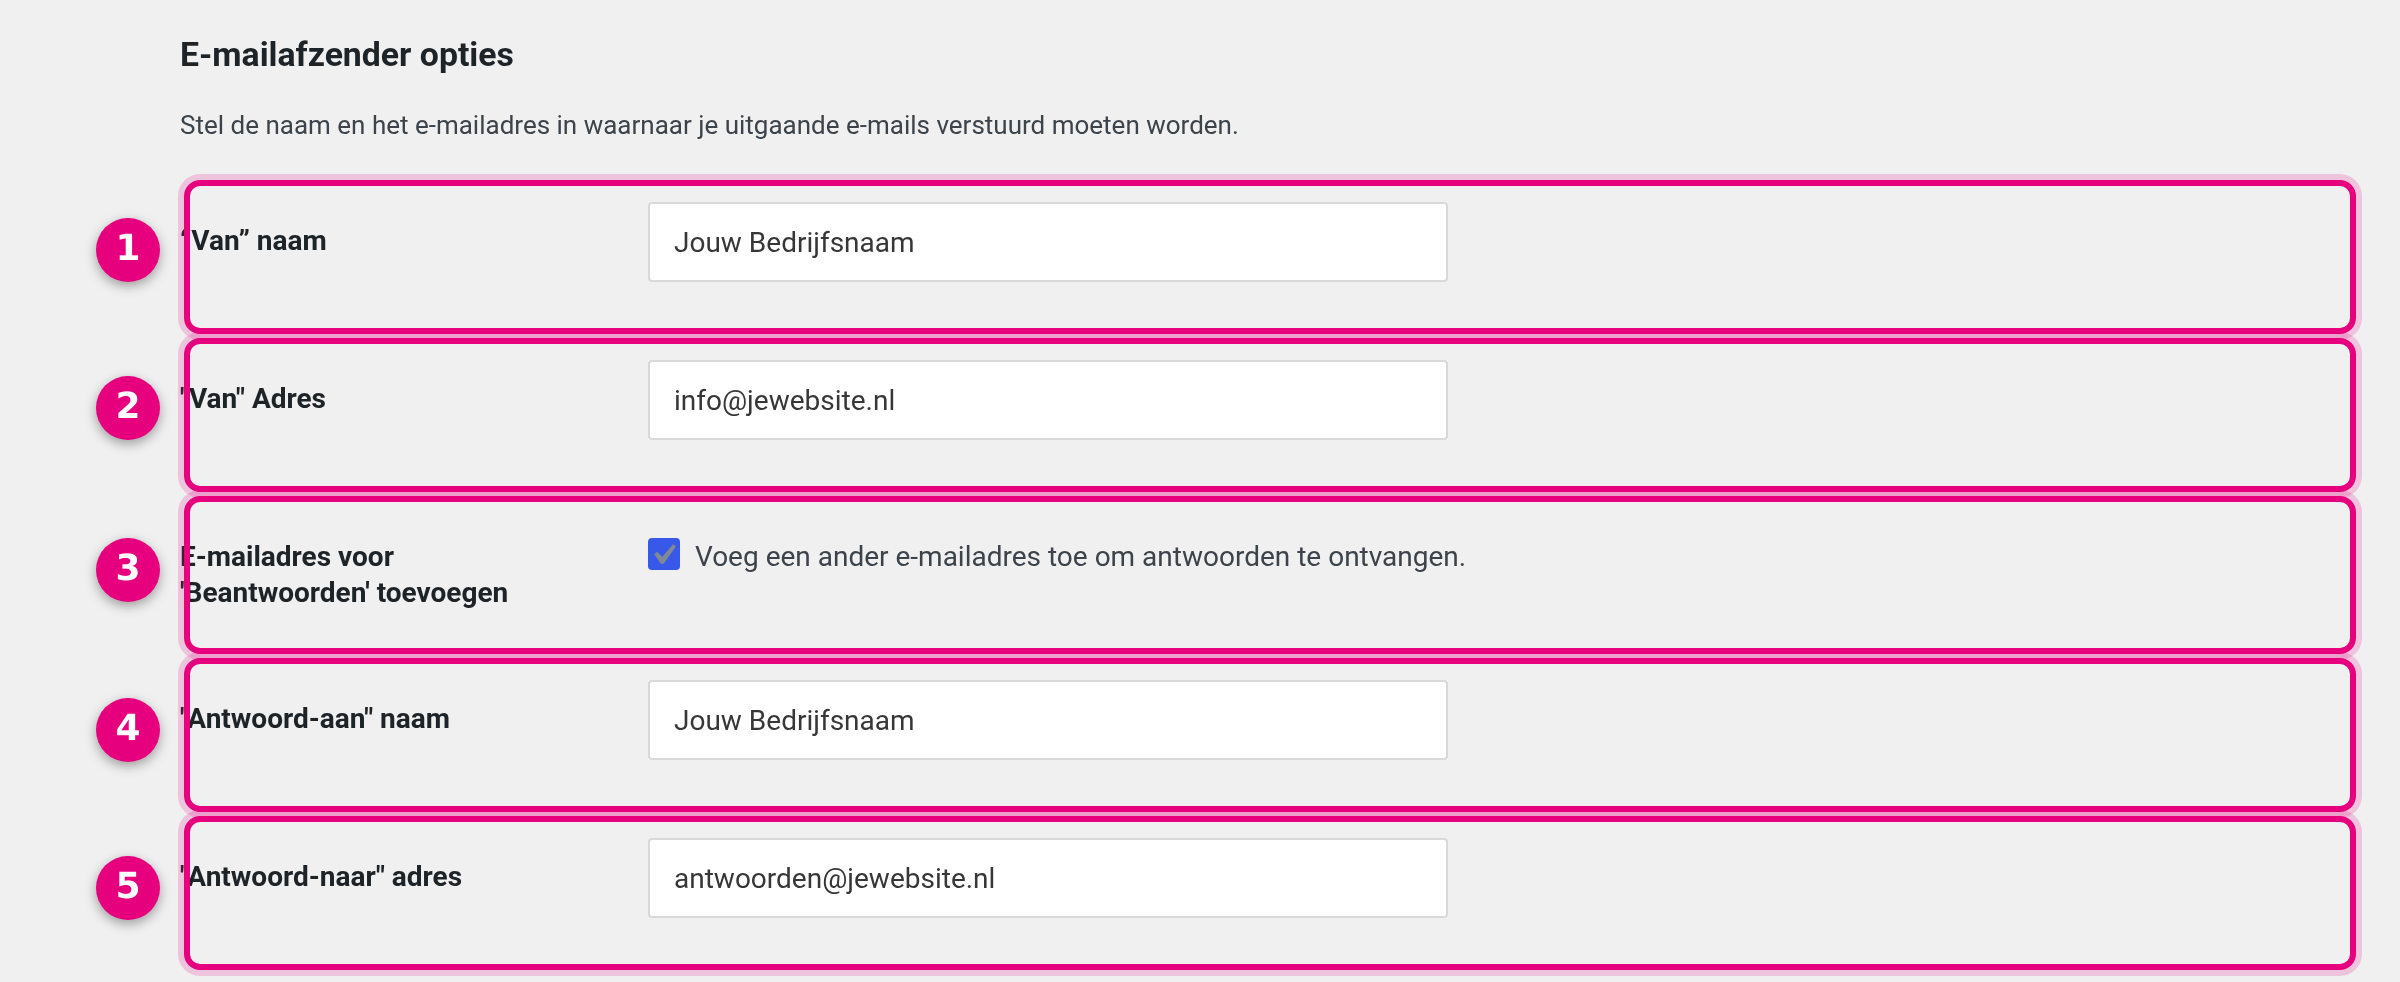
- “From” name – the sender name your customer sees in their inbox, for example your company name. This name is used as entered, even though the sender address itself is forced.
- “From” Address – this address does not become the sender address (that stays the noreply address, see above), but it automatically becomes the reply address of your customer emails. If your customer clicks Reply, the response arrives at this address. So enter here the email address on which you want to receive mail from customers.
- Add ‘Reply-to’ email address – tick this if you want to use a different reply address than the “From” Address, for example a separate support address.
- “Reply-to” name – the name belonging to that separate reply address.
- “Reply-to” address – the separate reply address itself. If the box at point 3 is ticked and this field is filled in, this address takes precedence over the “From” Address as the reply address.
Click Save changes at the bottom of the page.
Good to know: the notifications the shop sends to you as the owner (such as the New order email) automatically get the customer’s email address as the reply address. So if you reply to such a notification, you email your customer directly.
How to check it #
- Place a test order in your own shop. Do this in an incognito window and with an external email address that does not yet exist in your environment (so not your own domain and not your admin account), otherwise you get a distorted picture.
- Open the order confirmation that arrives at that address and look at the sender: you see your “From” name, with the noreply address as the sender address.
- Click Reply and check the address in the To field: that is your “From” Address, or your “Reply-to” address if you have set that up separately.
Want to know which emails your shop sends and when? That is explained in The order statuses of your shop explained. Adjusting the content and layout of the shop emails is covered in Adjusting WooCommerce emails and the alternatives.


