Every contact in your Autorespond administration has a detailed page where you find all the information in one place: contact details, email history, tags and lists, and linked orders, all clearly together.
This detail view is your central place for managing individual contacts. You can view data there, but also make changes directly, add notes and carry out actions.
Opening the contact detail page #
There are several ways to open the detail page of a contact:
- Go to CRM & Emails → Contacts and click the name of a contact in the list
- Search with the search field at the top of the contact list and click the contact you find
- Click a contact name in the statistics of an email campaign or automation
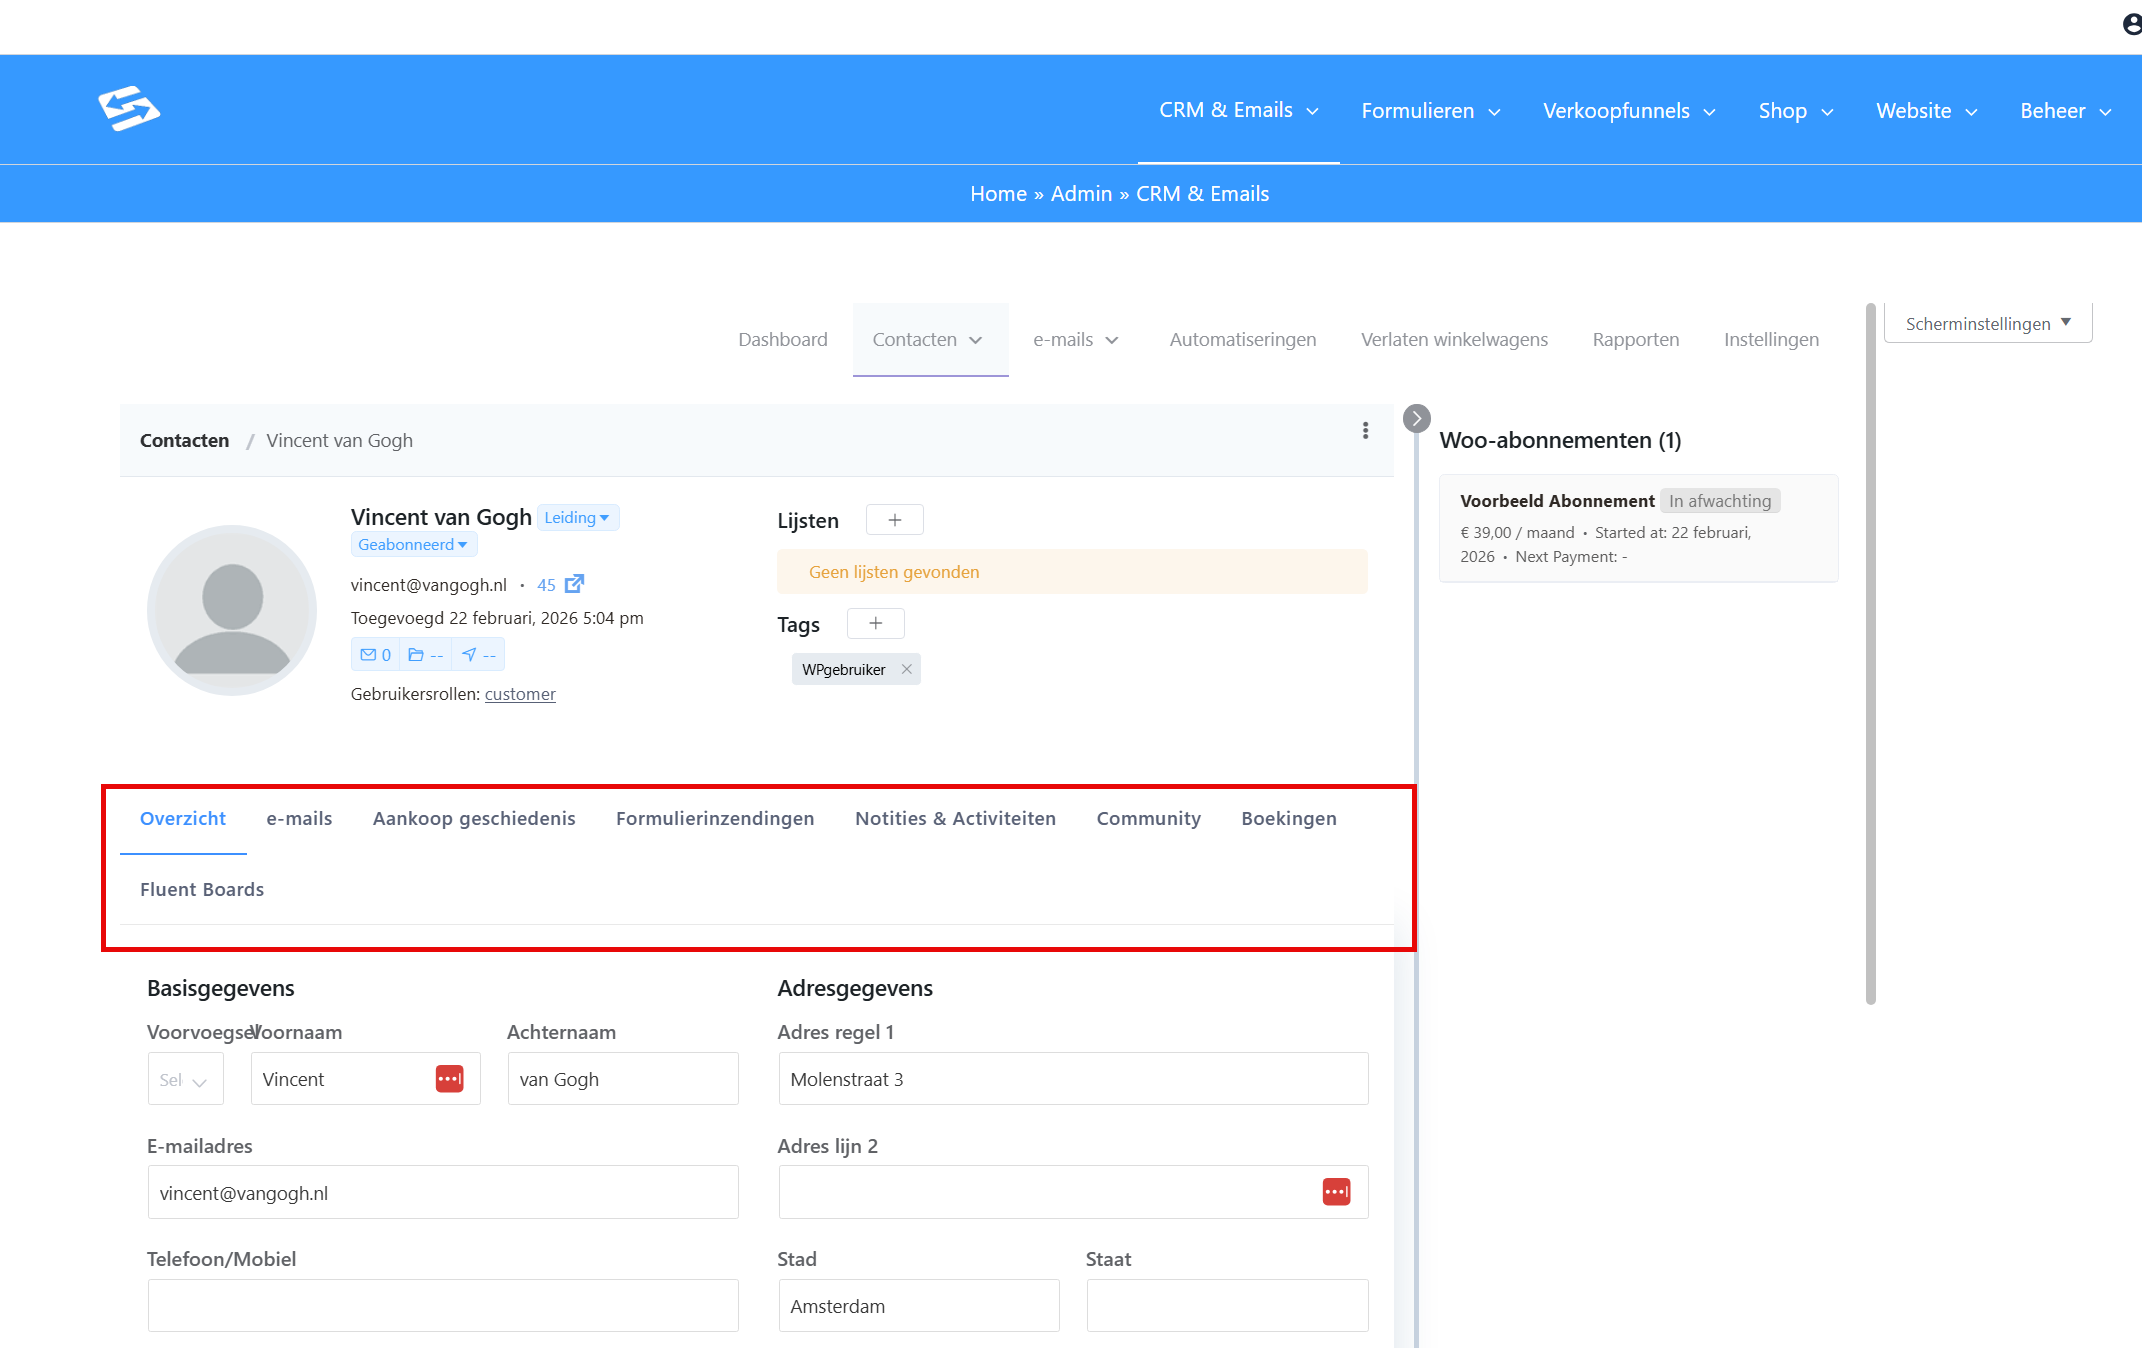
The detail page opens with the ‘Overview’ tab active. Here you find a summary of the most important information about this contact.
The available tabs #
The contact detail page is divided into several tabs, each with its own information. The tabs appear in this order:
- Overview, basic details, tags, lists and most recent activity
- Emails, every email sent to this contact
- Purchase history, orders and buying history (if you have the Shop module)
- Form entries, an overview of every form completed
- Notes & Activities, a chronological overview of all actions and internal notes
- Community, community activity (if you have the Community module)
- Bookings, appointments made (if you have the Appointments module)
- Project Boards, linked tasks and projects (available as standard)
Editing contact details #
In the Overview tab you find an ‘Edit’ button at the top right. Clicking it opens the edit panel where you can adjust all the contact information.
You can change the following details:
- First and last name
- Email address (note: this affects automations and email history)
- Phone number
- Address details
- Custom fields you have set up
- Contact status (subscribed, unsubscribed, unconfirmed)
After making your changes, click ‘Update contact’ to save them. The system automatically records when data was changed and by whom.
Managing tags and lists #
Directly below the contact details you see which tags and lists this contact has. You can change them here easily:
- Add a tag: click the ‘+’ icon next to ‘Tags’ and select or type a tag
- Remove a tag: click the ‘x’ on an existing tag
- Change list membership: click the ‘+’ icon next to ‘Lists’ to add or remove lists
Changes to tags and lists are saved immediately. Note that adding a contact to a list that has an automation attached can start that automation.
Viewing the email history #
The ‘Emails’ tab shows every email sent to this contact, including:
- Campaign emails with open and click statistics
- Email sequences that have started
- Automatic emails from automations
- Individual emails you sent manually
For each email you can see whether it was delivered, whether it was opened and what was clicked. This helps you understand how engaged this contact is with your content.
Activity history #
The ‘Notes & Activities’ tab gives a chronological overview of everything that has happened with this contact:
- When the contact subscribed
- Which forms were completed
- Which automations were started
- Changes to tags and lists
- Email interactions (opens, clicks)
- Purchases (if you use the shop)
This timeline helps you understand the customer journey of this contact and decide on suitable follow-up actions.
Adding internal notes #
In the ‘Notes & Activities’ tab you can add internal notes. Use it to record important information that does not fit the standard contact fields, such as:
- Notes from a phone conversation
- Particular requests or circumstances
- Agreements or commitments
- Reasons behind certain tags or list assignments
Notes are visible only to users of your Autorespond administration and are not shared with the contact. They help your team communicate consistently and personally with every contact.
Contact management in Autorespond is based on FluentCRM Pro, which is included in your package. Read the English documentation
For more on managing contacts, see also how to manage and add contacts and the contacts dashboard and overview.


