When you create a credit invoice, your customer automatically receives an email with the credit note attached. By default, that email and the document talk about a refund. If you do not pay out straight away, or you prefer to call it a credit, you will want to change those texts. On a credit invoice you often also want a different footer than the payment instruction that appears under your regular invoices. This article covers all three: the email texts, the title of the document and a separate footer per document.
The shop in Autorespond is based on WooCommerce and the invoice management on WP Overnight PDF Invoices & Packing Slips Pro, both included in your package. Read the WP Overnight documentation on credit notes
How to create a credit invoice and send it along automatically is explained in Creating and sending credit notes for an existing order. This article is about the texts and the layout.
1. Adjusting the “Refunded order” email #
The email your customer receives when you issue a credit is called Refunded order. You decide the subject and the heading yourself. Go to Shop → Shop Settings, click the Emails tab and open the Refunded order email.
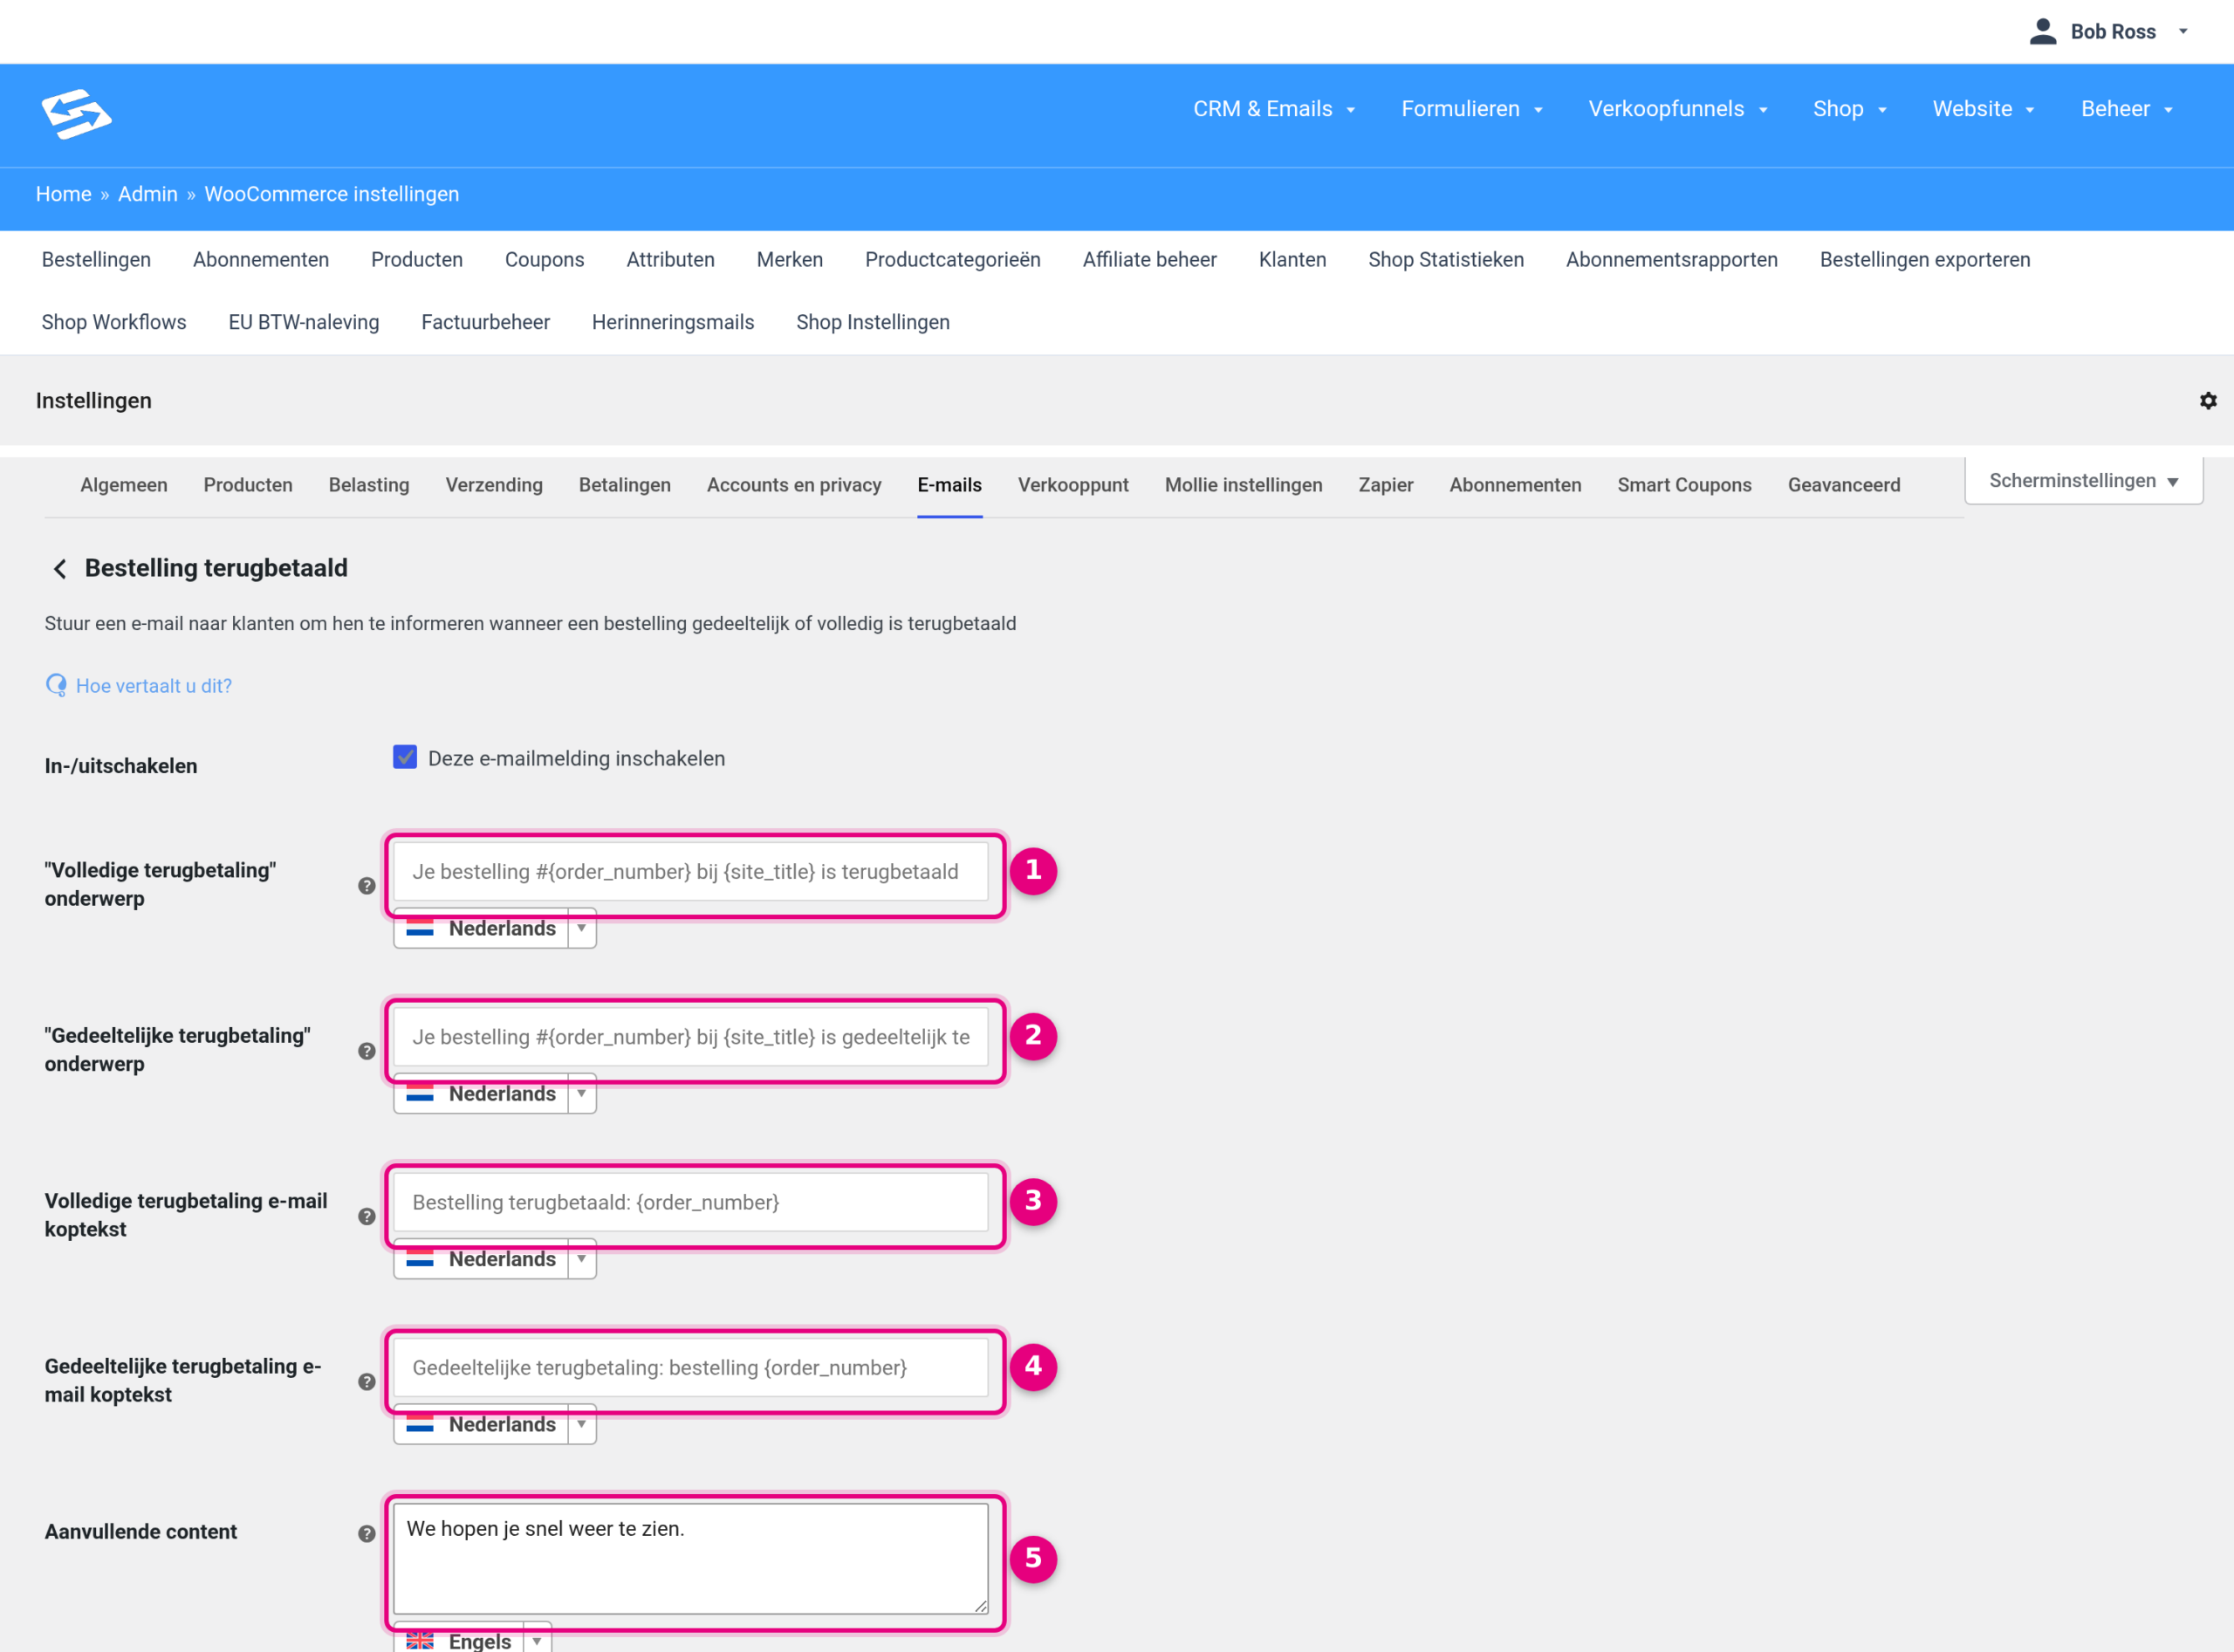
- “Full refund” subject: the subject of the email for a full credit, for example “Credit invoice for your order #{order_number} at {site_title}”. The shop fills in the codes between braces automatically.
- “Partial refund” subject: the same for a partial credit, for example “Partial credit for your order #{order_number}”.
- Full refund email heading: the large heading at the top of the email, for example “Order credited: {order_number}”.
- Partial refund email heading: the heading for a partial credit.
- Additional content (slightly further down the page): your own paragraph at the bottom of the email. Here you put something like “The amount of the credit invoice will be returned within 14 days to the account you paid from.”
Click Save changes at the bottom. With the Send test email button you send yourself an example.
One sentence in this email cannot be changed here: the opening line “Your order on … has been refunded. The details are shown below for your reference:” (for a partial credit, “has been partially refunded”). That line sits in the fixed email text of the shop. If you want that sentence to read differently as well, pass the wording you want to support and it will be replaced in your environment.
2. The title of the document: Credit note or Credit invoice #
The document itself is called Credit note by default. If you prefer Credit invoice, you change the title. Go to Shop → Invoice management, click the Documents tab and select Credit note under Choose document.
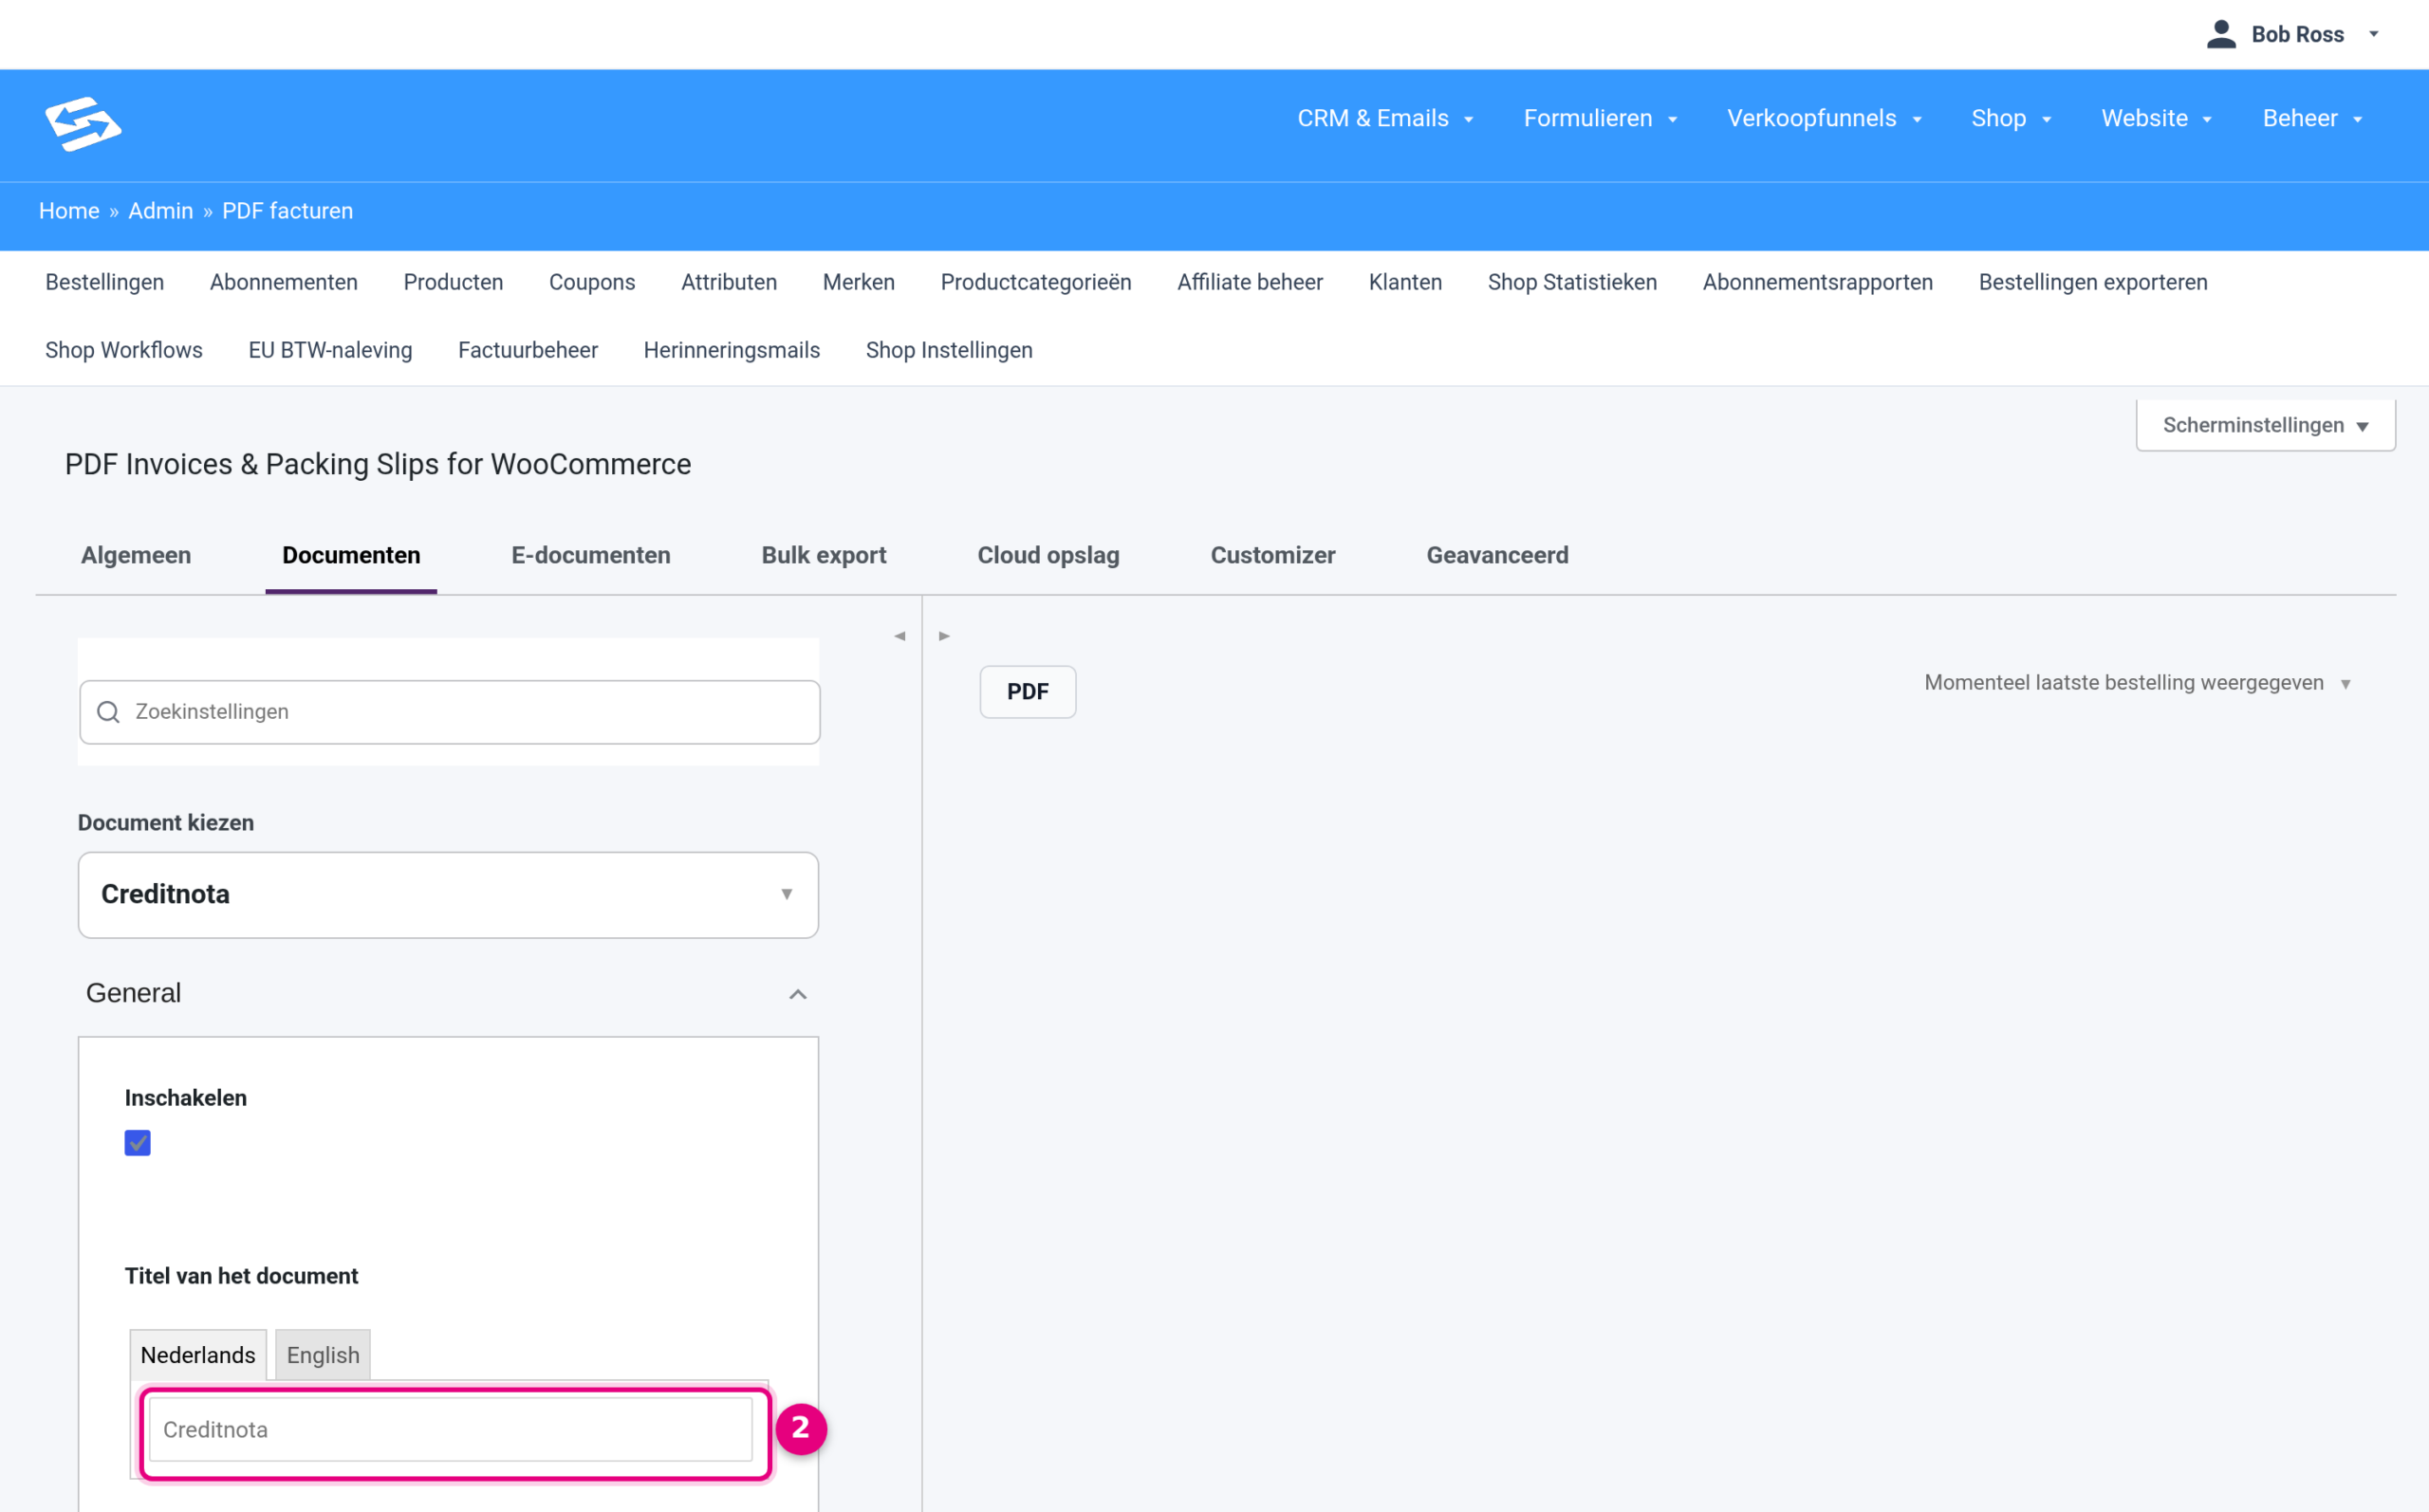
- Under Document title, enter the name that should appear at the top of the document, for example “Credit invoice”. If you run a multilingual shop, fill in the other language tab as well.
- Click Save changes at the bottom.
On the same page you set which emails the credit note is attached to automatically and how credit invoices are numbered. Those options are explained in the article about creating credit notes.
3. A different footer on the credit invoice than on the invoice #
The footer you fill in on the General tab (Shop → Invoice management → General, Shop details section, Footer field) appears under all documents: the invoice, but also the credit note and the packing slip. A payment instruction such as “Please transfer within 14 days to account …” therefore also ends up under your credit invoice.
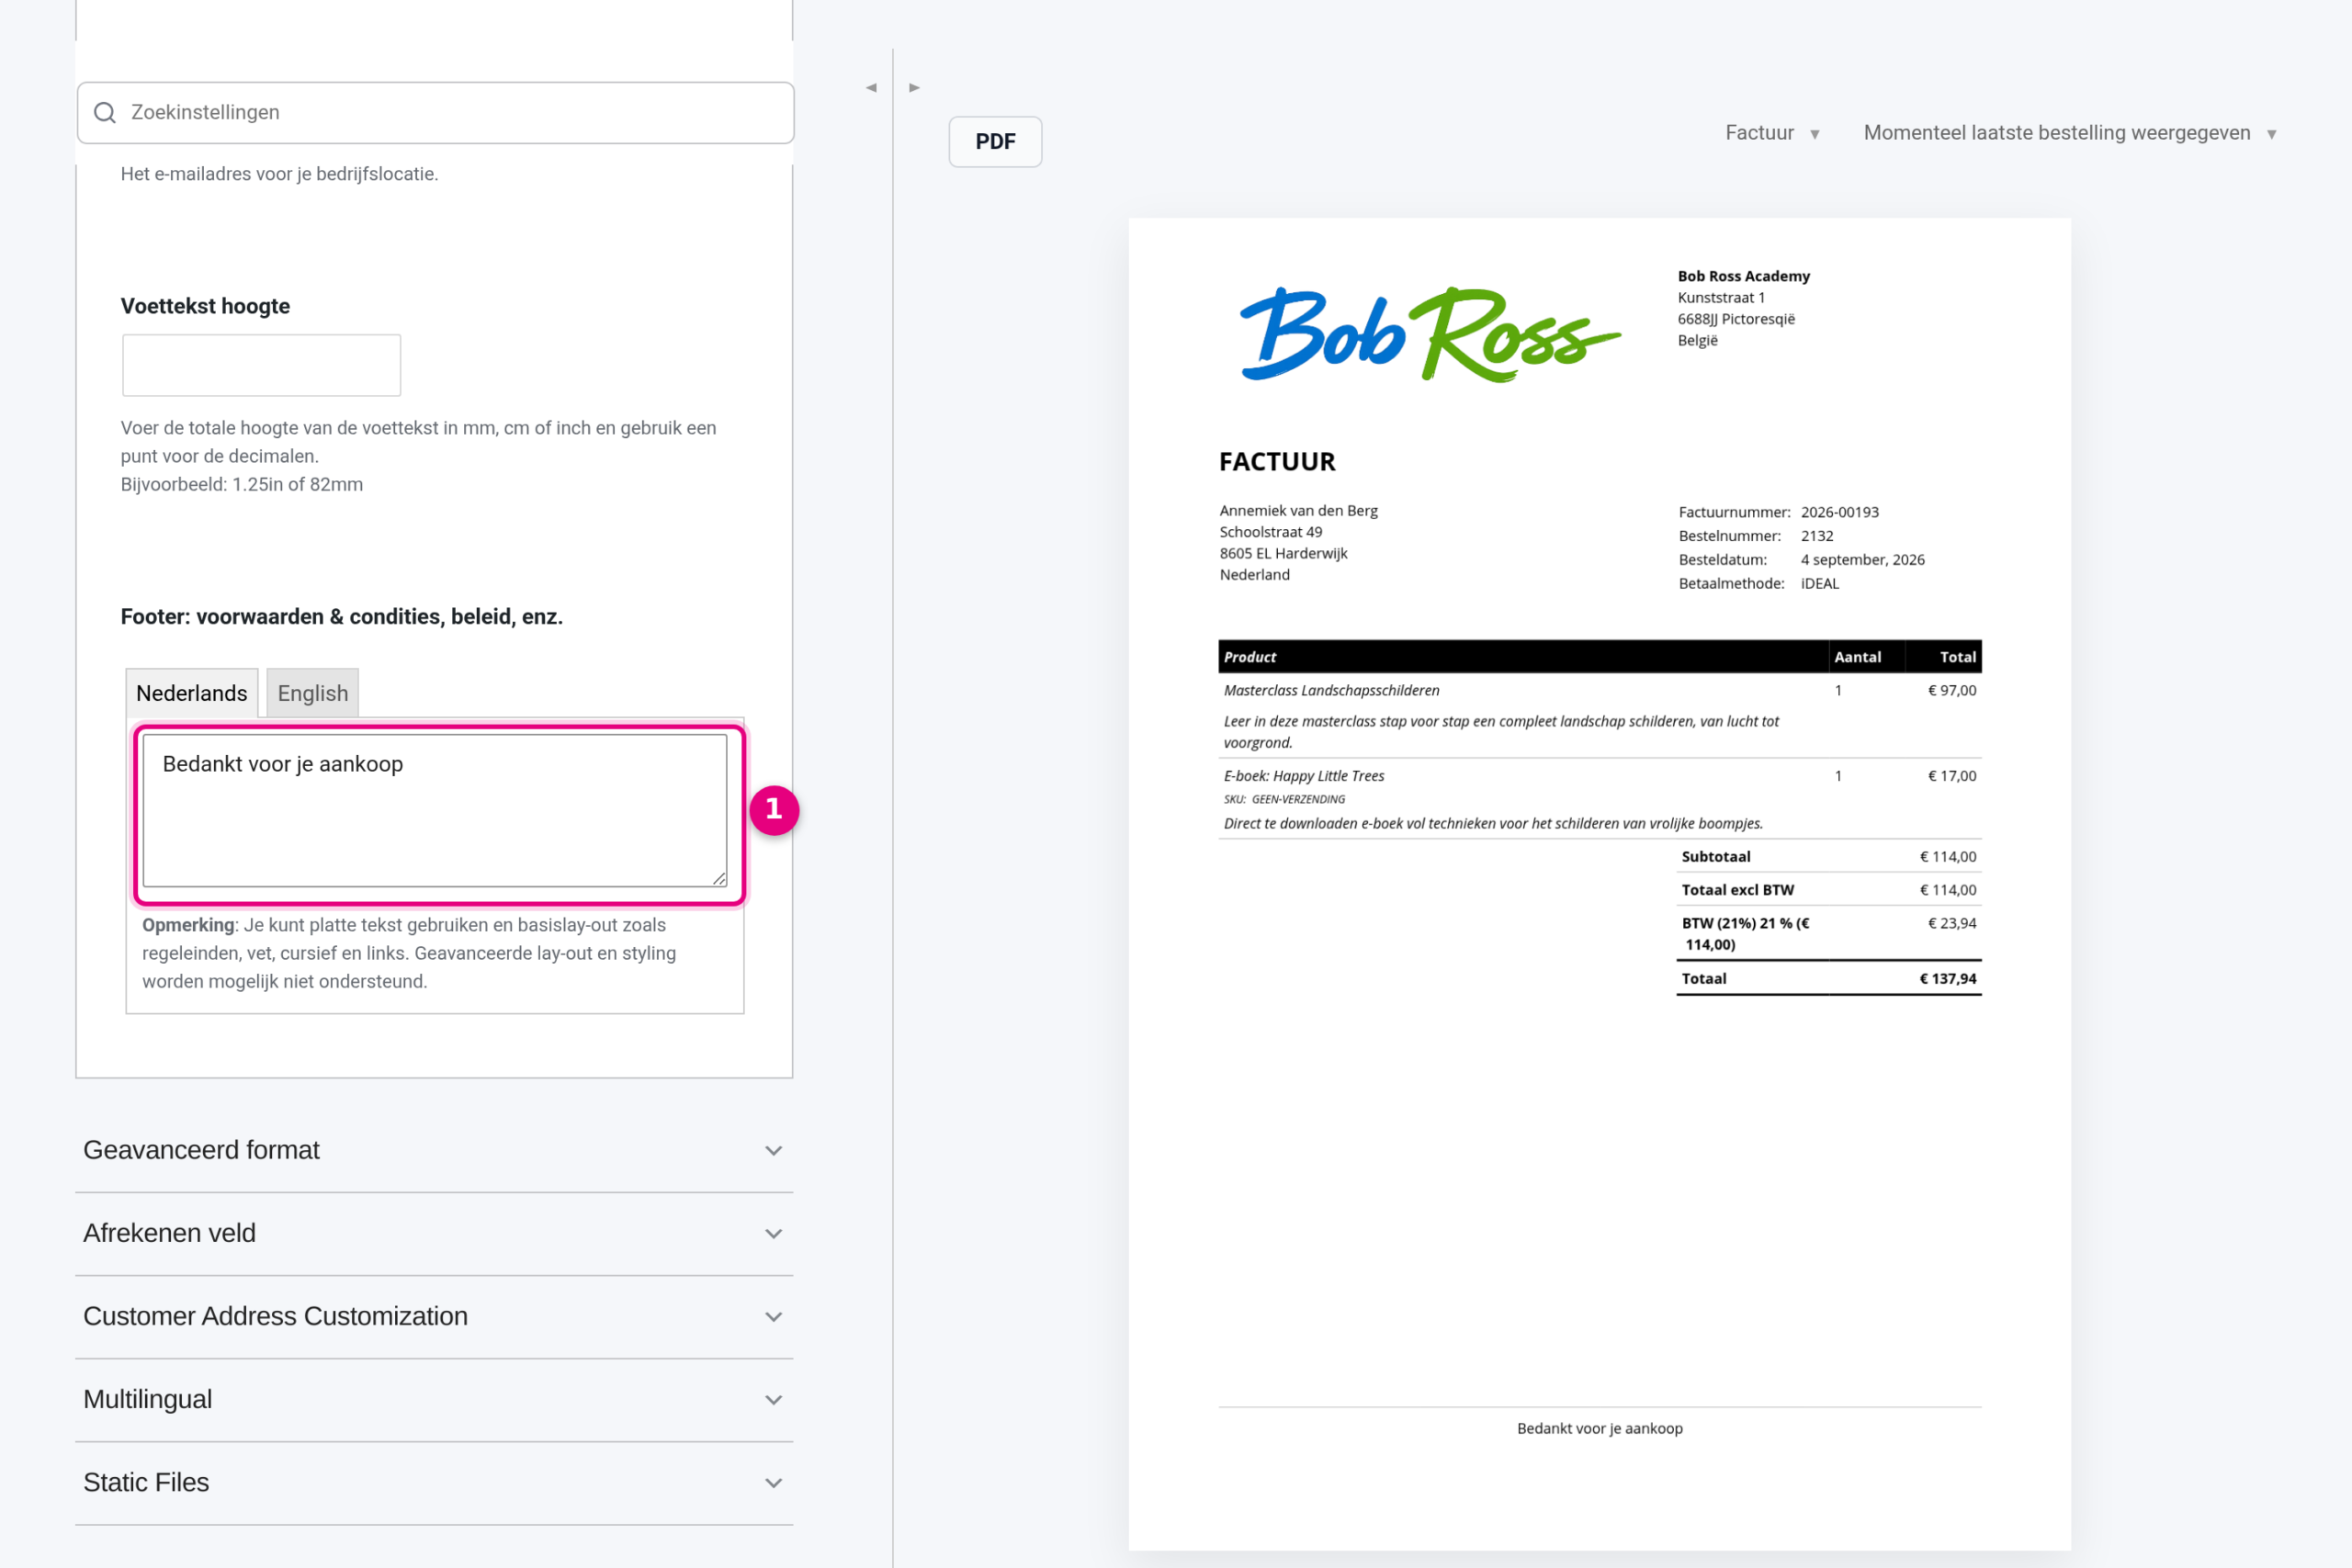
You have two ways to solve this.
Option A: one footer that works for both documents #
The quickest solution: write the general footer so that it fits both documents. For example: “For payment by bank transfer: please transfer within 14 days to account NL00 BANK 0000 0000 00 in the name of Your Company, quoting the invoice number. For credits: the amount of the credit invoice will be returned within 14 days.” Enter this under Footer on the General tab and save.
Option B: a separate text per document (recommended) #
If you want the invoice to show only the payment instruction and the credit invoice only the credit text, leave the Footer field on the General tab empty and add a separate text block per document in the Customizer. Go to Shop → Invoice management and click the Customizer tab.
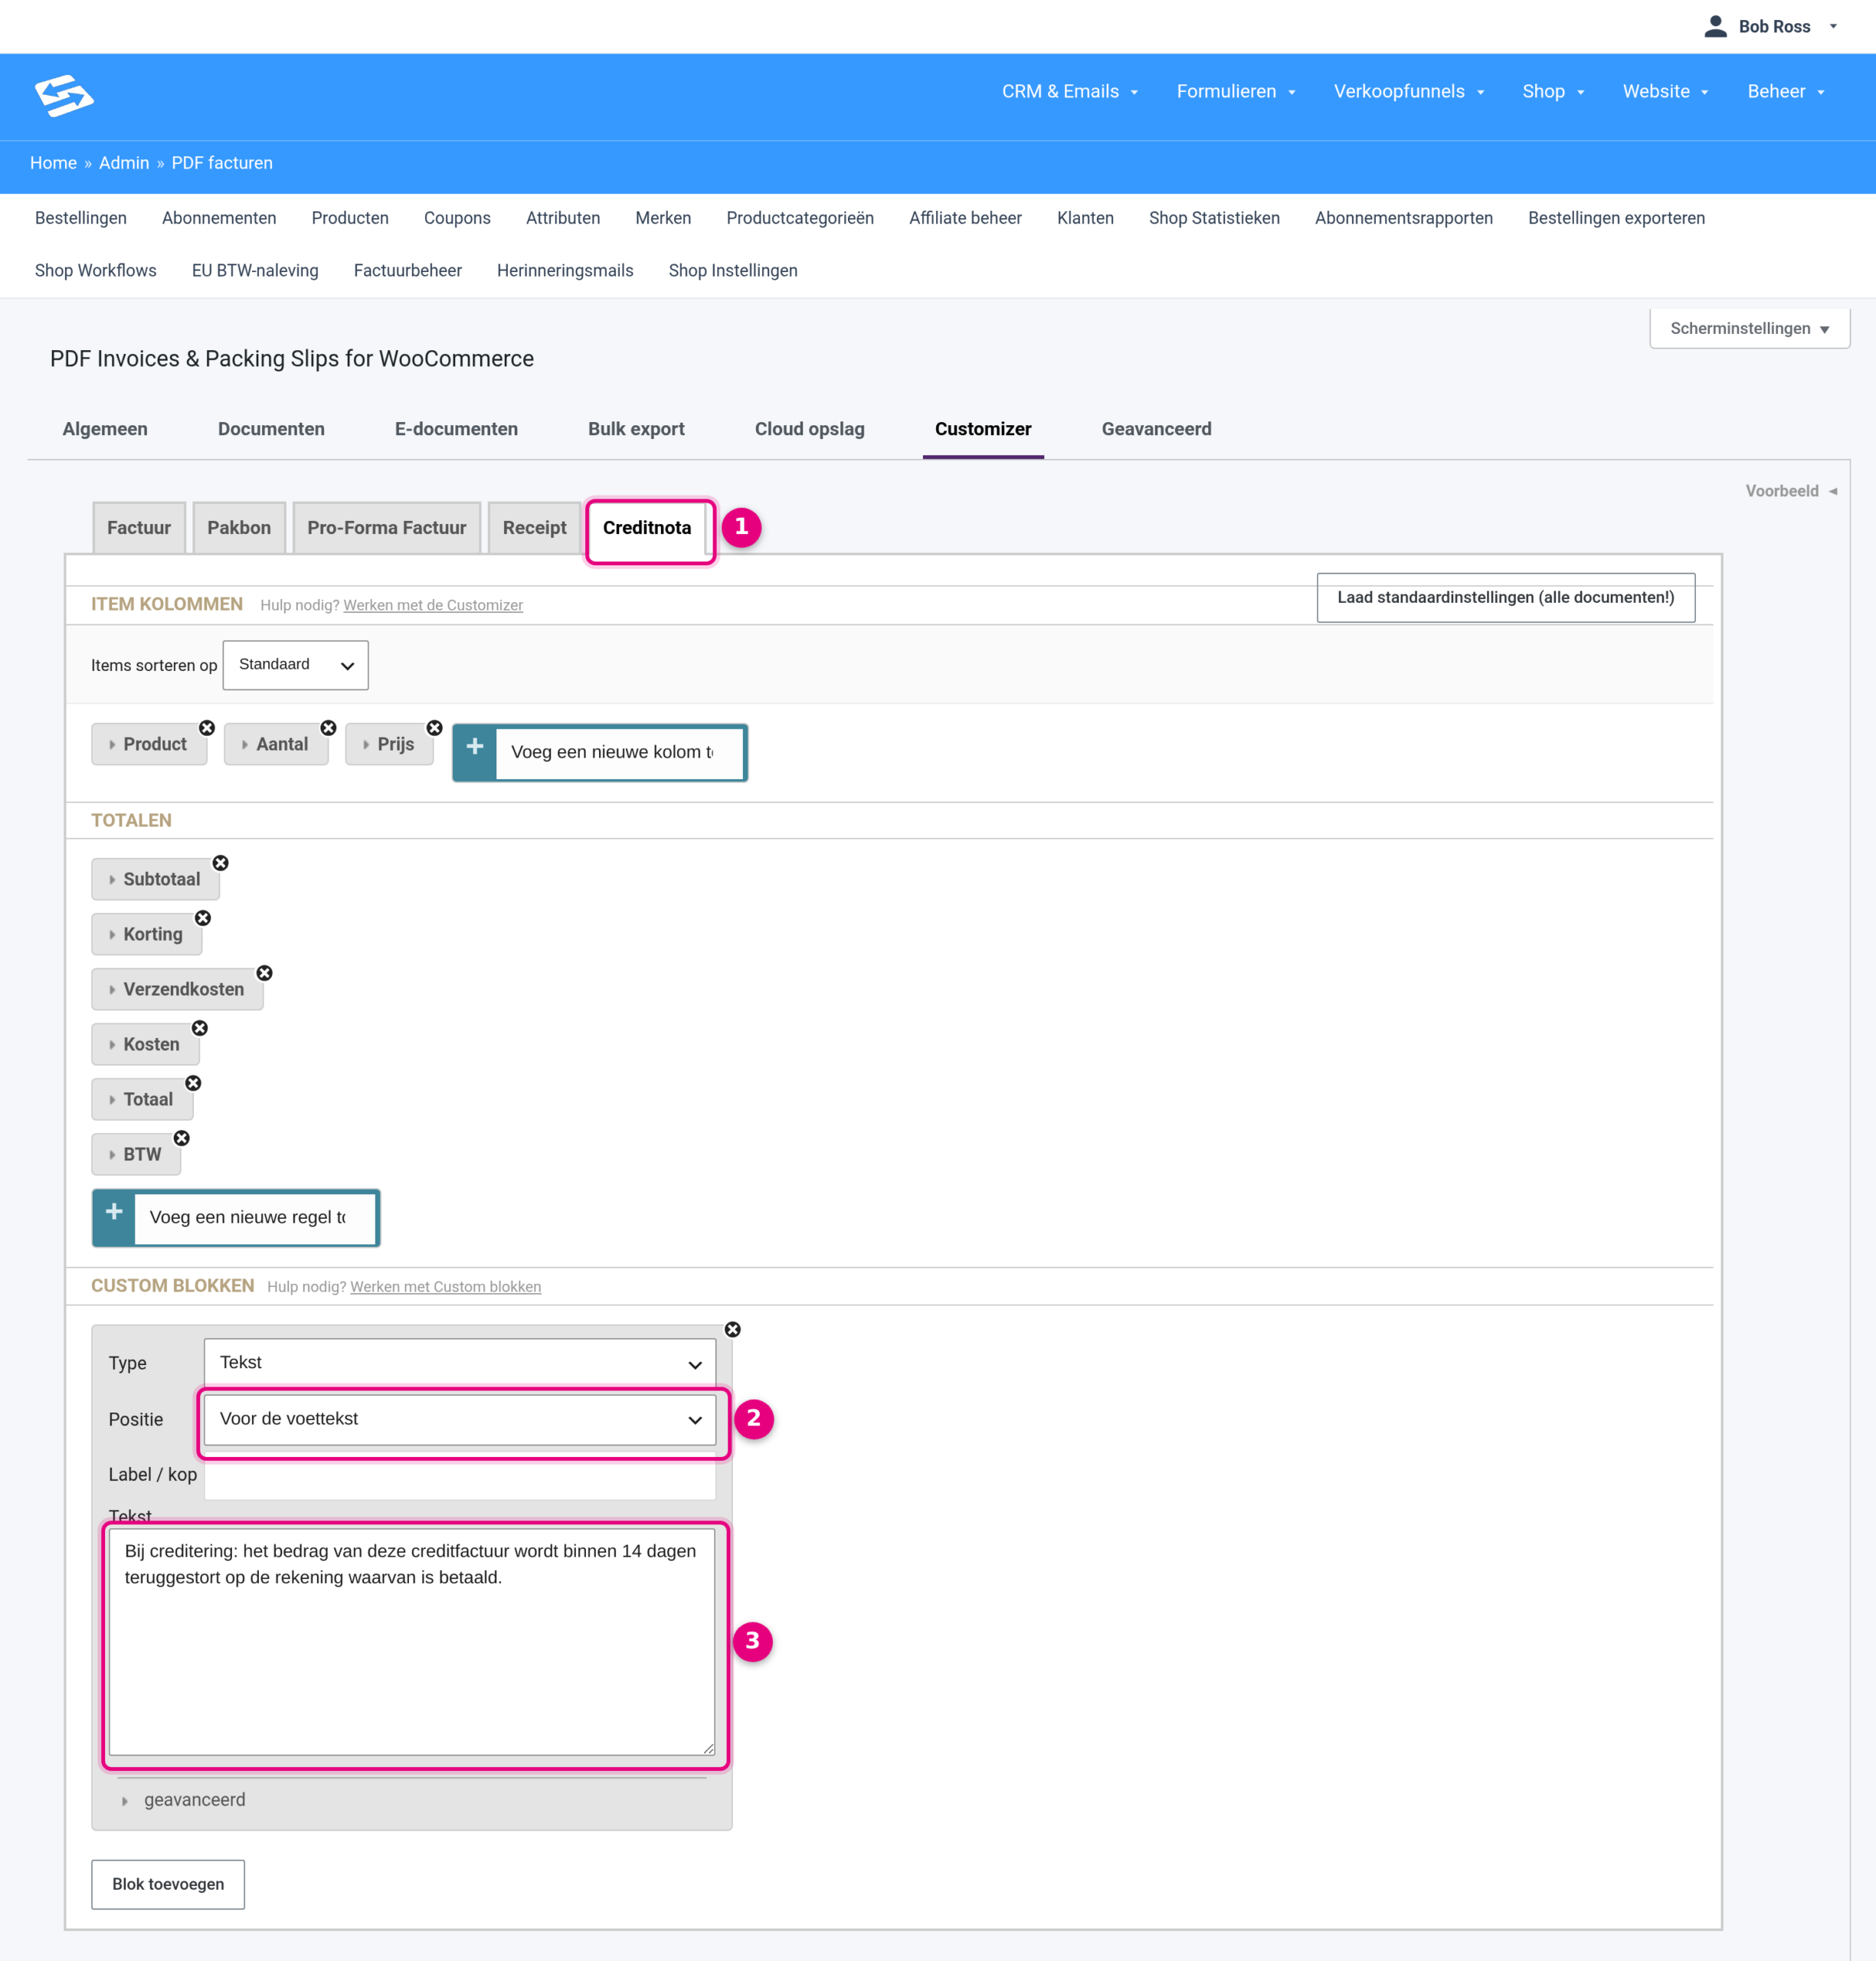
- Select the Credit note document at the top. In the Customizer every document has its own settings; what you do here applies only to the credit note.
- Scroll to Custom blocks and click Add block. Leave Type set to Text and choose Before the footer (or After the footer) under Position.
- Under Text, enter your credit text, for example “For credits: the amount of this credit invoice will be returned within 14 days to the account it was paid from.” The Label / heading field may stay empty.
- Click Invoice at the top and add a text block there in the same way with your payment instruction.
- Click Save changes at the bottom. Open the most recent order via Preview on the right and switch between Invoice and Credit note at the top of the preview to check both texts.
Do you want to show a text only in certain cases, for instance the payment instruction only for orders paid by bank transfer? Then open the advanced section inside the text block and set the condition there (order status, payment method, country or user role).
4. Crediting without refunding straight away #
Are you drawing up the credit invoice while the refund itself will be transferred later, by a colleague for example? Then choose Manual refund in the order when you enter the refund. Nothing is reversed through the payment provider; the shop only records the credit, creates the credit invoice and sends the email. You transfer the amount yourself afterwards. Always fill in the quantities per product line when entering the refund, so the VAT on the credit invoice is correct.
Related articles #
- Creating and sending credit notes in Autorespond for an existing order
- Creating a credit note without an original order or invoice
- Changing the layout of invoices and credit notes with the PDF customizer
- Selling products VAT-exempt (and showing it correctly on the invoice)
Frequently asked questions #
Can I replace the word “refund” with “credit” everywhere? #
You change the subject, the heading and the additional text of the email yourself, as well as the title of the document. Only the fixed opening line in the email (“Your order on … has been refunded”) sits in the email text of the shop; you have that changed through support.
Does a text block in the Customizer also apply to my invoices? #
No. The Customizer has a separate tab per document. A text block on the Credit note tab appears only on credit notes; for the invoice you add your own block on the Invoice tab.
Do credit invoices that have already been sent change as well? #
No. Changes apply to documents you create from now on. You can regenerate an existing credit note in the order, and it will then use the new settings.


