Do you want to set up advanced tracking on your Autorespond website, such as Google Tag Manager (GTM), the Meta Pixel (Facebook), or LinkedIn Insights? Or do you want to add specific scripts that are not in the basic settings as standard?
In this article we explain how to add these codes to your website easily through the advanced SEO settings. Please note: do not use this function for standard Google Analytics 4 (GA4) or Matomo if you have already connected these through the general settings. Those are added to the source code automatically to prevent double measurement.
Step 1: Navigate to the Analytics settings #
To add tracking codes, you need to be in the administration area of your Autorespond platform.
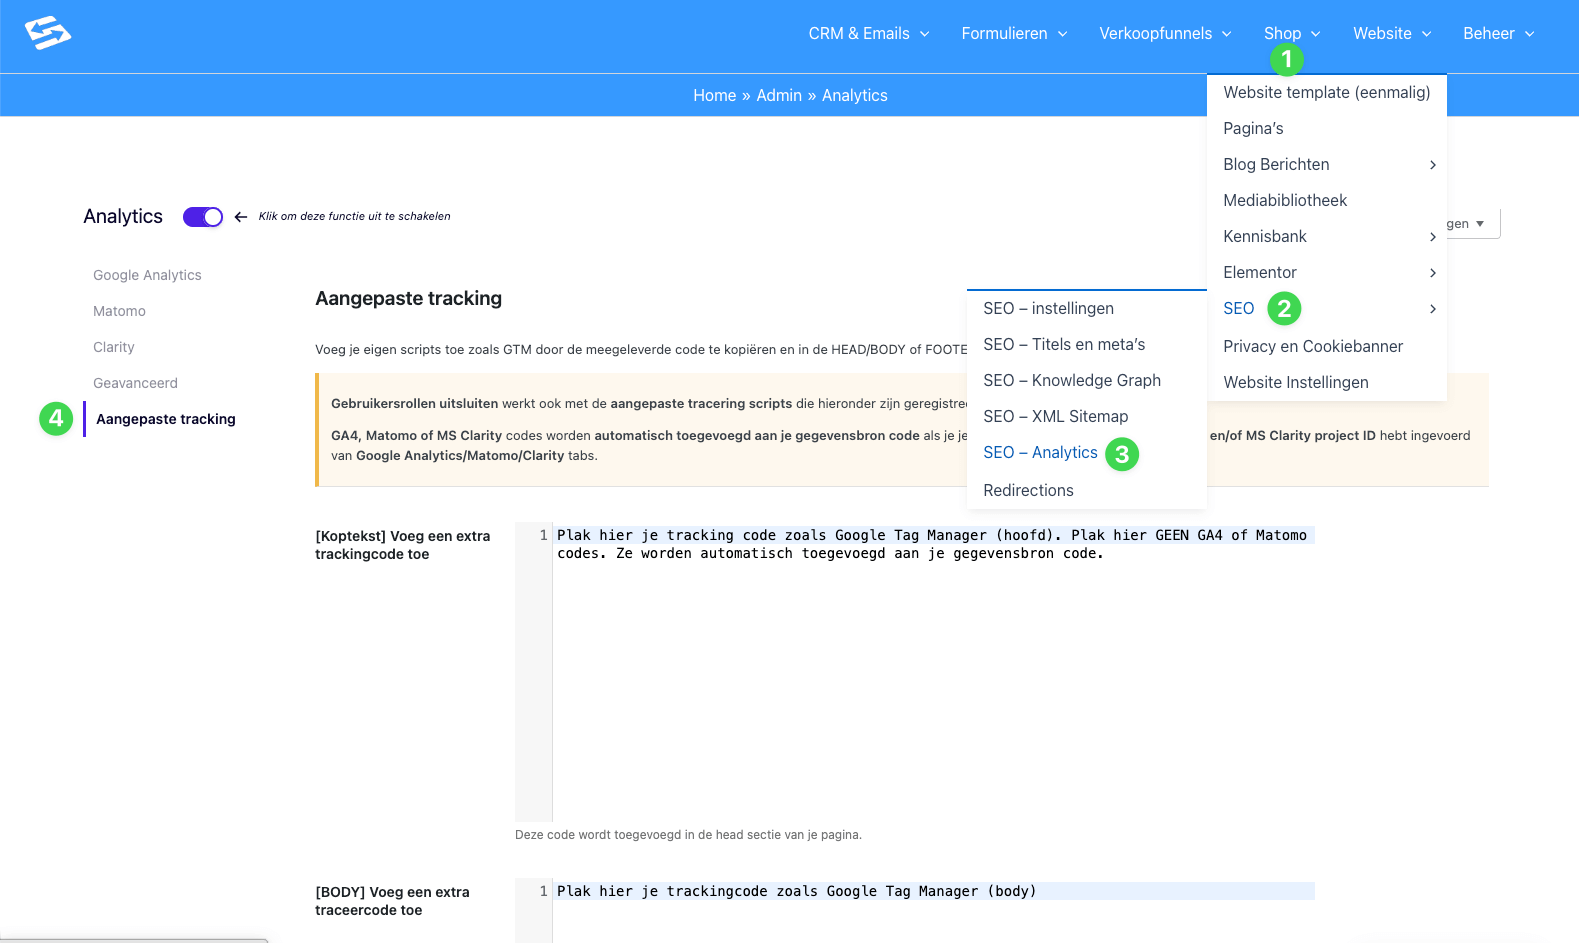
Follow the steps as indicated by the green numbers in the image above:
- In the top menu bar, click (1) Website to open the dropdown menu.
- Move your mouse to (2) SEO. A new submenu opens at the side.
- In this submenu, click (3) SEO – Analytics.
- You are now in the Analytics screen. Here, click the (4) Custom tracking tab (on the left-hand side of the screen).
Step 2: Placing your scripts #
You are now in the screen where you can paste the codes. Most tools (such as Google Tag Manager) give you two pieces of code: one part for the `head` and one part for the `body`.
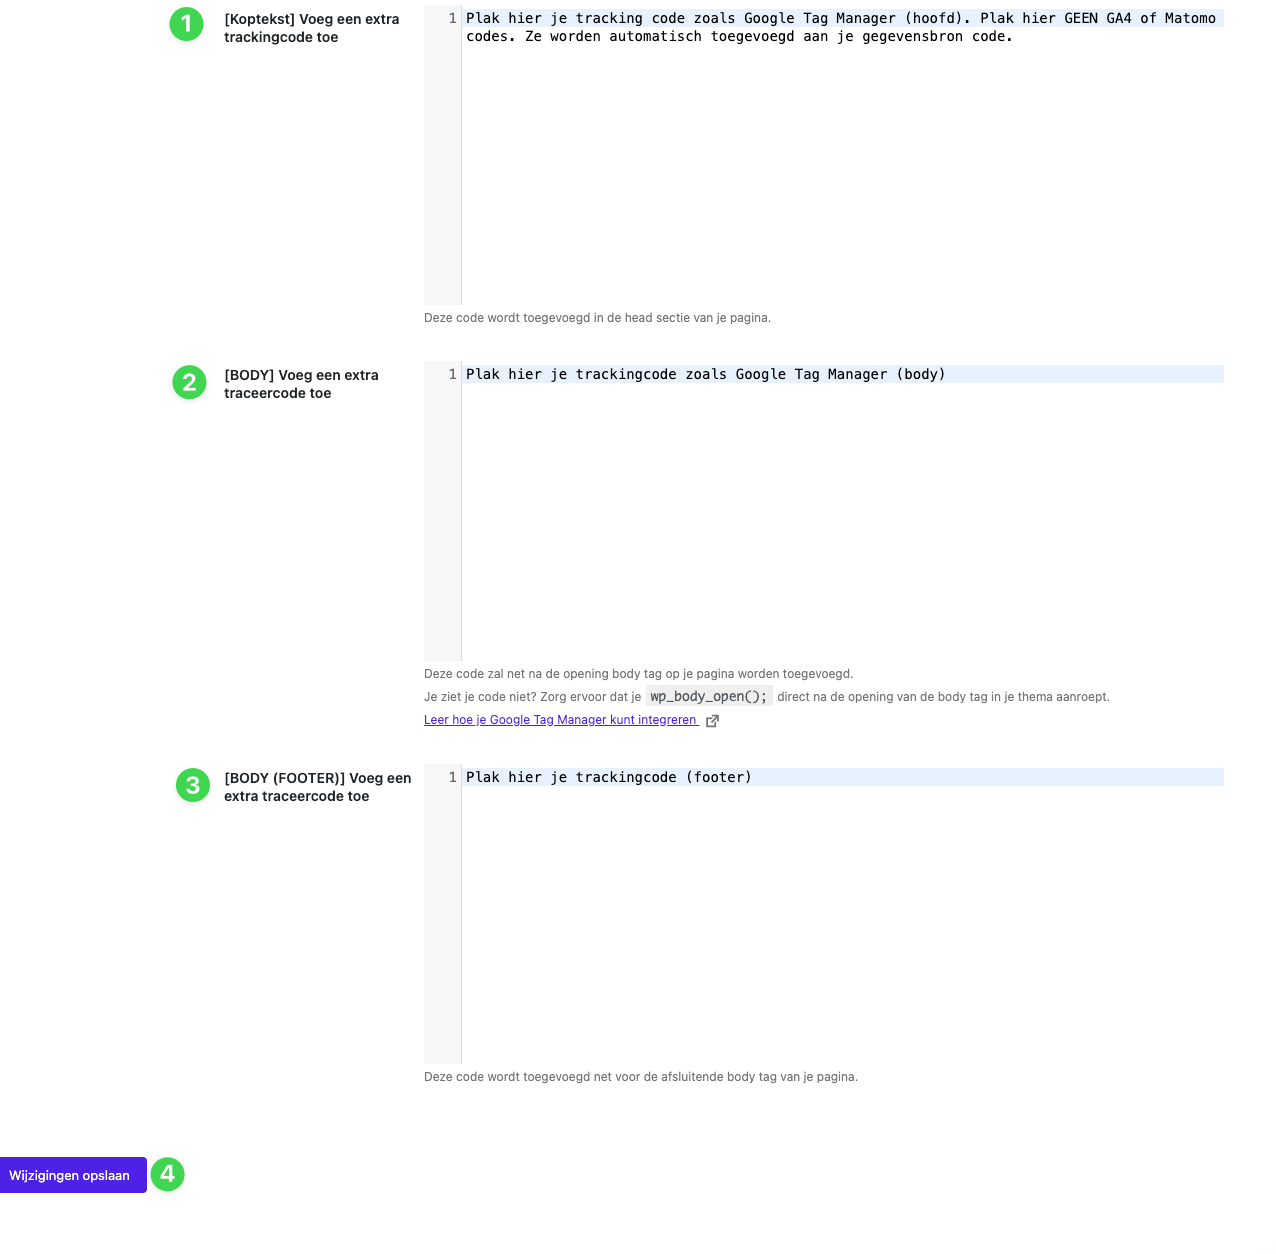
Use the fields as indicated by the green numbers:
1. [Header] Add an extra tracking code #
Paste the script that needs to go in the `head` section of your website here.
- When do you use this? This is the place for the main script of Google Tag Manager, the Facebook/Meta Pixel and verification codes for Pinterest or Google Search Console, for example.
- Important: As the notice on the screen says: do NOT paste standard GA4 or Matomo codes here if you have already entered them somewhere else.
2. [BODY] Add an extra tracking code #
Paste scripts that need to load directly after the opening `body` tag here.
- When do you use this? This is mainly used for the noscript part of Google Tag Manager. It makes sure tracking works (to a limited extent) if users have disabled JavaScript.
3. [BODY (FOOTER)] Add an extra tracking code #
Paste scripts that should only load just before the closing `footer` tag (right at the bottom of the page) here.
- When do you use this? This is useful for “heavy” scripts that must not slow down your page load time, such as chat widgets or less critical tracking tools.
4. Save changes #
Finished pasting the codes? Then remember to click the blue (4) Save changes button at the bottom left. Your tracking is now active straight away.
Frequently asked questions (FAQ) #
I have already set up Google Analytics 4 through the general settings. Do I need to add it here too?
No, definitely not. If you have already connected GA4 through the basic settings, the code is loaded automatically. If you place the code here as well, you measure everything twice, which makes your statistics unreliable.
Where can I check whether my Google Tag Manager is working?
You can use the free browser extension “Google Tag Assistant” for this, or start the “Preview mode” within Google Tag Manager itself. If you have pasted the codes correctly in fields 1 and 2, the Tag Assistant should give you the green light.
If it does not work straight away, first try clearing the cache through the menu Administration > Cache Toolbox.
Can I exclude specific pages from tracking?
In this screen you add tracking that applies to the whole website. Do you want to set specific rules (for example: load a script on the thank you page but not on the home page)? Then we recommend arranging this within Google Tag Manager using ‘Triggers’, rather than in Autorespond itself.
My script does not work, what now?
Check whether you have copied the full code, including the <script> and </script> tags. Without these tags the browser does not recognise the code as a script and it is simply shown as text on your website (or not executed at all).
Also check whether you cleared the cache before testing (through the menu Administration > Cache Toolbox)


