A free giveaway is one of the best ways to collect email addresses: someone fills in your form and immediately receives a nicely designed PDF as a gift, for example an e-book, a checklist or a step-by-step plan. In this article you can read how to have such a PDF generated automatically at the moment of sign-up, how to personalise the content with the details of the person signing up, and how that person receives the PDF through a download link in the confirmation email. You no longer have to do anything yourself: every person who signs up automatically gets their own PDF.
PDF generation for forms in Autorespond is based on the Fluent Forms PDF add-on, included in your package. Read the English documentation
What are you going to build? #
We start from a simple sign-up form with a name field and an email field. To that form you link a so-called PDF feed: a template with which Autorespond generates a fresh PDF for every submission. In the email notification to the person signing up you then place a download button. The screenshots show a free e-book from a painting academy as an example; the steps are the same for every type of giveaway.
Step 1: open PDF Feeds for your form #
Go to Forms, open your sign-up form and click Settings & integrations at the top. Then click PDF Feeds in the left-hand menu.
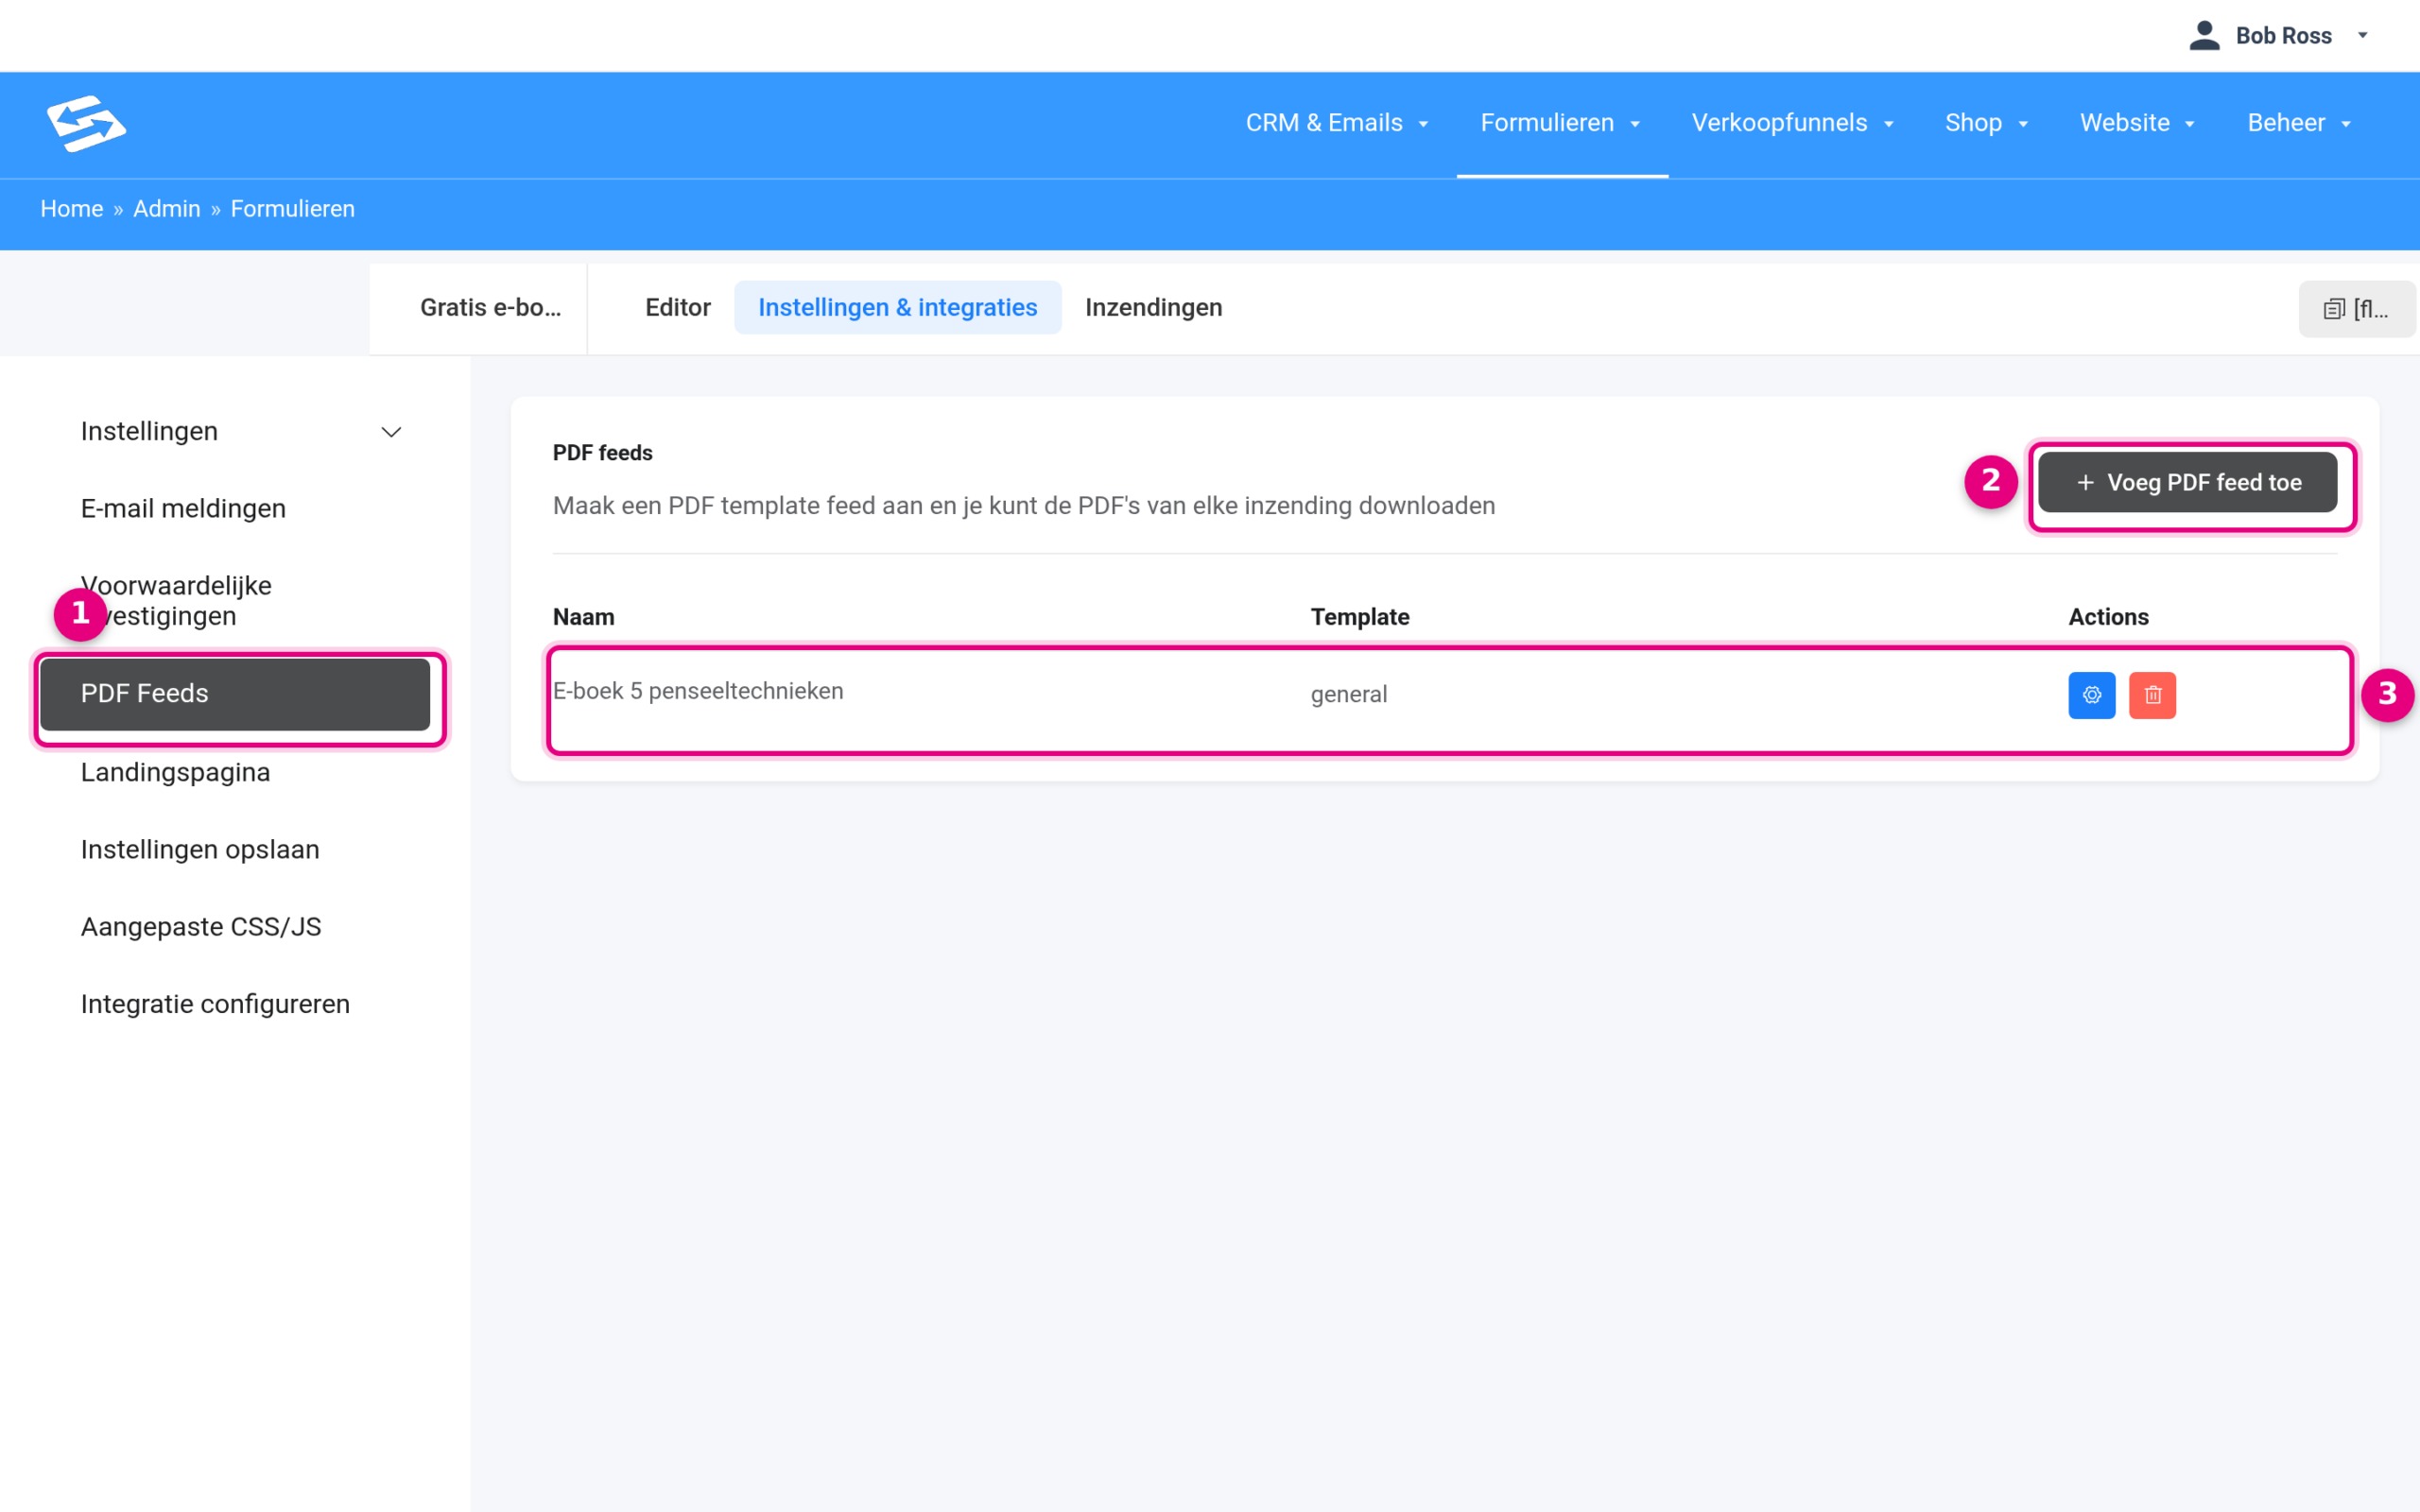
- PDF Feeds: you will find this menu item in the left-hand menu under Settings & integrations of your form. Here you manage all PDF templates for this form.
- Add PDF feed: this button creates a new PDF feed.
- An existing feed appears in the list with its name and template. The blue cog icon on the right opens the feed for editing, the red bin icon deletes it.
Step 2: choose a template #
Click Add PDF feed. First you choose a template as a starting point.
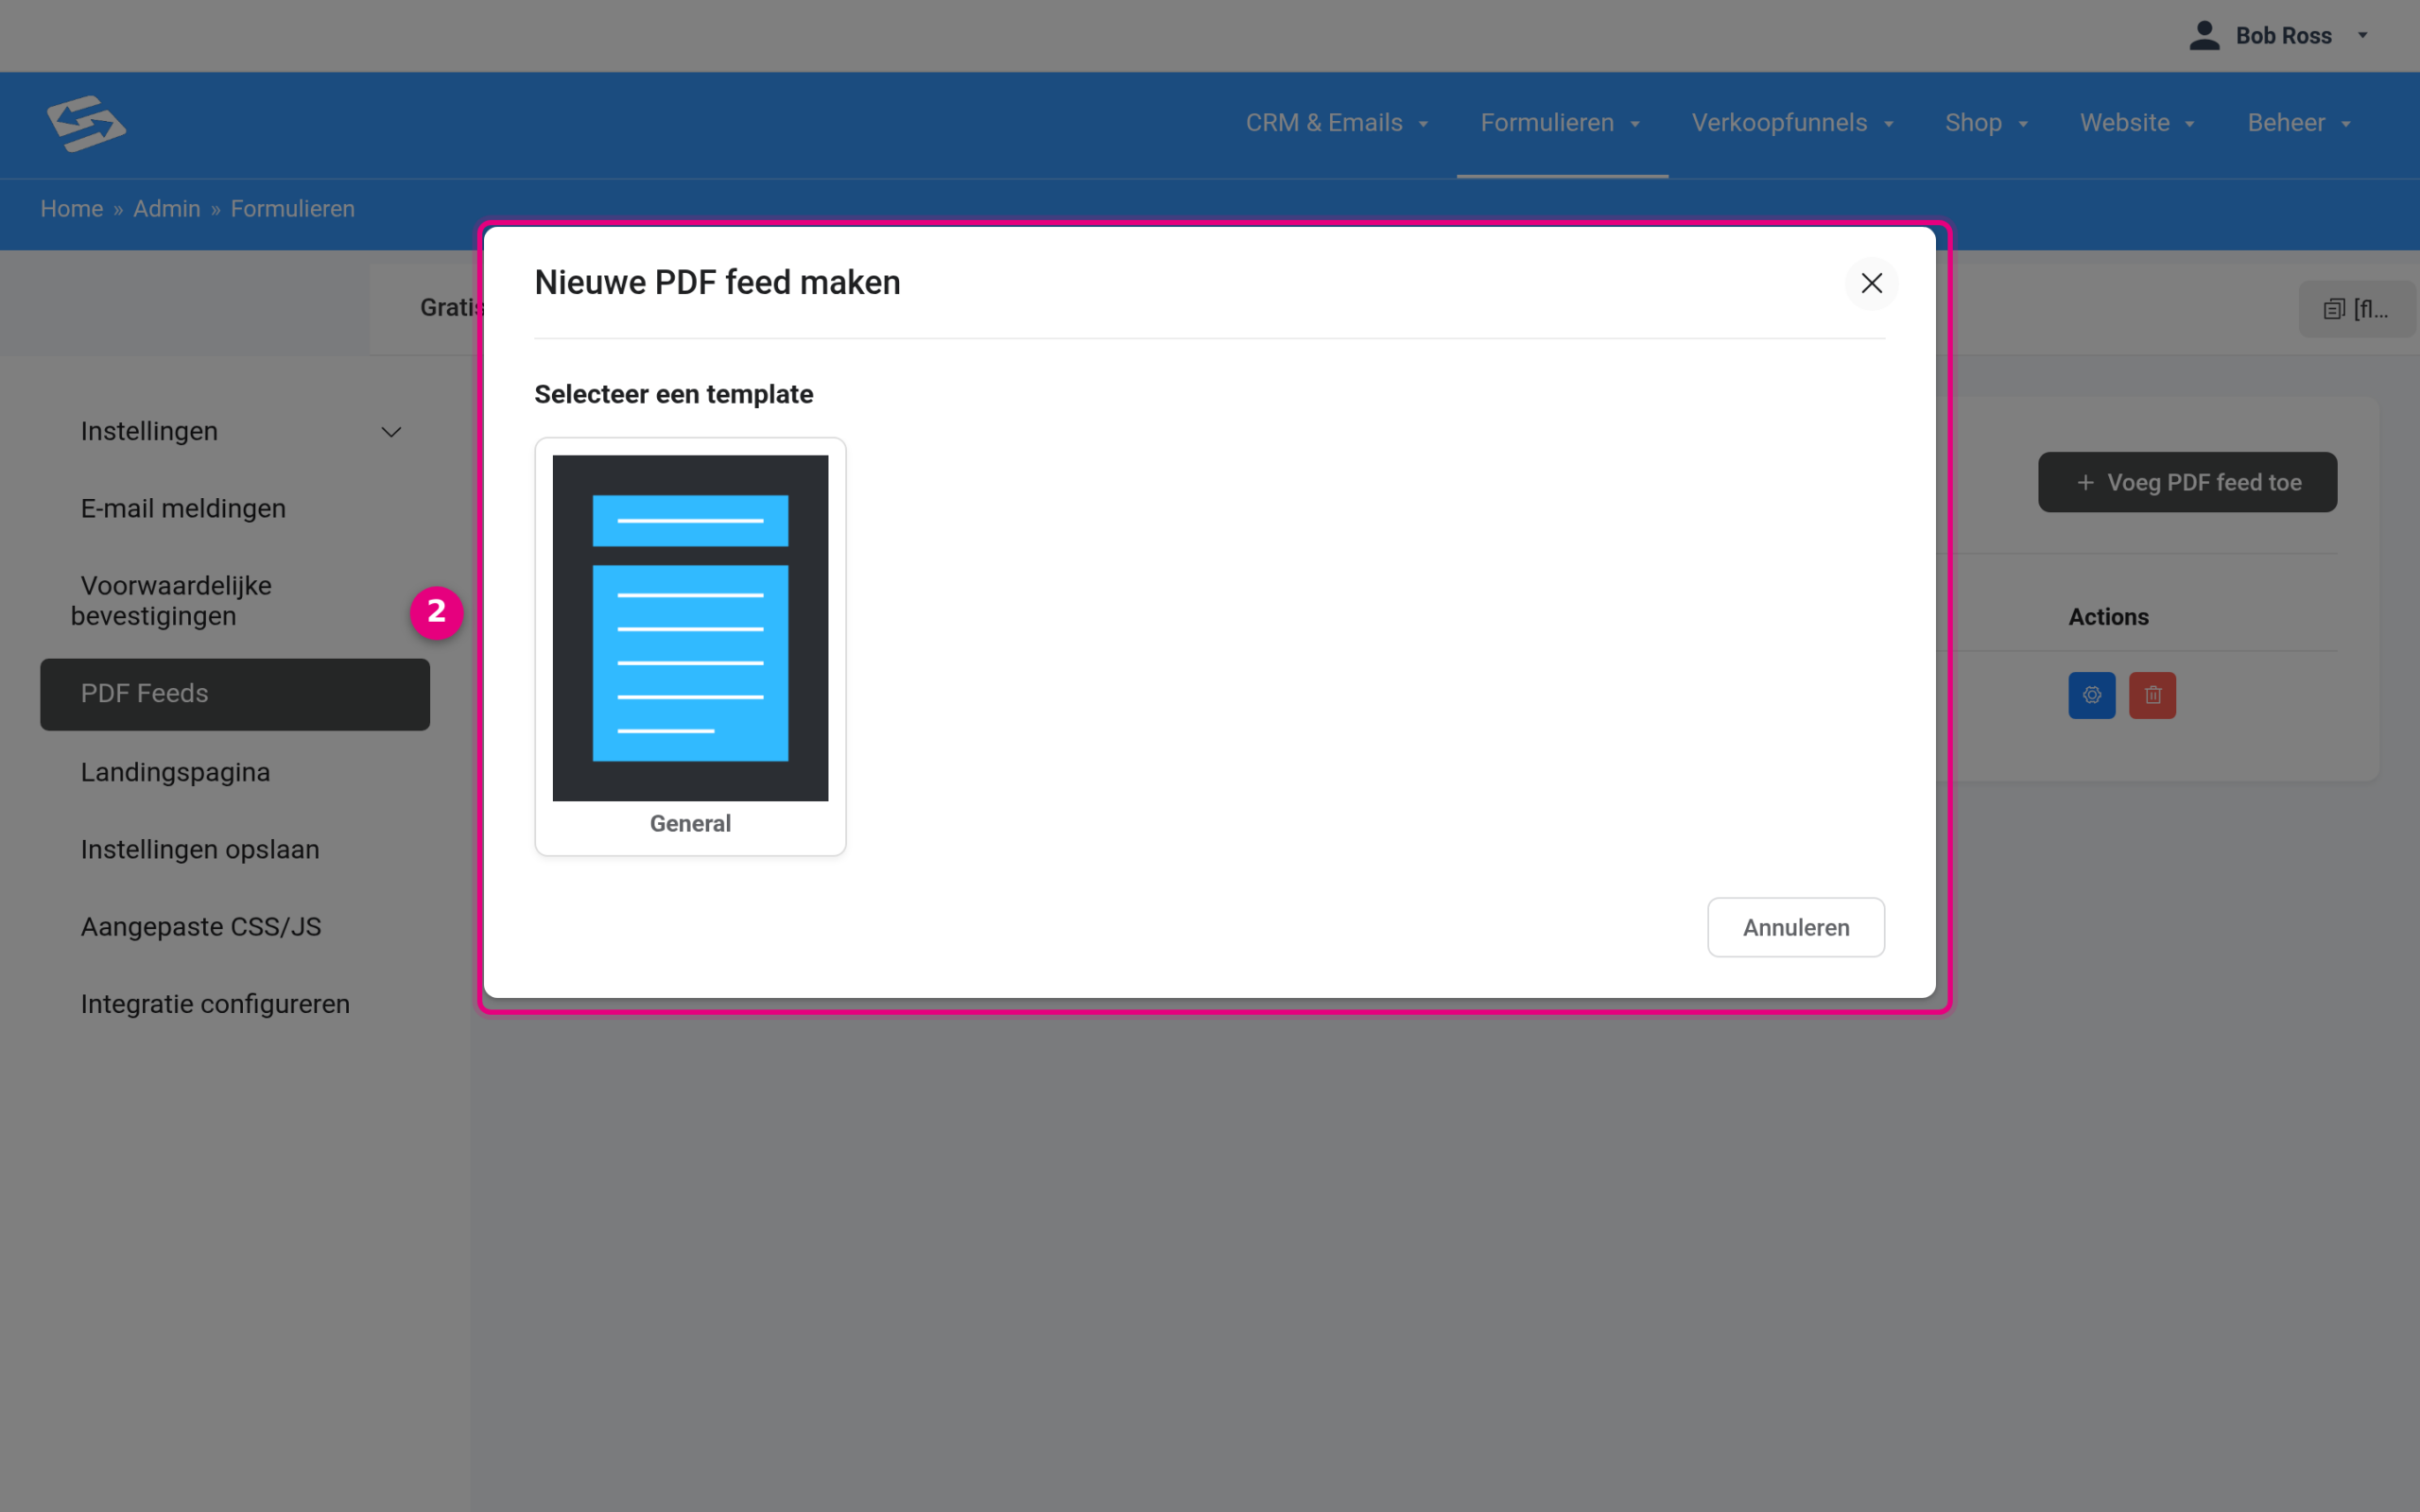
- In the Create new PDF feed window, under Select a template, choose the General template: a universal layout with a header, a text section and a footer. Click the template image to continue, or Cancel to stop.
Step 3: fill the PDF with content and personal details #
After choosing the template the feed editor opens. At the top you give the feed a recognisable name under Feed title. Below that you will find three text boxes: Header Content (appears at the top of every page), PDF Body Content (the actual content of your giveaway) and Footer Content (the footer on every page, for example with the date and page number).
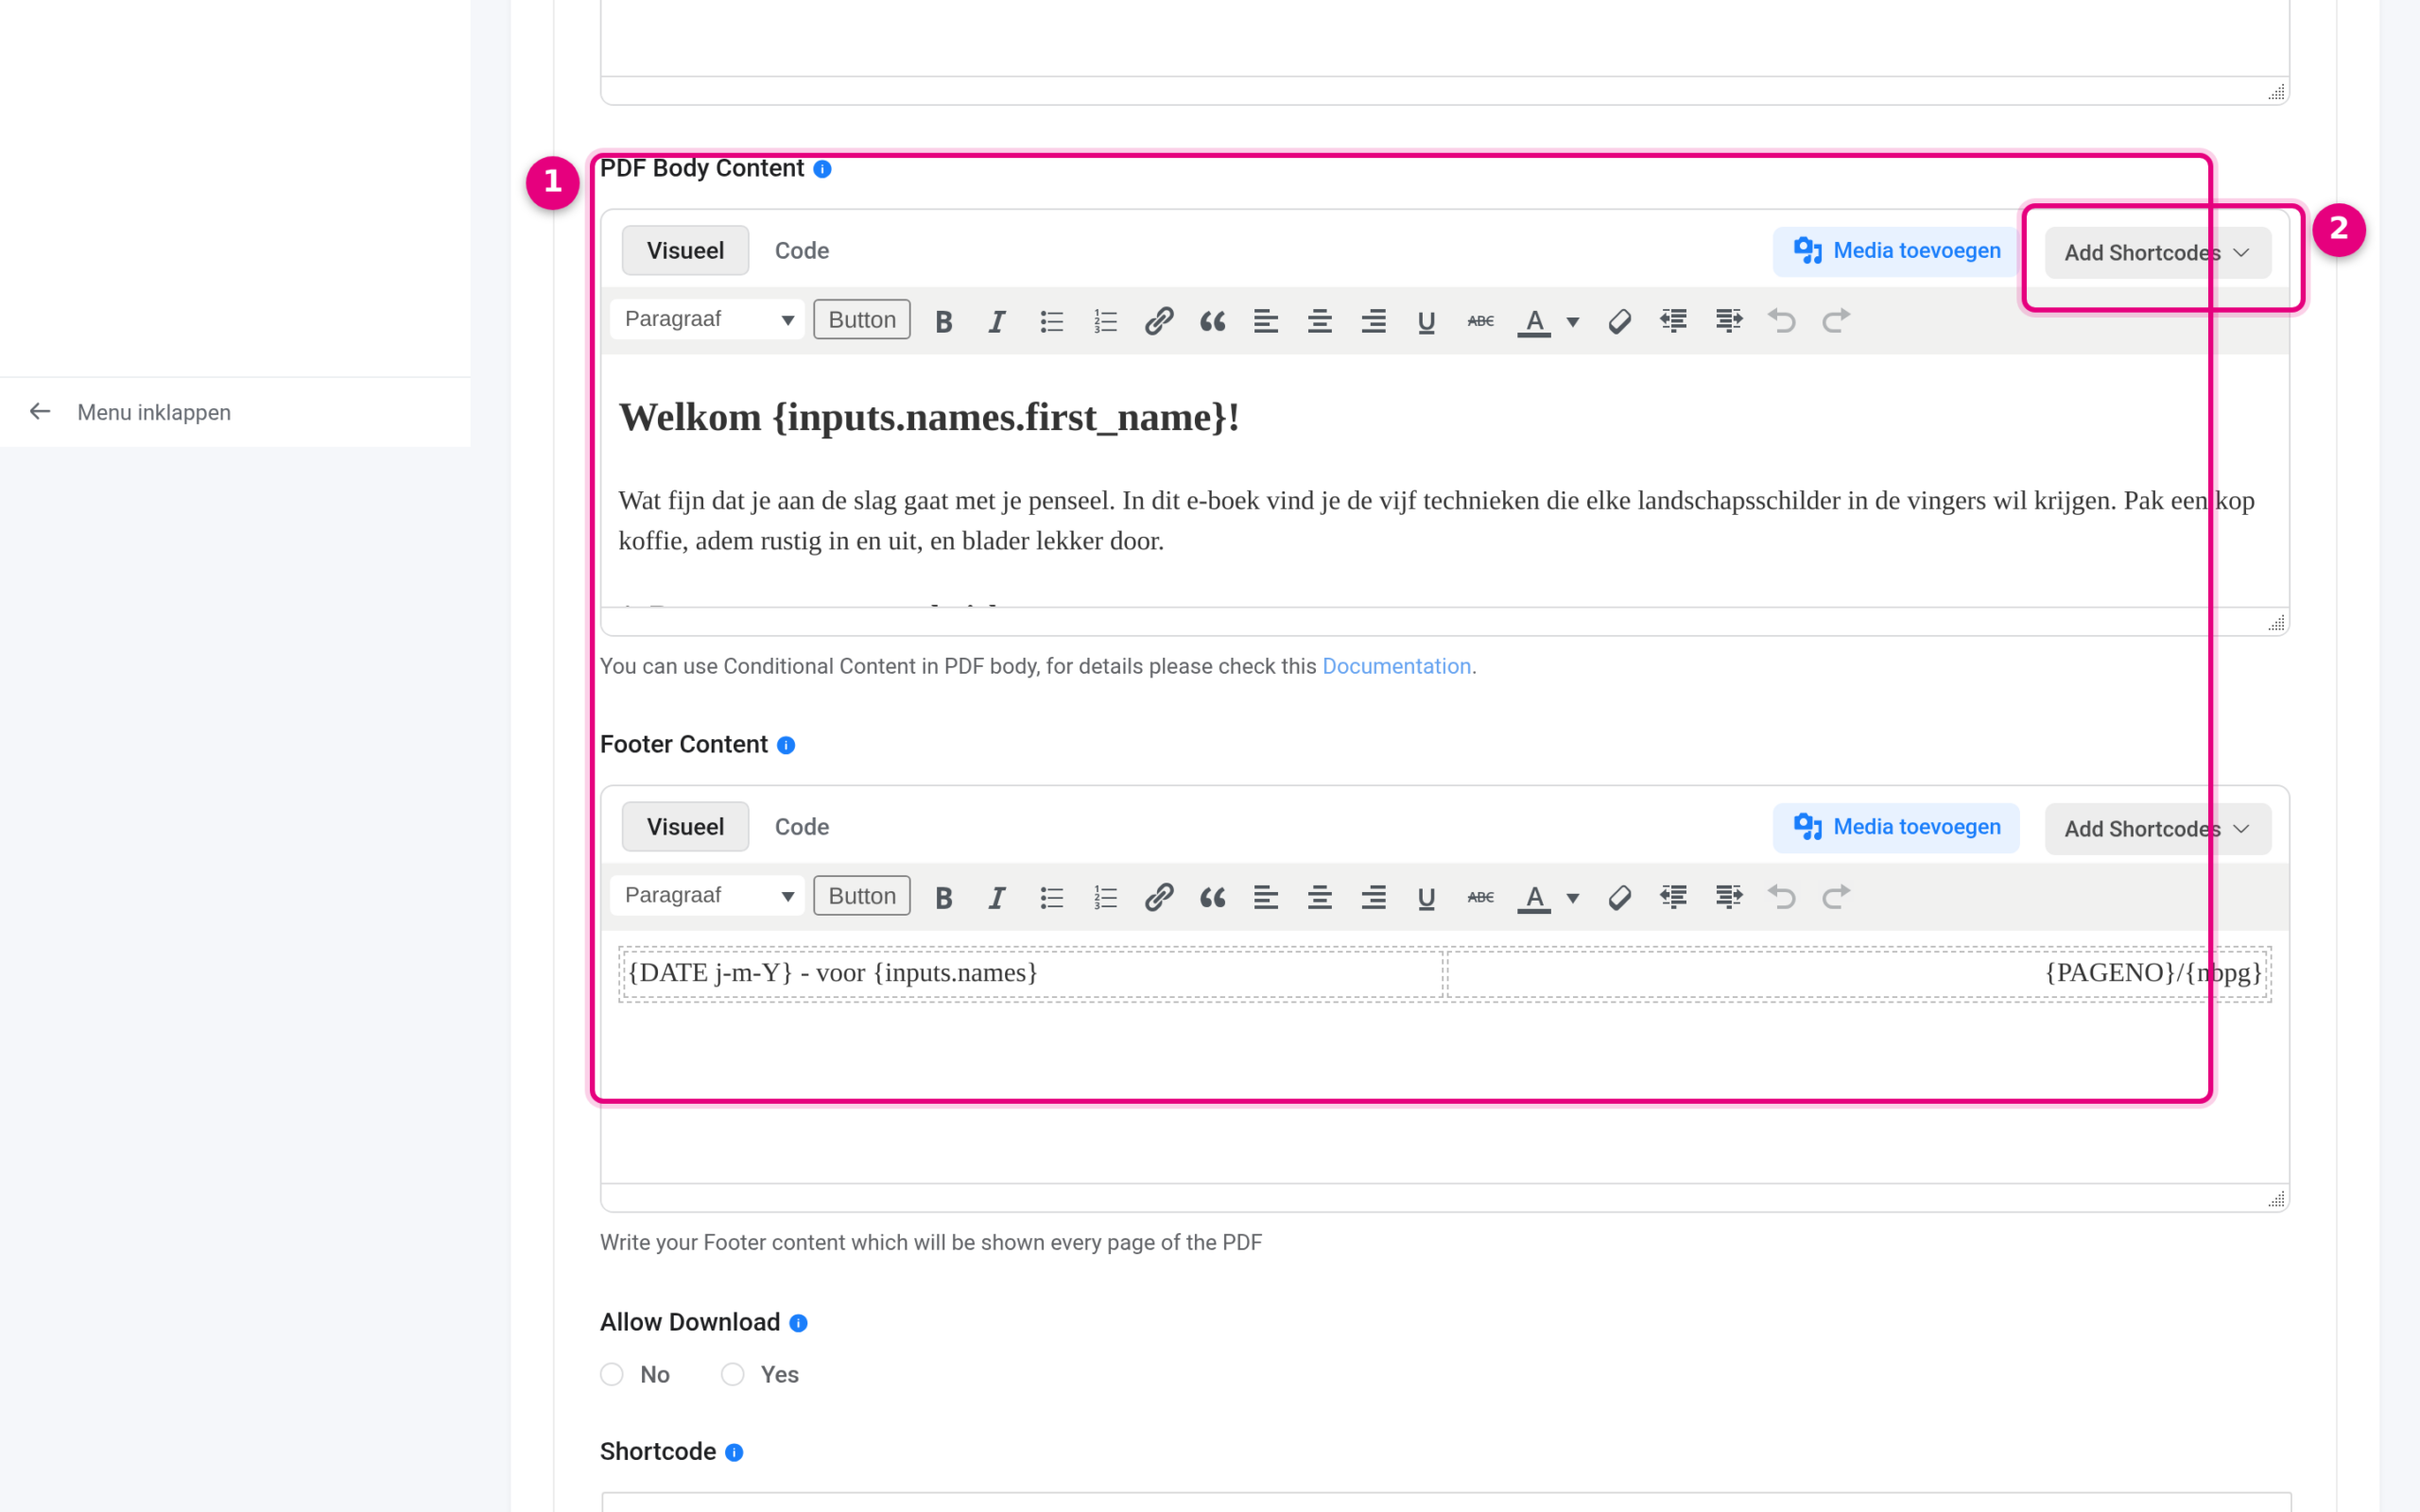
- PDF Body Content and Footer Content: here you write the full content of your giveaway, using the same editor you know from pages and emails (headings, bold, lists, images via Add Media). Do you see
{inputs.names.first_name}in the example? That is a shortcode: when the PDF is generated it is replaced by the first name of the person signing up, so every PDF feels personal. In the footer,{DATE j-m-Y}and{PAGENO}/{nbpg}provide the date and the page numbers. - Add Shortcodes: this drop-down menu (top right of every text box) lets you insert shortcodes without having to remember them. Among other things you will find all form fields, general details and the PDF download links there.
Below the body text box there is a note that you can use Conditional Content in the PDF: conditional text blocks that only appear when a field has a particular value. How to build a personal report with that is explained in the follow-up article about the personality quiz (see Related articles at the bottom). On the Display tab at the top of the feed editor you also set the paper size (A4 by default), the orientation and the font.
Step 4: prepare the download link #
In the feed editor, scroll down to Allow Download and the Shortcode field.
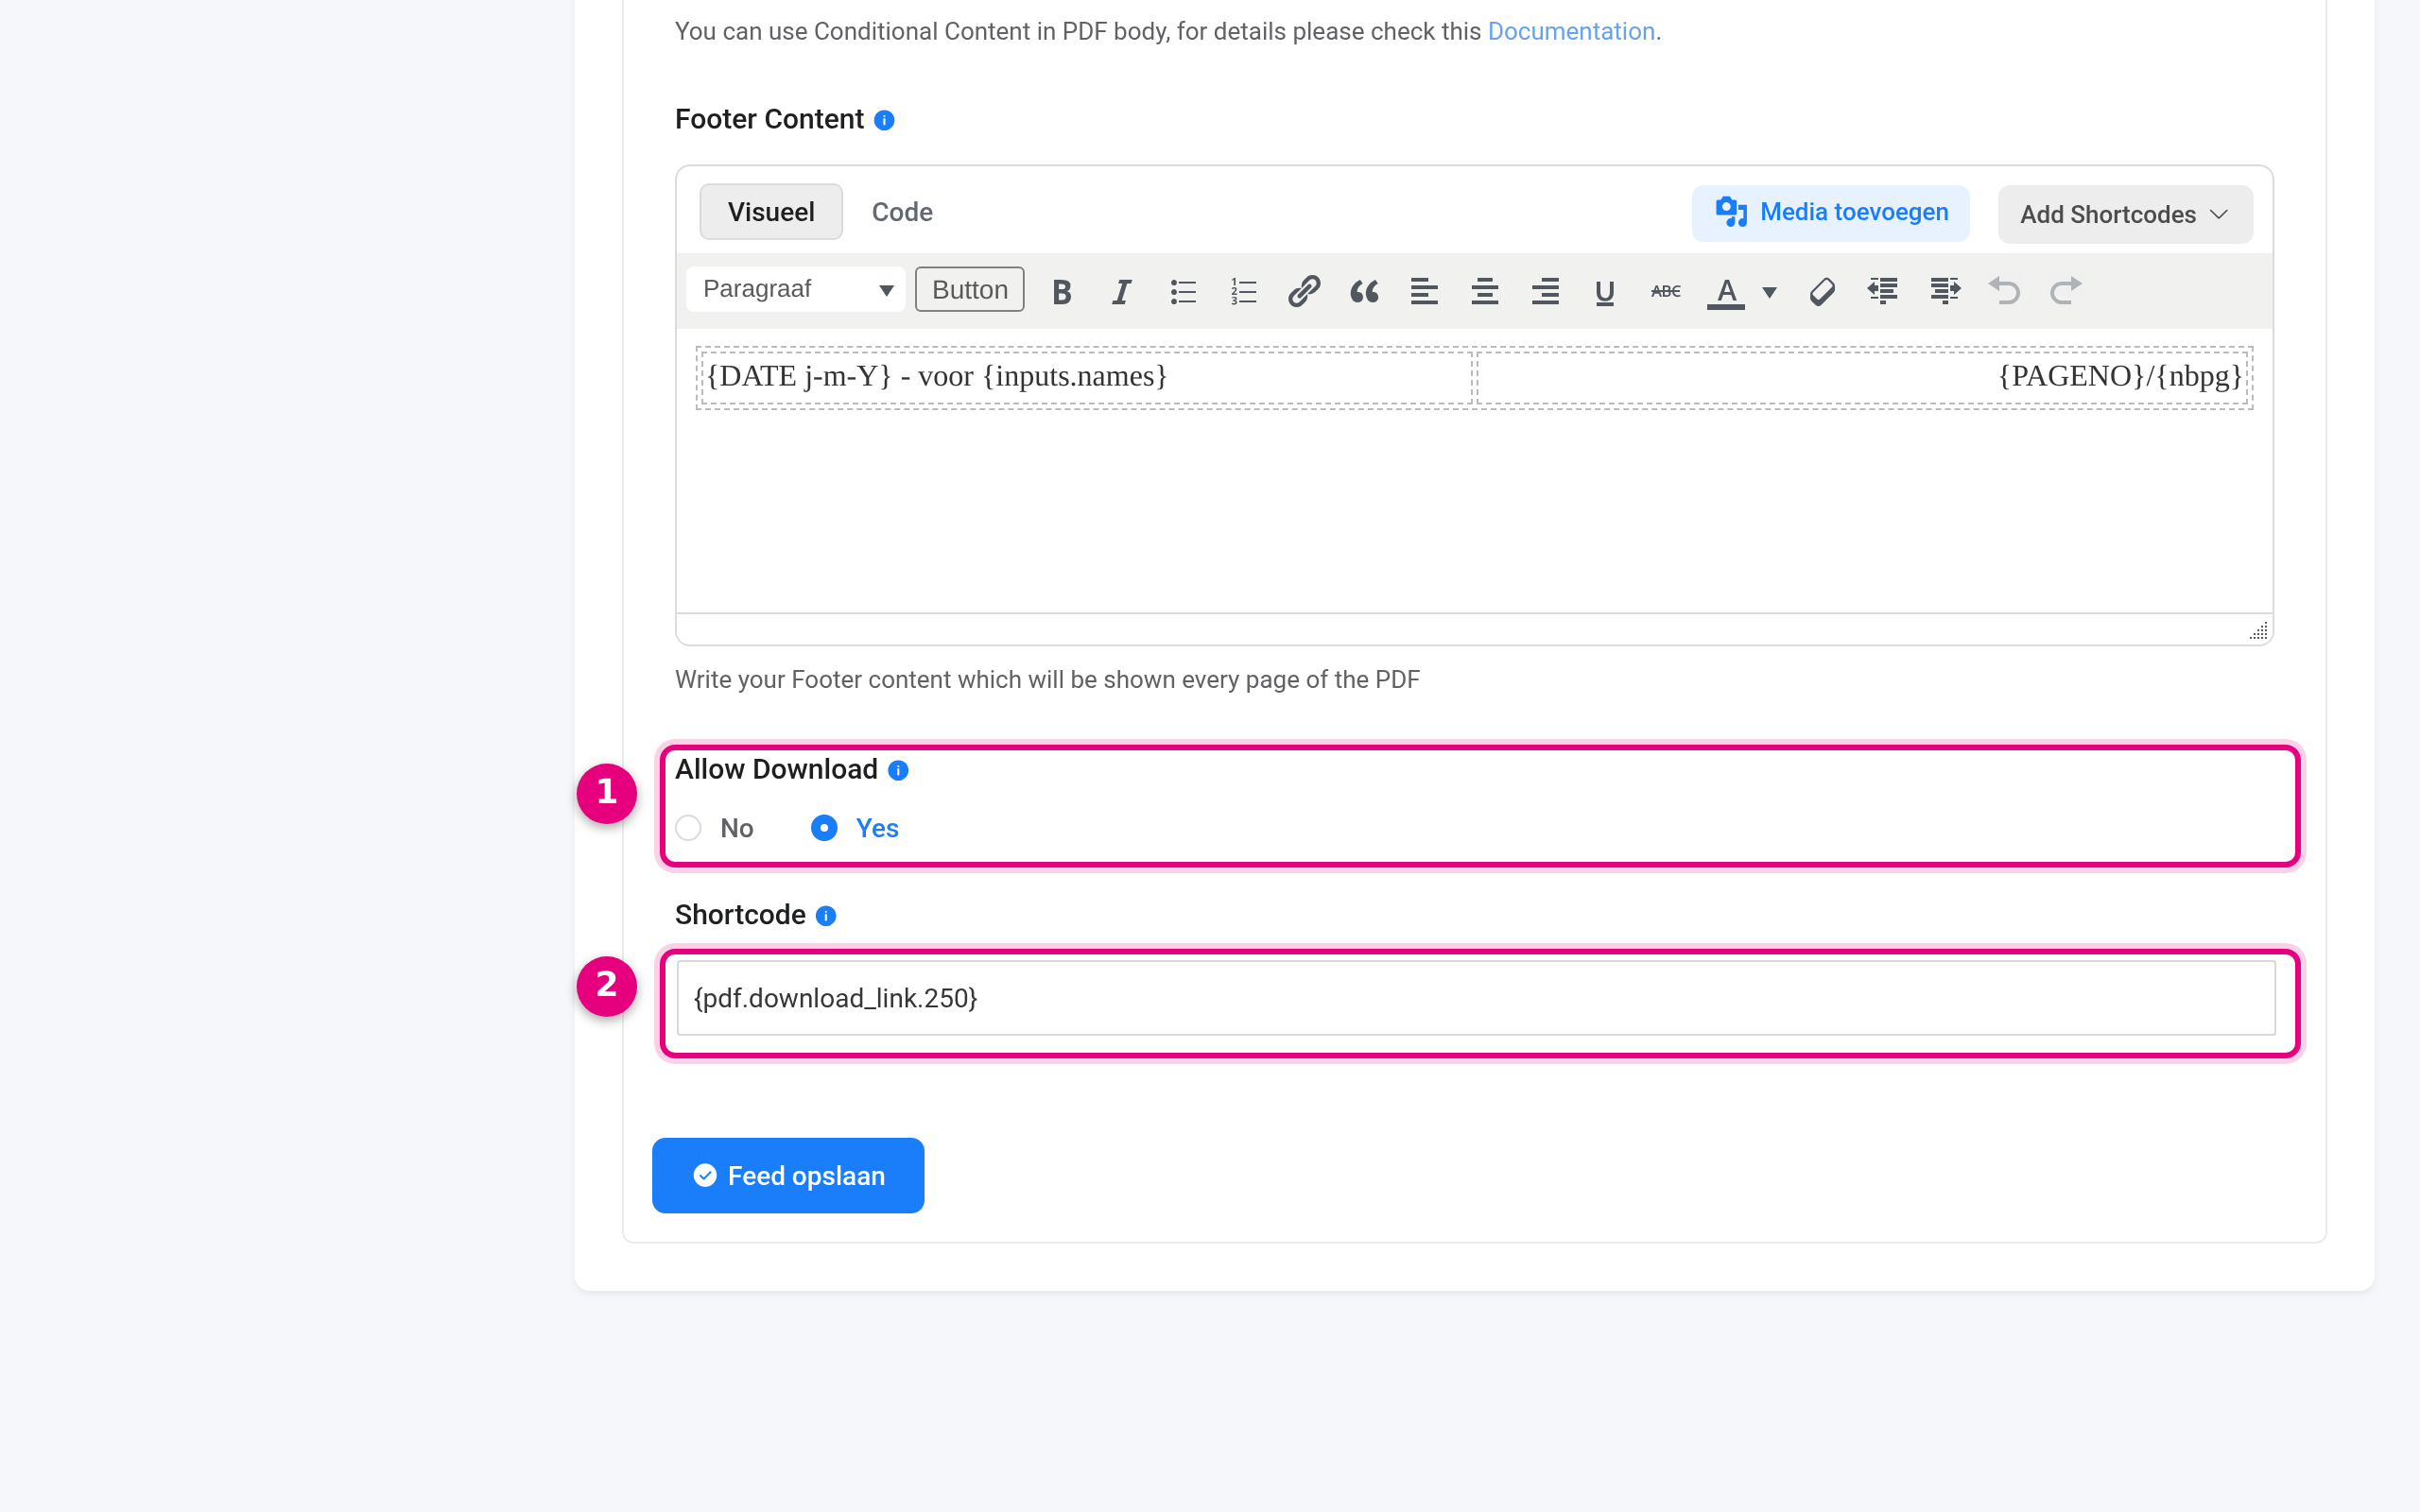
- Allow Download: set this to Yes, so that the PDF may be downloaded through a link.
- Shortcode: this is the download link shortcode of this feed, in the example
{pdf.download_link.250}. The number is unique to your feed, so always copy the shortcode literally from this field. Everywhere you paste this shortcode (for example in the email notification), a unique, secured download link for that one submission will appear. The person signing up does not have to log in for this.
Click Save feed at the bottom.
Step 5: put the download button in your confirmation email #
In the same settings screen go to Email notifications and open the notification that goes to the person signing up (or create one via Add notification; under Send to choose the Send to Field option with the email field of your form).
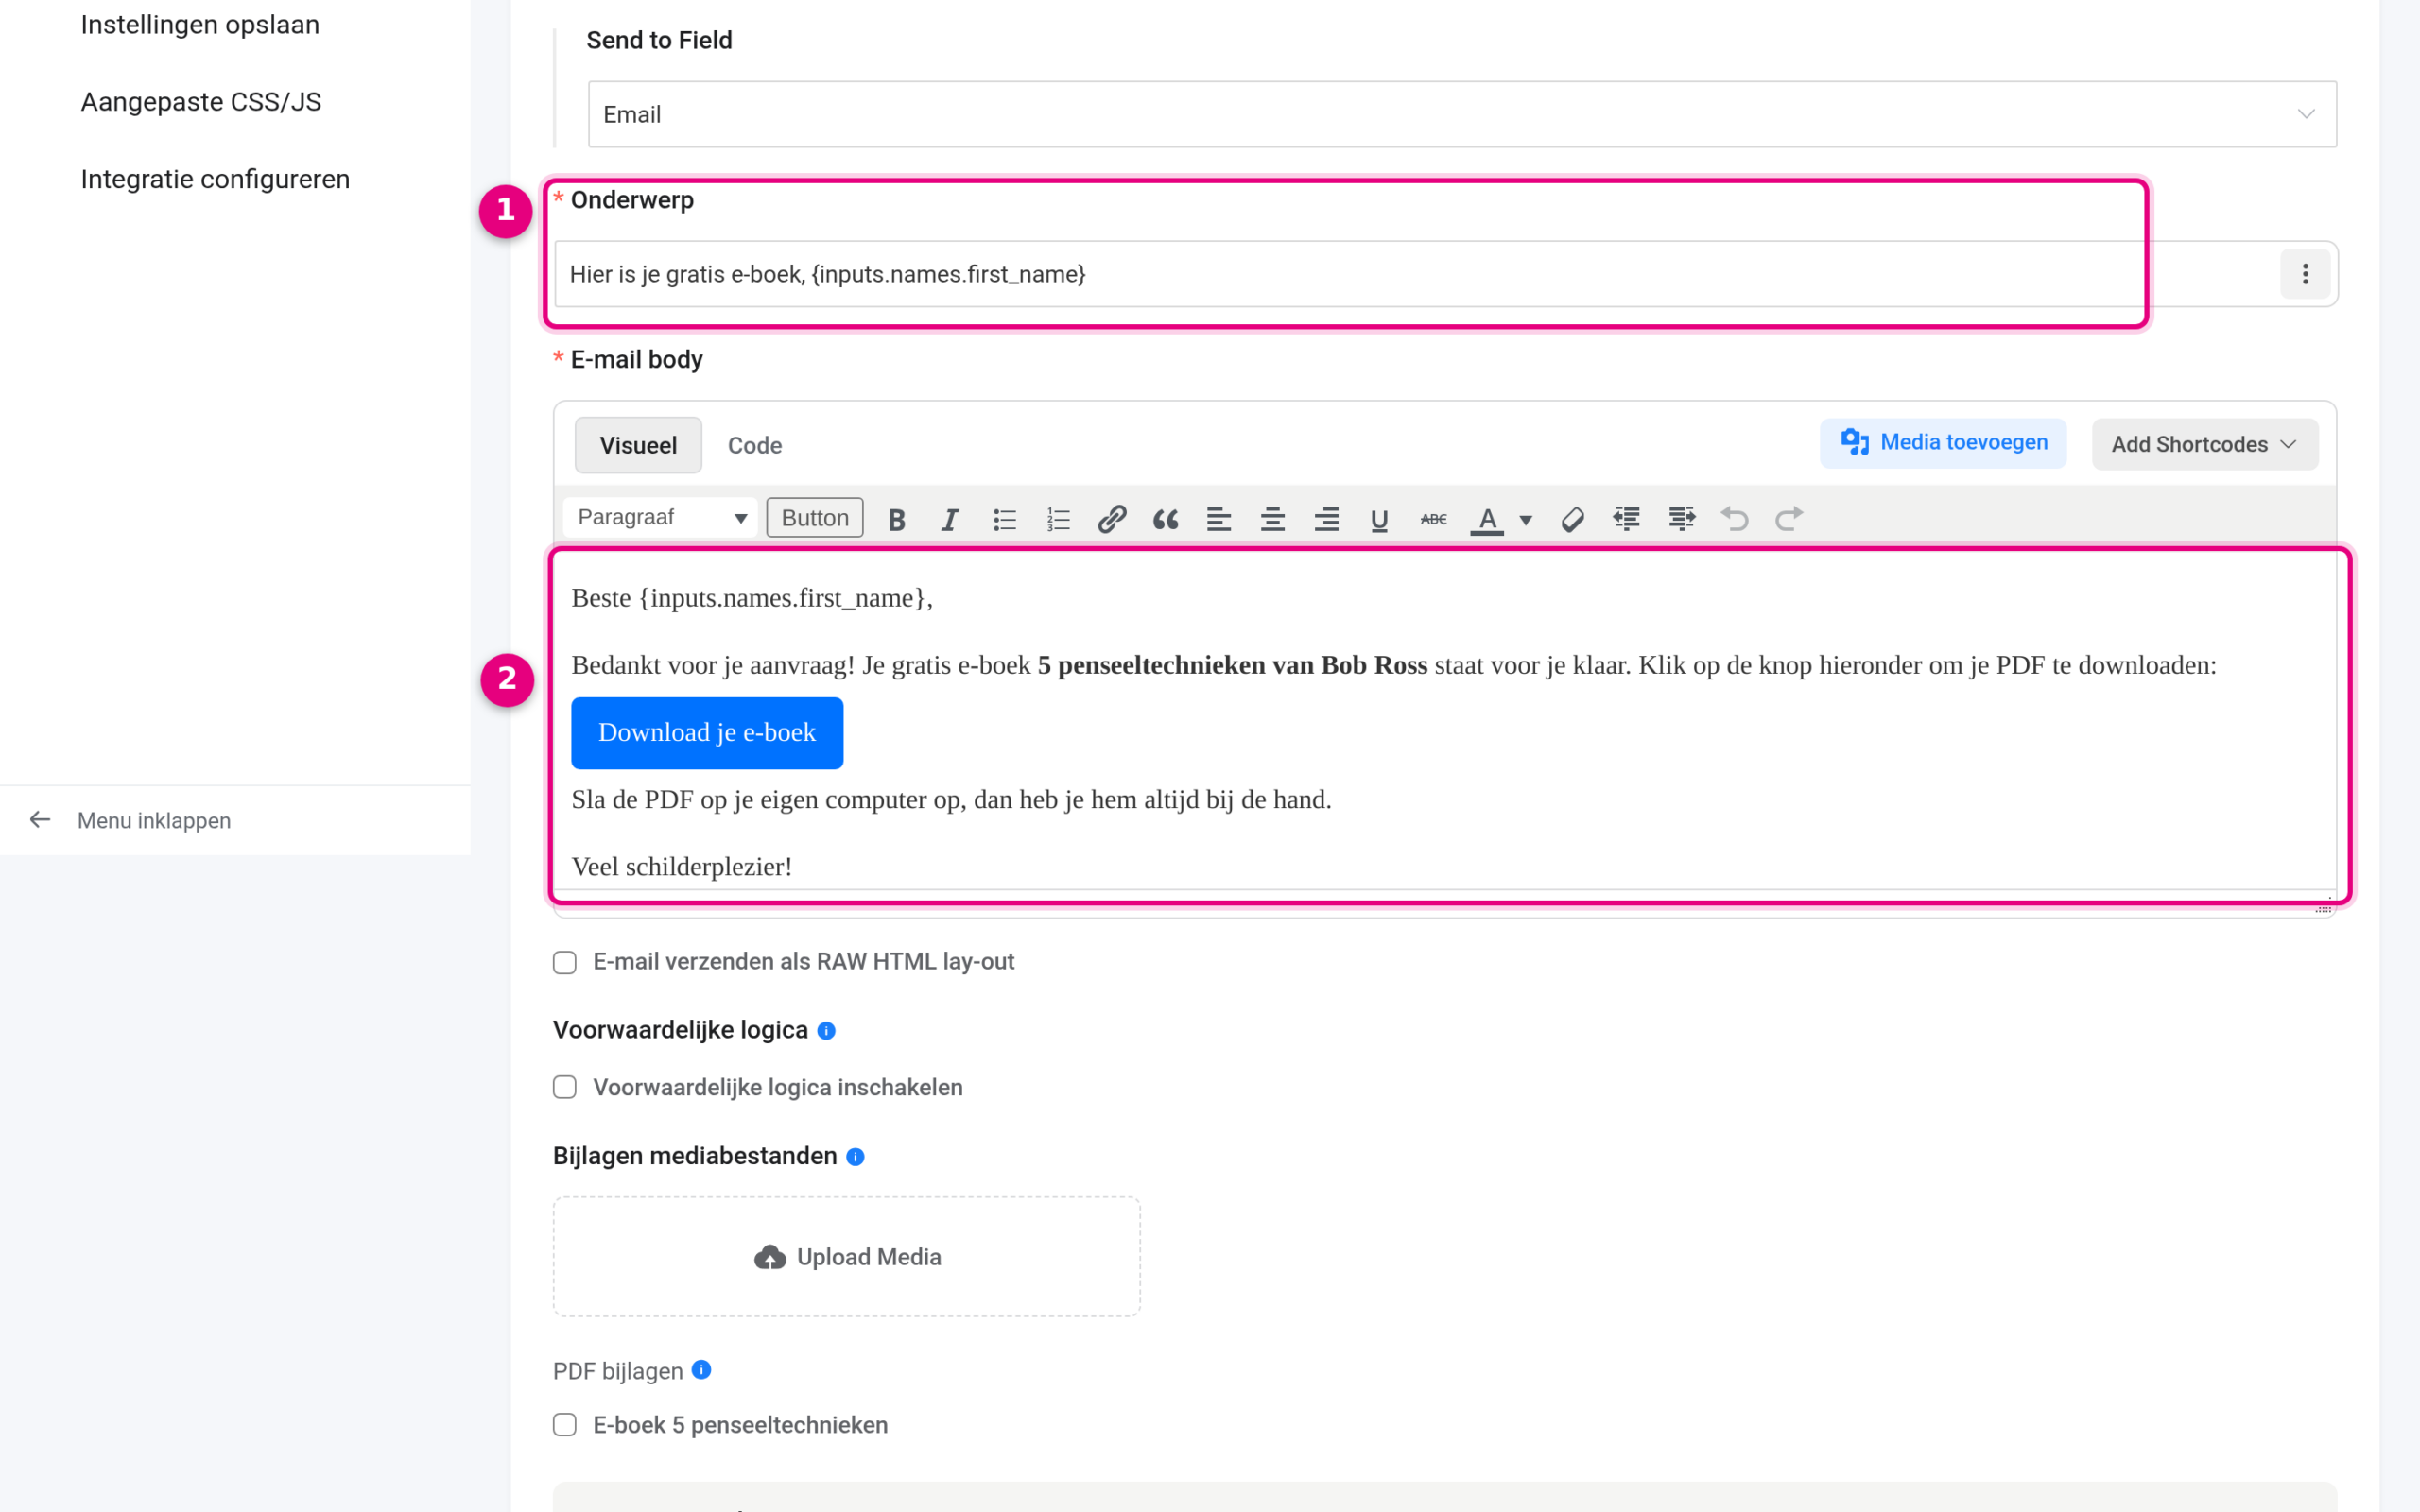
- Subject: make the subject personal with a shortcode too, for example “Here is your free e-book,
{inputs.names.first_name}“. - Email body: write your message here. Create a button via Button in the toolbar and use the shortcode from step 4 as the link address (in the example
{pdf.download_link.250}). When the email is sent this automatically becomes the unique download link for that person. Tip: add a line below it asking the reader to save the PDF on their own computer.
Alternative: send the PDF as an attachment #
A little further down in the same email notification you can also attach the PDF to the email as a real attachment.
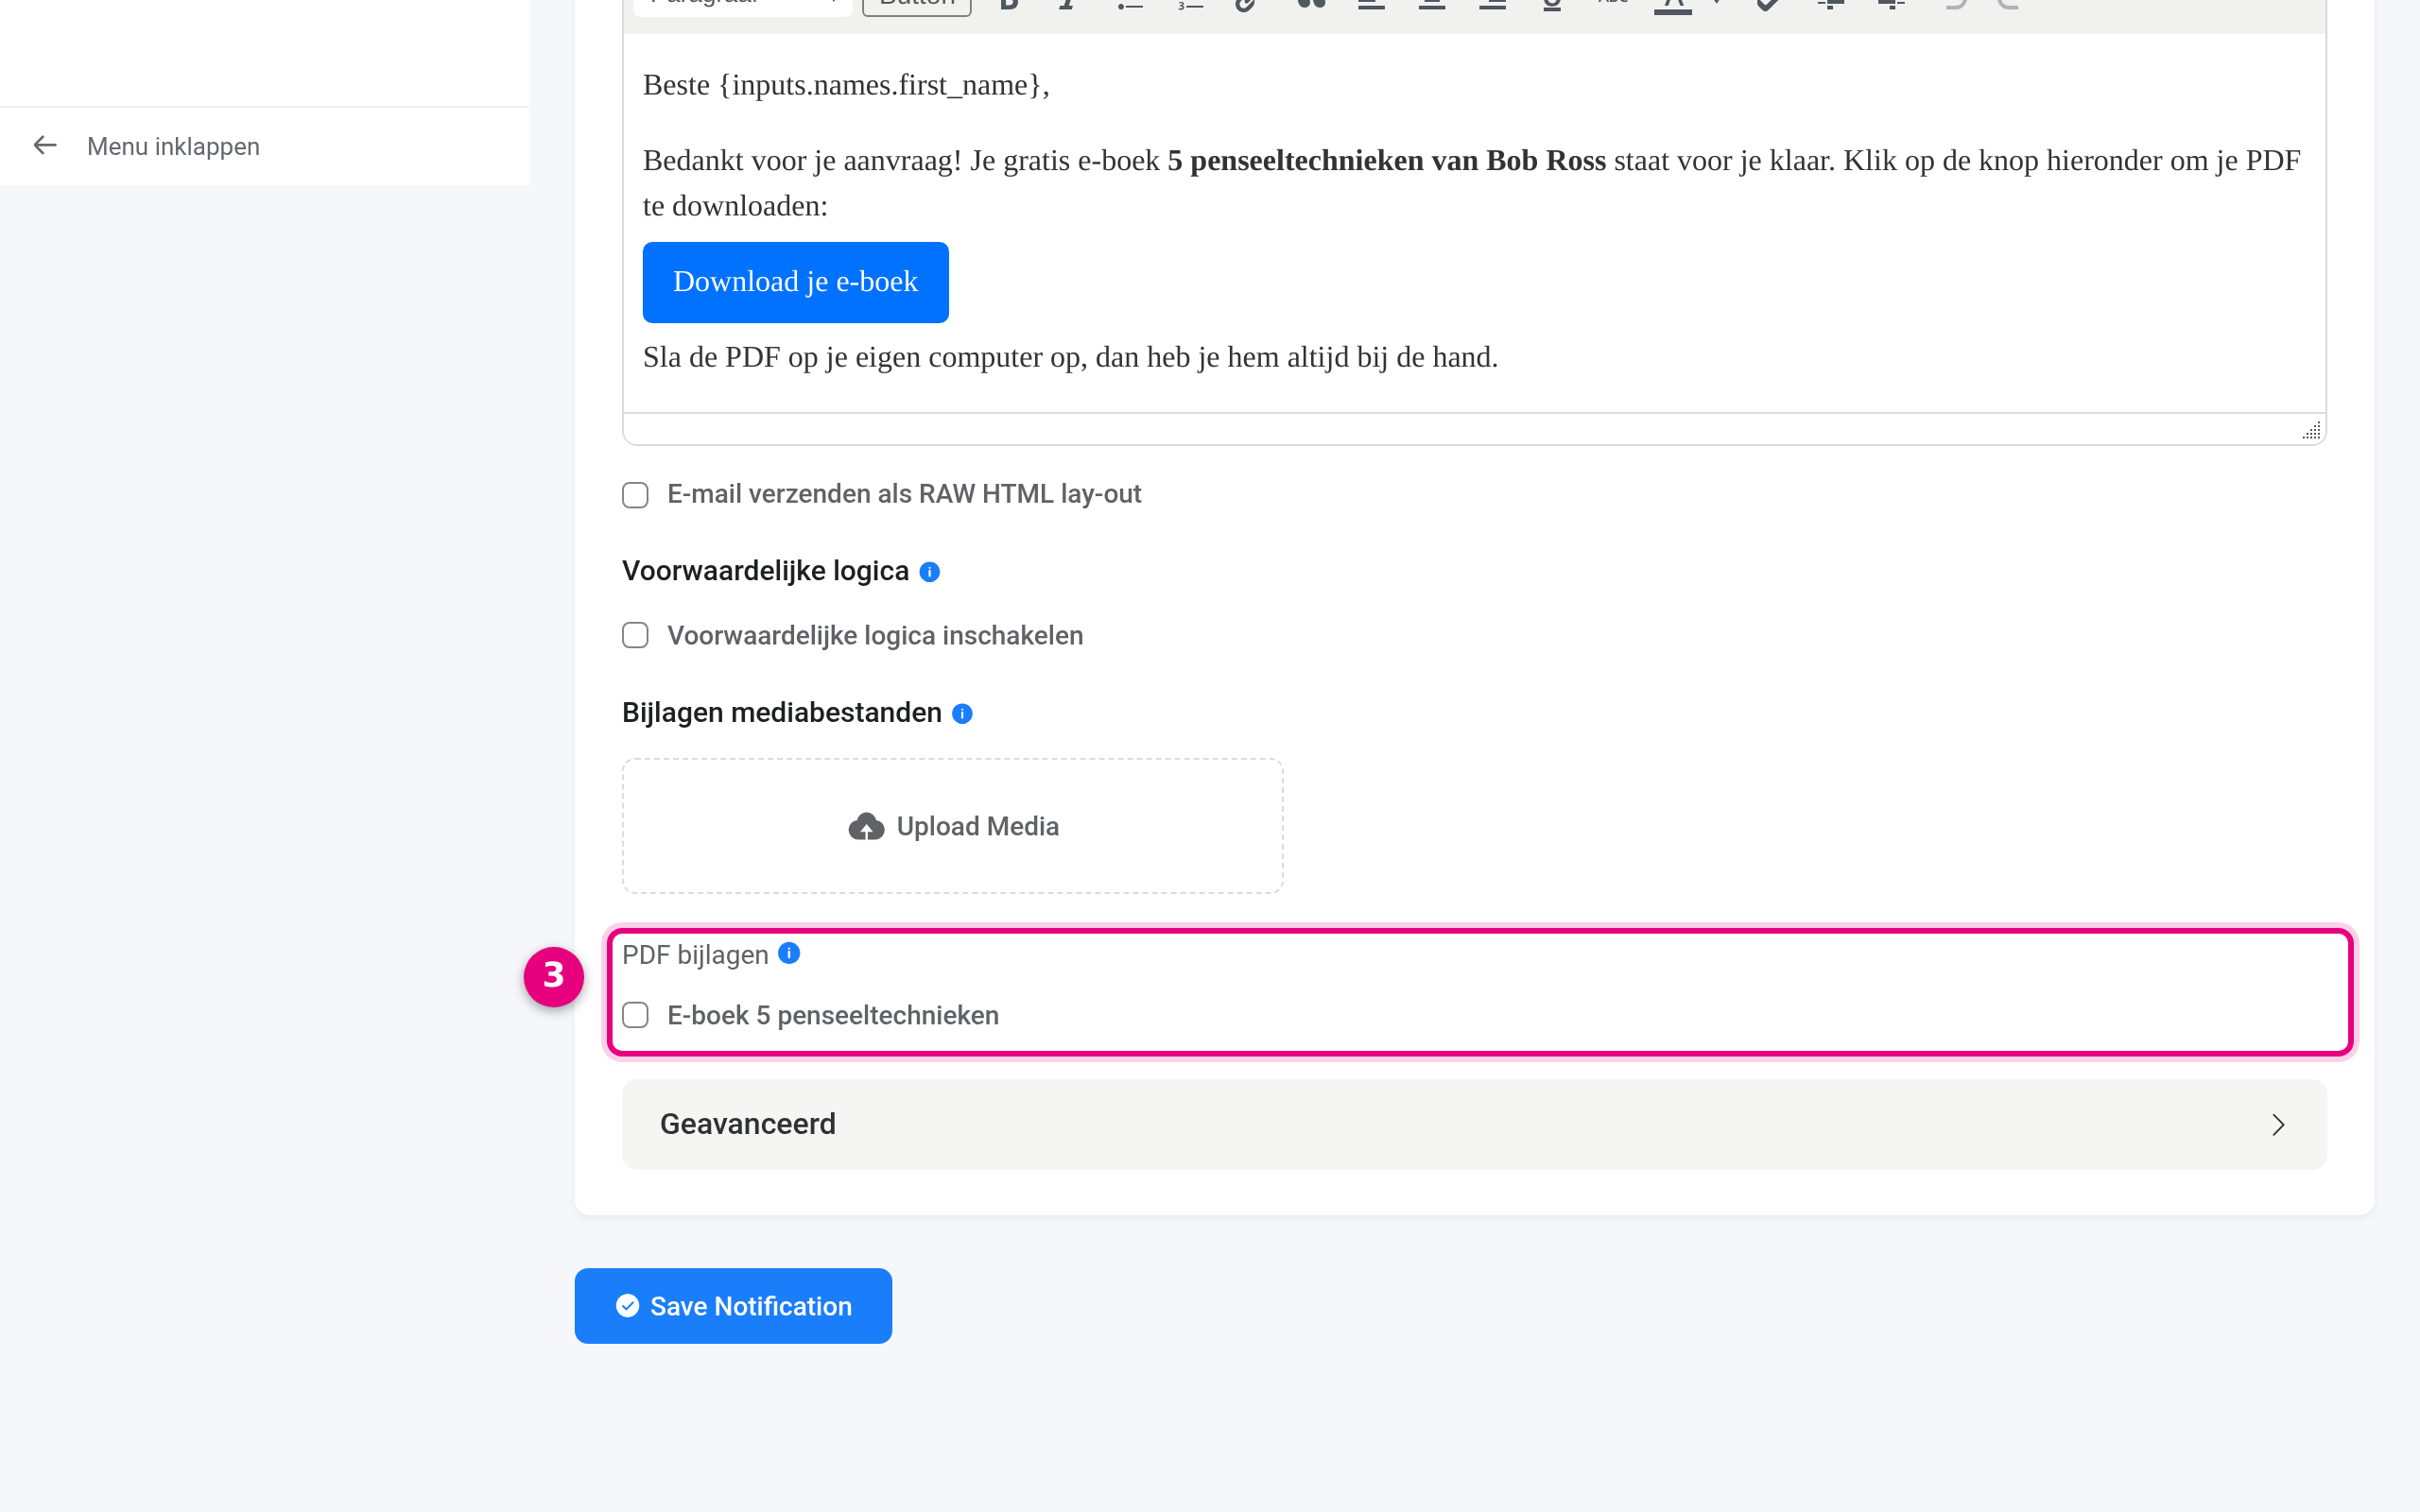
- PDF attachments: tick your PDF feed here and the generated PDF will be sent along as an attachment with this email. Above it you will also see Media file attachments, which lets you send a fixed file from your media library.
Our advice: use the download link from step 5 as your standard. Emails with attachments are heavier, end up in the spam folder more easily and count towards the mailbox space of your recipient. A link always works. You can read more background on this in Sending a file with your email through a download link.
Step 6: test the complete flow #
Place the form on a page with the Fluent Forms block or the shortcode [fluentform id="10"] (use the number of your own form). Open that page in an incognito window, fill in the form with your own email address and then check the following:
- Did the confirmation email arrive with the correct personal greeting? You can also find the sent email via Admin → SMTP/Mail settings → Email logs.
- Does the download button work and does the PDF open, with the name of the person signing up in it?
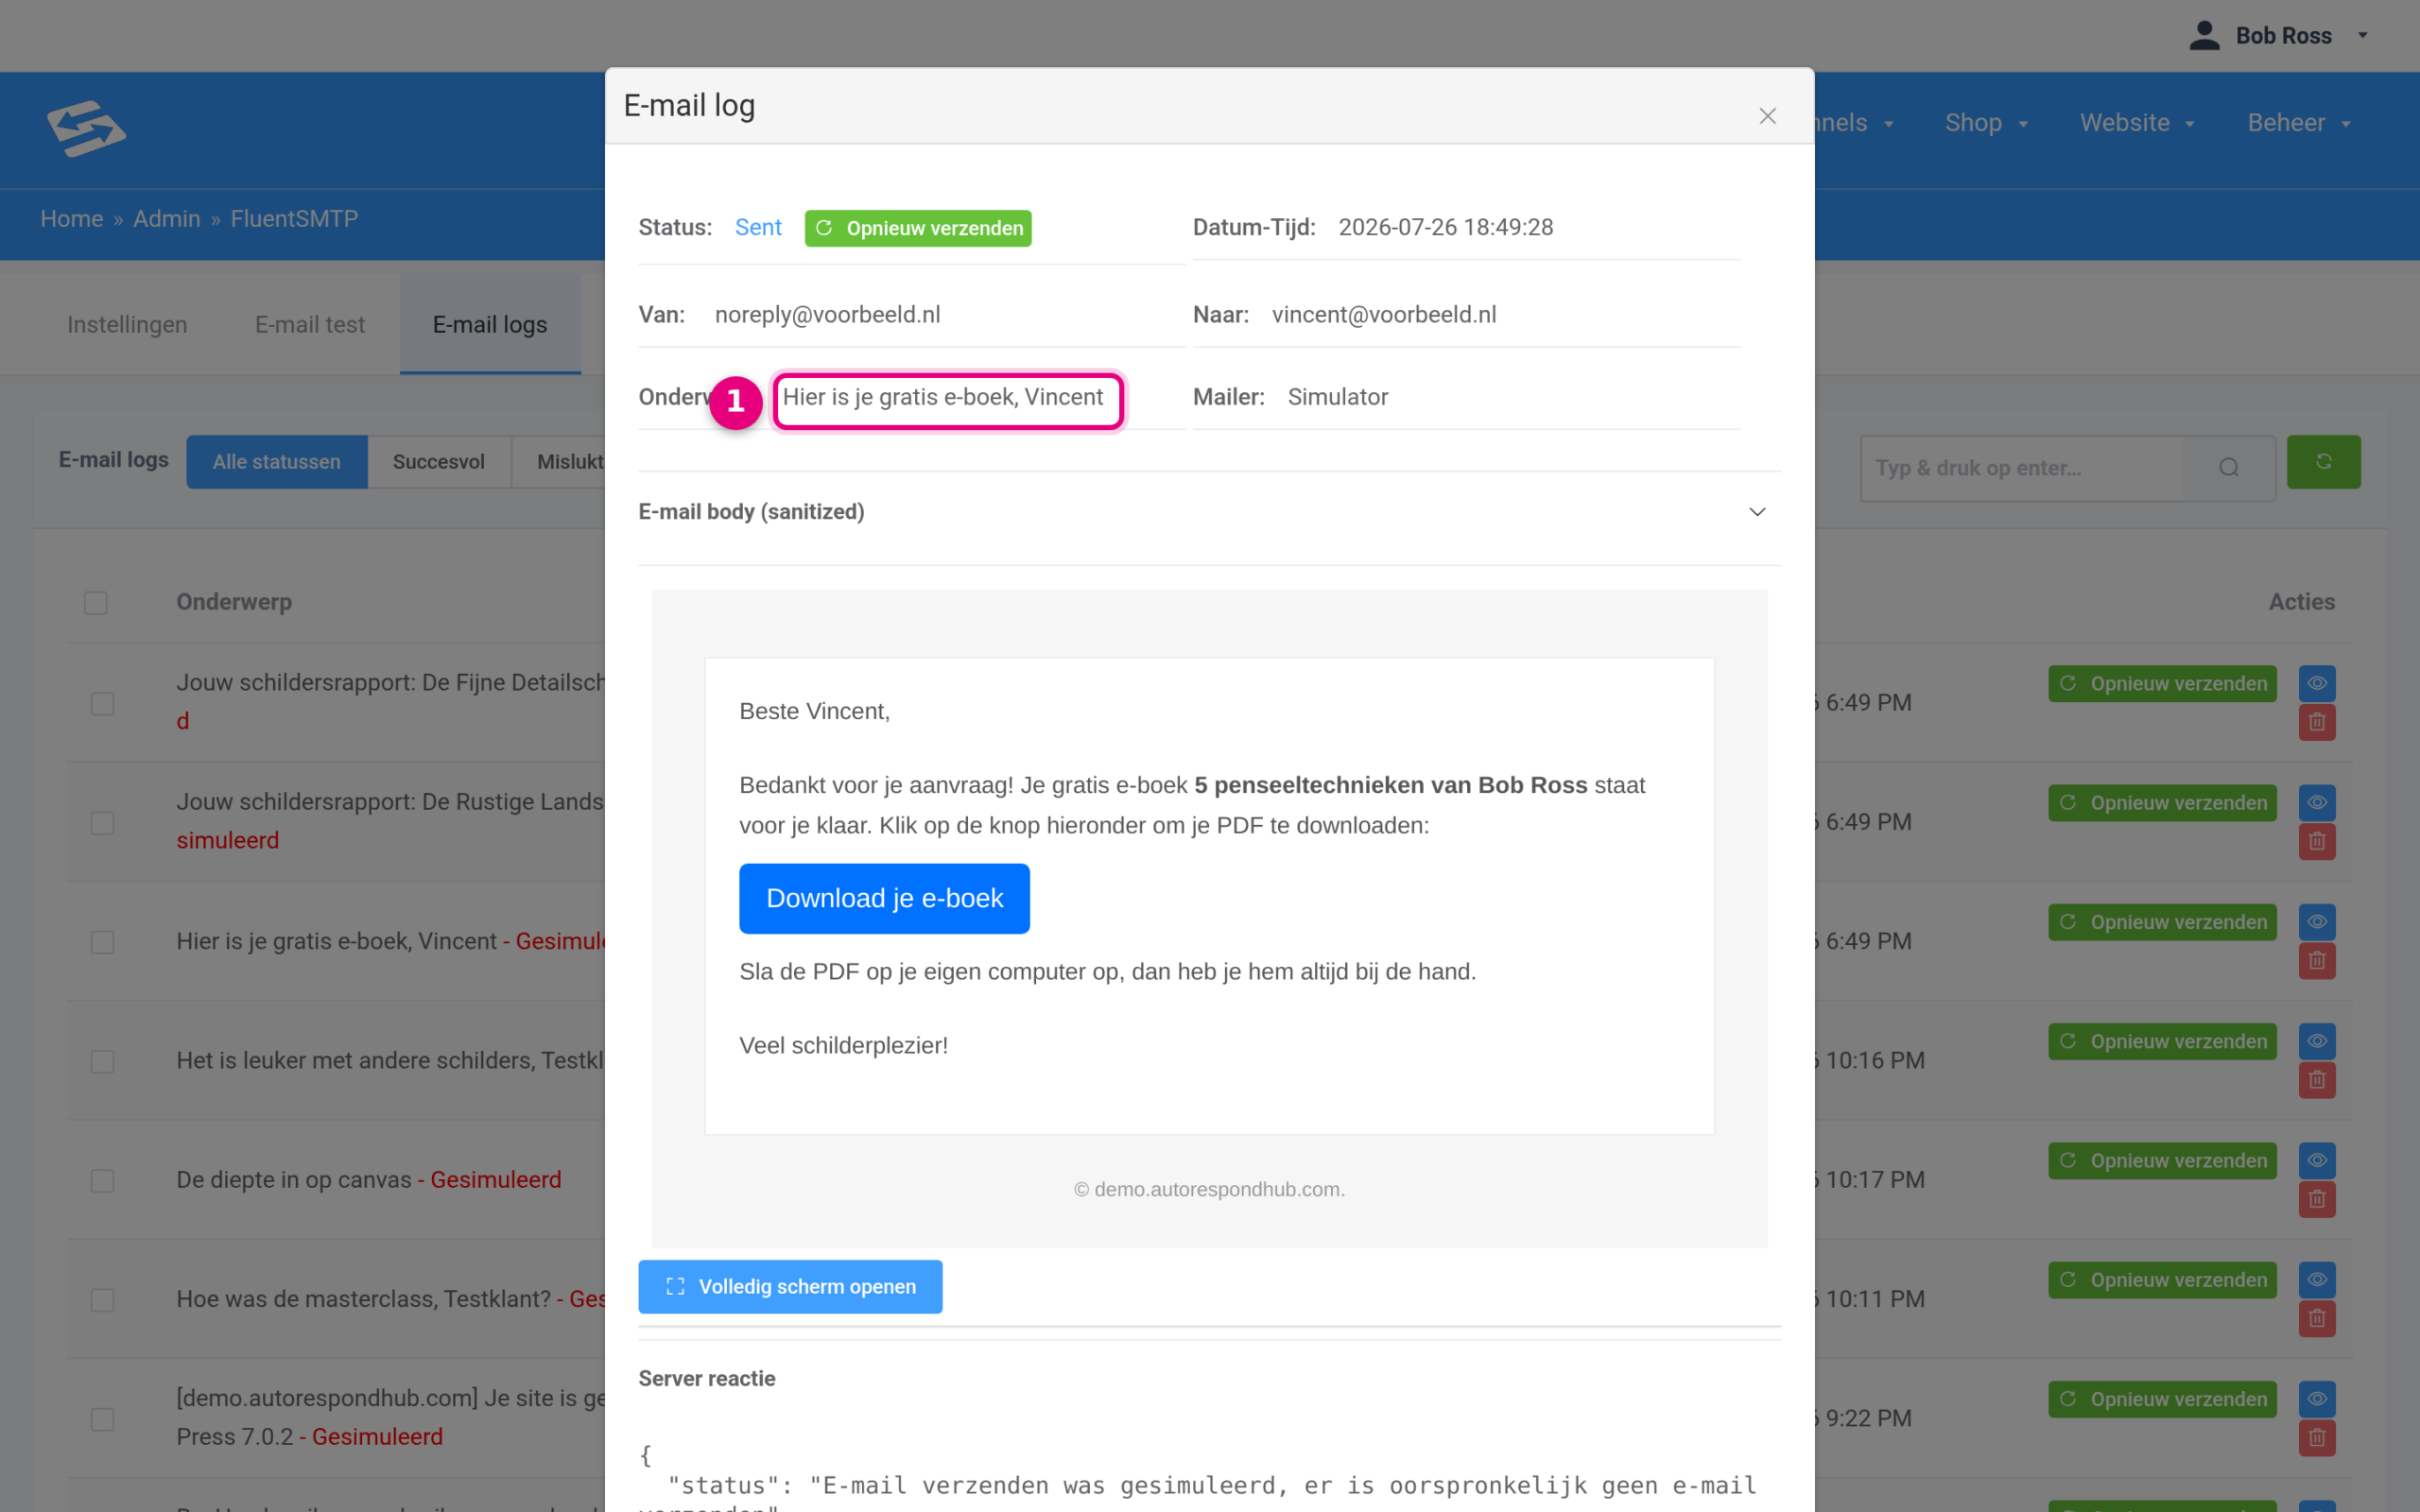
- In the email log window you see the subject with the first name that was filled in, plus the sender, the recipient and the full message text including the download button. That way you check exactly what the person signing up received, without having to search through a mailbox.
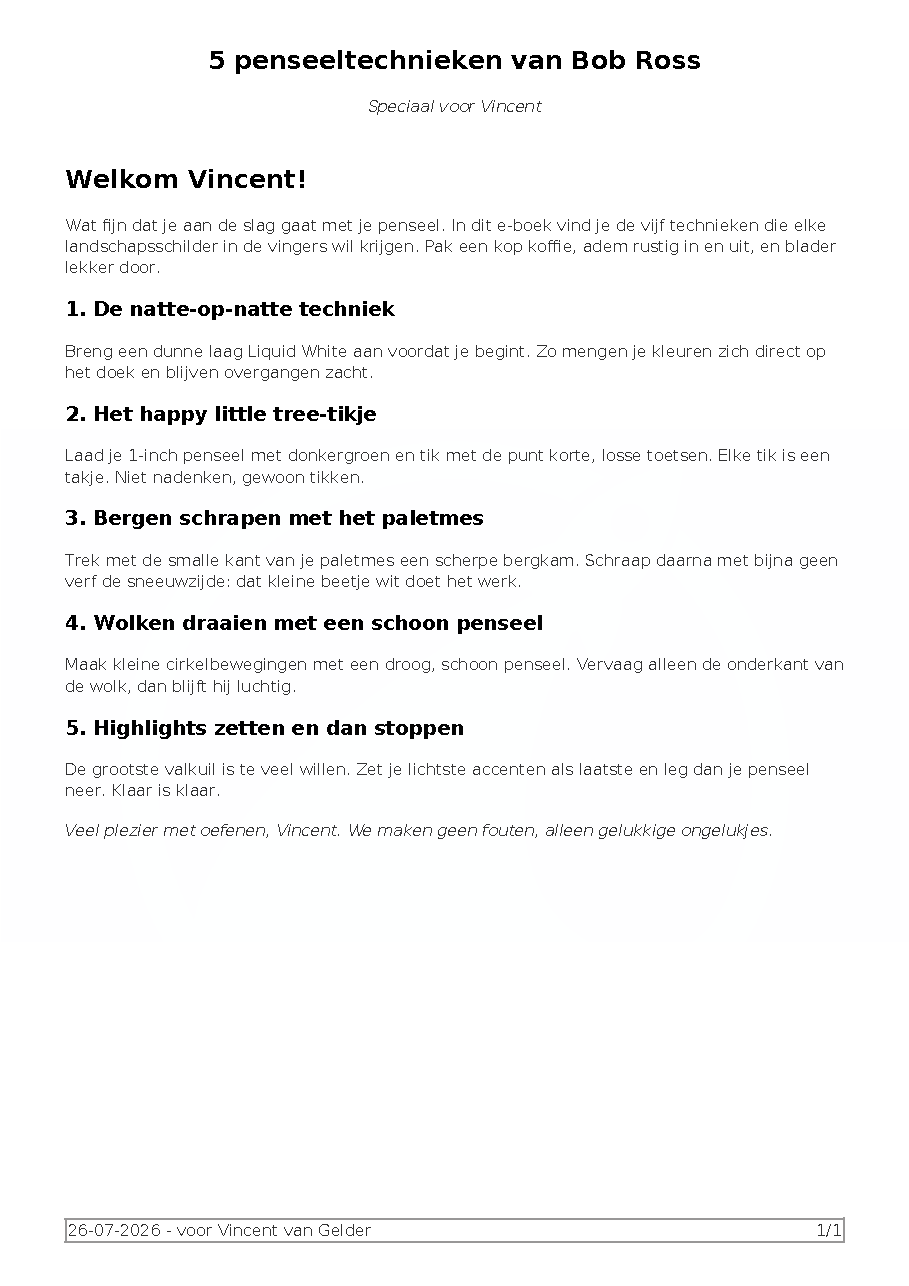
This is what the end result the recipient downloads looks like: a designed PDF with their own first name in the heading and in the text.
Going one step further #
Would you like the content of the PDF to differ per person, for example a personal report based on quiz answers? Then read the follow-up article about a personality quiz with a personal PDF report (see Related articles).


