Setting up conditional email notifications #
You have a form where people can choose different options, such as an interest in a specific product or service. Depending on their choice, you want to send different emails or forward them to different departments. With conditional email notifications you automatically send the right email to the right person, based on what someone fills in.
Instead of one standard notification for every form submission, you can set up smart rules. Does someone choose ‘Product A’? Then your sales department receives the notification. Does someone choose ‘Support’? Then the notification goes to your helpdesk team. This makes sure the right person gets the right information straight away.
When to use conditional notifications #
Conditional email notifications are useful in several situations:
- Contact form with different subjects: Support questions go to the helpdesk, sales questions to the sales department
- Sign-up forms for different products: Every product sign-up is forwarded to the responsible product manager
- Region-specific forms: Sign-ups from different cities go to the local branch
- Different company departments: HR questions go to human resources, IT questions to the technical department
- Personal handling: VIP customers receive a different notification from standard customers
Setting up conditional notifications #
You set up conditional notifications in the email settings of your form. The system checks the values that were filled in and sends the notification to the right recipient.
In this example we have a postcode field and we want to send a notification to a separate department within our organisation if the postcode is between 1011 and 1109:
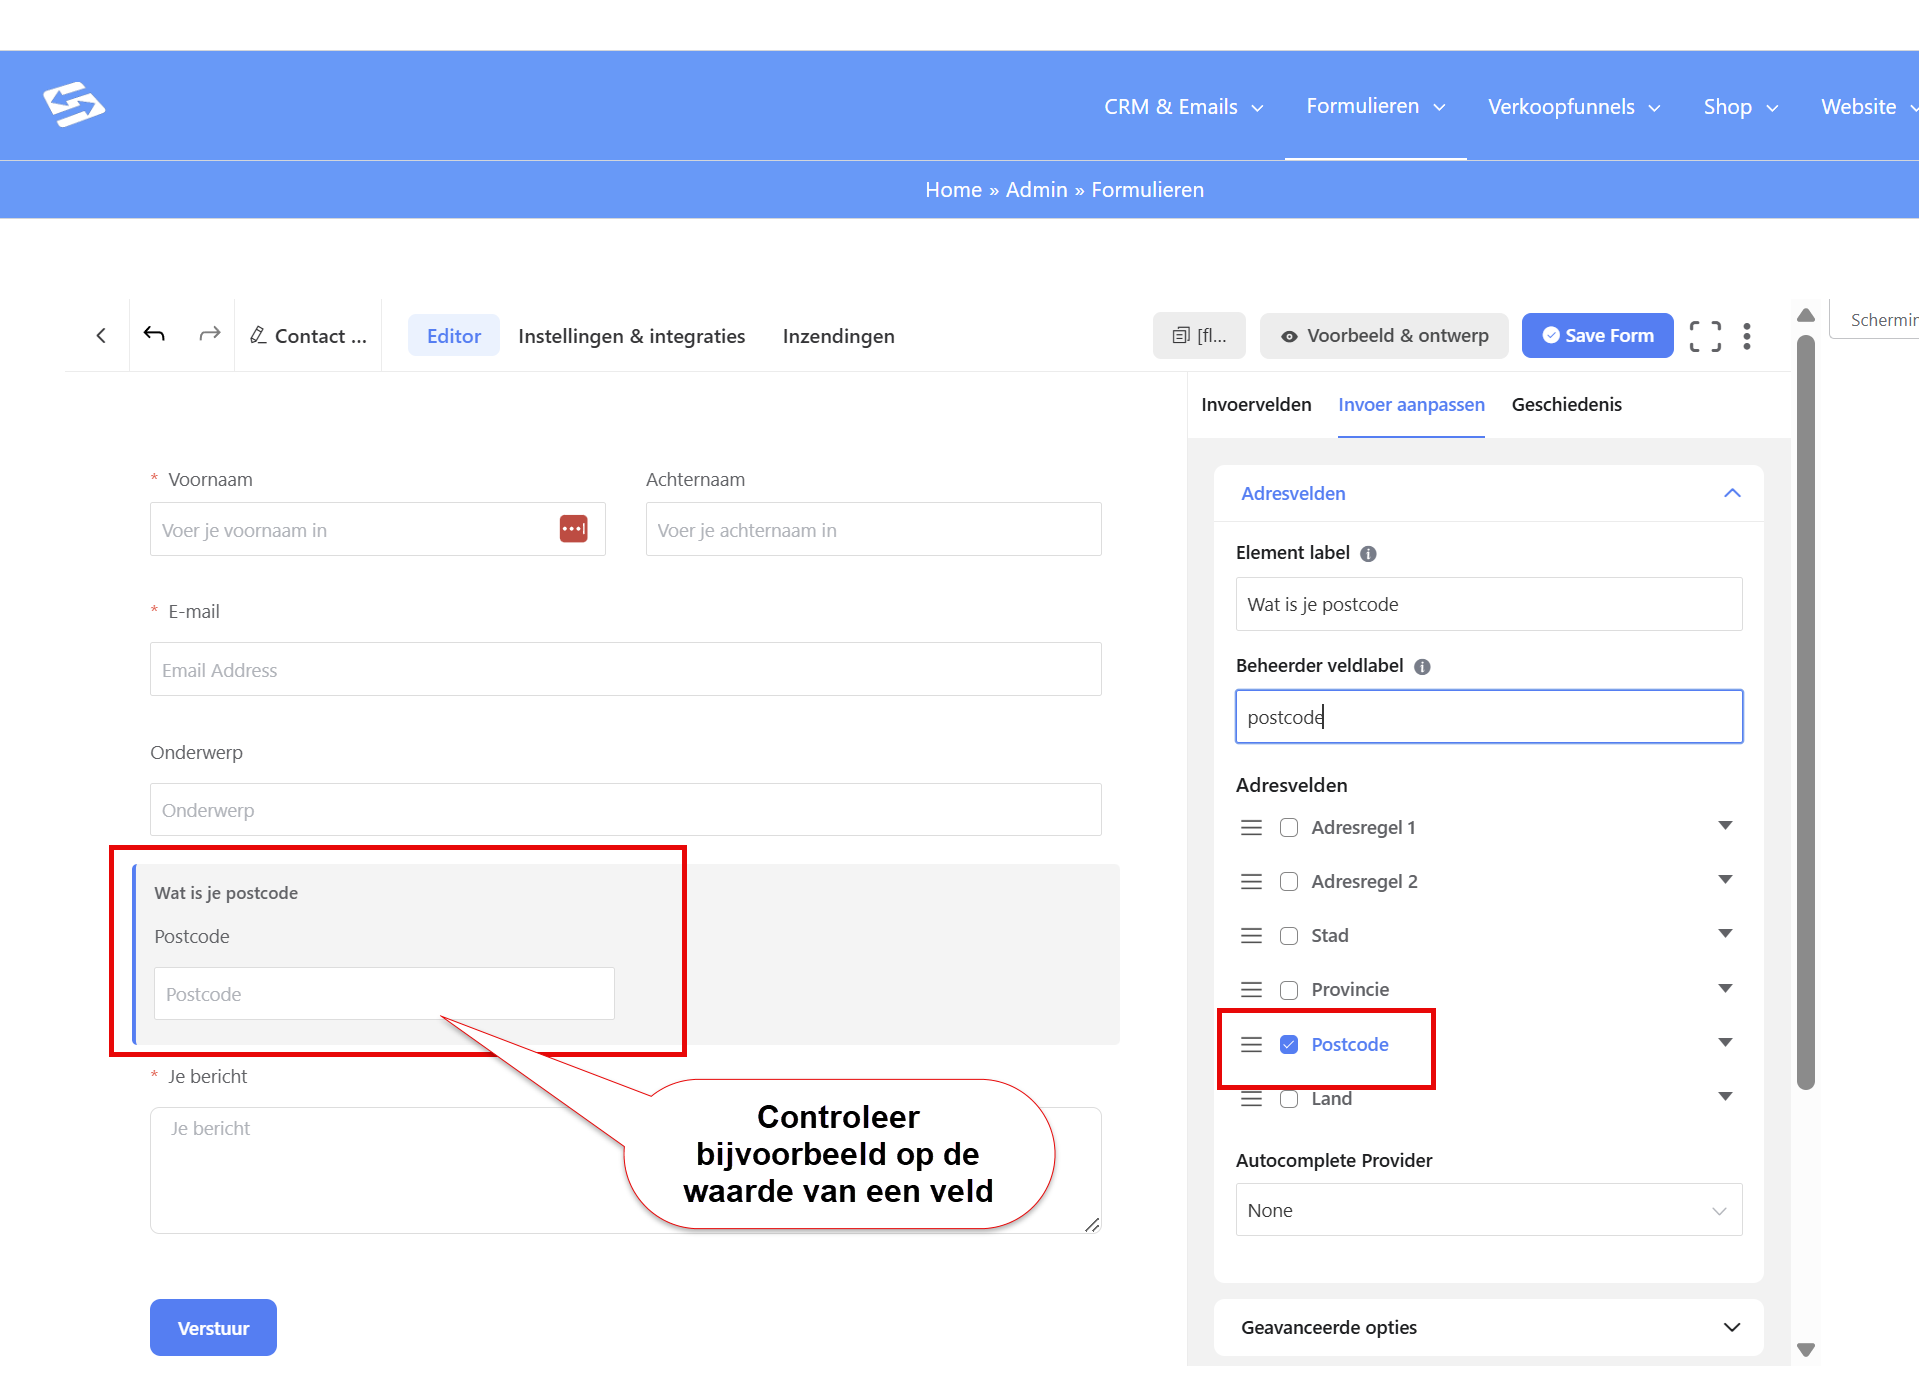
Step 1: Go to the notification settings #
In your Autorespond administration, go to Forms → Forms and open the form you want to set up conditional notifications for. Click ‘Settings & Integrations’ and go to the ‘Email notifications’ tab.
Step 2: Create a new notification #
Click ‘Add new notification’. Give the notification a clear name such as ‘Support requests’ or ‘Sales questions’. This name is only for your own overview.
Step 3: Set the conditions #
Scroll down until you see the ‘Conditional logic’ section. Switch on ‘Enable conditional logic’. You can now set rules for when this specific notification should be sent.
Choose the form field you want to base the condition on. This can be a dropdown, radio button, checkbox or any other field. Then set which value the field must have for this notification to be sent.
Step 4: Configure the email details #
Fill in the email details for this specific notification:
- To: The email address this notification should go to ([email protected], for example)
- Subject: A clear subject line that shows what kind of request it is
- Message: The content of the notification email, including the form data that was filled in
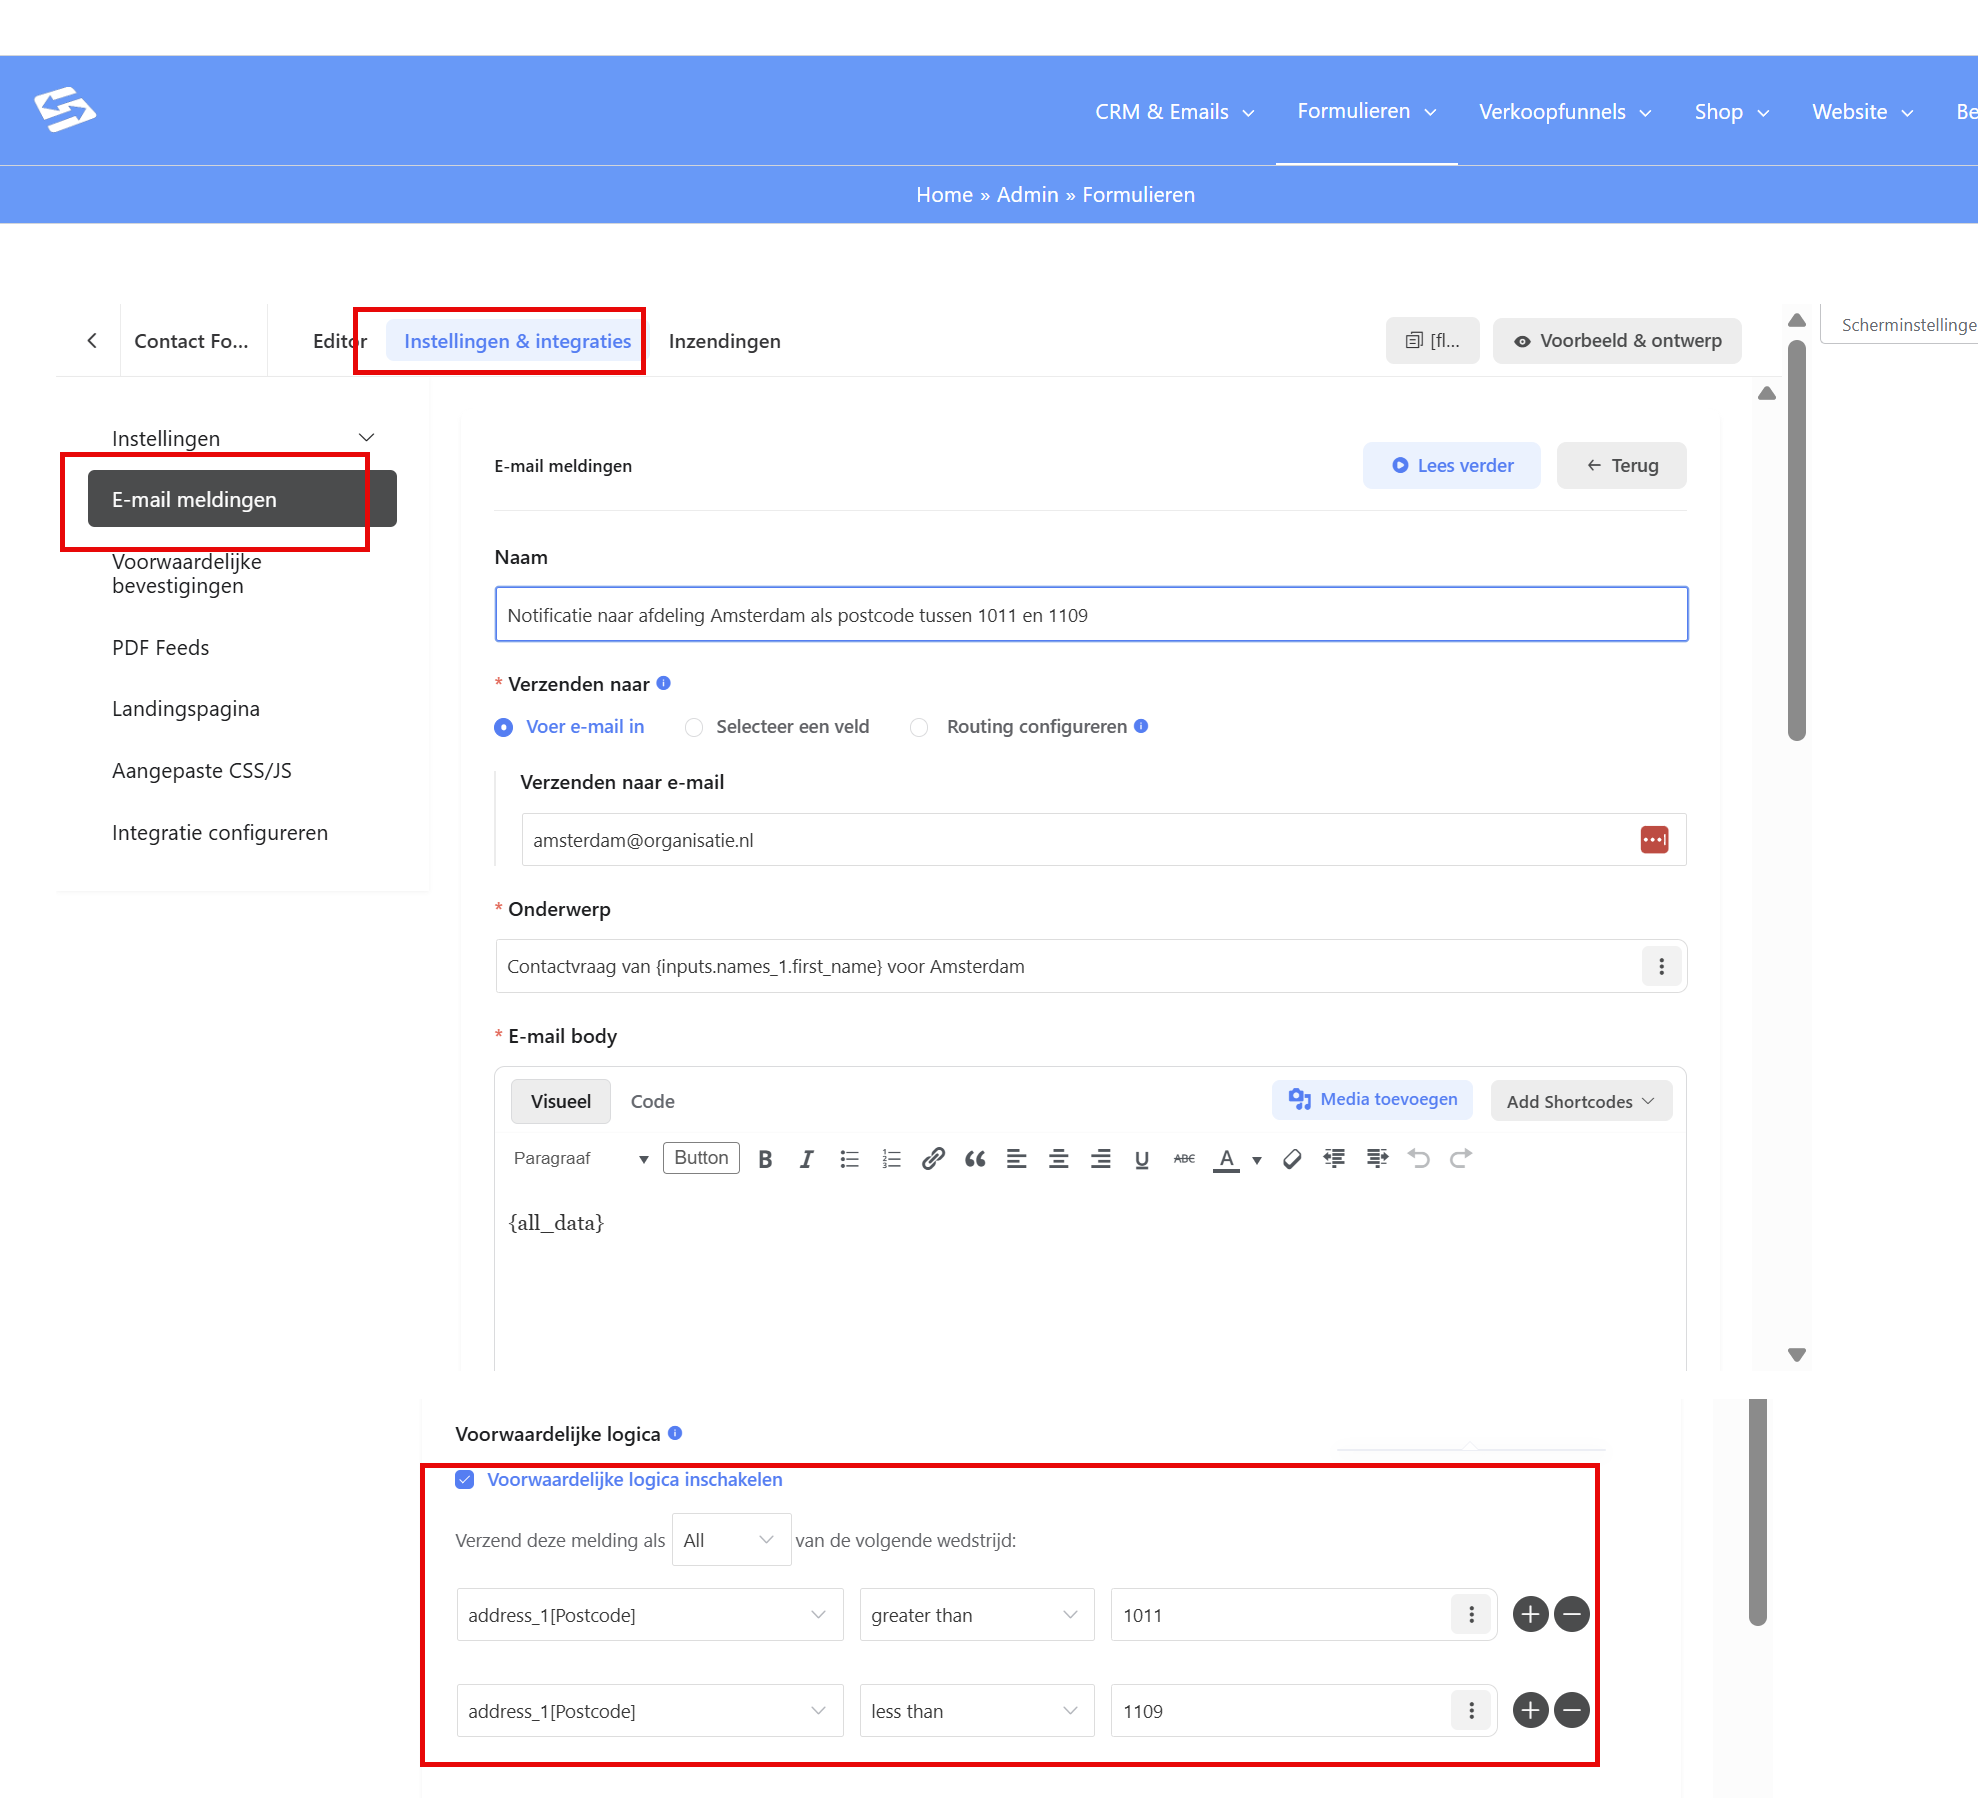
Step 5: Repeat for other conditions #
Create a separate notification for every possible choice. Does your form have a dropdown with ‘Support’, ‘Sales’ and ‘General questions’? Then you create three different notifications, each with its own condition and recipient.
Setting up complex conditions #
You can also set up more advanced conditions by combining several rules. For example: only send this notification if someone chooses ‘Product A’ AND comes from the Netherlands. Or: send it if someone is interested in ‘Premium service’ OR if the amount is higher than €1,000.
Use ‘AND’ logic when all conditions have to be true. Use ‘OR’ logic when only one of the conditions has to be true.
Standard notification as a backup #
It is wise to always set up a standard notification without conditions as a backup. It receives all form submissions that do not meet your specific conditions. That way you never miss an important request.
Set this backup notification to a general email address such as [email protected], so that someone is always aware of new submissions.
Testing your conditional notifications #
Always test your form thoroughly before you put it live. Fill in the form with different choices and check that the right notifications reach the right people. Pay particular attention to:
- Do the notifications arrive at the right email addresses?
- Do the emails contain all the required information from the form?
- Does the backup notification work for unexpected situations?
- Are all possible choices in your form covered by a notification?
Integration with your CRM #
Conditional notifications work well together with your CRM automations. You can assign tags automatically based on the form choice, for example, and then start automatic actions through smart links in the notification emails.
Conditional email notifications in Autorespond are based on FluentForms Pro, included in your package. Read the English documentation


