Shipping zones let you charge shipping costs automatically based on your customers’ delivery country. You no longer need separate products per country: the system applies the right shipping costs as soon as a customer enters their address at checkout.
Shipping settings in Autorespond are based on WooCommerce, included in your package.
How do shipping zones work? #
A shipping zone is a geographic area (country, region or postcode) to which you link one or more shipping methods. When a customer orders, the system detects the delivery address automatically and shows only the shipping methods that apply to that area.
For example: Dutch customers see “Standard shipping €6.95” and “Free shipping over €50”, while Belgian customers only see “Shipping Belgium €12.50”. The choice is filtered automatically on the basis of the address entered.
The system works with a priority order: the most specific zone takes precedence. If you have configured both a “Netherlands” zone and a “Europe” zone, a Dutch customer sees the settings of the Netherlands zone.
Setting up shipping zones step by step #
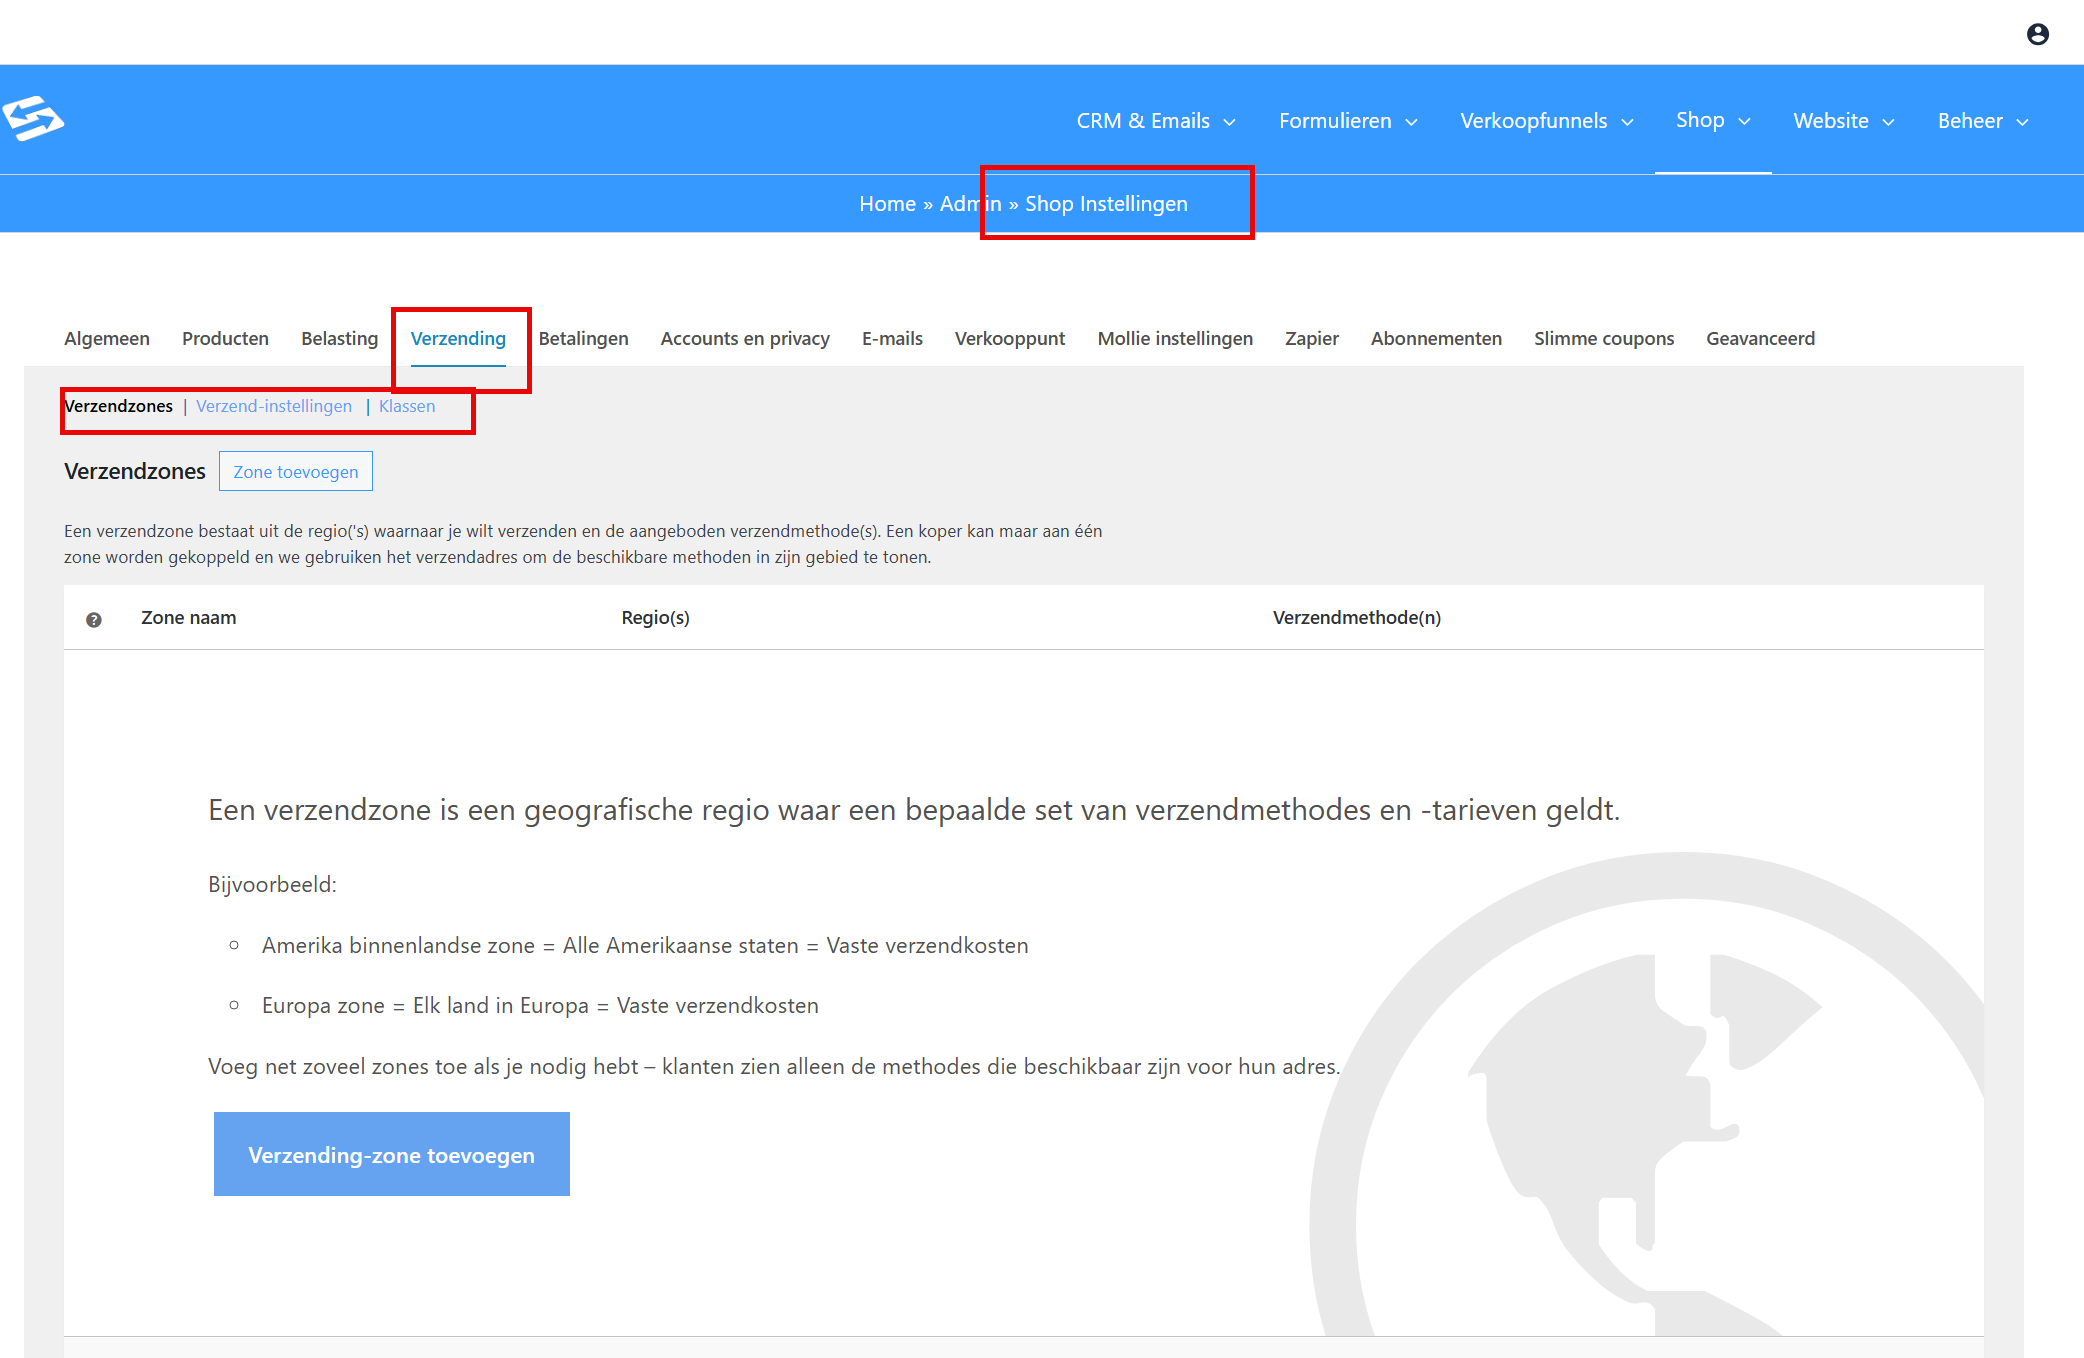
Go to Shop → Shop settings and open the ‘Shipping’ tab. You will see an overview of all shipping zones. The default zone “Locations not covered by your other zones” is always there and applies to countries without a zone of their own.
Dutch customers (several shipping options) #
- Click ‘Add shipping zone’ and name the zone ‘Netherlands’
- At ‘Zone regions’, click ‘Add’ and select ‘Netherlands’ from the list
- Click ‘Add shipping method’ and choose one of these options:
- Flat rate — for a standard shipping charge such as €6.95
- Free shipping — only above a minimum order value
- Local delivery — for your own delivery within a certain area
- Configure the method (costs, minimum amount, description) and save
- Repeat steps 3-4 for every additional shipping option within the Netherlands
Dutch customers can then choose at checkout between, for example, “Standard shipping €6.95” and “Free shipping over €50”. The system automatically shows only the options that are available for their order.
Belgian customers (separate shipping costs) #
- Click ‘Add shipping zone’ again and name this one ‘Belgium’
- Add Belgium to the zone regions
- Add a ‘Flat rate’ shipping method with the cost you want (€12.50, for example)
- Give the method a clear name such as “Standard shipping Belgium”
- Save the zone
Belgian customers only see this shipping option at checkout. They do not see any Dutch shipping methods, because their country is linked to a specific zone.
Zone order and priorities #
The order of the zones in your overview determines the priority. Drag zones up or down to change the order. More specific zones (such as ‘Netherlands’) have to sit above broader zones (such as ‘Europe’).
The default zone “Locations not covered by your other zones” is always at the bottom and applies to every country you have not explicitly configured. You can leave this zone empty (no shipping methods) if you only want to ship to specific countries.
Setting up free shipping correctly #
With the ‘Free shipping’ method you always have to set a condition, otherwise the method does not work. You can choose from:
- A valid free shipping coupon — free shipping only with a specific discount code
- A minimum order amount — €50 for free shipping, for example
- A minimum order amount OR a valid coupon — either option works
- A minimum order amount AND a valid coupon — both conditions must be met
The most commonly used option is a minimum order amount, because it encourages customers to order more. Set €50 for free shipping within the Netherlands, for example, but keep Belgian shipping paid because of the higher costs.
Shipping classes for different product types #
You use shipping classes for products that have different shipping costs within the same zone. Think of light products (€6.95) versus heavy parcels (€15.00) going to the same country.
Creating shipping classes #
- Go to Shop → Shop settings and open the ‘Shipping’ tab
- Click the ‘Shipping classes’ tab at the top
- Add classes such as “Standard”, “Heavy parcel” or “Fragile”
- Give each class a clear description
Assigning shipping classes to products #
- Go to Shop → Products and open the product you want to edit
- Scroll to the ‘Shipping’ tab in the product settings
- At ‘Shipping class’, select the right class for this product
- Save the product
Products without a shipping class automatically fall under the standard rates of your shipping methods.
Configuring rates per shipping class #
- Go back to your shipping zones and edit an existing shipping method
- You now see a table with all the shipping classes you have created
- Enter the right rate for each shipping class
- Leave fields empty if that shipping class is not available for this method
Example: your Dutch shipping method costs €6.95 for “Standard” products, €15.00 for “Heavy parcel” and €9.95 for “Fragile” (extra packaging costs).
Common configurations #
Netherlands + Belgium setup #
The most common setup for Dutch webshops:
- Netherlands zone: Standard shipping €6.95 + Free shipping over €50
- Belgium zone: Standard shipping €12.50
- “Locations not covered by your other zones” zone: empty (no shipping outside NL/BE)
Collection or local delivery only #
For local businesses:
- Netherlands zone: only “Local delivery €5.00” and “Collection €0.00”
- Configure postcode areas on local delivery to limit the delivery area
Linking shipping to your product #
You do not have to link shipping costs to a product manually. The shipping zones you have created apply automatically to all products in the shop, based on the customer delivery address. There is one setting you should check per product, though.
Check the shipping setting of the product #
Open the product through Shop → Products and click the Shipping tab. Check the following:
- The product is not marked as ‘Virtual’. Virtual products (such as downloads or services) automatically have no shipping costs. If this box is ticked, shipping is never calculated, whatever your zones say.
- The weight and dimension fields are optional, but useful if you ever start working with weight-based shipping.
- Leave the Shipping class field empty if you want to use the standard rates from your zones for this product, which is the case in most situations.
When do you use shipping classes? #
Shipping classes are only needed if you want to charge different rates for certain products than for others within the same shipping zone. Suppose you have a light product and a heavy product: you can then set a higher flat rate for the heavy product through a shipping class. For a shop with a single product this is not necessary.
You create shipping classes through Shop → Shop settings → ‘Shipping’ tab → ‘Shipping classes’ section. They then appear as an option in the Shipping tab of every product.
How it works at checkout #
As soon as a customer enters their country on the checkout page, the system looks up the matching shipping zone automatically and shows the shipping methods that belong to it. A Dutch customer sees the Dutch options, a Belgian customer sees the Belgian option. As an administrator you do not have to do anything: it works entirely automatically based on the zones you have set up.
Tips for practice #
- Test your configuration by placing a test order with different addresses
- Use clear names for shipping methods, such as “PostNL standard” instead of “Method 1”
- Check the VAT settings, since shipping costs are usually subject to VAT
- Consider shipping classes if you have products with very different dimensions or weights
For more advanced configurations such as shipping based on weight or postcode, see the official WooCommerce documentation on shipping zones.
See also: Standard WooCommerce shop settings for other important webshop settings.


