Video contents #
This video describes the steps for setting up the general store checkout, which is used as the basis whenever someone places an order with you. The software we use for this is called ‘Funnelkit’. This is a very popular extension to the standard WooCommerce functions and layout, with which the checkout experience can be set up entirely as you wish.
Structure of the video #
1. Access to the Store Checkout settings 1:18
- Go to the menu Sales funnels > Store checkout to edit the general store checkout and thank-you page..
- Click ‘Store Checkout’ to edit the checkout page. You can then manage the fields of the checkout page, such as the invoice fields. And you can edit the layout and design of the checkout page in the Elementor page builder.
2. Adjusting the checkout page 1:39
- In the checkout page settings you can manage the fields and tailor the checkout page to your needs
- Click ‘Preview’ to see a preview of the current checkout page.
3. Editing with Elementor 2:15
- Click the edit button to open the checkout page in Elementor.
- Adjust the logo and other design elements to match your own branding. We recommend placing a link to your contact page in the footer.
4. Field settings 6:38
- Once you have adjusted the design and style within Elementor and saved it, go back to the store checkout settings. There you set the standard fields such as email, first name and surname in the checkout
- Adjust the order of the fields if you want by clicking each field.
5. Adjusting payment methods 8:39
- You cannot adjust the payment methods here, but through the menu Shop > Settings, tab ‘Payments’. In the checkout editor you only see where they will be shown.
6. Confirmation page settings 11:21
- Do not forget to adjust the general confirmation page.
- Use the available shortcodes if you want to add dynamic text, such as the customer’s first name.
7. Advanced settings: adding extra sections 14:05
- You can split the invoice details into different sections if you want, and use subtitles as well. Add extra sections as you wish for contact details, order details and shipping details.
8. Advanced settings: validation settings 17:45
- In the store checkout settings you can add extra functions under the subtab ‘Optimizations’, such as a check on the email address (when an existing customer tries to order they get a call to action to log in. You can also validate phone and address fields.
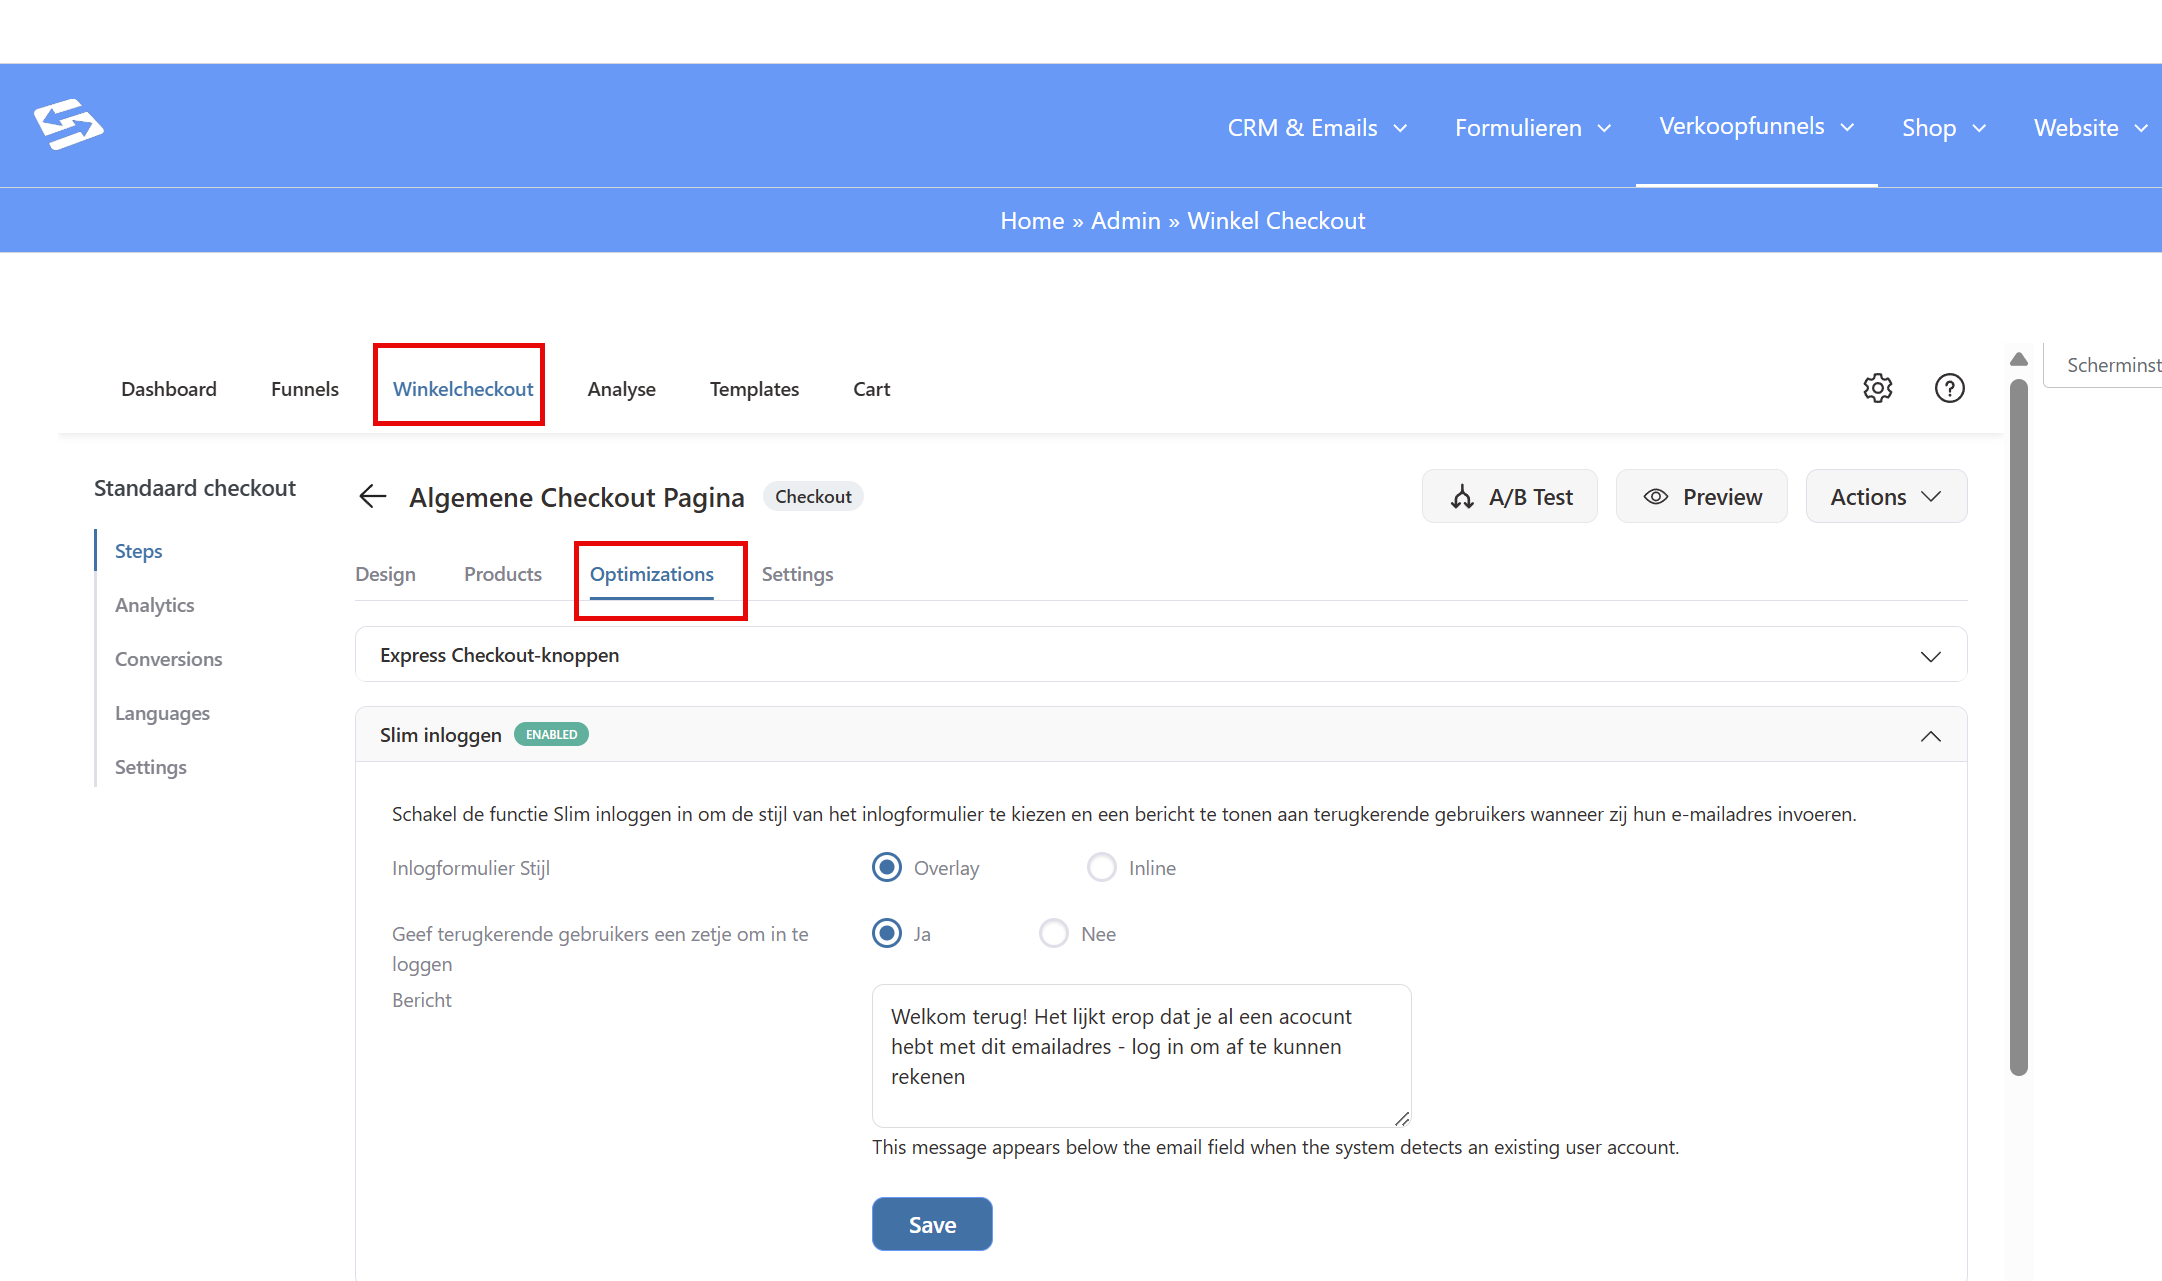
9. Advanced settings: tracking settings 18:43
- Under the subtab ‘Settings’ you can set specific Google Analytics and other tracking options for this checkout page. But we recommend keeping this ‘standard’ and setting up these connections through Sales funnel Settings > ‘Pixel tracking’
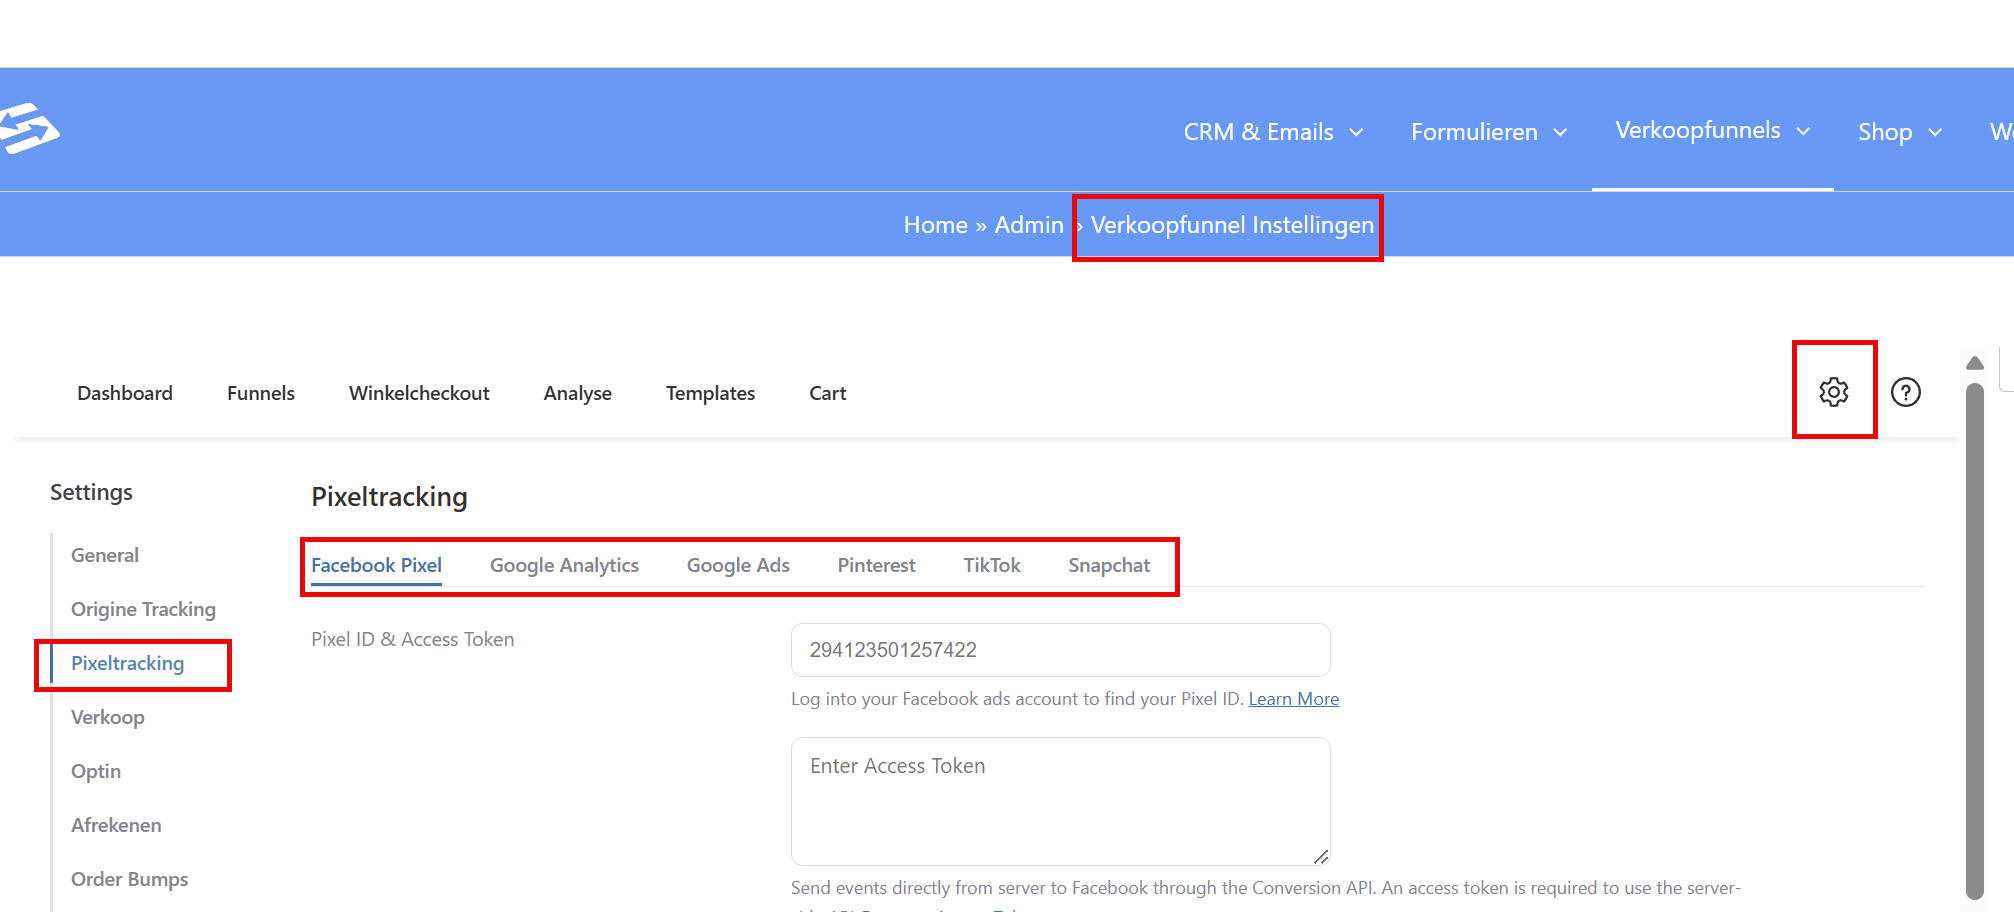
10. Direct order link 20:26
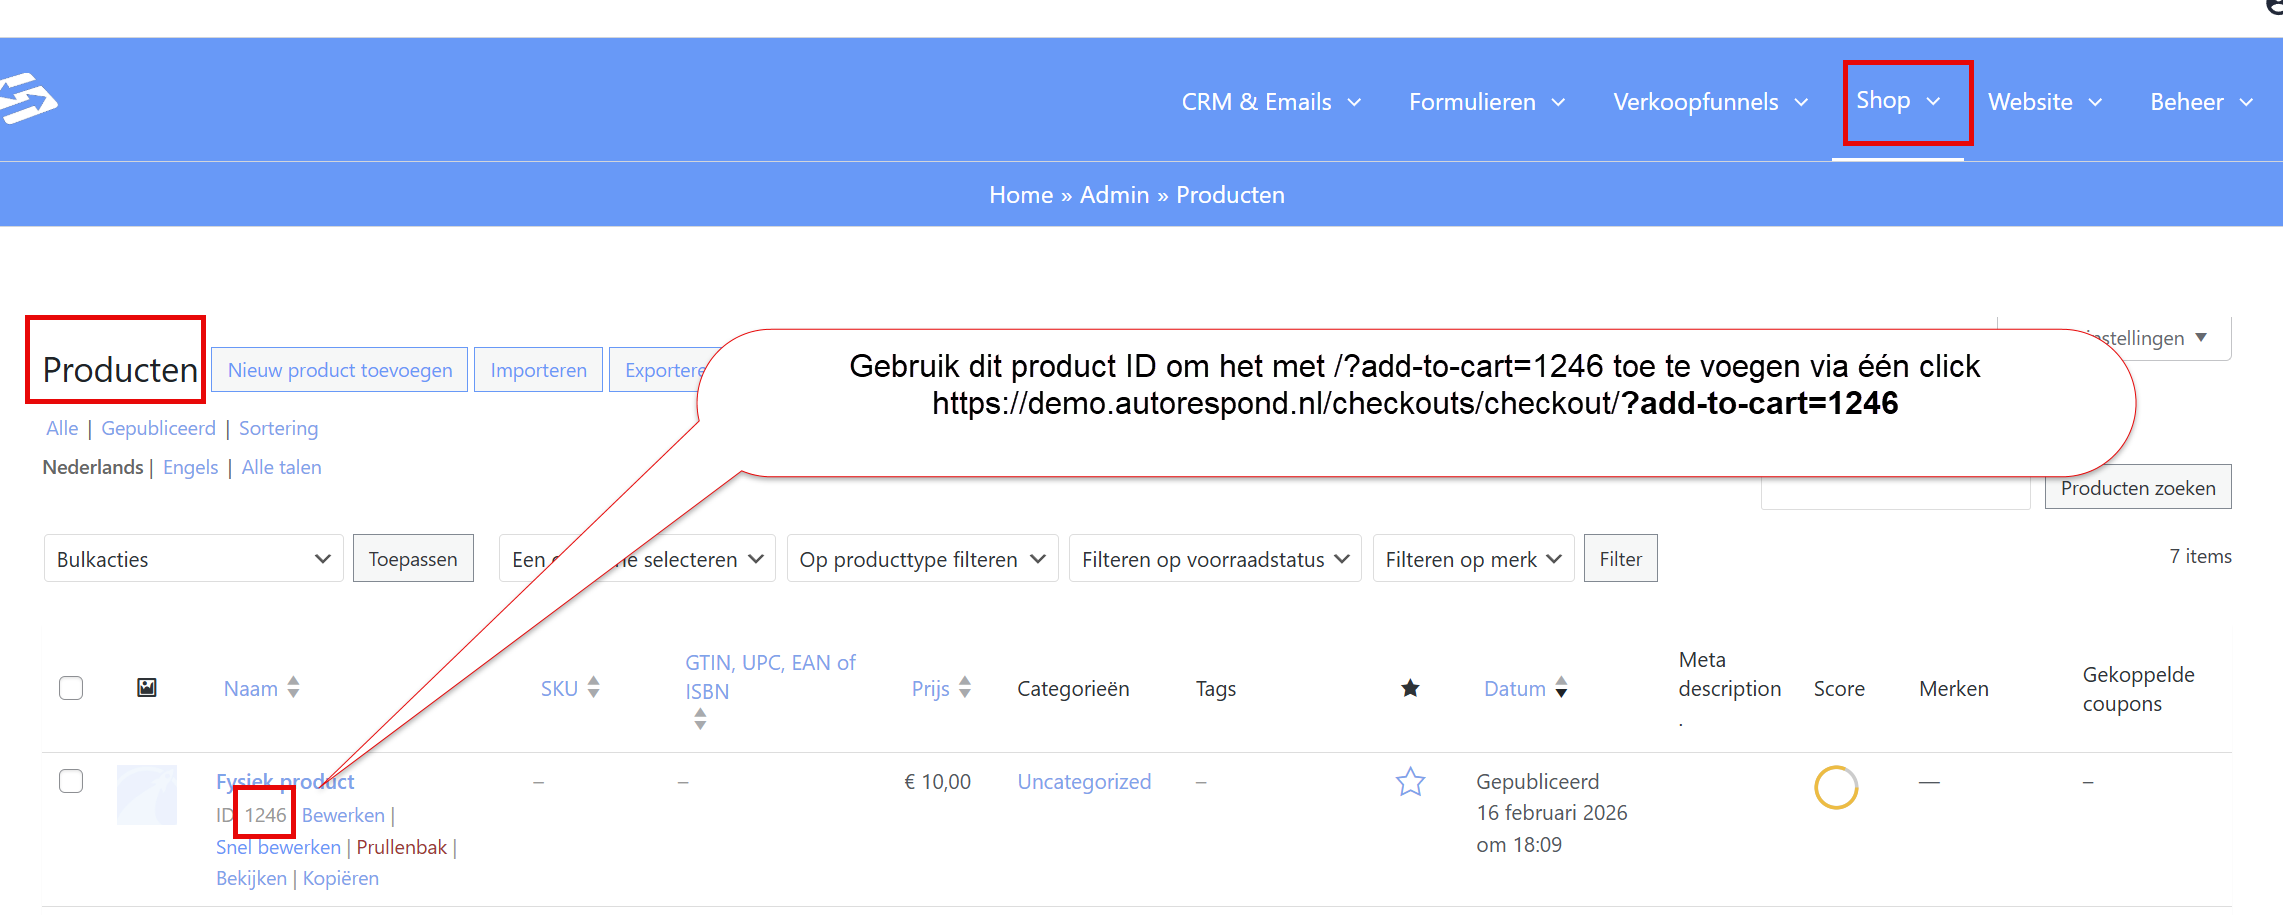
- Once you have set up the general Store Checkout as you want it, you can create an order link with specific products very quickly. Use the Store checkout page url for this and add the following to it: /?add-to-cart=XXX (replace the XXX with the correct product ID)
In this example the standard store checkout page url is:
https://demo.autorespond.nl/checkouts/checkout/If someone clicks that link without first adding a product to the shopping basket, the checkout is shown without a product, but if we want to show product ID 1246 for example, the link becomes:
https://demo.autorespond.nl/checkouts/checkout/?add-to-cart=1246
Tips #
- Make sure you do not change the Elementor layout of the checkout page to a different page layout, as this can disrupt the functionality.
- Always check that the changes have been applied correctly by opening the checkout page in an incognito tab after making your changes.
- Use the ‘Undo’ function in Elementor to reverse changes quickly.
- Use the copy and paste function (right-click an element to see it) to move elements between pages quickly within Elementor.


