Suppose you rent out two identical meeting rooms and want customers to be able to book them online, but never more than are available. With a group booking in the Appointments module you set a maximum capacity per time slot. As soon as both rooms are taken, the time slot is automatically closed for new bookings. Once the booking has finished, the places are released automatically.
The explanation below applies when it does not matter which room is booked (they are both the same). If it does matter, for example because one is significantly different from the other, you are better off setting up two separate hosts, one per meeting room.
The Appointments module is an optional extension you can add to your Autorespond package. This module lets people book appointments online, comparable to Calendly. More information about this module
Step 1: Create a WordPress user as host #
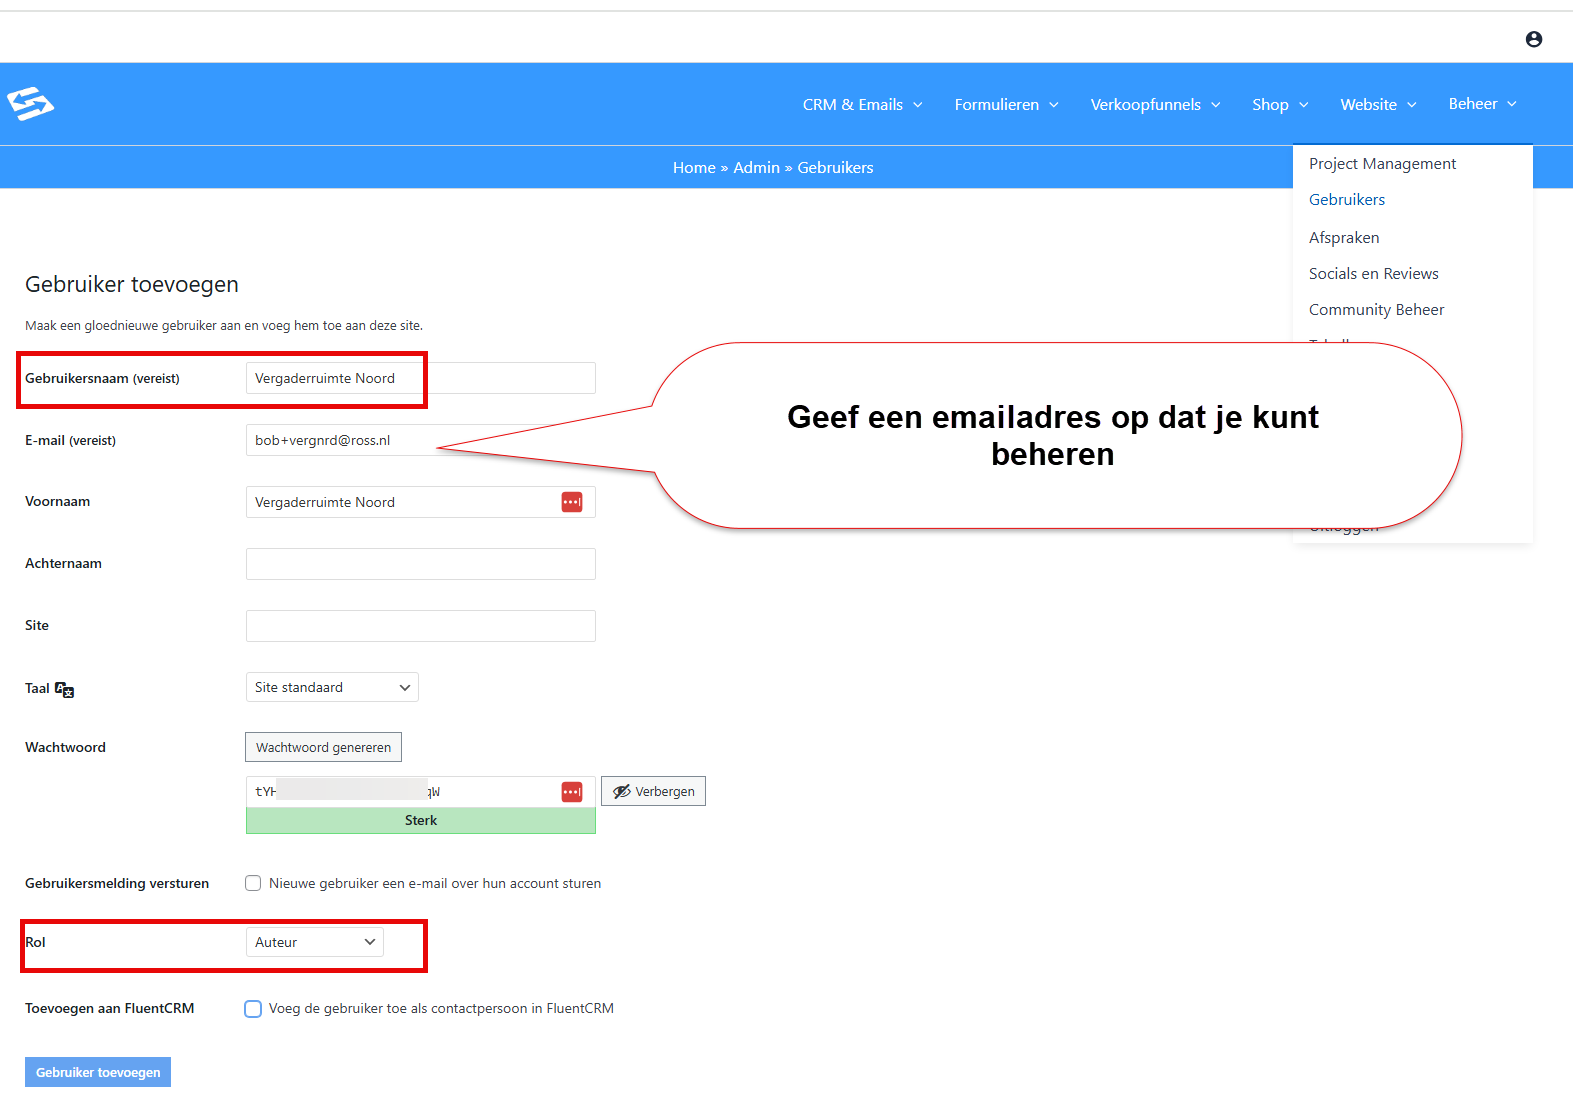
Every host in the Appointments module is linked to a WordPress user. So first create a user that represents your rental location or resource.
- In the dashboard, go to Manage → Users and click Add New User.
- Give the user a clear name that describes the resource, such as Meeting room North or Meeting room South.
- Set the role to Author. This is the minimum level needed to function as a host.
- Save the user.
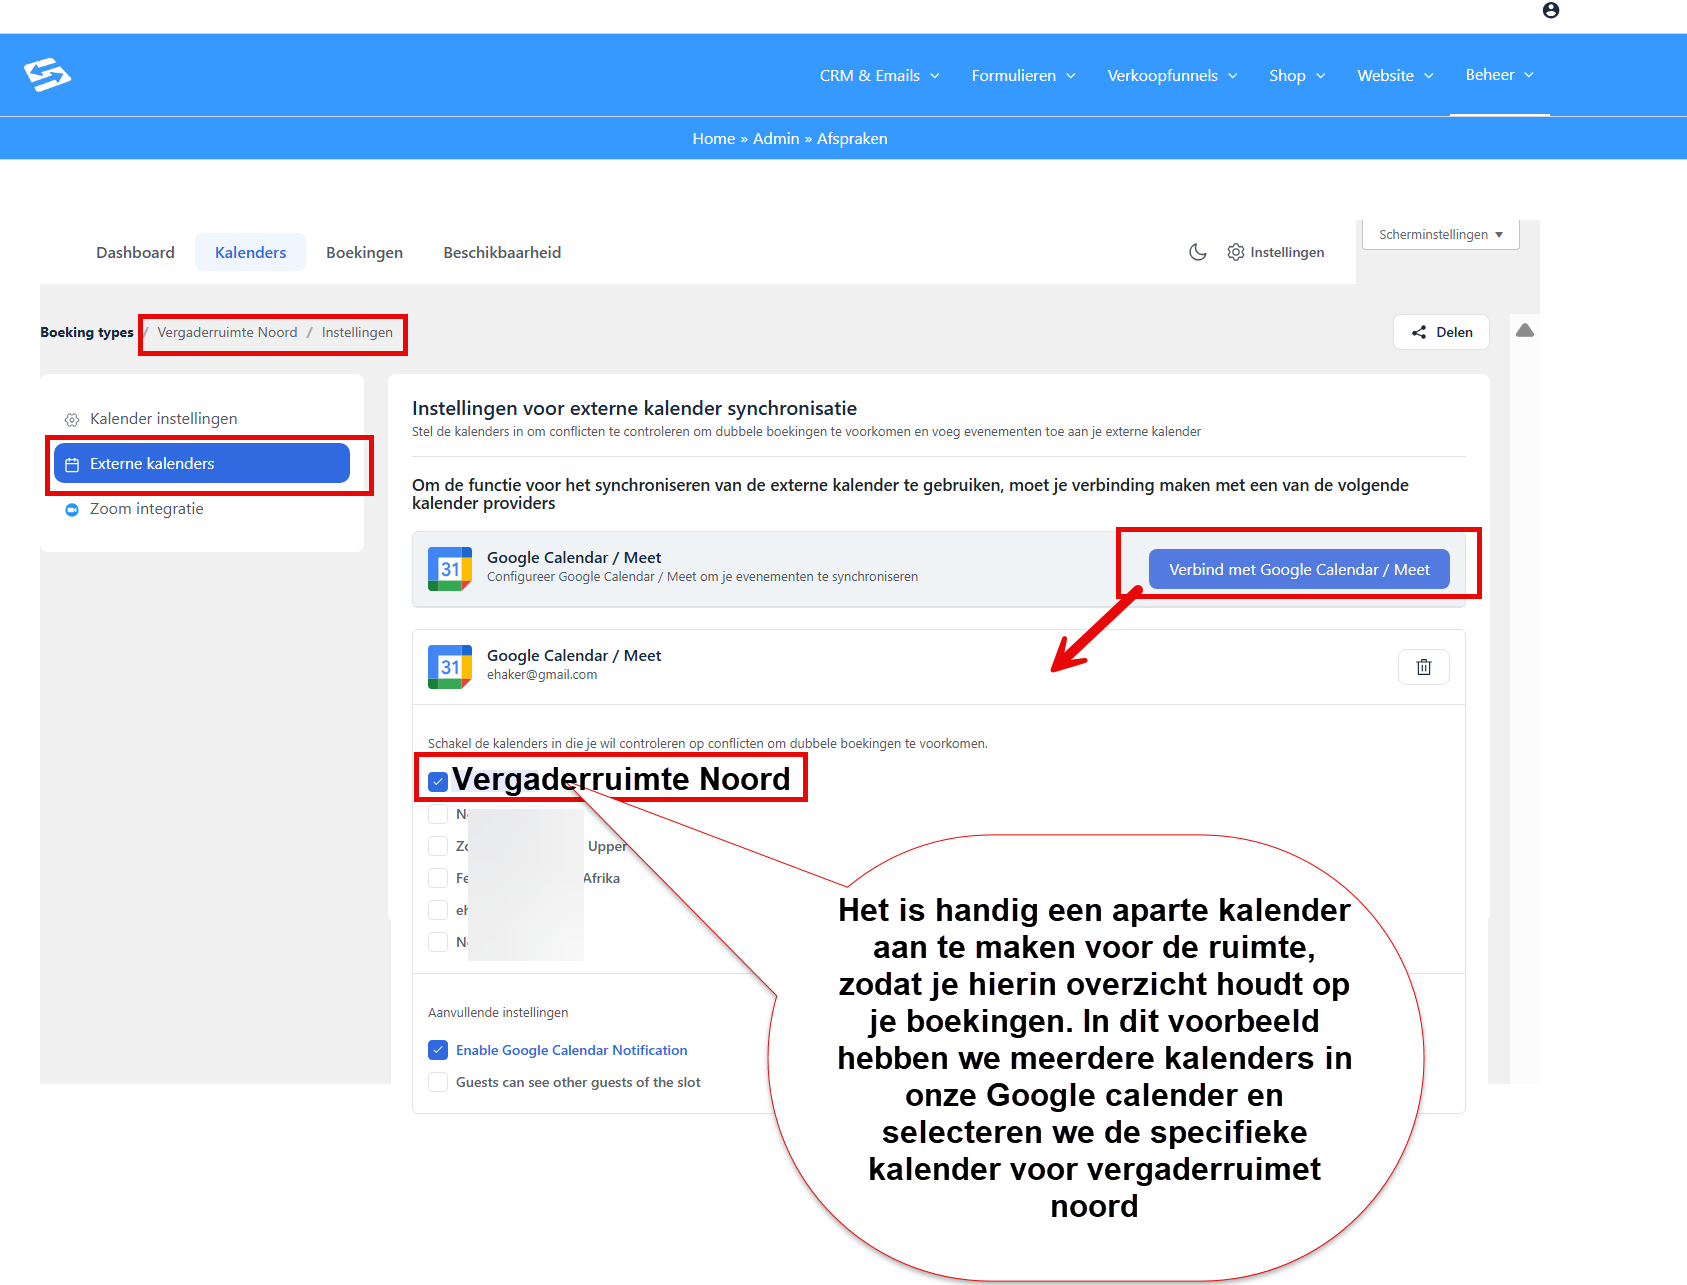
Do you also want to track occupancy in an external calendar such as Google Calendar? In that case you link an external calendar per host later on, via Host settings → External calendars. That way the availability of every room is always up to date.
Step 2: Add the host in the Appointments module #
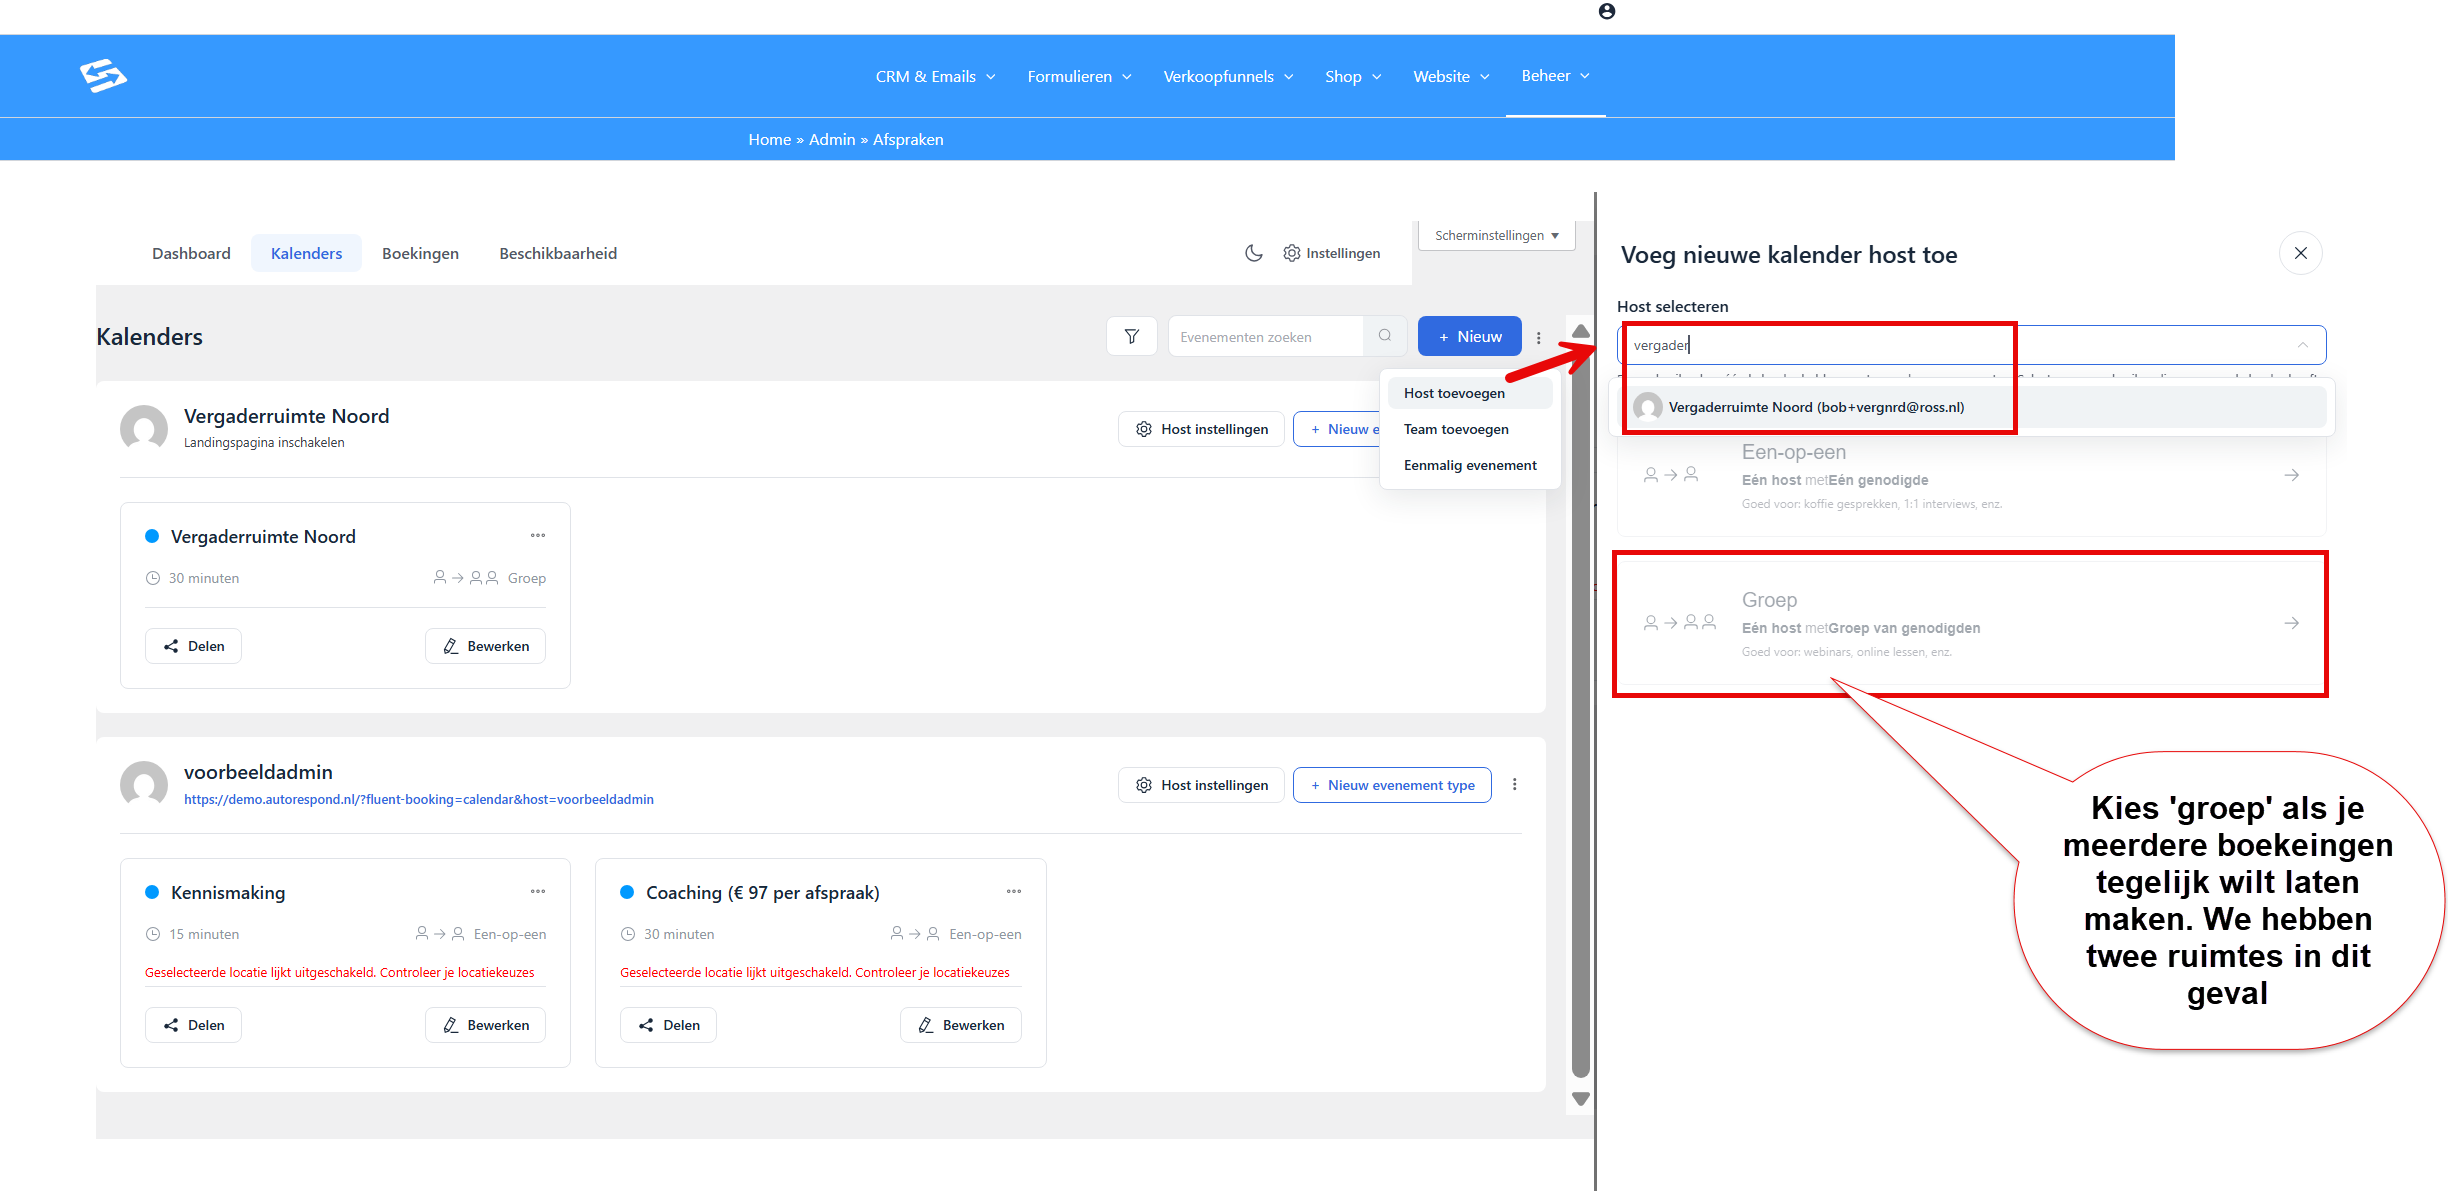
- Go to Manage → Appointments and click the Calendars tab.
- Click the + New button and choose Add host.
- Select the WordPress user you have just created as host.
- Choose Group as the booking type.
- Enter the event name (for example Rent a meeting room) and set the default meeting duration.
- Click Save.
Repeat this process for every individual resource if you want customers to be able to choose a specific room. If you want to offer the rooms as interchangeable, with the system automatically assigning an available room, create a single host with the maximum capacity set to the number of available rooms (see step 3).
Step 3: Set the maximum capacity per time slot #
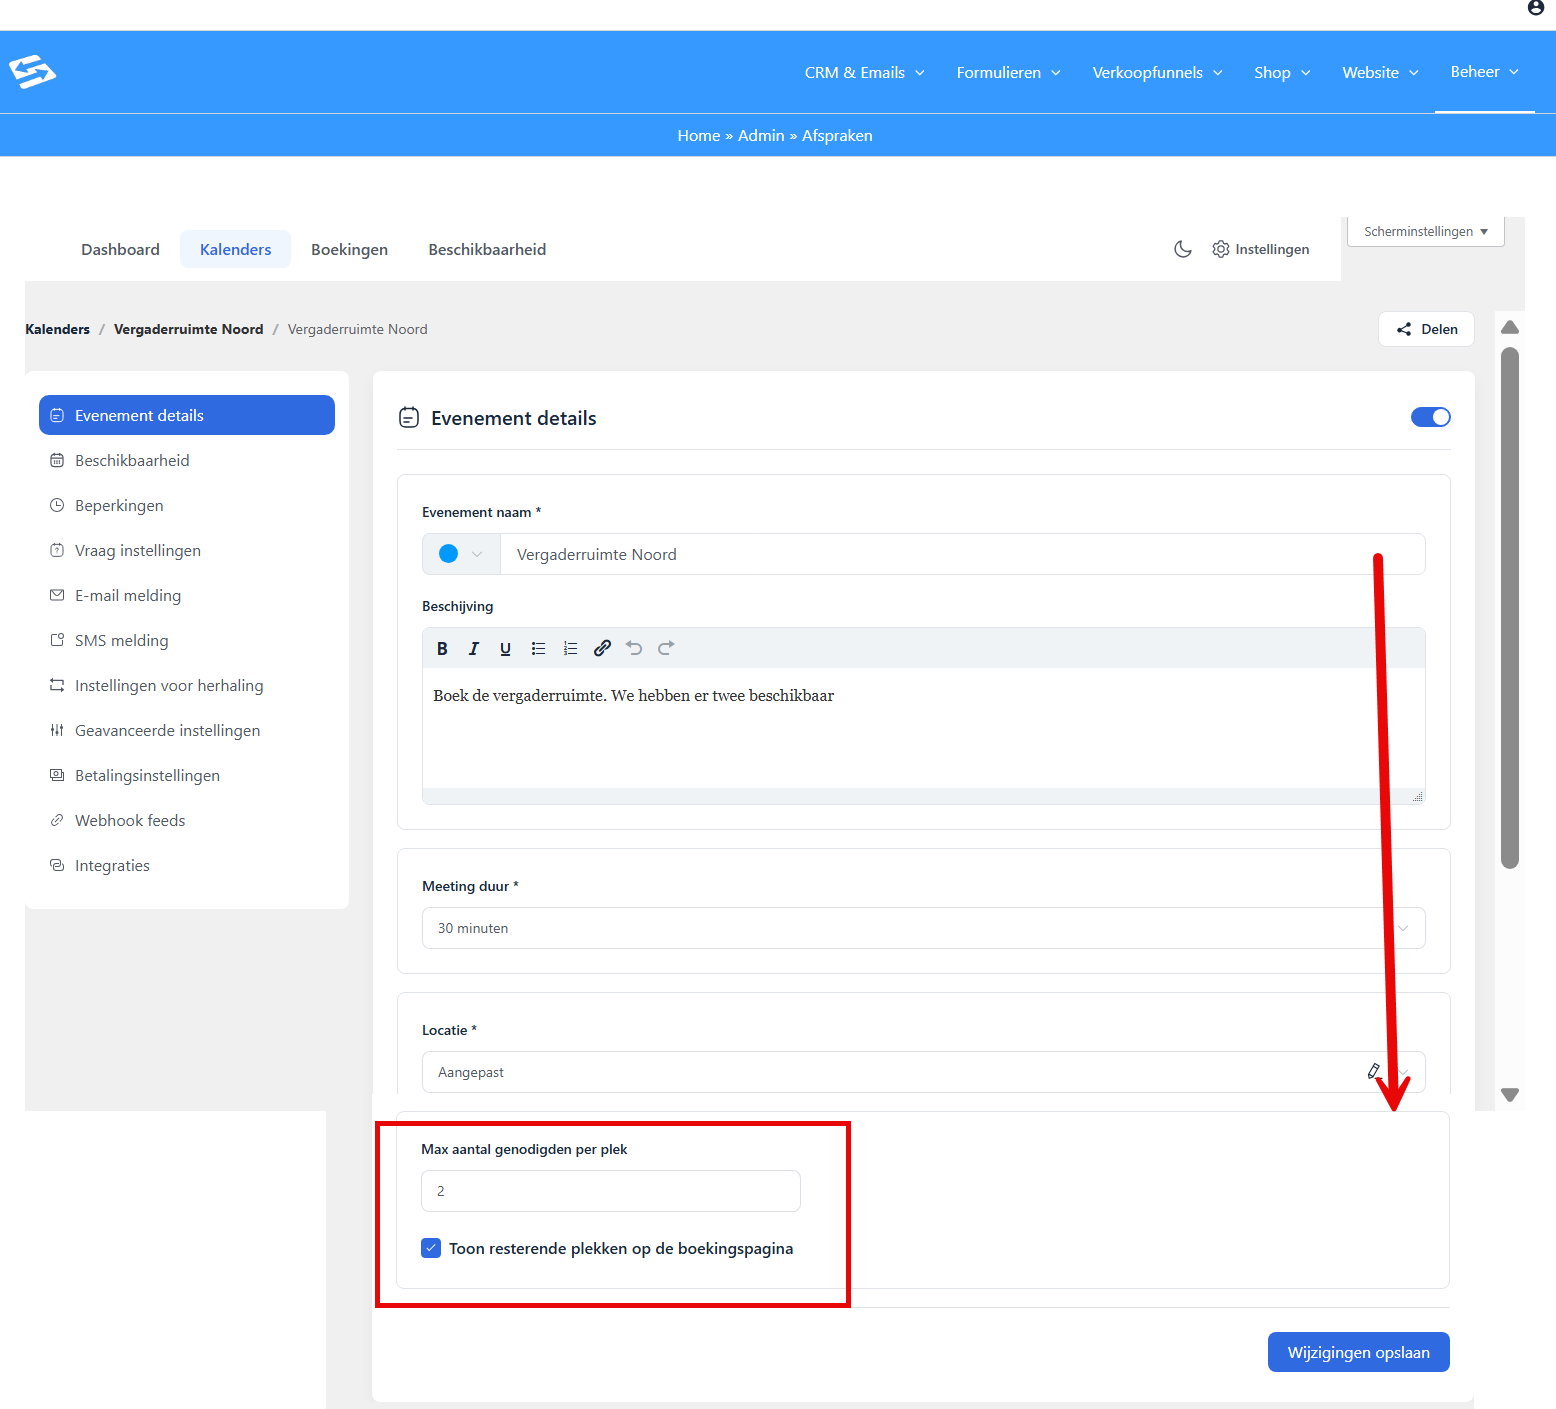
- Open the calendar and click the pencil icon next to the event to edit it.
- In the left-hand menu, go to Event details.
- Find the Maximum number of attendees field (or Total Spots) and set it to the number of available resources, in this example 2.
- Click Save changes.
The system now allows a maximum of 2 bookings per time slot. On the third attempt, the time slot is no longer available. Once the booking has passed, the places are released automatically and new customers can book again.
Step 4: Set the availability and other settings for the booking #
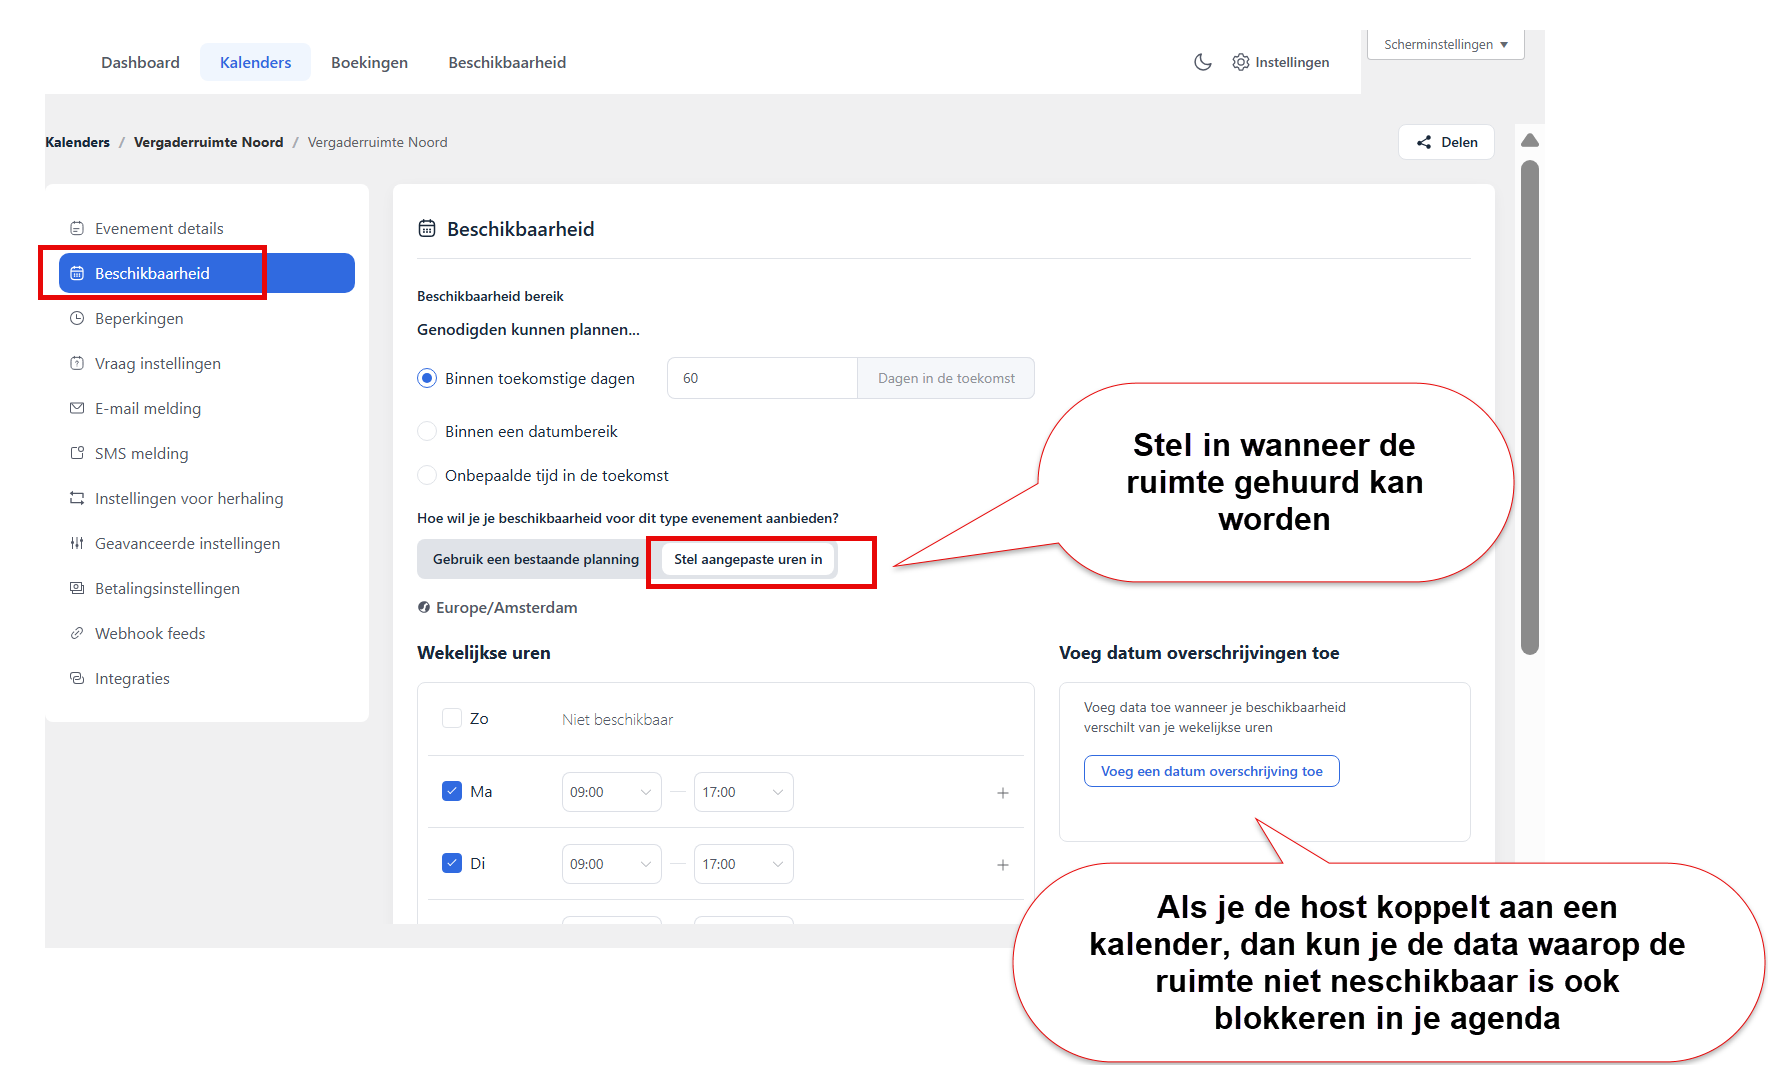
- In the calendar settings, go to Availability.
- Set the opening hours during which the rooms can be booked, such as Monday to Friday from 8:00 to 18:00.
- Use Date overrides to set exceptions, such as closing days or special availability (but bear in mind that this can also be done in your own calendar, if you link the host to your calendar (step 5)
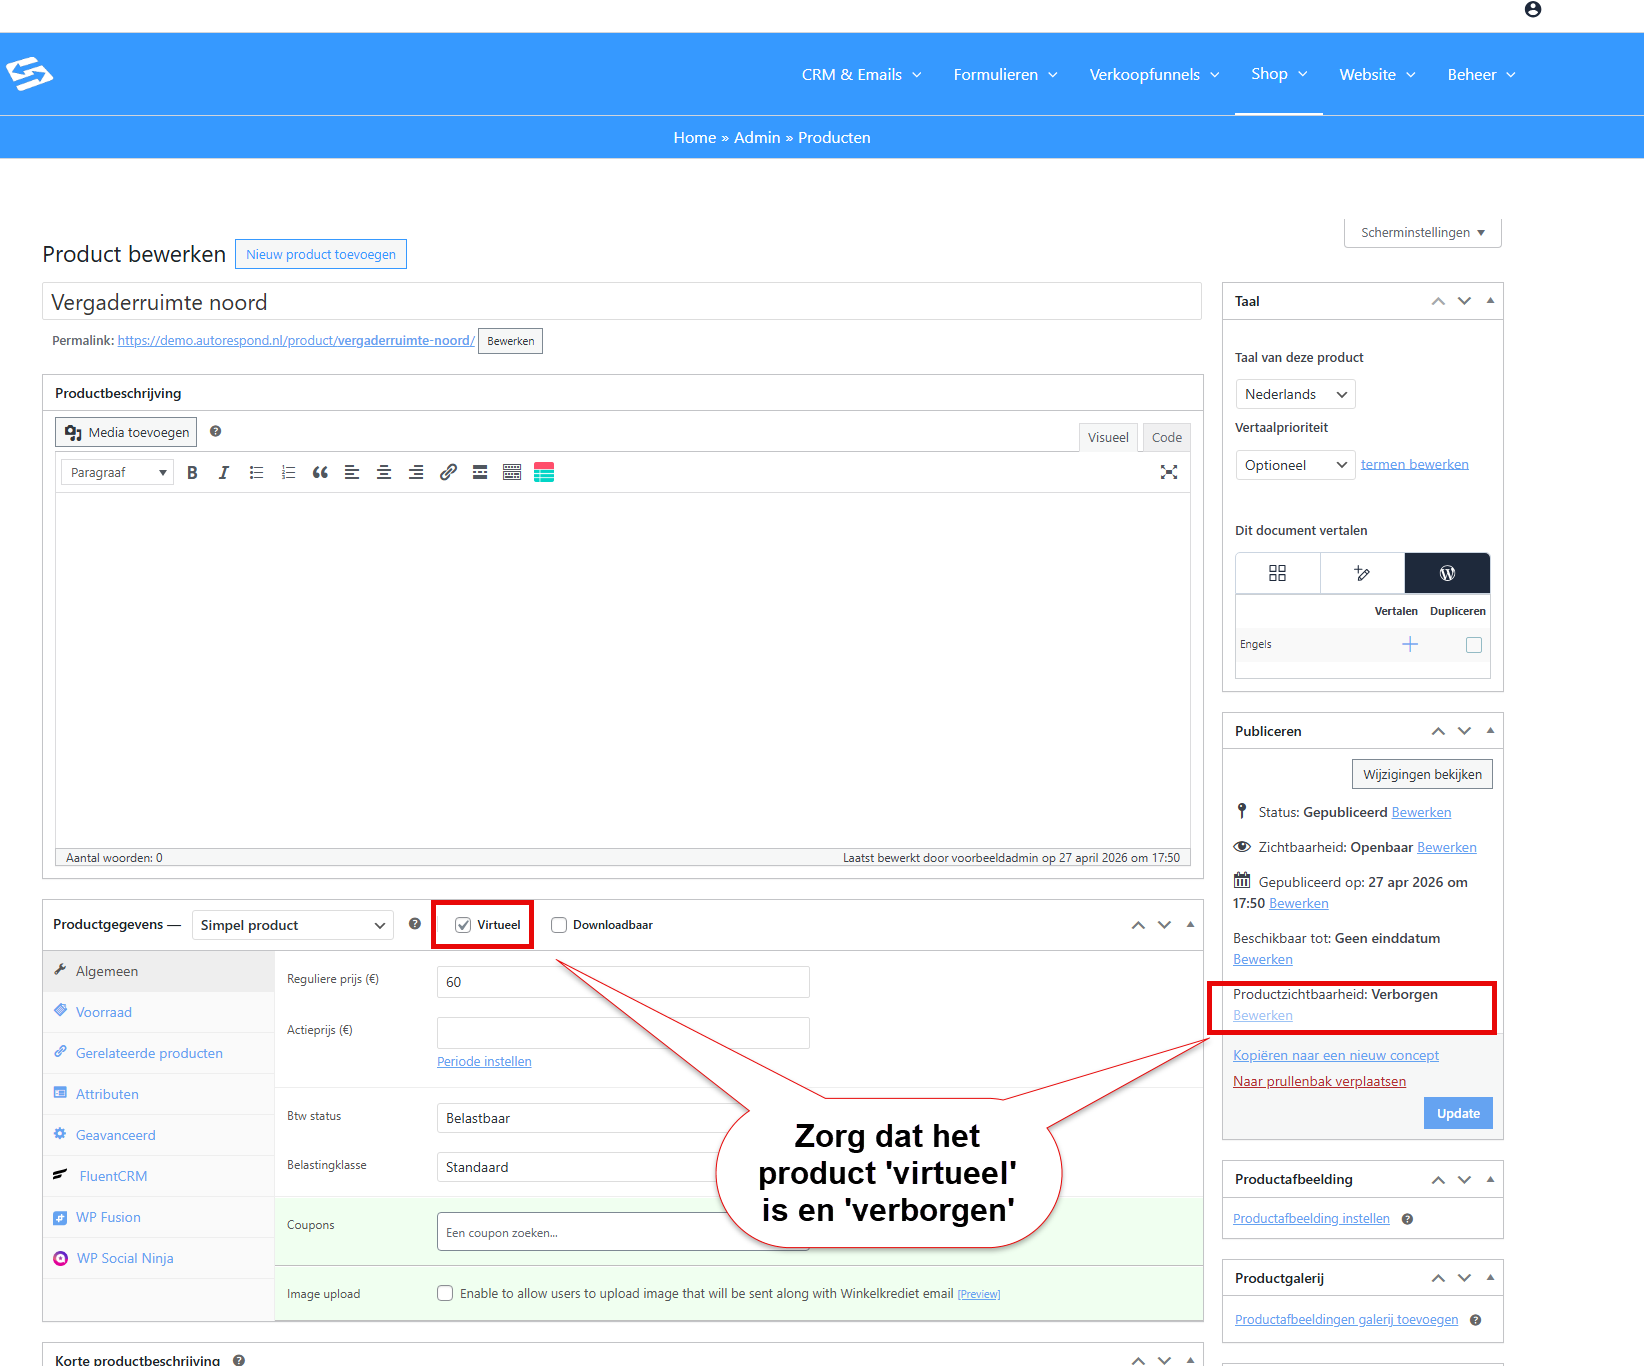
- Set all other settings as you wish, and link the calendar to a product if you like, so that payment is required before the room can be reserved.
- Click Save changes.
Step 5: Link your own calendar for this room #
Go to the host settings and link the calendar there. If you rent out rooms, it is useful to keep a separate calendar for them, so apart from your own calendar
Step 6: Place the calendar on your page #
In the calendar overview, click Share at the event to make the booking page available:
- Shortcode: insert the booking form into an existing page on your Autorespond website.
- Landing page: use the direct URL to send customers straight to the booking page.
Frequently asked questions #
Can I set different prices per meeting room?
Yes, that is possible if you create a separate user and host per room. You can then apply different prices, availability and settings per room, and also link a unique calendar per host. In that case you choose ‘one-to-one’ at ‘event type’. Customers can then choose between the specific rooms.
What happens if someone cancels a booking?
The place is released automatically and the time slot becomes available again for new bookings. You do not have to do anything manually for this.
Can I track occupancy in my own calendar as well?
Yes, via Host settings → External calendars you link Google Calendar, Outlook or Apple Calendar. Bookings are then synchronised automatically with your external calendar. If you block a particular time slot in your calendar, it cannot be booked.
For more details about setting up paid appointments, see also Setting up paid appointments with automatic checkout.


