A credit note (also called a credit invoice) is a document with which you cancel a previously paid invoice in full or in part. You use this for product returns, discounts granted afterwards, or incorrect invoicing.
In Autorespond you create credit notes through the invoice management system. The document is linked automatically to the original order and contains all the VAT information your bookkeeping needs.
Invoice management in Autorespond is based on PDF Invoices & Packing Slips Professional, included in your package. Read the PDF Invoices & Packing Slips Professional documentation
Requirements for creating a credit note #
Before you can create a credit invoice, three conditions have to be met:
- There has to be an existing order with a positive amount — you cannot create a credit note without an original invoice
- A PDF invoice must already have been created for the order
- You must first have processed a refund in WooCommerce for the order concerned
- The credit note function must be switched on in Shop > Invoice settings (this is on by default)
Without these steps, the option to create a credit note is not available in the system.
Step 1: General settings for your credit notes #
Credit notes are switched on by default in Autorespond. Just as with invoices, you have several options for credit invoices as well.
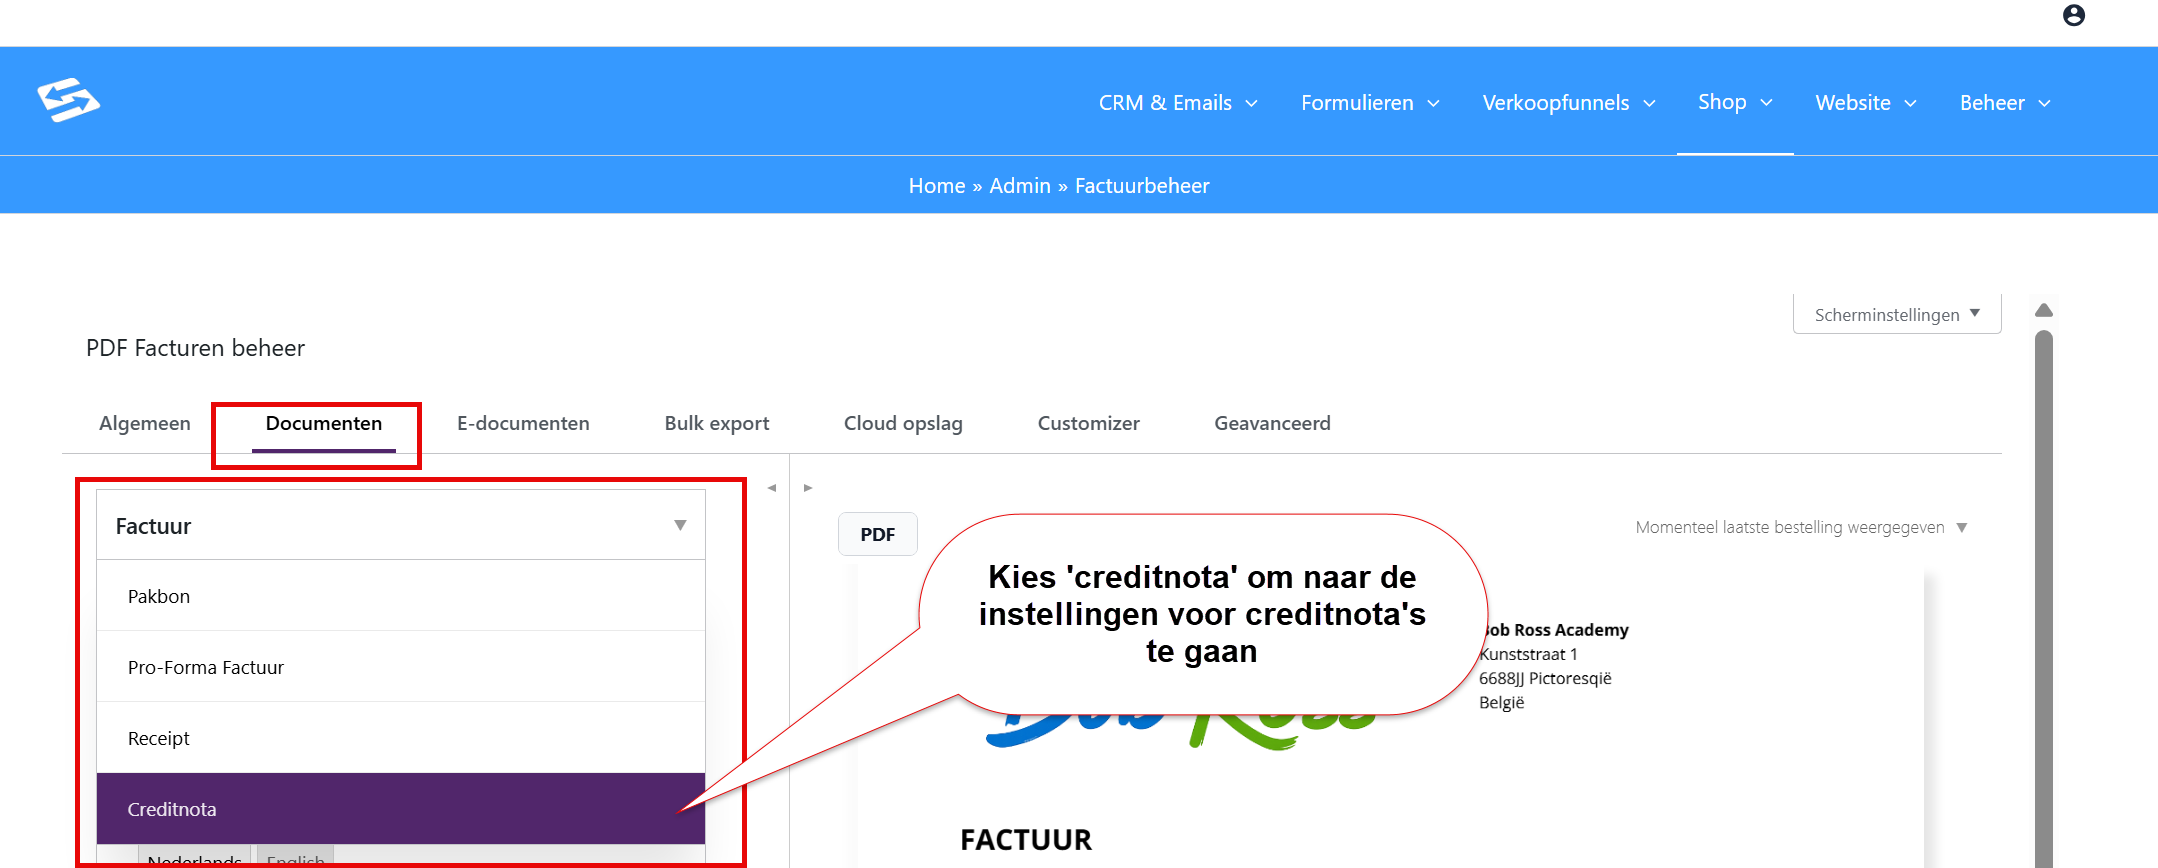
Go to the menu Shop > Invoice management, tab ‘Documents’ and then choose the document type ‘Credit note’:
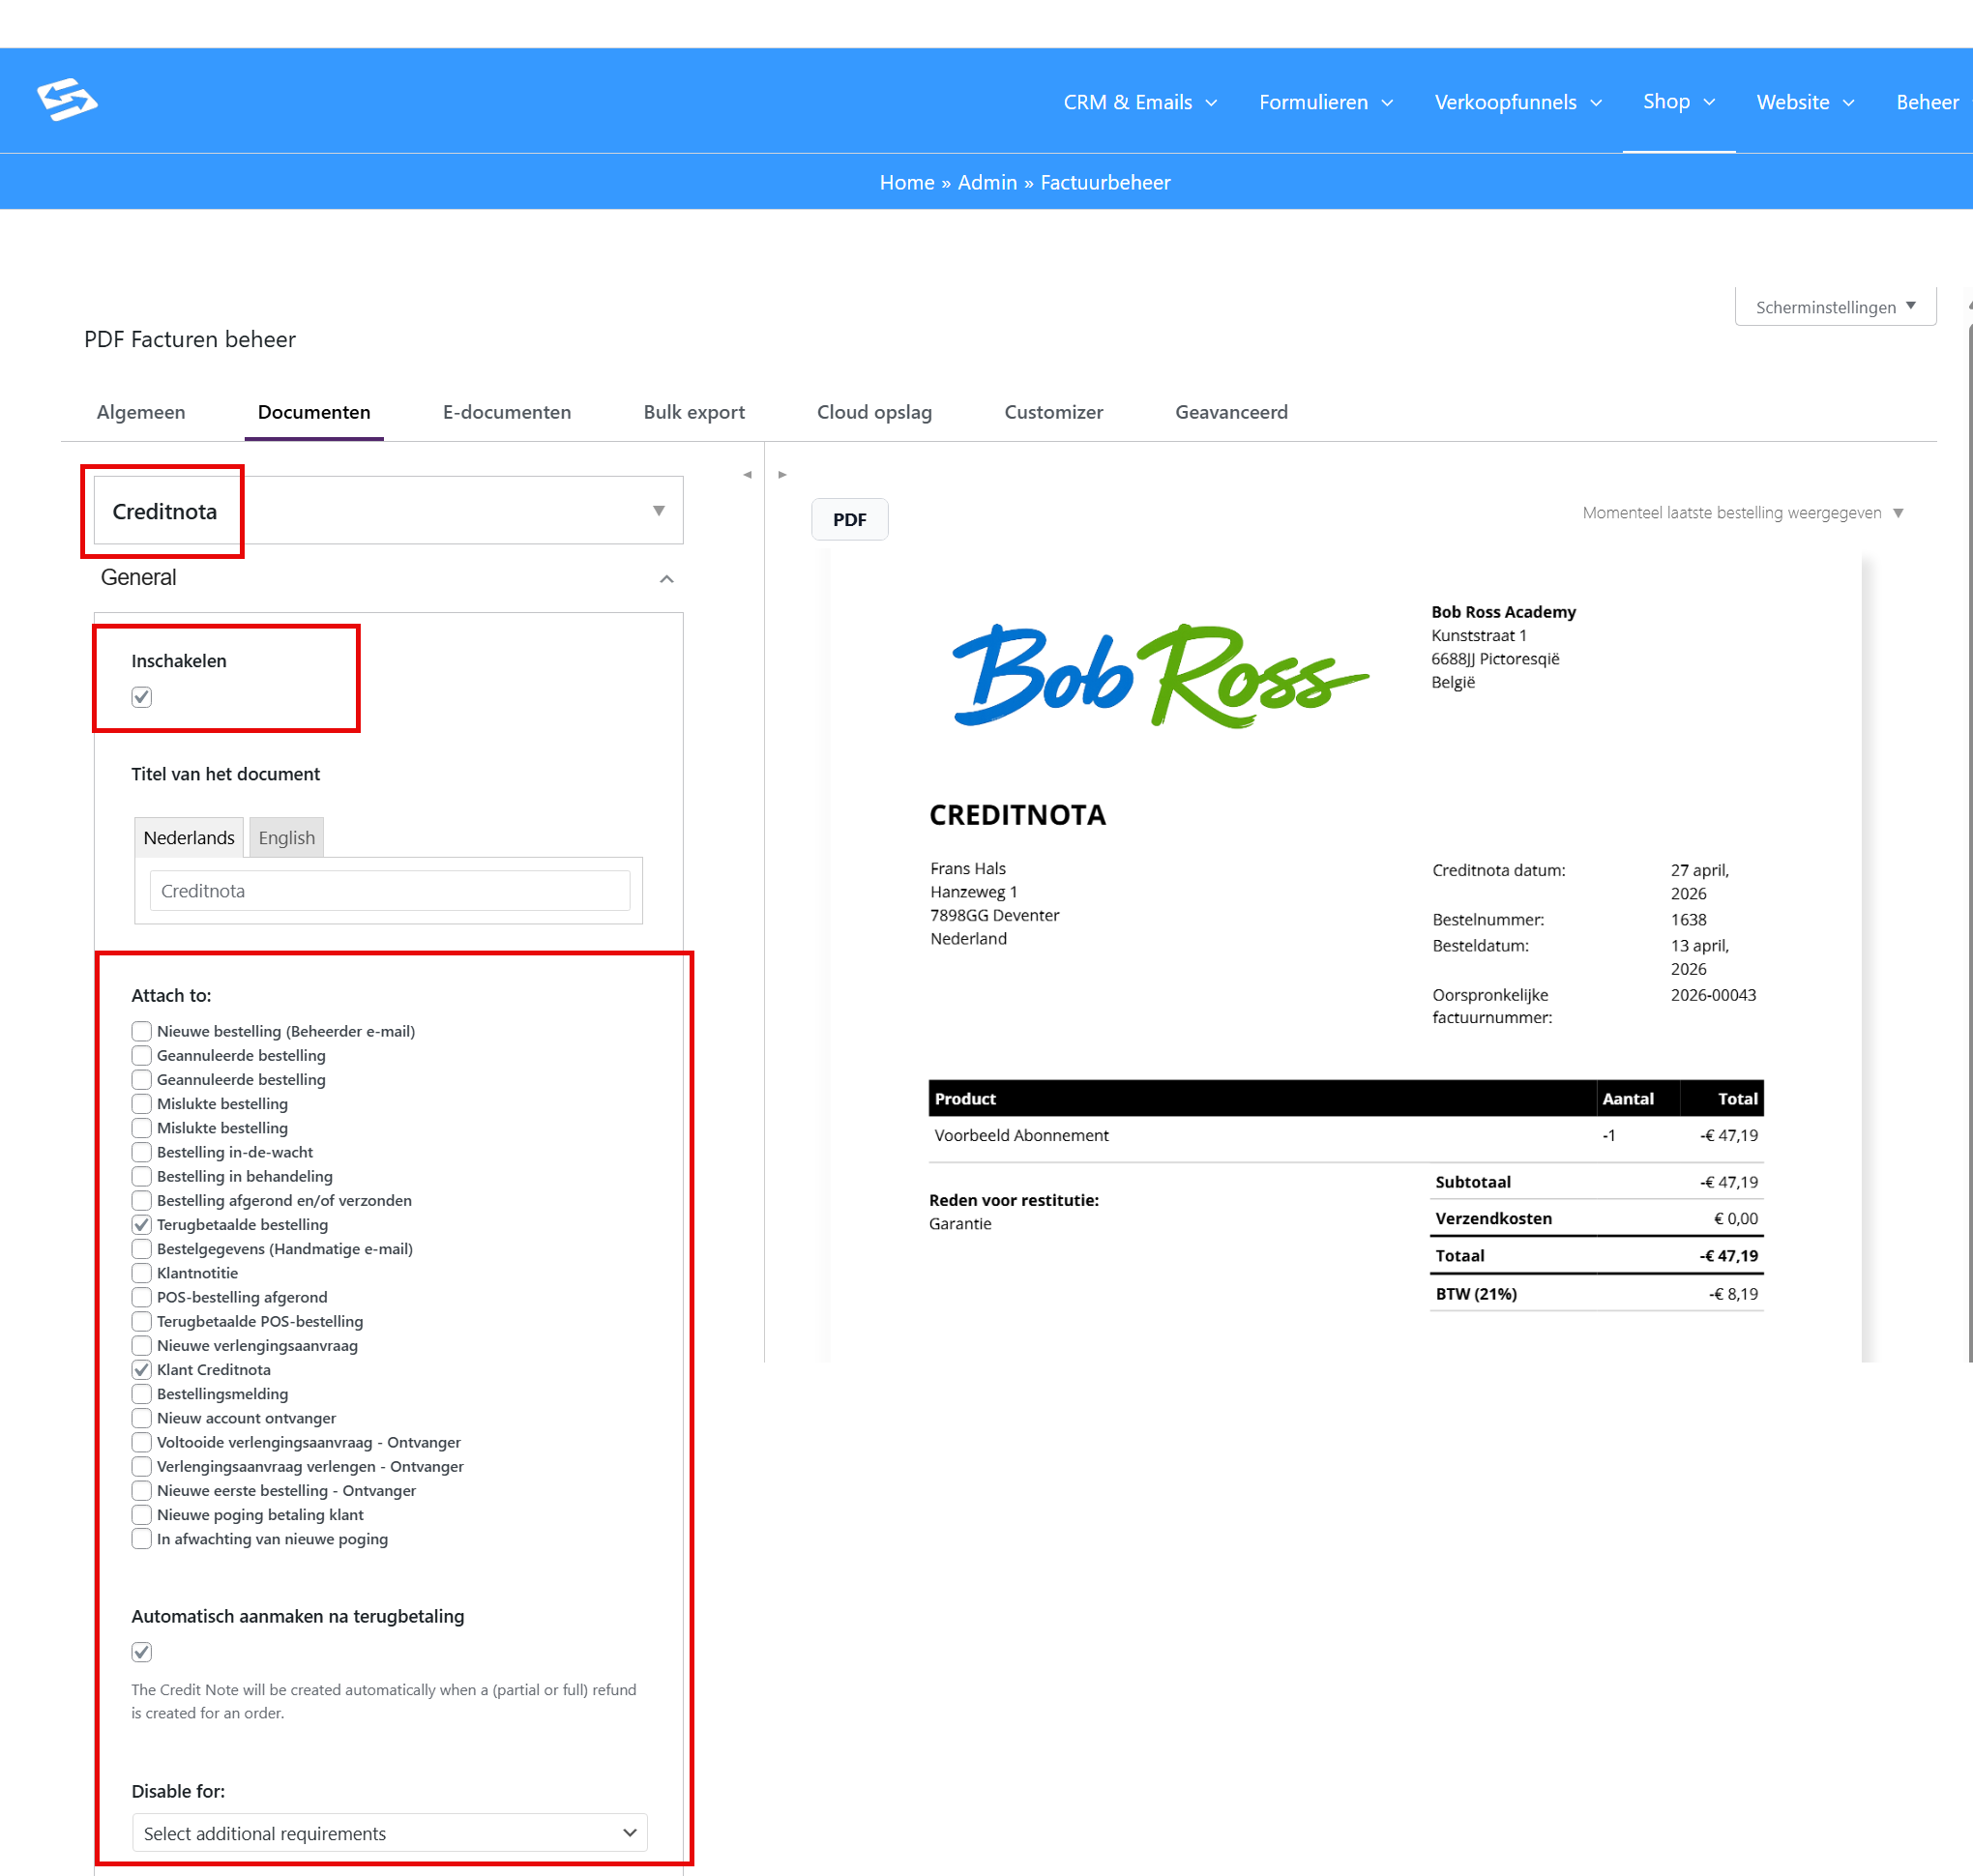
In the Credit note settings you can set which WooCommerce emails the credit note should be added to as a PDF:
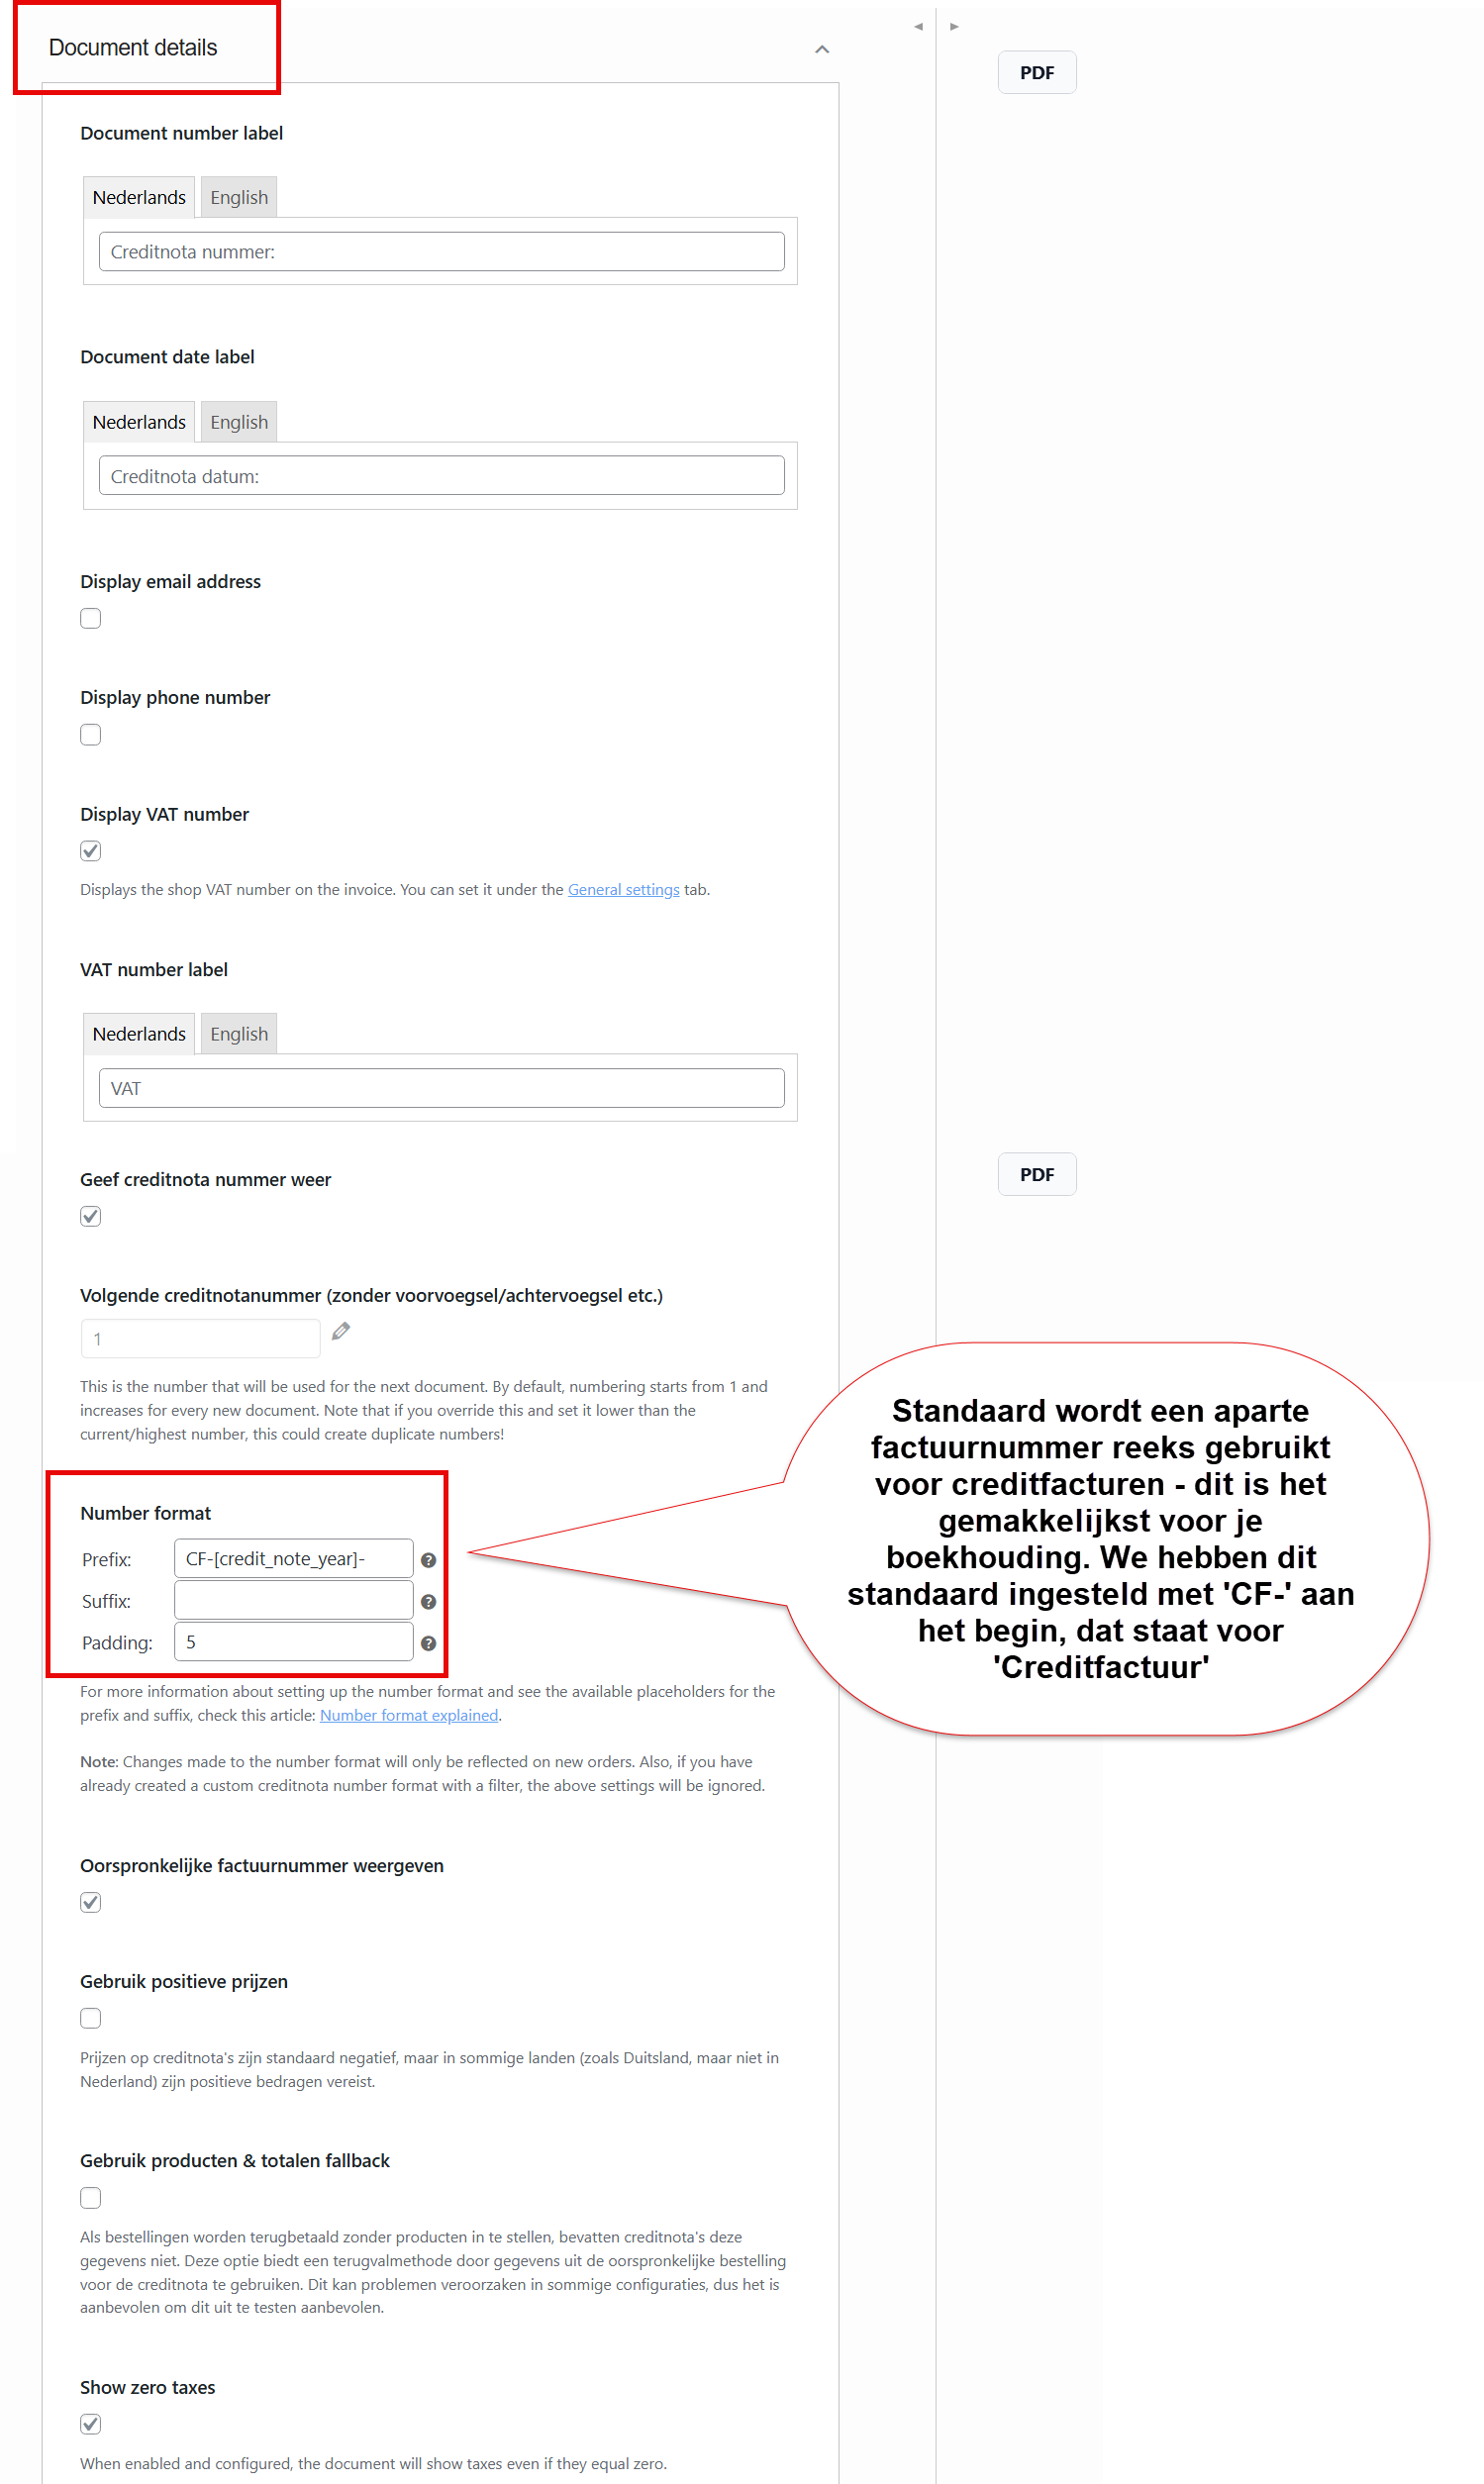
Under the ‘Document details’ section you can set the credit invoice numbering. By default a separate invoice number series is used for credit invoices – this is the easiest for your bookkeeping. We have set this up by default with ‘CF-‘ at the start, which stands for ‘Credit invoice’
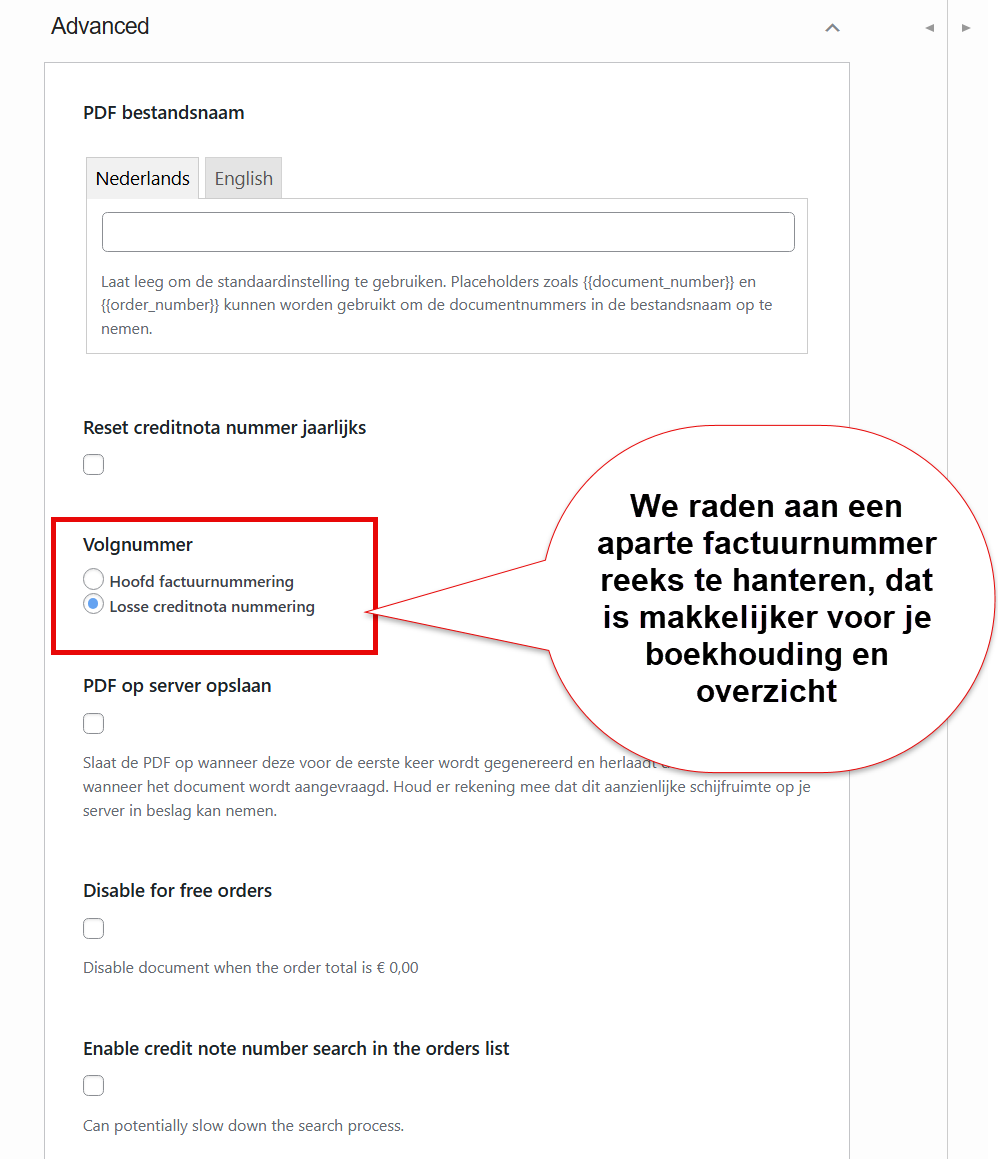
It is possible to set the credit invoice number series to be part of your normal invoice number series.
Step 2: Processing a refund in WooCommerce #
Before a credit note is created, you first have to process the refund:
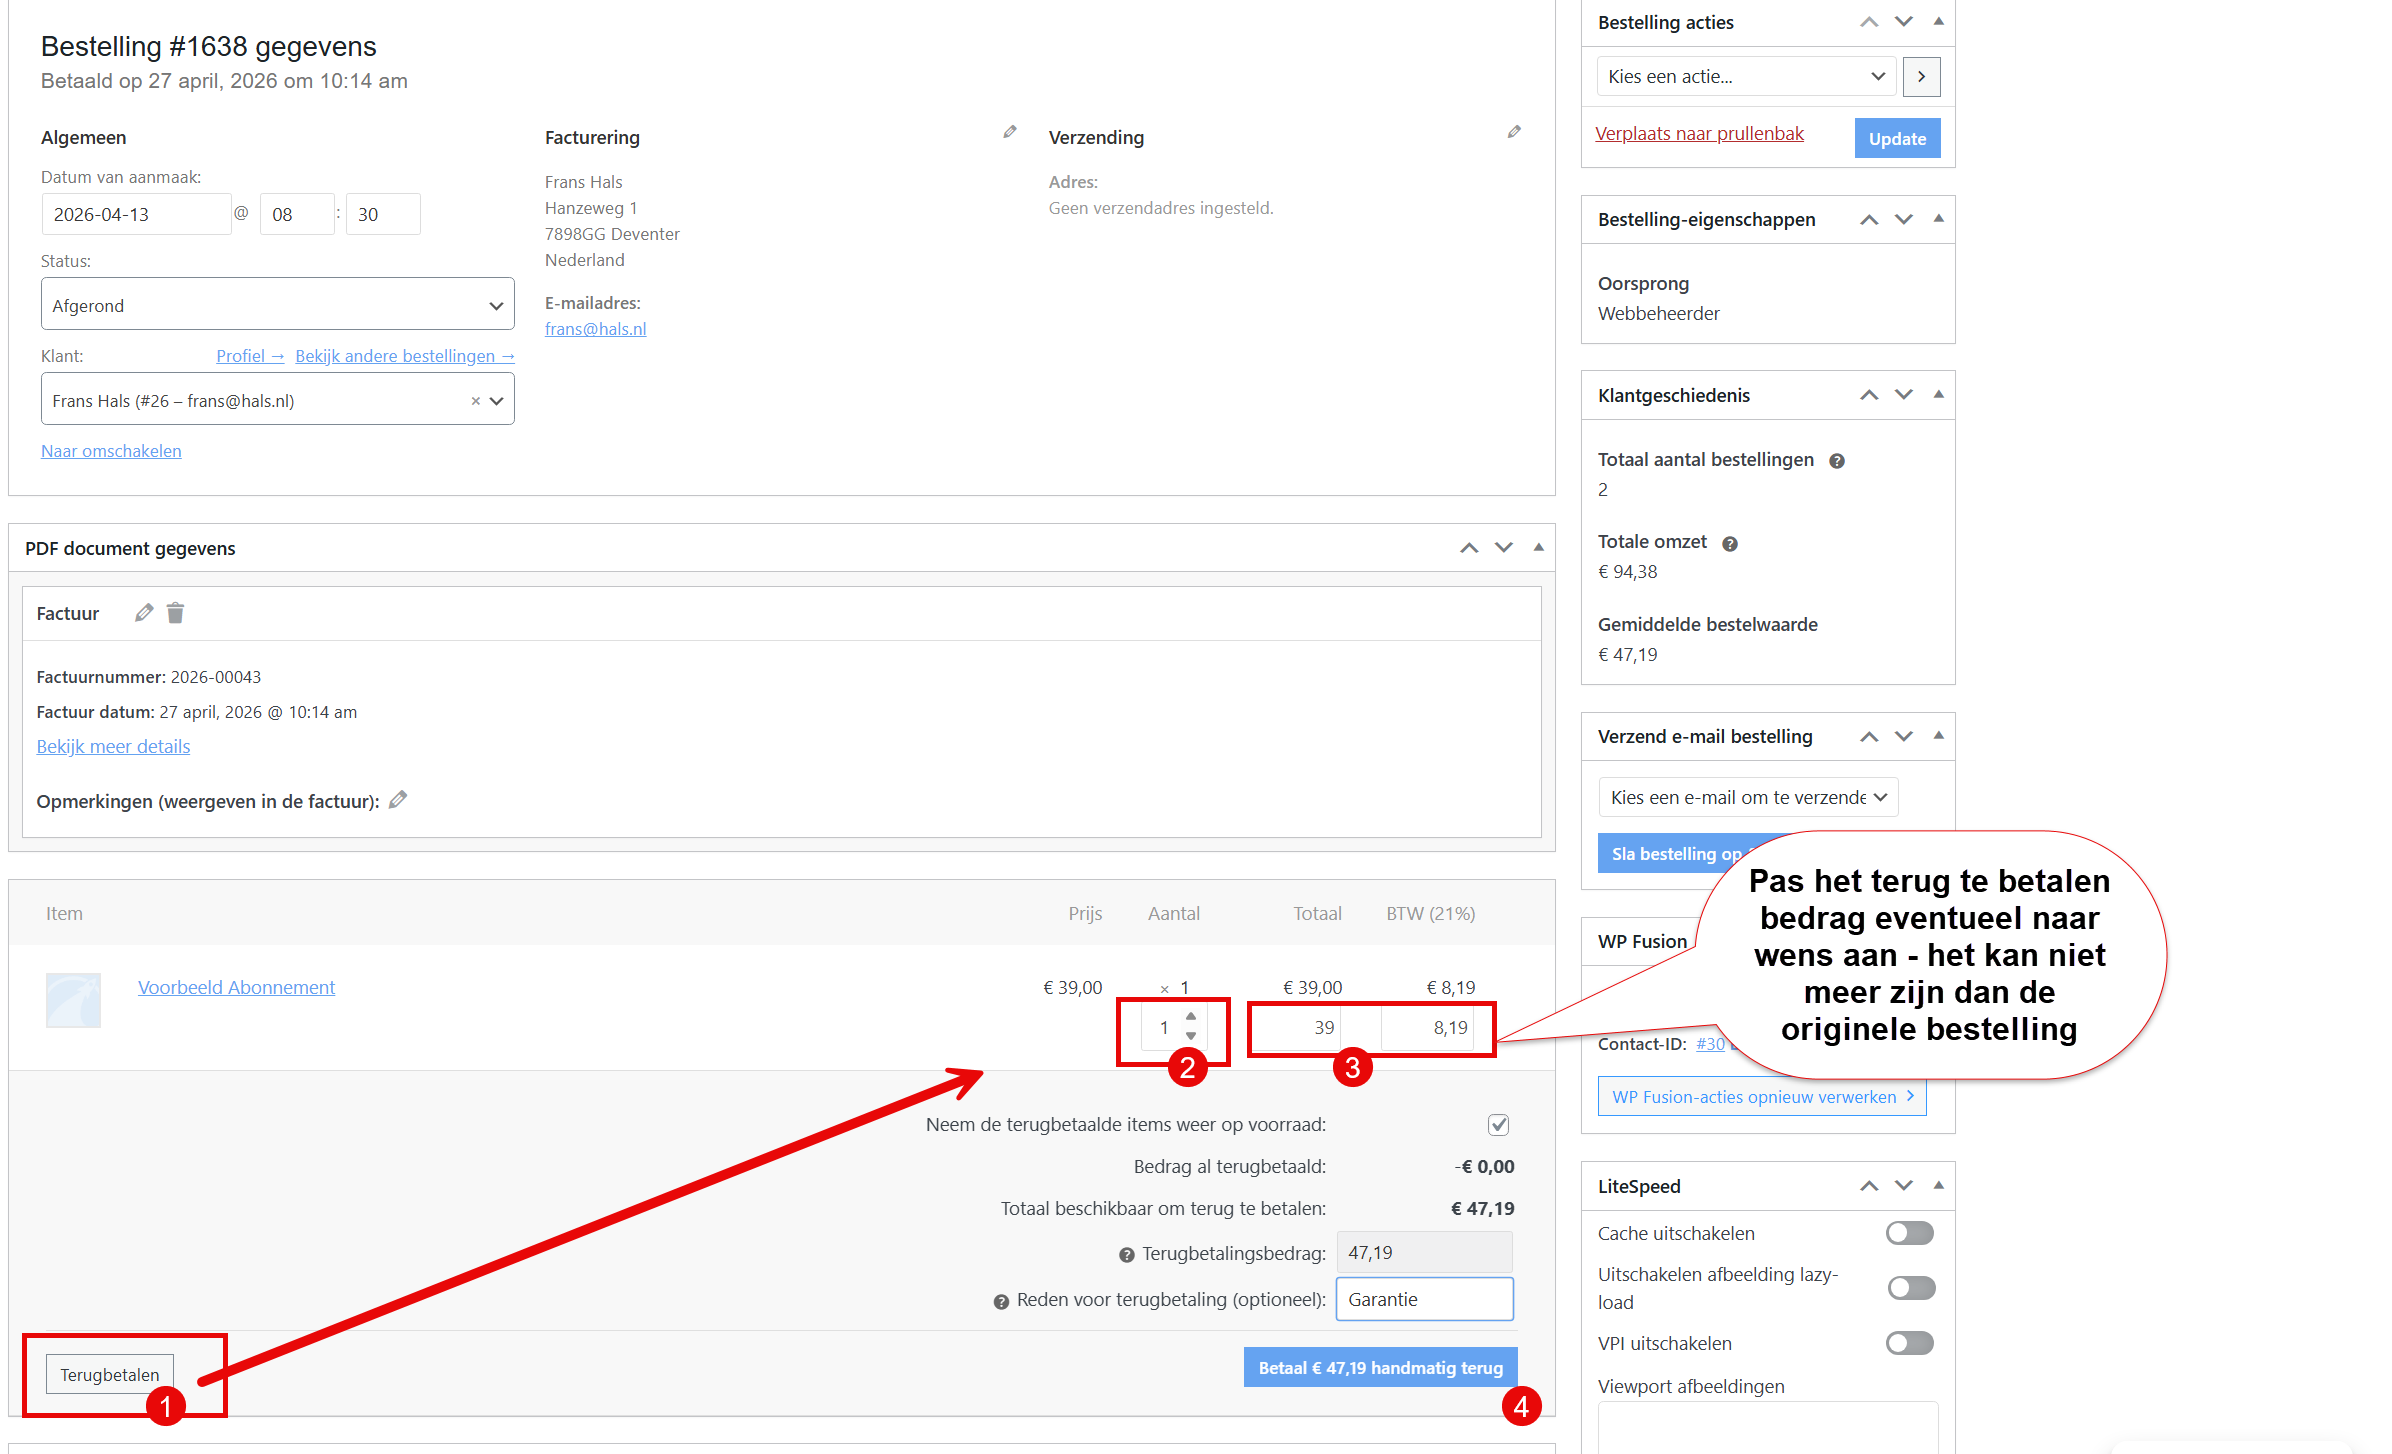
- Go to Shop → Orders and open the order concerned
- Scroll down to the order lines section
- Click the ‘Refund’ button
- Important: Fill in the quantities per product line — this ensures the VAT on the credit note is calculated correctly. Optionally you can adjust the amount if you are making a partial refund.
- Optionally enter a reason for the refund
- Click ‘Refund via [payment method]’ or ‘Refund manually’
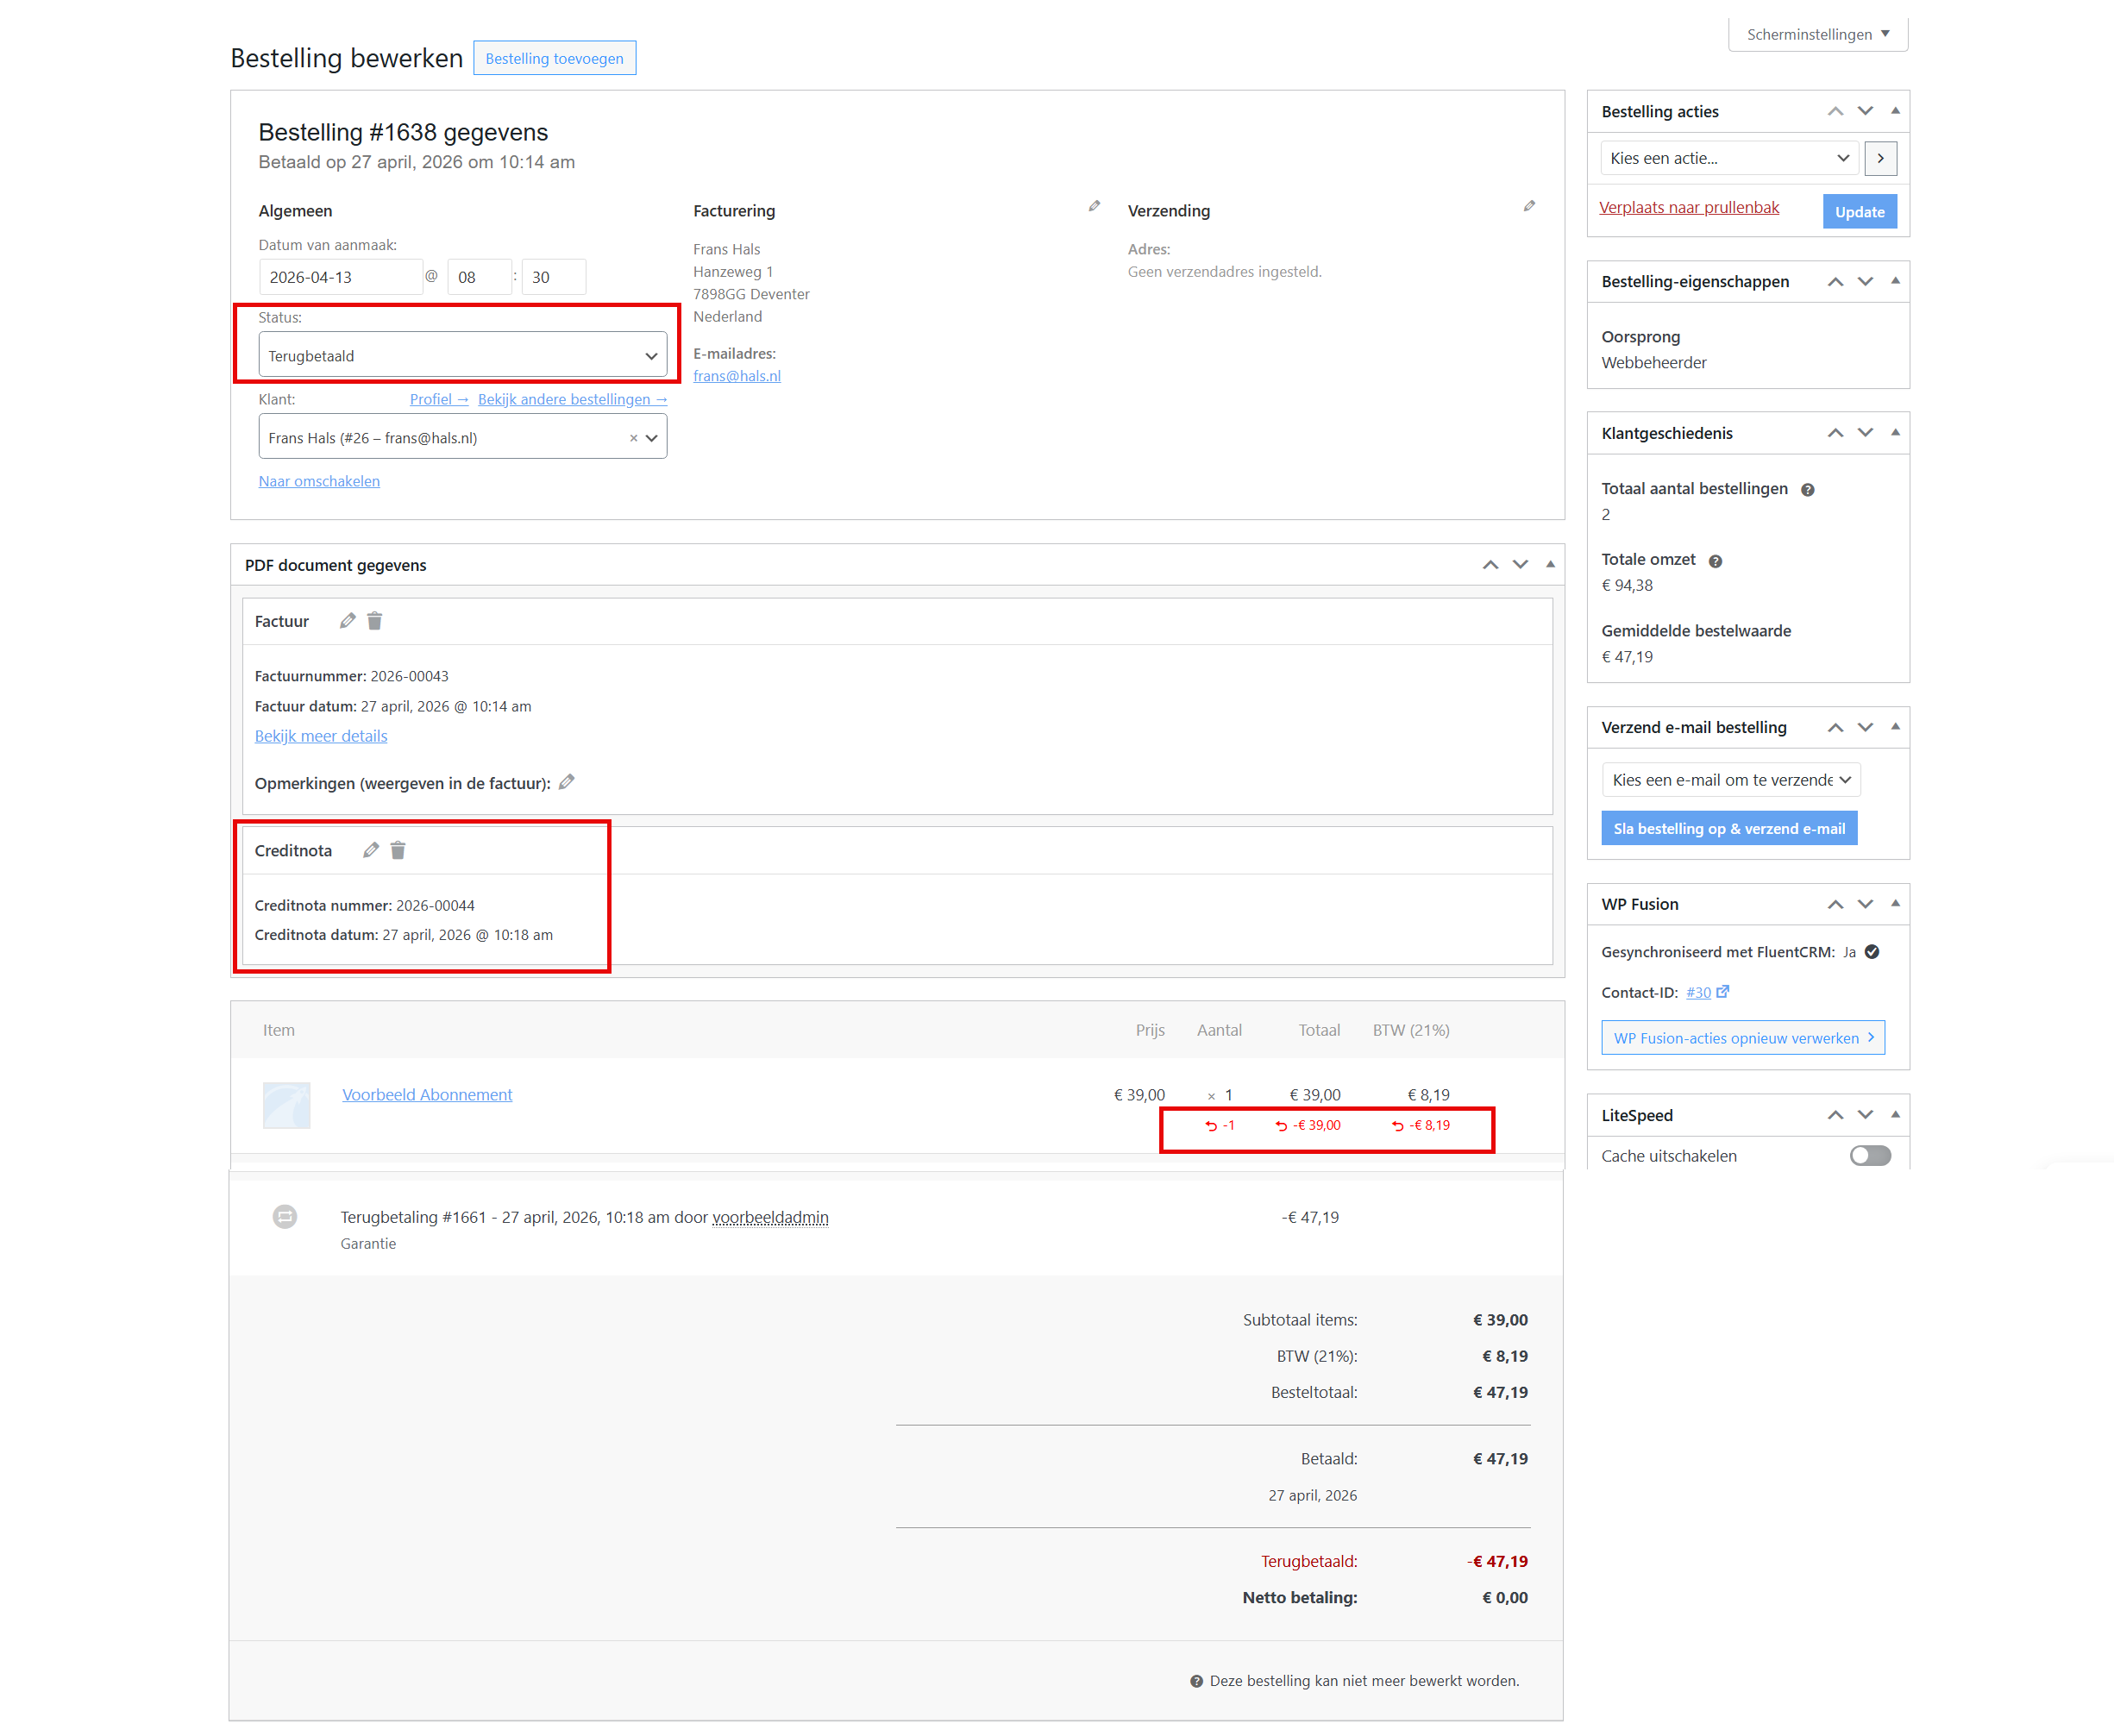
After the refund has been processed, a credit invoice is generated automatically.
After this action the order is given the status ‘Refunded’ and you see the credit invoice in the order.
Sending the credit invoice automatically by email #
You can have the credit note sent along automatically as an attachment to the WooCommerce refund email:
- Go to Shop → Invoice management → Documents
- Click the ‘Credit note’ tab
- Open the ‘Attachments’ subtab
- Switch on the option to attach credit notes automatically to refund emails
We have set this up by default for the following WooCommerce emails:
– Refunded order
– Customer credit note
This means the customer receives the credit note automatically as soon as you process a refund.
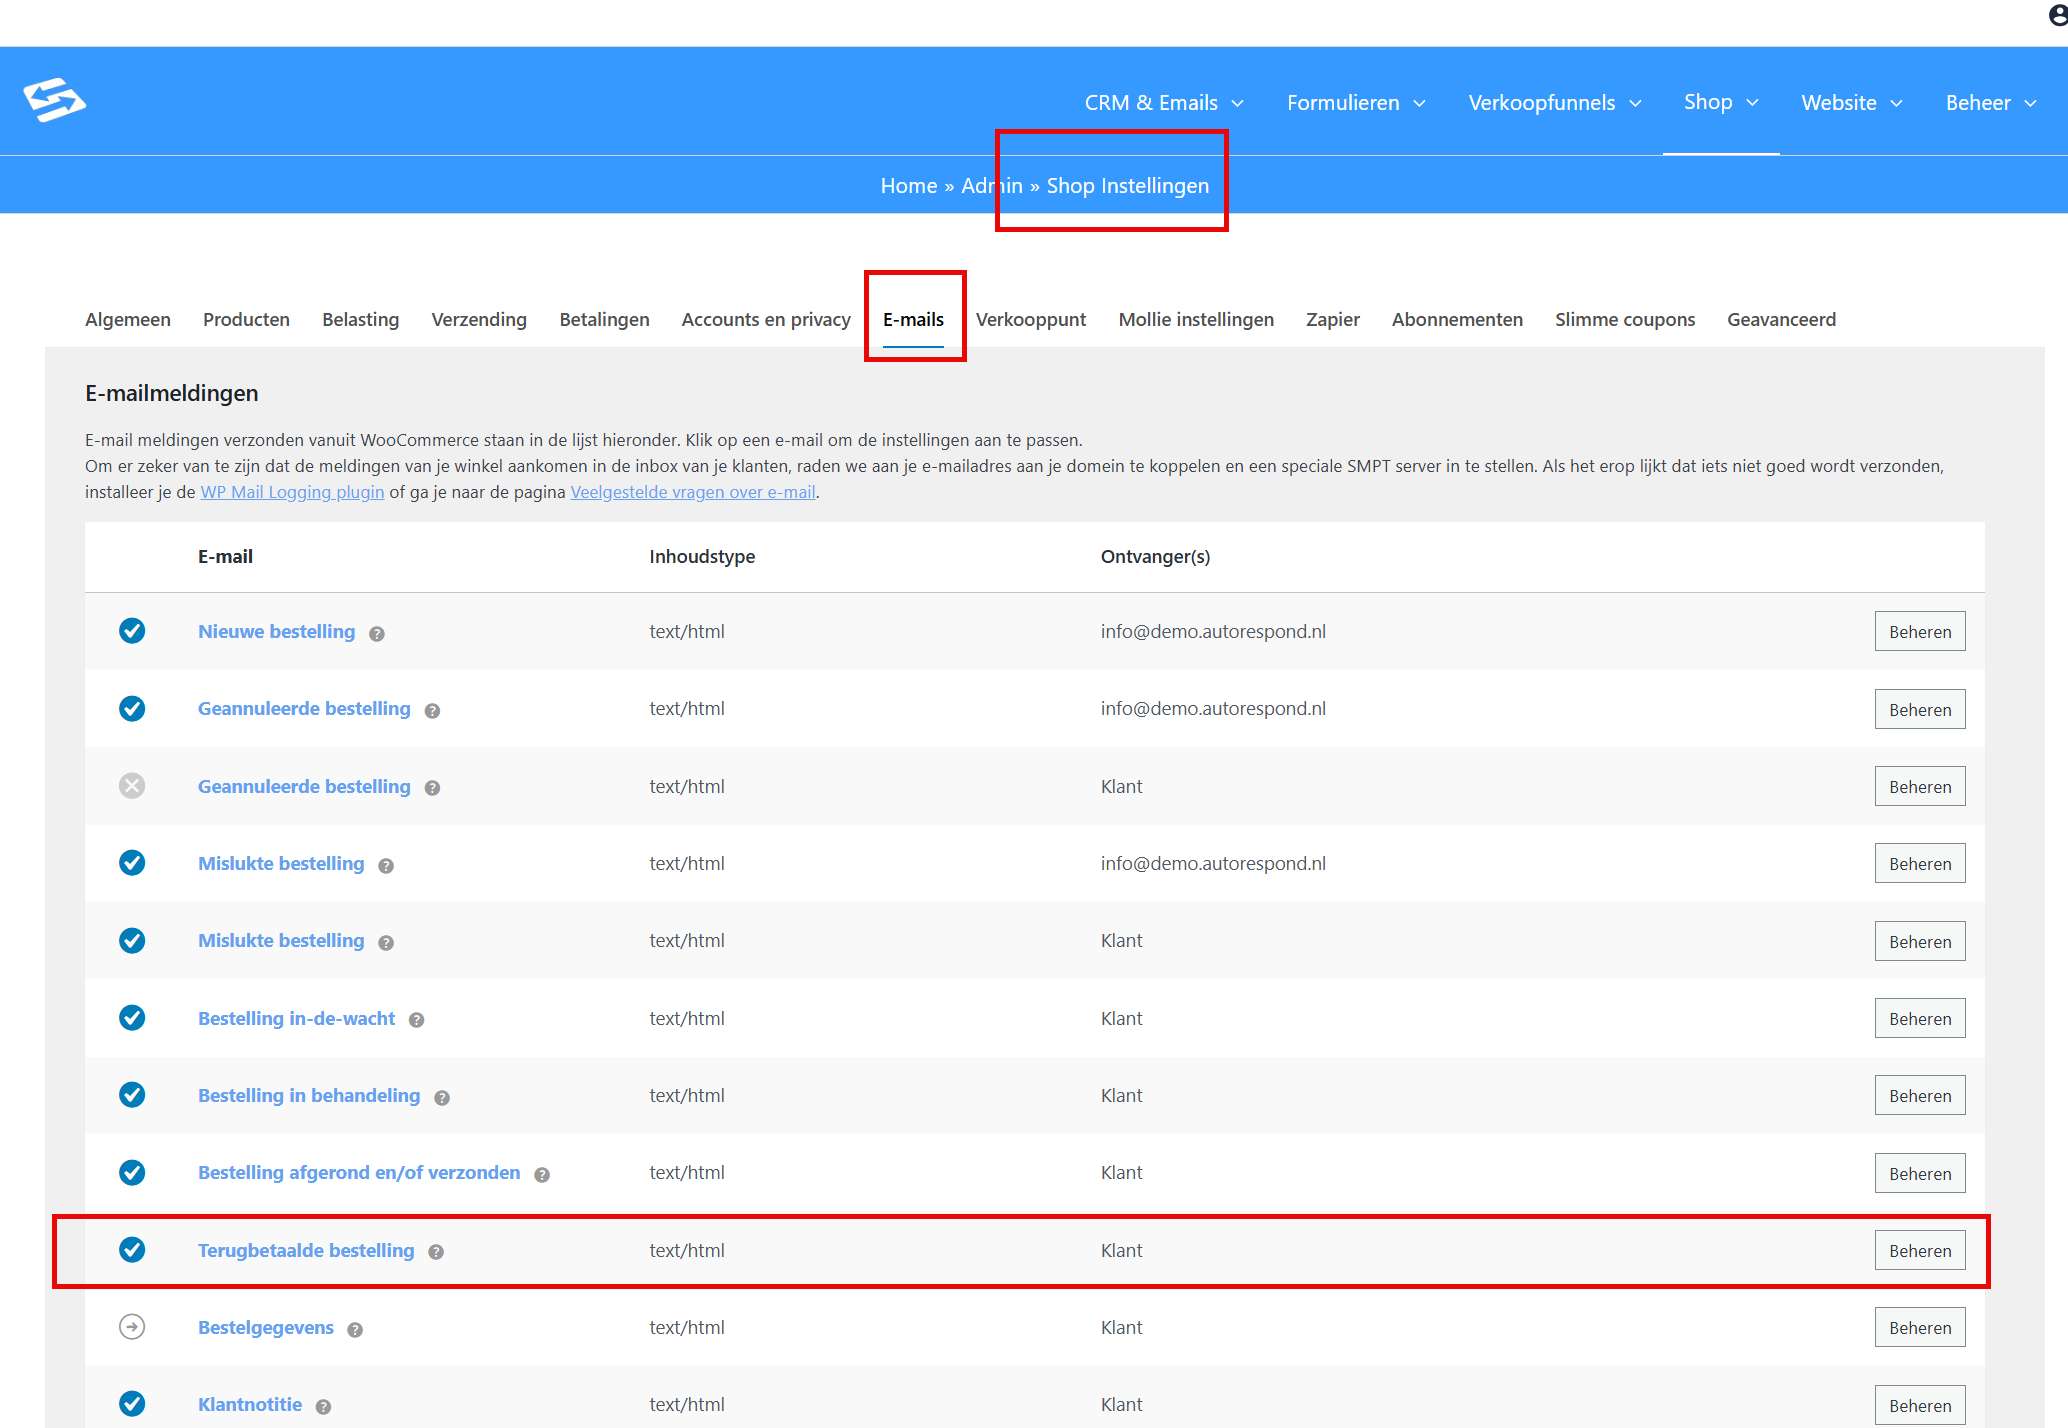
You can find and adjust these emails through the menu Shop > Shop settings, tab Emails

Setting the invoice numbering for credit notes #
For credit invoices you can choose between three different numbering systems:
Option 1: Separate numbering (recommended) #
Credit notes get their own ascending number series, separate from the normal invoices. You can set your own prefix, suffix and format (for example CN-2026-001). This is the clearest option for your bookkeeping because invoices and credit notes stay clearly separated.
Option 2: Same series as invoices #
Credit invoices draw numbers from the same series as the normal invoices. This means the numbering becomes mixed, which is less common in practice.
Option 3: Use the order number #
The credit note gets the same number as the WooCommerce order. Simple, but less professional.
Set the numbering you want through Shop → Invoice management → Documents → Credit note → section ‘Credit note number’.
Frequently asked questions #
Can I create a credit note without processing a refund first? #
No, you always have to process a refund in WooCommerce first before the option to create a credit note becomes available in the system.
Why do I have to fill in the quantities per product line on a refund? #
By filling in the quantities per product line instead of only the total amount, the system calculates the VAT on the credit invoice correctly.
Can I create credit notes in bulk for several orders? #
Yes, go to Shop → Orders, select several orders for which refunds have already been processed and use the bulk action ‘Create credit notes’.
Which numbering option is best for my bookkeeping? #
For most businesses separate numbering is the clearest. Credit notes then get their own series with a recognisable prefix such as CN-2026-001.
For more information about invoice management, see also Setting up PDF invoices and creating a new order and invoice manually.


