Besides email, you can now also send WhatsApp messages from your Autorespond environment. You send campaigns to contacts who have opted in for them, let automations send a WhatsApp message (a reminder or a thank you, for example) and hold one-to-one conversations from a shared inbox, where the messages are stored neatly with the contact. In this article you switch on the Messaging module, connect a WhatsApp provider and create your first campaign.
The Messaging features in Autorespond are part of FluentCRM Pro (version 3.2 and higher), included in your package. Read the English announcement
What do you need? #
- A WhatsApp Business profile for your organisation.
- An account with a WhatsApp provider: Twilio or the Meta Cloud API (WhatsApp Business). Messages run through that provider and you pay them per message.
- Approved message templates for messages outside an ongoing conversation. You get those templates approved by your provider.
- Separate WhatsApp consent from your contacts: someone who has subscribed to your emails has not thereby given consent for WhatsApp.
Please note: ask your contacts separately for WhatsApp consent, for example with an opt-in field in your forms, and only send to contacts who have explicitly given it. WhatsApp is a personal channel: people who receive messages they did not ask for will block your number quickly, and that damages the quality of your sending number.
Step 1: switching on the Messaging module #
- Go to CRM & Emails and click the cog (Settings) in the top right.
- Choose Messaging in the left-hand bar.
- Switch on Enable Message Module. Two tabs now appear below the switch: Sms and WhatsApp.
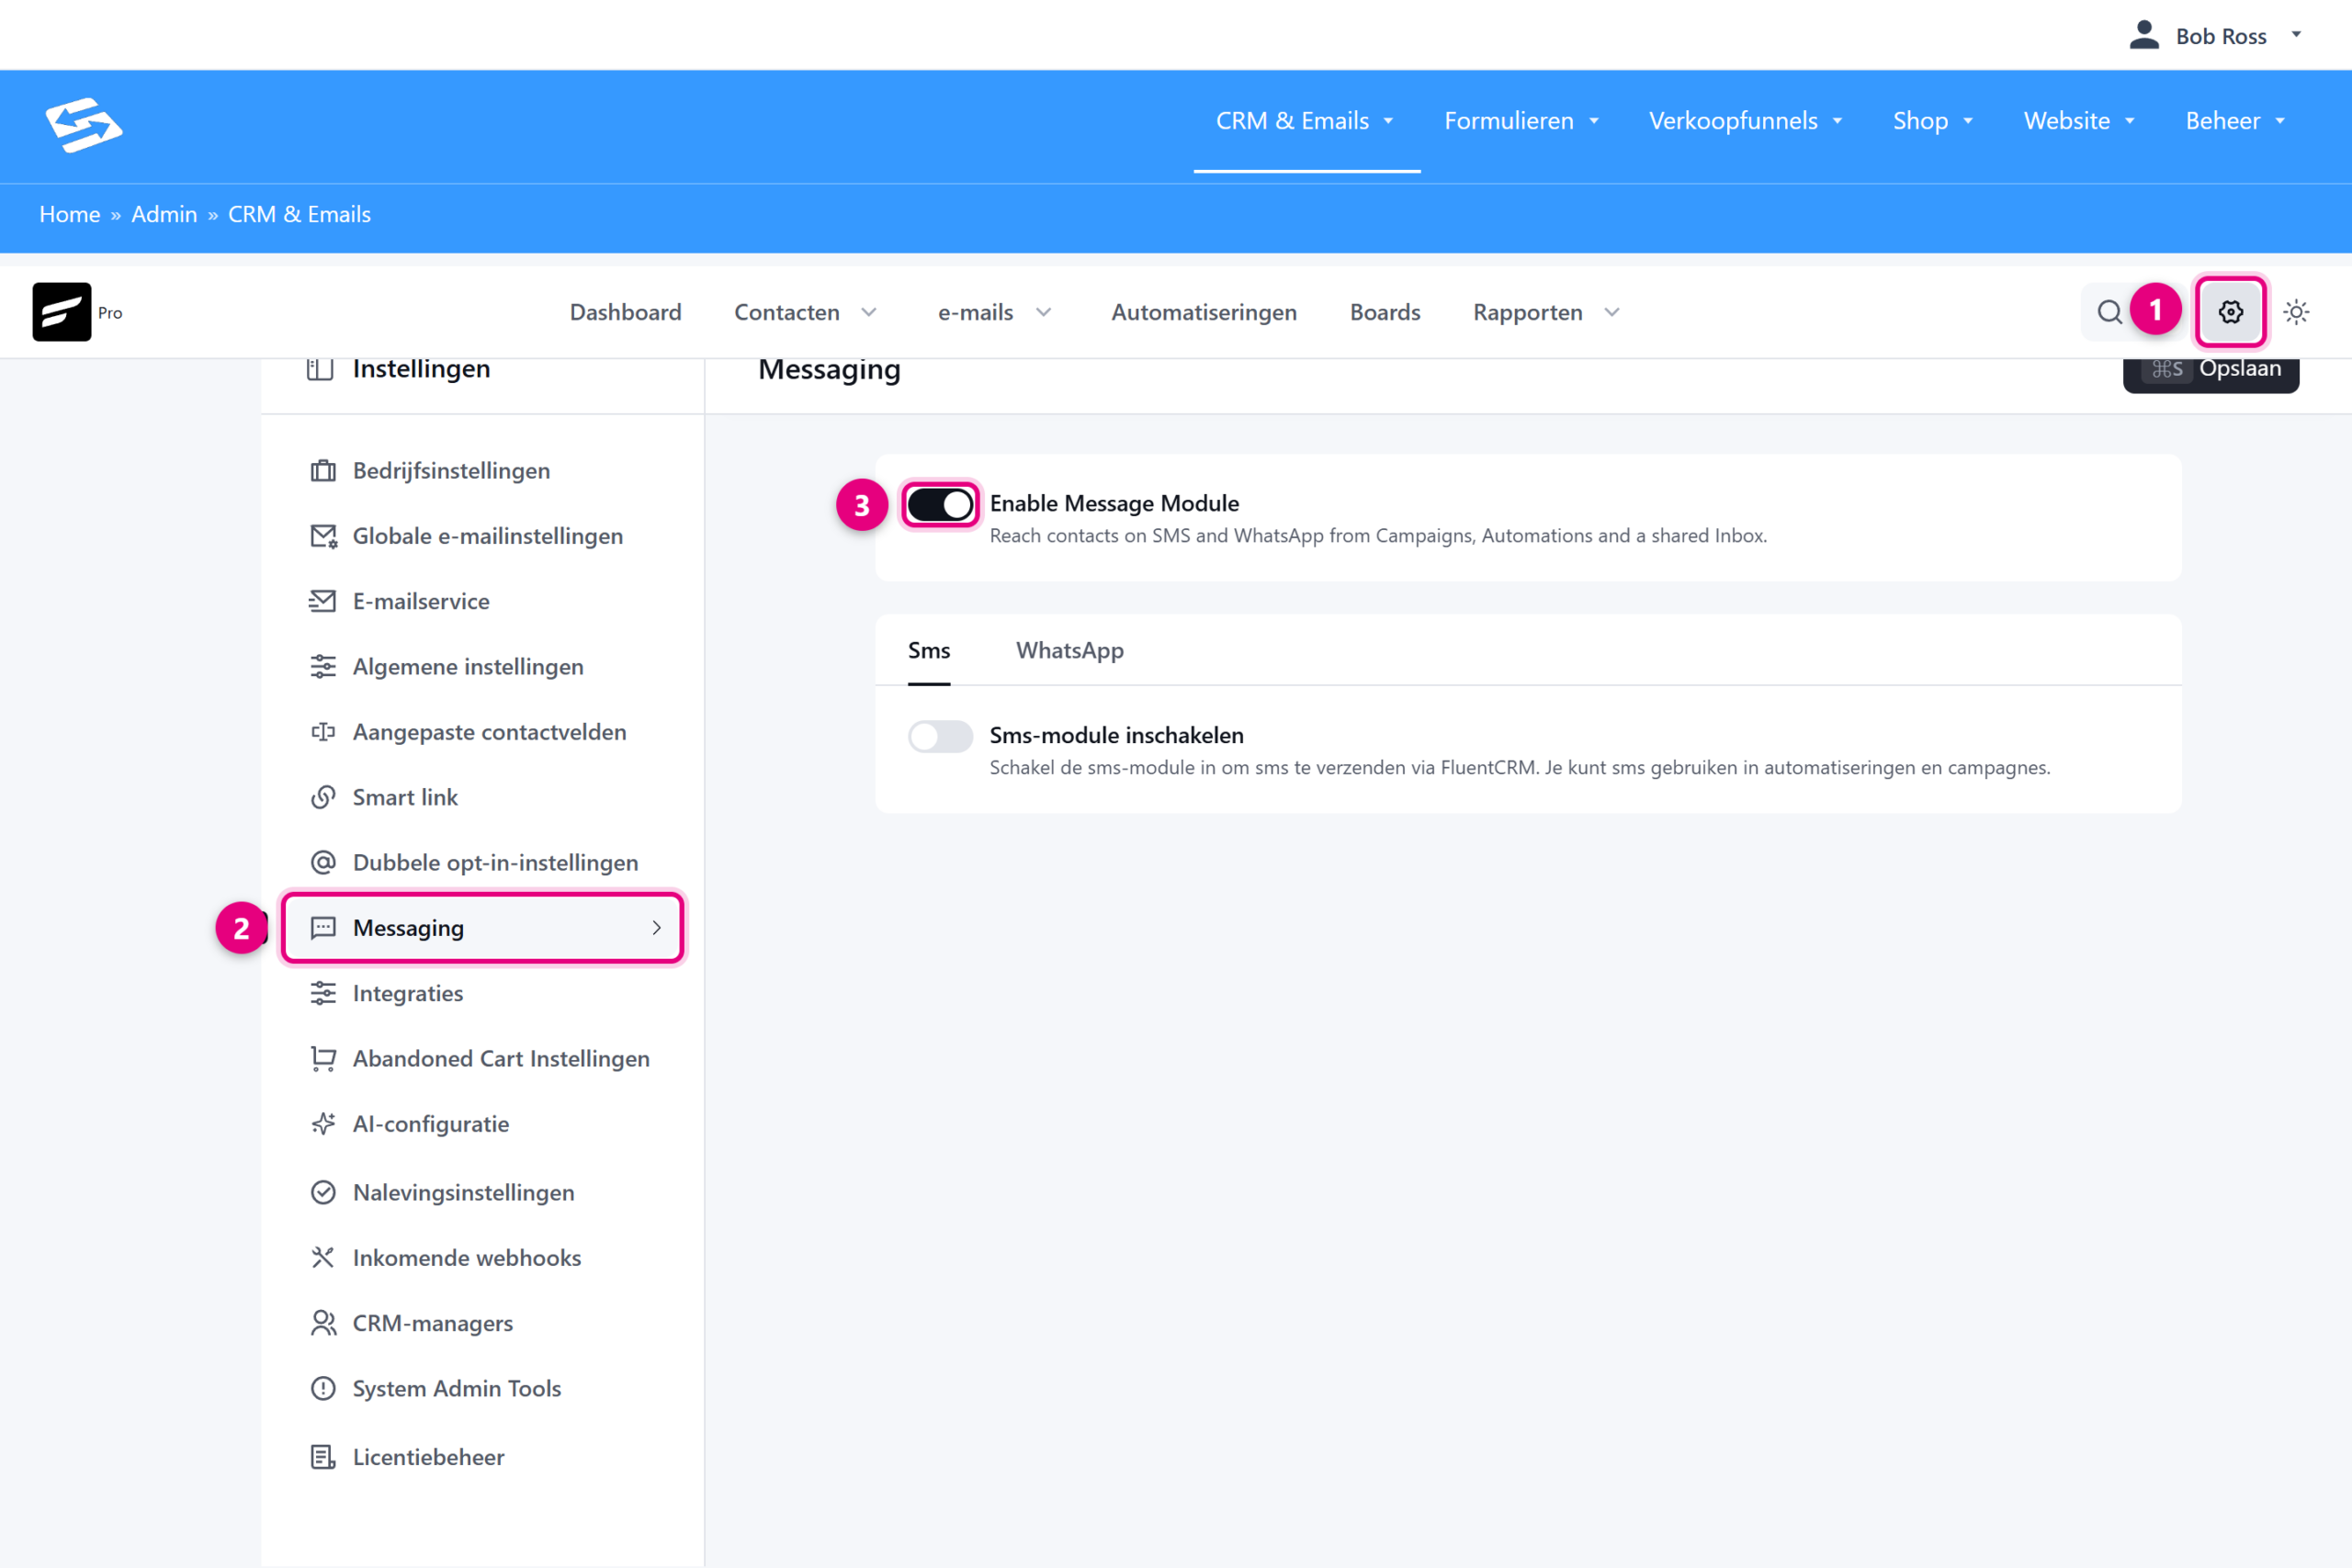
- Settings: the cog in the top right opens the settings of your CRM.
- Messaging: the settings page for SMS and WhatsApp.
- Enable Message Module: the main switch for the messaging channel.
Step 2: switching on WhatsApp and connecting your provider #
- Click the WhatsApp tab.
- Switch on Enable WhatsApp Module.
- Under Choose your WhatsApp provider, pick Twilio WhatsApp or Meta Cloud API (WhatsApp Business). The fields for your choice appear below it.
- Fill in the details of your provider (see below) and click Save in the top right.
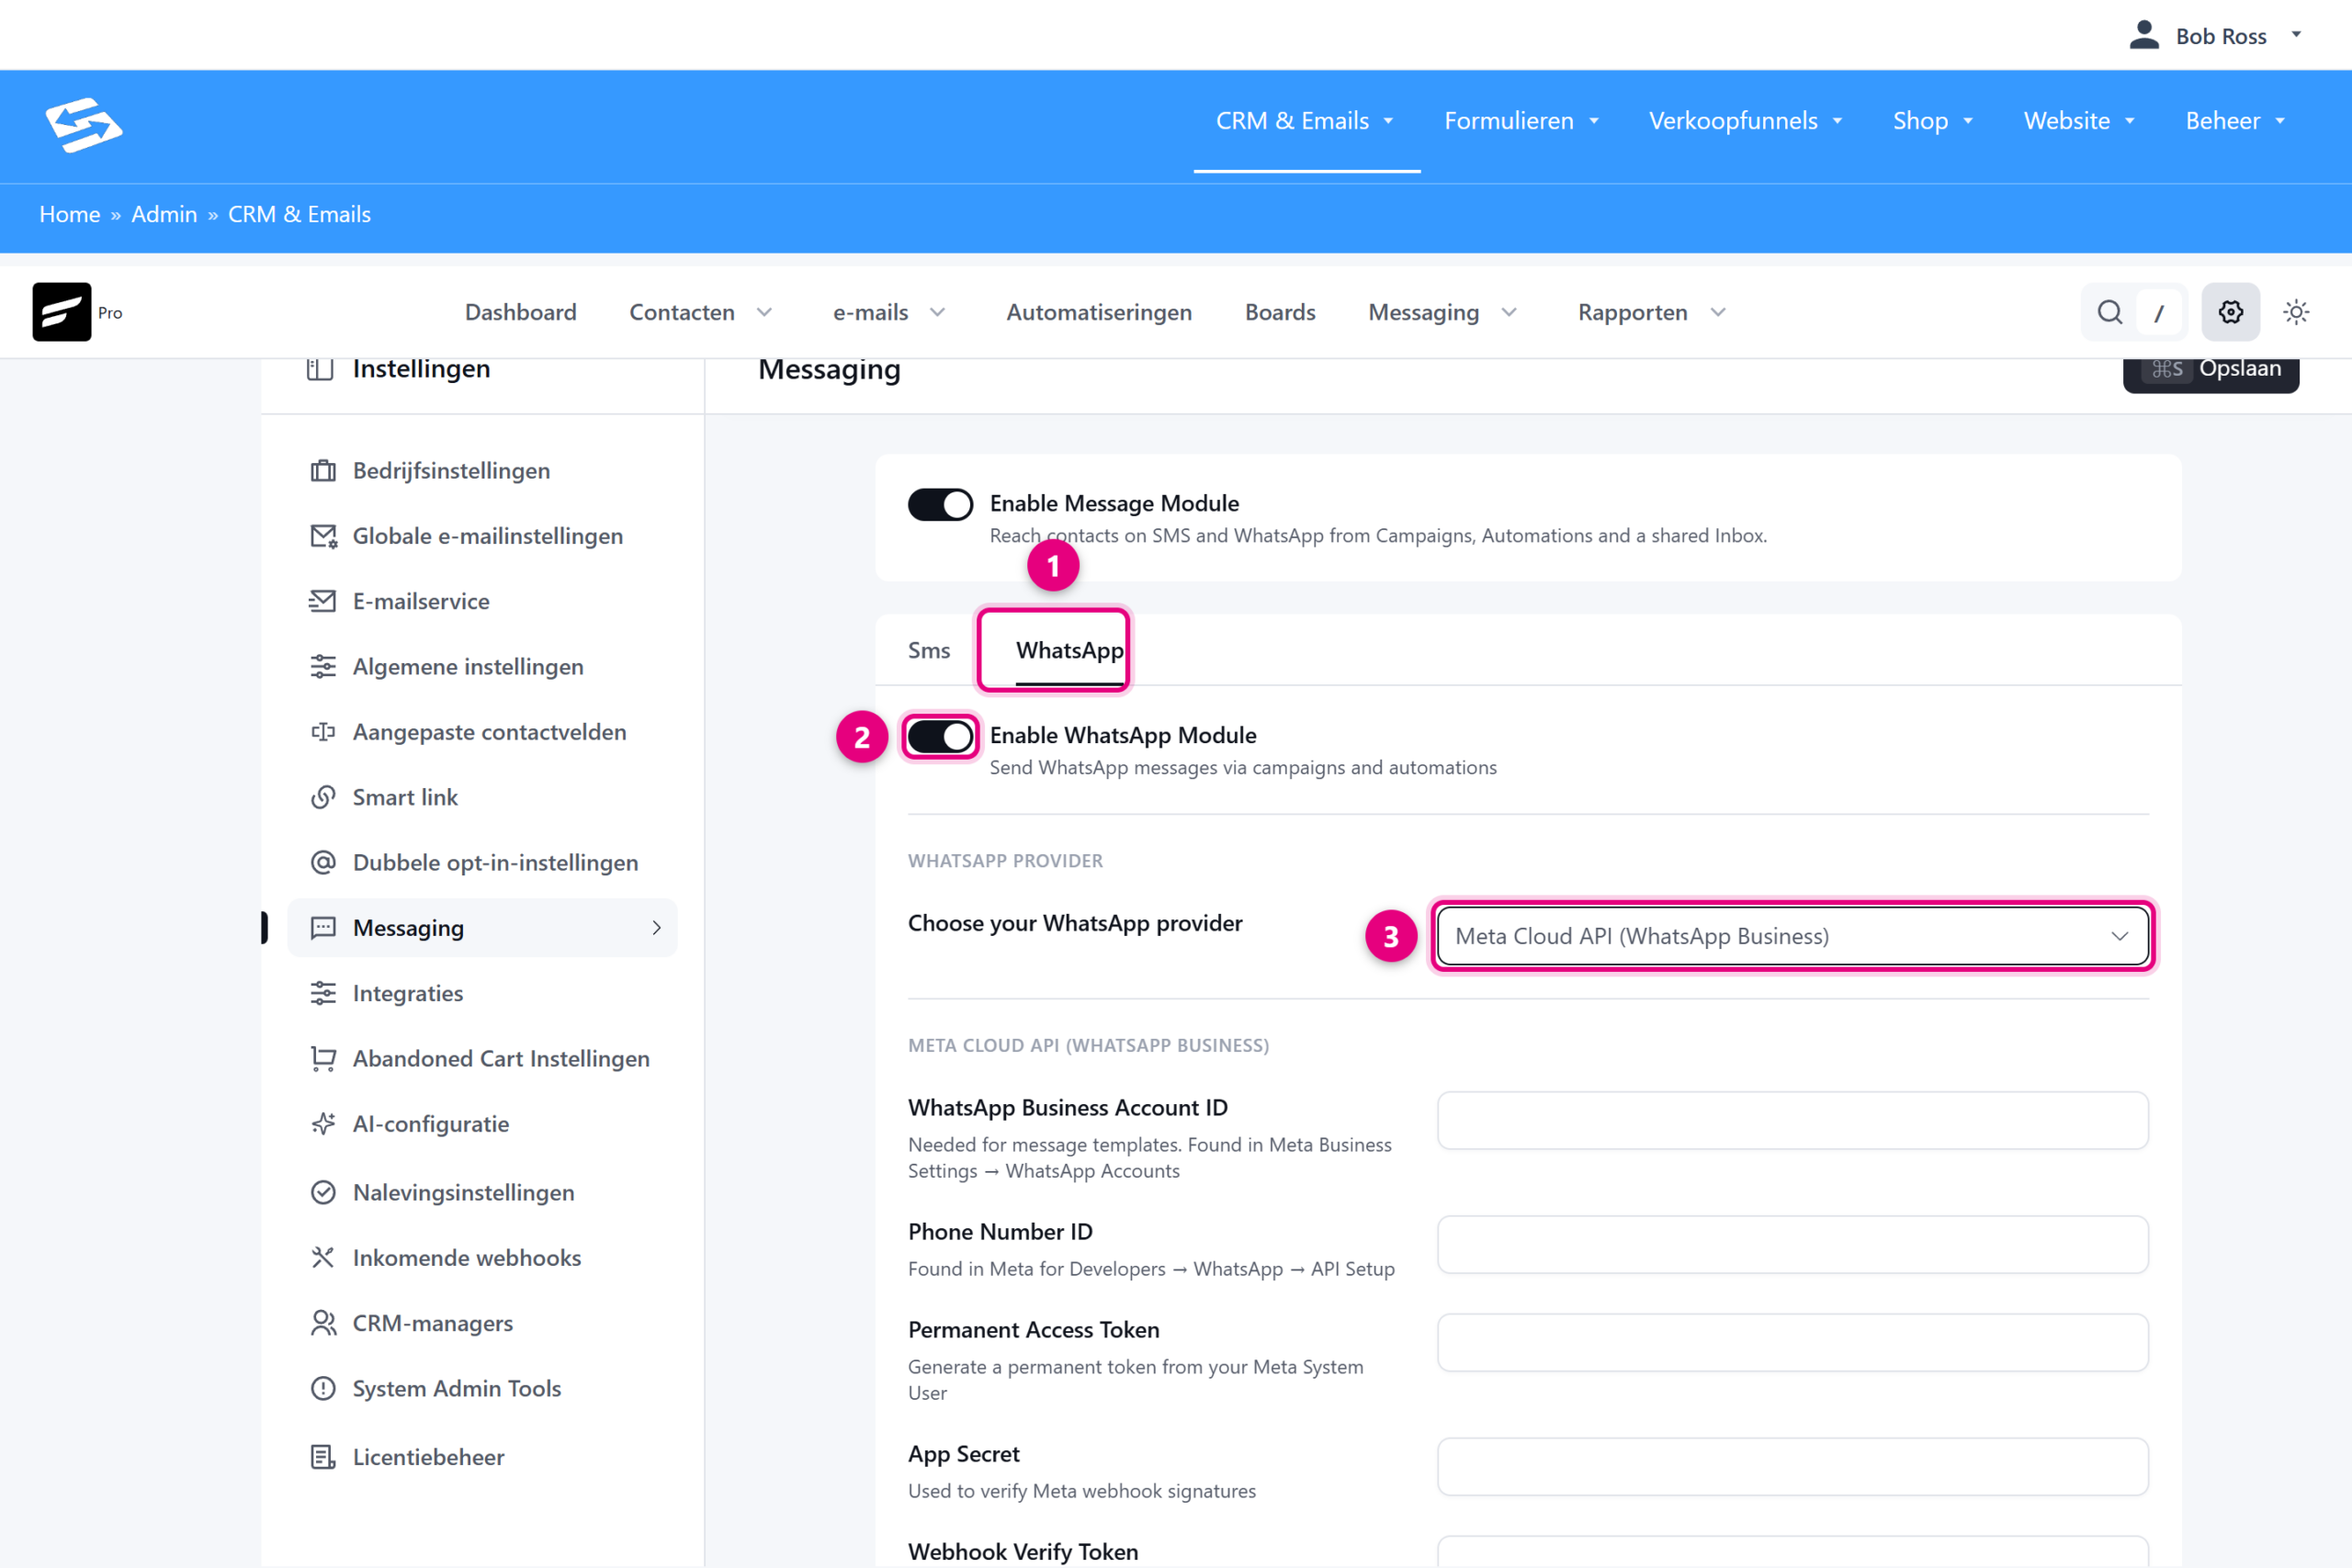
- WhatsApp tab: all WhatsApp settings are gathered here.
- Enable WhatsApp Module: the switch for the WhatsApp channel.
- Choose your WhatsApp provider: pick the provider you have an account with, and the matching fields appear.
If you choose Meta Cloud API (WhatsApp Business), you fill in these fields:
- WhatsApp Business Account ID: you will find this in Meta Business Settings under WhatsApp Accounts. It is needed for your message templates.
- Phone Number ID: you will find this in Meta for Developers under WhatsApp, in API Setup.
- Permanent Access Token: create a permanent token through a Meta System User. Treat it like a password.
- App Secret: your environment uses this to check that incoming webhook messages really come from Meta.
- Webhook Verify Token: a secret text of your own choosing. Enter exactly the same text in the webhook settings in Meta.
If you choose Twilio WhatsApp, these are the fields:
- Twilio Account SID and Twilio Auth Token: the same details as those of your Twilio account.
- WhatsApp From Number: your approved Twilio WhatsApp sending number, with country code (for example +14155238886).
- Messaging Service SID: optional, only if you use a Twilio Messaging Service with a sending pool.
Step 3: your first WhatsApp campaign #
Once you have saved, a new Messaging menu appears at the top of your CRM, with the sections Inbox, WhatsApp, Templates and Activities underneath it.
- Click Messaging at the top.
- Choose the WhatsApp tab.
- Click Create new campaign. Choose an approved template, personalise it with contact details, choose your recipients and send or schedule the campaign.
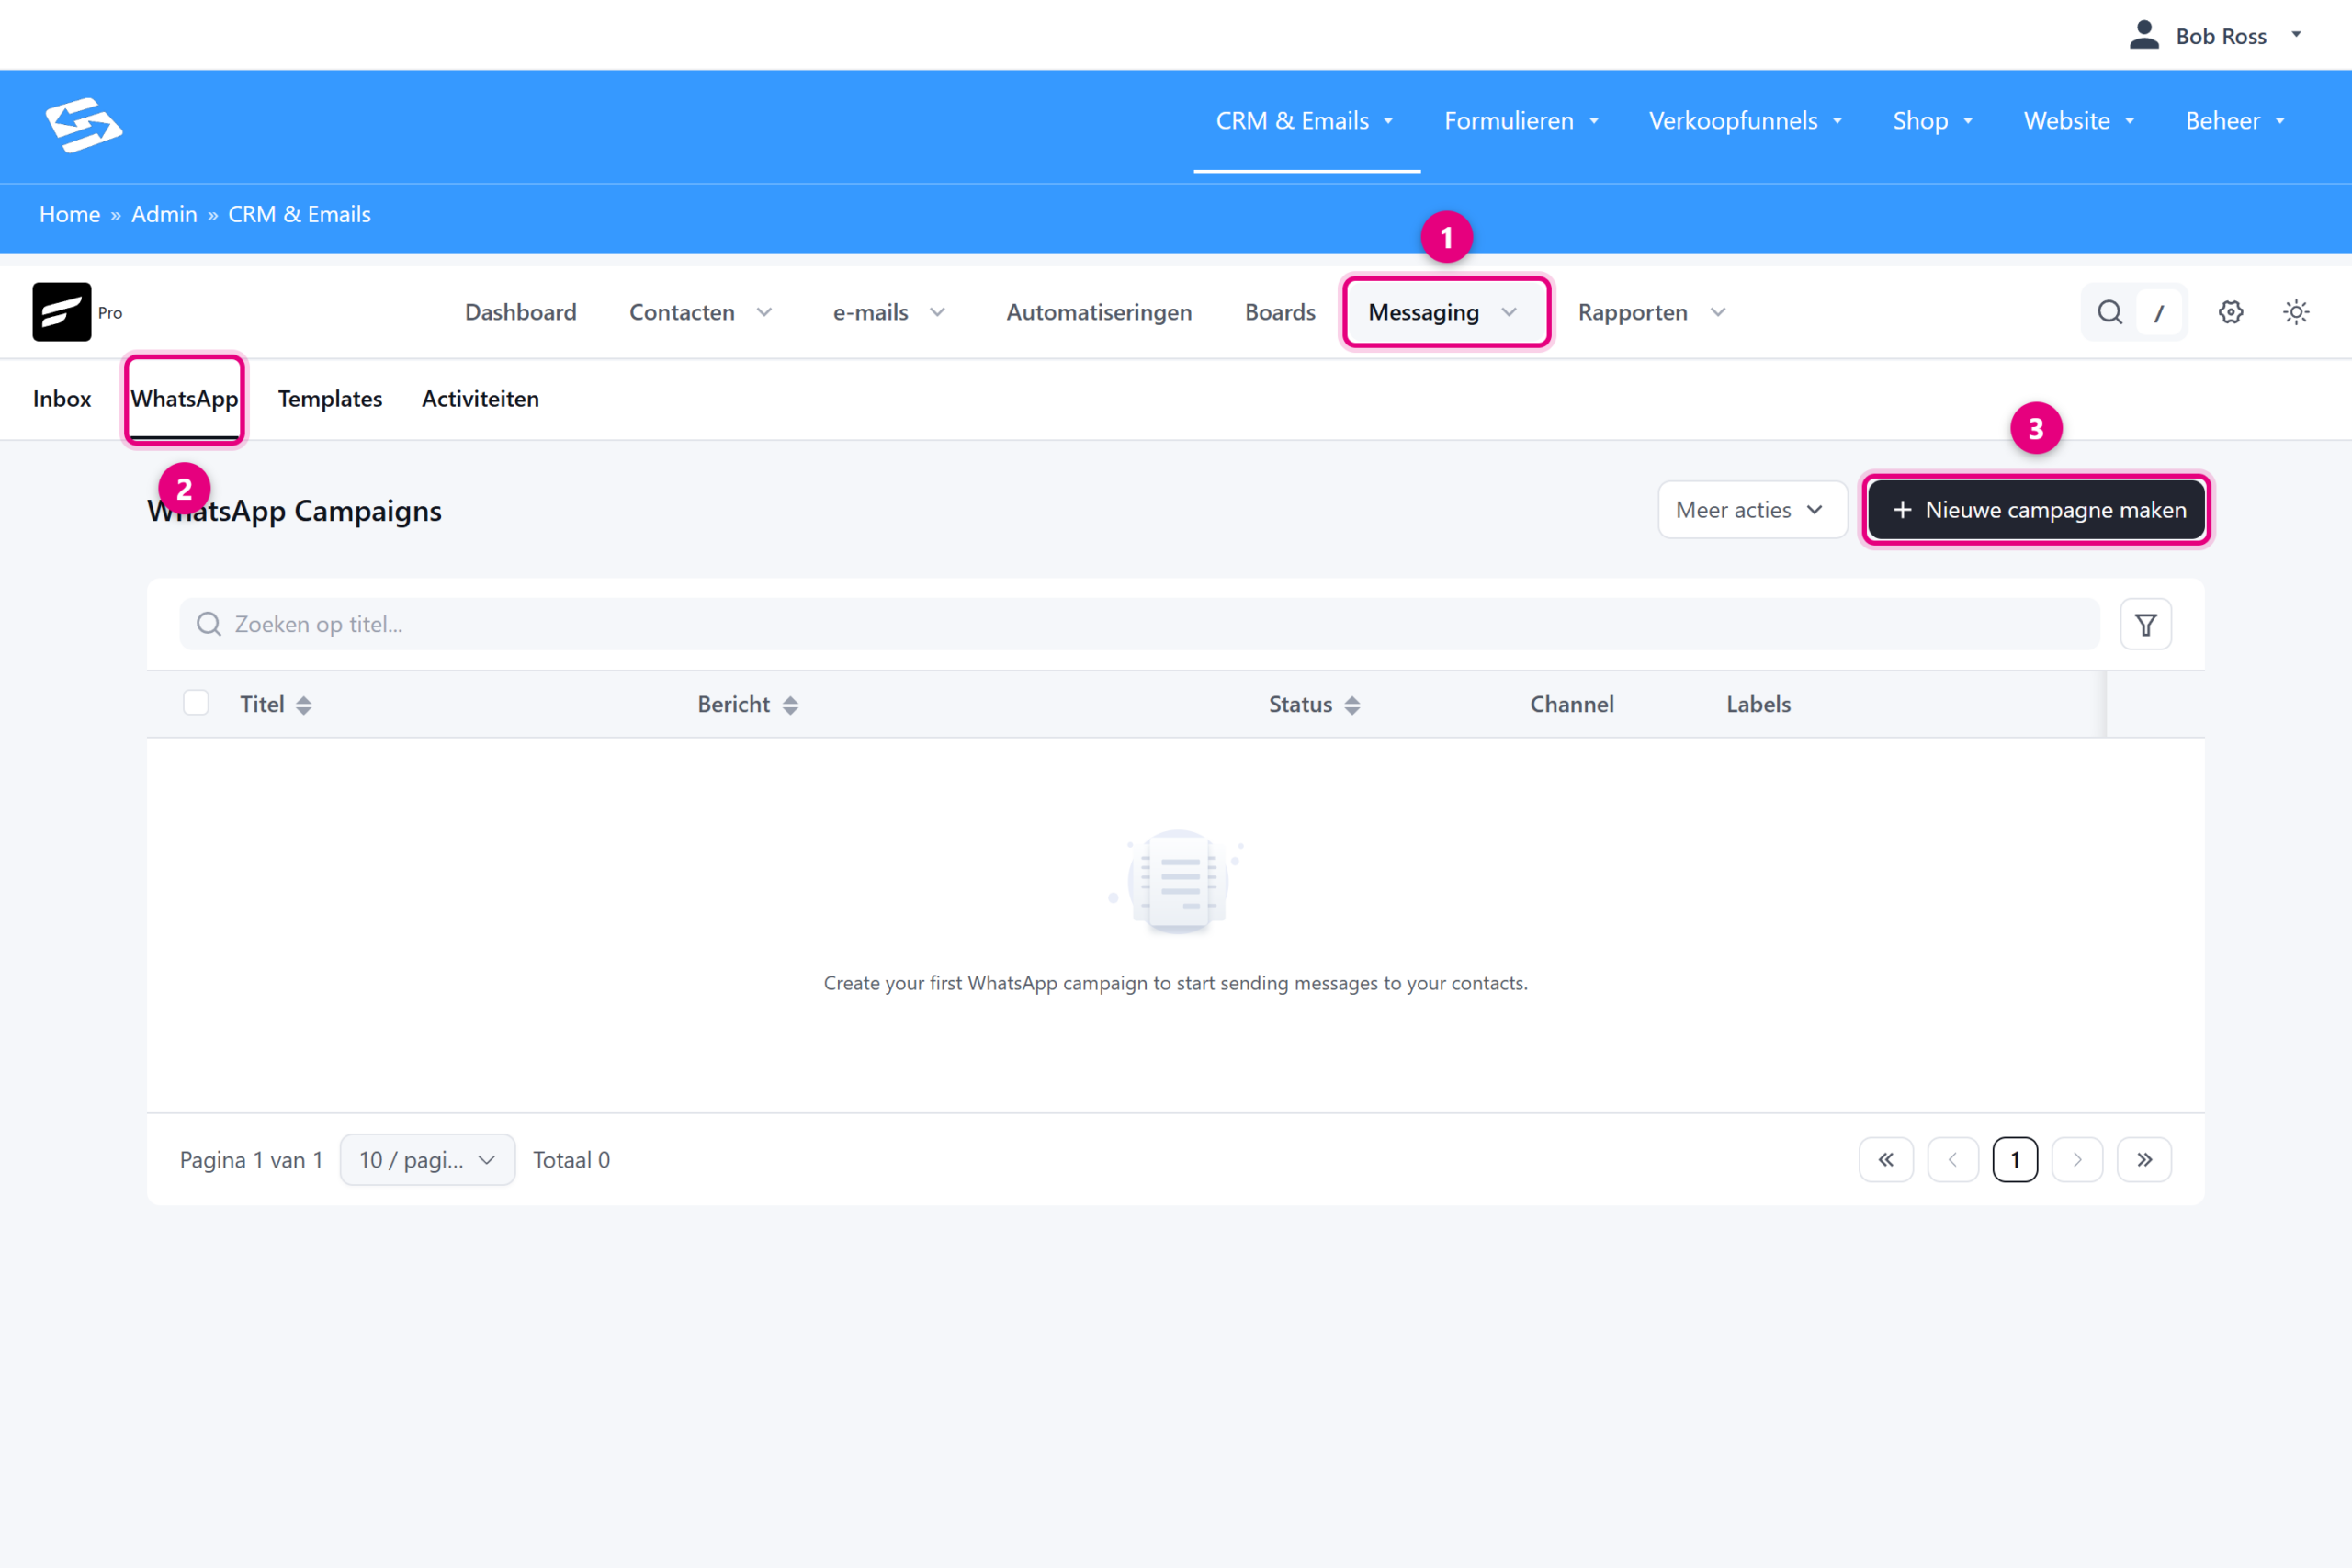
- Messaging: this menu appears as soon as the WhatsApp channel is switched on.
- WhatsApp: the overview of your WhatsApp campaigns.
- Create new campaign: this is where you start your first campaign.
In the Inbox you see all conversations and reply directly, and the messages are also kept with the contact record. Under Templates you prepare reusable messages. And in your automations you add a WhatsApp message as an action, for example a reminder for an appointment or a thank you after a purchase.
Important to know #
- The 24-hour window: if a contact replies, you can write back freely for 24 hours. Outside that window you may only send approved templates, which is a rule set by WhatsApp itself.
- Costs: you pay per message to your provider (Twilio or Meta), not to Autorespond. Check the current rates with your provider.
- No group messages: this channel sends personal messages to individual contacts. You cannot use it to post in WhatsApp groups, so treat it as an addition to a community group, not a replacement.
- Screen language: the newest Messaging screens are still partly in English.


