Configure automation actions #
Actions determine what happens when an automation is triggered. You can run several actions one after another, such as adding tags, sending emails, updating contact details or starting other processes. Every action has its own settings that determine how it is carried out.
Automations in Autorespond are based on FluentCRM Pro, included in your package. Read the FluentCRM documentation
Add actions to an automation #
Go to CRM & Emails → Automations and open an existing automation, or create a new one.
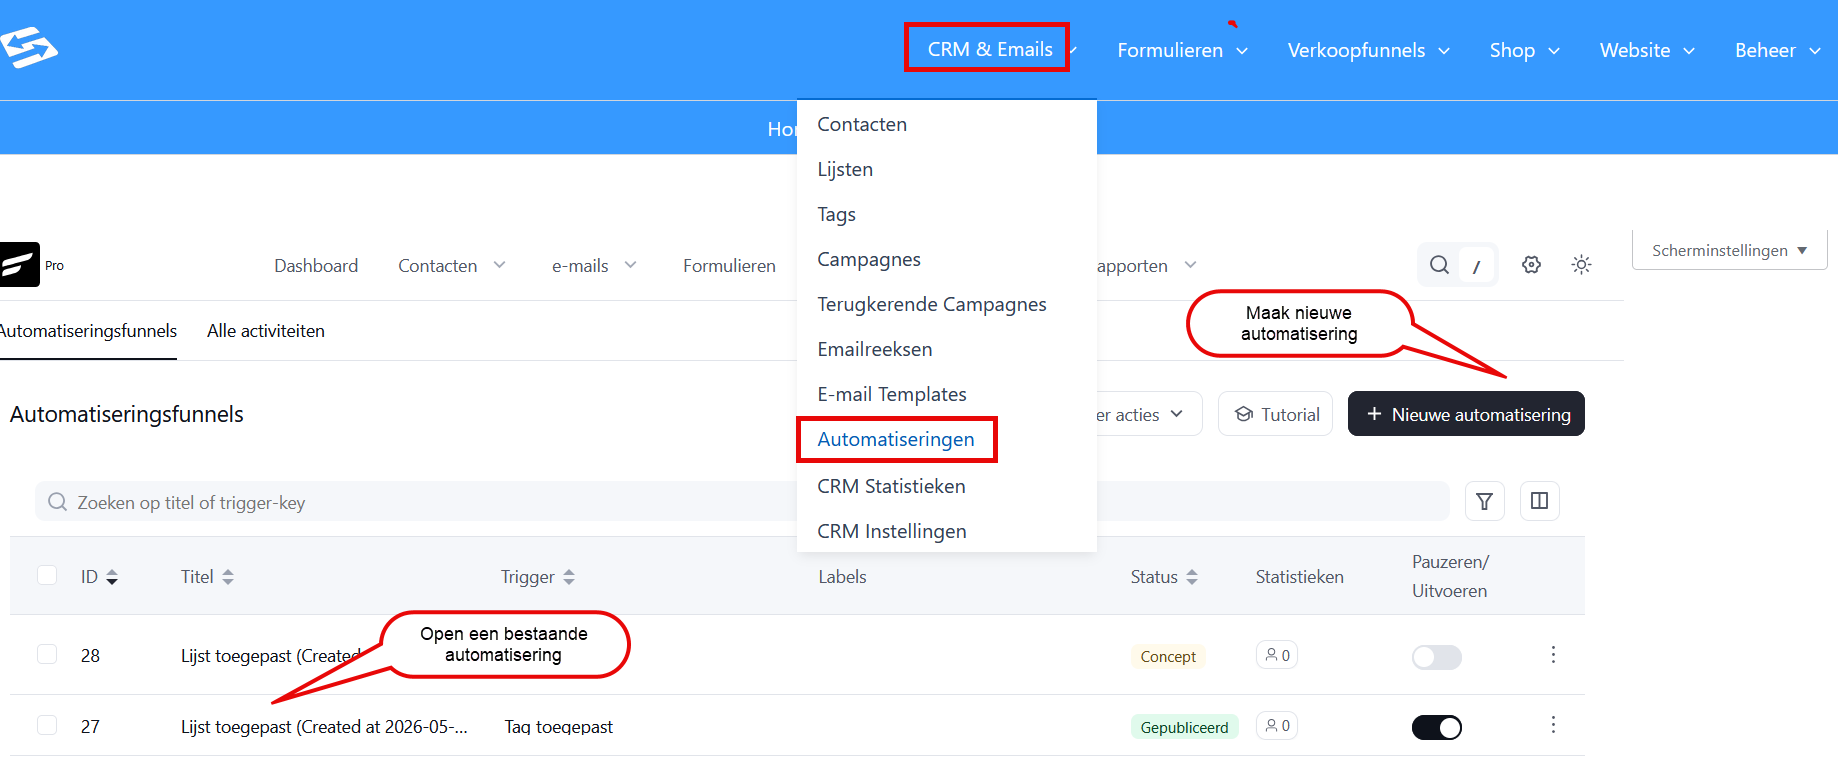
Every automation starts with a trigger (the starting step). This is described in Setting up automation triggers. Once you have created that trigger, click the plus icon to add a new action. First click the option ‘Add action / goal’. After that you can choose from various categories of actions, each with its own function.
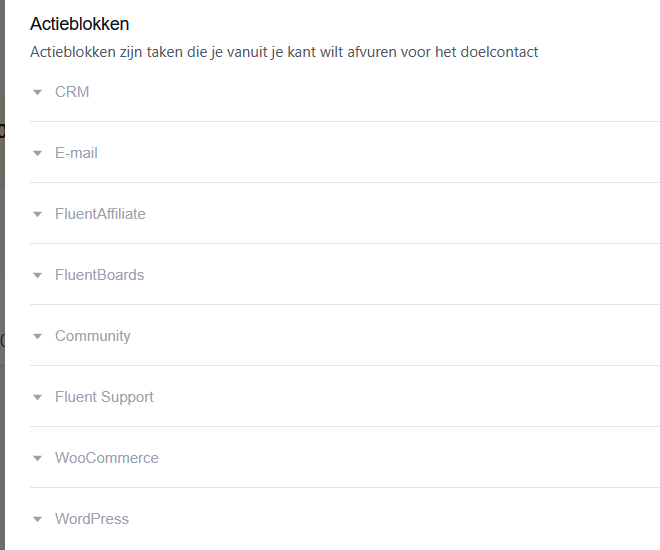
Contact and relationship data actions #
Add or remove a tag #
Add tags to contacts automatically, or remove them again. Tags are useful for segmentation and for tracking behaviour or preferences. You can add several tags at once by clicking them one after another in the dropdown. When removing tags, you select the specific tags that should be taken off.
Add or remove a list #
Add contacts to specific lists or remove them from those lists. This is mainly useful for newsletters or specific target groups. Note that removing someone from a list is not the same as unsubscribing: contacts can still receive other emails.
Update custom fields #
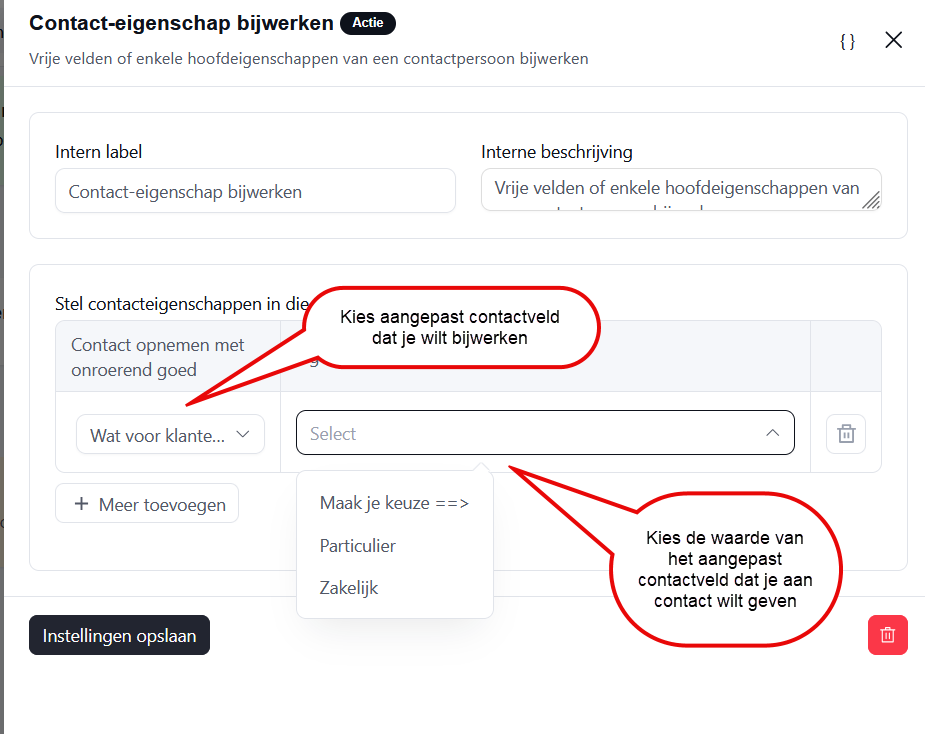
Through ‘Add action / goal’ -> ‘Update contact property’ you can change the value of custom contact fields automatically. In the left dropdown, first pick the custom contact field you want to change, then set the value you want in the field next to it.
You can set text, numbers and dates. This helps you keep contact information up to date, or track specific properties such as preferences or behaviour.
Wait and timing actions #
Wait #
Insert a pause between actions. You can wait a set number of minutes, hours or days. You can also wait until a specific date and time. This action is essential for creating realistic intervals between messages.
Wait until a specific day or time #
Pause the automation until a particular day of the week or time of day. For example: wait until next Tuesday at 09:00 before sending a business email. This gives your communication optimal timing.
Email actions #
Send an email #
Send a specific email to the contact. You can pick an existing email template or write a new email. The email goes to the email address of that contact, but you can also send it to a different address.

Start an email sequence #
Start a complete email sequence for the contact. The sequence runs through automatically according to the timing you configured. You can indicate whether or not the sequence should restart if the contact is already in it.
WordPress user actions #
Create a WordPress user #
Create a WordPress user account for the contact automatically. You can set the user role (customer or subscriber, for instance) and decide whether a password is generated. The email address of the contact is used as the username. You can choose whether or not to send the contact an email with the login details.
Change a WordPress user role #
Change the role of an existing WordPress user. This is useful for granting or withdrawing access rights based on behaviour or purchases. The action only works if the contact is also a WordPress user.
External integration actions #
Send a webhook #
Send data to external systems automatically through a webhook. You can set the URL and decide which contact details are included. This is useful for connections with other software that is not integrated directly.
HTTP request #
Run a custom HTTP request to an external API. You can set headers, include data and choose the method (GET, POST, and so on). This gives you full control over external connections.
Notification actions #
Send an admin notification #
Send an email to one or more administrators when the action runs. This keeps you informed about important events such as new sign-ups, purchases or specific behaviour.
Send an SMS (with an external provider) #
Send an SMS to the contact through a connected SMS provider. You first have to configure an SMS service under CRM & Emails -> CRM Settings -> SMS Setting. The phone number has to be present in the contact details.
Advanced actions #
Start another automation #
Start another automation for the same contact. This helps you split complex processes into several manageable automations. The contact then runs through both automations at the same time.
Stop the automation #
Stop the current automation for this contact. None of the following actions in this automation are carried out. This works well together with conditions, to end automations early.
Remove a contact from another automation #
Take the contact out of another running automation. This prevents the contact from receiving unnecessary or conflicting actions from several automations at once.
Set up conditional actions #
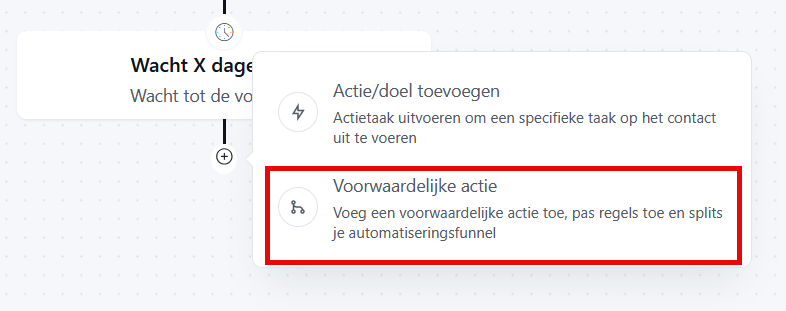
If an action should only run when certain conditions are met, add a ‘Conditional action’ step before that action. Before the action in question, click the plus icon and choose the option ‘Conditional action’. This determines whether the steps that follow are carried out. It makes your automations far more precise and relevant.
Test your actions #
Always test new actions with a test contact before you activate the automation. Go to CRM & Emails → Contacts, create a test contact and let it run through the automation. Check that every action is carried out correctly and that the timing is right.
Tips for effective actions #
Keep automations manageable by not packing too many actions into a single one. Use sensible waiting times between actions to mimic natural communication. Make sure contacts can leave an automation easily by including unsubscribe links in your emails. Review regularly whether your automations are still relevant, and adjust them when your audience or strategy changes.


