Setting up automation triggers #
Triggers are the starting point of every automation in your CRM. They determine when an automation is activated and for which contacts. By setting up the right triggers, you make sure your contacts receive the right messages at exactly the right moment, or that the right actions are carried out for those contacts.
Automation triggers in Autorespond are based on FluentCRM Pro, included in your package. Read the FluentCRM documentation
What exactly is a trigger #
A trigger is the condition that makes an automation start. For example:
- a new contact signing up through a form
- a purchase in your shop
- adding a specific tag to a contact
As soon as this event takes place, the automation starts running for that specific contact.
You can combine several triggers in one automation. A contact only needs to match one of the triggers for the automation to start. This gives you the flexibility to set up different starting points for the same automation.
Setting up primary triggers #
Go to CRM & Emails → Automations and click ‘New automation’. A new screen opens where you can select the trigger you want.
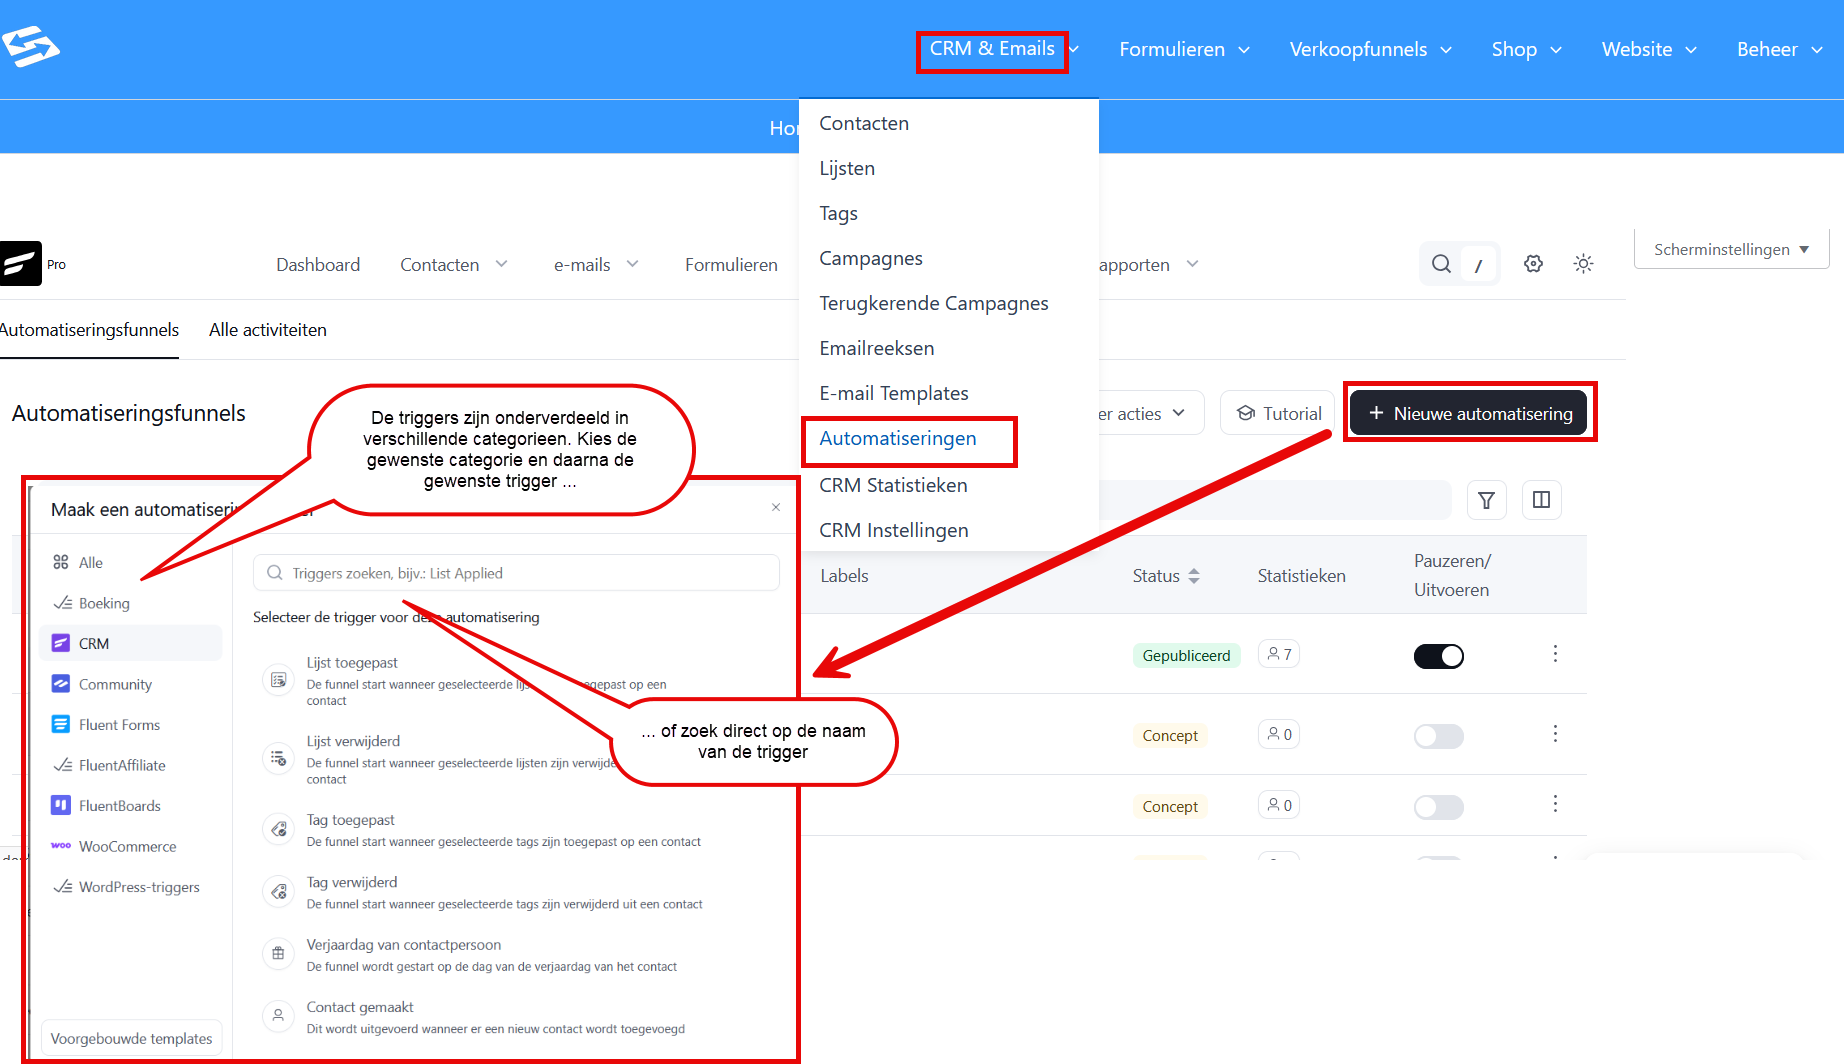
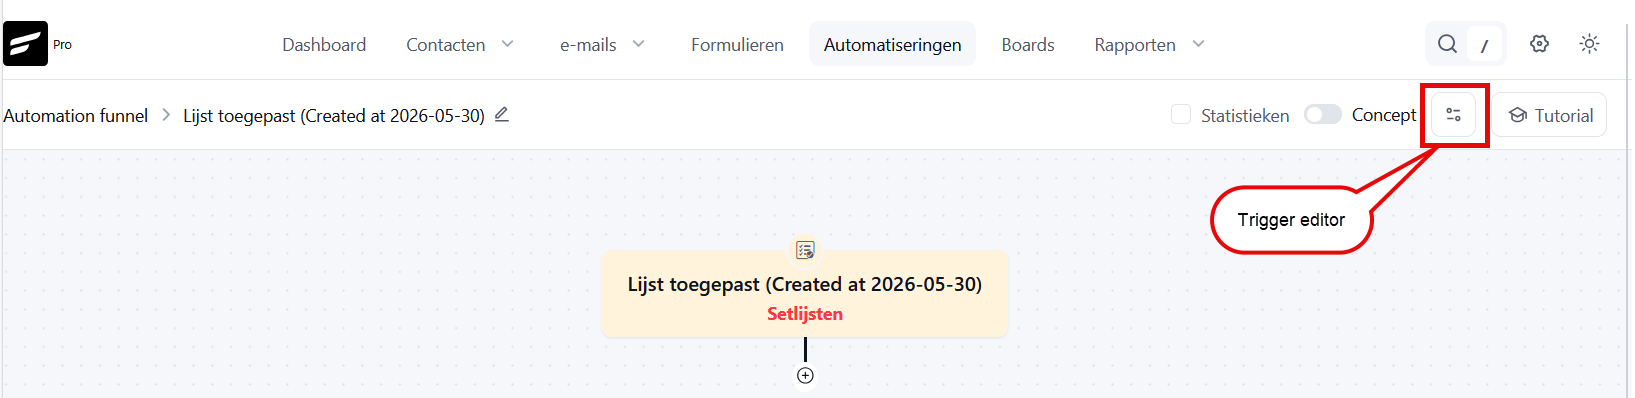
You can also edit an existing automation. In the automation editor you will find the trigger editor at the top right.
Contact-related triggers #
Contact created: Starts the automation when a new contact is added to your CRM, whatever the source. This trigger works for manually added contacts, form submissions, and imports.
Tag applied: Activates the automation when a specific tag is added to a contact. Select the relevant tag or tags from the list. This trigger is very handy for building targeted follow-up flows based on interests or behaviour.
Tag removed: Starts when a tag is removed from a contact. You can use this to take contacts out of certain flows or to place them in other flows.
Contact birthday: Activates the automation on the contact’s birthday.
Company applied: Starts the automation when one or more selected companies are linked to a contact.
Company removed: Starts the automation when one or more selected companies are removed from a contact.
List-related triggers #
List applied: Starts the automation when a contact is added to a specific list. Choose from the lists available in your CRM. This is ideal for welcome series or specific newsletters.
List removed: Activates when a contact is taken off a list. Use this for exit surveys, for example, or to move contacts to other lists.
Form triggers #
New form submission: One of the most used triggers. Starts the automation when a specific form is submitted. Select the form you want from the list of available forms. This trigger works very well for welcome series after a sign-up, lead magnet follow-ups, or specific information requests. Make sure your form is correctly linked to your CRM through the form integration settings.
Subscription payment received (Fluent Forms): Starts the automation when a subscription payment has been received successfully through Fluent Forms.
Subscription cancelled (Fluent Forms): Starts the automation when a subscription is cancelled through Fluent Forms.
Shop-related triggers #
If you use the Shop module, you have access to many shop-related triggers:
New order (processing): This automation starts as soon as a new order is marked as processing
Order completed: This automation starts when an order is completed
Order refunded: This automation starts when an order is refunded
Order status changed: This automation starts when the status of an order changes
Subscription activated: This automation starts when a WooCommerce subscription begins or its status changes to active.
Renewal payment received: This automation starts when a recurring payment for a subscription is received
WooCommerce subscription cancelled: This automation starts when a WooCommerce subscription is cancelled.
Renewal payment failed: This automation starts when a subscription payment fails
Renewal subscription expired: This automation starts when a subscription expires
Abandoned cart – WooCommerce: This automation starts when a cart is abandoned in WooCommerce
Community triggers #
If you use the community module, you have access to powerful community-related triggers:
Joined a space: This automation starts when a user joins a space or community.
Left a space: This automation starts when a user leaves a space or community.
Enrolled in a course: This automation starts when a user enrols in a course.
Completed a course: This automation starts when a user has completed a course.
Unenrolled from a course: This automation starts when a user unenrols from a course.
Section/topic completed: This automation starts when a user has completed a particular section of a course.
Lesson completed: This automation starts when a user has completed a particular lesson of a course.
User level (leaderboard) increased: This automation starts when a user moves up a level on the leaderboard.
Board triggers #
A few triggers are available for the project management boards as well:
Contact added to task: This runs when a contact is added to a task
Stage Changed: Runs when the stage of a task (linked to a CRM contact) is changed
Calendar-related triggers #
If you use the Appointments module, you have access to powerful calendar-related triggers:
New booking: This automation starts when a new booking is confirmed
Booking cancelled: This automation starts when a booking is cancelled
Booking completed: This automation starts when a booking is marked as completed (manually or automatically)
Booking rescheduled: This automation starts when a booking is rescheduled
Affiliate triggers #
The following triggers are available for contacts who sign up or withdraw as an affiliate:
Affiliate account approved: This automation starts when the status of an affiliate is set to approved.
Affiliate registered as pending: This automation starts when an affiliate registers and is given the status ‘pending’.
Successful referral created: This automation starts when a successful referral is created with a paid order.
Affiliate payout sent: This automation starts when a payout transaction is marked as paid for an affiliate.
WordPress triggers #
These two triggers look at the user account on your site, not at the contact in your CRM:
New user registration: Starts the automation when a new user has registered on your site. Handy for an onboarding series after registration.
User login: Starts the automation when a user logs in to your site.
Which start trigger do you choose after a payment? #
The list above shows everything that can start an automation. For automations that may only run after payment has been made, for example to give access to a course or to connect with an external system, the choice between the shop triggers matters most. Below you can read which start step to choose and when.
Standard advice: Order completed #
On every Autorespond site the shop workflow Order status ‘Completed’ after payment is switched on by default. It moves every paid order straight to the final status Completed. As a result, every paid order ends up on Completed and the trigger Order completed fires for every payment method and every product type. This is therefore the recommended start step for everything that may only happen after a successful payment: granting access, applying a tag, sending an outgoing webhook to an external system and the accompanying emails.
You can see whether the workflow is switched on for your site under Shop → Shop Workflows. What the workflow does exactly and which emails your customer receives is explained in Completing paid orders automatically (default workflow).
When New order (processing) makes sense #
The trigger New order (processing) starts at the moment an order is given the status Processing, so as soon as the payment comes in. Choose it in these cases:
- The workflow Order status ‘Completed’ after payment is switched off on your site. Orders then stay on Processing and only reach Completed if you complete them yourself.
- You sell physical products that you only set to Completed after you have shipped them, while the automation already has to start at the payment.
If the default workflow is switched on, a paid order passes through both Processing and Completed in quick succession. In that case put your action in one automation and not in two, otherwise the same customer goes through everything twice.
Paying by bank transfer or on invoice #
With a bank transfer the order first gets the status On hold: the order is ready, but it has not been paid yet. If you want to do something at that point, for example send an email with the payment instructions, use the trigger Order status changed and set To order status to On hold. Keep the access itself in a separate automation with the trigger Order completed, which only starts once the payment has come in and the order is completed.
What each status means is explained in The order statuses of your shop explained. The complete set-up with a waiting email up front and access after payment is described in Granting access only after payment (including bank transfers).
Changing the start trigger of an existing automation #
If you have already built an automation with a different start trigger, you do not have to rebuild it:
- Open the automation through CRM & Emails → Automations.
- Click the start trigger at the top and choose ‘Edit primary automation trigger’.
- Under ‘Select new automation trigger’, choose the trigger you want and click ‘Change automation trigger’.
The settings of the trigger itself, such as the target products, are cleared when you switch. Set those again afterwards. The steps below the trigger simply stay in place.
Advanced triggers #
Smartlink clicked: Starts the automation when a contact clicks a specific smartlink in an email. This is perfect for measuring interest in particular topics or offers. The trigger works indirectly, for example by first adding a tag to a contact who clicks a particular smartlink and then letting that tag start an automation. You can read more about using smartlinks in Starting automatic actions with a smartlink.
Webhook received: For integrations with external systems you can start automations (indirectly) through incoming webhooks. The webhook can, for example, give a contact a tag or add them to a list, after which that tag or list can start an automation. This does require technical knowledge and correct webhook configuration.
Date based: You cannot trigger an automation directly on a particular date. What you can do is set a so-called ‘wait step’ right after a primary trigger, which waits until a specific date and time is reached or until a certain number of days or hours has passed.
Refining trigger conditions #
For many triggers you can set extra conditions to make the automation even more specific:
- Segmentation: Determine which contact groups the trigger applies to
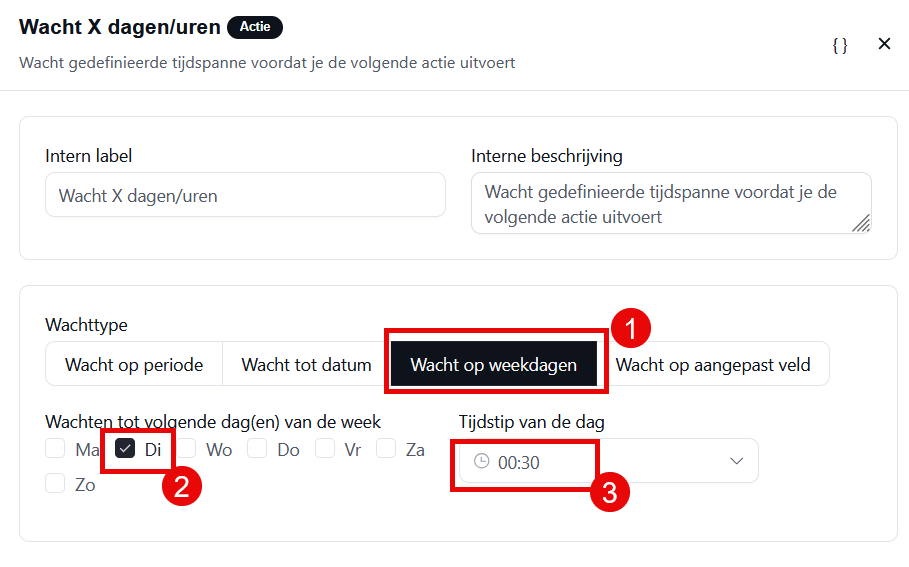
- Time restrictions: Set the trigger to be active only on certain days or at certain times. After the primary trigger you can add a wait step in which you state, for example, that the automation may only continue on Tuesday at 00:30
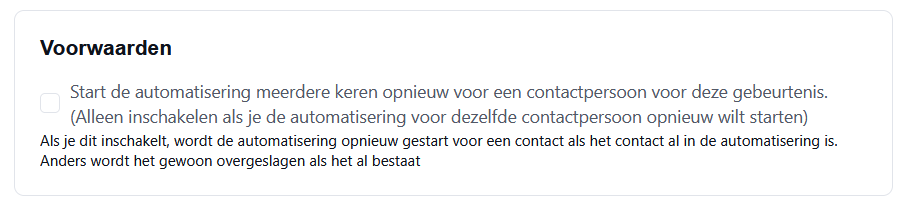
- Frequency: Determine how often a contact can go through the same automation (once or repeatedly)
Testing and monitoring triggers #
Before you take an automation live, always test the triggers with a test contact. Create a test contact and manually go through the steps that should activate the trigger.
Monitor your active automations regularly through the automation reports. There you see how many contacts were started by which triggers and where they may have stopped in the flow.
Common trigger combinations #
In most scenarios you use two or three triggers side by side, each in its own automation, so that you decide exactly what happens at each moment. These are the combinations that come up most often:
- Waiting email and access with bank transfers: Order status changed with To order status set to On hold for the email with the payment instructions, and Order completed for the access as soon as the payment comes in.
- Granting access and withdrawing it again: Order completed for the access after payment, and Order refunded to take that same access away again as soon as you refund the amount.
- Following up subscriptions: Subscription activated for the welcome series at the start, Renewal payment received for the confirmation at each term and Renewal payment failed for a message when a direct debit does not go through.
Smart trigger combinations let you build highly targeted and personal automations that give your contacts exactly the right information at the right moment.


