Setting up custom contact fields #
Custom contact fields let you record extra information about your contacts that goes beyond the standard details such as name and email address. They are also known as ‘custom fields’ or ‘free fields’. You can, for example, keep track of industry, customer status, preference or any other important data that is relevant to your business.
Custom contact fields in Autorespond are based on FluentCRM Pro, included in your package. Read the FluentCRM documentation
Custom fields can be used in forms, email campaigns, automations and segmentation. That way you can send different emails based on the industry someone works in, or start an automation when someone is given a particular customer status.
How to create custom contact fields #
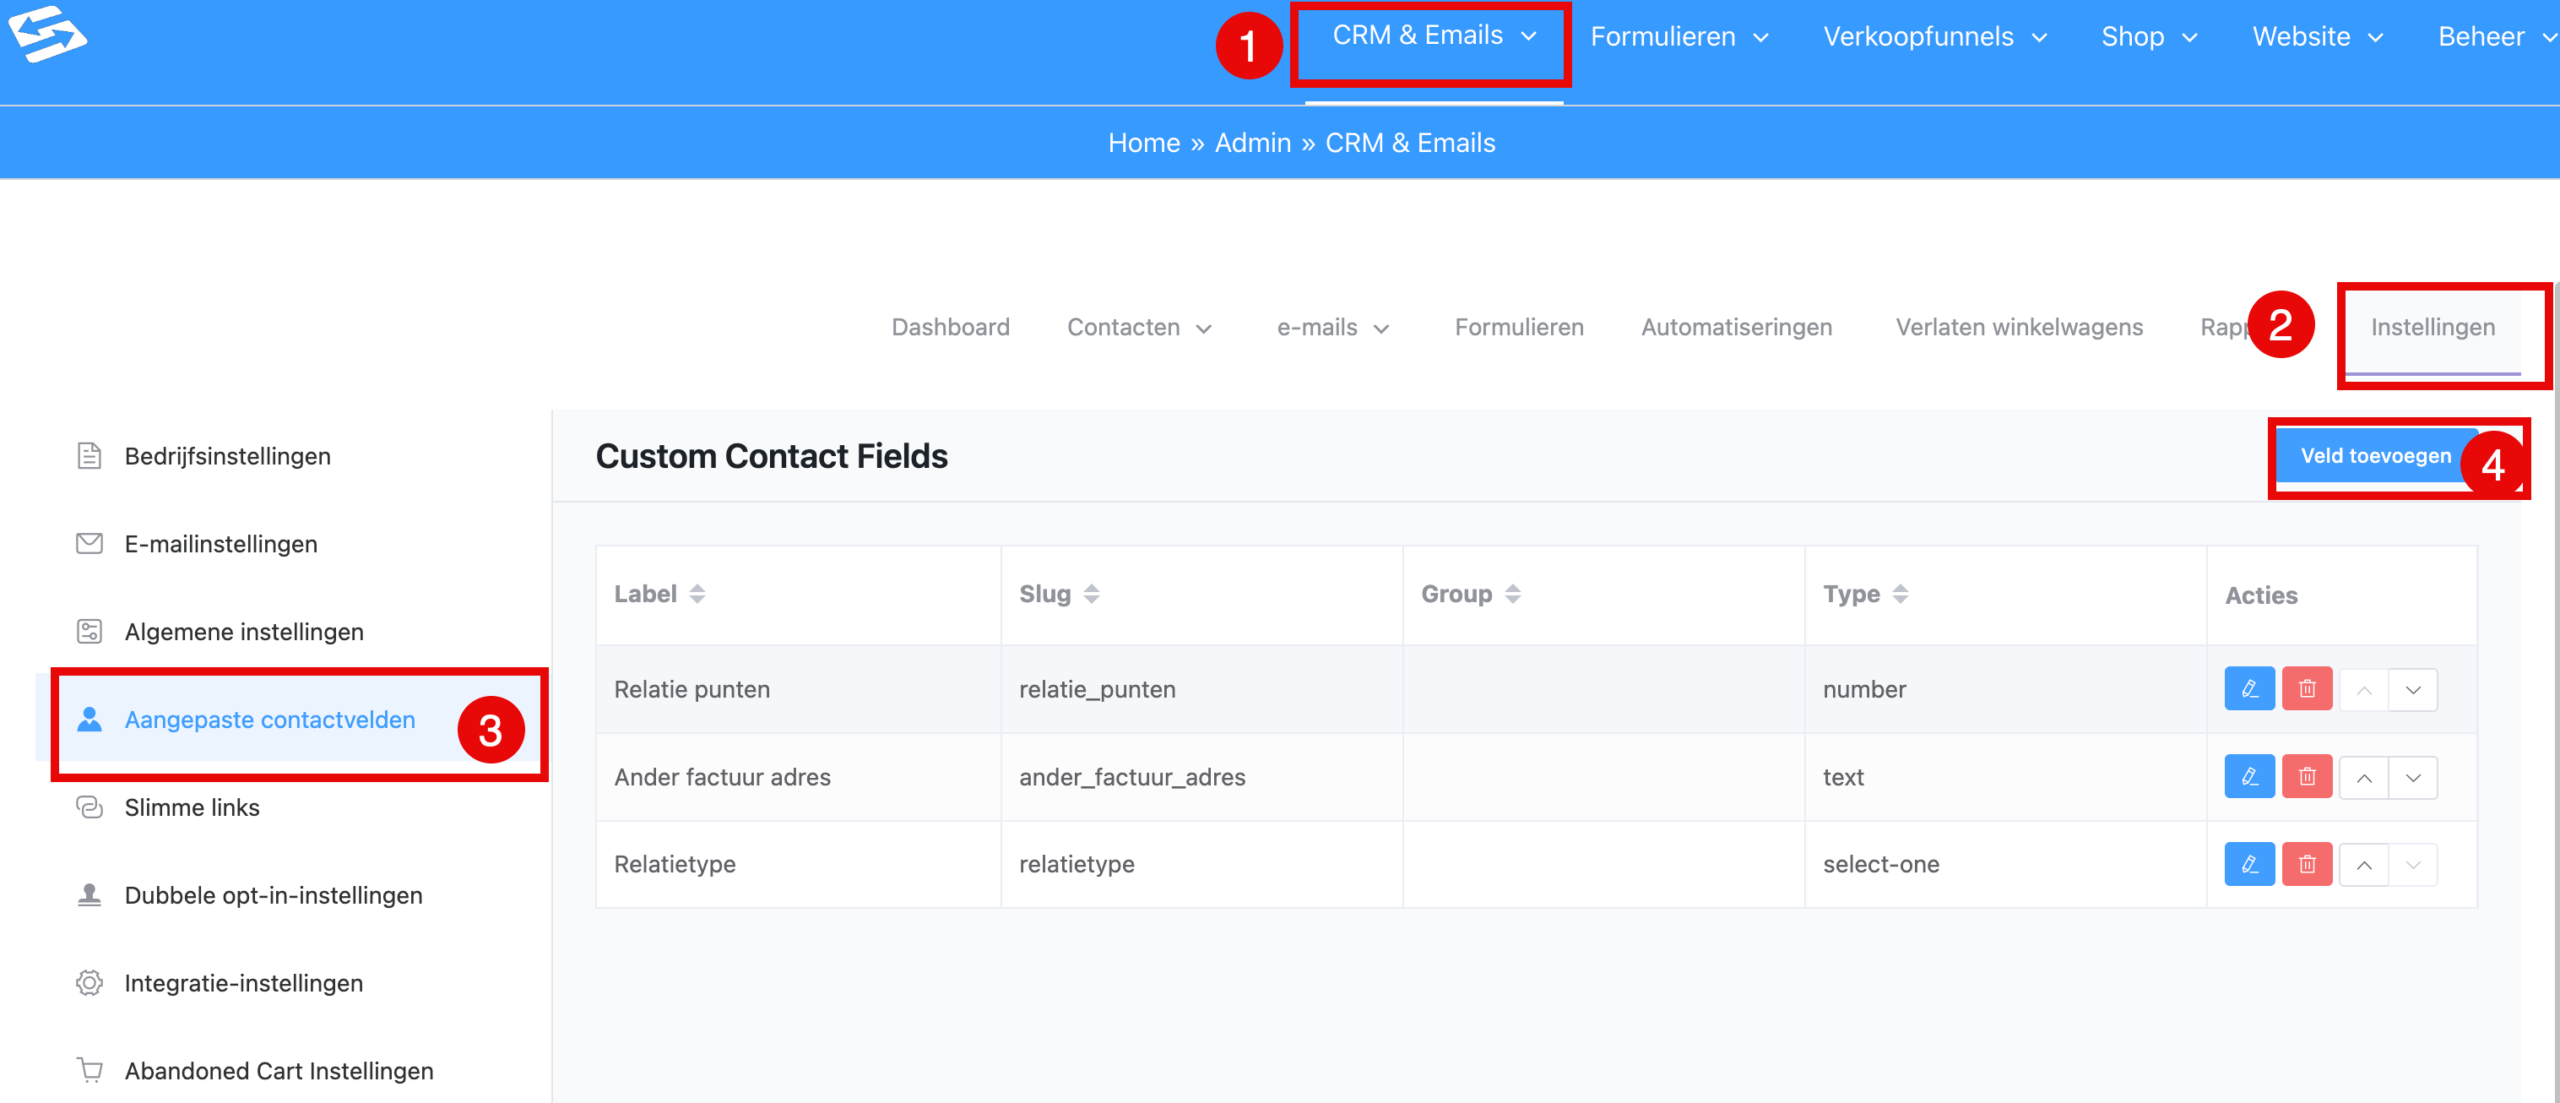
- In your Autorespond administration, go to CRM & Emails → CRM Settings → Custom fields
- Click “Add field”. You can now create the field.
- Enter a field name (for example “Industry” or “Customer status”)
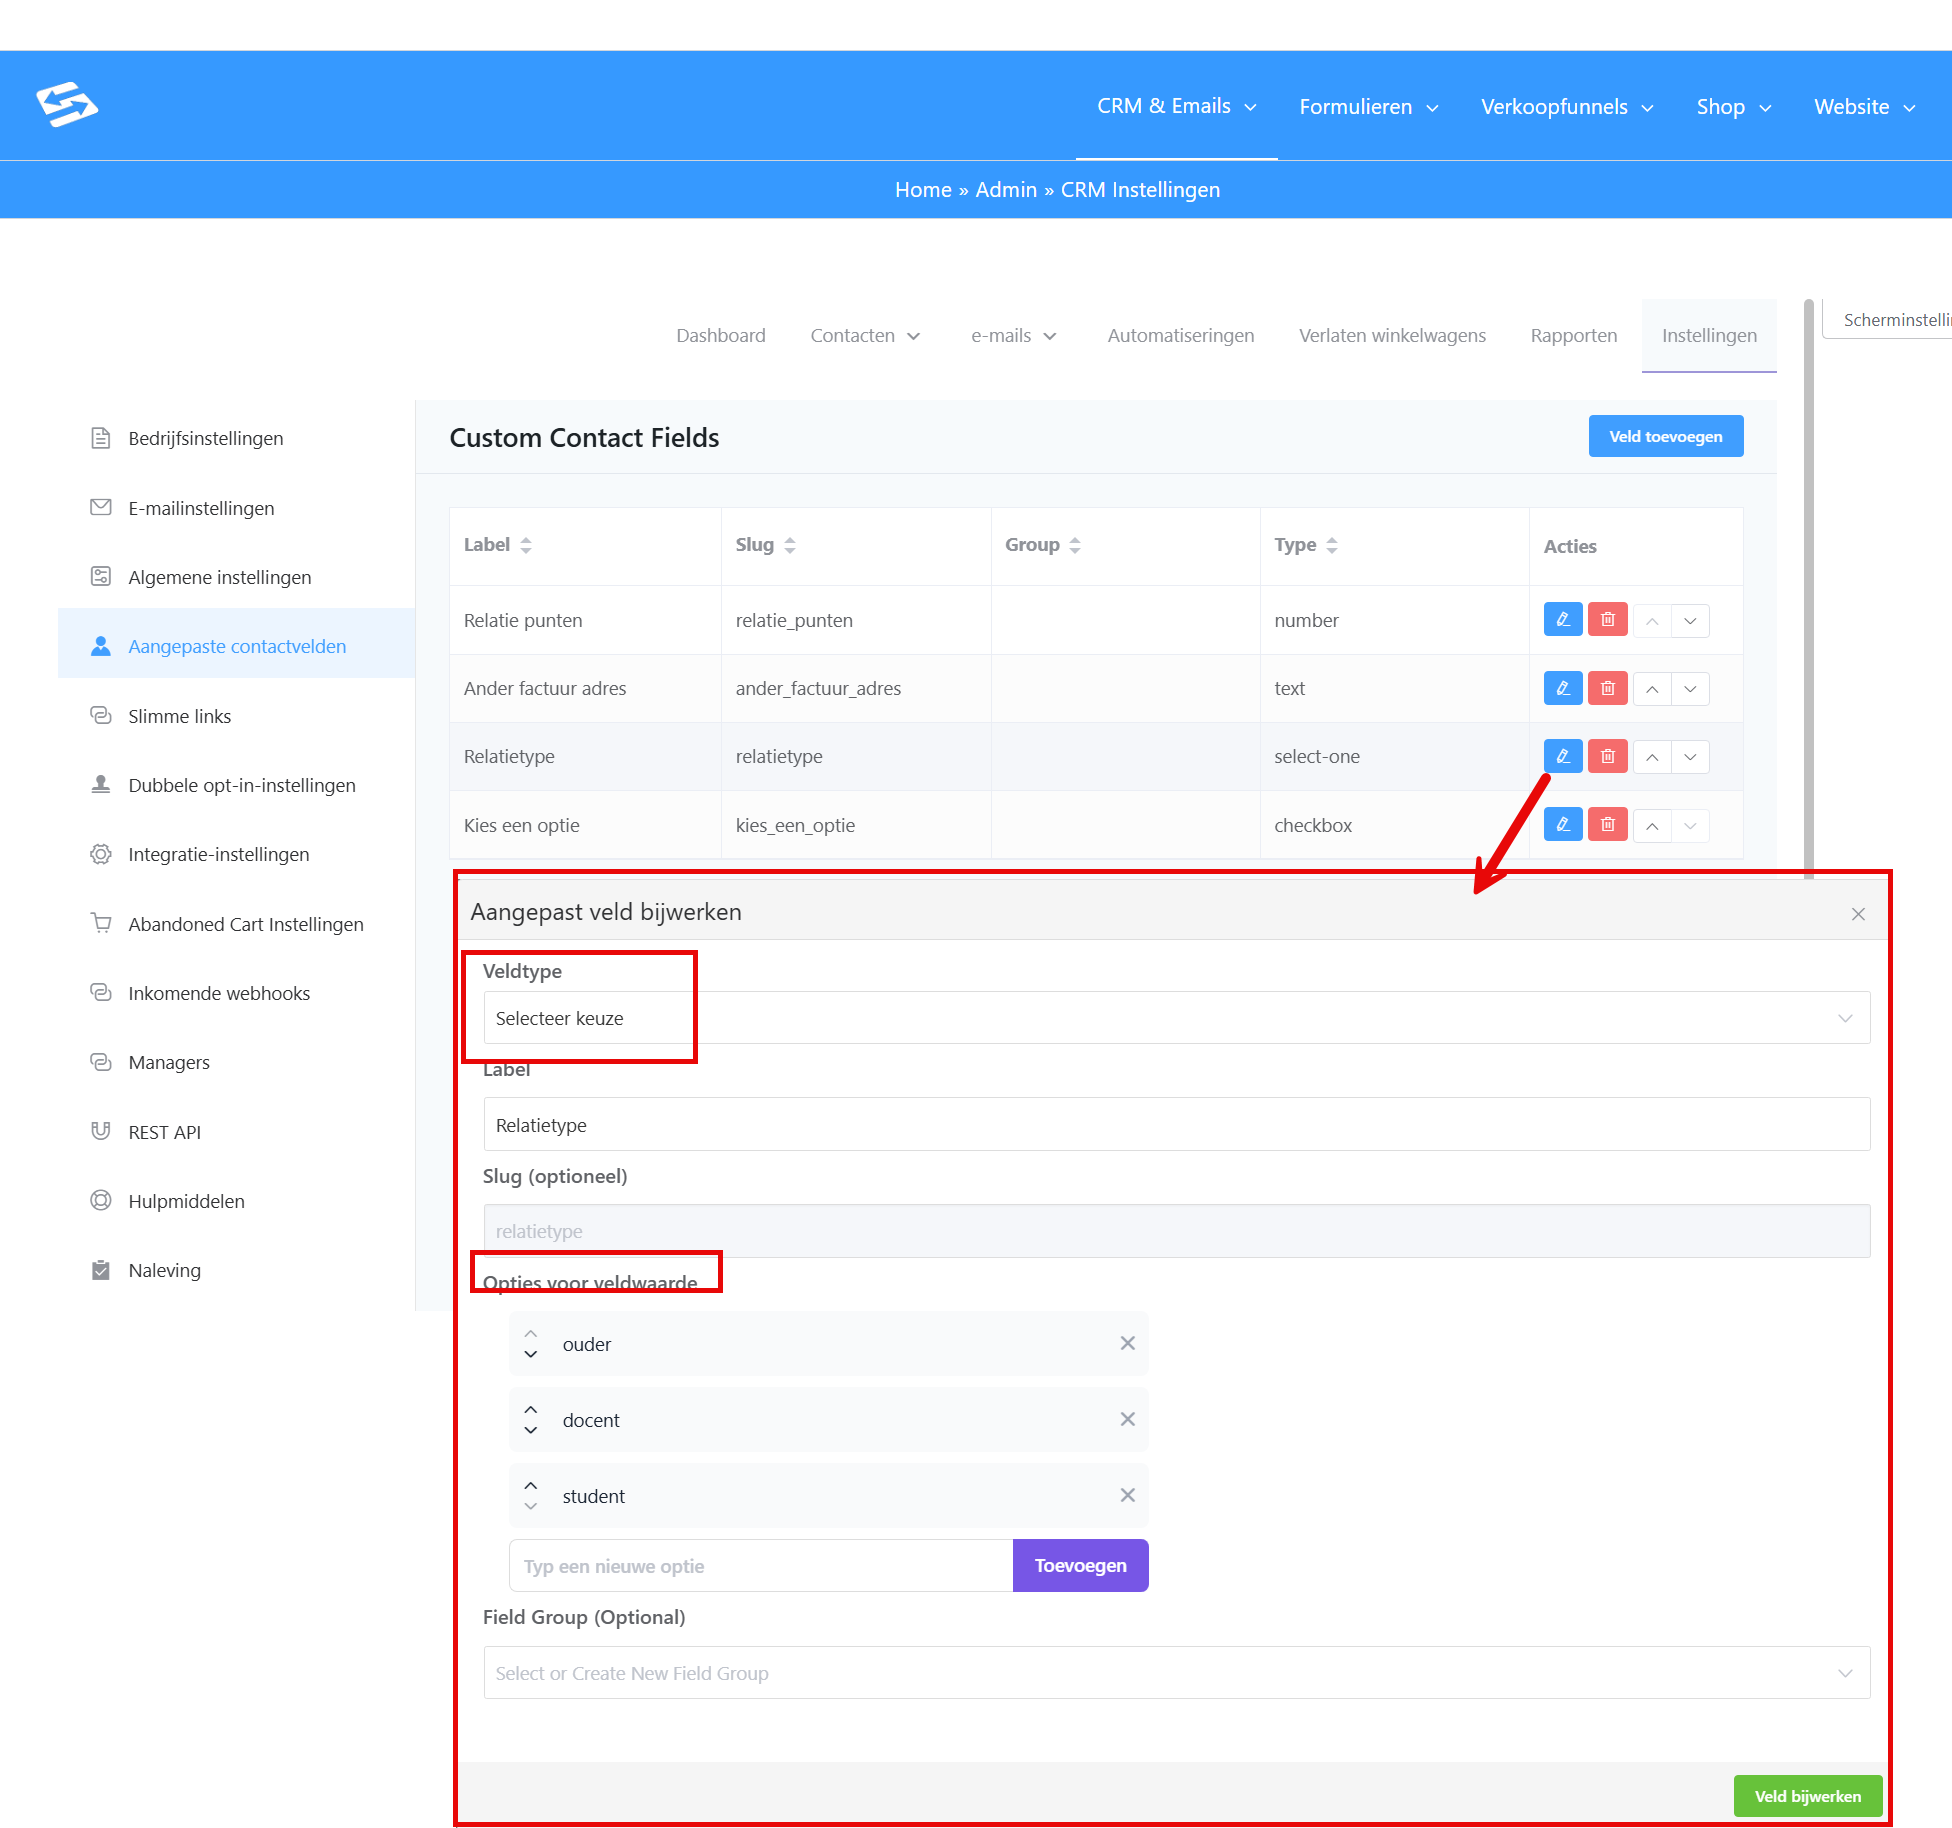
- Choose the field type that best suits your data. See below for more explanation about this.
- Configure any additional options for the chosen field type.
- Click “Save field”.
The new field appears straight away in the list of custom fields and can be used immediately in your contact forms, email campaigns and automations. Read on below to see how to do that.
Available field types #
You can choose from various field types, each suited to a specific kind of information:
Text field (Single Line Text) #
For short texts such as job title, company name or reference number. The field accepts a single line of text.
Text area (Multi Line Text) #
For longer texts such as remarks, notes or detailed descriptions. This field gives you room for several lines of text.
Dropdown list (Select One) #
For situations where your contact can choose one option from a predefined list. For example customer status (prospect, customer, former customer) or industry (hospitality, retail, services).
When you create a dropdown list you enter the possible options, separated by line breaks. The first option automatically becomes the default value.
Multiple choice (Select Multiple) #
For situations where your contact can select several options. Think of areas of interest, or products and services someone is interested in.
Radio buttons (Radio Button) #
Comparable to a dropdown list, but shown as clickable buttons. Suitable for shorter lists with clear options such as “Yes/No” or “Male/Female”.
Tick boxes (Checkbox) #
For multiple options that can be selected independently of each other. For example newsletter preferences or areas of interest.
Date (Date Time) #
For recording dates such as date of birth, contract date or expiry date. The field offers an easy-to-use date picker.
Numeric (Numeric) #
For numbers such as turnover, number of employees or age. The field only accepts numeric values.
Using custom fields in forms #
Data you collect through a form field can be added directly to the contact’s custom field.
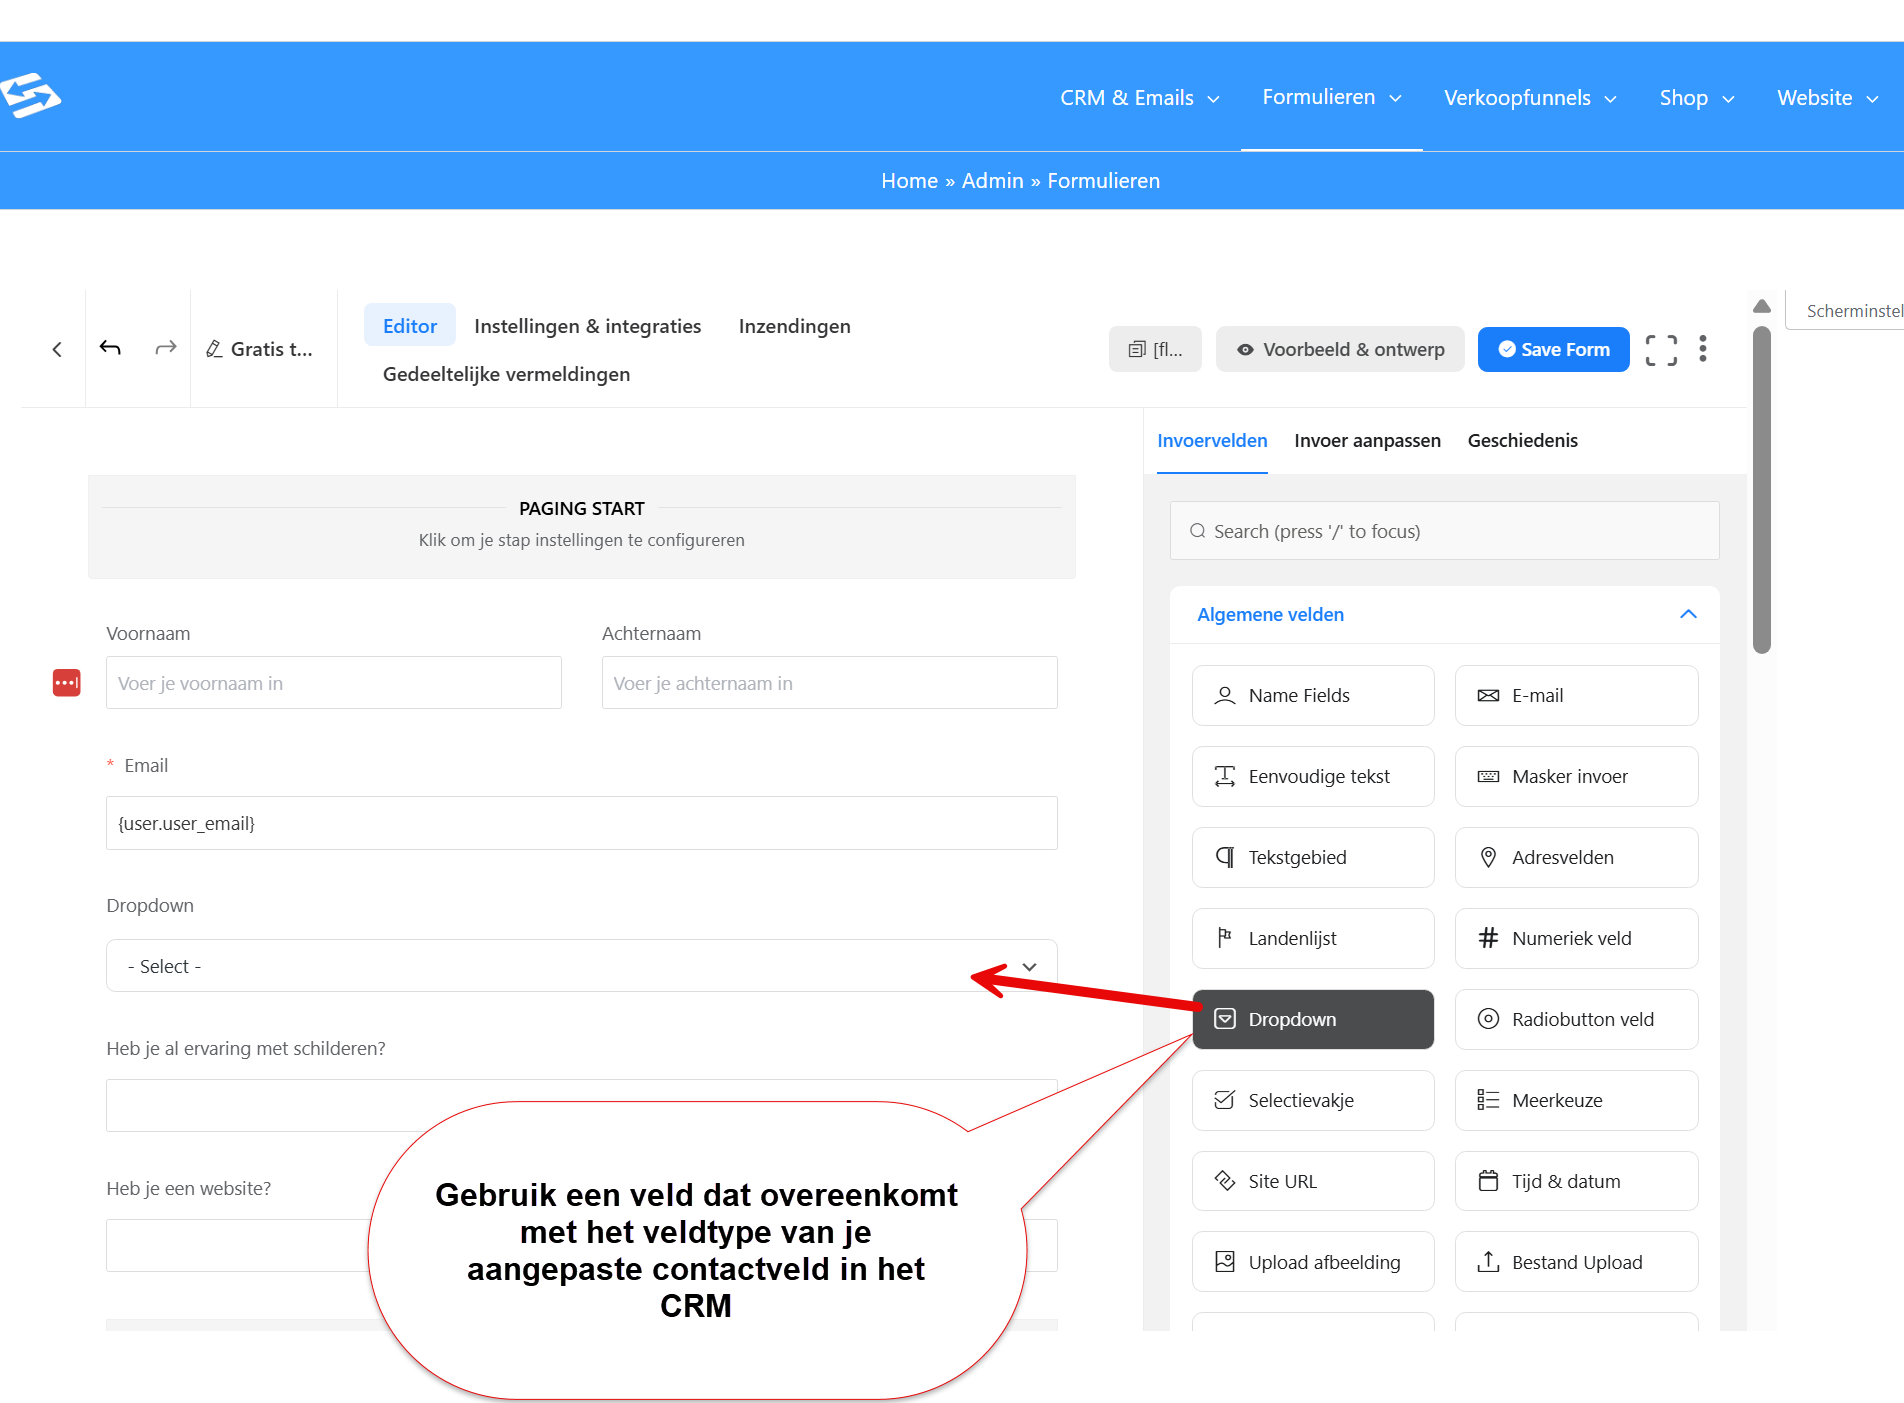
It is not possible to use a custom field you created in the CRM directly as a field in a form.
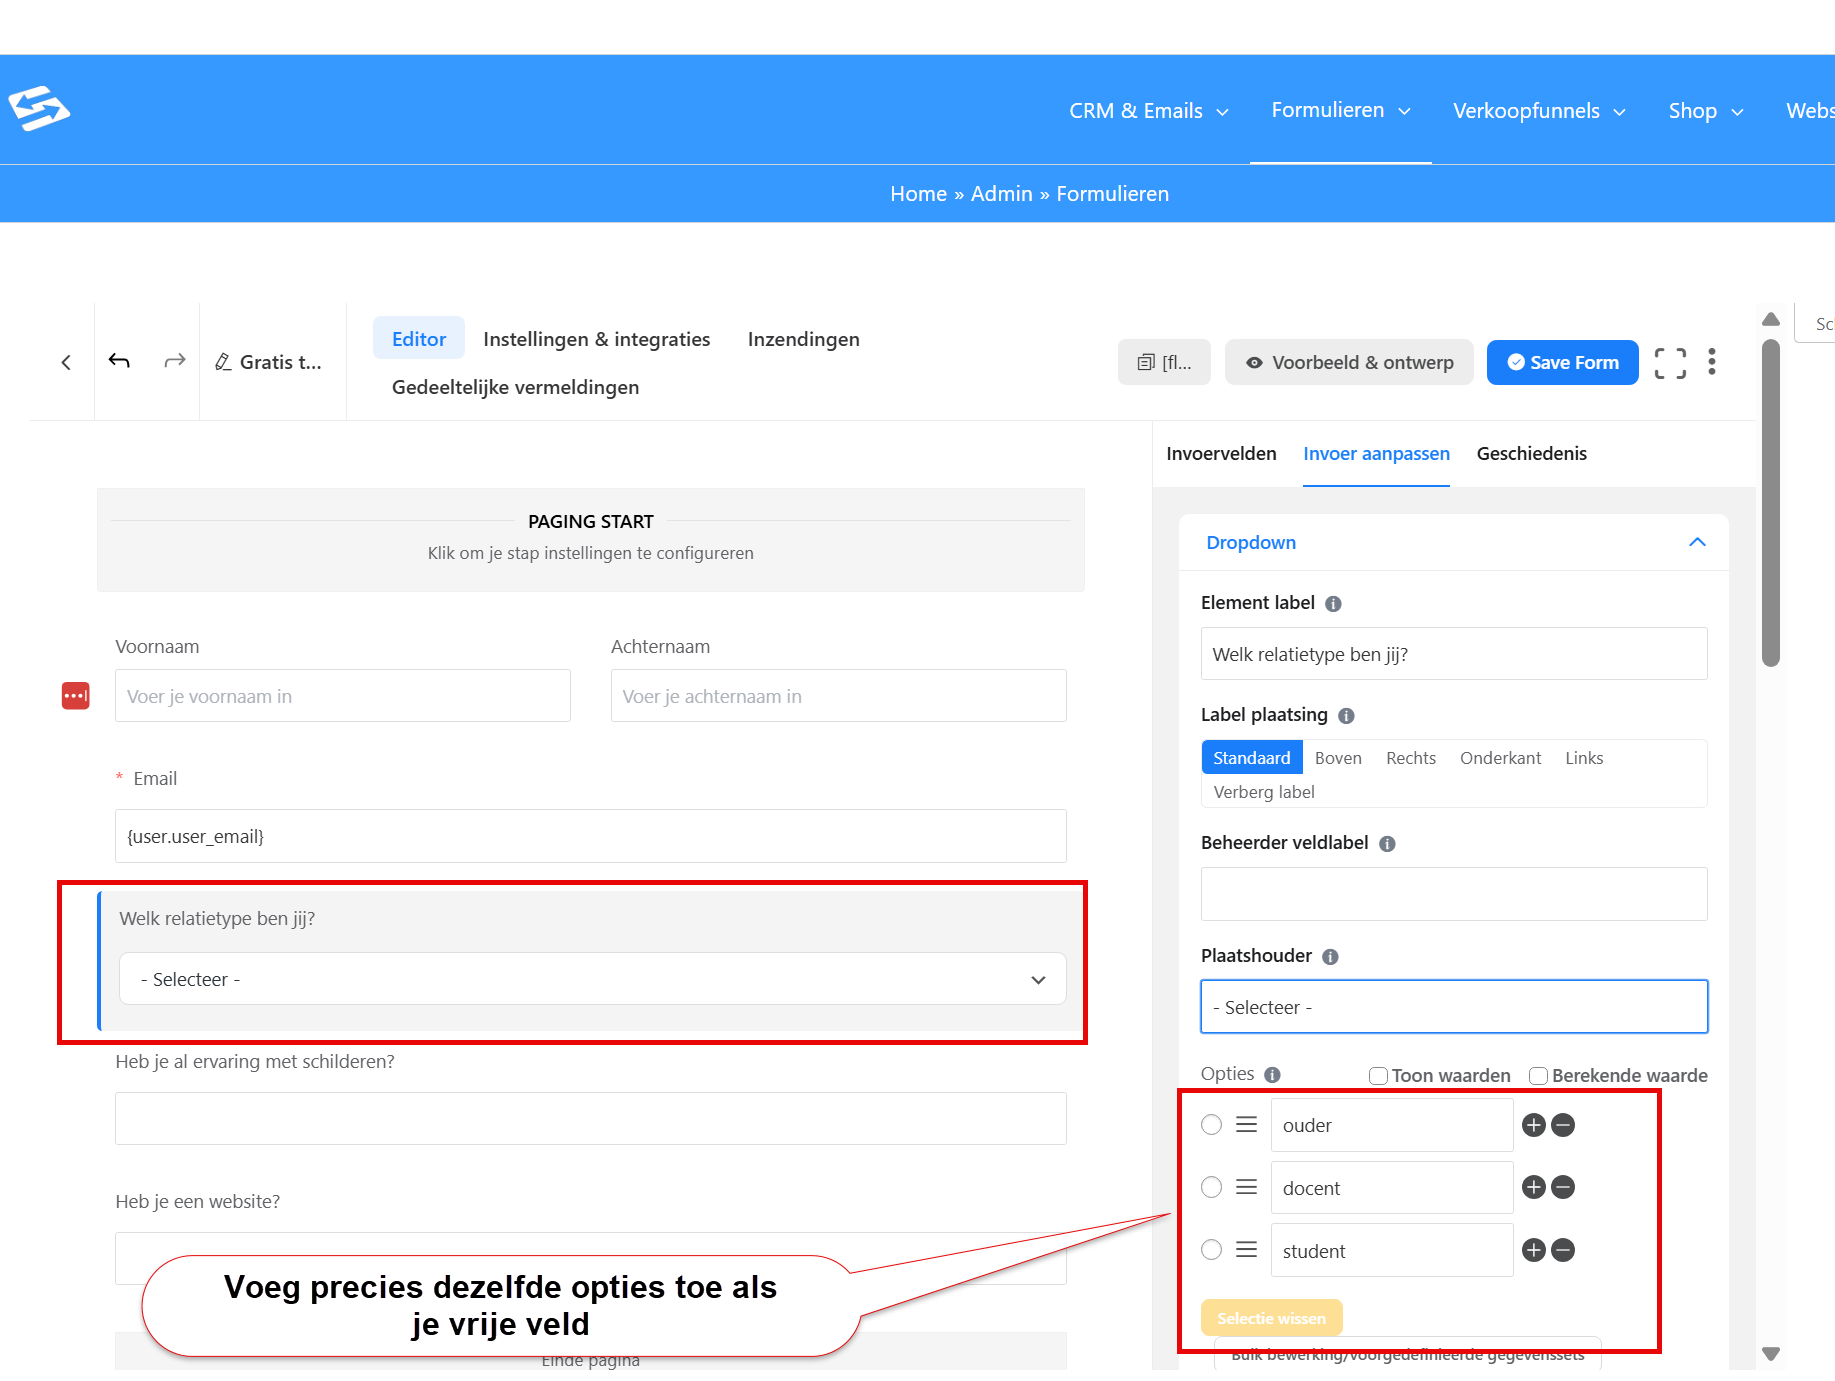
Add a field of your own that the visitor can fill in. For example: ‘which type of contact are you’. Make sure the options you set in this form are exactly the same as the options you set in the custom contact field you created in the CRM:
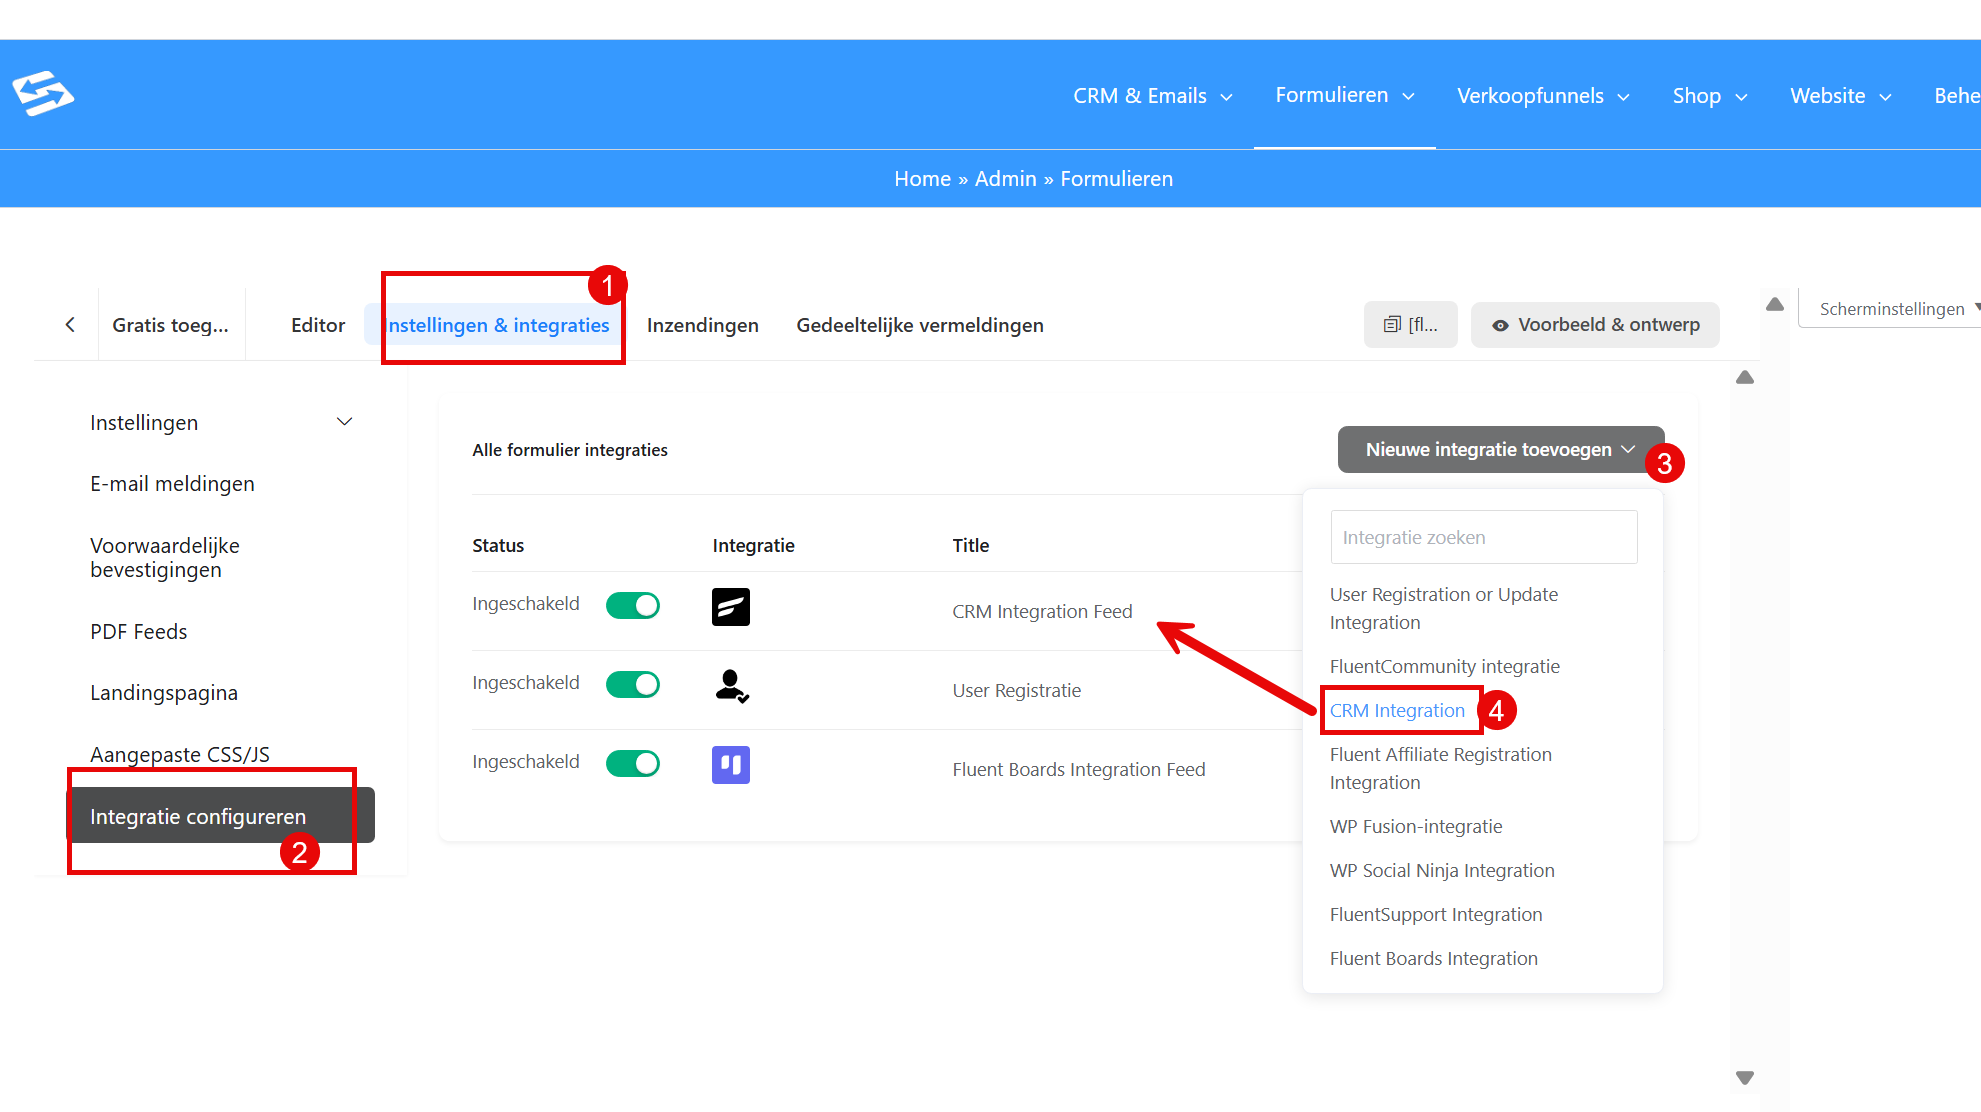
Save the form and then go to the ‘Settings & Integrations’ tab in the form. Click ‘Configure integration’ there and add a new configuration. Choose the ‘CRM integration’:
In the integration settings, first make sure the correct standard fields are linked to the correct fields of the form. The email address is essential, but you can also link the first name and surname fields. On the left you select the field that exists in your CRM and on the right you select the form field.
Under ‘Other fields’ you can then link the custom contact field. On the left select the custom contact field you created in the CRM and on the right select the form field:
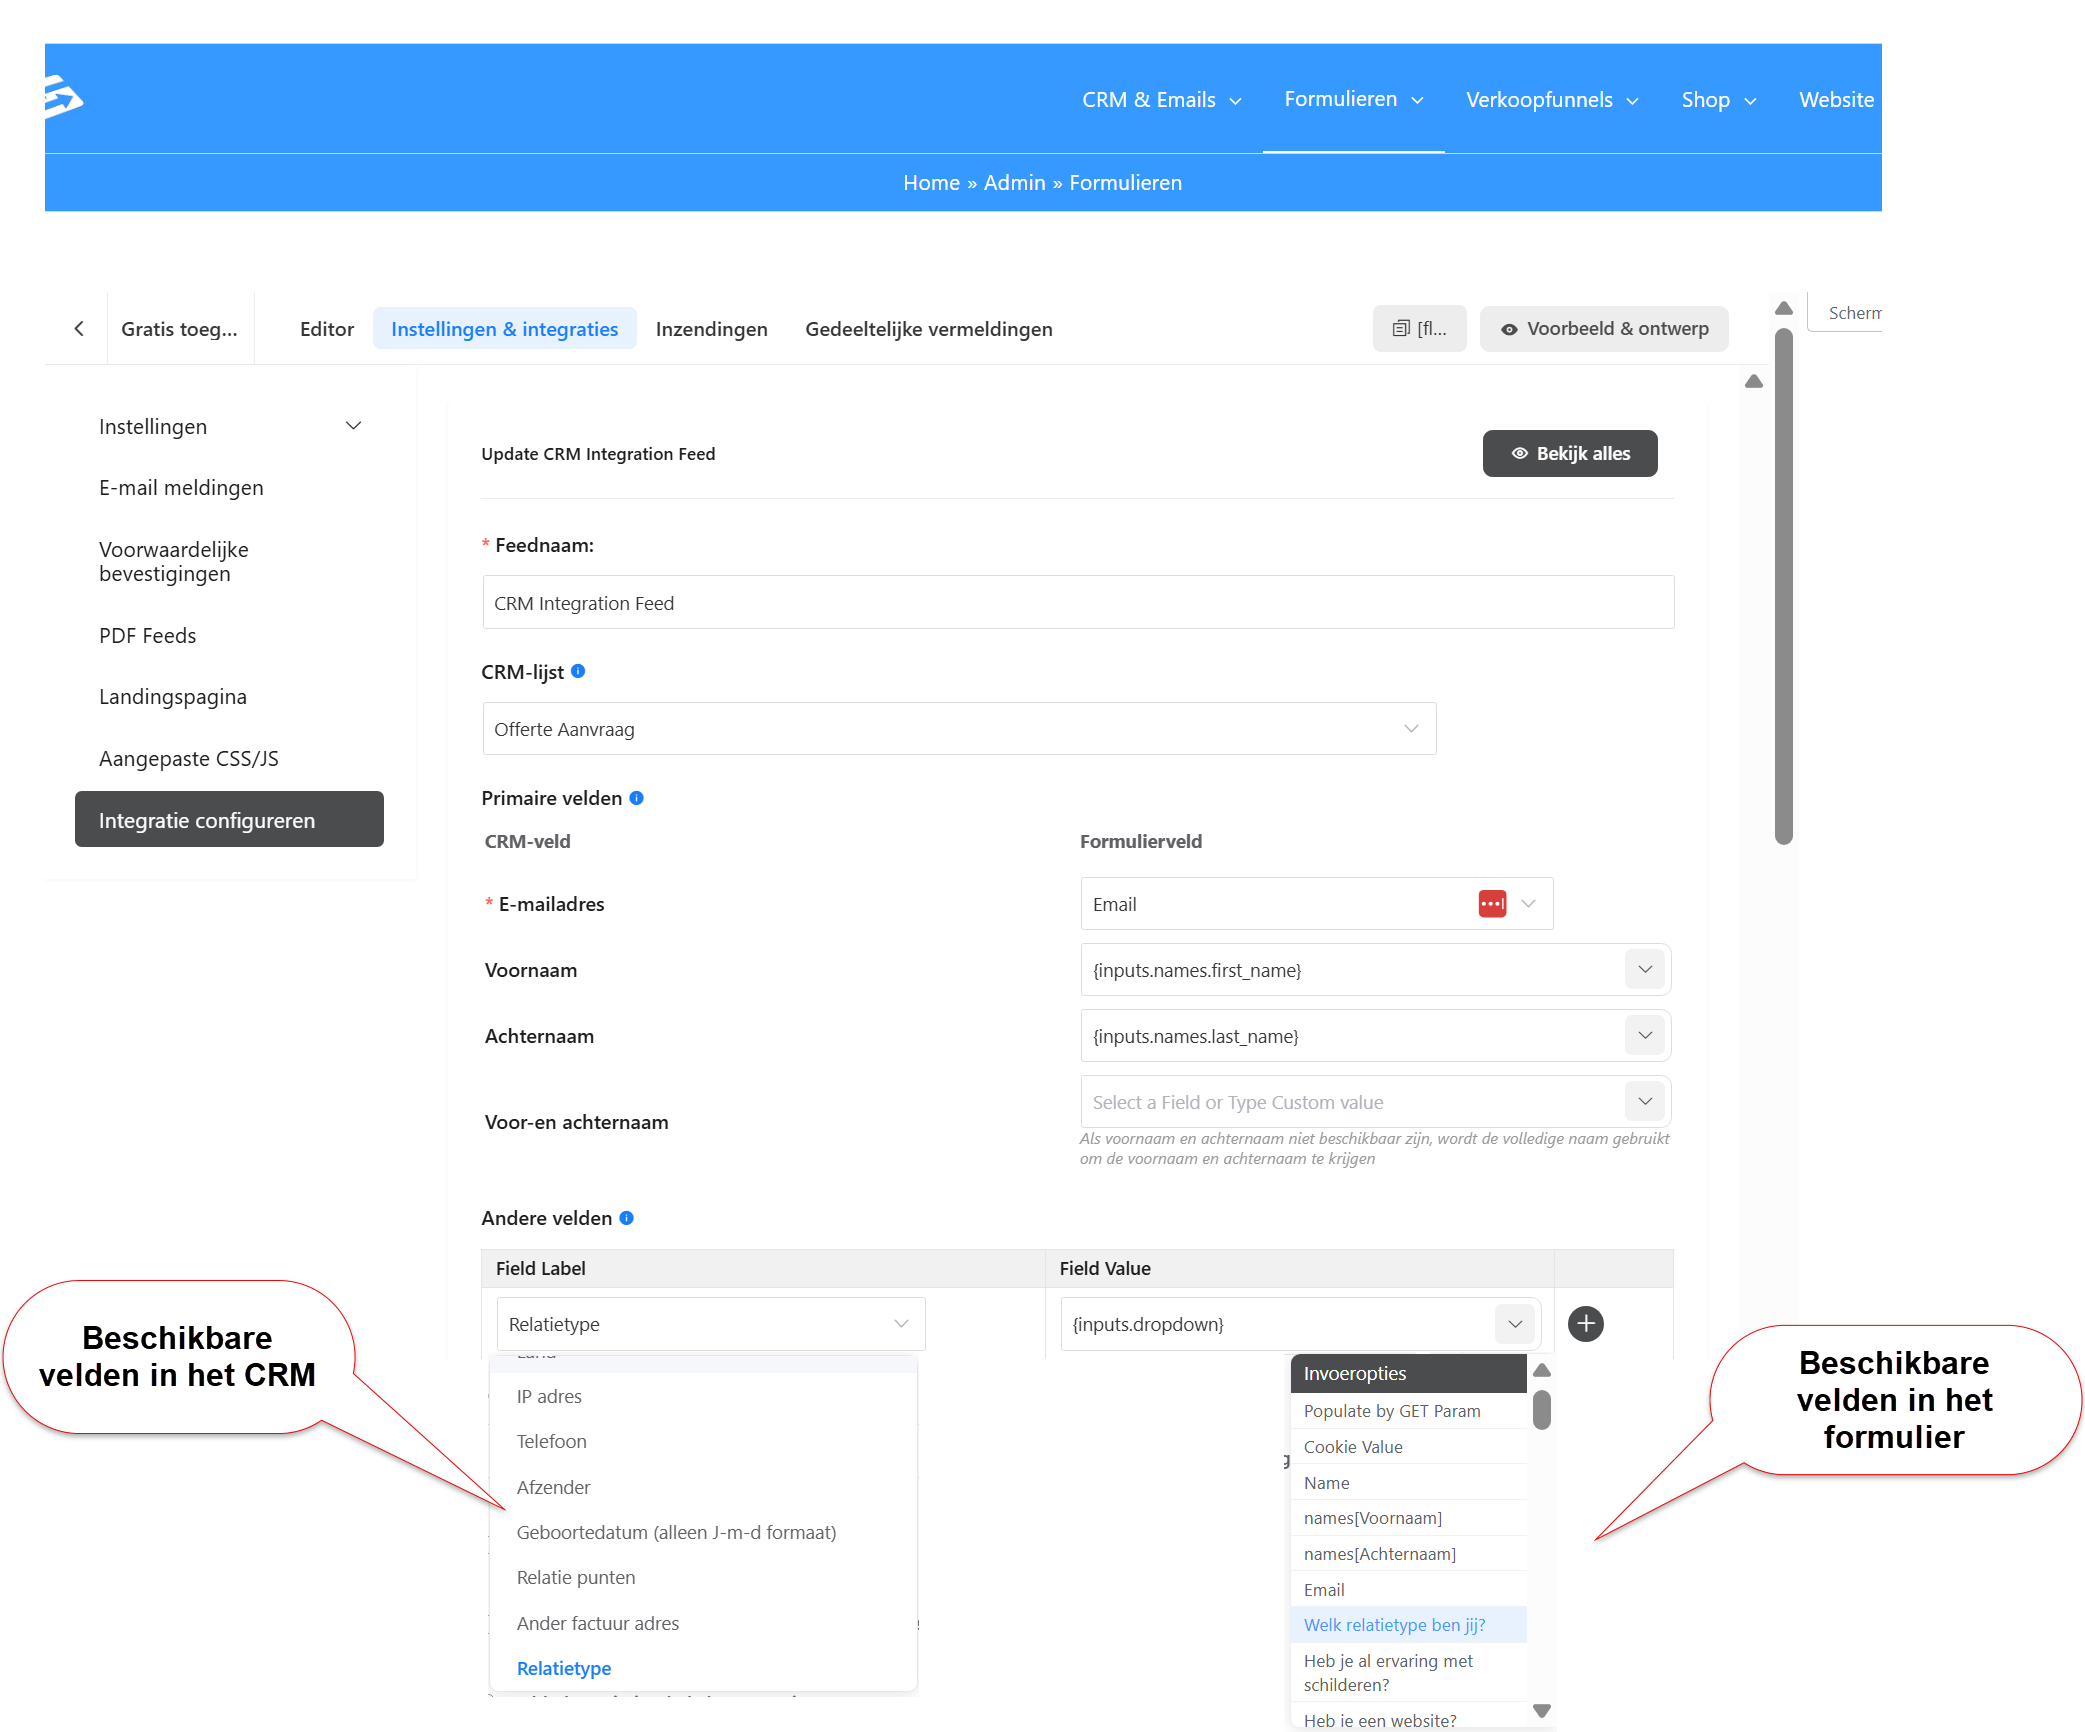
Save the integration settings and from that moment on the details of a new sign-up are set directly in the right custom contact field in your CRM.
For more information about forms and the CRM link, see linking form sign-ups to the CRM.
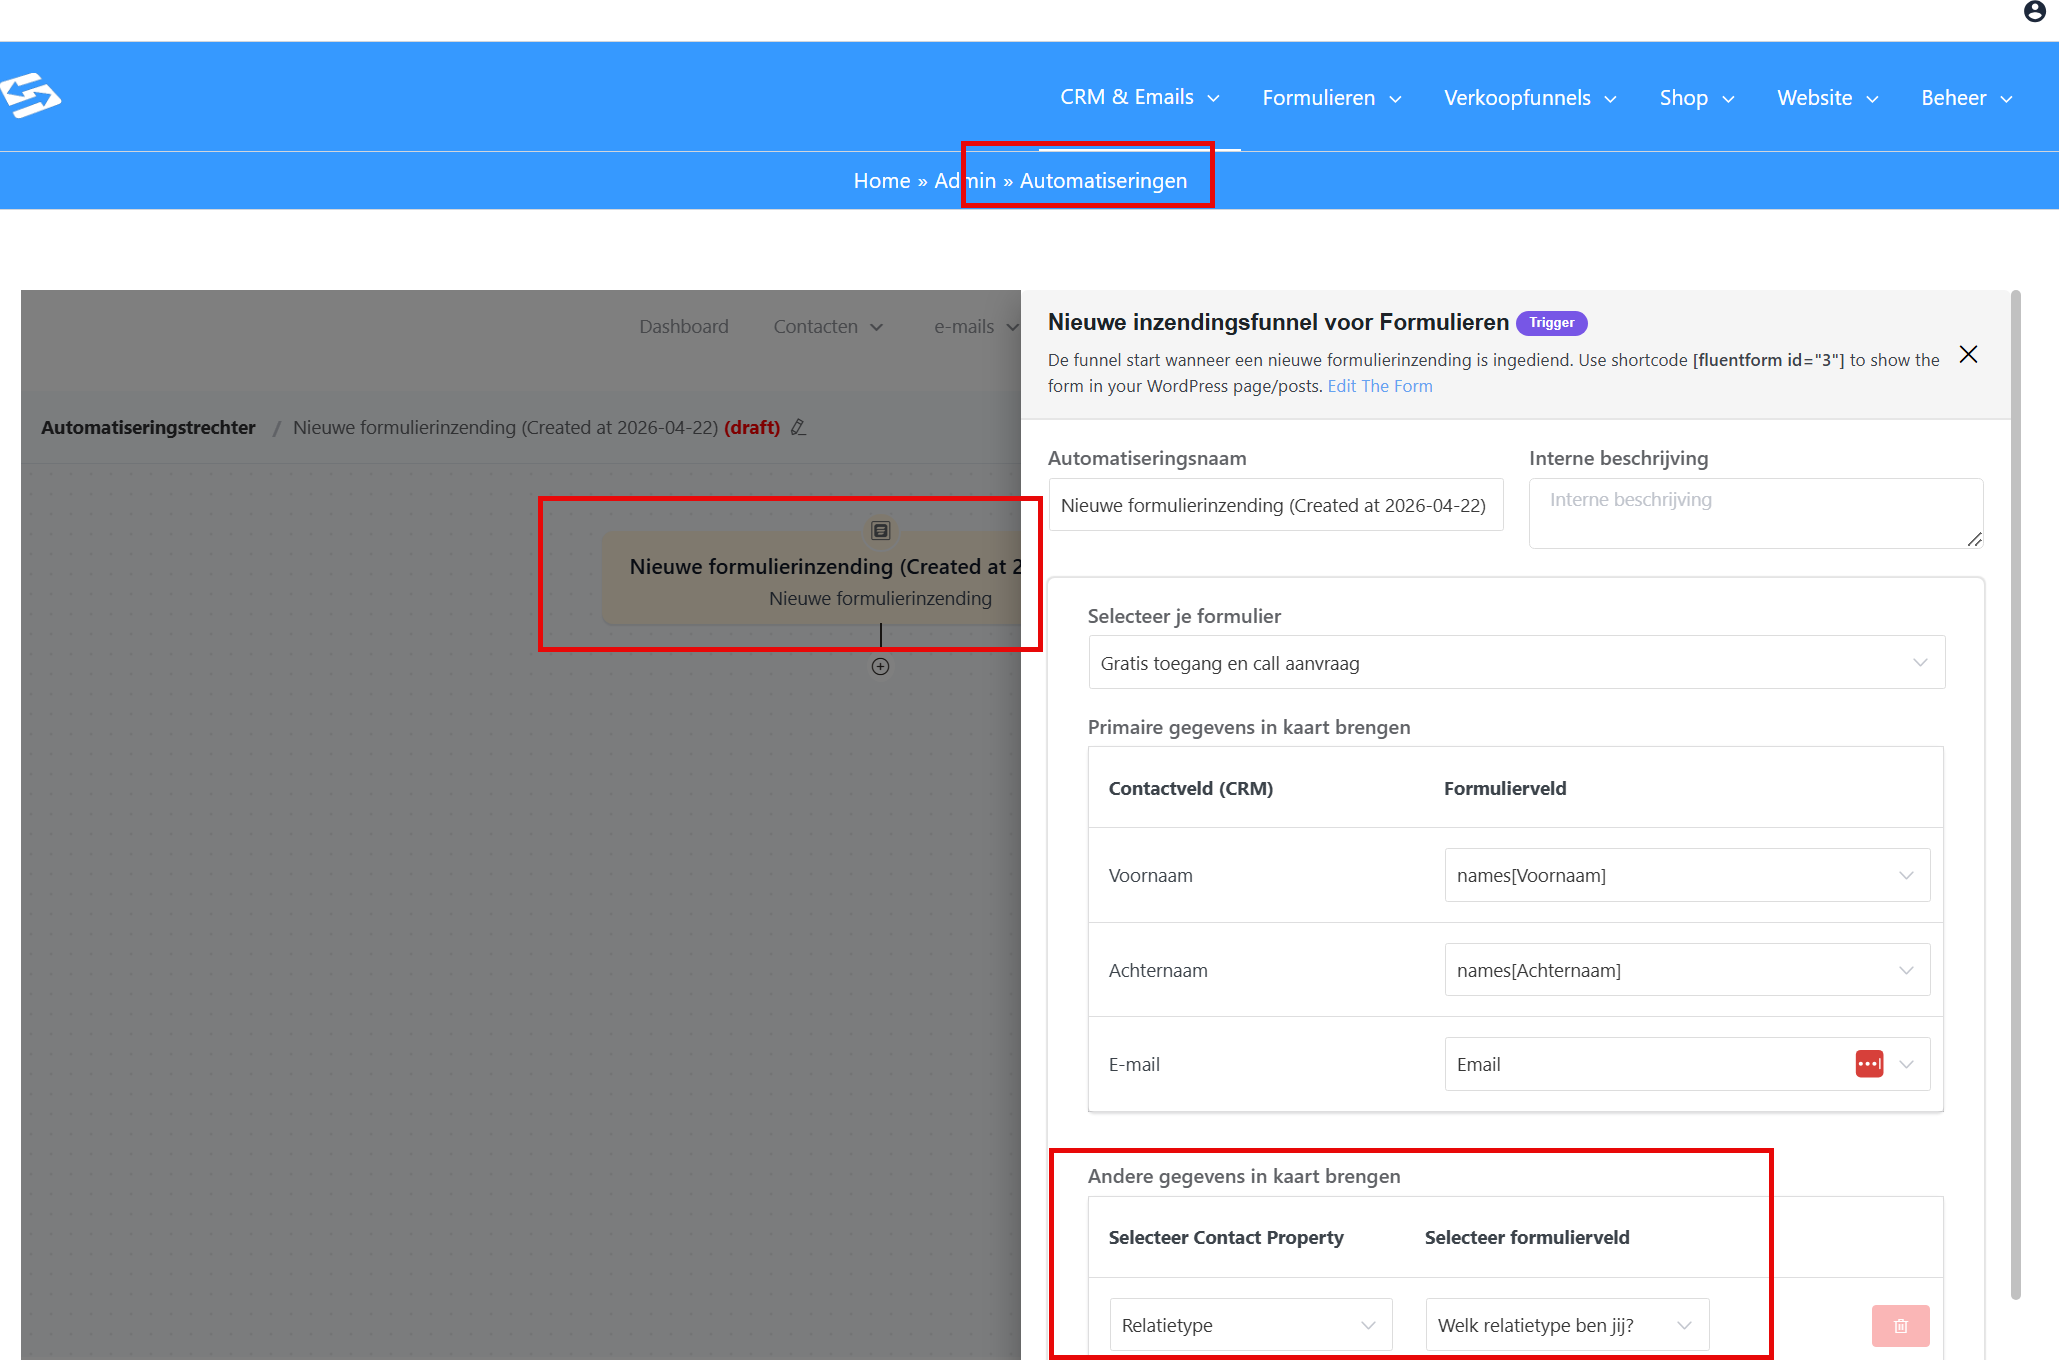
Are you using an Automation with the form as the start trigger? In that case you can also make sure, in that start step, that the value entered for the field in the form is linked to the right custom contact field in the CRM (so you do not need to use the integration in the form)
Using custom fields in email campaigns #
You can show the value of custom fields in your emails by using merge tags. The merge tag for a custom field is always:
{{contact.custom.fieldname}}
Replace “fieldname” with the exact name of your custom field, without spaces and in lower case. For example: if your field is called “Industry”, use {{contact.custom.industry}}.
You can use these merge tags in the subject line, the email text and even in conditional sections in emails to show personalised content based on the field value.
Segmentation with custom fields #
Custom fields are powerful for creating targeted lists and segments. You can filter contacts based on their custom field values:
- Go to CRM & Emails → Contacts
- Click “Advanced filters”
- Add a filter rule and select your custom field
- Choose the condition you want (equals, contains, does not equal, etc.)
- Enter the value you want to filter on
- Click “Apply filter”
You can then save this filtered list as a segment for future use in campaigns and automations.
Custom fields in automations #
Within automations you can use custom fields for both triggers and actions. For example, you can:
- Start an automation when a custom field is updated
- Change the value of a custom field as an action in an automation
- Set conditions based on custom field values
- Create different paths in your automation depending on custom field values
This makes complex, personalised automation flows possible, in which your contacts receive different treatment based on their specific characteristics.
Editing existing custom fields #
You can always adjust existing custom fields:
- Go to CRM & Emails → CRM Settings → Custom fields
- Click the pencil icon next to the field you want to edit
- Adjust the settings you want
- Click “Update field”
Please note: if you change the field type of a field that already contains data, existing data can be lost. Test this first with a small number of contacts before you make large changes.
Deleting custom fields #
Be careful when deleting custom fields. If you delete a field:
- All data in that field disappears permanently from every contact
- Merge tags that refer to that field no longer work in emails
- Automations that use the field can no longer function correctly
- The field disappears from every form where it was used
So always check where a field is used before you delete it.
Frequently asked questions #
How many custom fields can I create? #
There is no hard limit to the number of custom fields you can create, but do bear in mind how easy your forms are to use and how clear your contact details remain.
Can I change the order of options in a dropdown list? #
Yes, you can change the order by entering the options again in the order you want, using the edit function of the custom field.
Are custom fields included when importing contacts? #
Yes, when you import a CSV file you can link columns from your file to custom fields. Make sure the custom fields exist before you start importing.
Can I use custom fields in conditional email content? #
Yes, custom fields work perfectly in conditional sections. You can show different content based on the value of a custom field, which makes powerful personalisation possible.


