Importing contacts from files #
You can import contacts in bulk from CSV or Excel files into your Autorespond account. This is useful when you have contacts from external systems, spreadsheets, or other CRM systems that you want to bring across. The import function handles various file formats and offers advanced options for matching fields.
Please note: never import contacts that have not signed up to receive emails from you in line with GDPR legislation. That means through a double opt-in process in which they have confirmed ownership of their email address and their sign-up for your emails.
You are responsible for your own mail reputation
For each Autorespond account, Autorespond monitors the spam rate and the mail reputation at receiving mail servers. Our mail server providers apply a lower limit for this mail reputation. If the mail reputation deteriorates below this limit, our mail server provider may suspend the service until the problems have been resolved. To protect our overall mail reputation we will intervene immediately if we see that emails from your account are marked as spam or blocked by receiving mail servers far more often than normal. (see also our terms and conditions)
We take spam complaints very seriously: do not import or email contacts that have not given explicit permission to be emailed (through double opt-in). Comply with GDPR legislation
Preparing your import file #
Before you start importing, it is important that your file is formatted correctly. Use CSV format where possible, because this works most reliably. Excel files (.xlsx) are supported too but can sometimes cause encoding problems.
Make sure the first row of your file contains the column names. Use clear names such as “first name”, “last name”, “email”, “company” or “phone”. Remove empty rows and check that email addresses are formatted correctly. Contacts without a valid email address cannot be imported, because email is the primary identification field.
Watch the size of your file. For very large files (more than 10,000 contacts) it can be sensible to split it into smaller parts to avoid time-outs.
Importing contacts step by step #
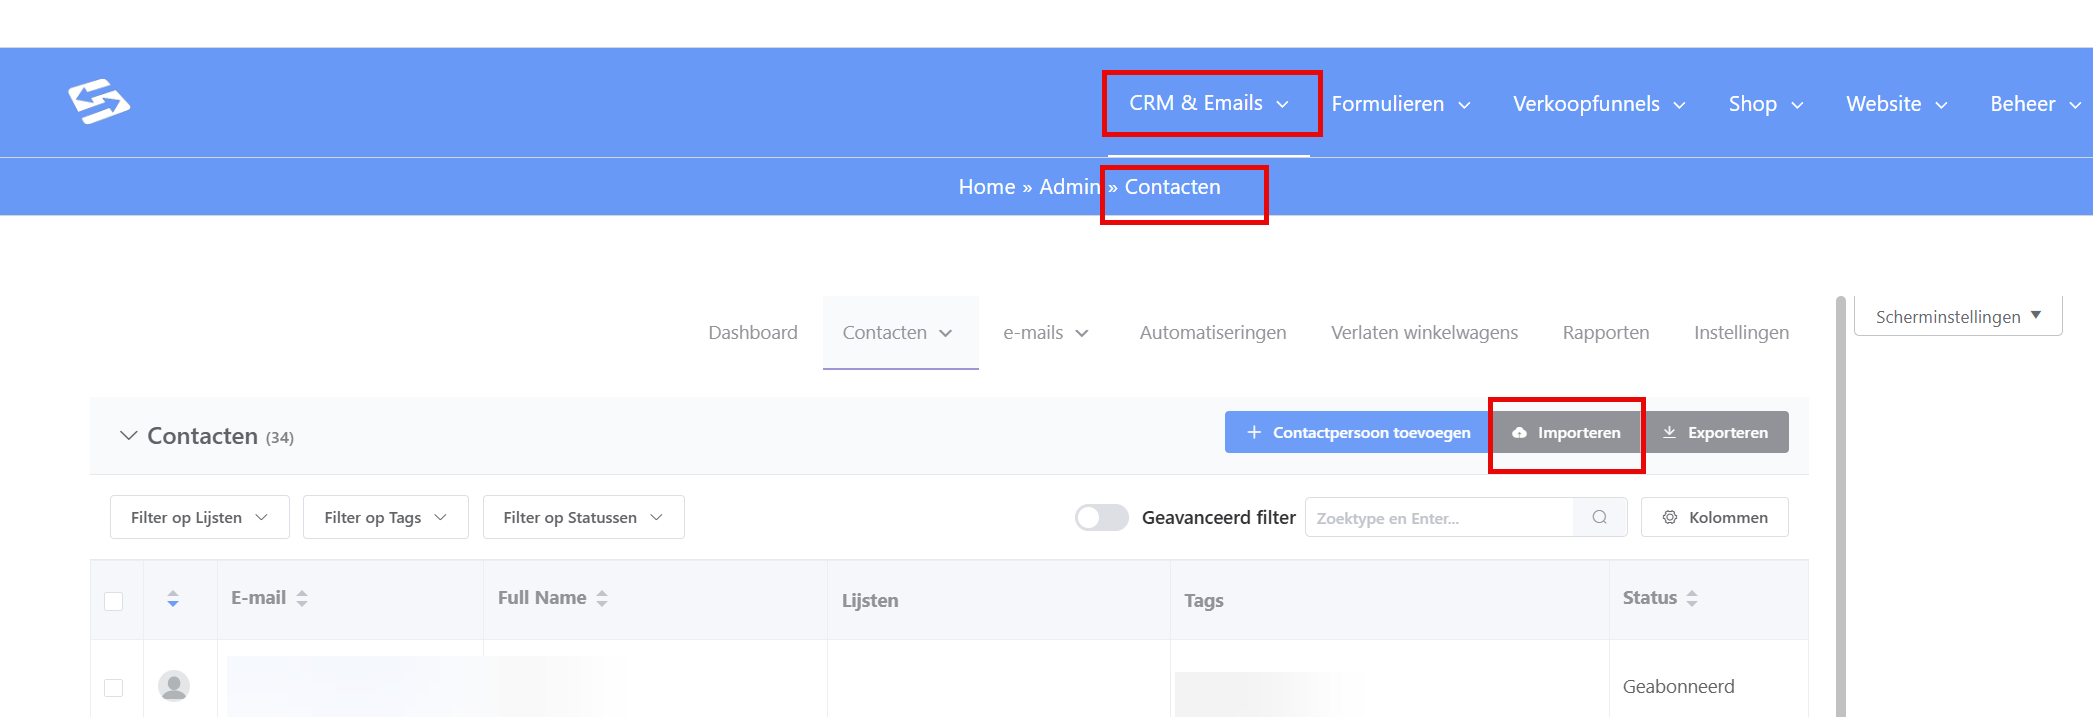
In your Autorespond account, go to CRM & Emails → Contacts. Click the “Import” button in the top right to start the import process.
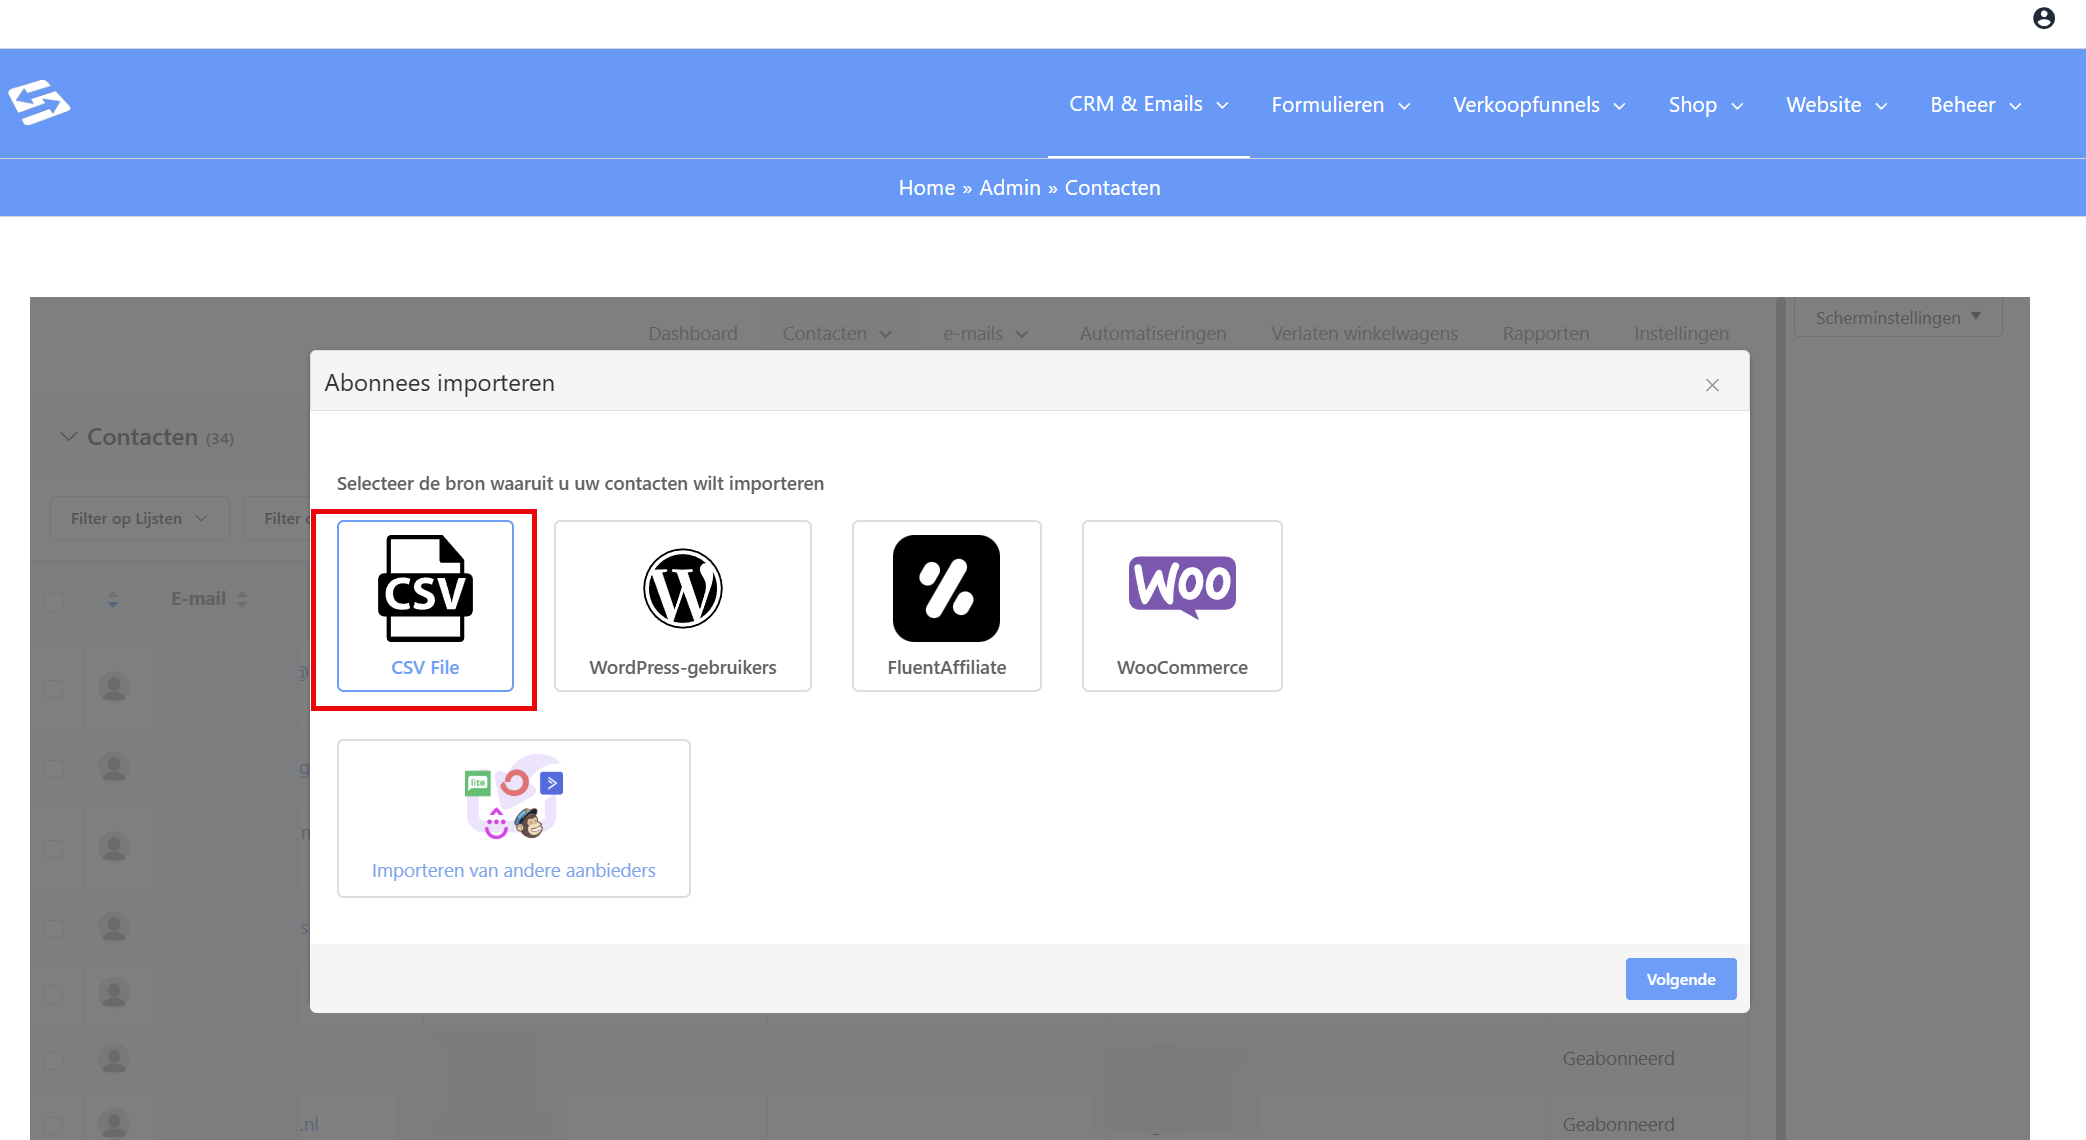
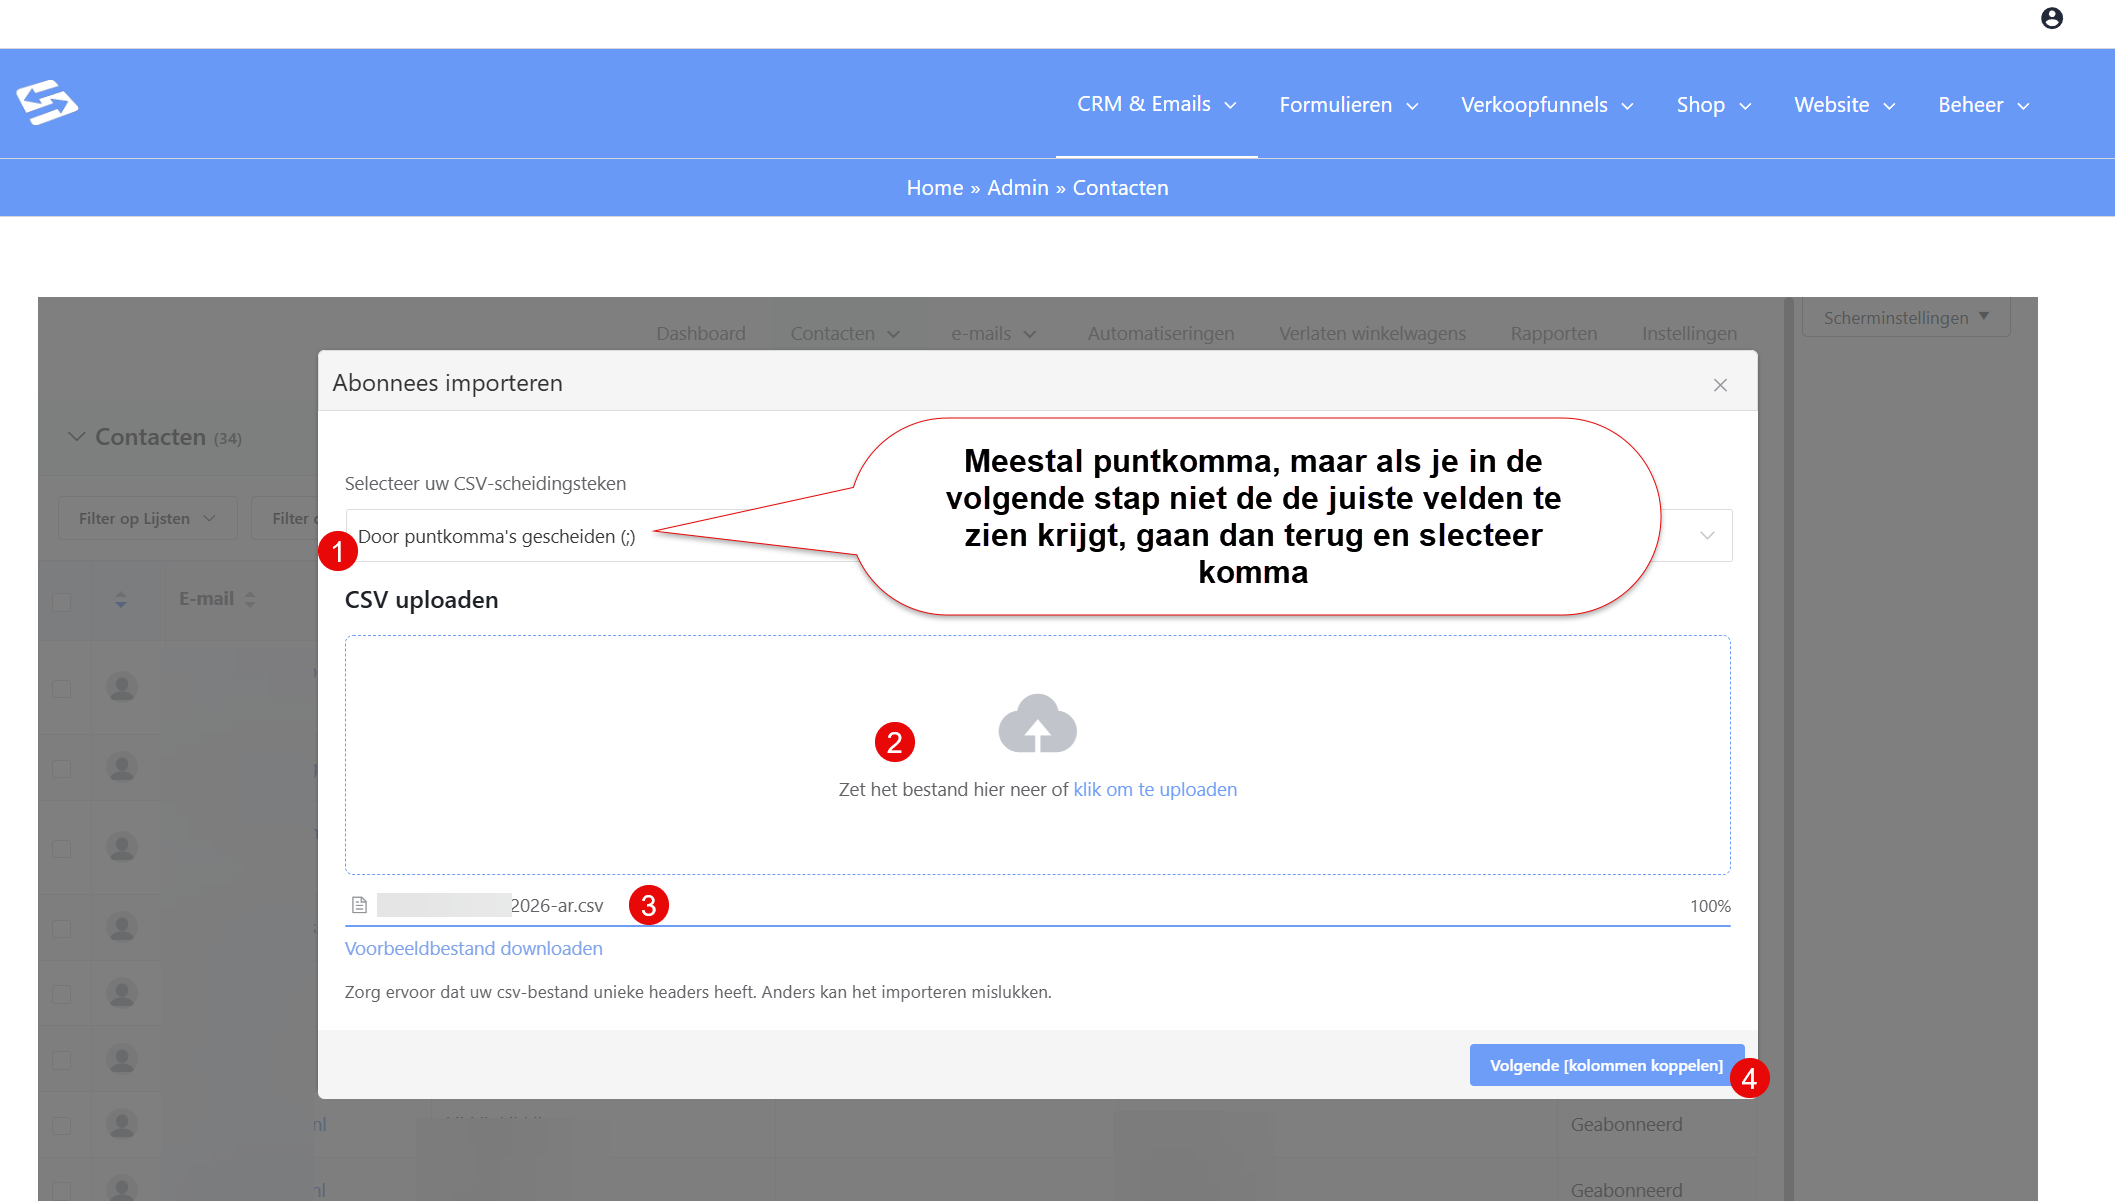
- Upload the file: Click “Choose file” and select your CSV or Excel file. The system analyses the structure of your file automatically and shows a preview of the first rows.
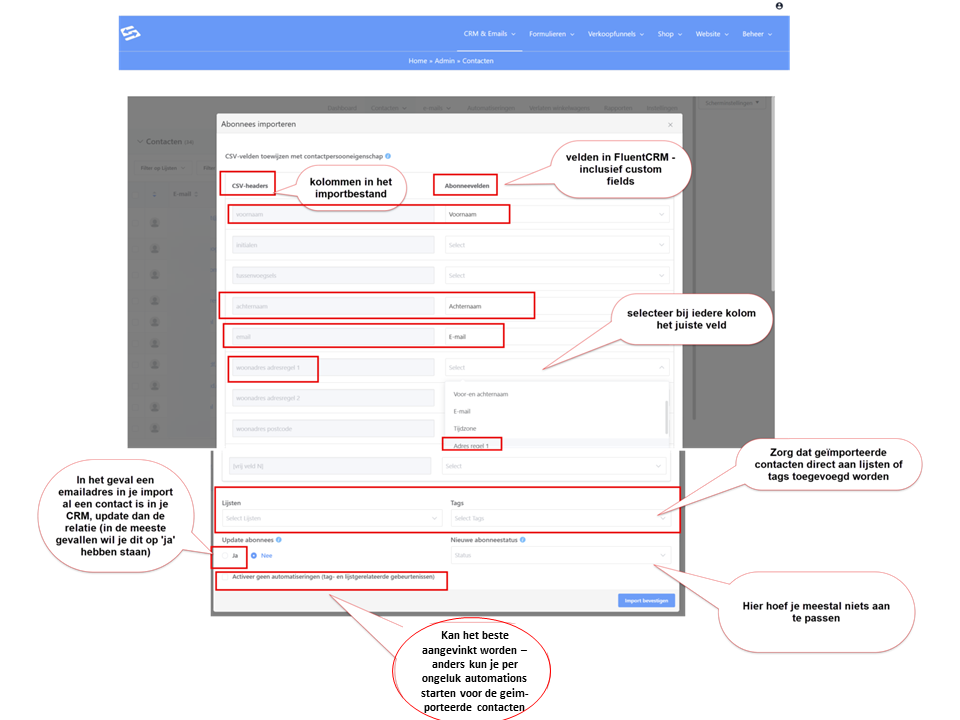
- Match the fields: In the next step you indicate which columns from your file correspond to which fields in the CRM. The system tries to recognise automatically which column is which, but always check this manually. You can match fields with standard contact fields such as name and email, and also with custom fields you created earlier.
- Configure the import settings: Set what should happen with existing email addresses. You can choose to update existing contacts or to leave them as they are.
- Assign tags and lists: You can automatically give all imported contacts a tag or add them to a list. This makes it easy to filter later on who came in through this import.
- Set the status: Decide which status the imported contacts receive. Only choose “Subscribed” if you are certain that these contacts have given permission for email marketing. If in doubt, choose “Double opt-in required” so that contacts have to confirm their permission first.
- Do not trigger automations: Imported contacts may, for example, have a tag that would trigger (activate) an existing automation. Ticking this box ON makes sure that does not happen. If you leave the box unticked, the automations are triggered (which is usually not what you want).
Once you confirm all settings, the import process starts. Depending on the size of your file this can take a few minutes. You see a notification when the import is complete, including an overview of how many contacts were imported successfully.
Using custom fields during an import #
If you want to import extra information that does not fit into the standard contact fields (name, email, phone), you can use custom fields. You have to create these before you can import.
Go to CRM & Emails → CRM Settings → Custom fields to add new fields. Give each field a clear name and choose the right type (text, number, date, and so on). Once saved, these fields are available in the import process.
Common problems and solutions #
If contacts are not imported, check whether the email addresses are valid and do not contain special characters. Empty email fields cause the entire row to be skipped.
For encoding problems (odd characters in names or company names), save your CSV file with UTF-8 encoding. In Excel you do this through File → Save as → CSV UTF-8.
Is the import taking too long? Split large files into parts of no more than 5,000 contacts at a time. This prevents time-outs and makes the process more reliable.
After the import: checking contacts #
After every import, check that everything came across correctly. Filter the contact list on the tag or list you assigned during the import. Look at a number of contacts to see whether the fields are filled in correctly and whether any odd characters have appeared.
Did you import contacts with the status “Double opt-in required”? Then you need to send a confirmation campaign in which contacts can confirm their permission. Only then can you legally send them emails for marketing purposes.
The import functionality in Autorespond is based on FluentCRM, included in your package. Read the FluentCRM documentation


