To receive payments in your shop and sales funnels you use Mollie: the payment provider that handles iDEAL, credit card, Bancontact and other payment methods. Direct debits for subscriptions also run through Mollie. In this article you connect your own Mollie account to your Autorespond environment. You do that in two parts: first you create an API key in the Mollie dashboard, then you paste that key into the shop settings of your Autorespond environment.
The payments in your Autorespond shop run through the Mollie integration for WooCommerce – included in your package. Read the Mollie documentation
What you need #
- Your own Mollie account. If you do not have one yet, create it first at mollie.com.
- An account activated by Mollie. After you sign up, Mollie checks your company details; only then can you receive real payments. Test payments can be made straight away.
Step 1: open the Developers section in Mollie #
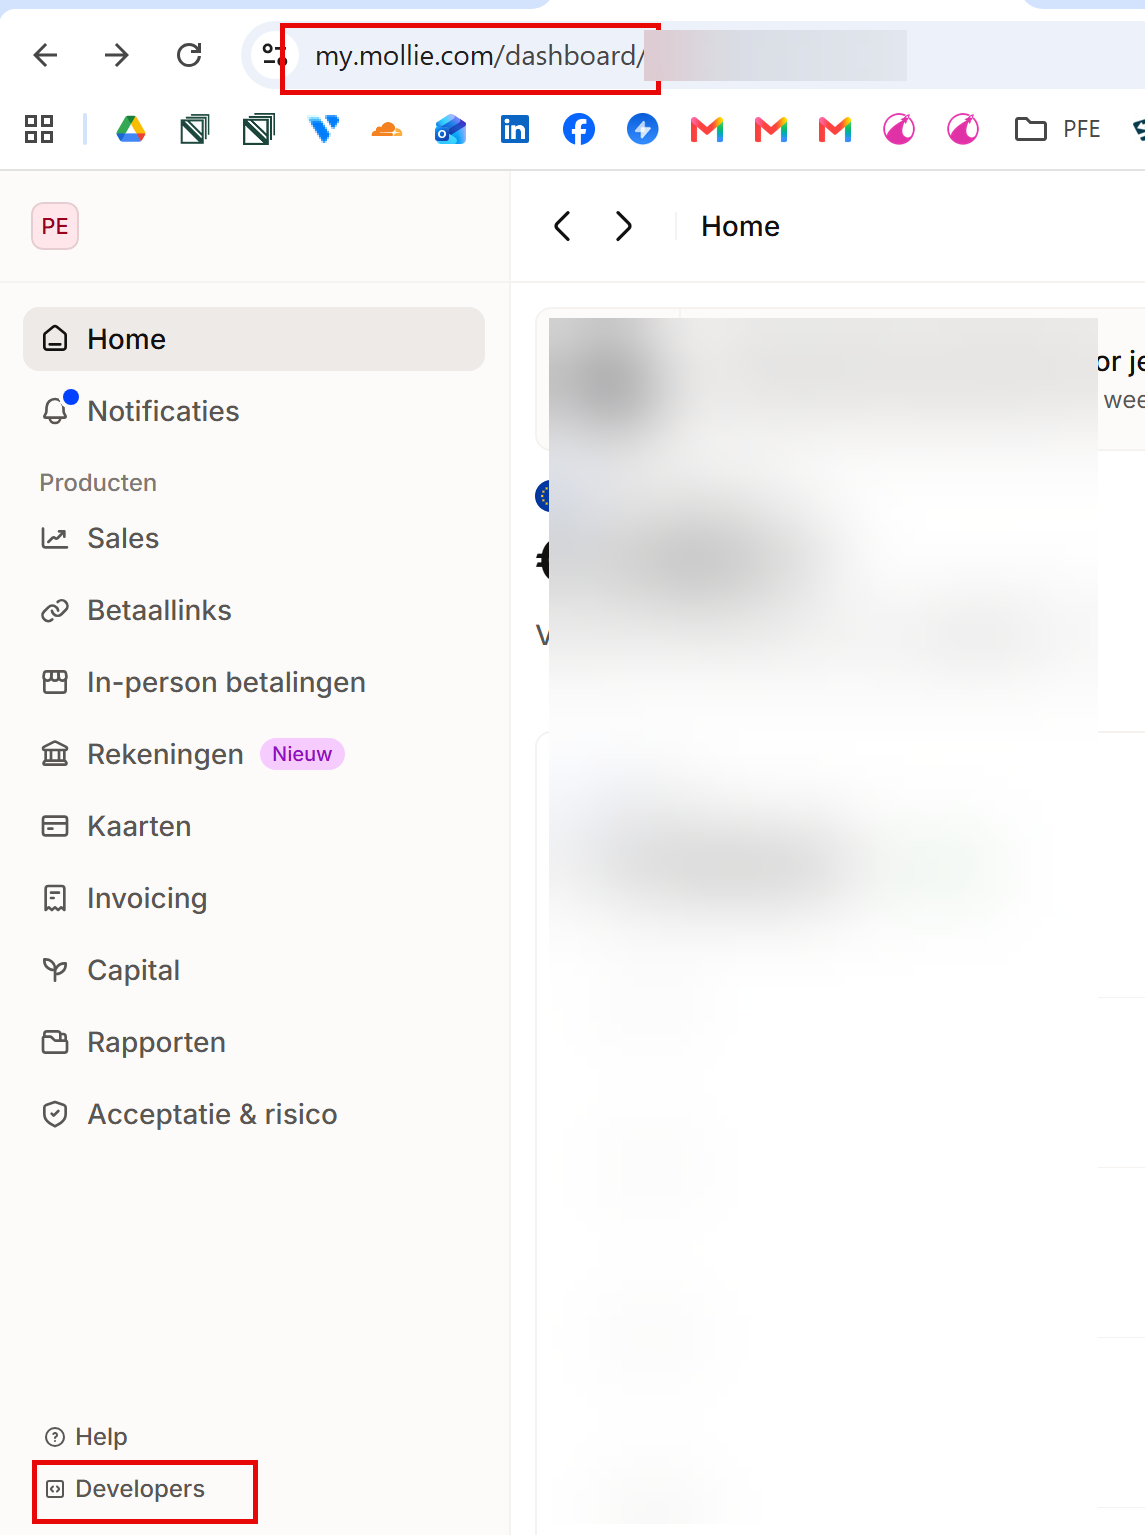
Log in to your Mollie dashboard at my.mollie.com. In the menu on the left, right at the bottom, click Developers (see the red frame at the bottom left).
Step 2: create a new access token #
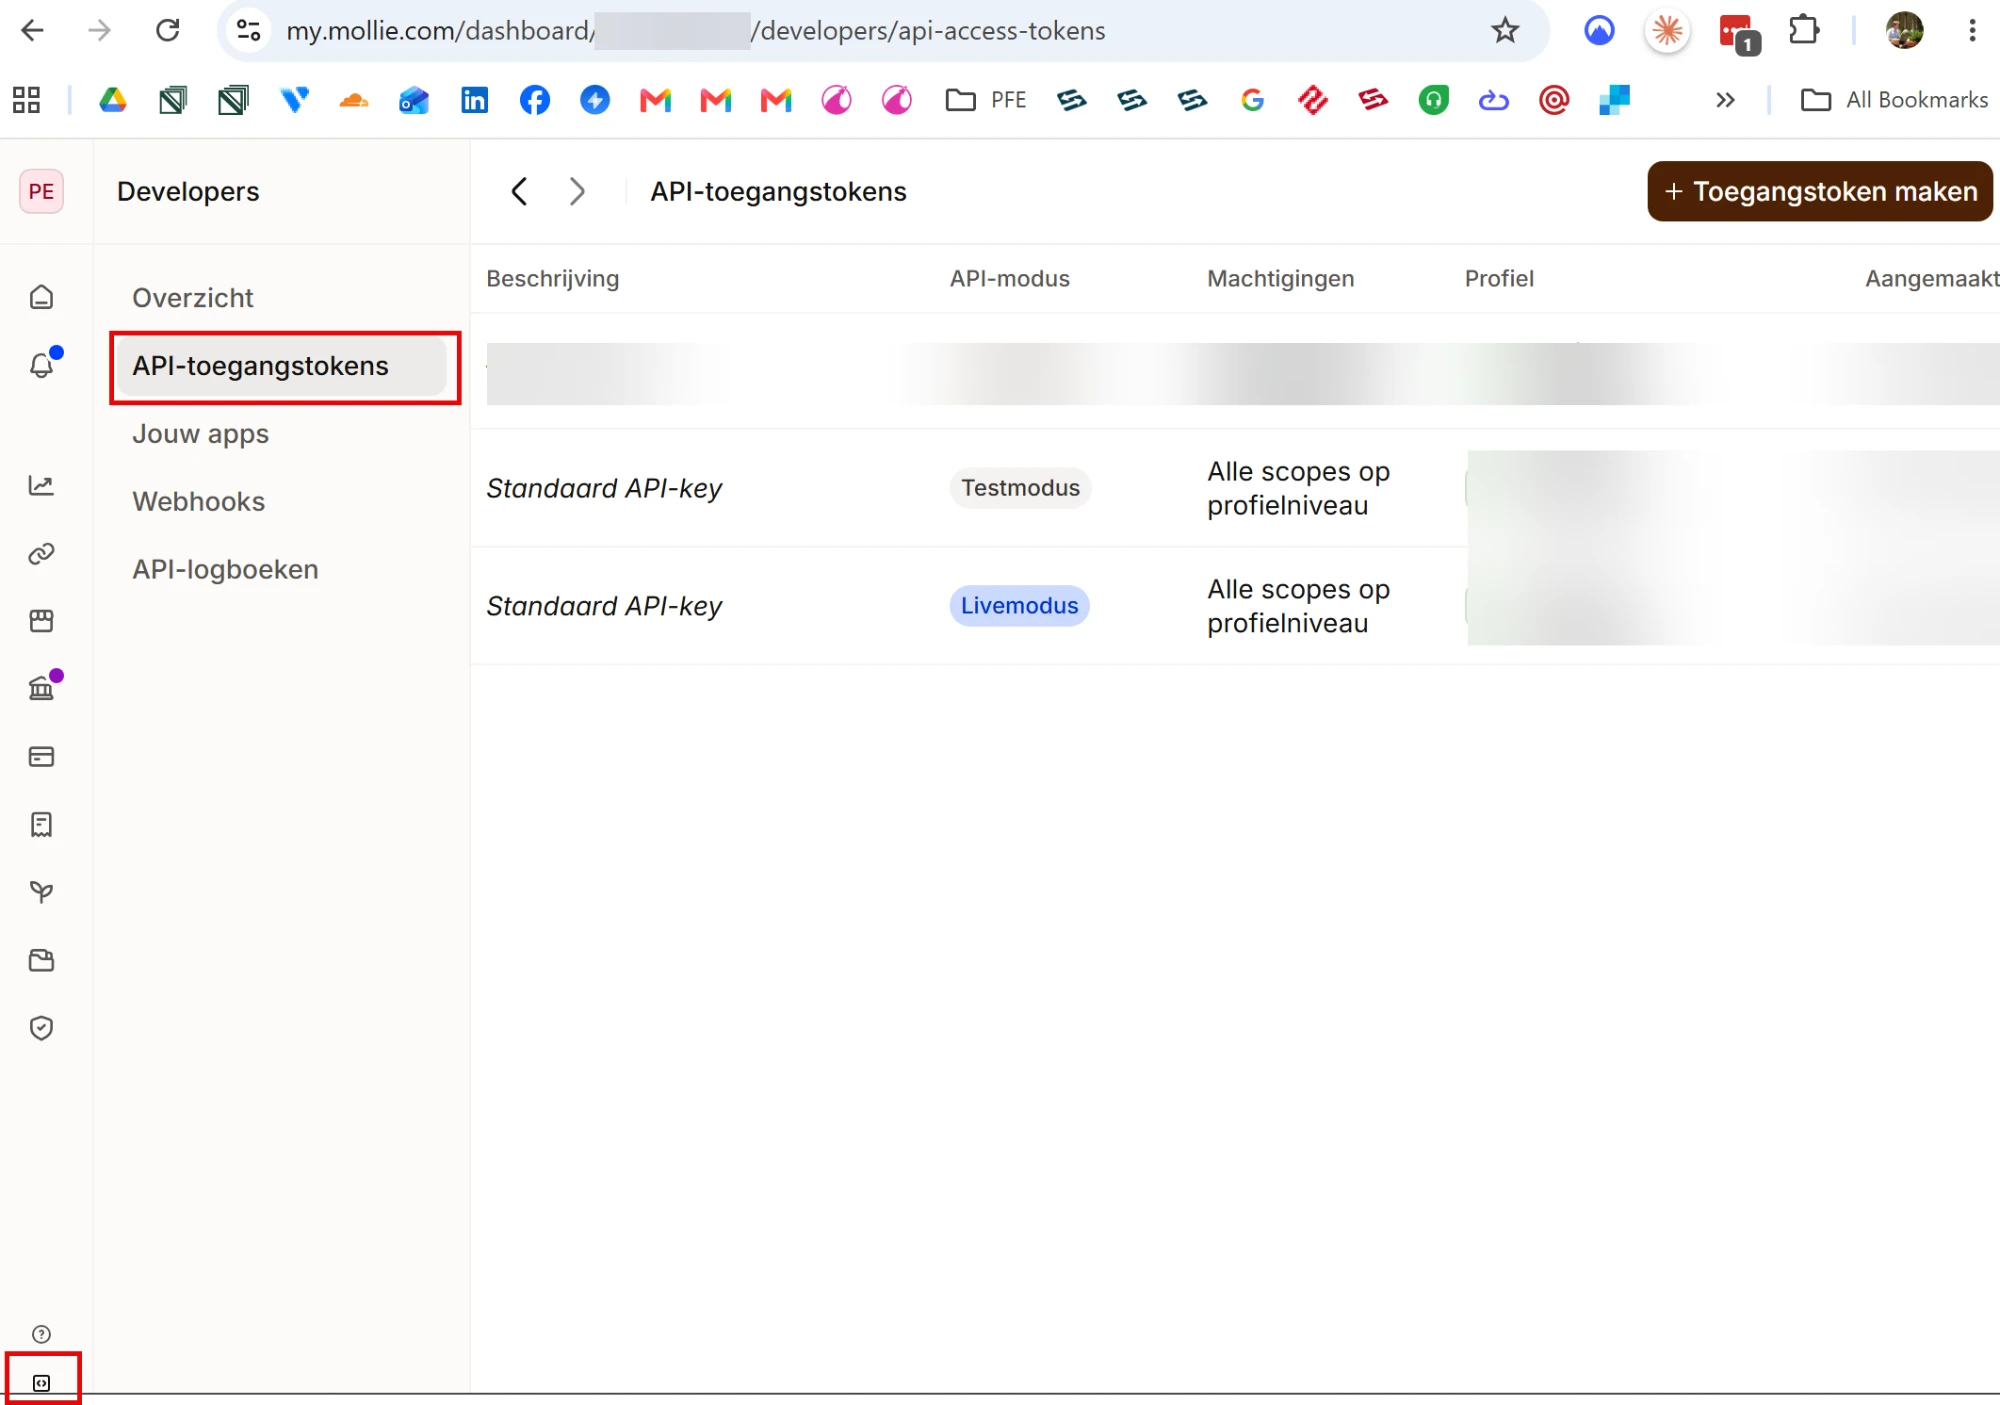
In the Developers menu, click API access tokens. Here you see the tokens that already exist; most accounts already have a Standard API key in test mode and one in live mode by default. Click + Create access token at the top right to create your own token for the integration.
Step 3: configure the access token #
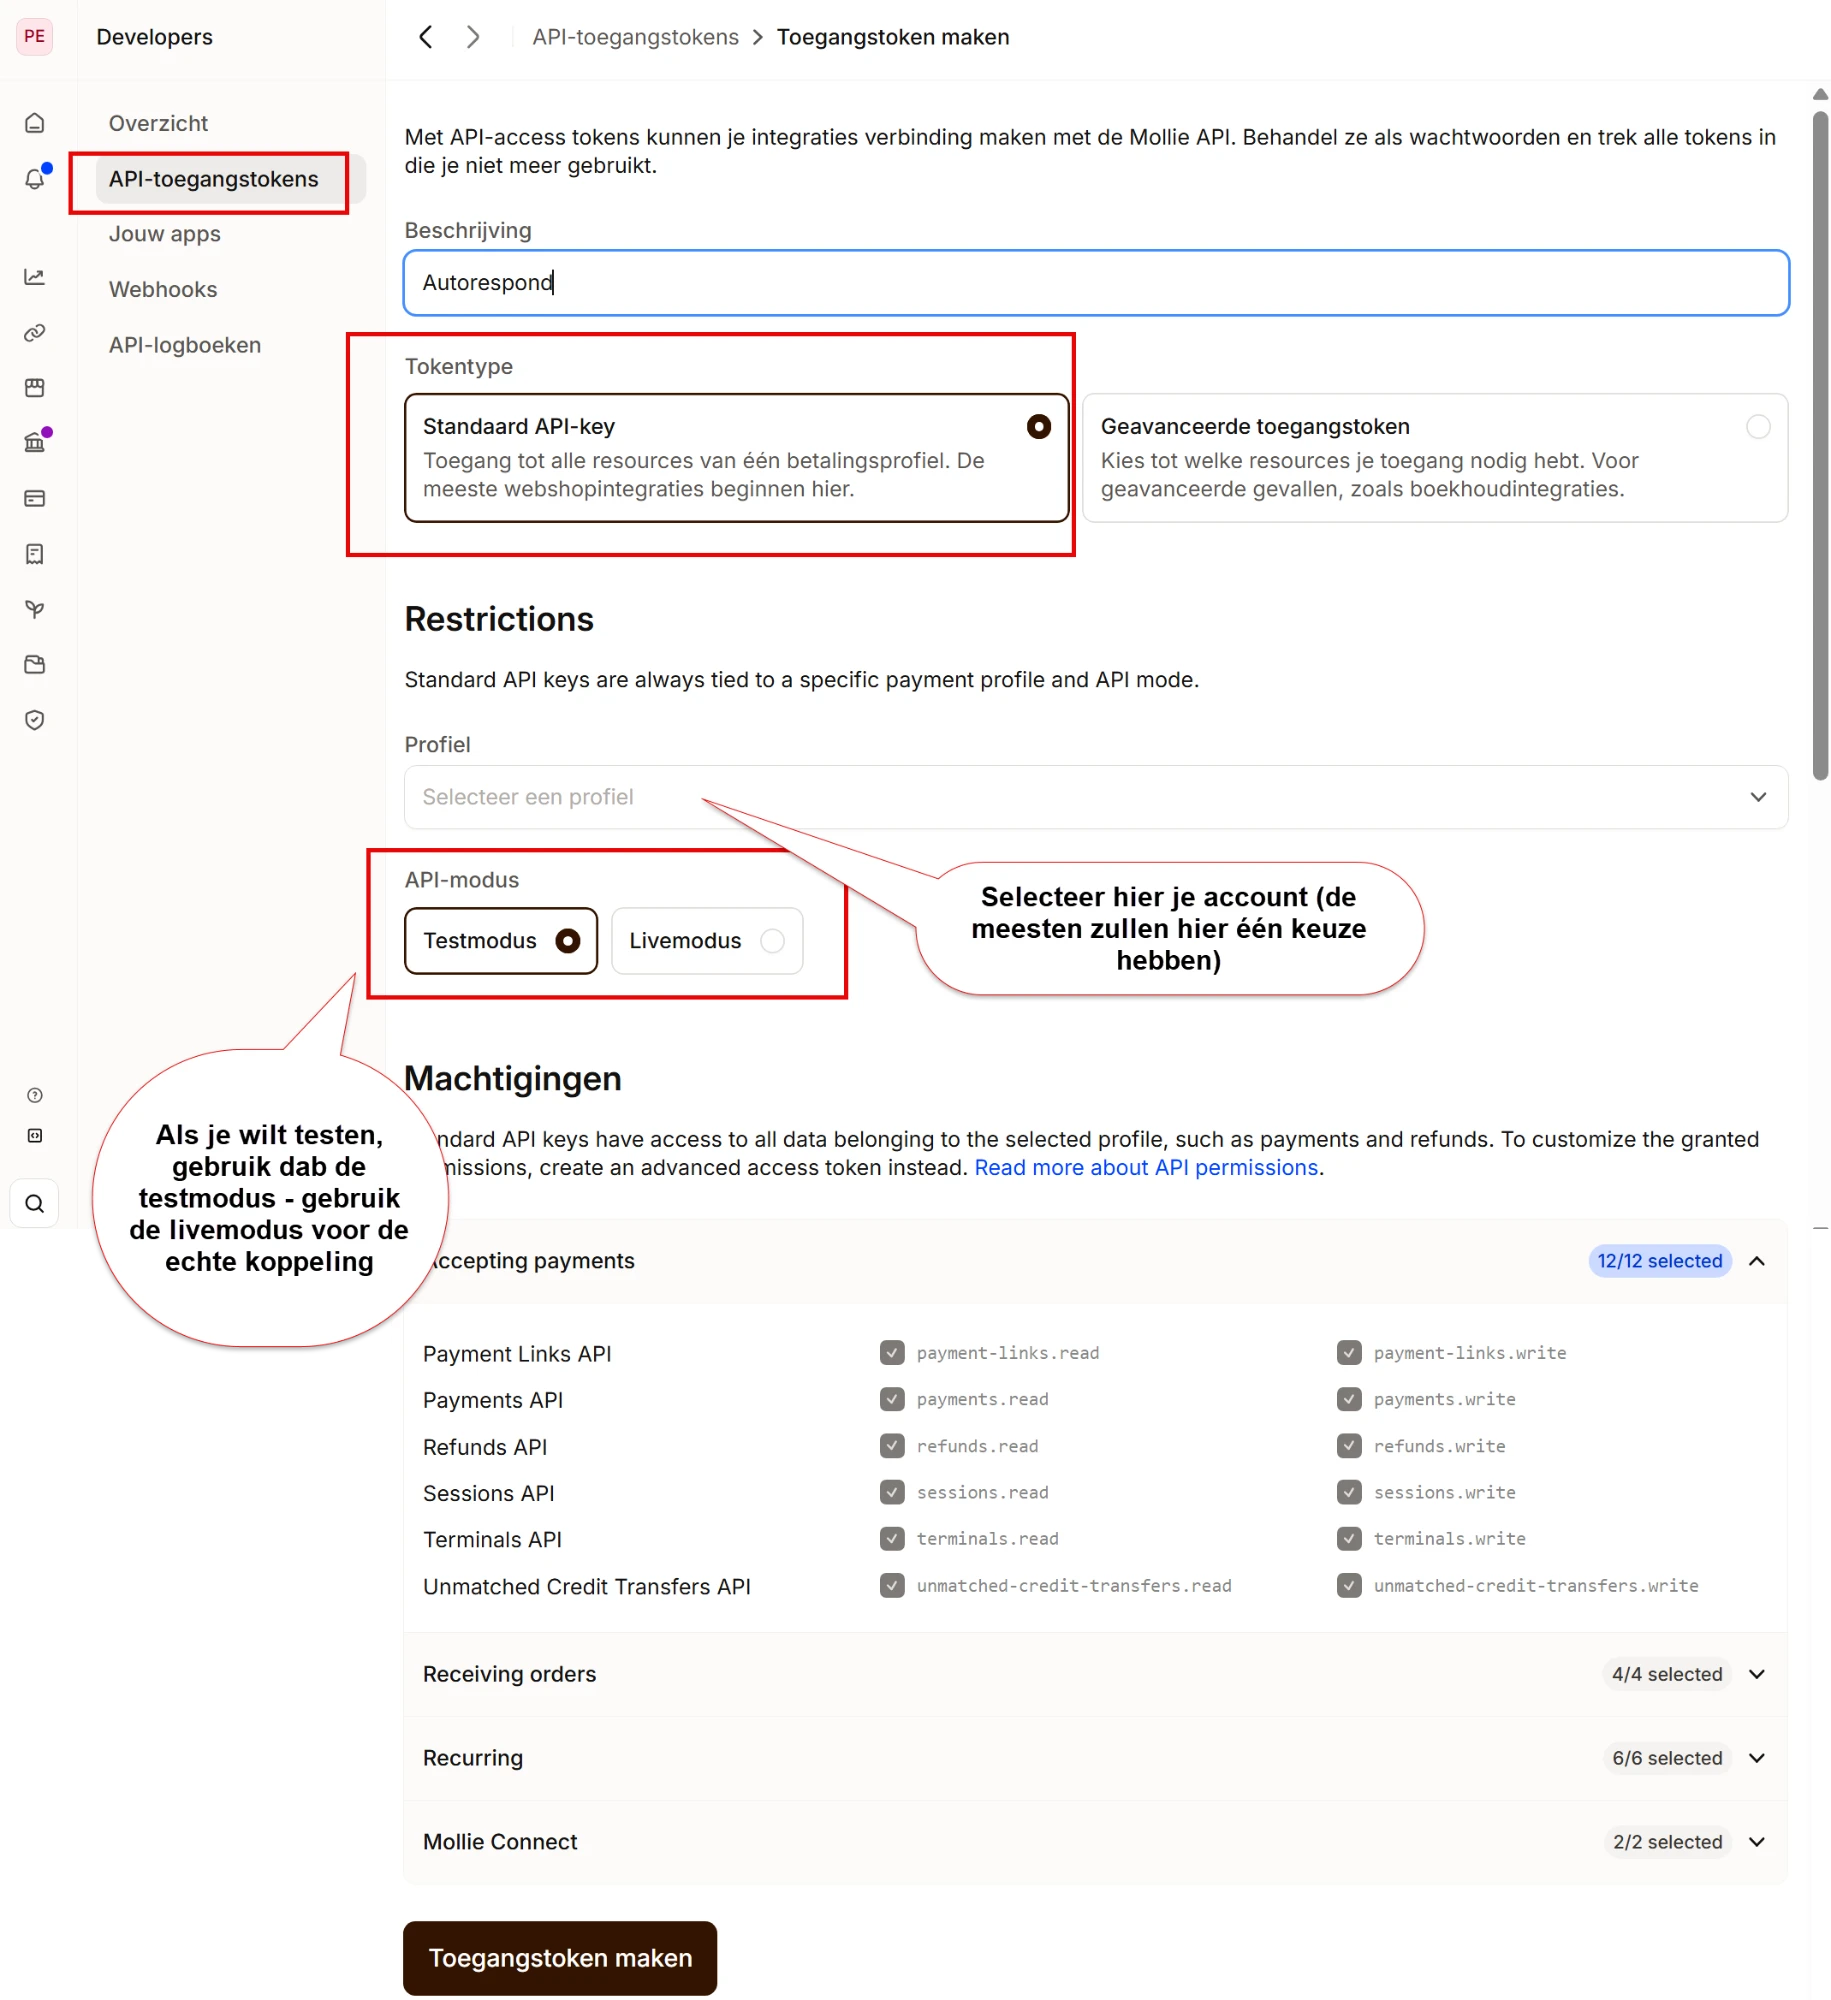
On the Create access token page you fill in the following:
- Description: give the token a recognisable name, for example Autorespond. That way you can see at a glance later what this token is used for.
- Token type: choose Standard API key. This type gives access to all the resources of one payment profile and is exactly what the shop integration needs. The Advanced access token is intended for special cases, such as bookkeeping integrations.
- Profile: select your account. Most accounts only have one choice here; if you use one Mollie account for several websites, choose the profile that belongs to this website.
- API mode: choose Live mode for the real integration. If you want to test first without real payments, (also) create a token in Test mode.
- Permissions: with a Standard API key all permissions are on automatically and you cannot untick them individually. That is fine, see the explanation below.
Click Create access token at the bottom. Mollie then shows the API key: a live key starts with live_, a test key with test_. Copy the key; you will need it in step 4. Treat the key like a password and do not share it.
Which permissions does the integration need? #
The shop integration uses just about the whole Mollie toolkit: creating payments and reading their status, processing refunds, retrieving payment methods and, if you sell subscriptions, managing customers and direct debits. A Standard API key covers all of this, and the permissions always remain limited to the one profile you selected. Leaving all permissions on is therefore not a security risk here but exactly the intention: a key with too few permissions is what causes errors at checkout or when refunding.
Working safely with API keys comes down to other habits: give every token a recognisable description, use a separate token for each website or integration, and revoke tokens you no longer use through the same API access tokens page.
Step 4: paste the key into your Autorespond environment #
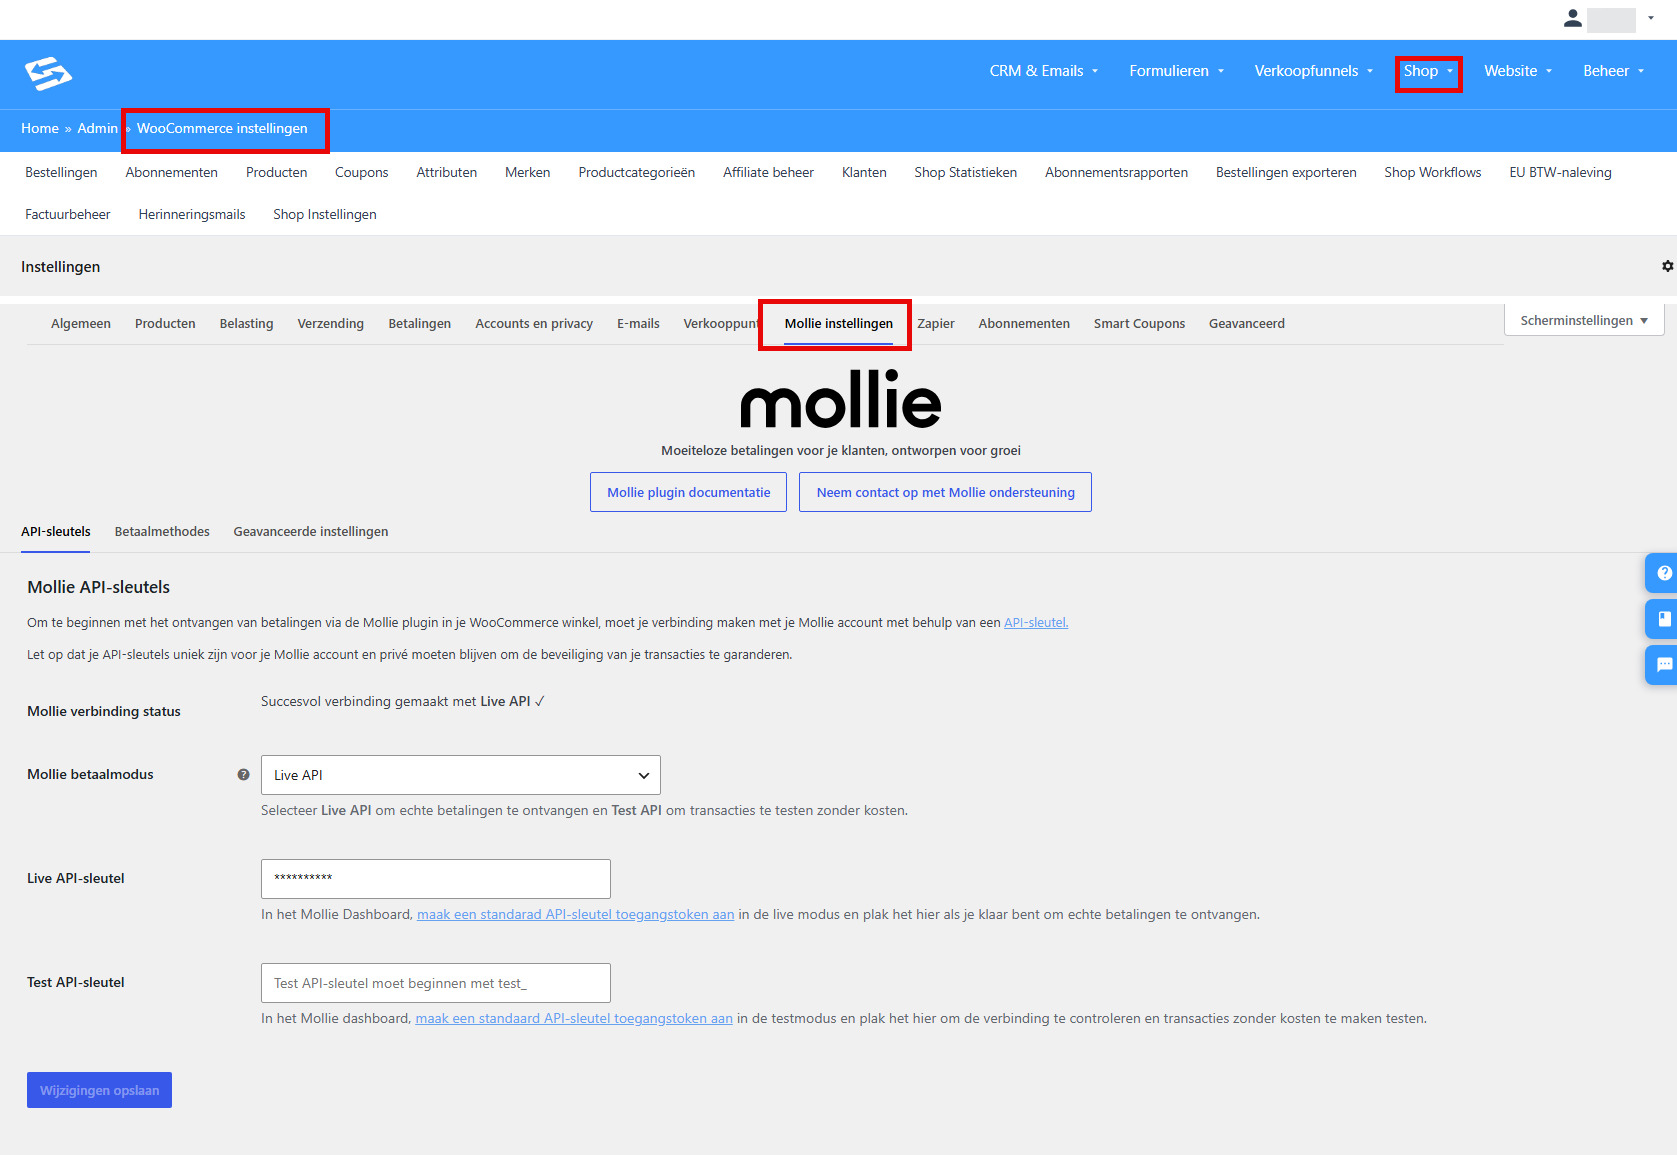
In your Autorespond environment, go to Shop → Shop Settings and open the Mollie settings tab. You land on the API keys tab:
- Set Mollie payment mode to Live API.
- Paste your live key into the Live API key field. Make sure no spaces are included before or after the key.
- Click Save changes.
If the connection has worked, you see the message Successfully connected to Live API ✓ at the top under Mollie connection status.
Step 5: activate your payment methods #
After connecting, you decide which payment methods your customers see at checkout. You do that in two places: in your Mollie dashboard you switch on which methods your account supports, and in your Autorespond environment on the Payment methods tab (next to API keys) you choose which of those appear in your checkout. You can read how to set that up in How can I change a payment method.
Frequently asked questions #
Should I switch off permissions for security? #
No. A Standard API key comes with all permissions within the chosen profile; unticking them individually is not possible and is not necessary either. The shop integration uses payments, refunds, payment methods and (for subscriptions) direct debits. You take care of security by naming tokens recognisably, using a separate token for each integration and revoking unused tokens.
What is the difference between test mode and live mode? #
With a test key (starts with test_) you place trial orders without any money actually being taken. Paste it into the Test API key field and set the payment mode to Test API. Finished testing? Then set the payment mode back to Live API, otherwise no real payments will come in.
I cannot get a connection, what now? #
Check whether the key has been copied in full (without spaces), whether it starts with live_ while the payment mode is set to Live API (or test_ with Test API), and whether your Mollie account has already been activated by Mollie. If in doubt, create a new token and try again.
Can I use one Mollie account for several websites? #
Yes. In Mollie, create a separate profile for each website and create a separate API key for each profile. That way you keep the payments and payouts separate per website.


