You sell a main product (a one-off payment) together with one or more subscriptions and you want your customer to pay for everything in one go: one page, one total amount and one payment button, with no parts that can be left out. In Autorespond you arrange this with an individual sales funnel. In this article we build such a funnel step by step and you also see what happens to the subscriptions after the order. A grouped product is not suitable for this scenario; at the bottom you can read why.
Sales funnels in Autorespond are based on FunnelKit Funnel Builder, included in your package. Read the FunnelKit documentation
Step 1: create a new funnel #
In the menu, go to Sales funnels → Funnels. Here you see all your individual funnels listed.
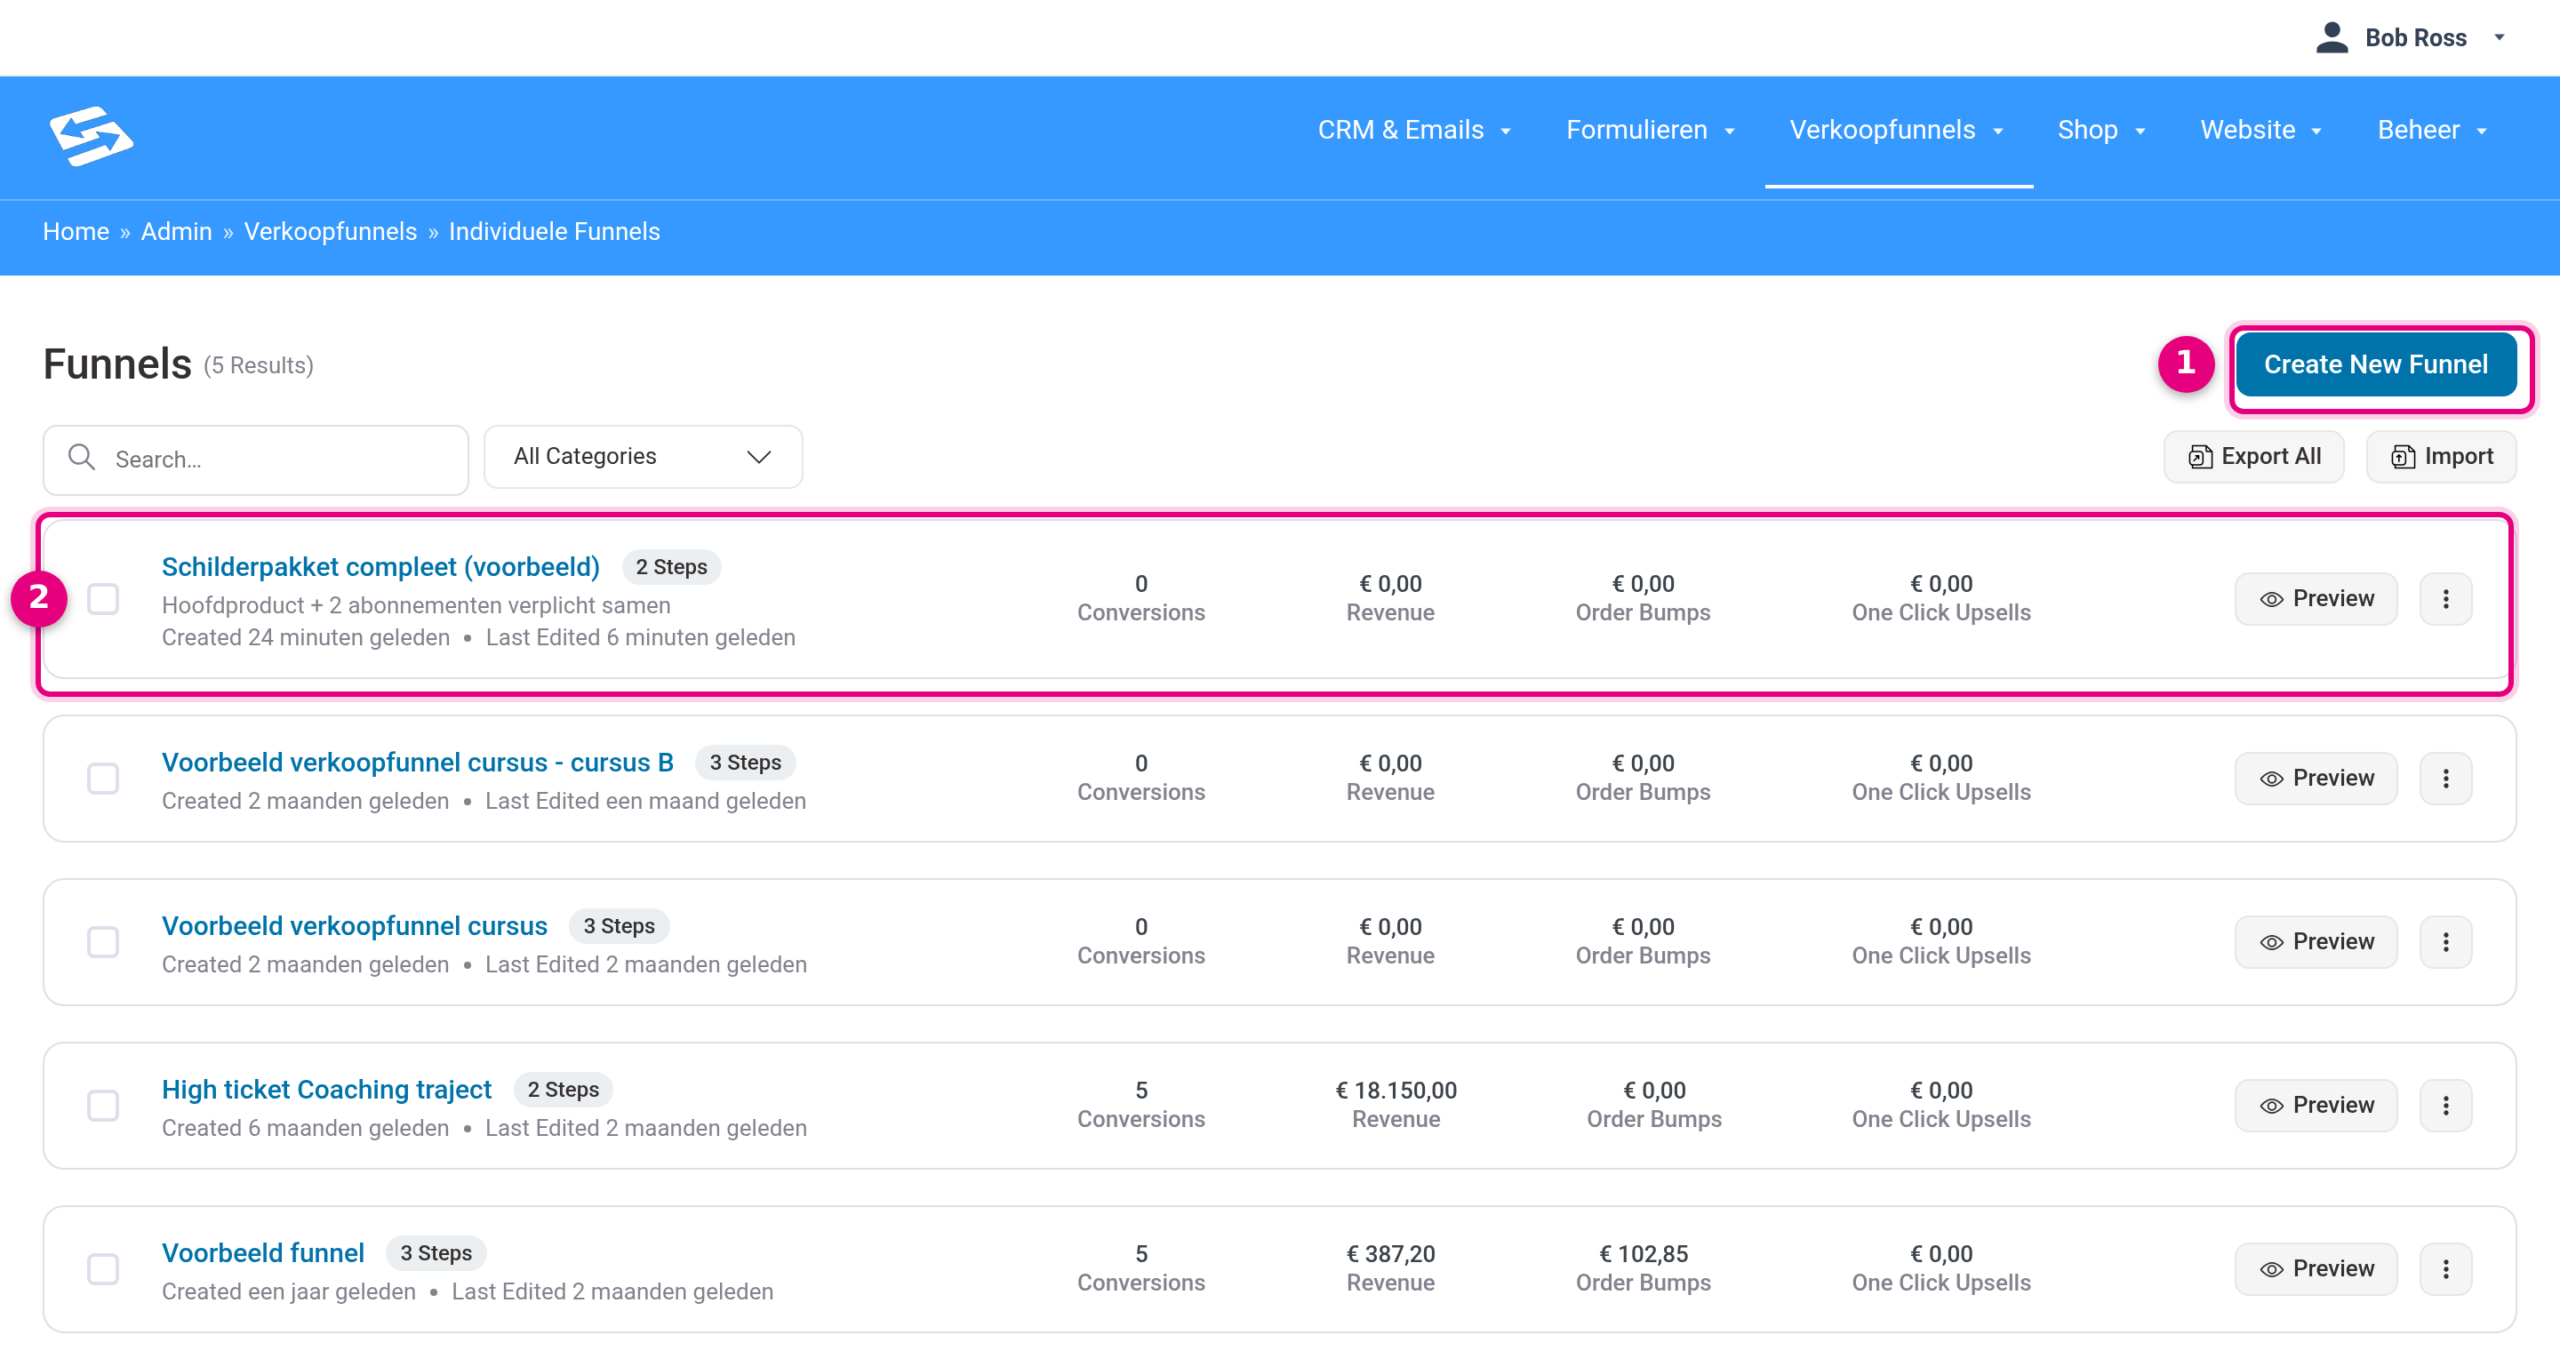
- Click Create New Funnel at the top right to create a new funnel.
- Every funnel is a row in this overview, with the number of steps and the results (Conversions, Revenue, Order Bumps, One Click Upsells). Through Preview you view the funnel; through the dots menu on the right you can duplicate or delete a funnel, among other things. The highlighted row is the sample funnel we build in this article.
Step 2: choose a template with a checkout page #
After clicking Create New Funnel you choose how you want to start.
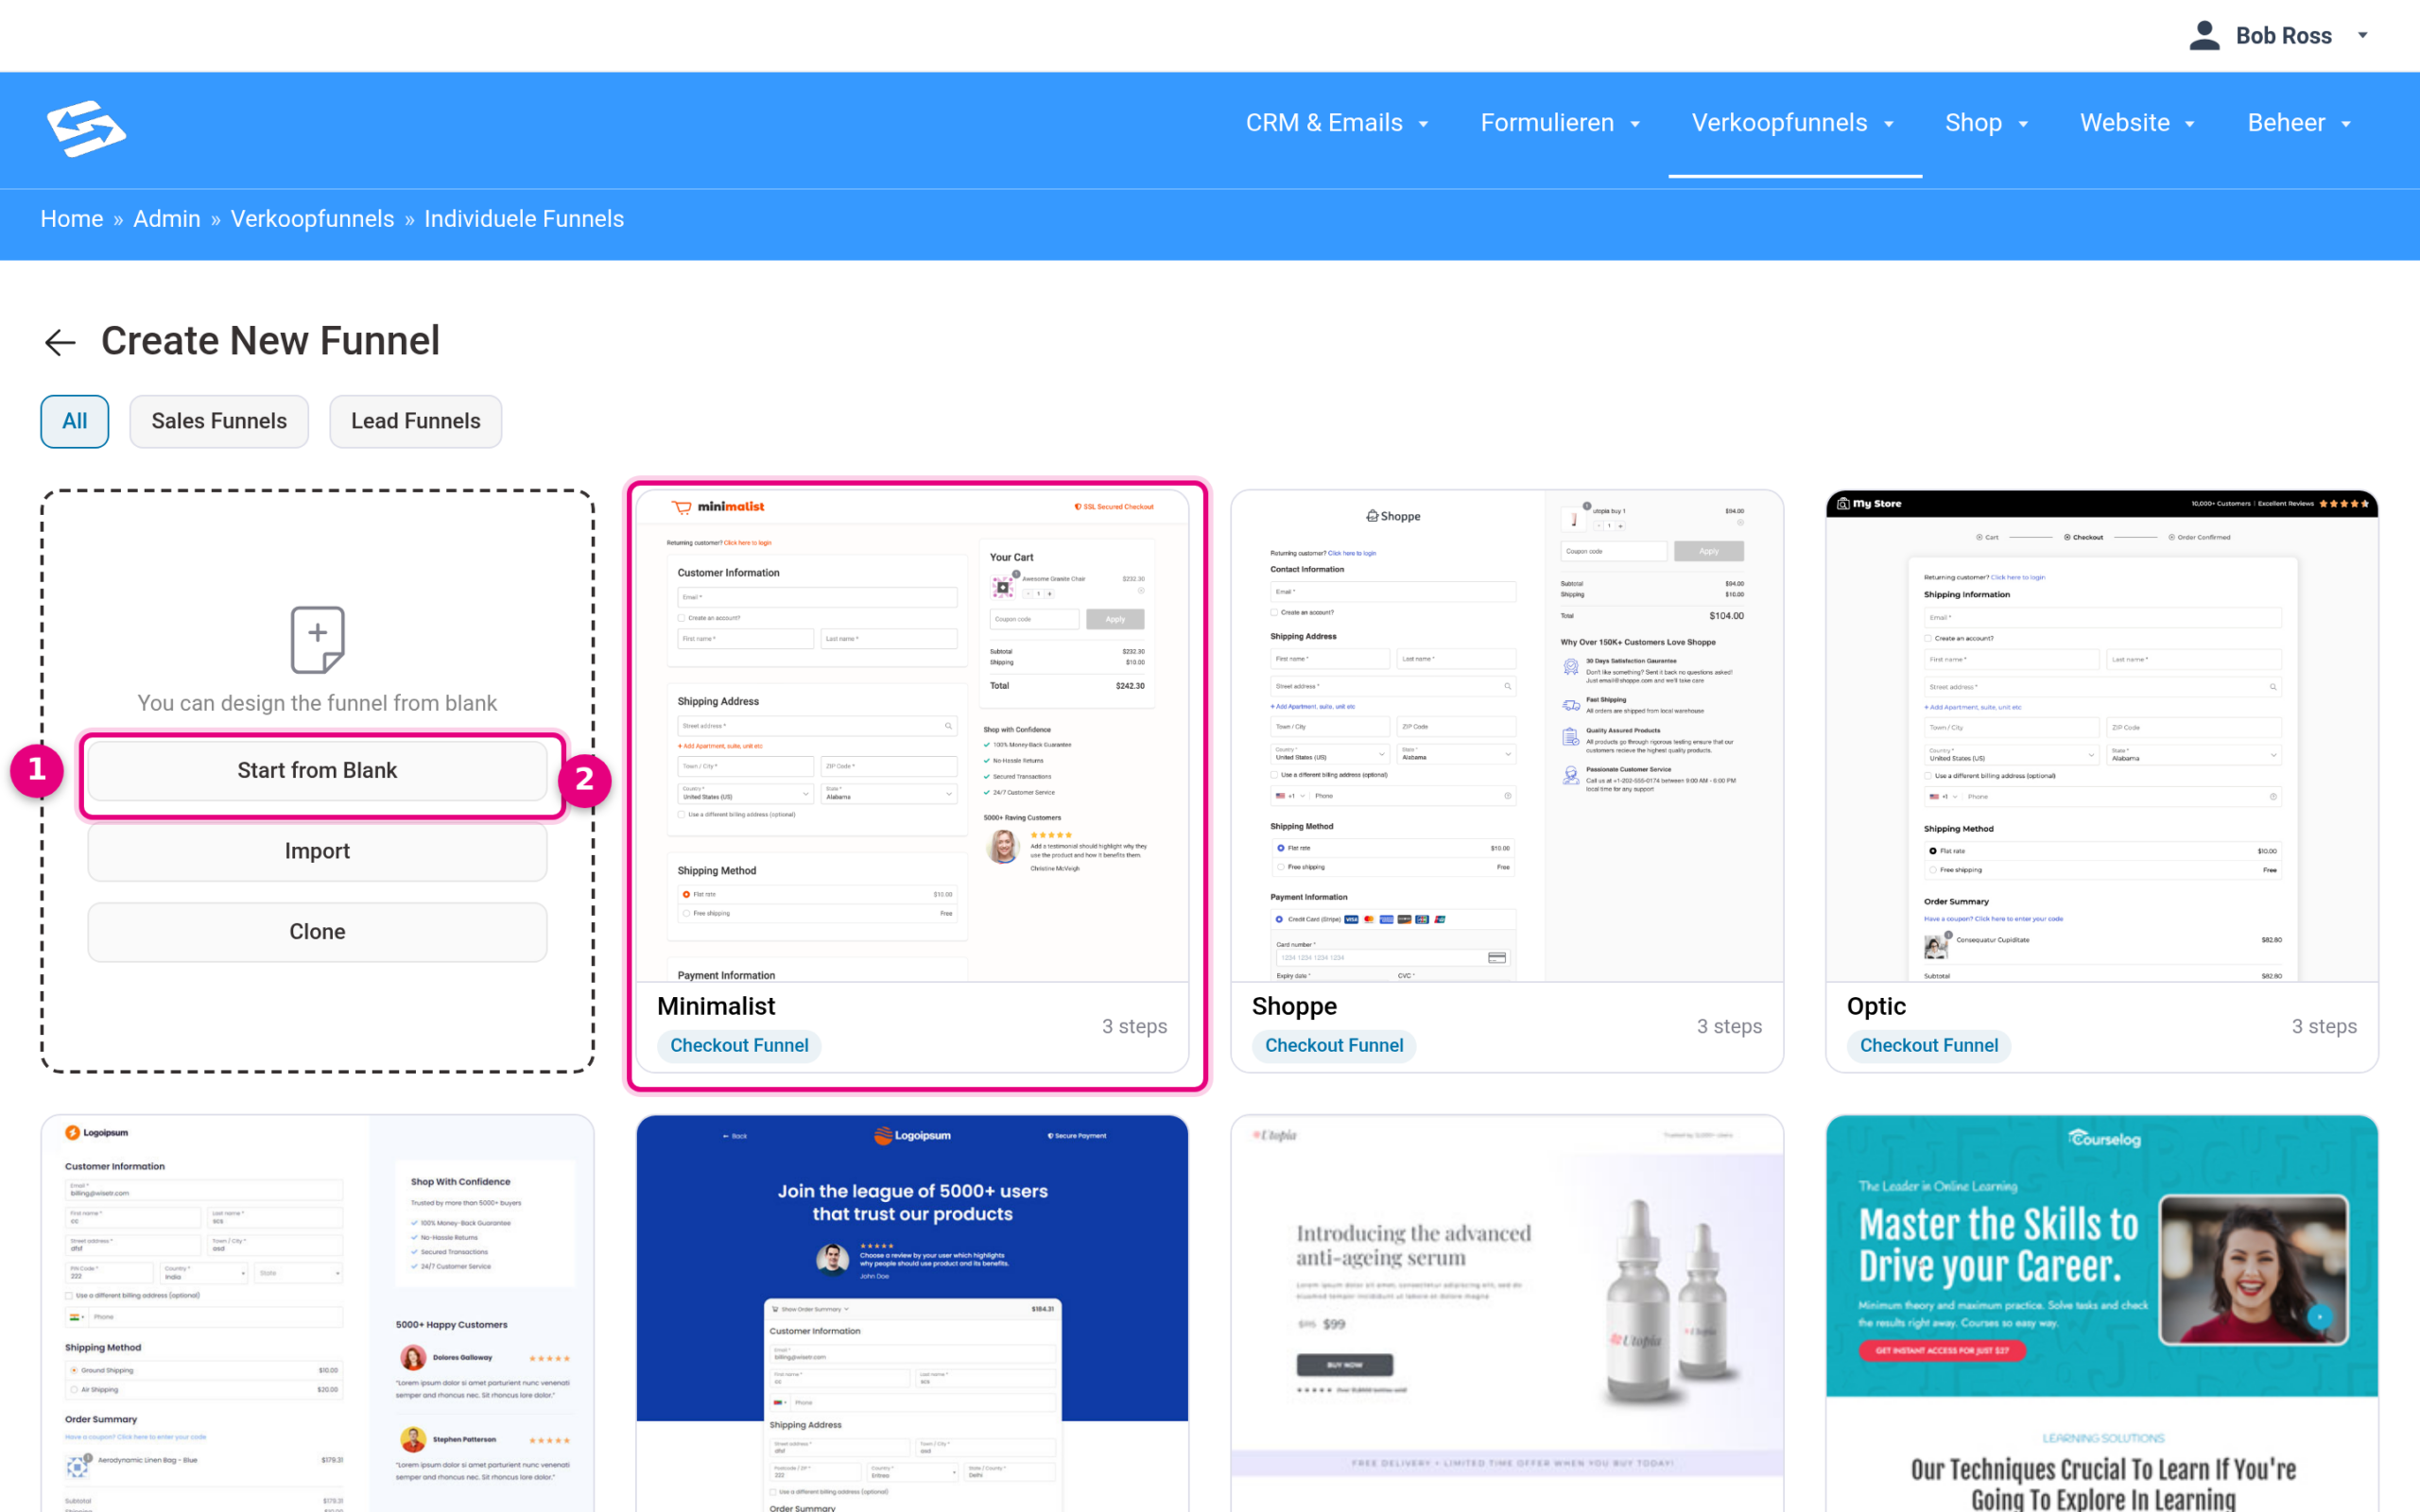
- With Start from Blank you begin with an empty funnel and add the steps yourself. Below that there are also Import (load a previously exported funnel) and Clone (copy an existing funnel).
- Quicker is a ready-made template from the Checkout Funnel category (such as Minimalist, Shoppe or Optic). Your funnel then gets a styled checkout page straight away (the step with the Checkout label) and a thank you page. You do not need an order bump or upsell step for this scenario; you can leave those out when importing or delete them later.
Give the funnel a recognisable name and then open the step with the Checkout label in the funnel.
Step 3: put the products in the checkout page and make them mandatory #
In the checkout step, open the Products tab. Here you decide which products are in the order and whether the customer has anything to choose.
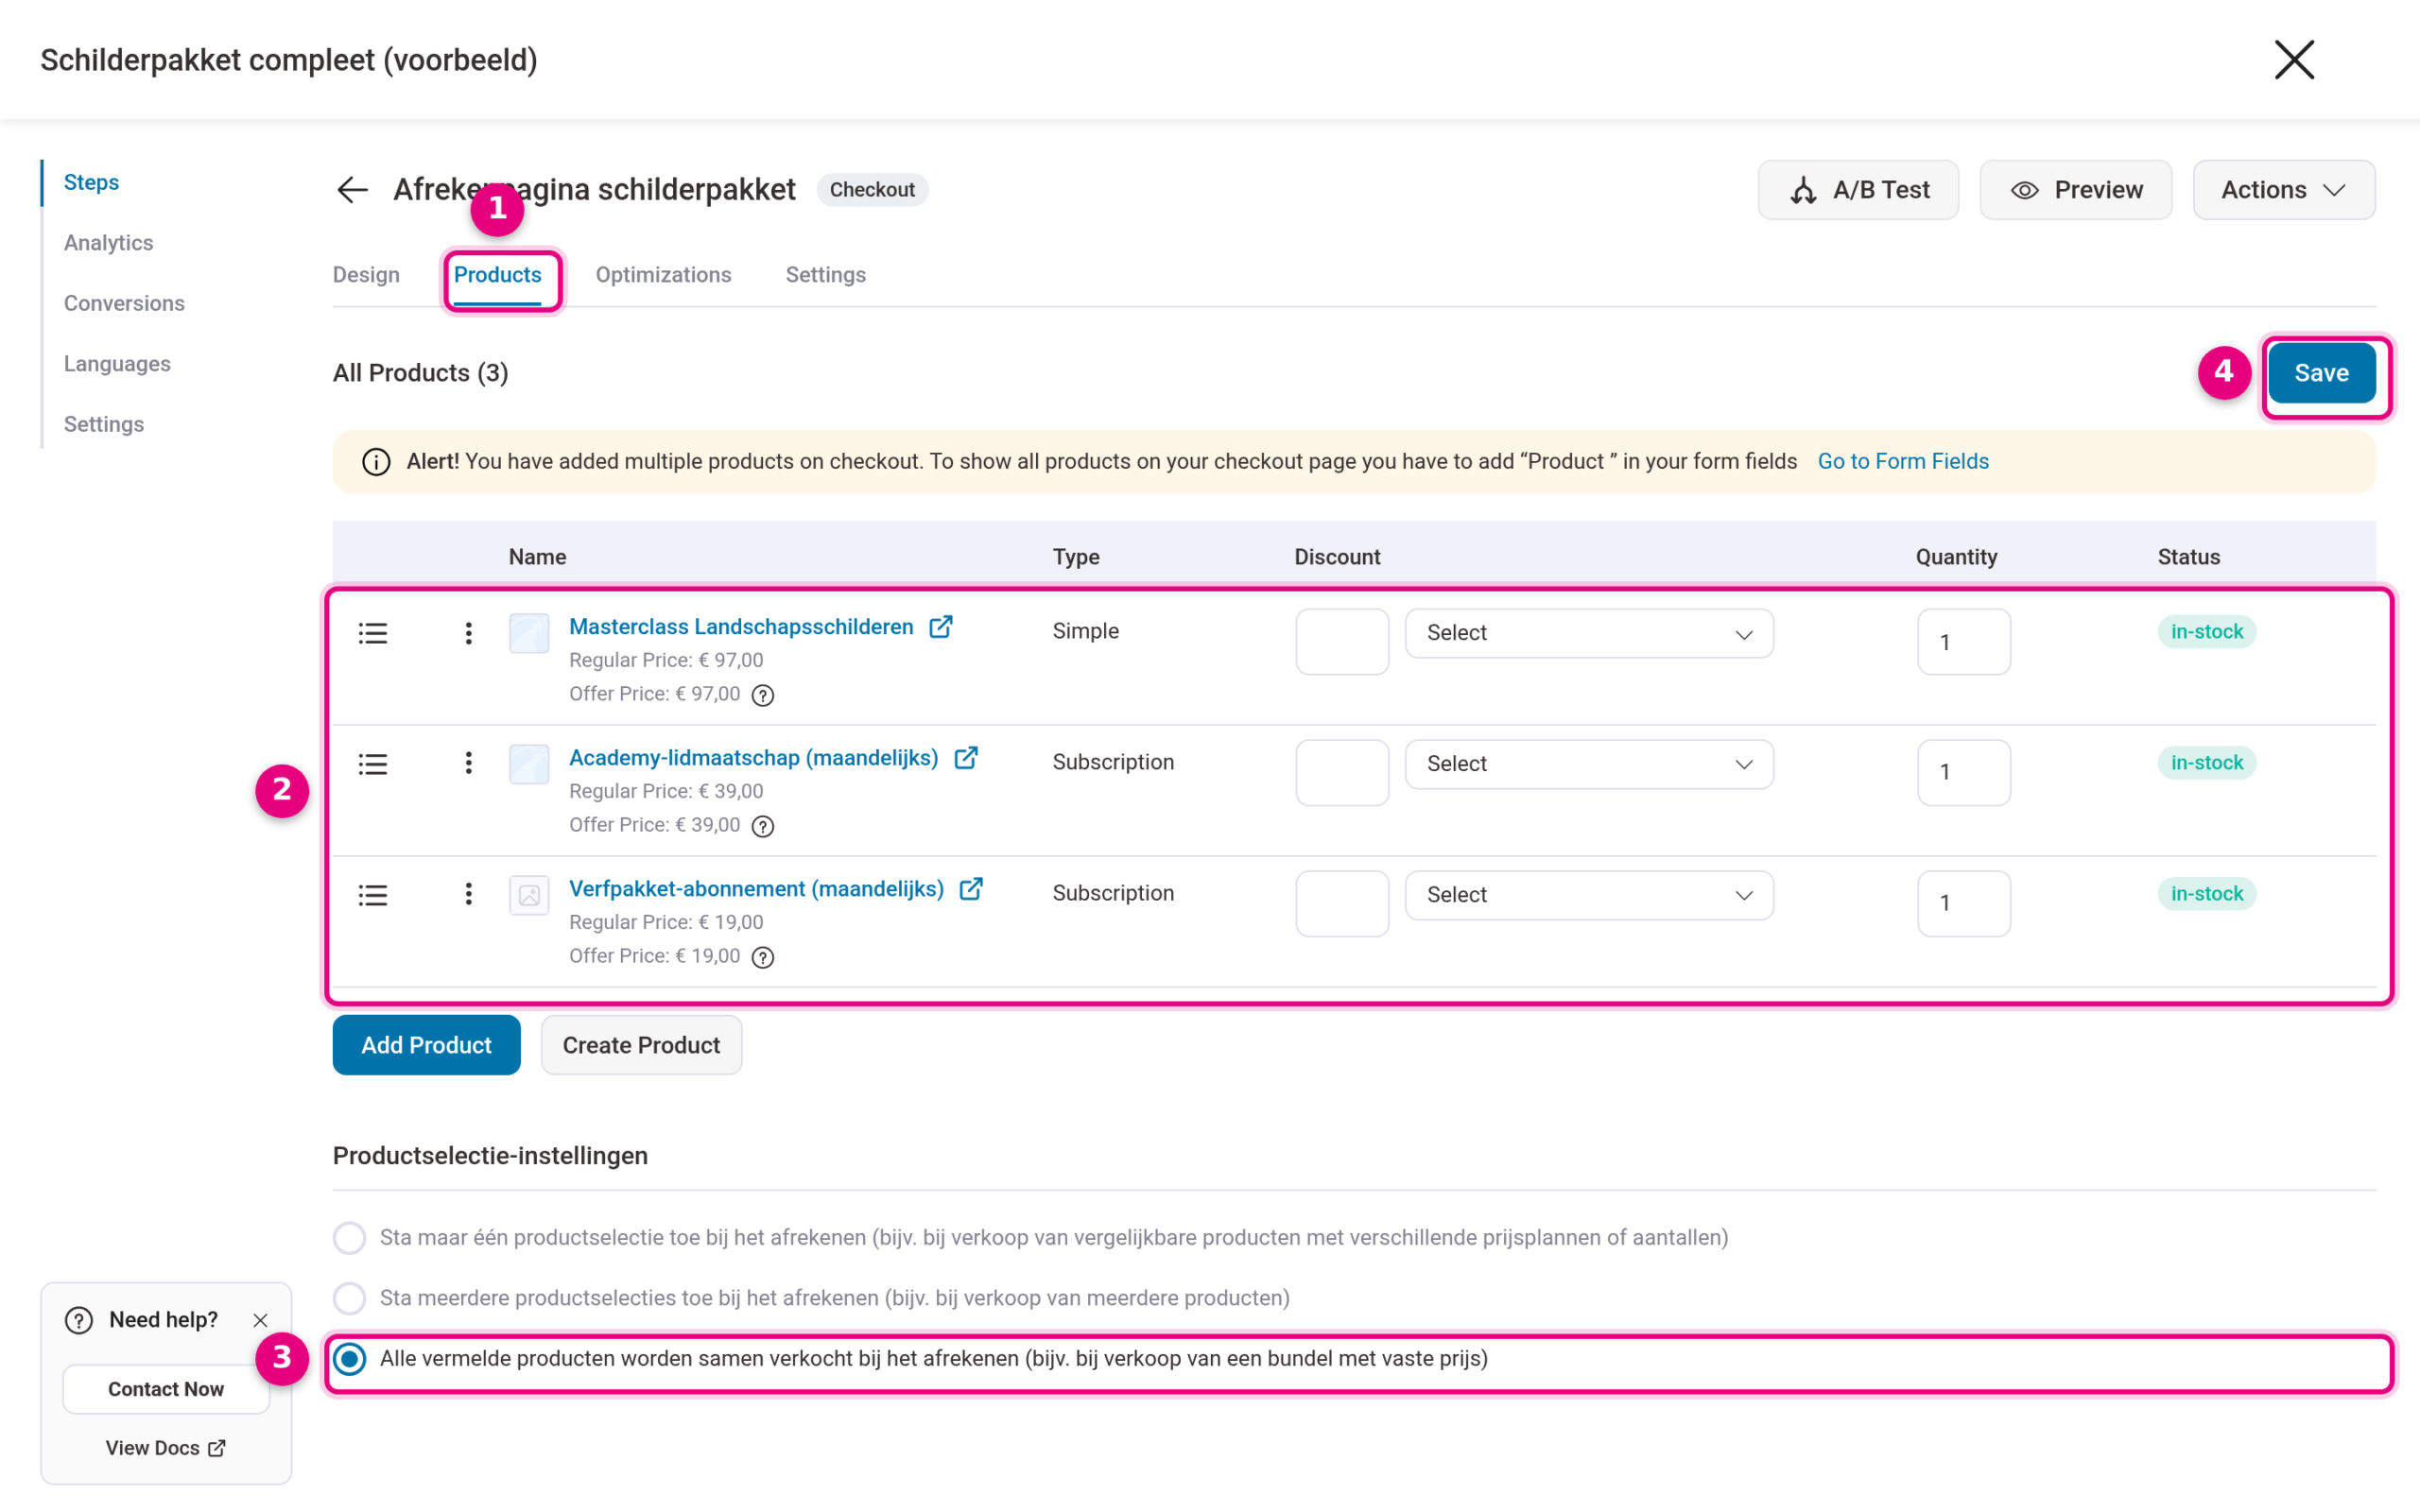
- Click the Products tab.
- Add your products with Add Product. In this example: a one-off main product (type Simple) and two subscriptions (type Subscription). Subscriptions and ordinary products can simply be combined in one funnel. For each product you can also set a discount (Discount column) or a different quantity (Quantity) here.
- Under Product selection settings choose the option “All listed products are sold together at checkout (e.g. when selling a bundle with a fixed price)”. This is the setting that makes sure the order can only be placed with all the products together: the customer gets no selection menu and cannot leave anything out.
- Click Save to save the product settings.
Do you see a yellow notice at the top about “Product” in your form fields? That only applies if you do want to show a product choice (the first two options). With the bundle option no selection field is needed and you can ignore the notice.
Step 4: this is what your customer sees #
Open the checkout page through Preview (or the step’s own URL) to view the result.
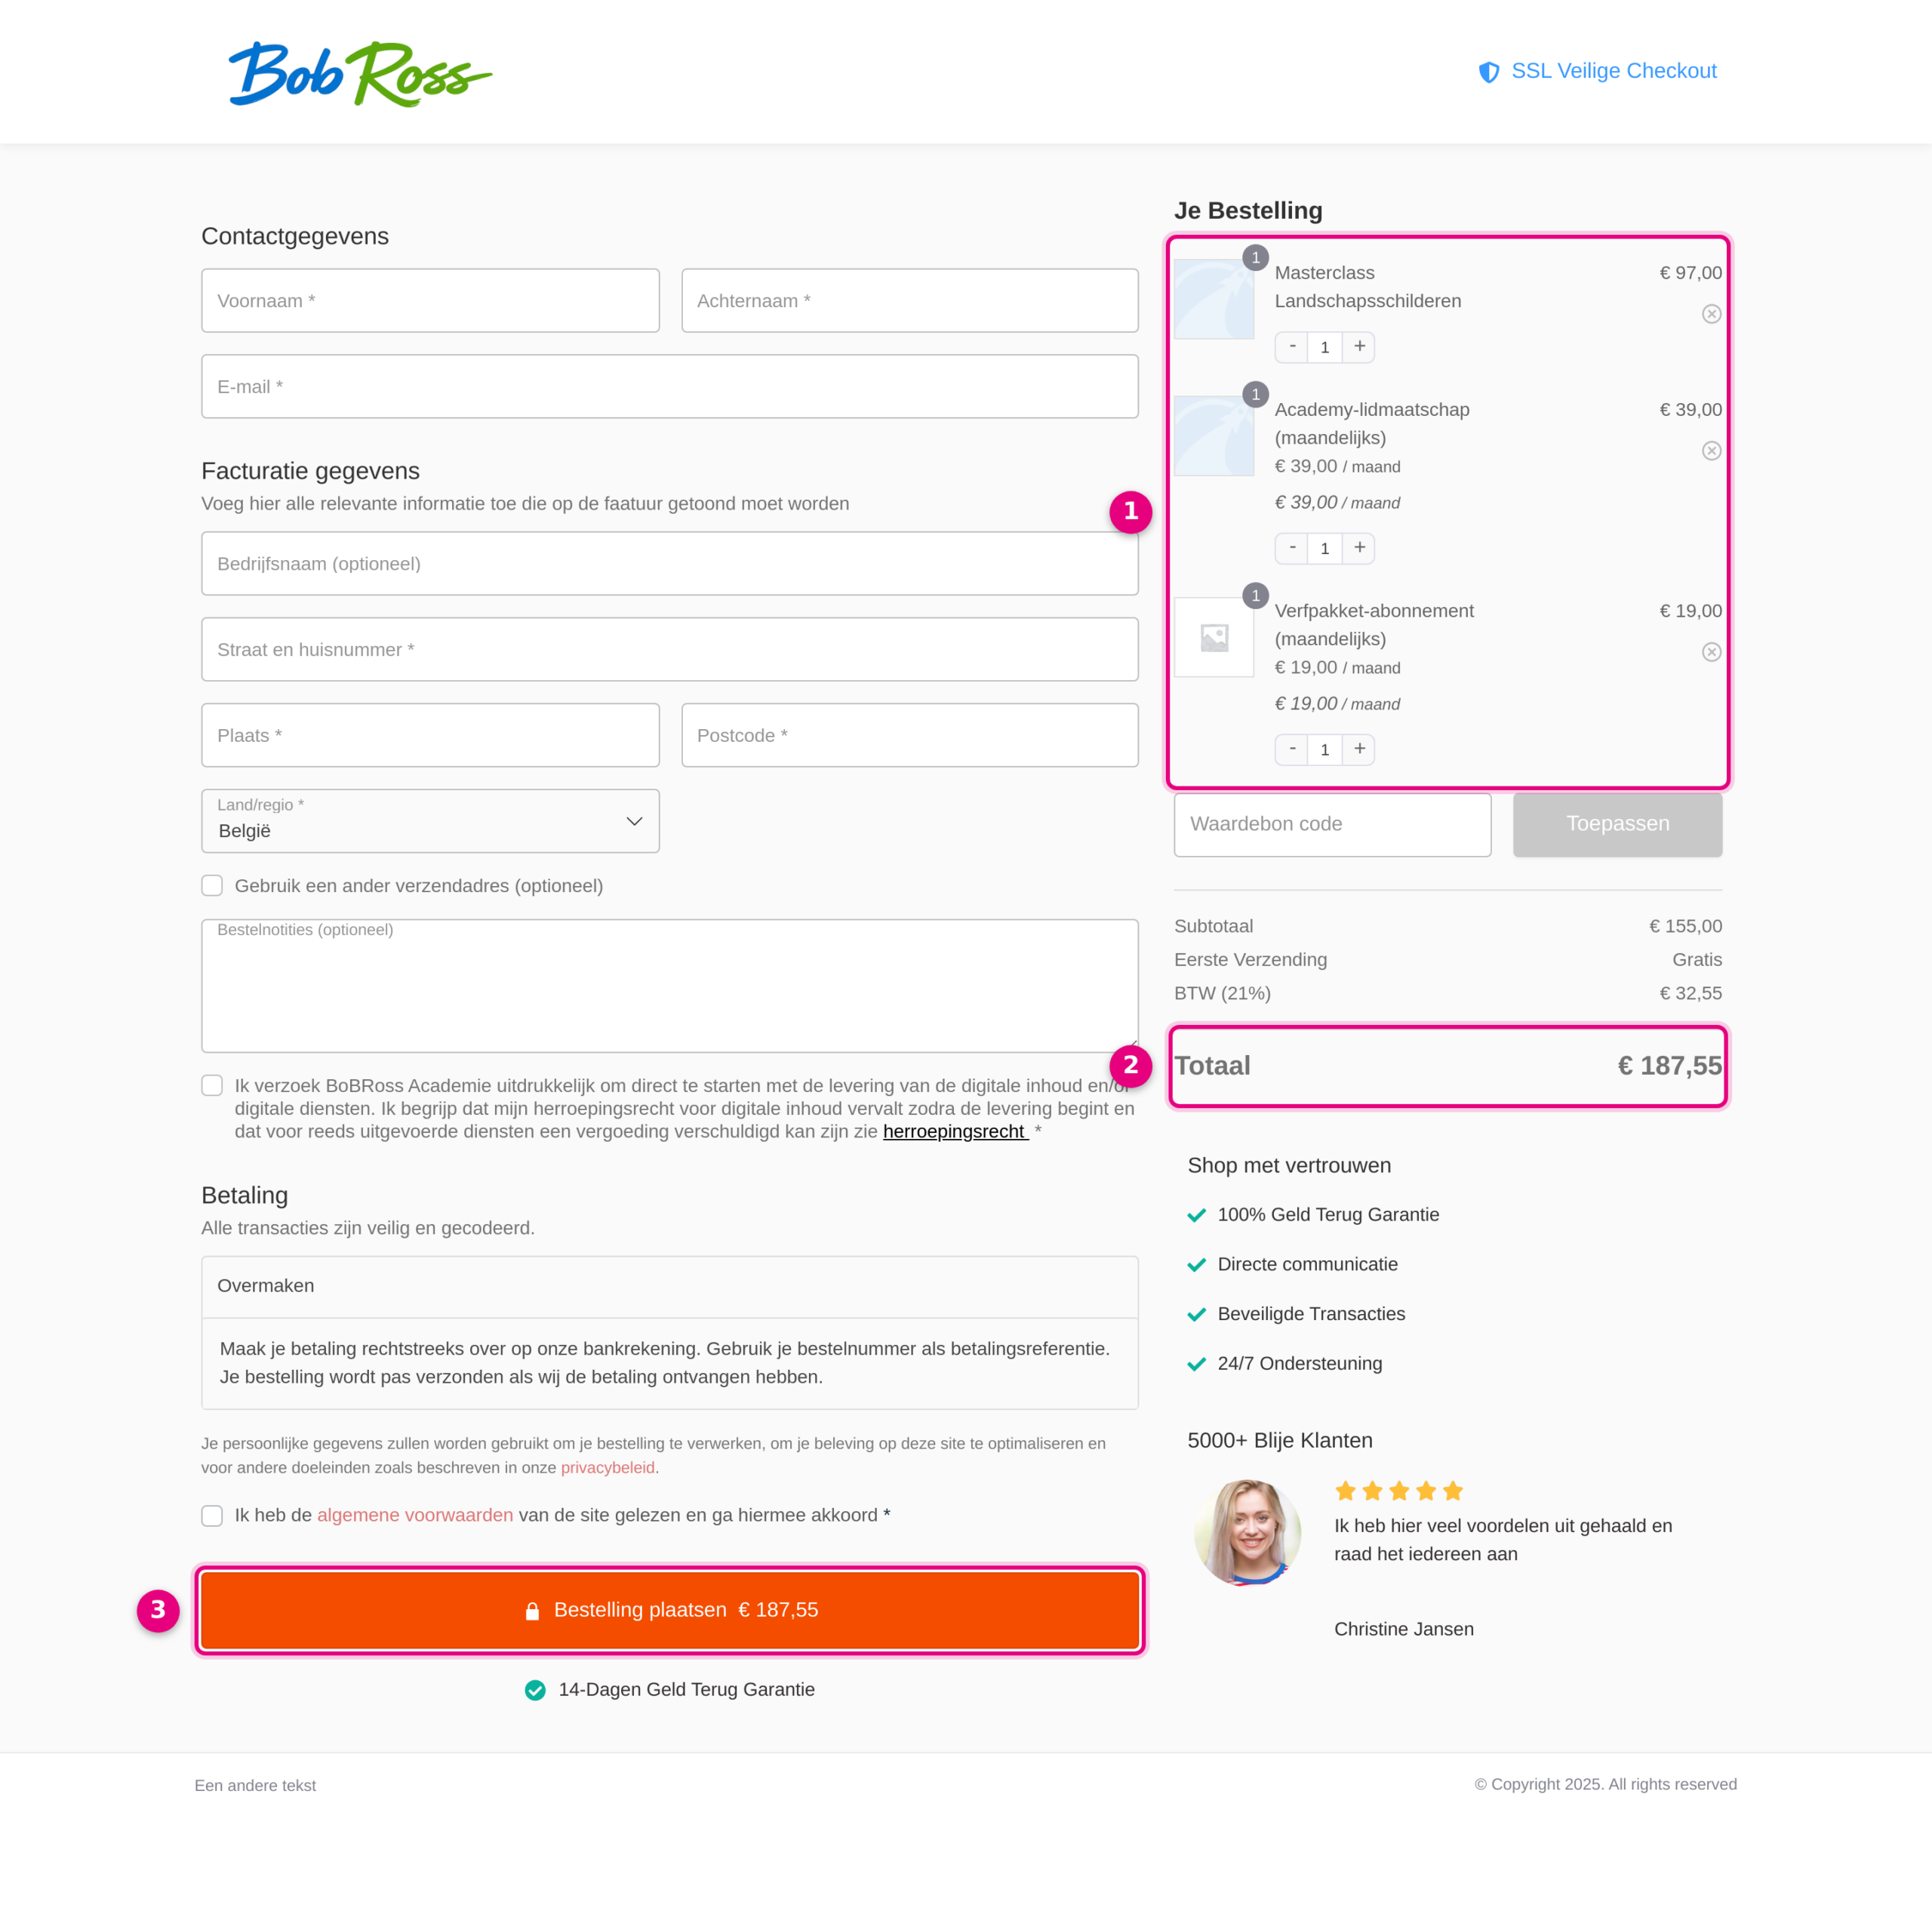
- All three products are in the order summary. For the subscriptions the term price is shown alongside (for example €39.00 / month), so the customer sees exactly what recurs.
- There is one total for the first payment: the one-off product plus the first term of both subscriptions, including VAT.
- One payment button settles the complete order in one go.
Tip: depending on the design you chose, the order summary may still show plus/minus buttons or a delete icon per line (as in this sample design). If you want the customer to be unable to change anything at all, hide those elements on the Design tab in the order summary settings of your chosen design.
The checkout page has its own URL. You put that link straight behind the order button on your website or in your emails; a separate order link with add-to-cart is therefore not needed for this funnel.
What happens to the subscriptions after the order? #
At checkout a separate subscription is created automatically alongside the order. The one-off product is not in it; only the subscription products are. You will find it under Shop → Subscriptions.
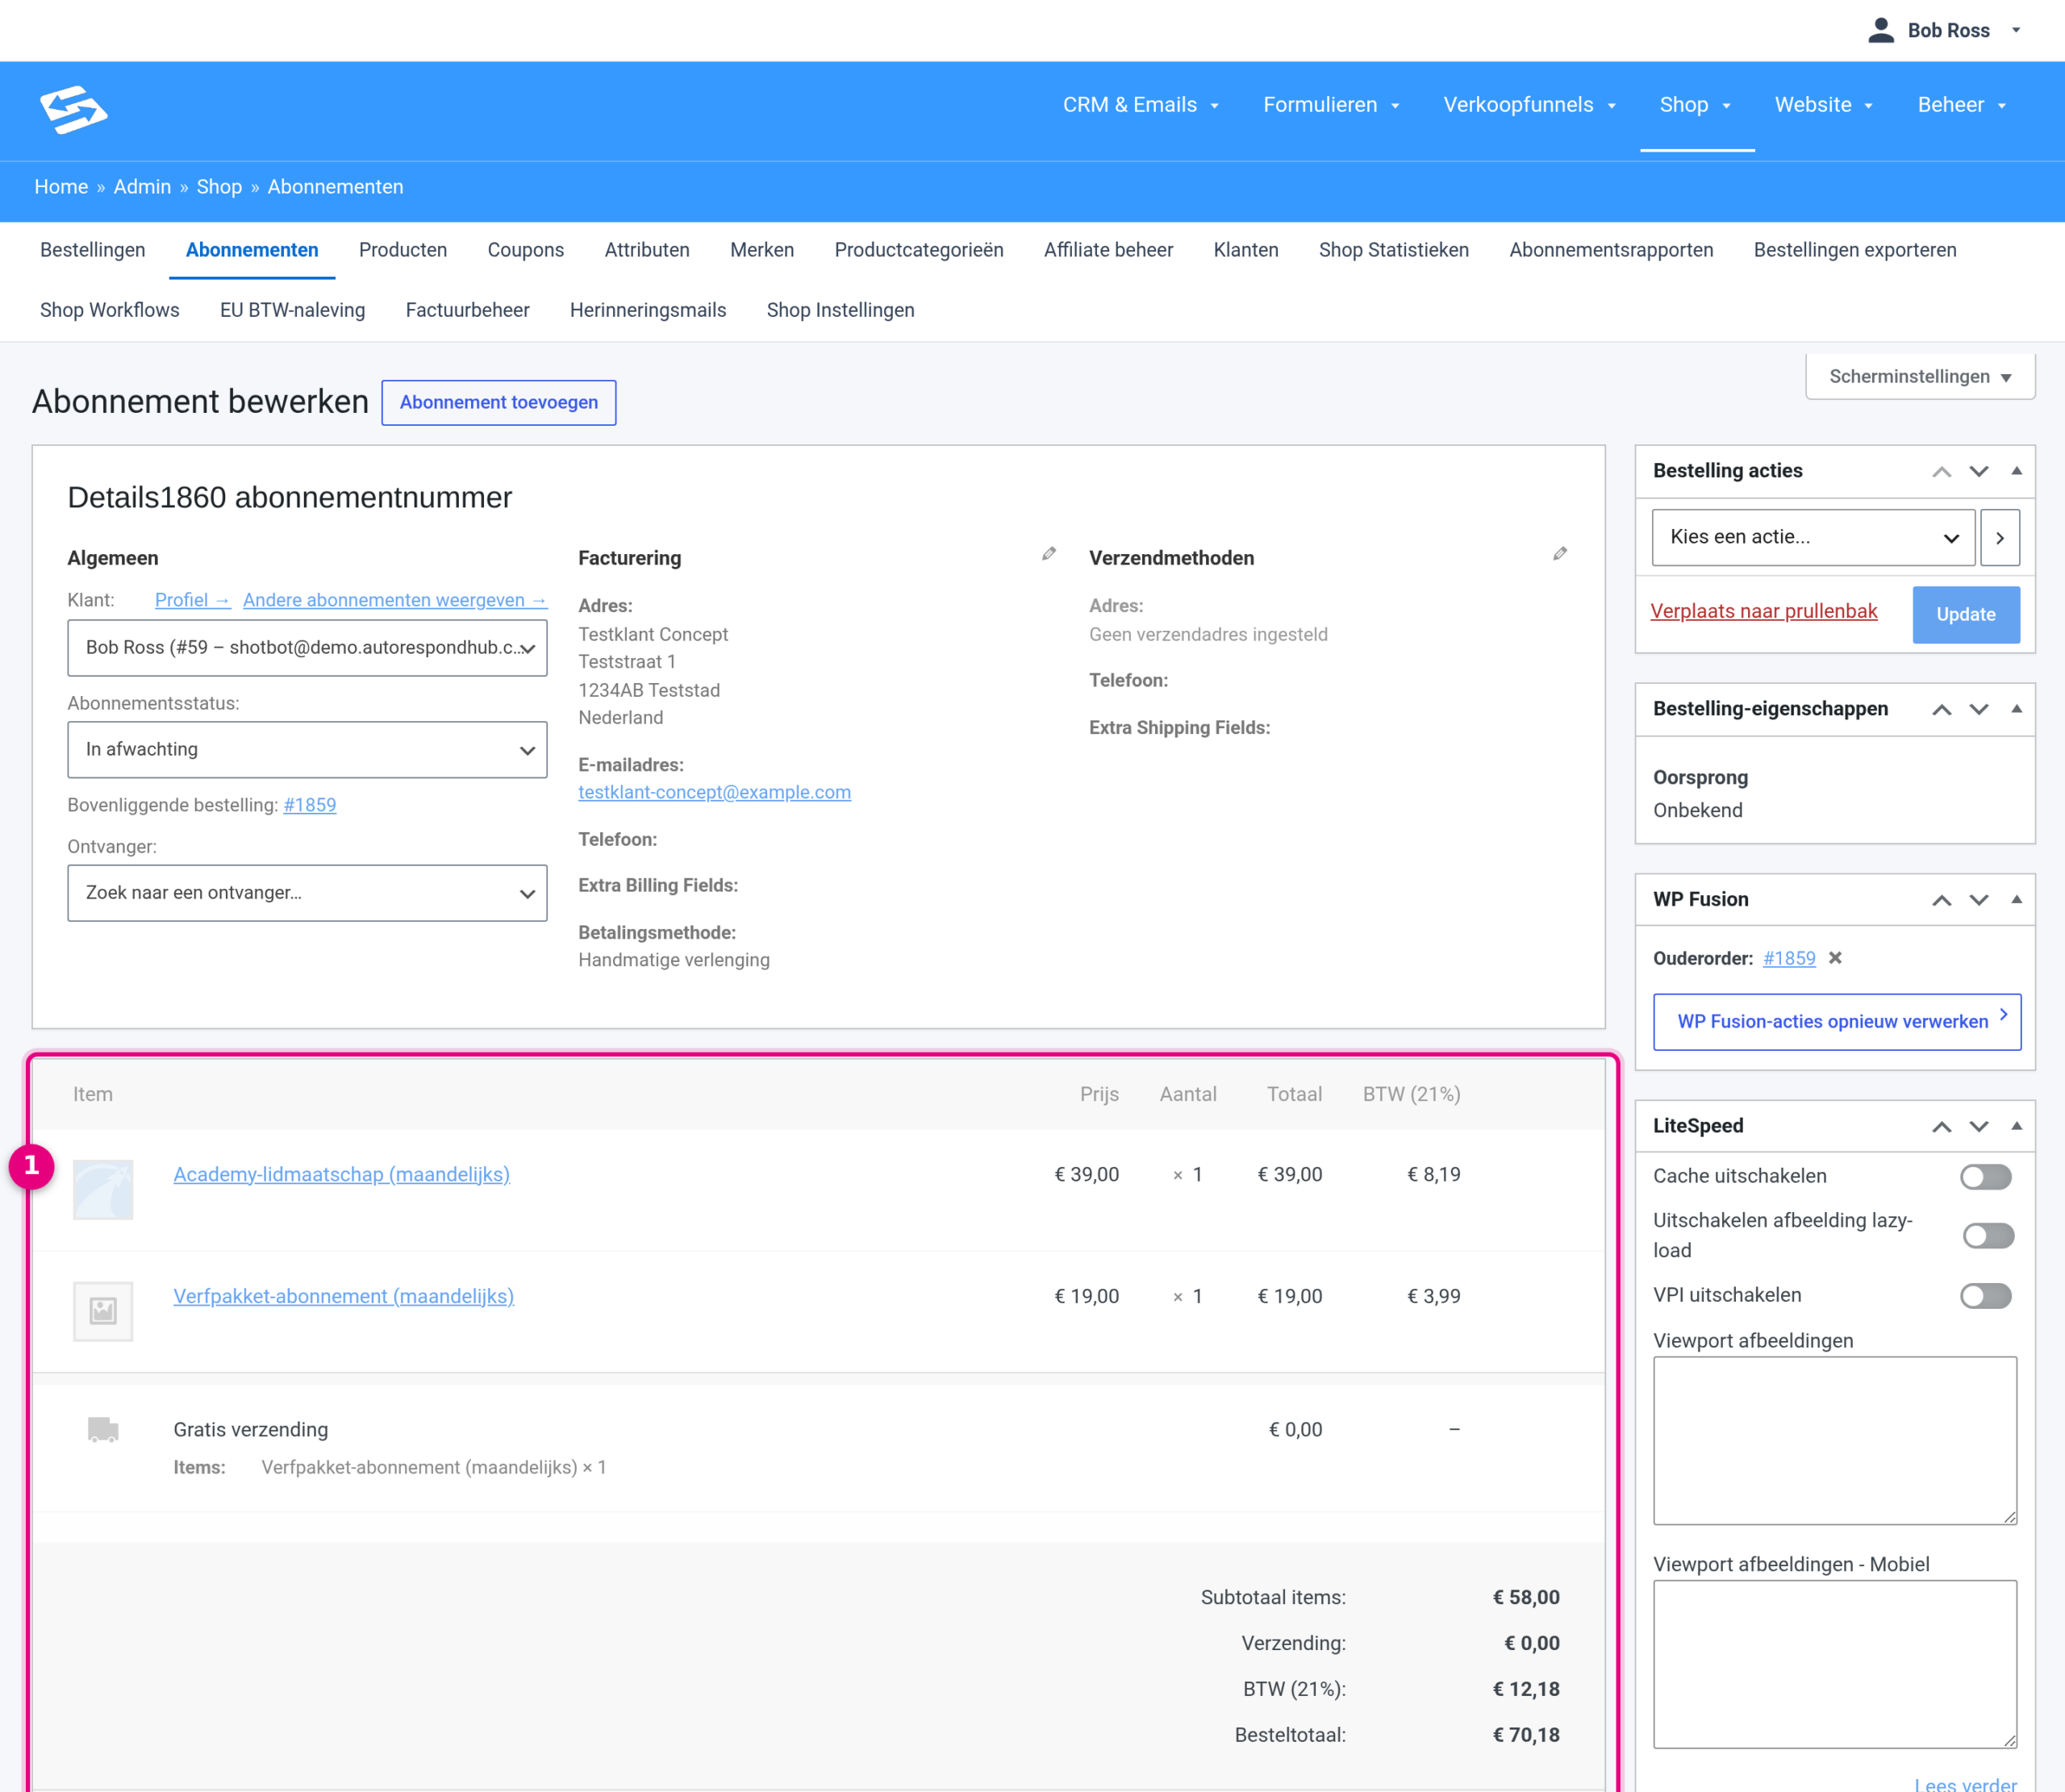
- The subscription contains only the two subscription products, with the amount that is collected each term. The one-off main product is only in the original order; you will find that through the link at Parent order.
Worth knowing: subscriptions with the same billing rhythm (for example both monthly, without a trial period) are combined into one subscription, as above. If your subscriptions have a different rhythm (for example monthly and annually), a separate subscription is created for each rhythm. The subscription then continues automatically: at every term the payment is collected through the customer’s payment method, as long as it supports direct debits (such as the common methods through Mollie). The customer does not have to do anything for this.
Why not a grouped product? #
A grouped product may look like an alternative, but it is something quite different: it is an overview page on which the customer chooses for each sub-product what and how much they order. Nothing is mandatory, there is no shared payment button and subscriptions cannot be combined with it in one click. For a mandatory combination the sales funnel from this article is therefore the right route. You can read more about what a grouped product actually is and when to use it in What is a grouped product (and when do you use it)?


