A countdown timer on your checkout or landing page shows visitors how long an offer is still valid. That makes a deadline visible and helps people who are hesitating to decide now. In this guide you place a countdown timer on your page that counts down per visitor and automatically sends visitors to another page once the time is up.
Please note: the countdown timer is only available with the website module. The countdown timer is a widget of the professional page builder that comes with the website module. If your package does not include the website module, you cannot use this widget. If you do want to use it, get in touch about adding the website module.
The countdown timer in Autorespond is based on the Countdown widget from Elementor Pro, part of the website module. Read the Elementor documentation
Two kinds of countdown timers #
The widget has two types. Due date counts down to one fixed moment that is the same for everyone, for example the closing of your registration on Friday at 20:00. Evergreen timer starts separately for every visitor at the moment they open the page for the first time, for example “valid for another 48 hours”. For an ongoing offer (such as after an automated webinar) you choose the Evergreen timer; that is the one we use in this guide.
Step 1: add the Countdown widget to your page #
Open the page through Edit with page builder. Search the widget panel for Countdown and drag the widget to the place you want on your page, for example directly below your offer or above the order button on your checkout page.
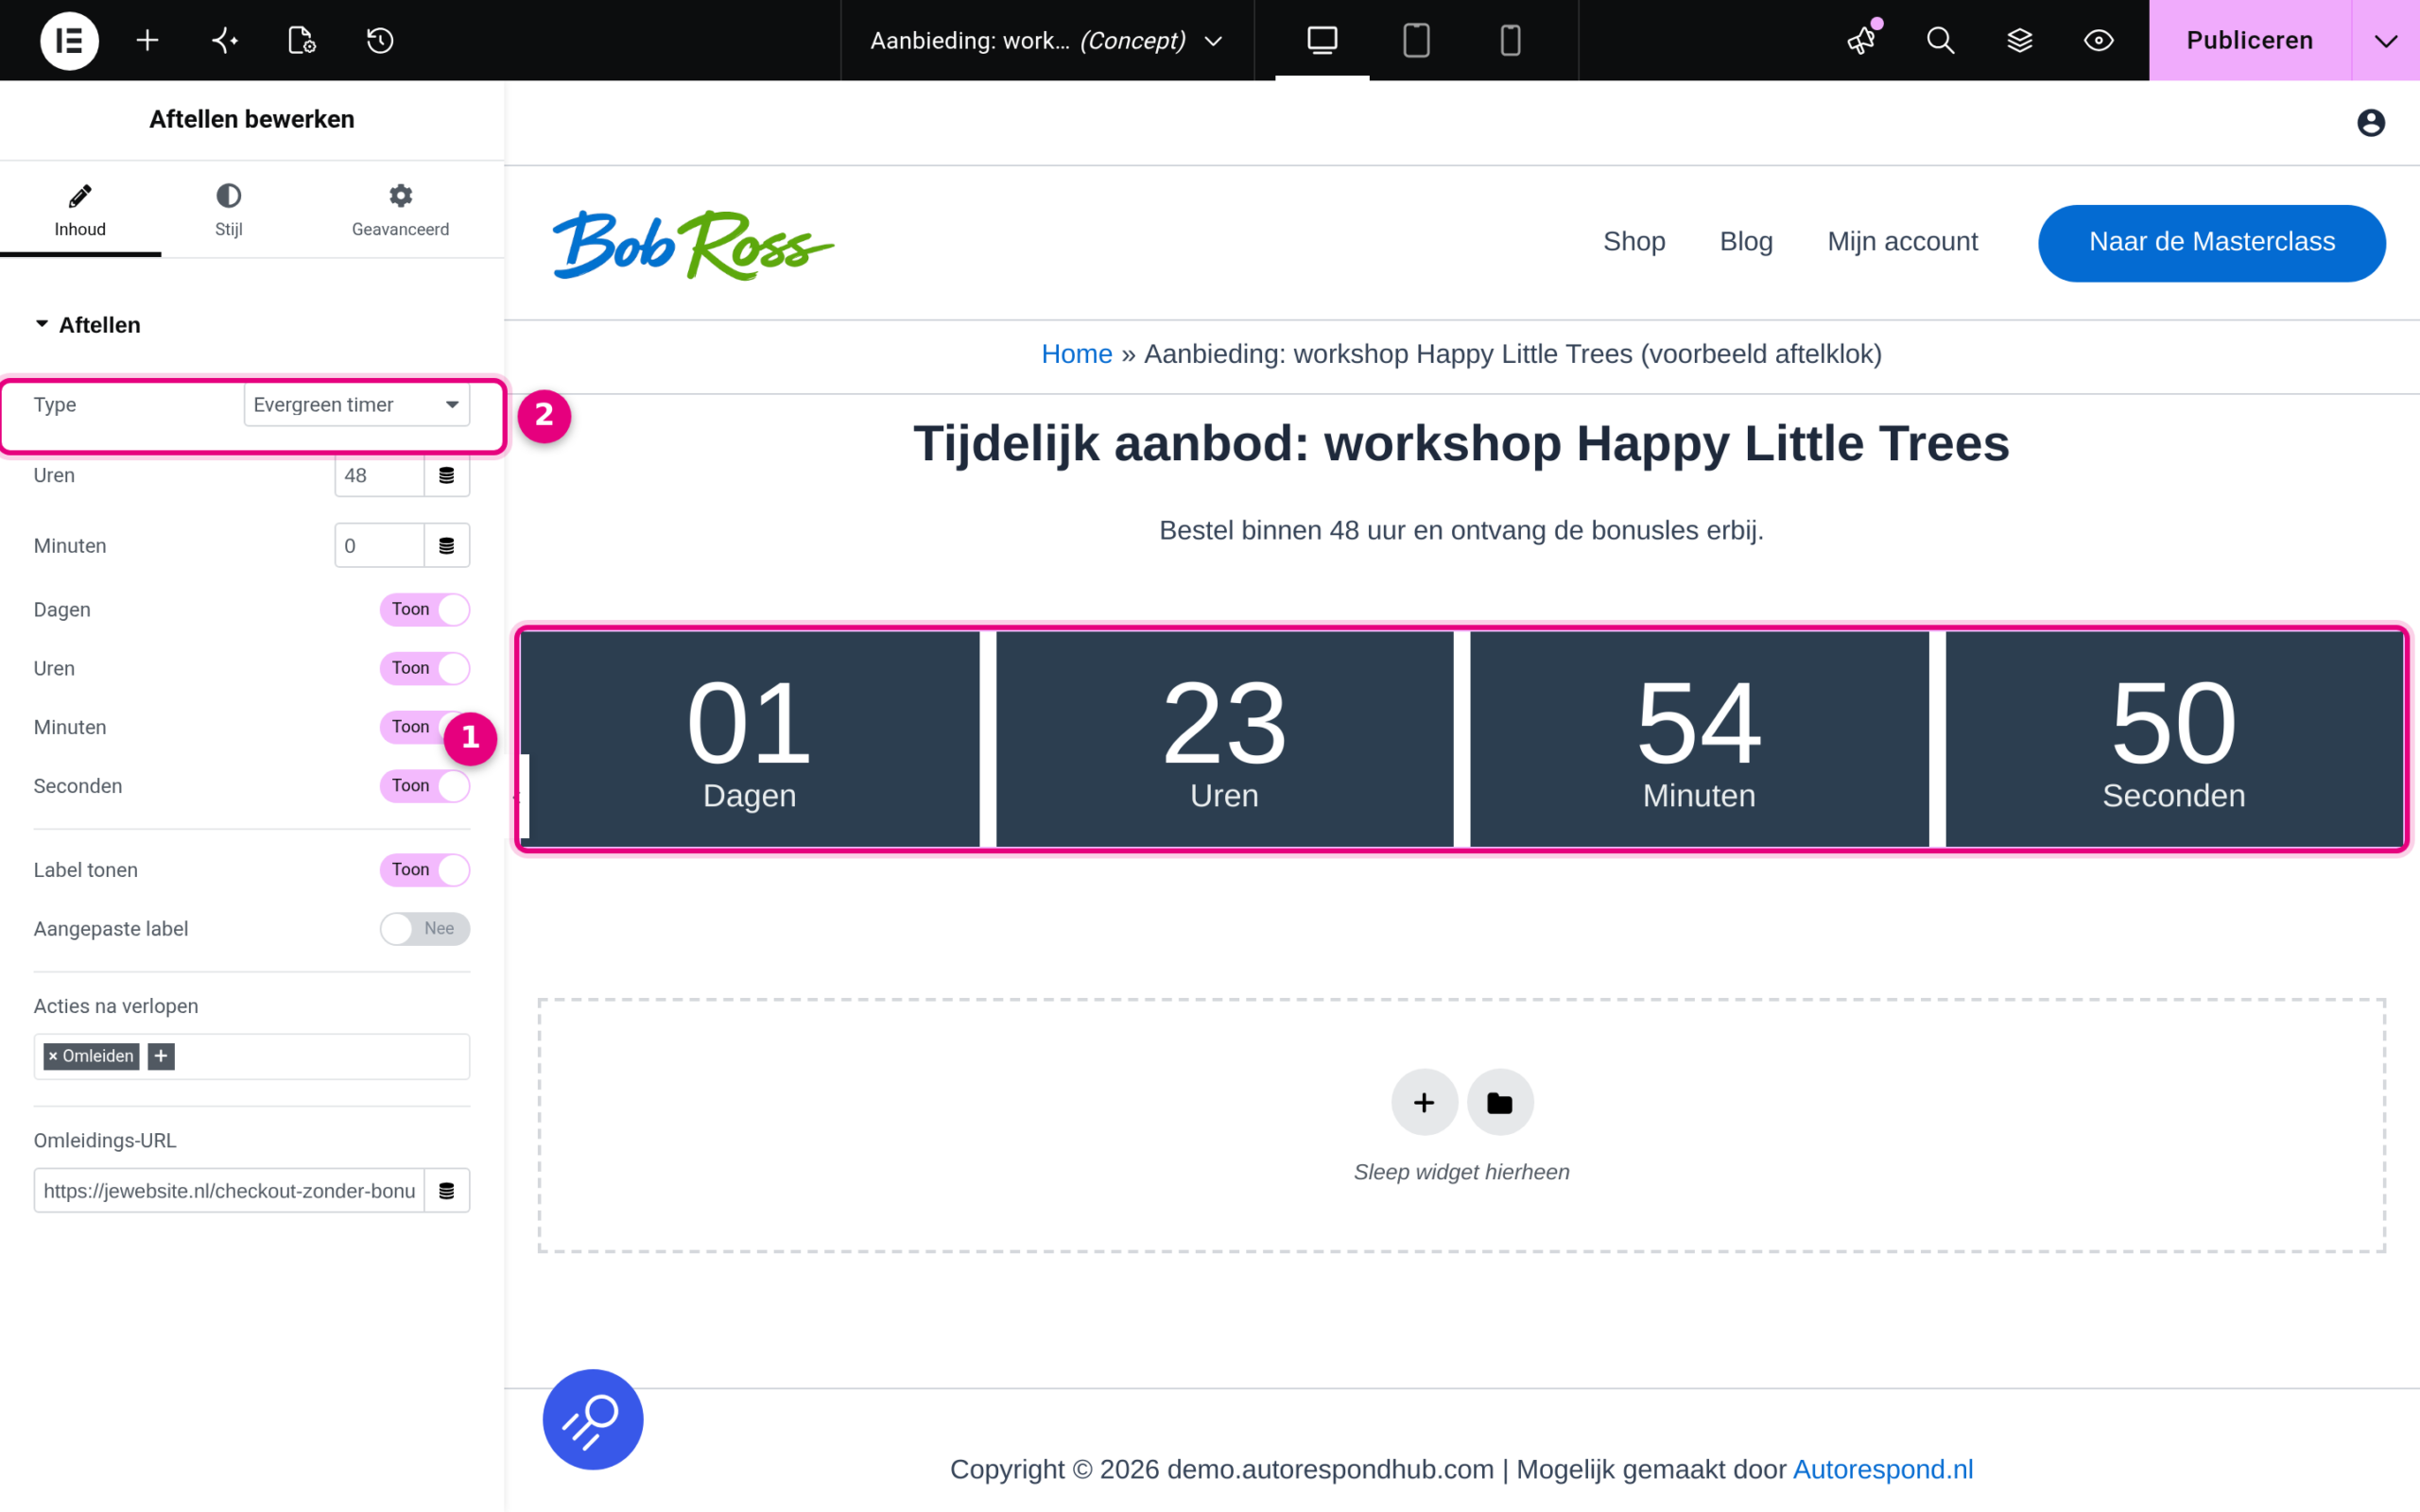
- The countdown timer on your page: the widget shows days, hours, minutes and seconds and counts down live.
- Type: in the left-hand panel you set the type under Countdown; here you choose Evergreen timer in the next step.
Step 2: set up the Evergreen timer #
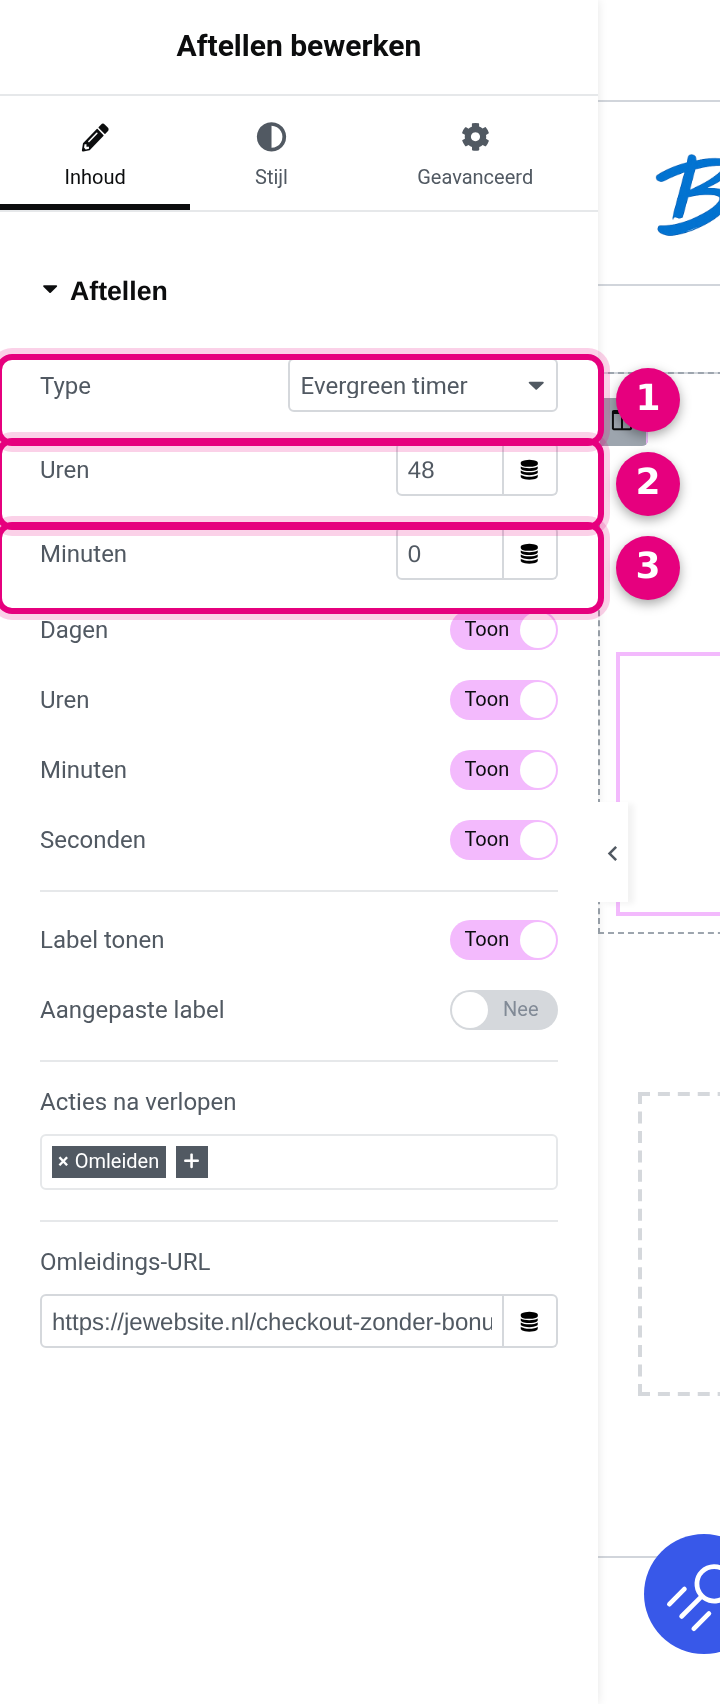
- Type: choose Evergreen timer. The timer then starts per visitor, on their first visit to the page.
- Hours: the running time of the timer in hours. Enter 48, for example, for a two-day campaign.
- Minutes: any extra minutes on top of the hours; usually you leave this at 0.
Below that, the Days, Hours, Minutes and Seconds switches determine which parts of the timer are visible, and Show label determines whether the words appear under the figures. With Custom label you can change those words yourself. You adjust the colours and the size of the timer on the Style tab.
Step 3: choose what happens when the time is up #
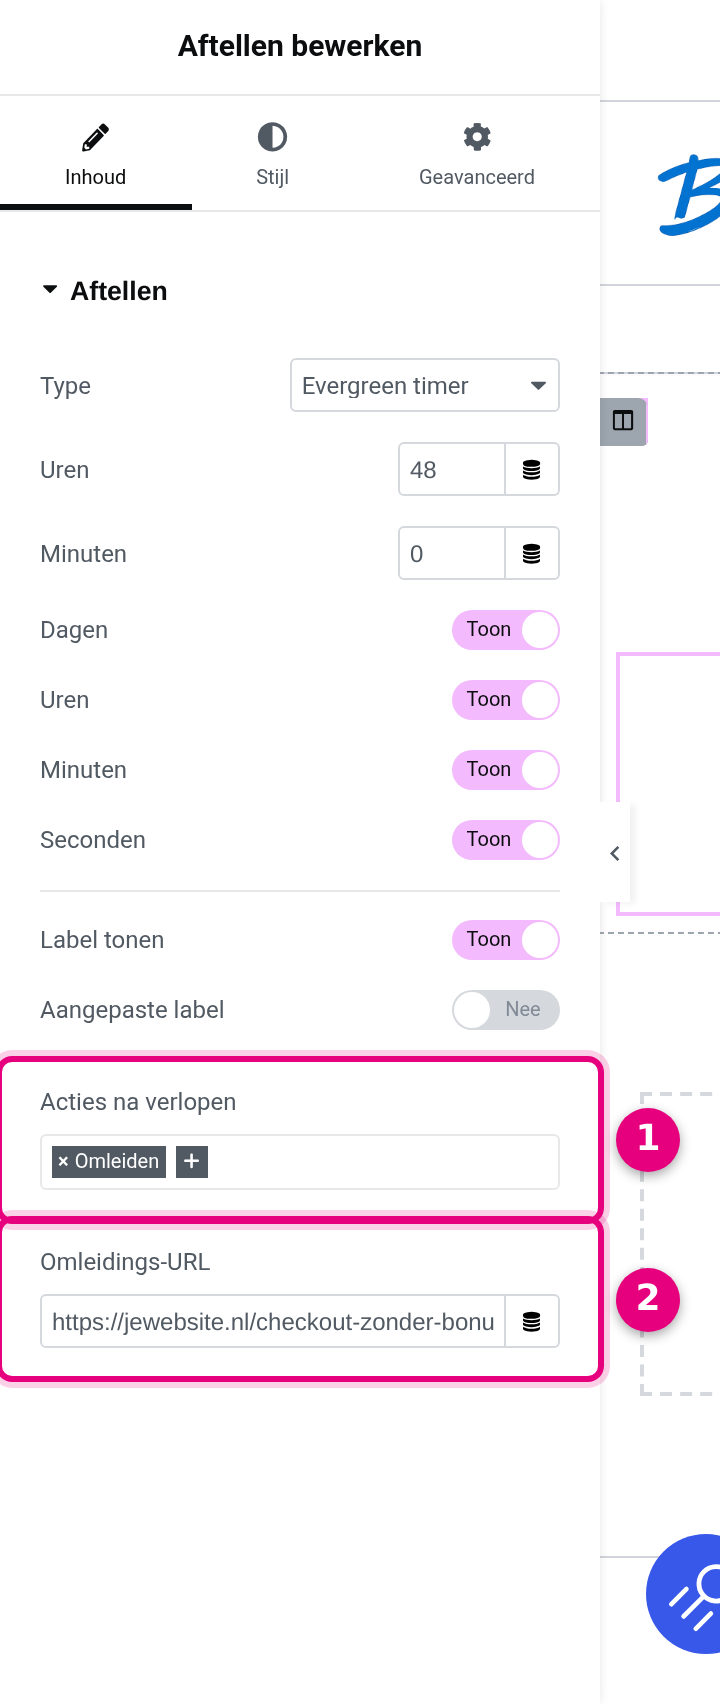
- Actions after expiry: choose Redirect. Visitors whose timer has reached zero are then sent on automatically. You can also choose Hide (the timer disappears) or Message (a text appears).
- Redirect URL: the address the visitor goes to when the time is up, for example your checkout page without the bonus or campaign discount.
Then click Publish (or Update) to save the page.
Good to know: the timer counts per browser #
The Evergreen timer remembers the start time in the visitor’s browser. If someone opens the page in a different browser, on a different device or in an incognito window, the timer starts again. So the countdown timer is mainly a visible nudge, not a watertight limit. If you want a hard limit, combine the timer with a personal discount code with an expiry date: the code expires on the server and really stops working after that, whatever the visitor does. You can read how to set that up in Setting a temporary campaign price after an automated webinar.
Testing #
Temporarily set Hours to 0 and Minutes to 1. View the page, wait until the timer reaches zero and check whether you are sent to the Redirect URL. Test in an incognito window if you want the timer to start again. Then set the real running time back and save the page again.


