Do you have your own website and use the Fluent Forms Pro plugin? You can keep using that plugin and those forms, and connect sign-ups straight to your Autorespond CRM. With an incoming webhook you can forward form entries from any external website automatically to your Autorespond contact database. This is ideal if you have several websites but want to manage all your leads centrally, and do not want to use the standard form embed option through an iframe.
This method suits you particularly well if you already use Fluent Forms Pro heavily on your main site, but want to collect all contact details centrally in your Autorespond CRM.
Forms and CRM in Autorespond are based on Fluent Forms Pro and FluentCRM Pro, both included in your Autorespond package. Read the English documentation. To use Fluent Forms Pro on your own main website (so outside your Autorespond website), you can buy the plugin yourself and install it on that site.
Step 1: create an incoming webhook in your Autorespond CRM #
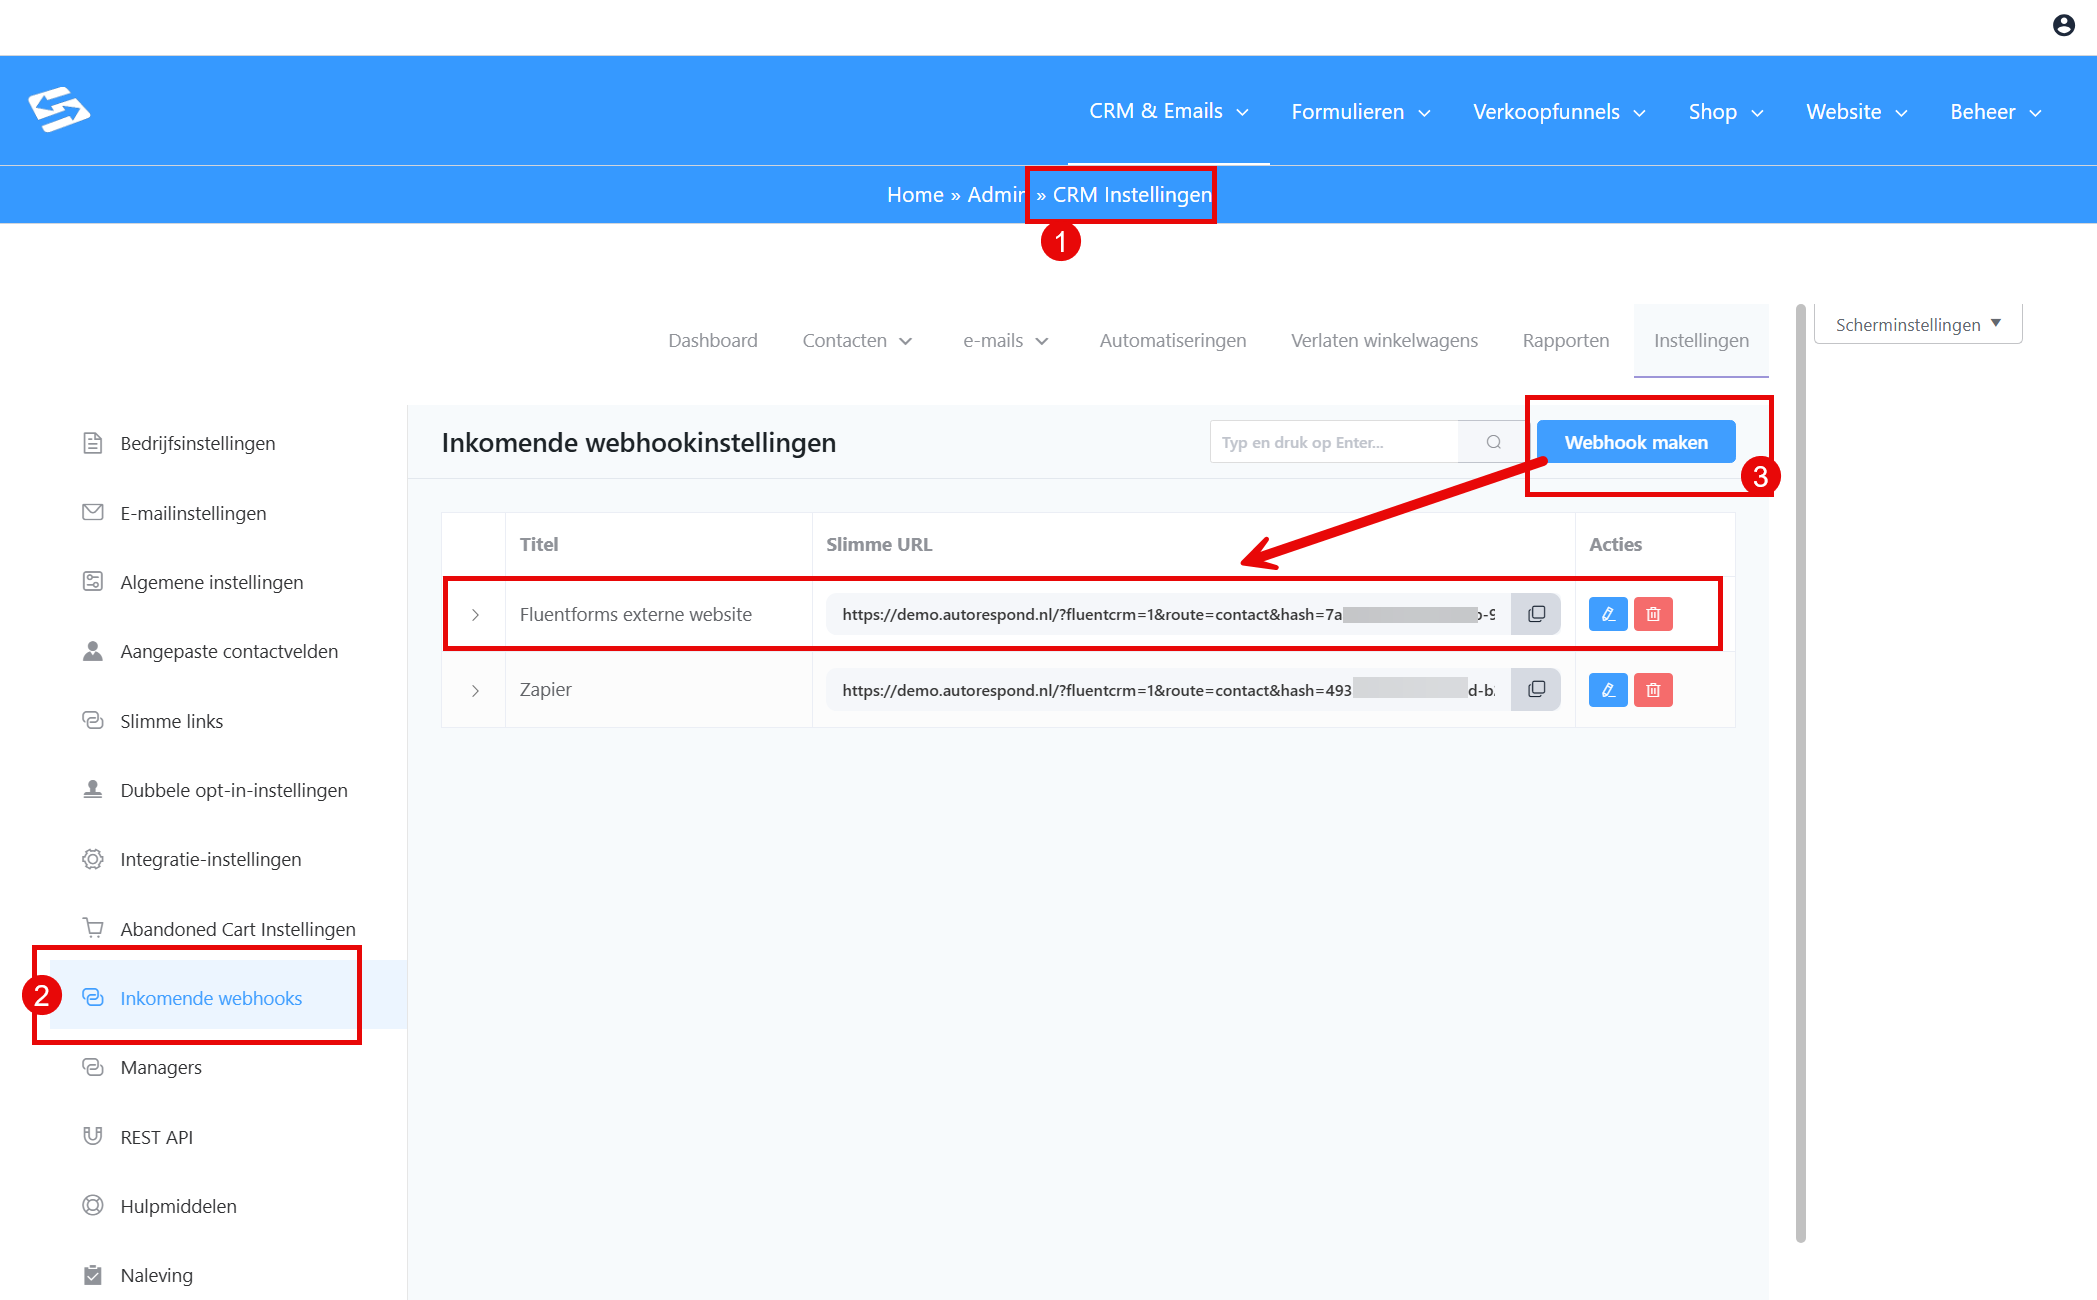
In your Autorespond administration, go to CRM & Emails → CRM Settings → Incoming WebHooks.
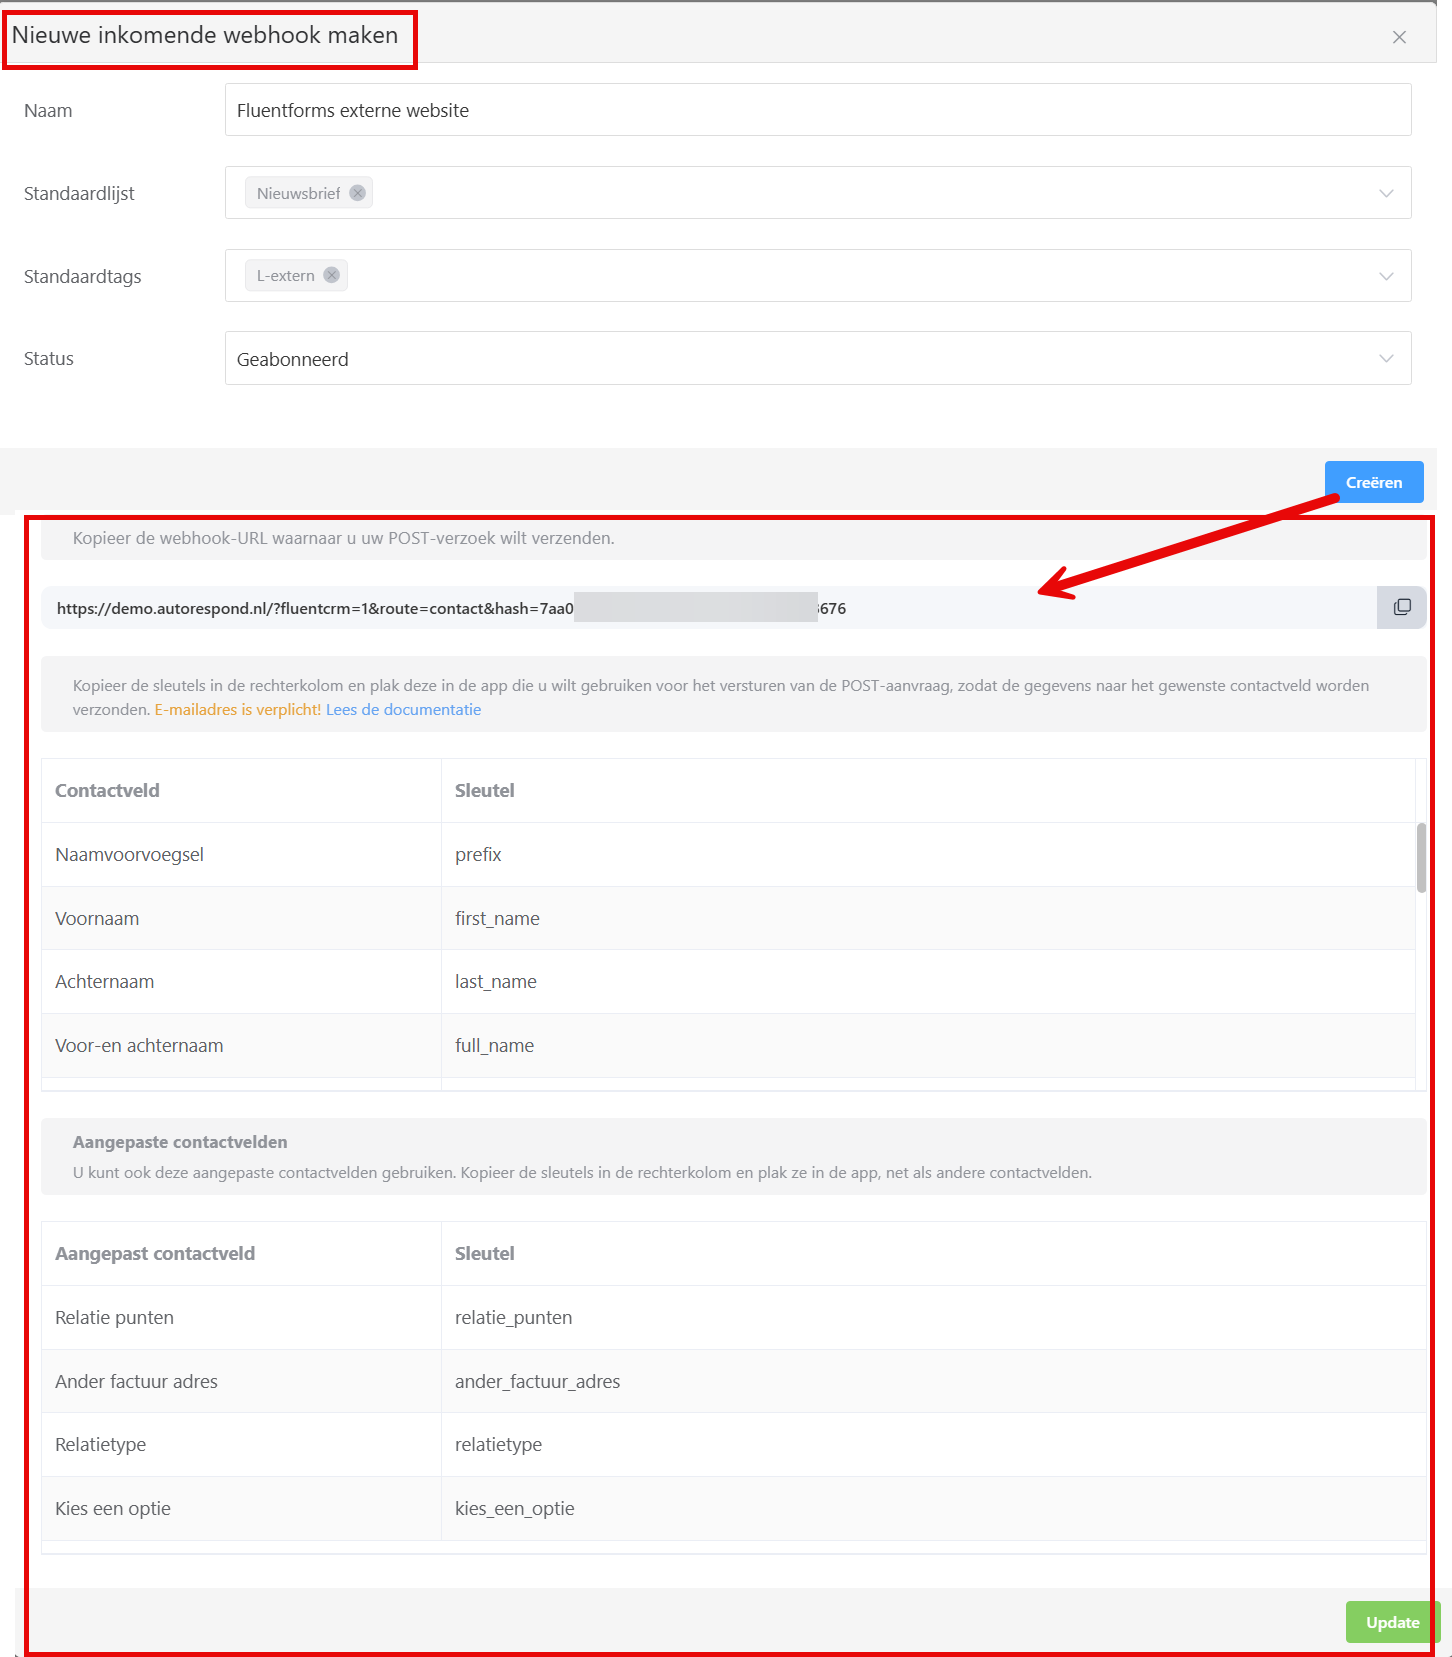
Click ‘Add webhook’ and fill in the following:
- Webhook name: give it a recognisable name (for example ‘Contact form main website’)
- Description: an optional note for yourself
- Lists: select the list that new contacts should be added to
- Tags: optionally choose tags to be assigned automatically
After saving you get a unique webhook URL. Copy that URL, you need it in the next step. The URL also acts as authentication, so keep it safe.
Step 2: set up the webhook integration on your external form #
Go to the external website where your form lives.
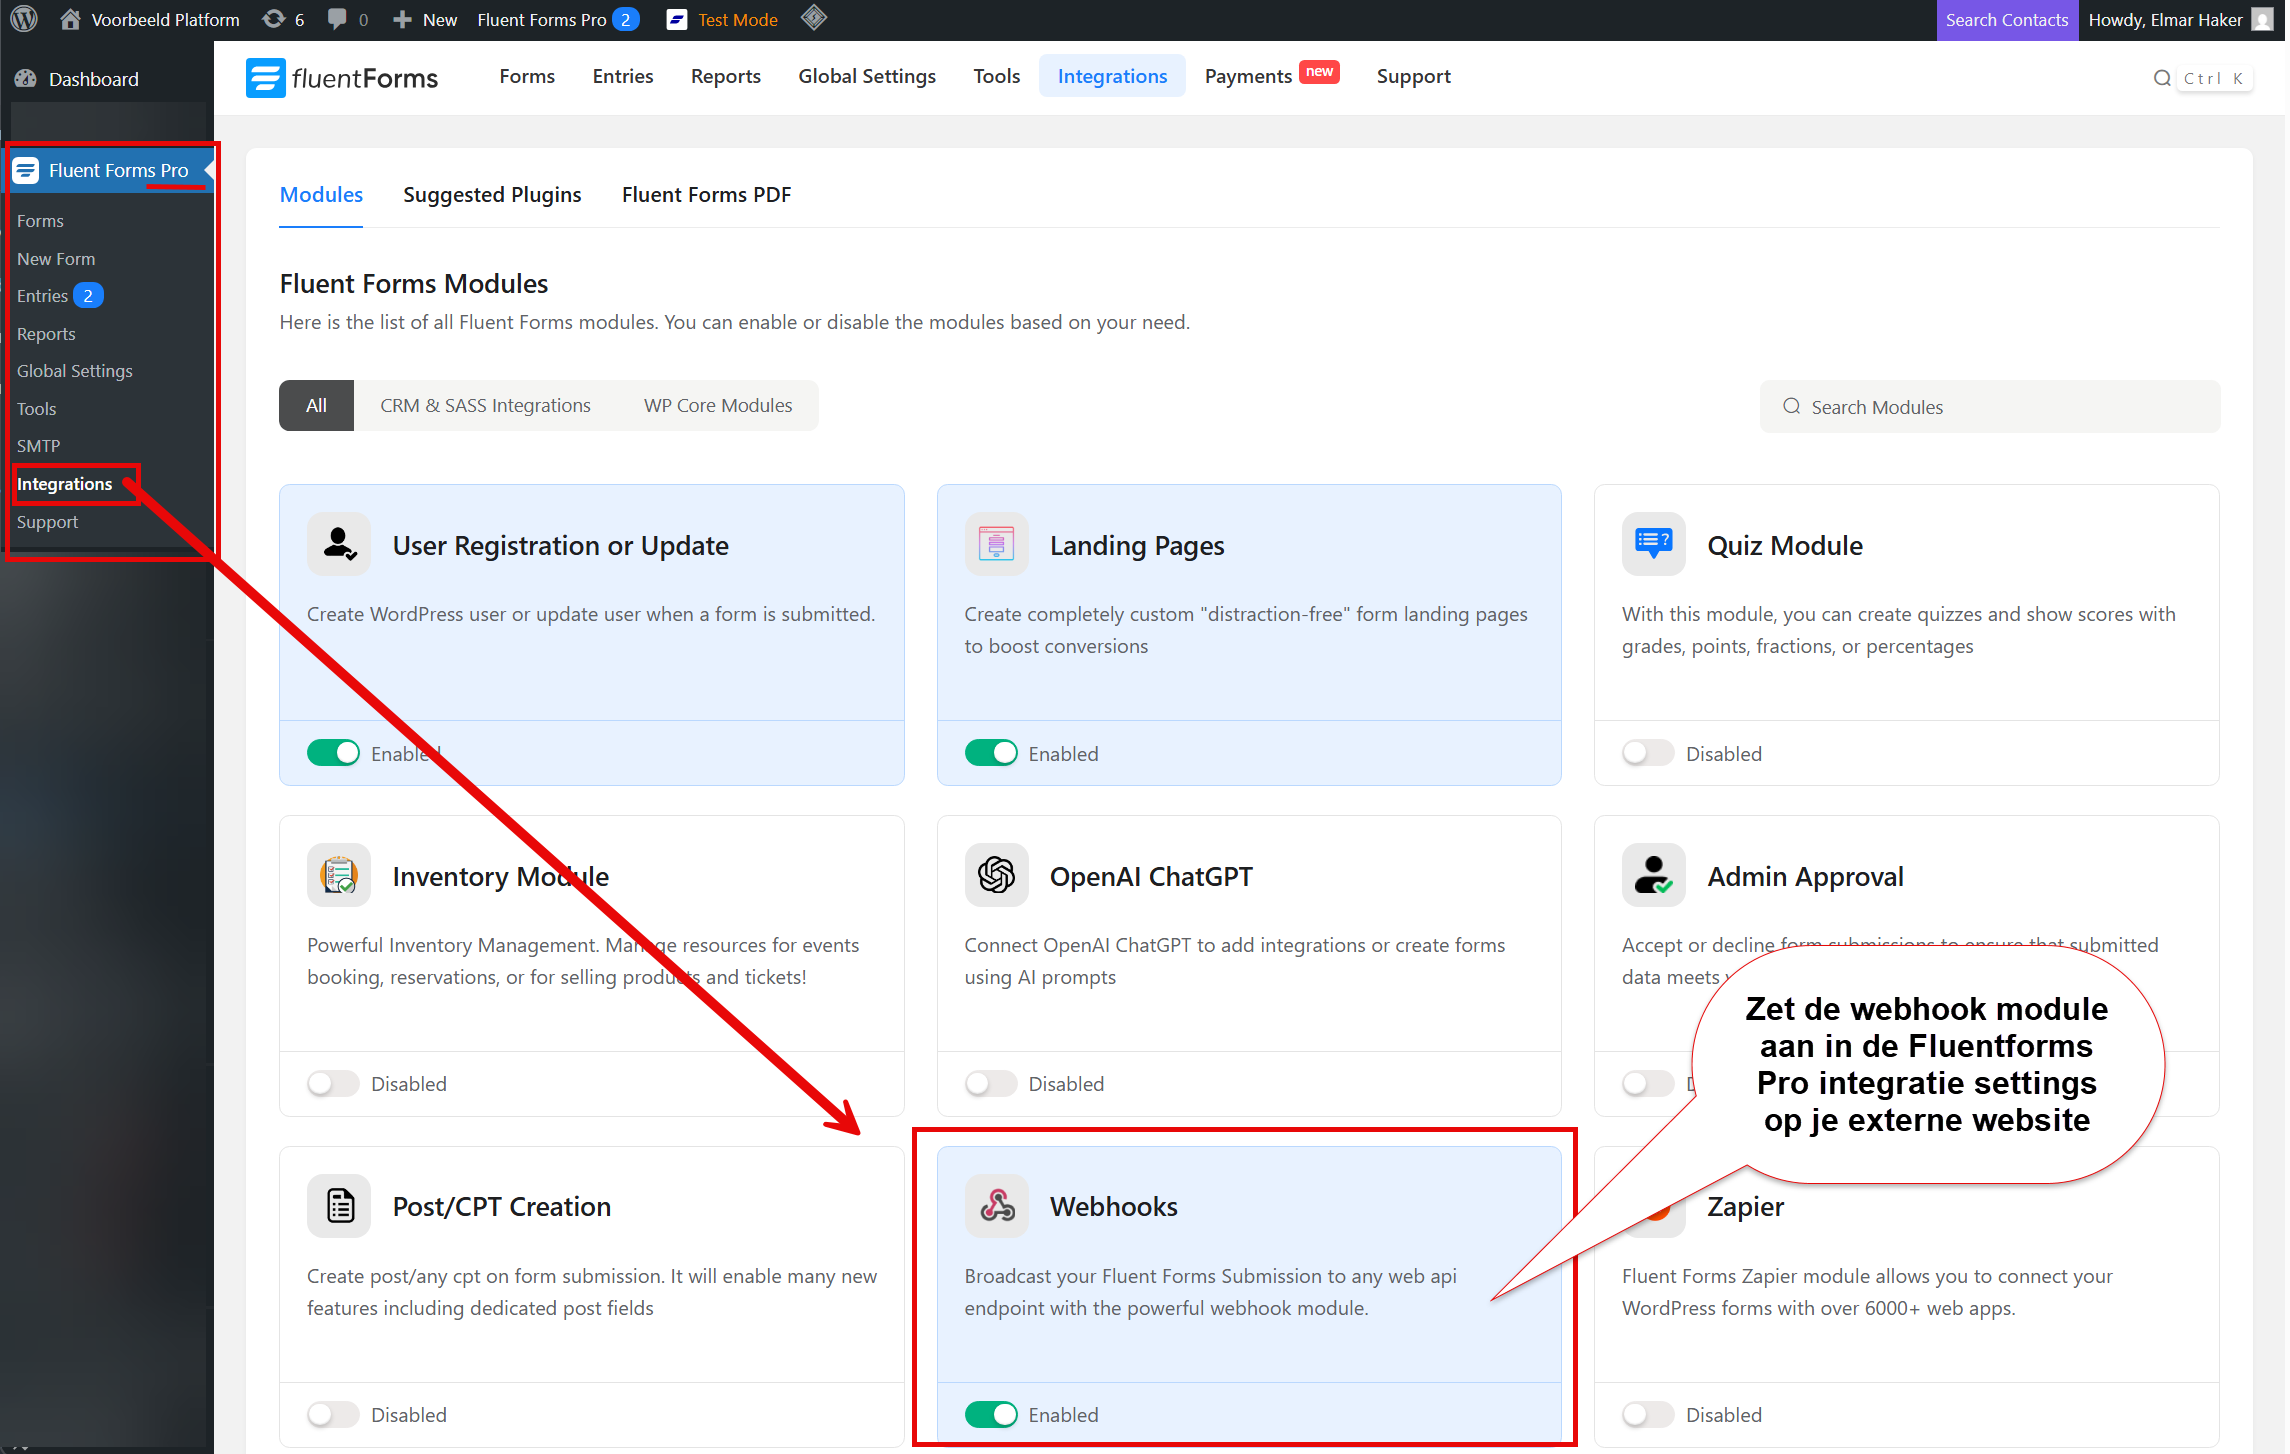
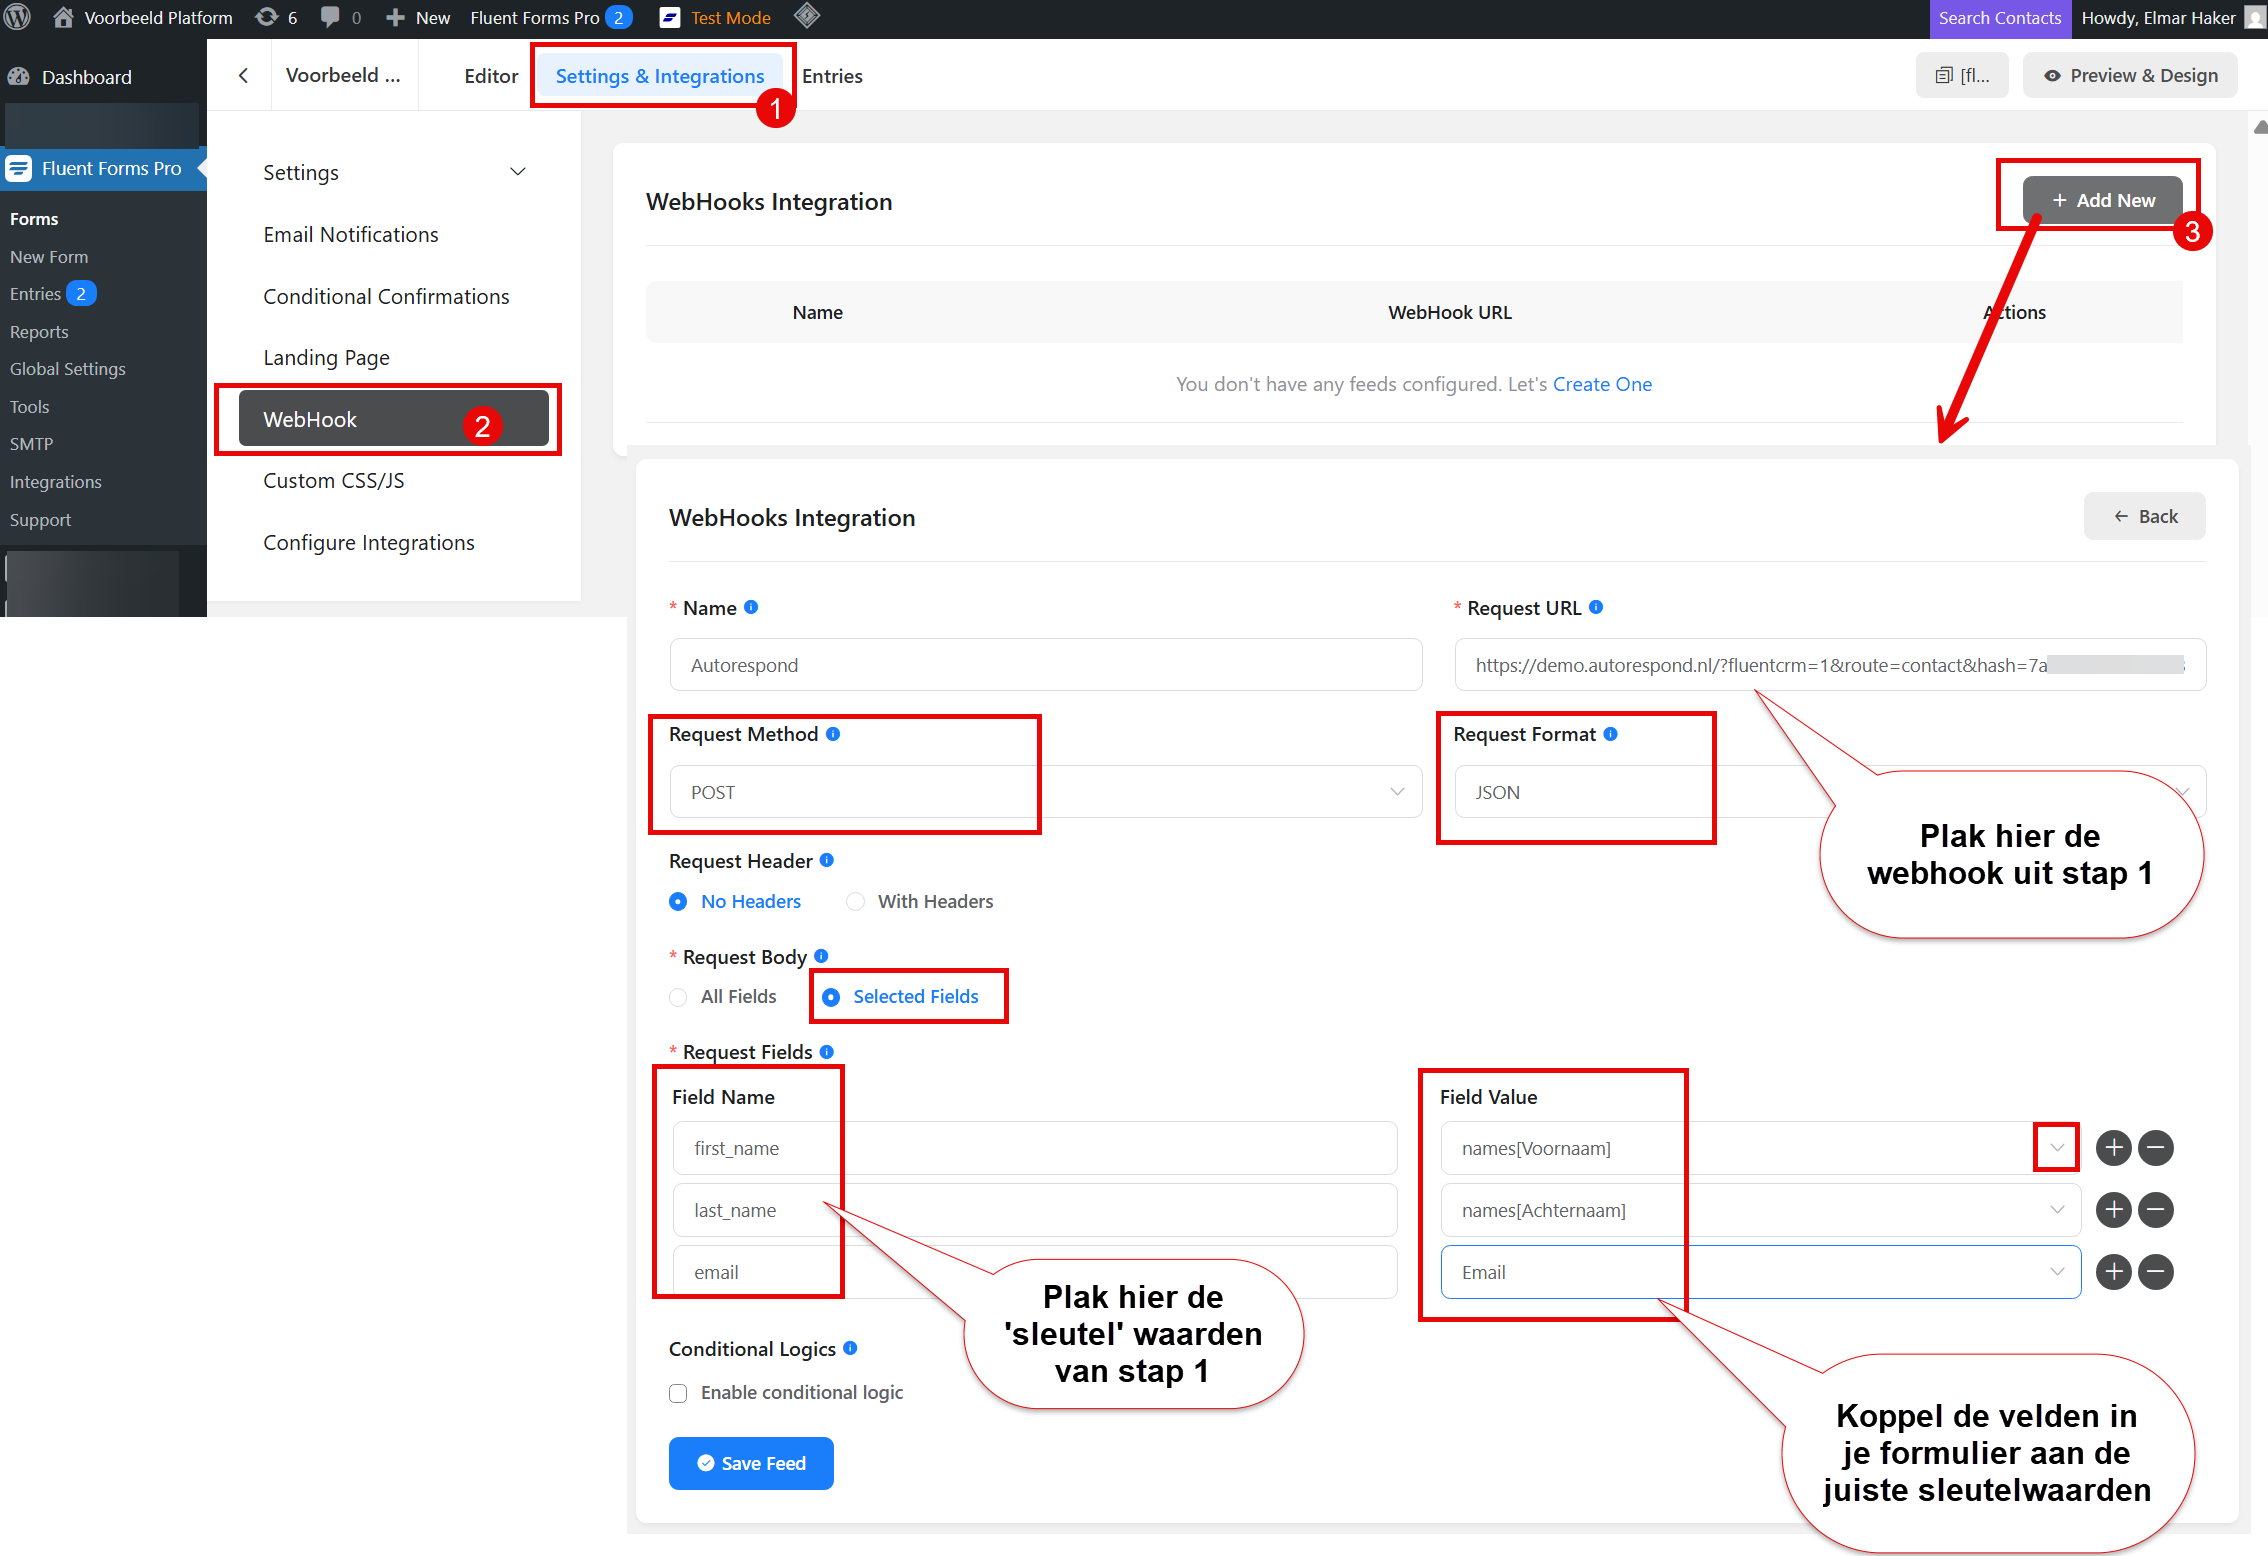
First go to wp-admin Fluent Forms Pro > Integrations and switch on the webhook module:
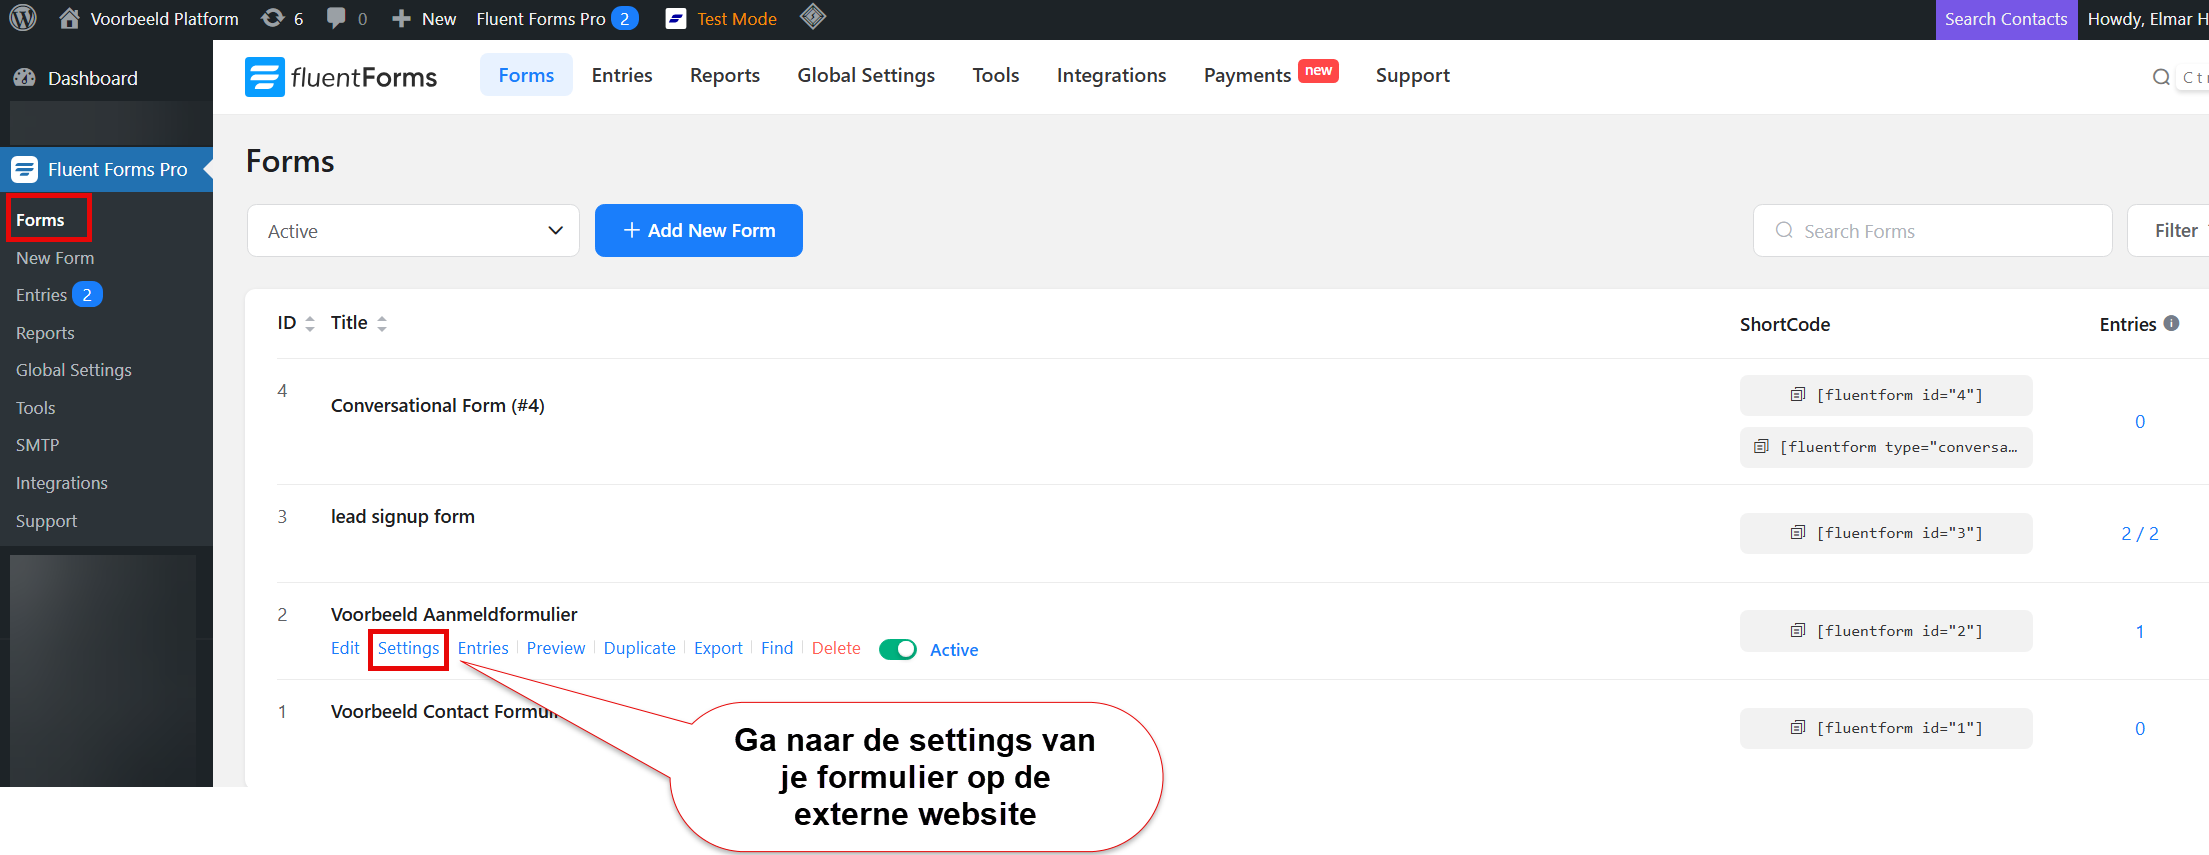
Then open the form and go to the ‘Webhooks’ tab:
Click ‘Add New Integration’ and select ‘WebHooks’. Fill in the following settings:
- Request URL: paste the webhook URL from step 1 here
- Request Method: choose ‘POST’
- Request Format: select ‘JSON’
Step 3: map the fields between form and CRM #
In the webhook configuration you map the form fields to the CRM fields. Use these standard mappings:
- Key: email | Value: {inputs.email} (replace ’email’ with the name of your email field)
- Key: first_name | Value: {inputs.first_name} (replace ‘first_name’ with the name of your first name field)
- Key: last_name | Value: {inputs.last_name} (replace ‘last_name’ with the name of your last name field)
Use the same structure for other fields such as phone, city or custom fields. You can look up the key names in your CRM settings, in the webhook from step 1
Save the webhook.
Step 4: test and check #
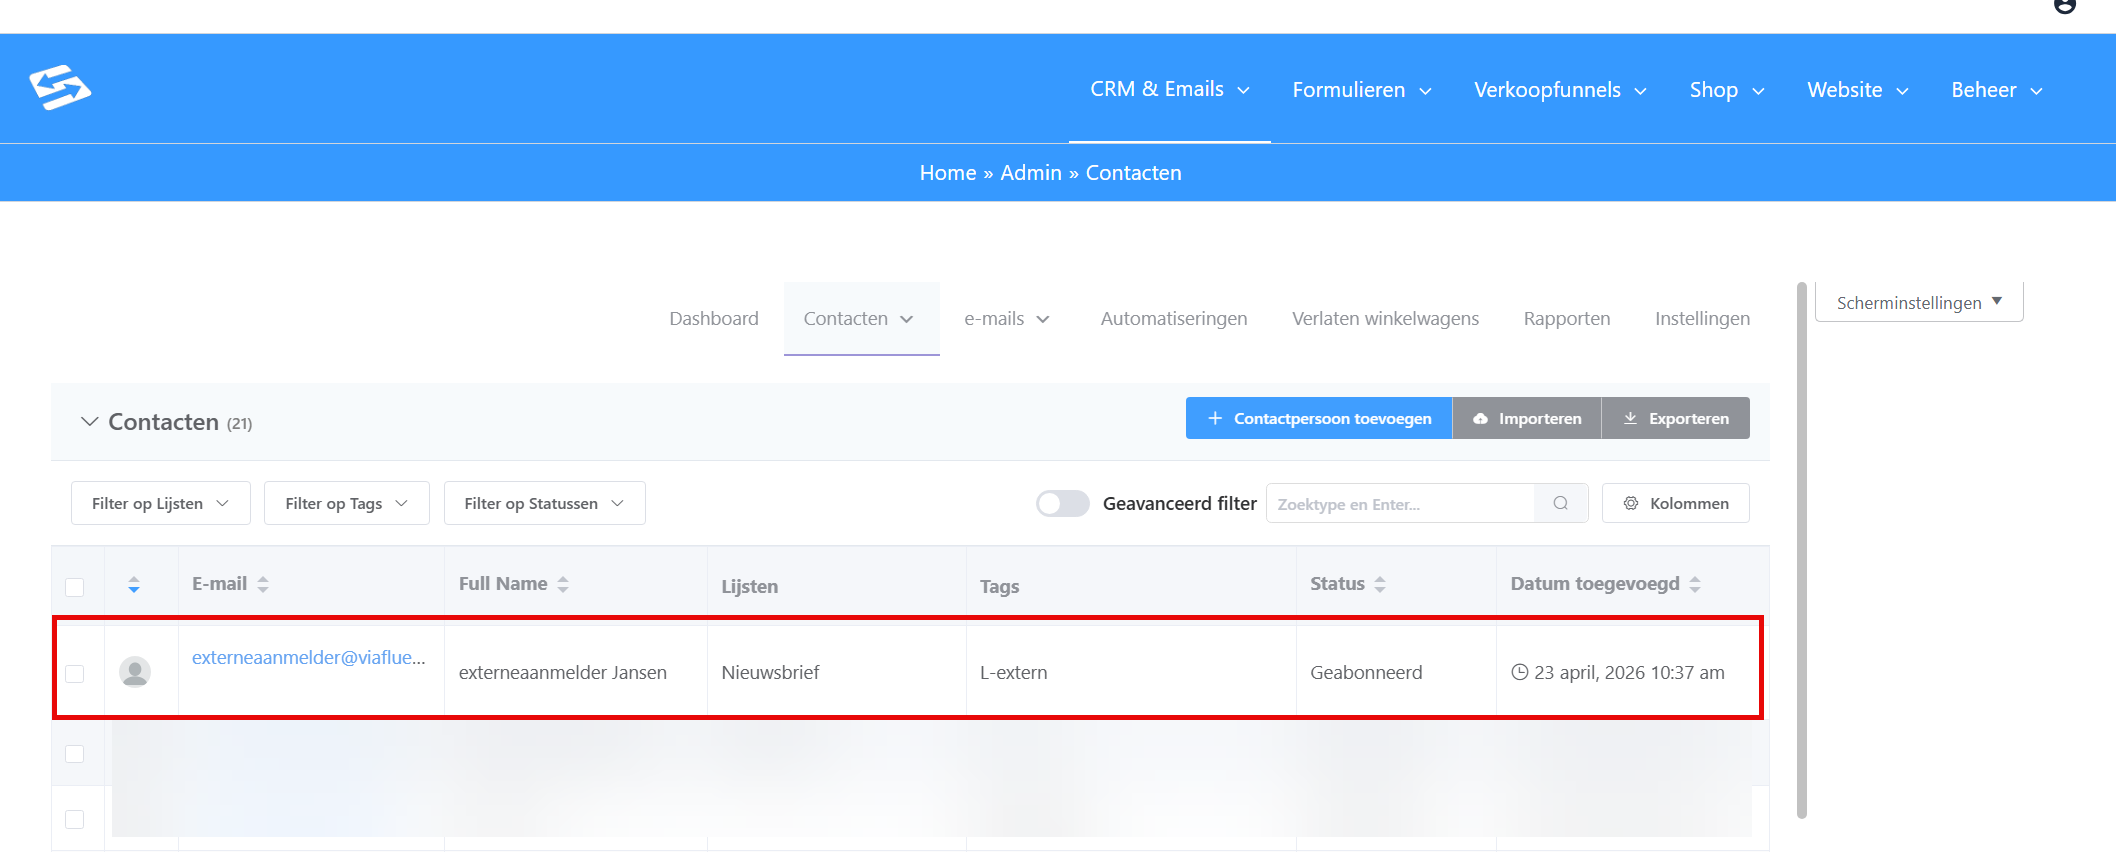
Fill in the form on your external website with test data and submit it. Then check in your Autorespond CRM whether the contact was created:
- Go to CRM & Emails → Contacts
- Search for the email address or the name you entered
- Check that the right list and tags were assigned
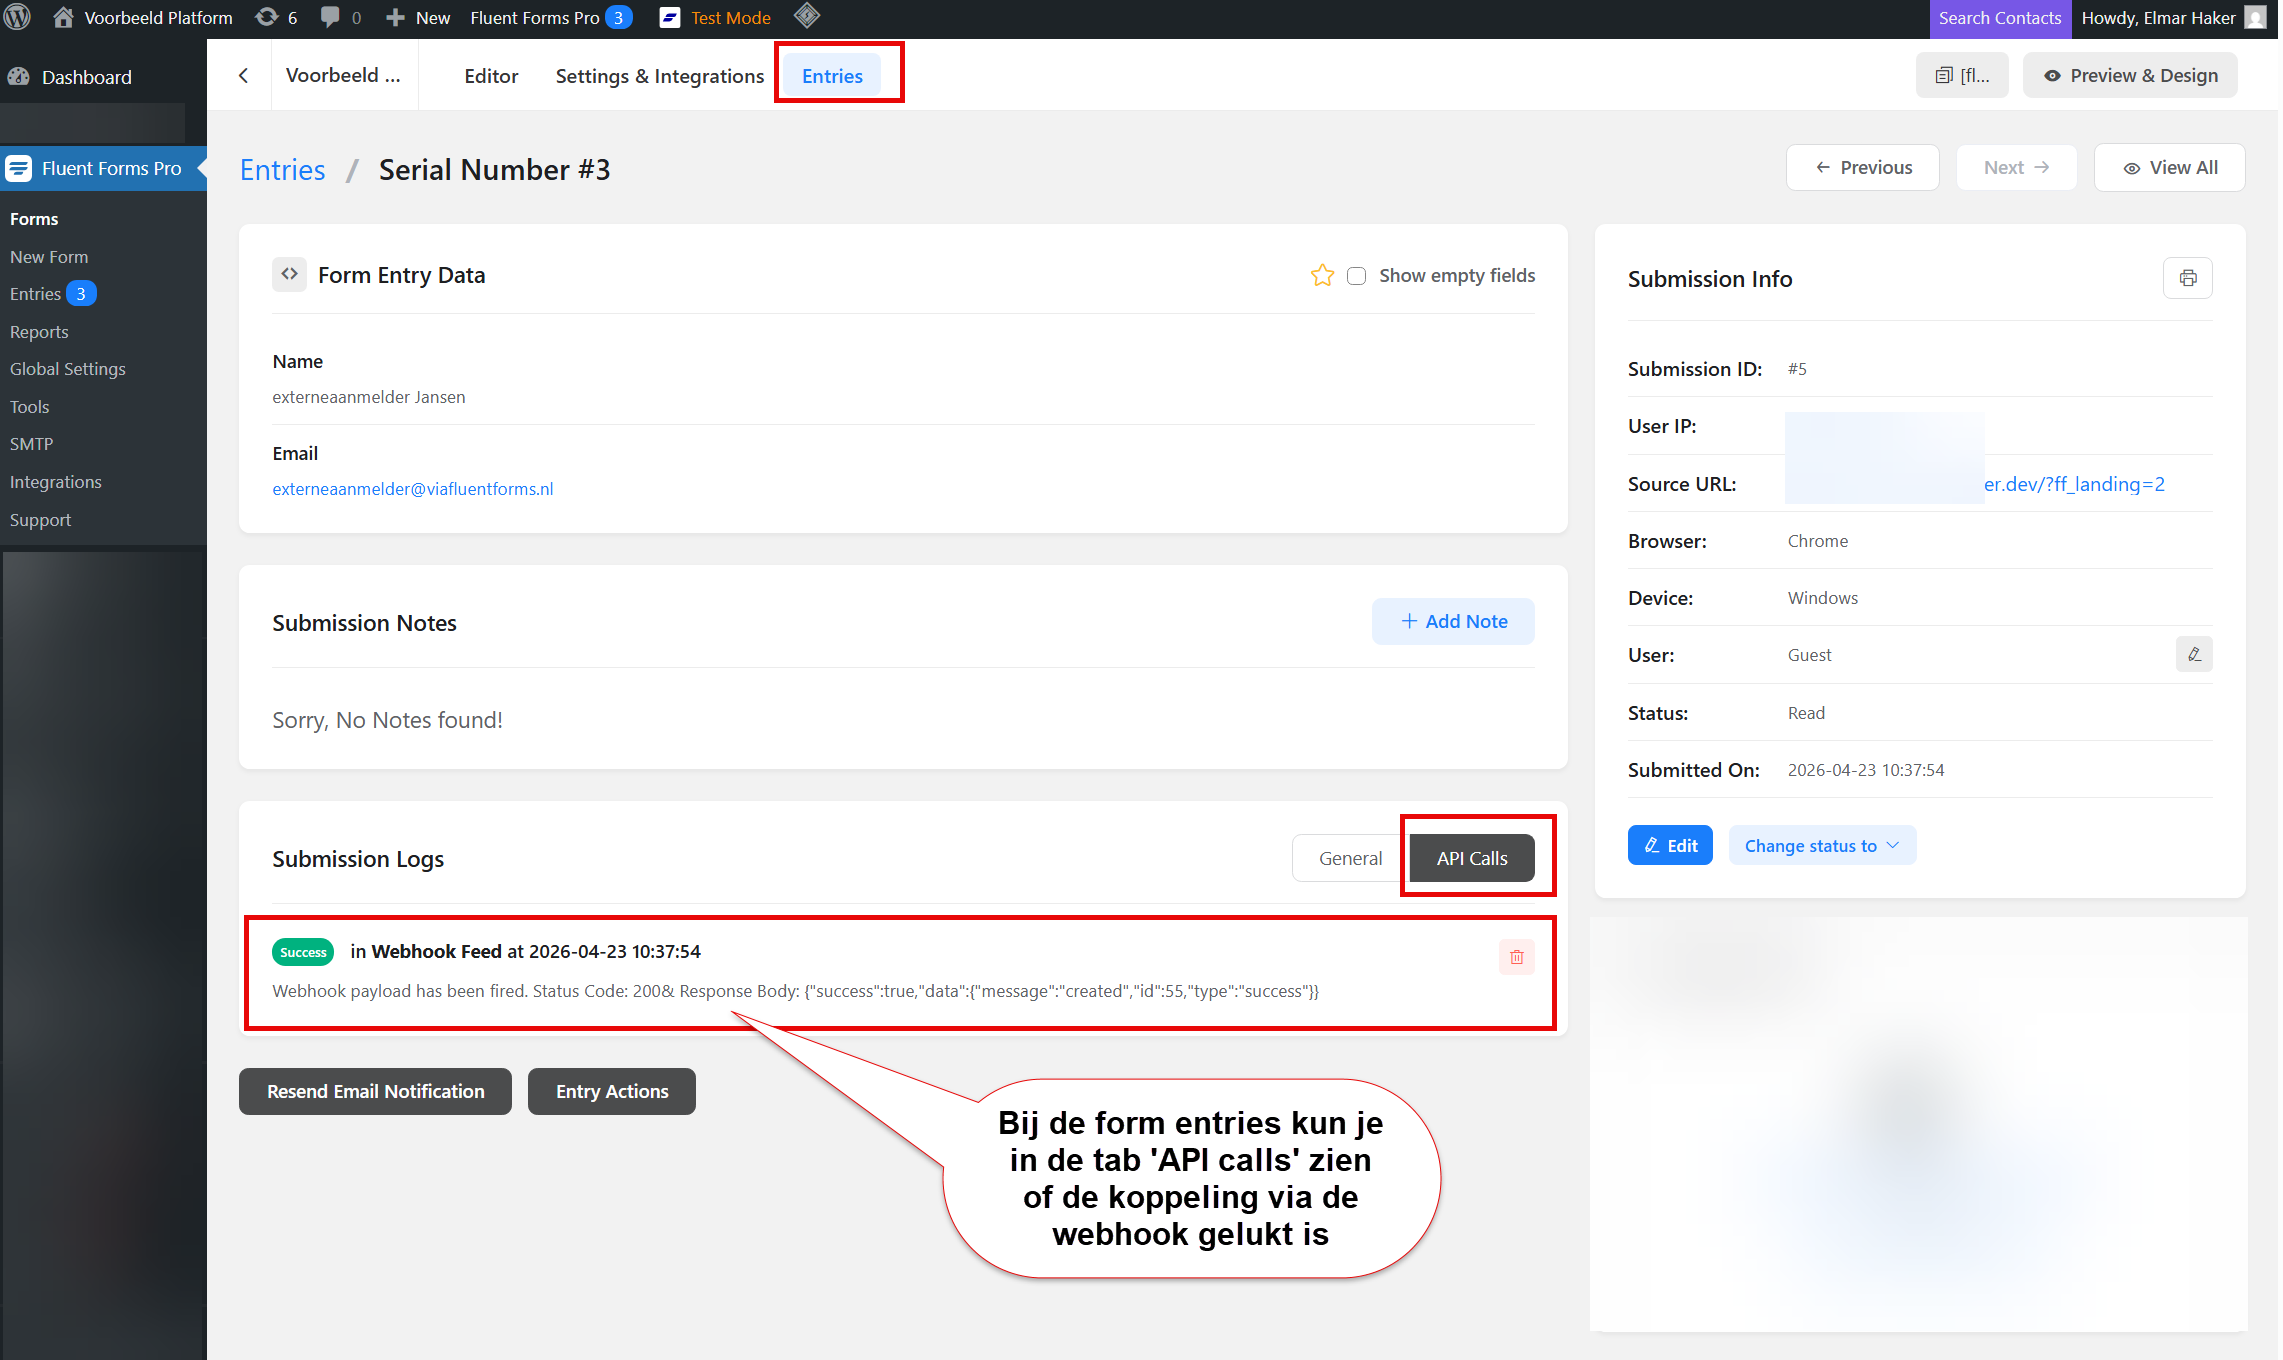
If the contact does not appear, check the webhook URL and the field mappings. In Fluent Forms you can see under Form Entries whether the form was submitted correctly.
Connecting several forms or websites #
You can use the same webhook URL for several forms, but it is clearer to create a separate webhook per form or per website. That way you can assign different lists and tags, and keep better track of where contacts come from.
For every new form, repeat steps 1 to 4 with a new webhook name and, if you want, different list or tag settings.
Frequently asked questions #
Can I send custom fields through the webhook as well? #
Yes, custom contact fields are supported automatically. Use the name of the custom field as the key, exactly as set under CRM & Emails → CRM Settings → Custom fields.
What happens if the email address already exists in my CRM? #
The existing contact is updated with the new information. The lists and tags you set are added to the existing profile without any existing data being lost.
Can I change the webhook connection later? #
Yes, you can always go back to CRM & Emails → CRM Settings → Incoming WebHooks to change the list and tag assignments. You do not need to change anything in the form itself.
For more advanced form options and integrations, see also how to connect forms directly to the CRM within the same Autorespond environment.


