The email preference settings determine whether contacts can manage their own list subscriptions through a preferences page. This gives contacts more control over which emails they receive and reduces unsubscribes, because people can switch off specific topics instead of opting out entirely.
The merge tag you place in your email for this (usually in the footer) is:
##crm.manage_subscription_url##
Email preferences in Autorespond are based on FluentCRM Pro, which is included in your package.
Finding the email preference settings #
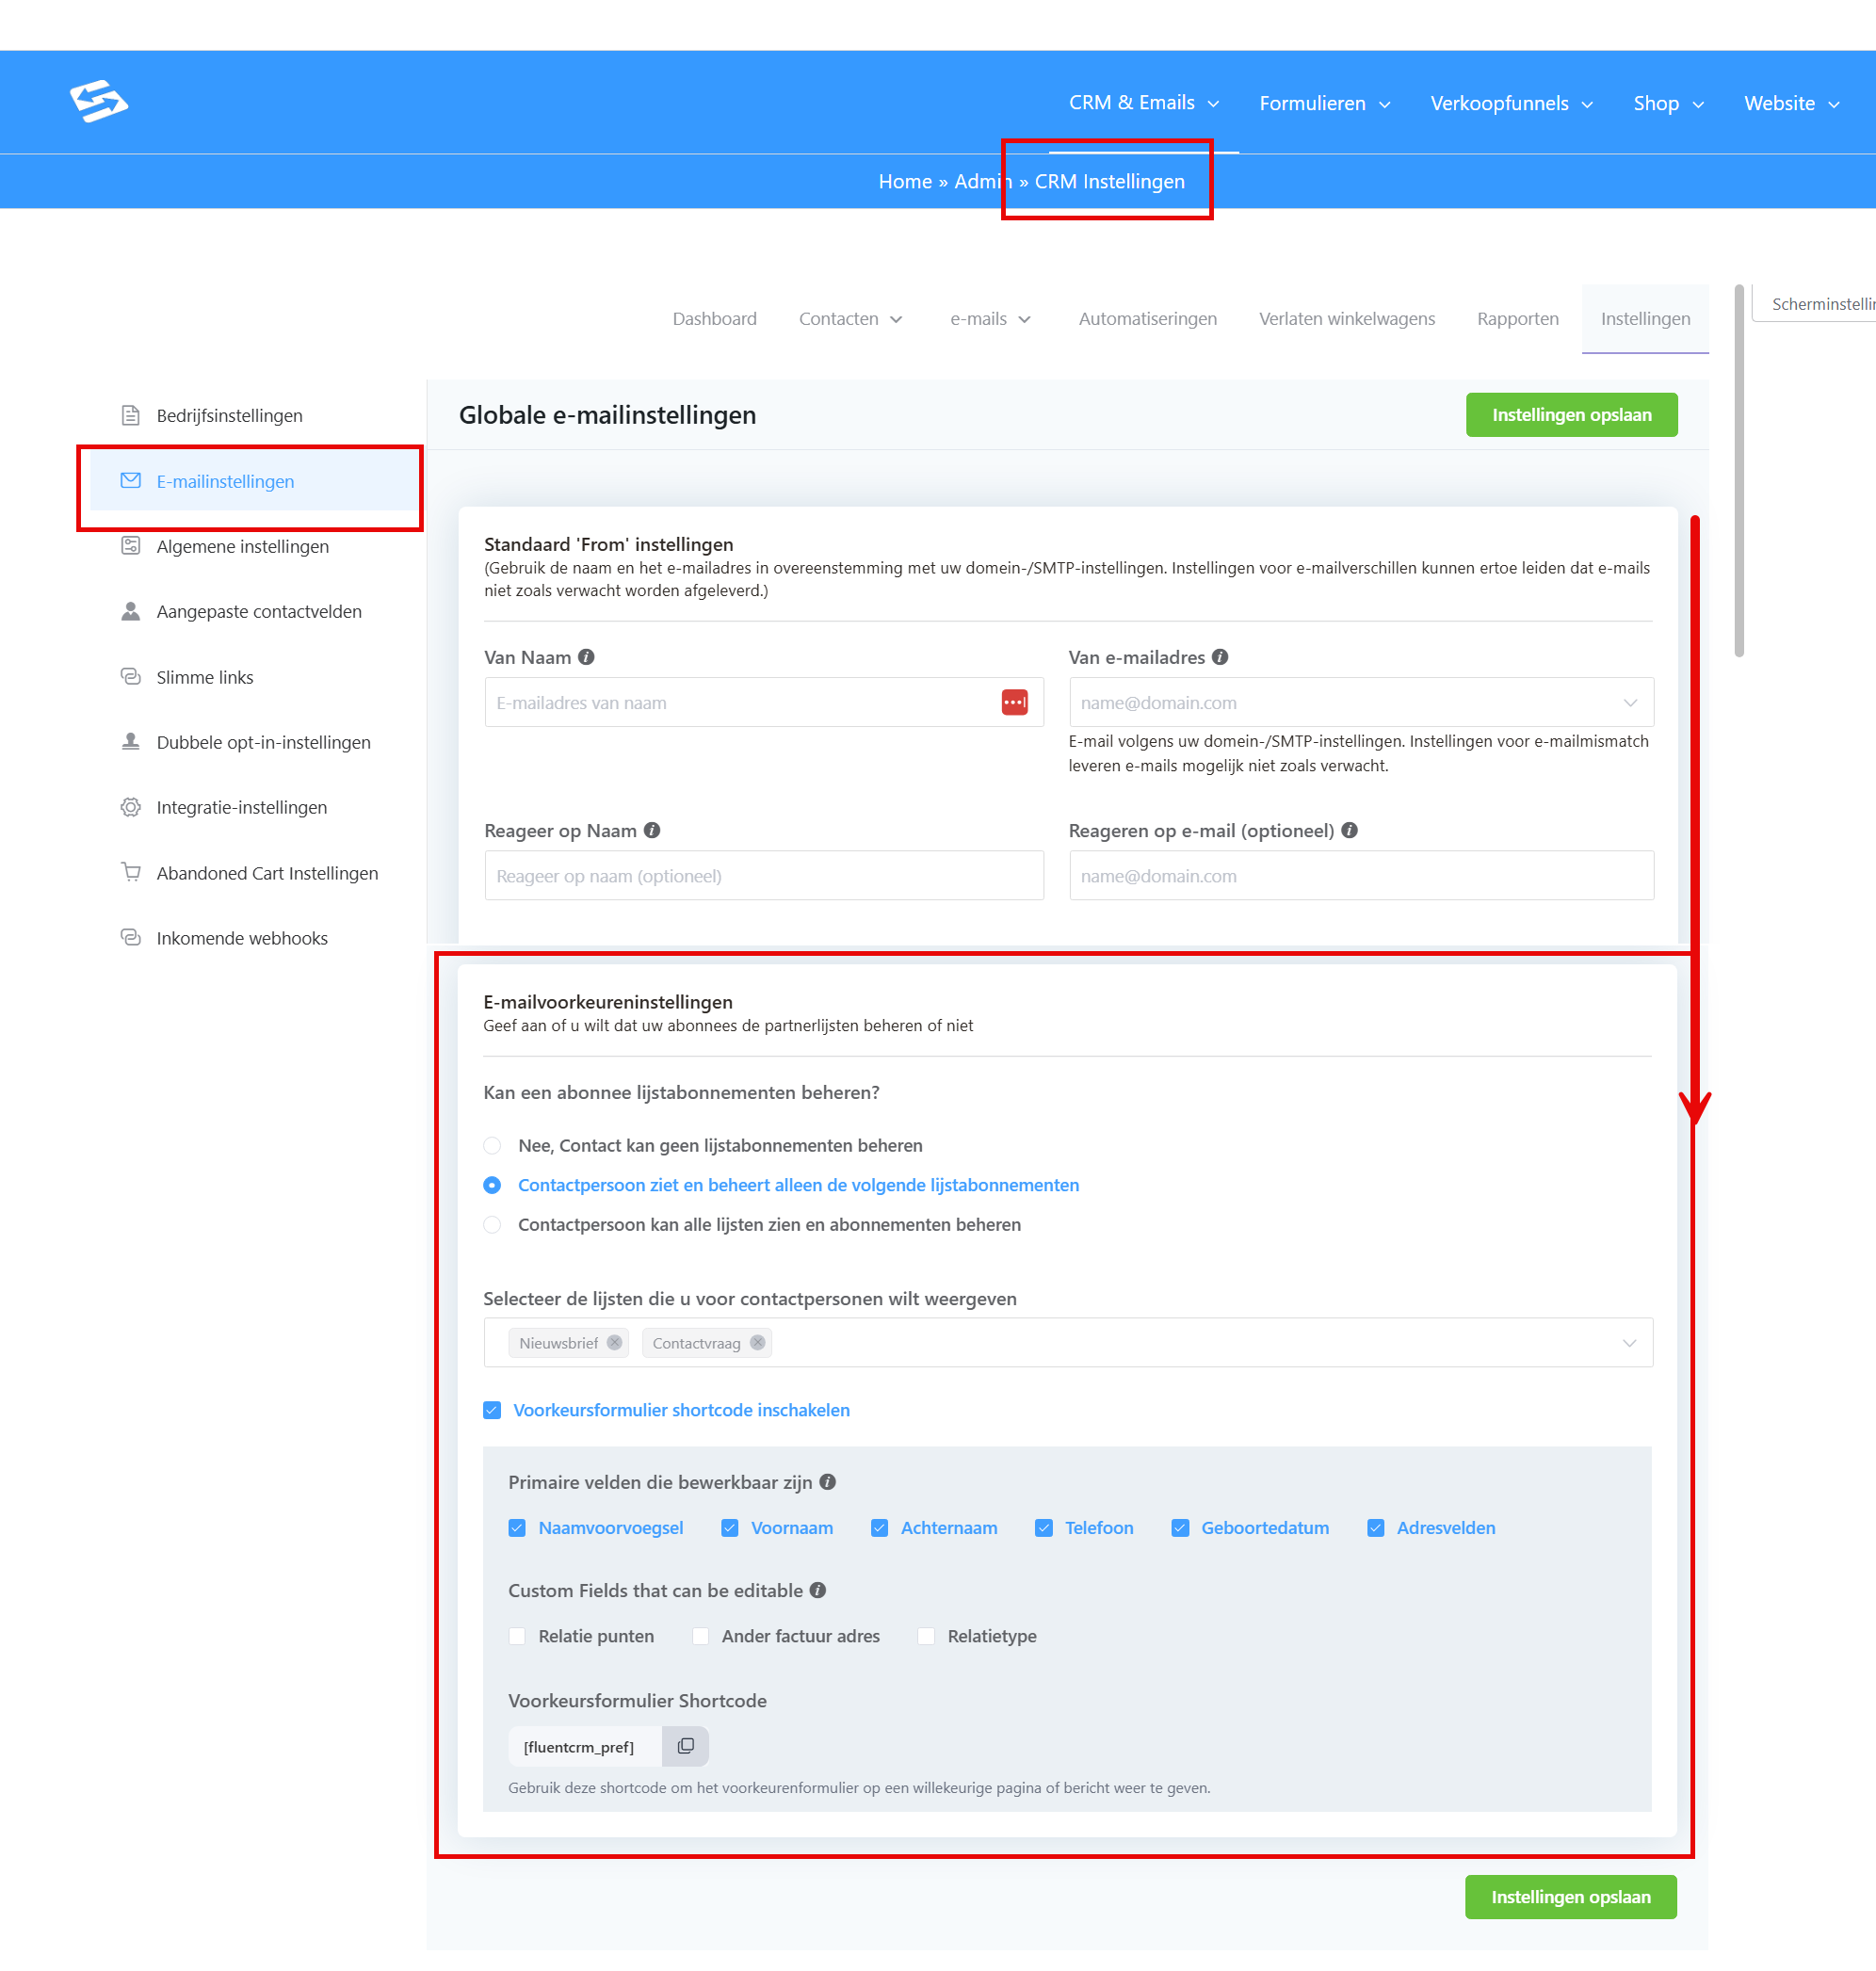
In your Autorespond administration, go to CRM & Emails → CRM Settings. Click Email settings in the sidebar and scroll to the Email preference settings section.
The three preference options #
You can choose from three settings for how contacts manage their list subscriptions:
Option 1: No (recommended for a simple setup) #
Contacts cannot manage their list subscriptions. They can only stop all marketing emails through the unsubscribe link. Use this option if you want a simple setup without separate lists.
Option 2: Selected lists only (recommended) #
Contacts see and manage only the lists you select. This is the most flexible option, because you decide exactly which lists are visible on the preferences page. Use it if you have different topics (newsletter, offers, product updates) that contacts can choose between.
Option 3: All lists #
Contacts see every list in your CRM and can subscribe to or unsubscribe from any of them. Note that this also shows internal lists that are not meant for contacts to manage. Use this option only if all of your lists are suitable for contacts to see.
Letting contacts edit their own details with the ‘preferences form’ #
If you also want to let your contacts change their own details, tick the box at ‘Enable preferences form shortcode’. Below that, you can then tick which fields your contacts may change themselves. You can make first name, last name, phone, date of birth and the address fields editable. It then works as a kind of profile page for your contacts.
Note: contacts cannot change their email address this way.
The preferences form shortcode #
The Generate preferences form shortcode button gives you a shortcode that displays the full preferences form. You can place this shortcode on any page to build your own preferences page.
Important: the shortcode only works for contacts who are logged in with a user account. Contacts without an account cannot use the preferences page through the shortcode, they have to use the direct link they receive in your emails.
Sending contacts to the preferences page #
Use the smart code ##crm.manage_subscription_url## in your emails to send contacts to their personal preferences page. This link works for every contact, including those without a user account.
Add this link to your email footer under CRM & Emails → CRM Settings → Email settings → Email footer settings.
Example footer:
“Do not want to receive these emails any more? ##crm.unsubscribe_url## or ##crm.manage_subscription_url##”
A practical example: a three list setup #
An effective setup uses three focused lists that contacts can manage themselves:
- Newsletter, monthly news and updates
- Offers, discounts and special deals
- Product updates, new products and improvements
Create these lists under CRM & Emails → Lists. Add new contacts to all three lists automatically on sign-up through your form settings or automations. In the email preference settings, select these three lists so contacts can choose which topics they want to keep.
Automations on list changes #
When a contact adjusts their preferences, you can respond automatically with an automation. Go to CRM & Emails → Automations and choose one of these start triggers:
- List applied, starts when someone subscribes to a specific list
- List removed, starts when someone unsubscribes from a specific list
Examples of automation actions #
- Confirmation email, send an email confirming the change
- Add a tag, mark the contact with a tag such as “Preferences changed”
- Re-engagement series, start a series after 30 days to win back contacts who opted out
- Segmentation, apply other tags based on which lists someone does or does not select
For more on working with automations, see segmenting and filtering contacts and connecting form sign-ups to the CRM.
Frequently asked questions #
What happens if a contact switches off every list on the preferences page? #
The contact stays in the CRM but no longer receives marketing emails through campaigns or automations. Transactional emails (such as invoices) are still sent.
Can contacts without a user account use the preferences page? #
Yes. Every contact can manage their preferences through the direct link ##crm.manage_subscription_url##. The shortcode only works for logged-in users.
Do I need a separate automation for each list? #
No. You can set several lists as the trigger within one automation, or use conditions to check which specific list the action relates to.


