Customising WooCommerce emails and the alternatives #
WooCommerce automatically sends emails on various events such as new orders, payment confirmations and shipping notifications. These emails are only partly customisable through the standard settings. For more extensive customisation there are alternatives available.
Standard WooCommerce email settings #
You will find the basic email settings through Shop → Shop settings → ‘Emails‘ tab. Here you can change the following per email:
- The sender address and sender name
- The header and footer text
- Which emails are sent and which are not
The customisation options are limited. You cannot use extensive macros as you can in the CRM system, and the layout is largely fixed.
Placeholders available in WooCommerce emails #
WooCommerce emails only support the standard WooCommerce placeholders:
- {site_title} – Name of your website
- {customer_email} – Email address of the customer
- {customer_first_name} – First name of the customer
- {customer_last_name} – Last name of the customer
- {order_date} – Order date
- {order_number} – Order number
These placeholders are far more limited than the extensive macro options available in CRM & Emails for regular newsletters and automations.
Alternative 1: Shop Workflows (AutomateWoo) #
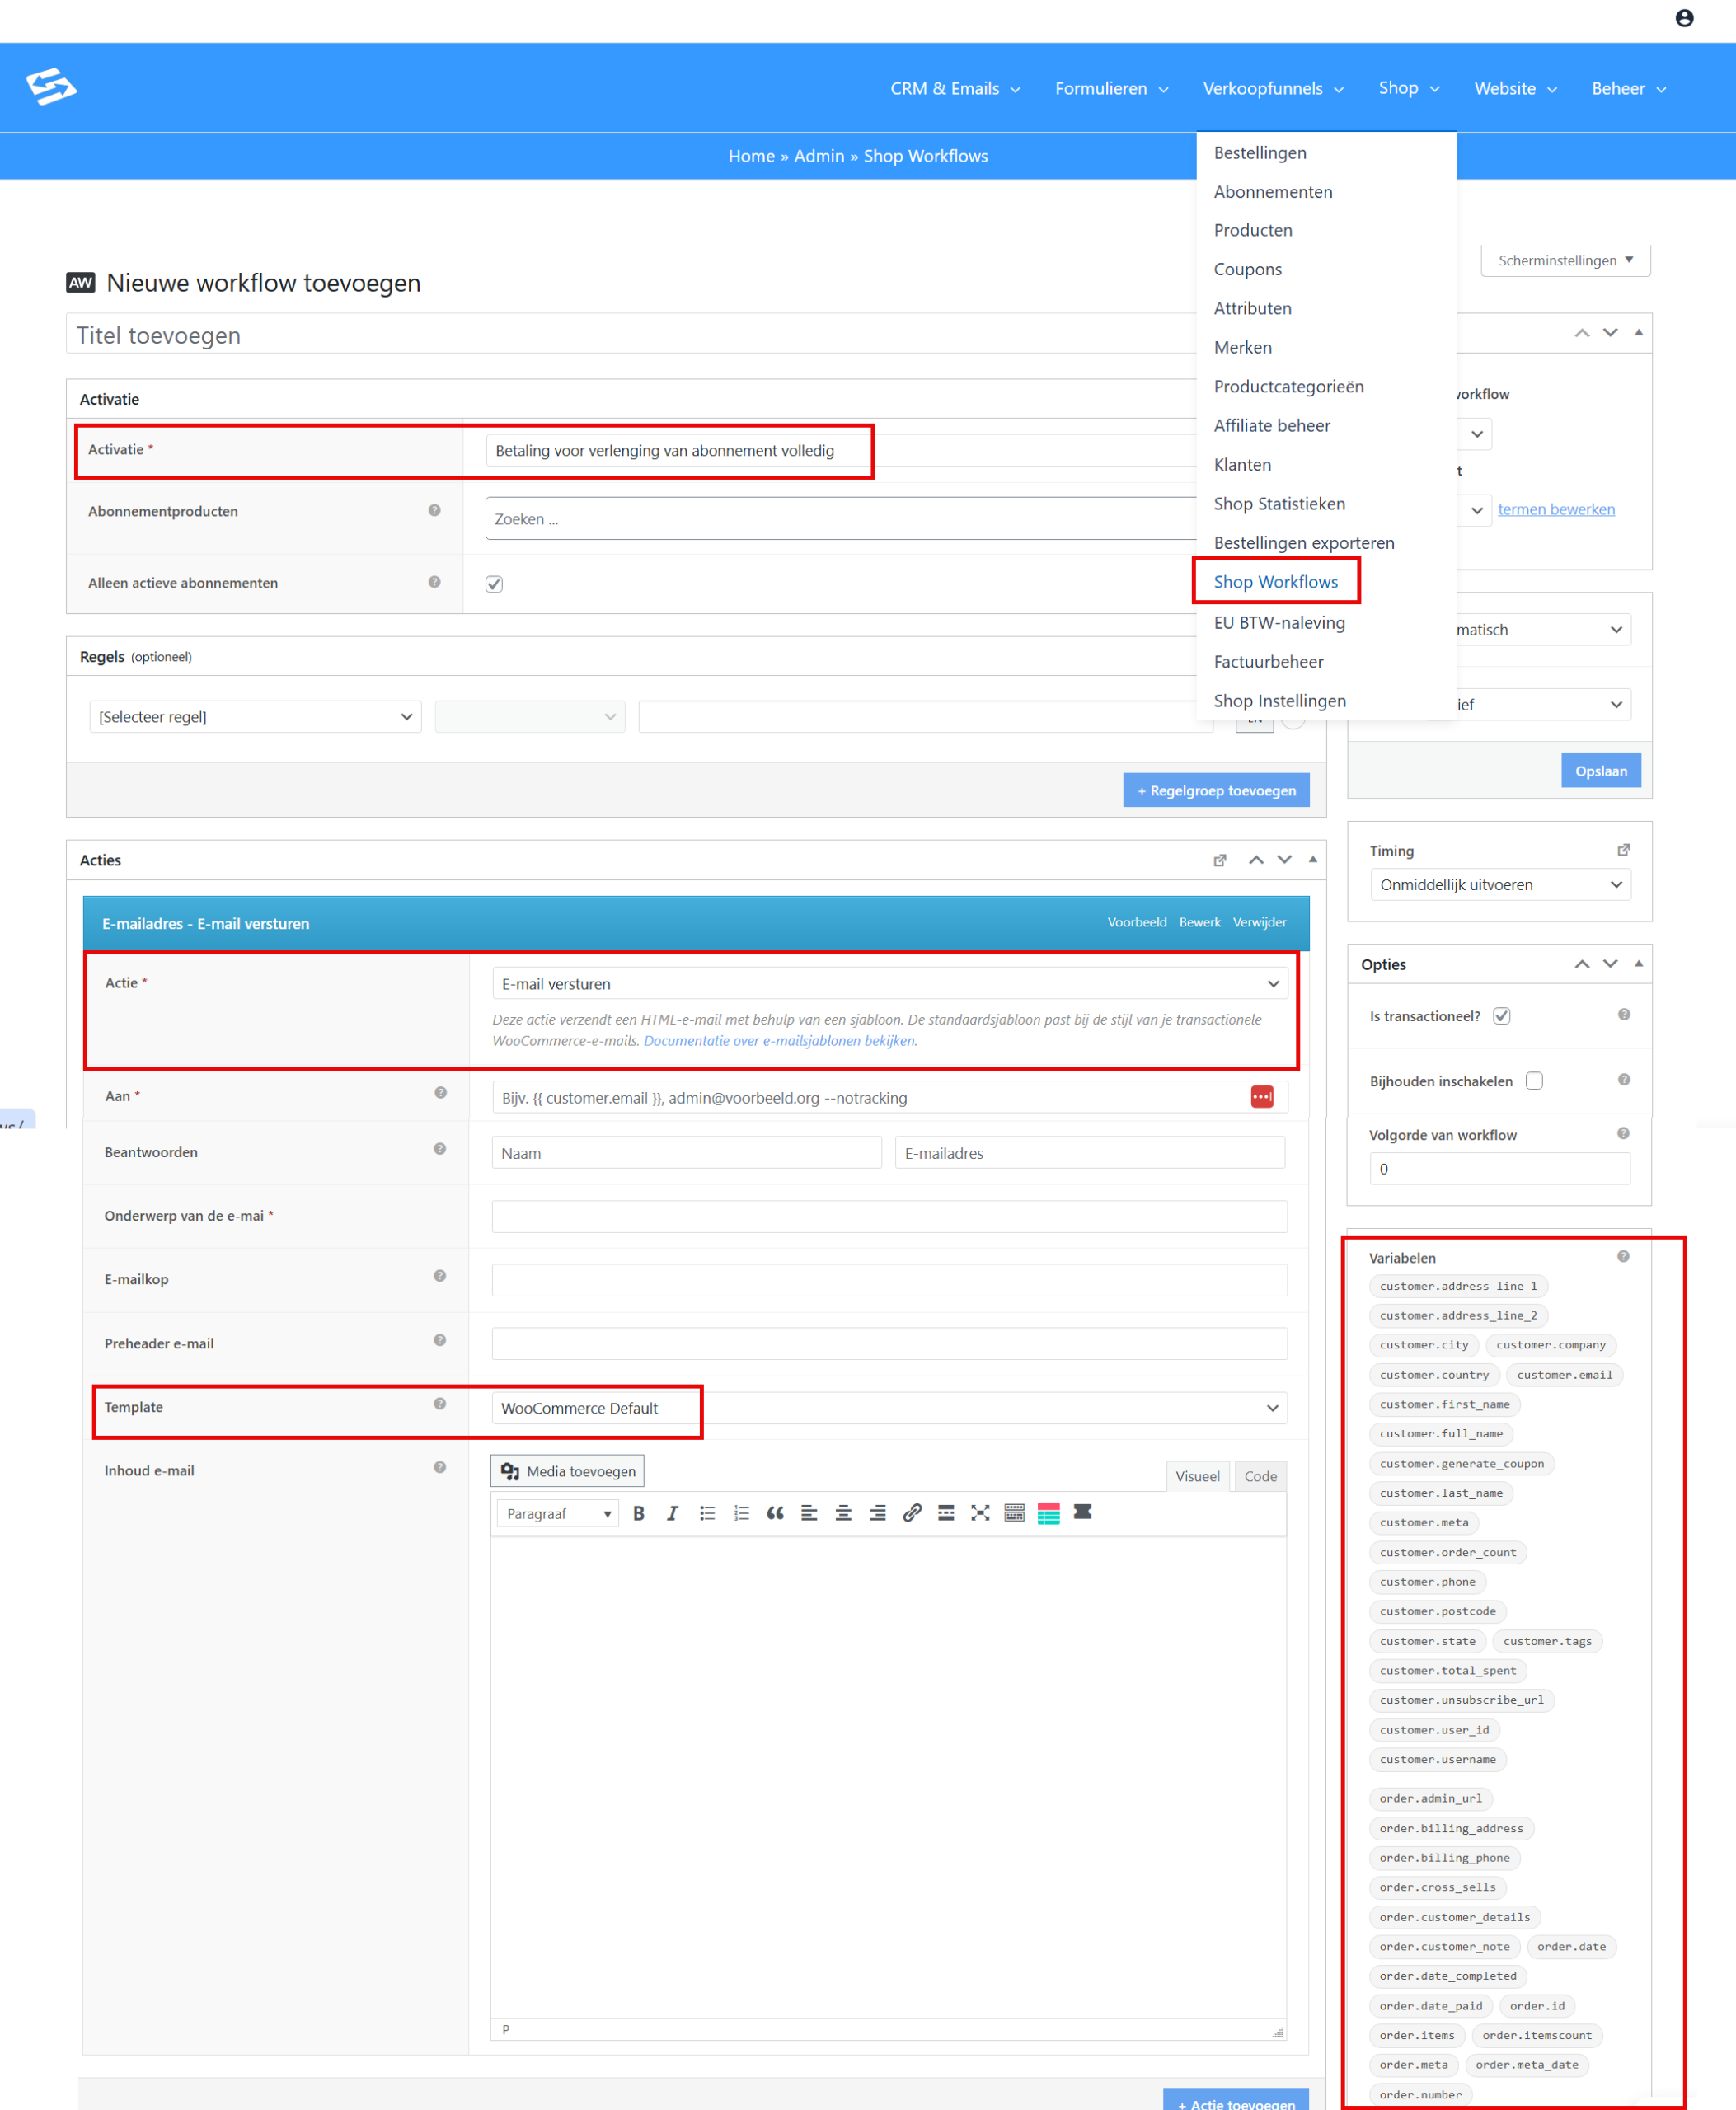
For more advanced email customisation you can use Shop Workflows through Shop → Shop Workflows. This gives you more options, although the email layout remains limited.
Advantages of Shop Workflows #
- Extensive variables (such as {{ order.billing_first_name }}, {{ subscription.product_name }})
- Conditional logic
- Timing and wait actions
- Can use the same layout as the standard WooCommerce emails
#
Examples of workflows #
- Reminder for outstanding payments after X days
- Custom shipping confirmation with tracking information
- Subscription renewal notification
- Follow-up email for product reviews
Setting up payment reminders #
For automatic payment reminders:
- Go to Shop → Shop Workflows
- Create a workflow with the trigger ‘Order status changes to on-hold’
- Add a wait action (7 days, for example)
- Add a condition to check whether the payment is still outstanding
- Add an email action with your reminder text
Alternative 2: use an automation within FluentCRM #
Through the CRM & Emails → Automations menu you can also set up an automation with a webshop-related starting step. This gives you access to the full CRM system with all its personalisation options, such as macros for first name, tags and custom fields.
Automations offer the advantages of the CRM system: advanced email templates, extensive macros, segmentation based on tags and lists, and integration with your complete customer database. This method is ideal if you want consistent communication between your regular email marketing and your webshop-related messages.
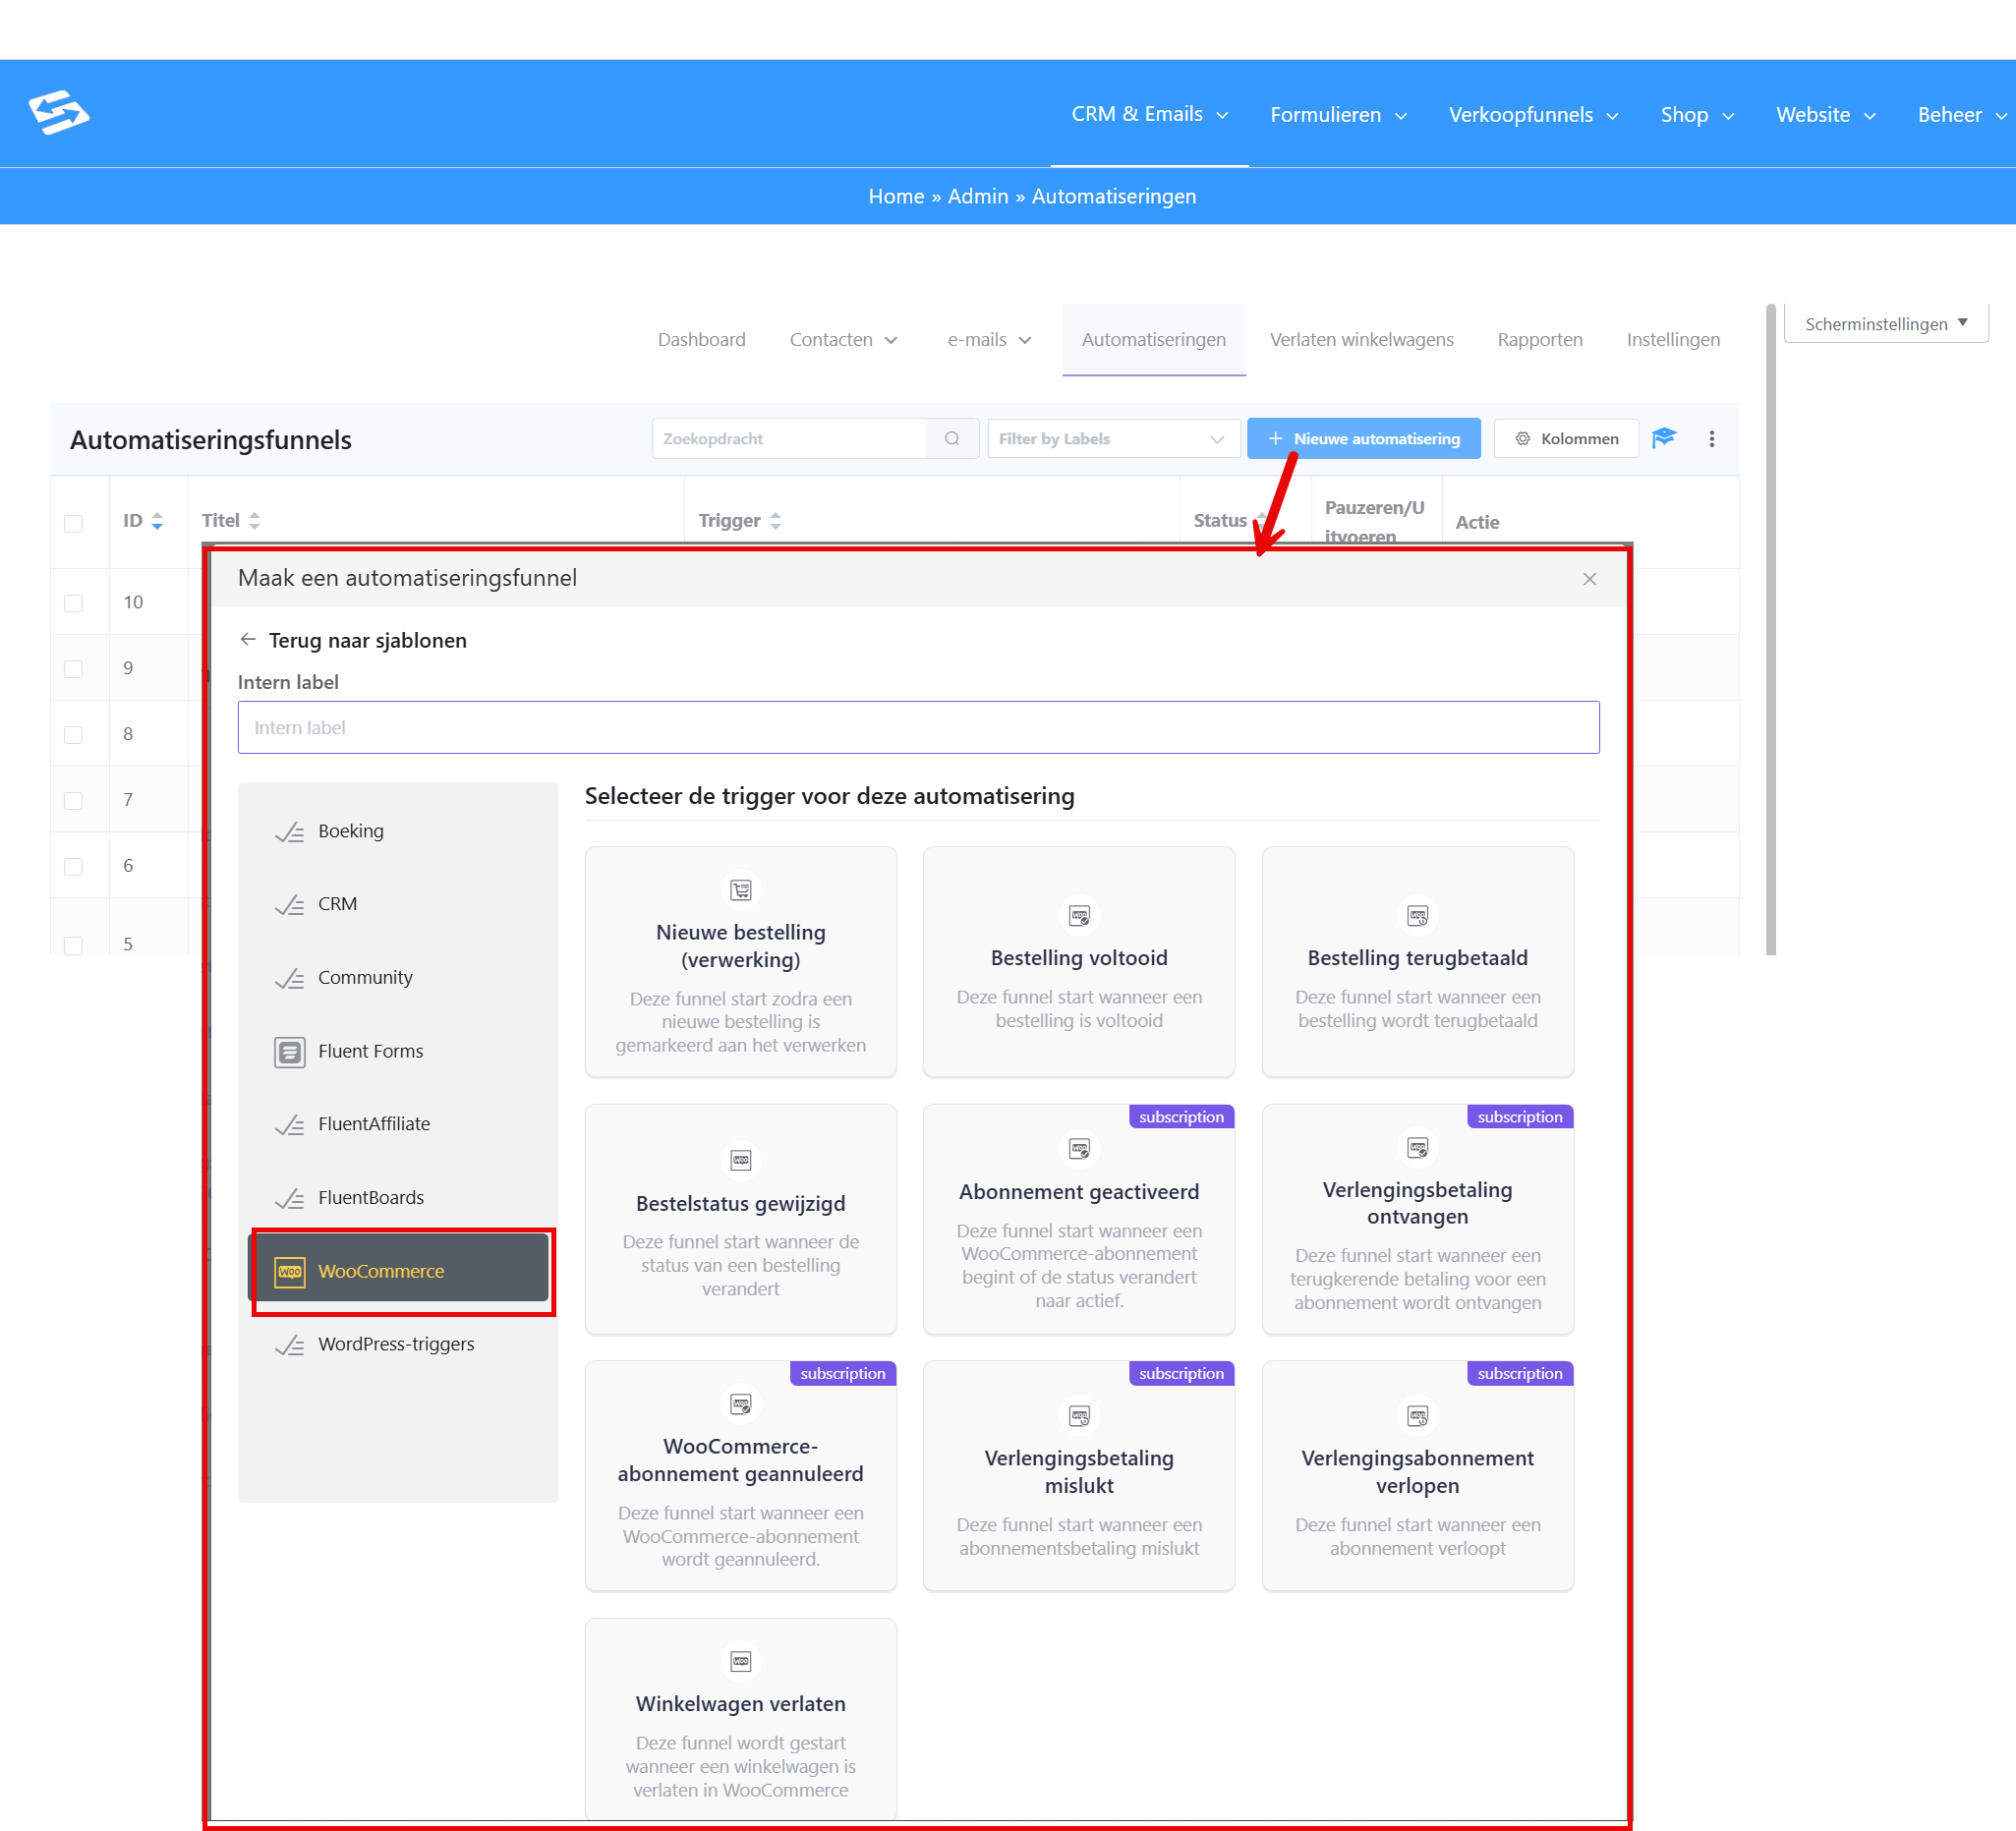
Automation triggers available for webshop actions #
When creating an automation you can choose from various webshop-related triggers:
Order triggers #
- New order (processing) – this automation starts as soon as a new order is marked as ‘processing’. Ideal for order confirmations with a personal touch.
- Order completed – starts when an order has been completed in full. Suitable for shipping confirmations, tracking links or a follow-up for product reviews.
- Order refunded – triggers on refunds. Use this for custom refund confirmations or feedback requests.
- Order status changed – starts on every status change of an order. A flexible trigger for multiple scenarios depending on your workflow.
- Cart abandoned – triggers when a customer leaves products in the basket without checking out. Perfect for abandoned cart recovery emails.
Subscription triggers #
- Subscription activated – starts when a subscription begins or the status changes to active. Use this for welcome messages or onboarding sequences for new subscribers.
- Renewal payment received – triggers on every recurring payment. Suitable for renewal confirmations or loyalty programmes.
- Subscription cancelled – starts when a subscription is cancelled. Ideal for exit interviews, win-back campaigns or alternative offers.
- Renewal payment failed – triggers on failed payments. Use this for payment reminders with instructions for updating payment details.
- Subscription expired – starts when a subscription expires for good. Suitable for win-back campaigns or a move to alternative products.
Setting up an automation #
- Go to CRM & Emails → Automations
- Click ‘Create new automation’
- Choose a webshop-related trigger from the list above
- Set any conditions (only for specific products, for example)
- Add actions such as sending an email, applying tags or starting an email sequence
- Test your automation and activate it
For extensive instructions on working with automations, see how to link form submissions to the CRM and an automation for new customers on their first purchase only.
Frequently asked questions #
Can I fully adapt WooCommerce emails to my house style? #
The standard WooCommerce emails are only partly customisable. For extensive customisation, use Shop Workflows or request bespoke work through the Growth Partner plan.
Can I attach the PDF invoice automatically to custom emails? #
No, through Shop Workflows you cannot attach the PDF invoice to the emails you set up there. You can use this route to send specific emails with all the order details, for example, but the invoice always has to be sent through one of the standard WooCommerce emails.
Why do CRM macros not work in WooCommerce emails? #
WooCommerce emails use their own placeholder system, which is limited to standard WooCommerce data. For extensive macros, use Shop Workflows.


