Composing an email in the editor #
The email editor in Autorespond offers extensive options for putting together professional emails. You can use it to create campaigns, recurring campaigns, email sequences and templates with a visual editor that requires no technical knowledge.
The available editors #
When you create a new campaign you choose the editor you want to use straight away. Go to CRM & Emails → Campaigns and click Add campaign. In the Create campaign window you enter the title and choose an editor:
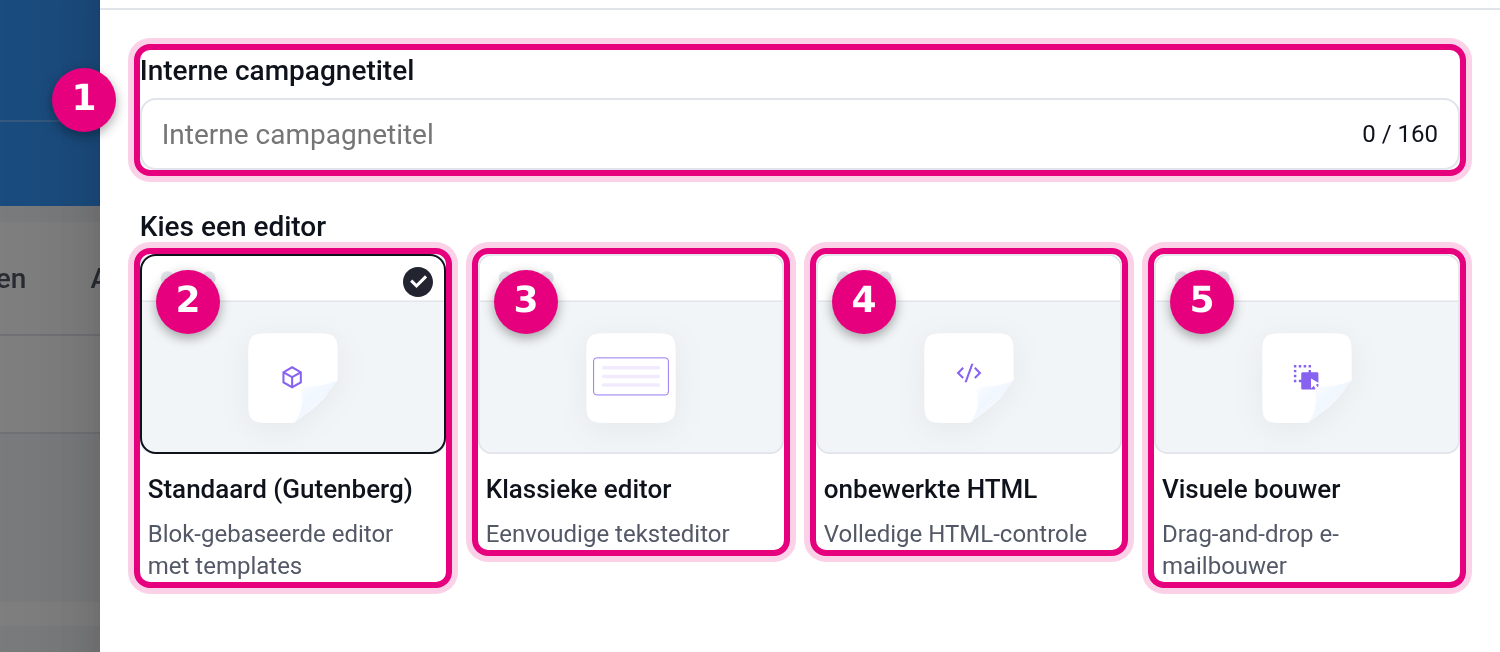
- Internal campaign title: the name you use to recognise the campaign later, not visible to recipients.
- Default (Gutenberg): the block based editor with templates. It is selected by default and works the same way as the page editor of your website.
- Classic editor: a simple text editor for plain text emails.
- Raw HTML: full HTML control, for advanced users who want to work with code directly.
- Visual builder: the drag and drop email builder. This is the visual editor explained further below.
In the past you switched view inside the editor with a purple icon. That icon no longer exists, so you now make the choice beforehand, when you create the campaign.
We recommend choosing the Visual builder to begin with: it is built for email layout and matches the visual templates you almost certainly already have, particularly if you are a migrated user.
Tip: you do not have to start from scratch every time. You copy an existing visual campaign in the campaign overview through the three dots behind the campaign, with Duplicate. The copy appears as a draft with [Copy] in front of the title and contains the full visual design of the original, so you only adjust the content, the subject and the recipients.
The Default (Gutenberg) editor #
If you choose Default (Gutenberg), you work with standard WordPress blocks. Some users prefer it because it gives you somewhat more advanced layout options. The editor opens straight away on an empty canvas, and there is no separate template selection screen beforehand:
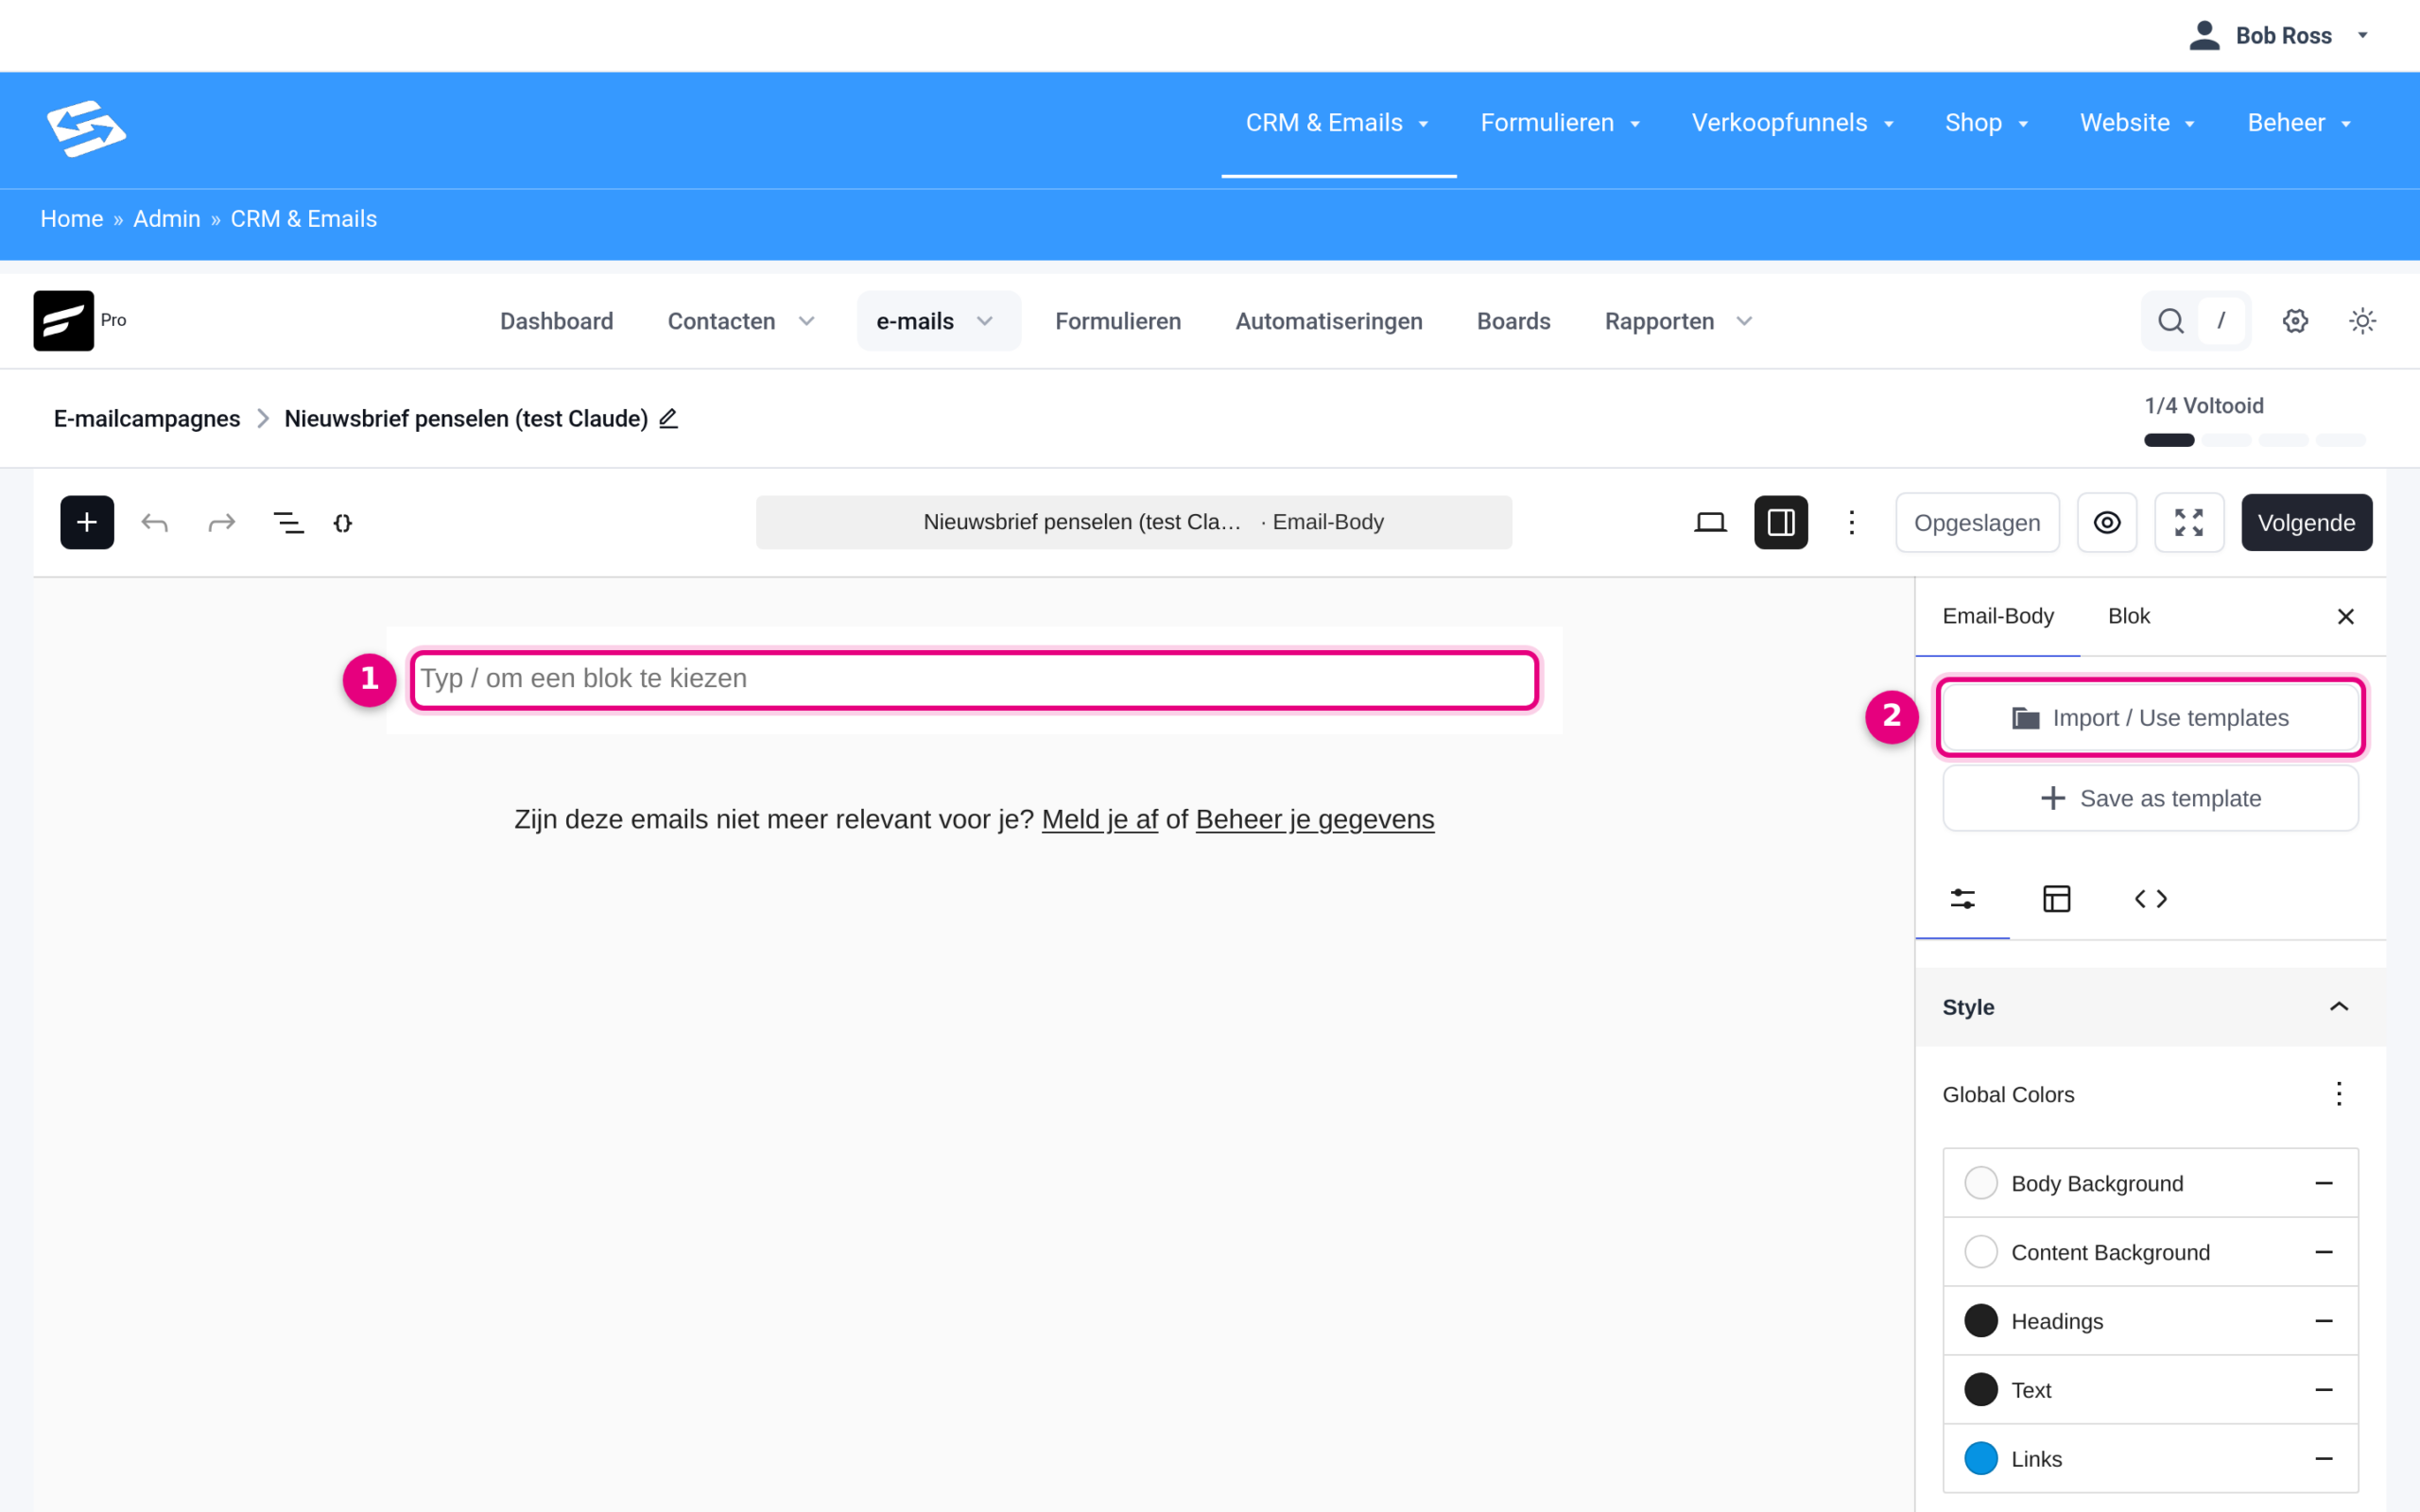
- The empty canvas: this is where you put the email together. Type your text directly, or type / to choose a block.
- Import / Use templates: opens the template chooser, so you can still start from a ready-made email template. The button below it (Save as template) saves your own layout as a template for later.
If you click Import / Use templates, you choose a ready-made template in the Select Template window:
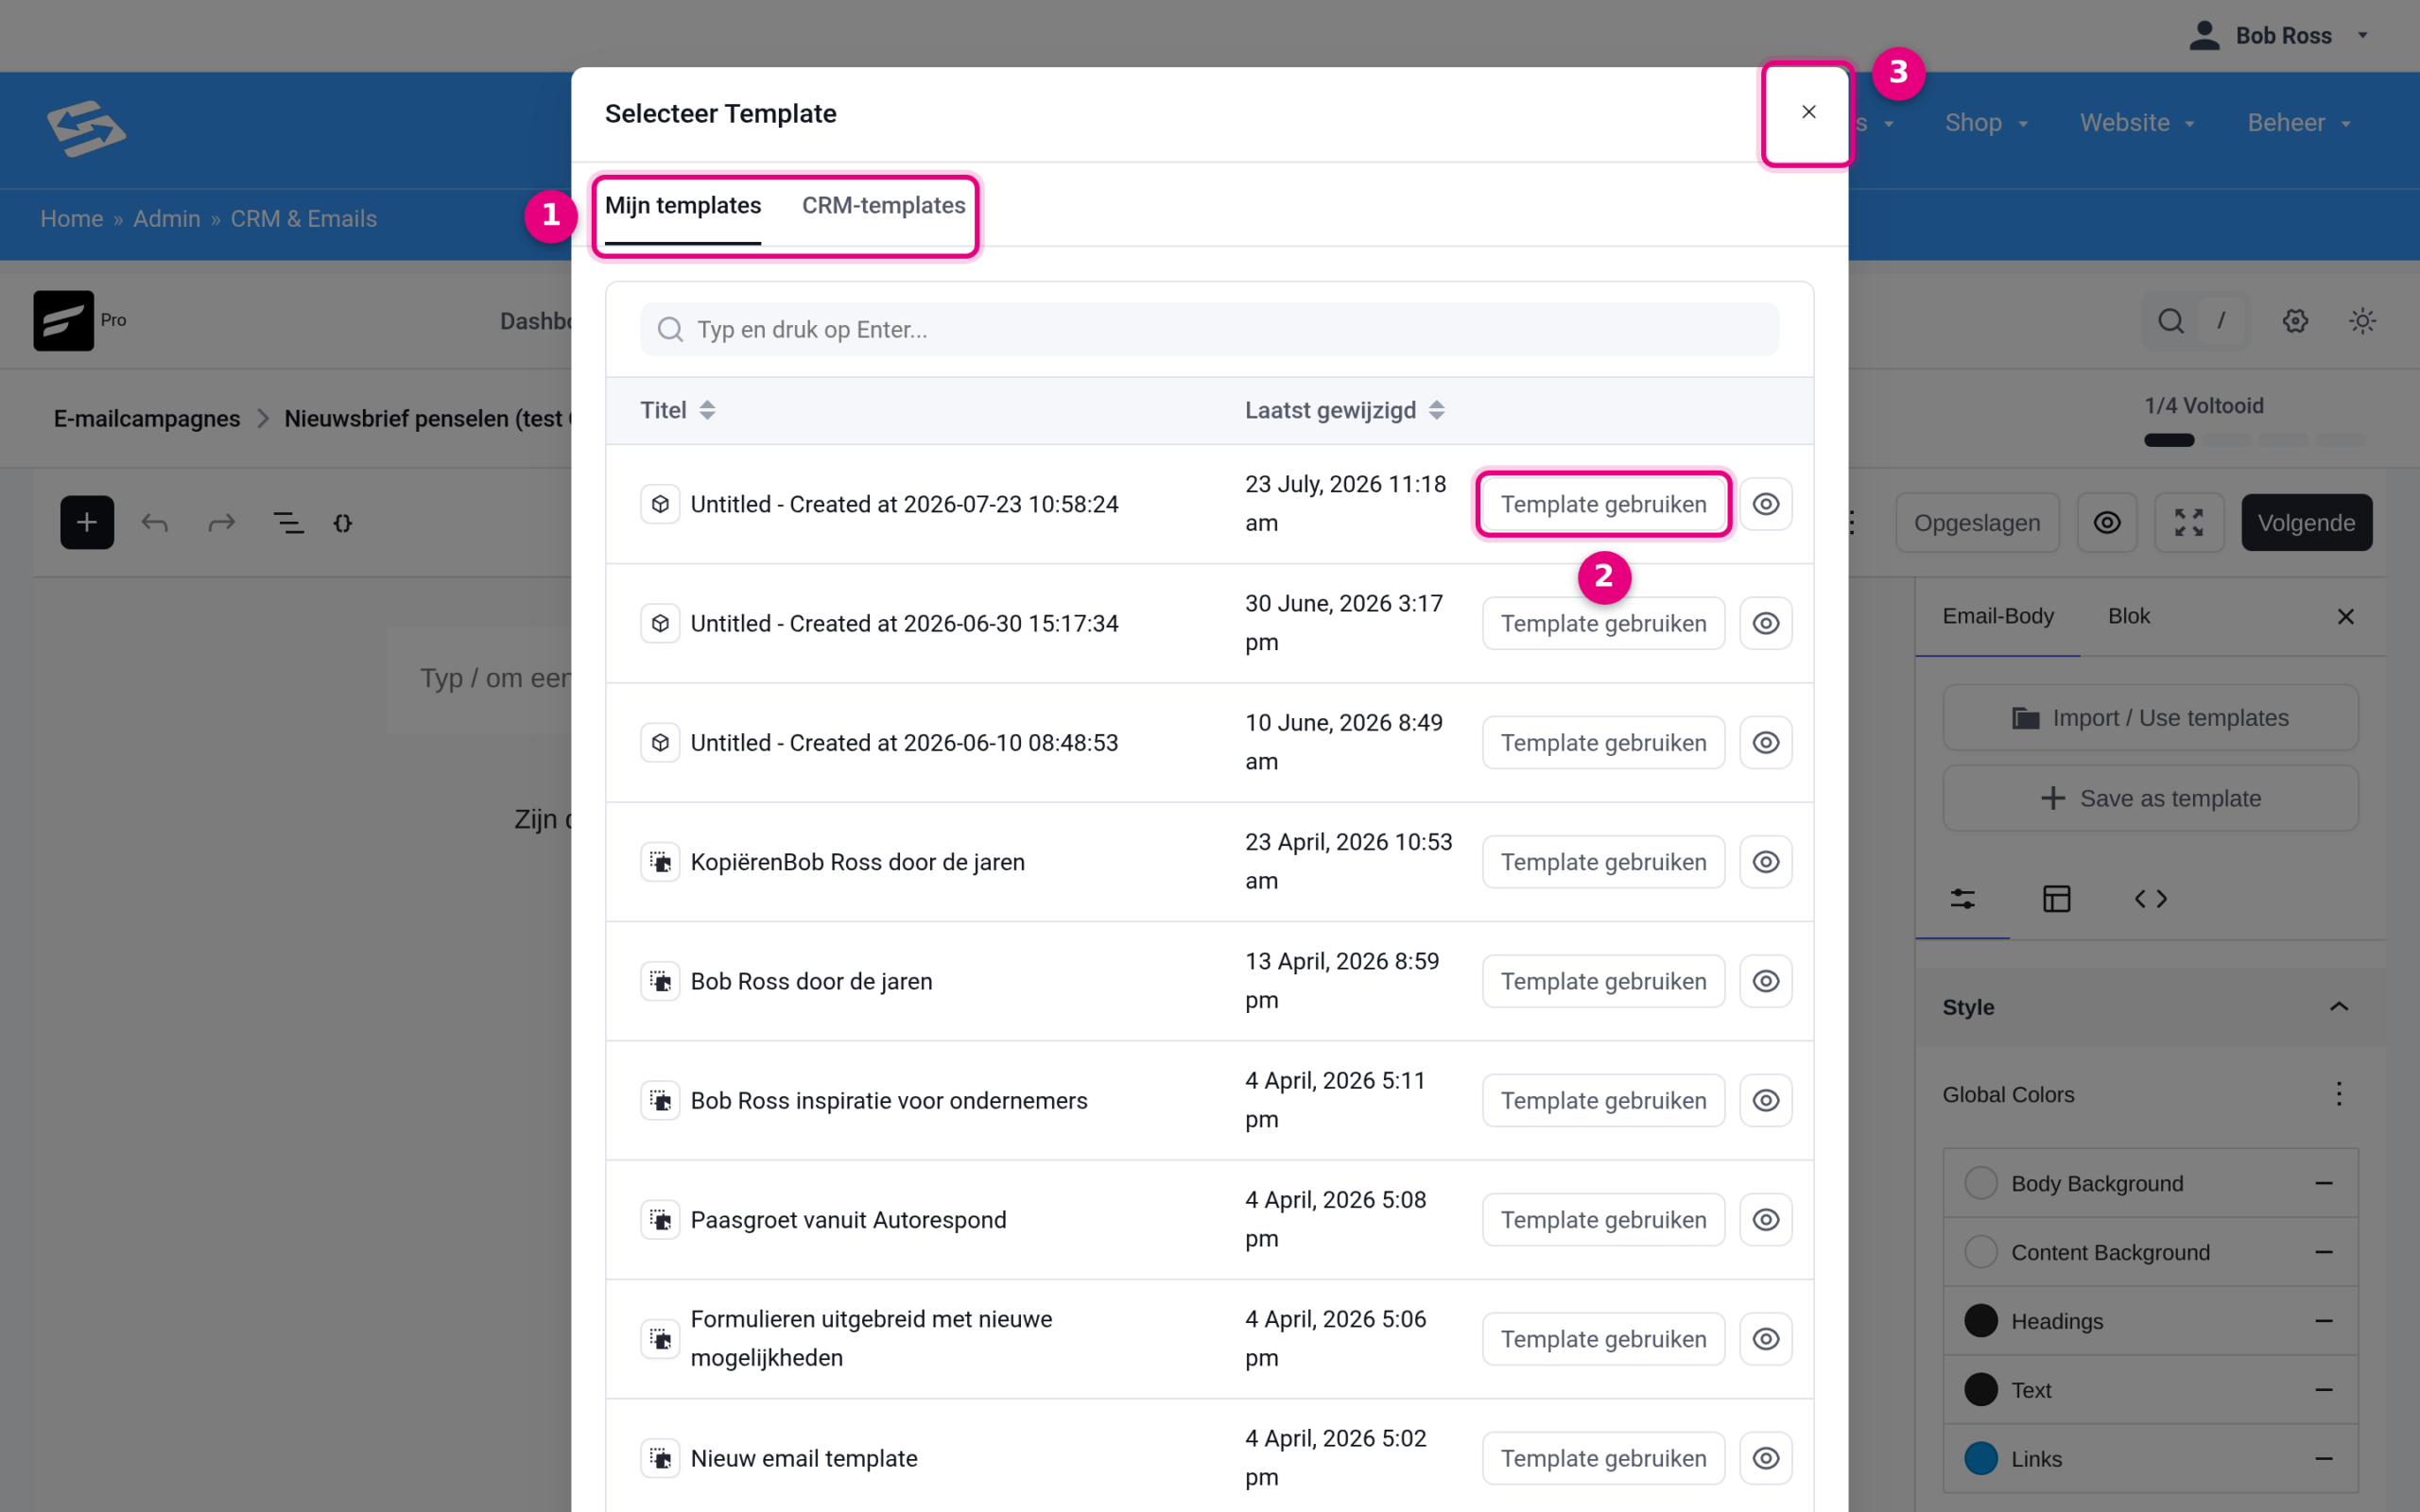
- My templates and CRM templates: My templates holds your own saved email templates, CRM templates holds the example templates that come with the system.
- Use template: loads the chosen template into the editor. The eye icon next to it shows a preview first.
- Close: if you would rather start from an empty canvas after all, close this window and carry on in the editor.
You see the available block options by clicking the plus icon at the top left:
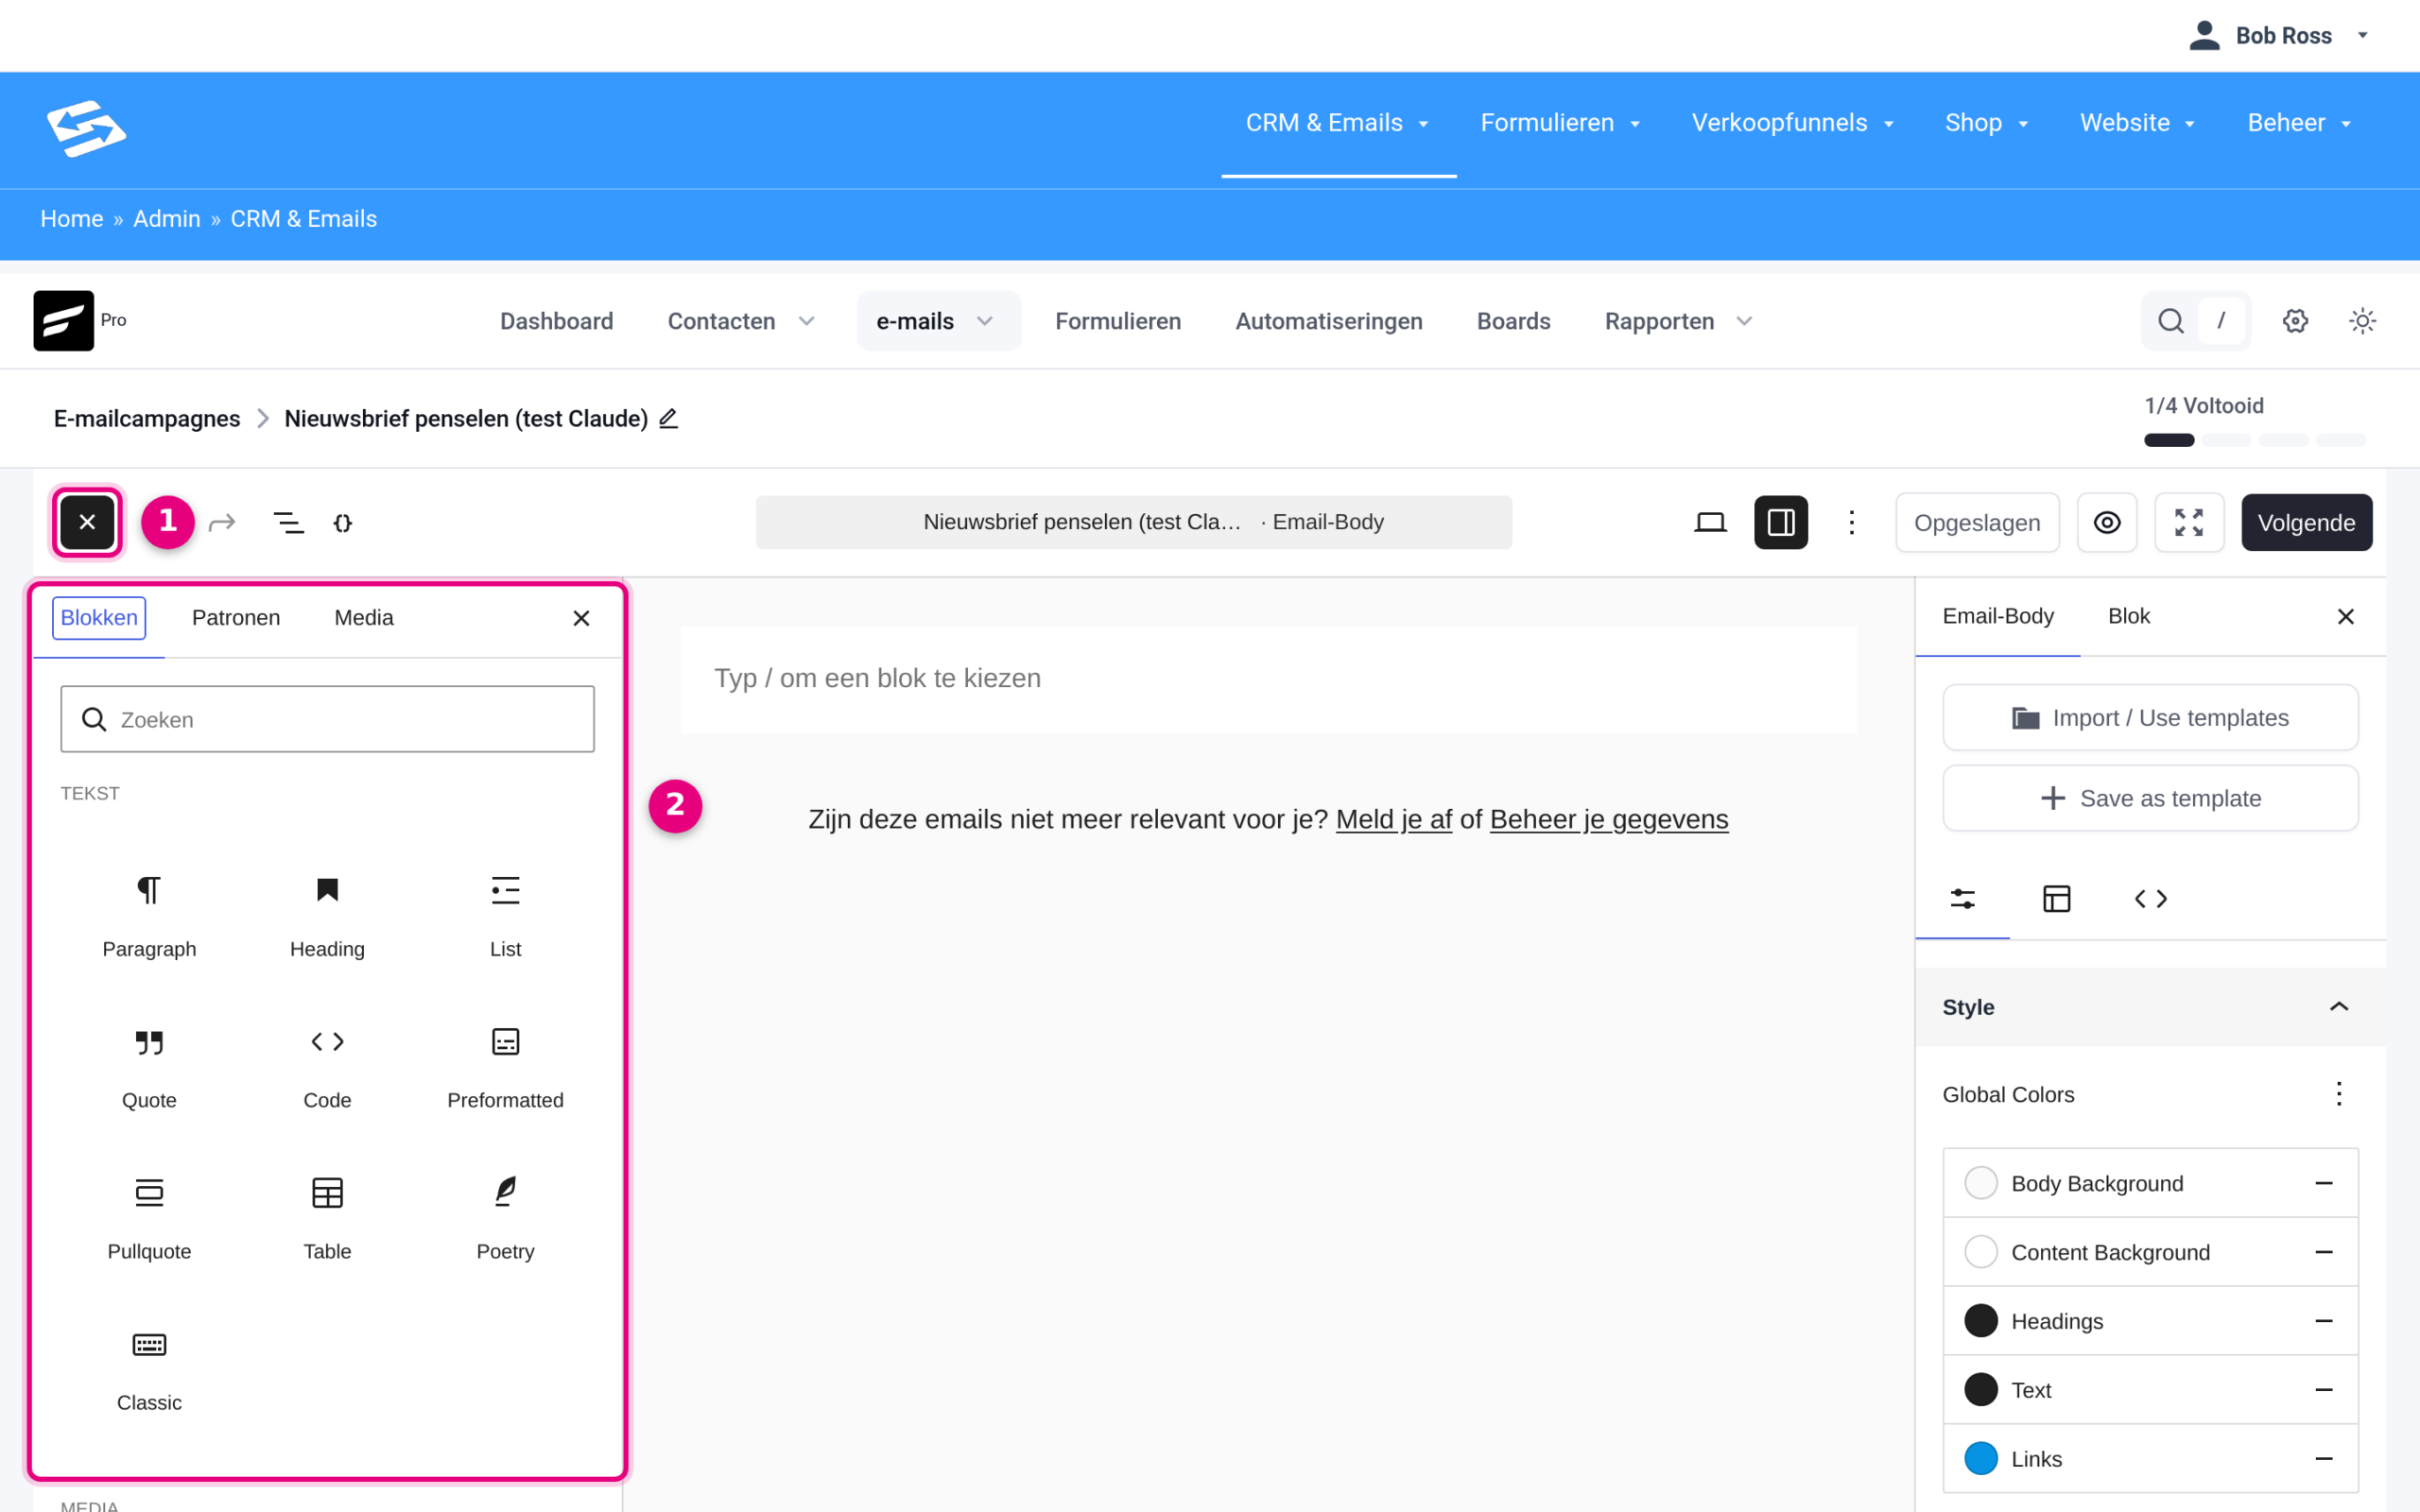
- The plus icon at the top left opens the blocks panel. While the panel is open, the icon turns into a cross for closing it again.
- The blocks panel: all the available blocks, grouped into Text, Media, Design and Widgets, among others. At the top you search for a block by name, and the Patterns and Media tabs let you add ready-made patterns or media files. Drag a block onto the canvas or click it to add it.
The Visual builder (drag and drop) #
If you choose the Visual builder, the drag and drop editor opens (based on the ‘unlayer’ template builder that FluentCRM has integrated). You first choose a starting design: a pre-designed layout or an empty canvas:
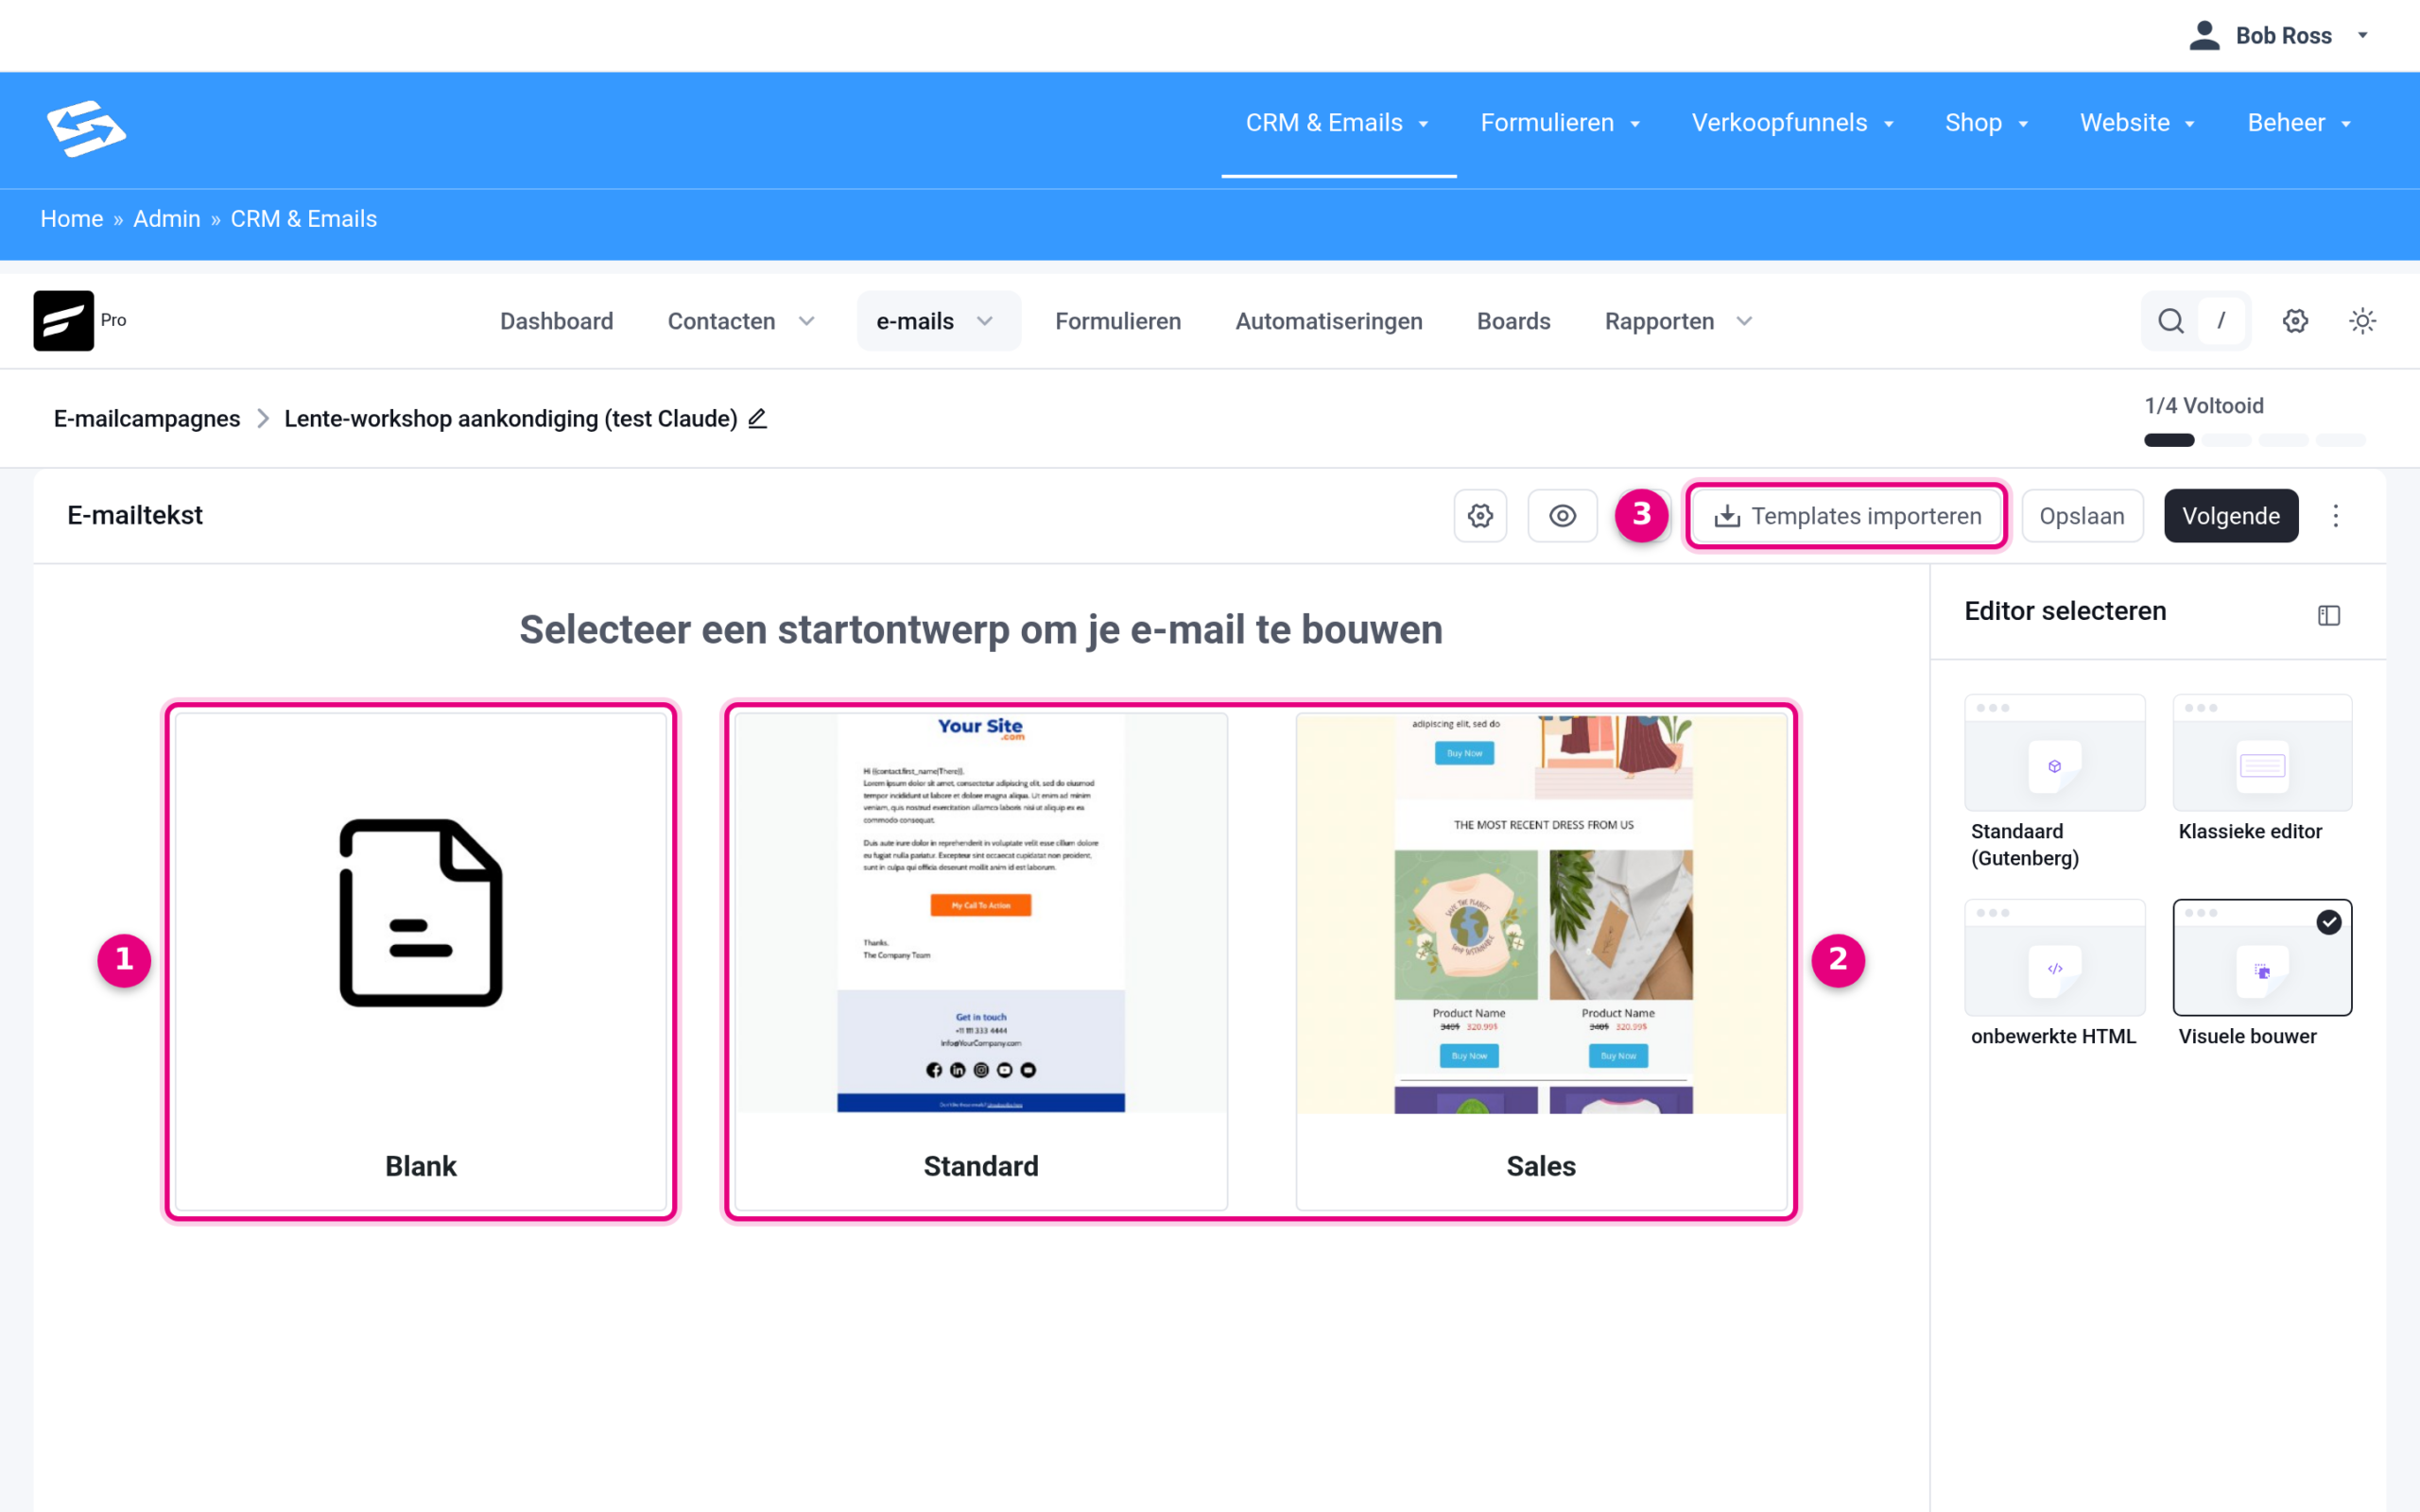
- Blank: start from an empty canvas.
- Standard and Sales: pre-designed starting layouts (a basic setup with text and a button, and a sales oriented setup with product blocks) that you can adjust straight away.
- Import templates: loads a previously saved email template into the Visual builder. On the right, under Select editor, you can also still switch to one of the other editors.
Note: this editor choice applies to campaigns. Since the latest update, a new email template (CRM & Emails → Email Templates) always opens directly in the default block based editor, with no selection screen. Existing visual templates do still open in the Visual builder, and you create a new visual template by copying an existing visual one. See the section Two kinds of template in Managing email templates.
Opening the editor #
You open the email editor from several places in your Autorespond administration:
- For campaigns: go to CRM & Emails → Campaigns → Add campaign → choose your editor → the Compose step
- For email sequences: go to CRM & Emails → Email Sequences → add a new email
- For templates: go to CRM & Emails → Email Templates → Add template (a new template opens in the default block editor, existing visual templates open in the Visual builder)
- In automations: when adding a ‘Send email’ action
How the Visual builder is laid out #
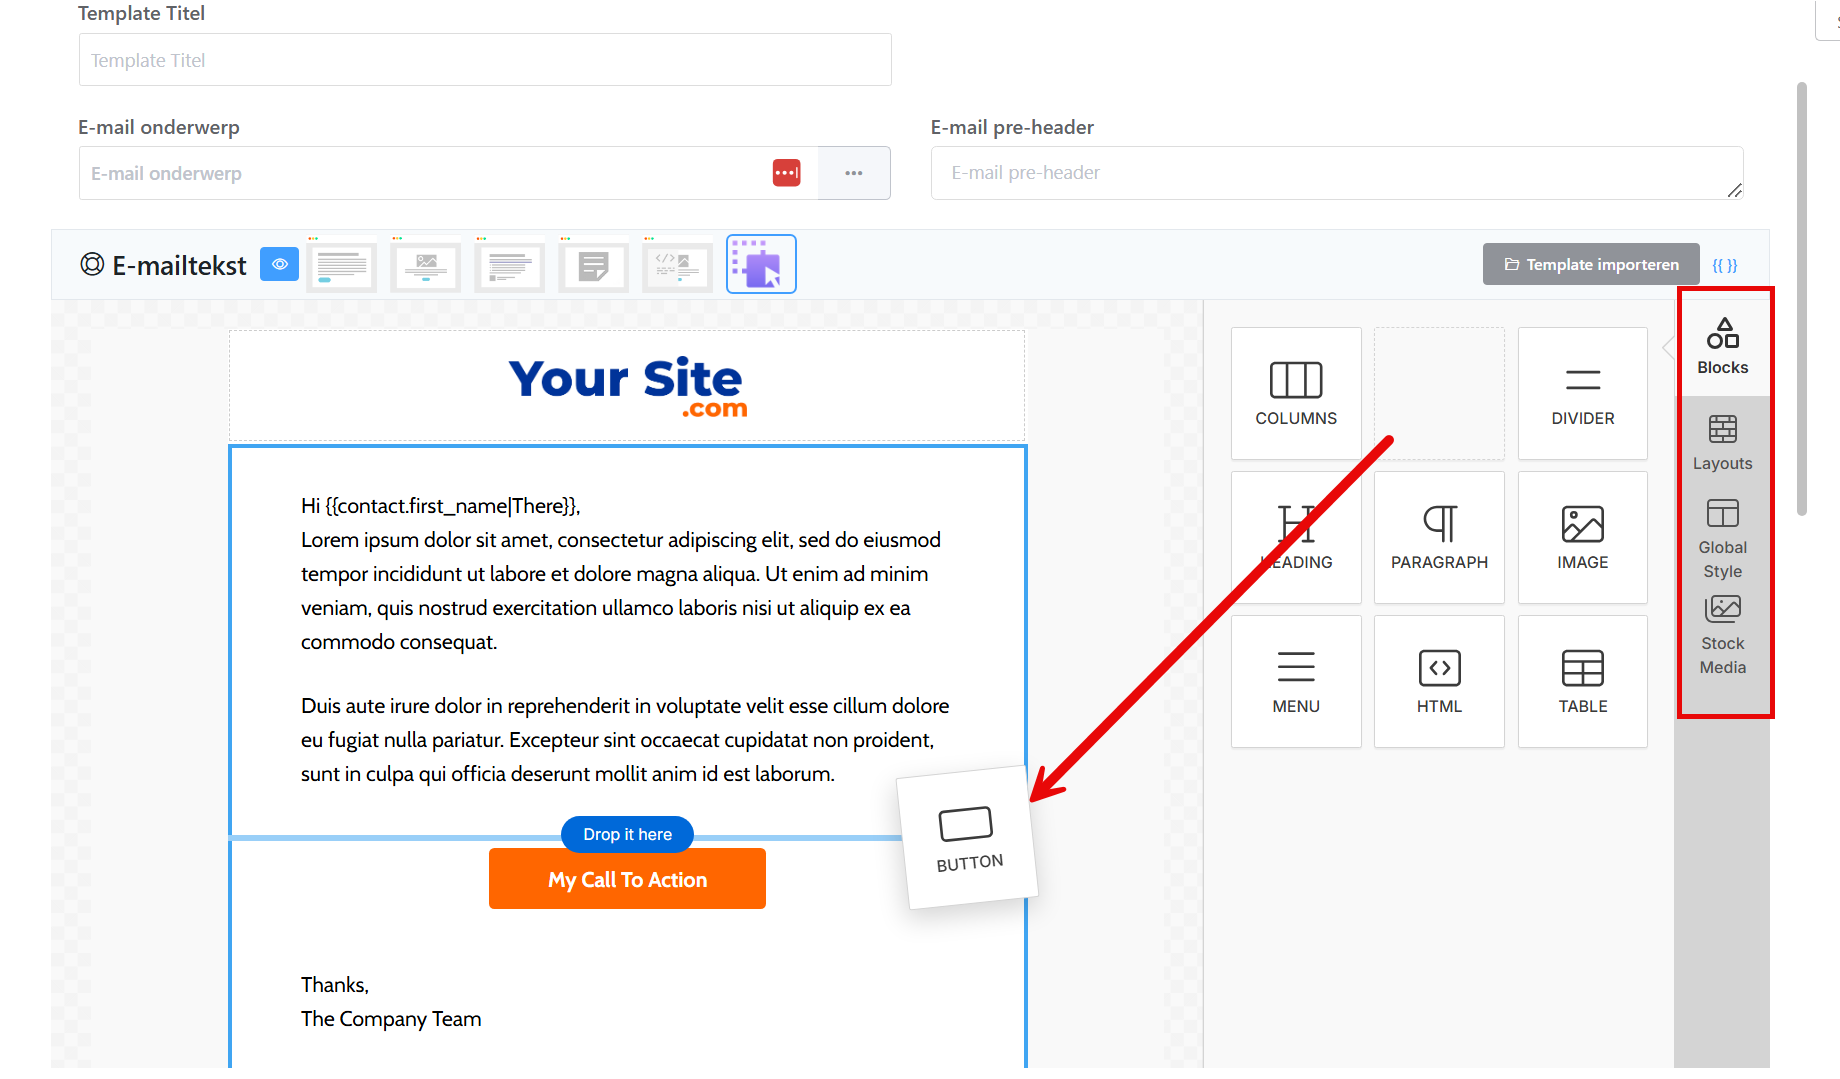
The editor consists of the visual editor, where you see how your email will look, and four tabs on the right. The ‘blocks’ tab is shown first by default. Alongside it there is the ‘layouts’ tab, the ‘global style’ tab and the ‘stock media’ tab.
The block tab in the visual editor #
These are the building blocks for your email template. You can drag these blocks into the visual editor, and you see immediately where you can place them:
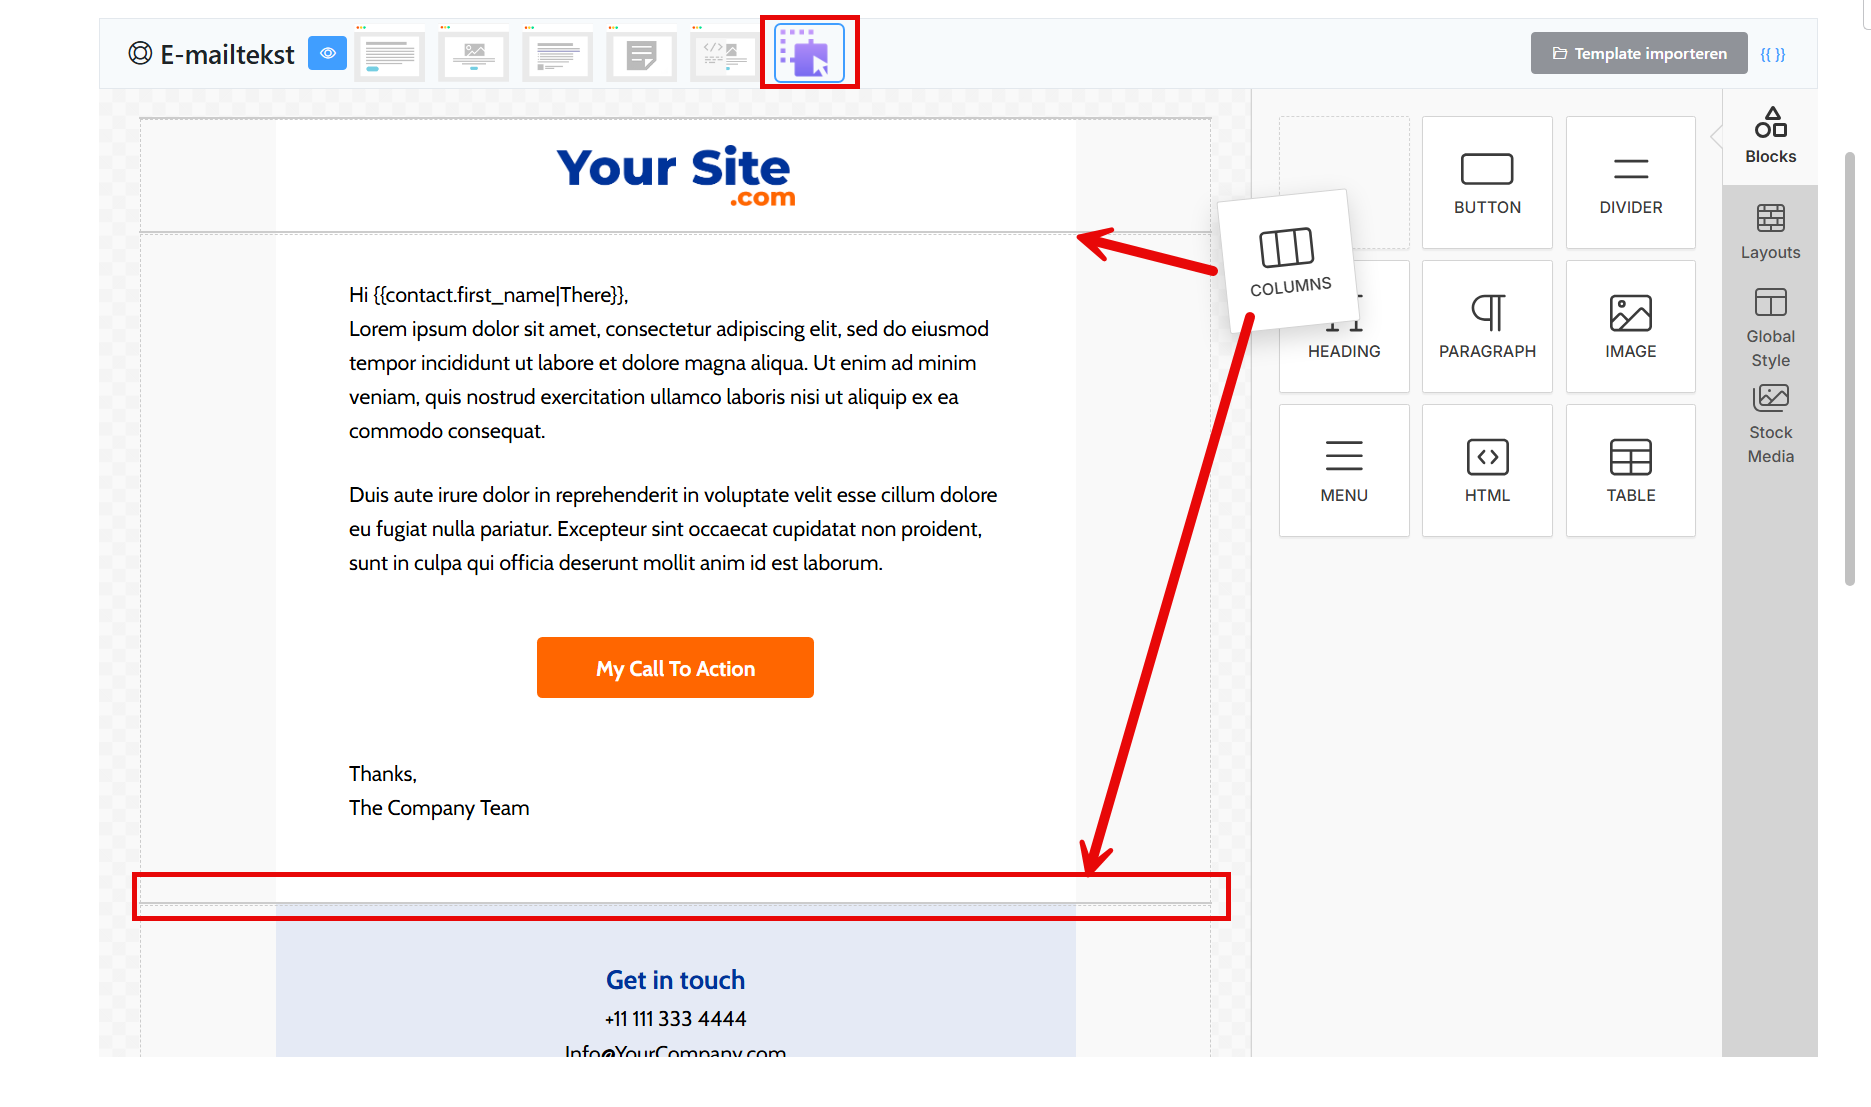
The column block can only be placed outside an existing column, so it cannot be placed inside another column:
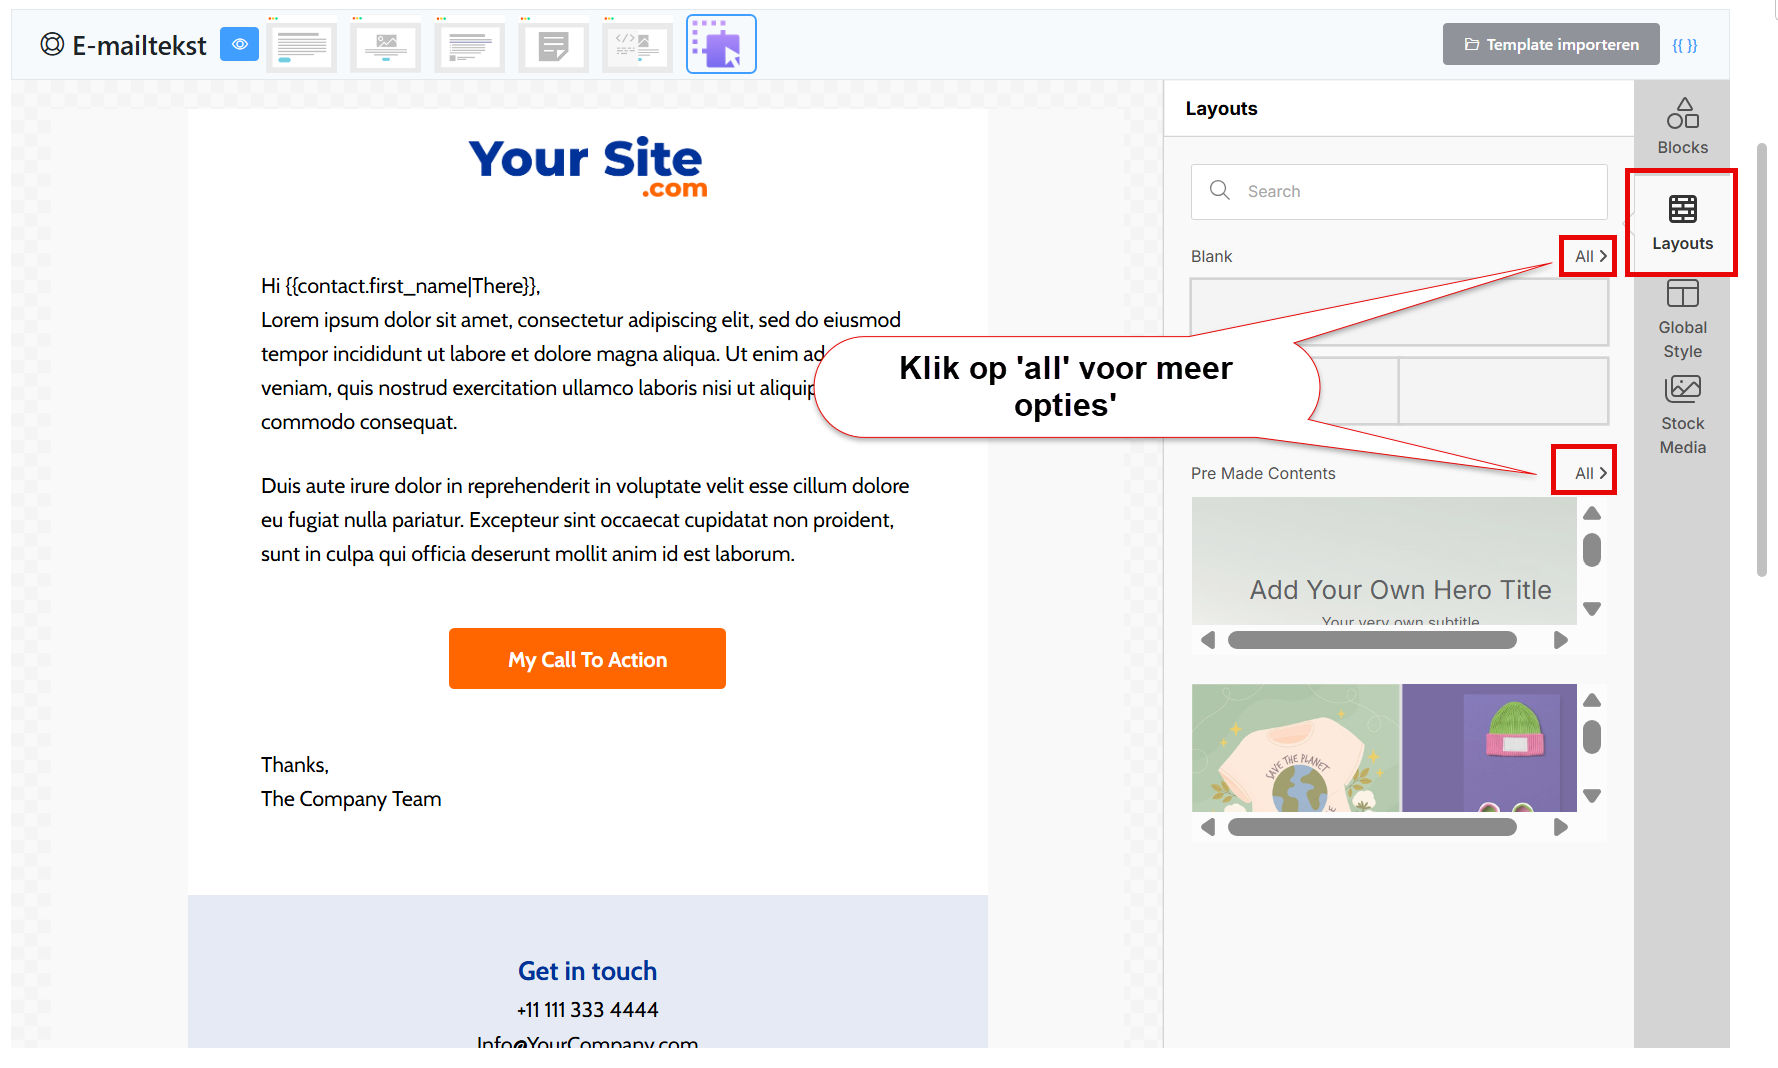
The Layouts tab in the visual editor #
On the right you also find the ‘layouts’ tab, where you find predefined internal layouts for your columns:
The Global Style tab in the visual editor #
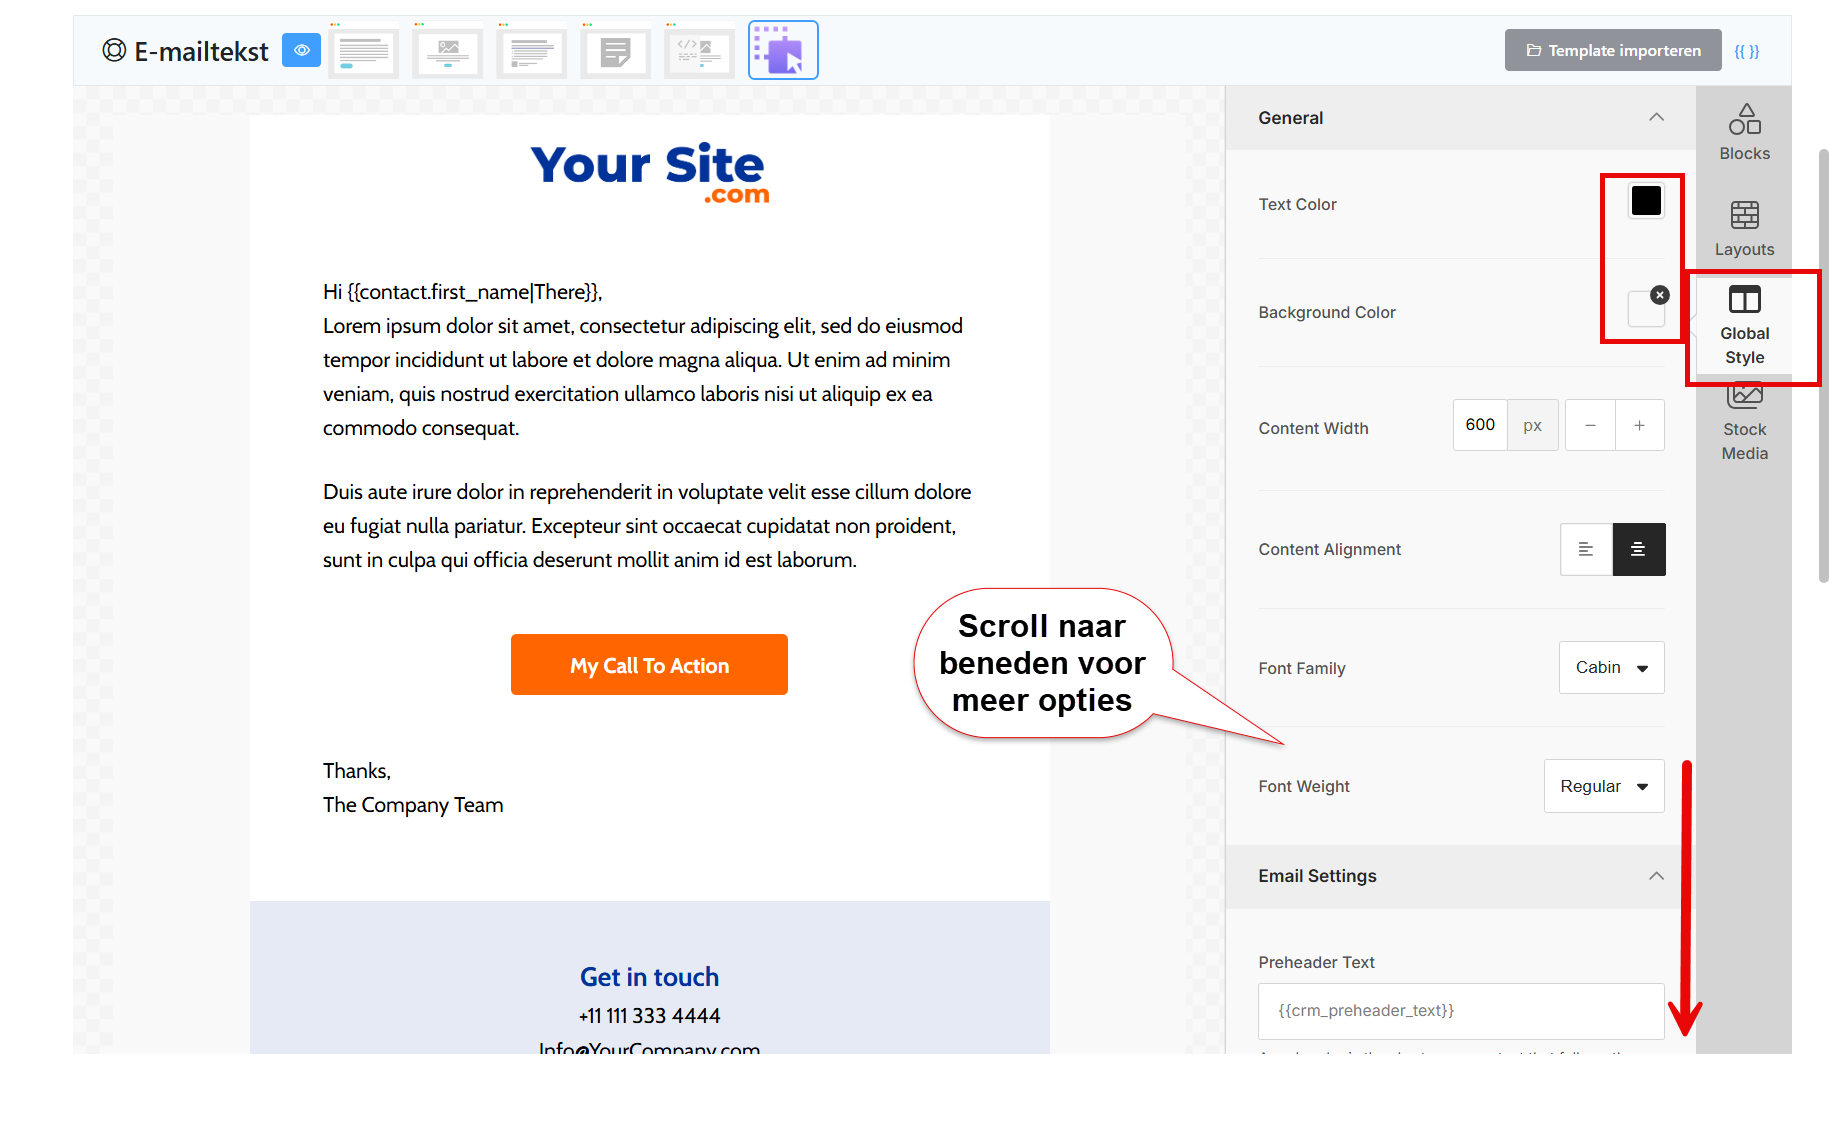
This tab is where you set the general styling of the visual editor, such as the text colour, the background colour and the fonts. Important: you can override this per block, because each block has its own styling settings too
The Stock media tab in the visual editor #
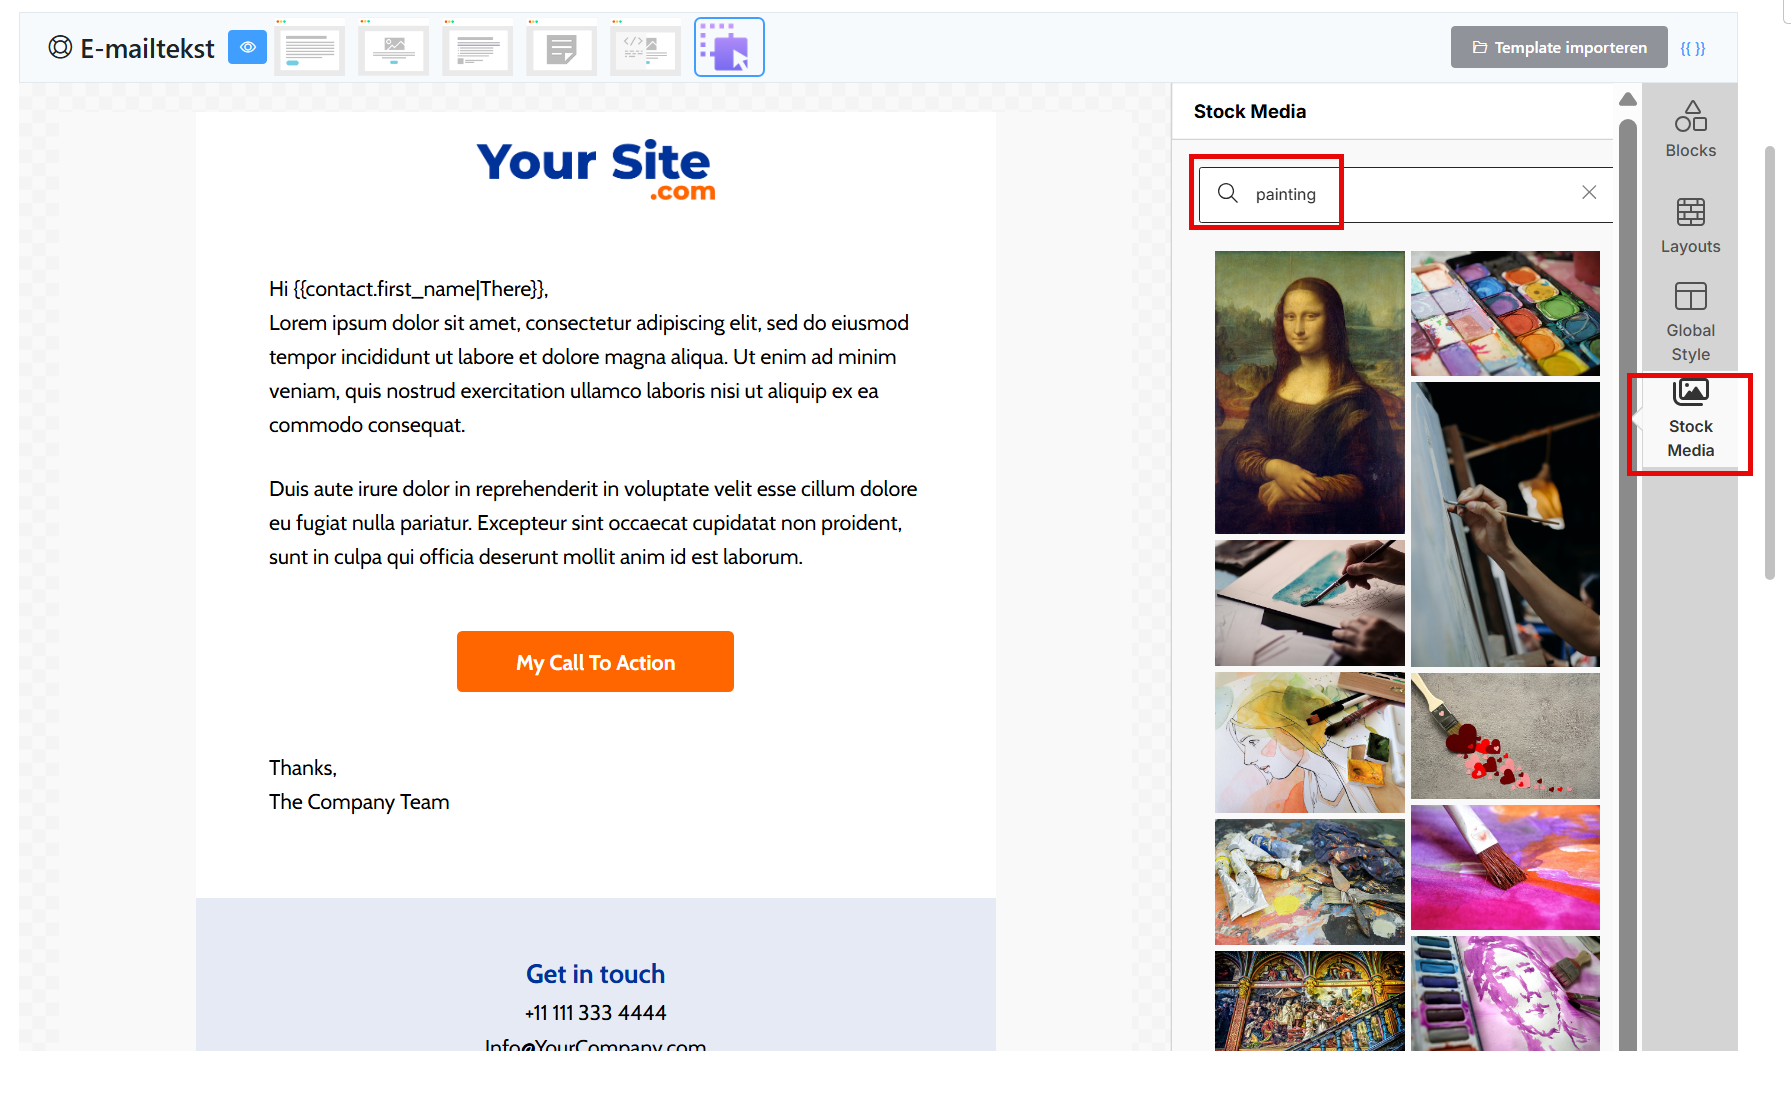
Here you find stock media you can use as images in your emails:
Adjusting row styling and block styling in the visual editor #
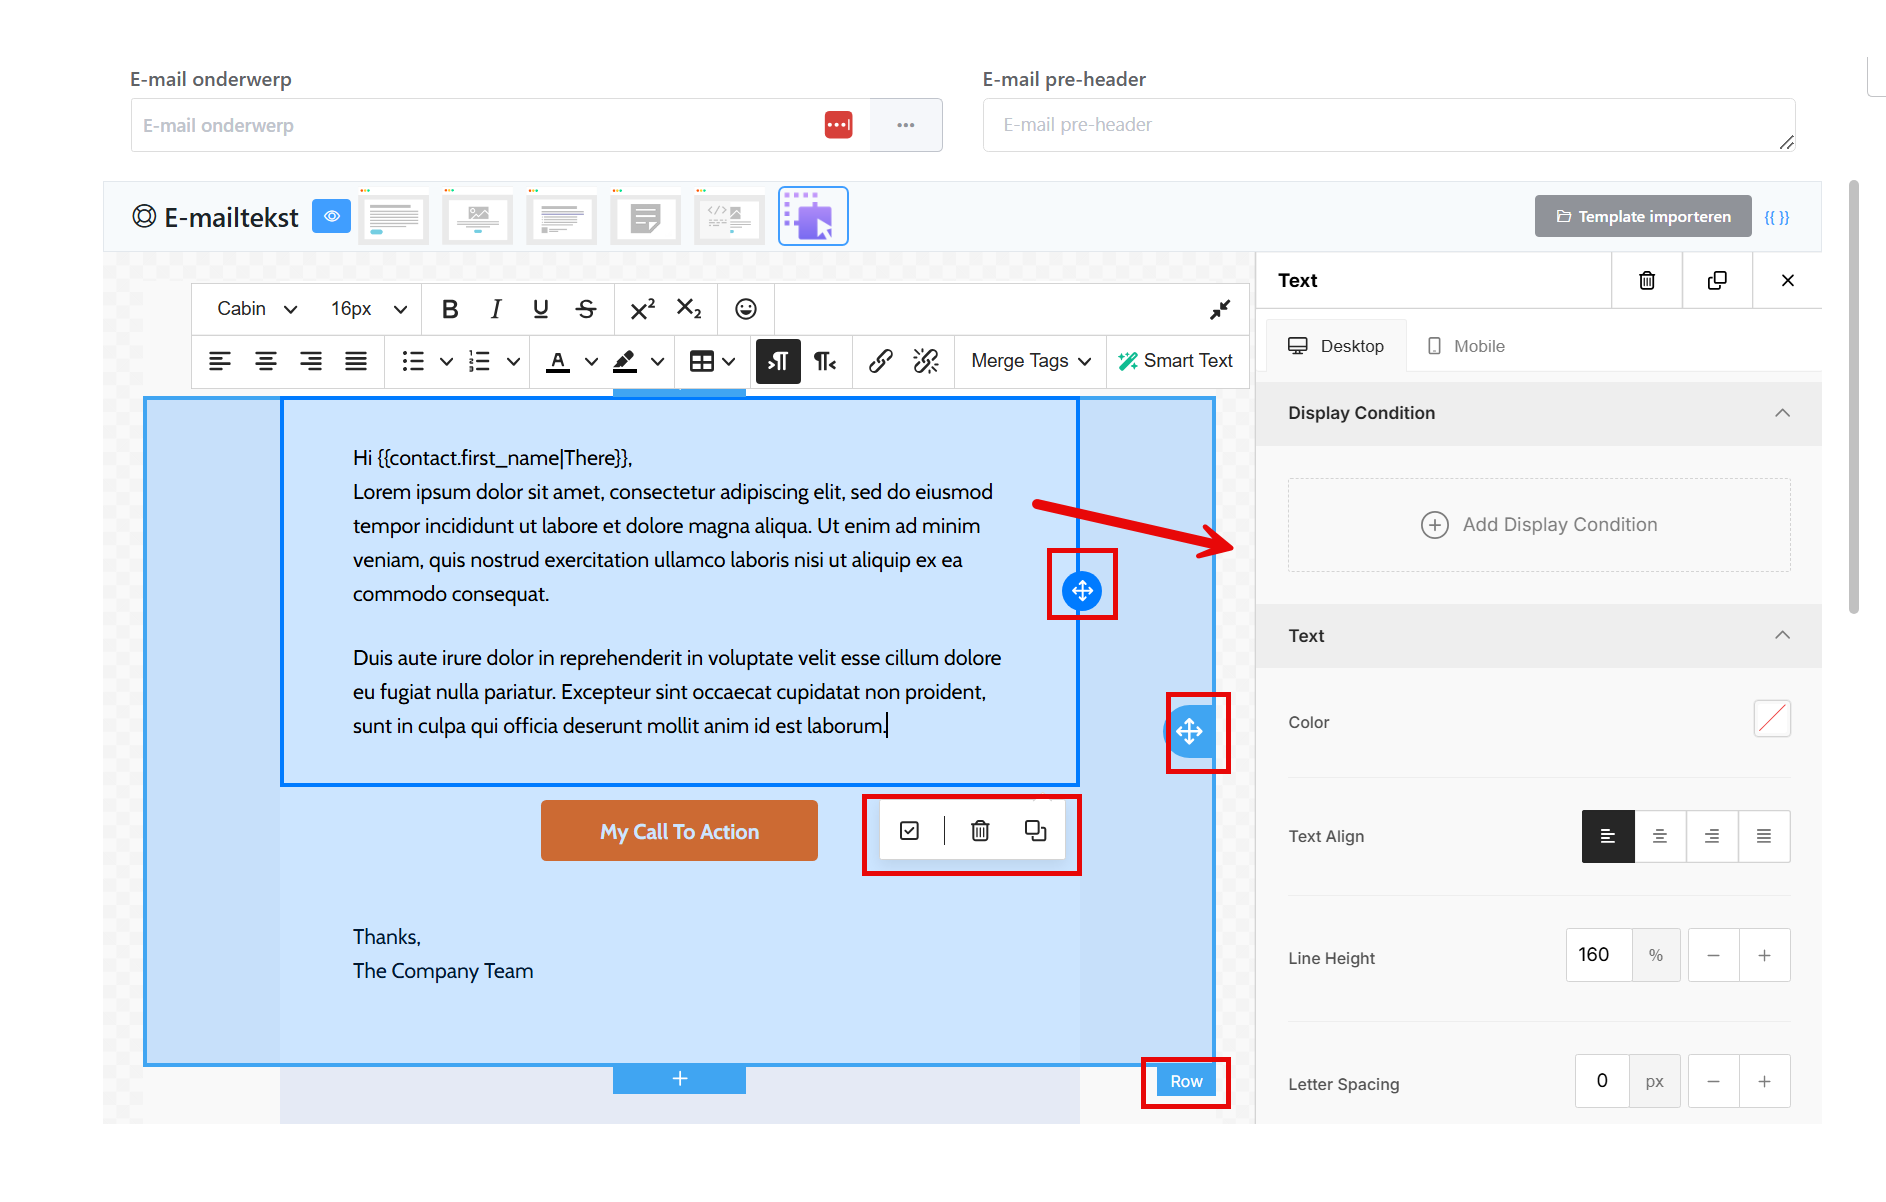
Within the visual editor you can adjust the underlying ‘row’ styling, where you change the general styling per row and set how many columns the row should have.
And you can adjust the styling separately per block. Click a block and you see its settings on the right.
Key options
- You can drag blocks by clicking the arrows icon and dragging.
- You can also copy or delete both blocks and rows
- Per block you can apply conditional logic and set which contacts may or may not see the block
Adding merge tags to your email #
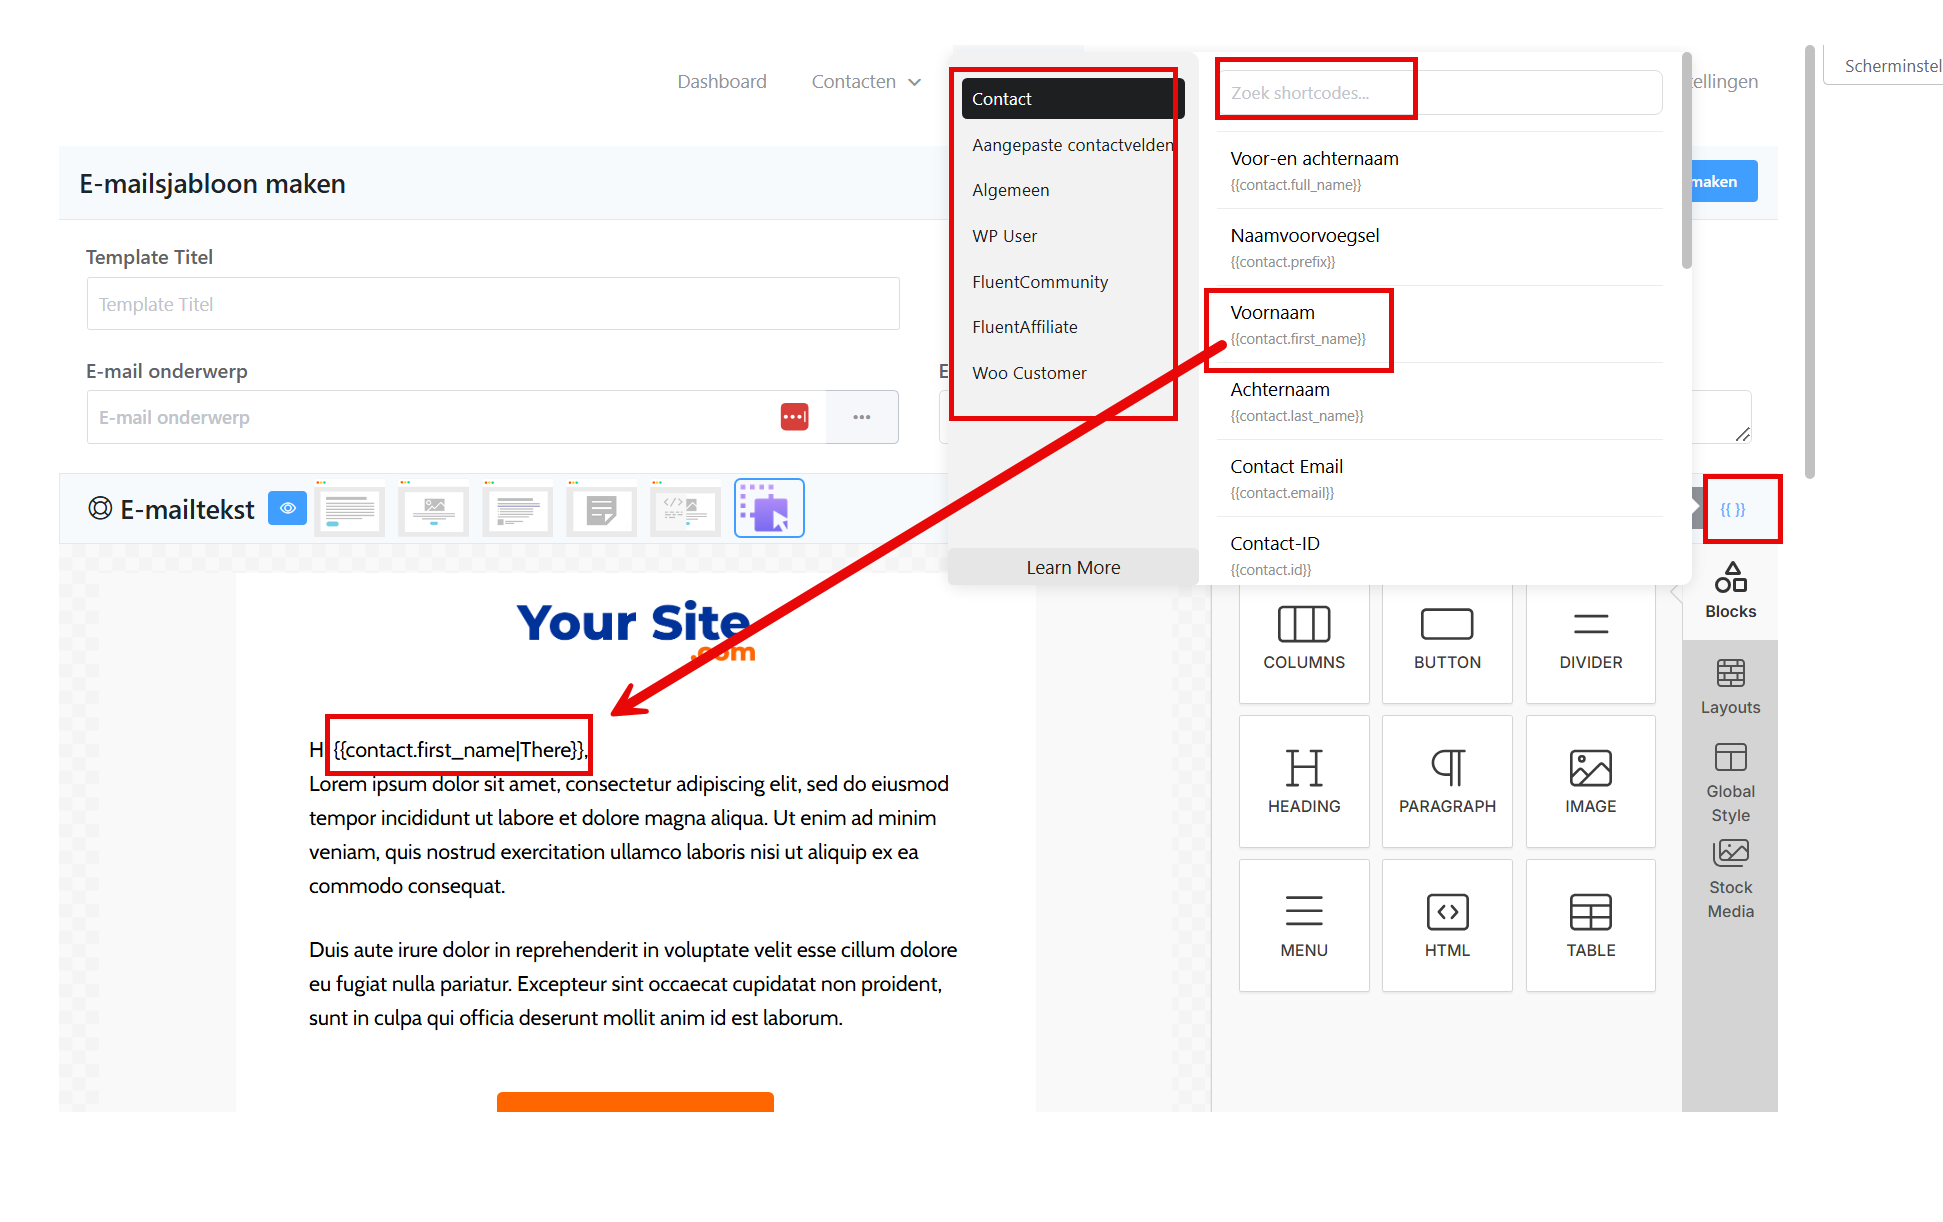
Merge tags (also called ‘shortcodes’) show dynamic content per contact, and you get to them easily through the merge tag button at the top right. Choose your merge tag and click it. It is copied, and you can then paste it wherever you want it in your email:
Putting an email together step by step #
1. Basic email settings #
Start by setting the basic information in the right hand column:
- Subject: write a compelling subject line
- Preheader: the text shown after the subject in the inbox
- From name: set automatically on the basis of your CRM settings
2. Adding content #
Drag blocks from the blocks panel onto the canvas. Start with a text block for your opening paragraph, for example. Click the block to edit the content in the rich text editor that appears.
3. Adding images #
Drag an image block to the position you want. You can upload an image from your computer or enter the URL of an image online. Do not forget to add alt text for accessibility
Composing emails in Autorespond is based on FluentCRM, which is included in your package. Read the English documentation


