Creating email sequences #
Email sequences are automated series of consecutive emails sent at set intervals. You use them for a welcome series after sign-up, a course delivered by email, or follow-up messages after a purchase. The difference with automations is that email sequences are purely about sending a fixed series of emails, while automations can contain more complex flows with conditions and actions.
An email sequence starts automatically when a contact is added to it, usually through an automation, a form or a manual action. Every email in the sequence is sent at the moment you set, counted from the moment the contact was added to the sequence.
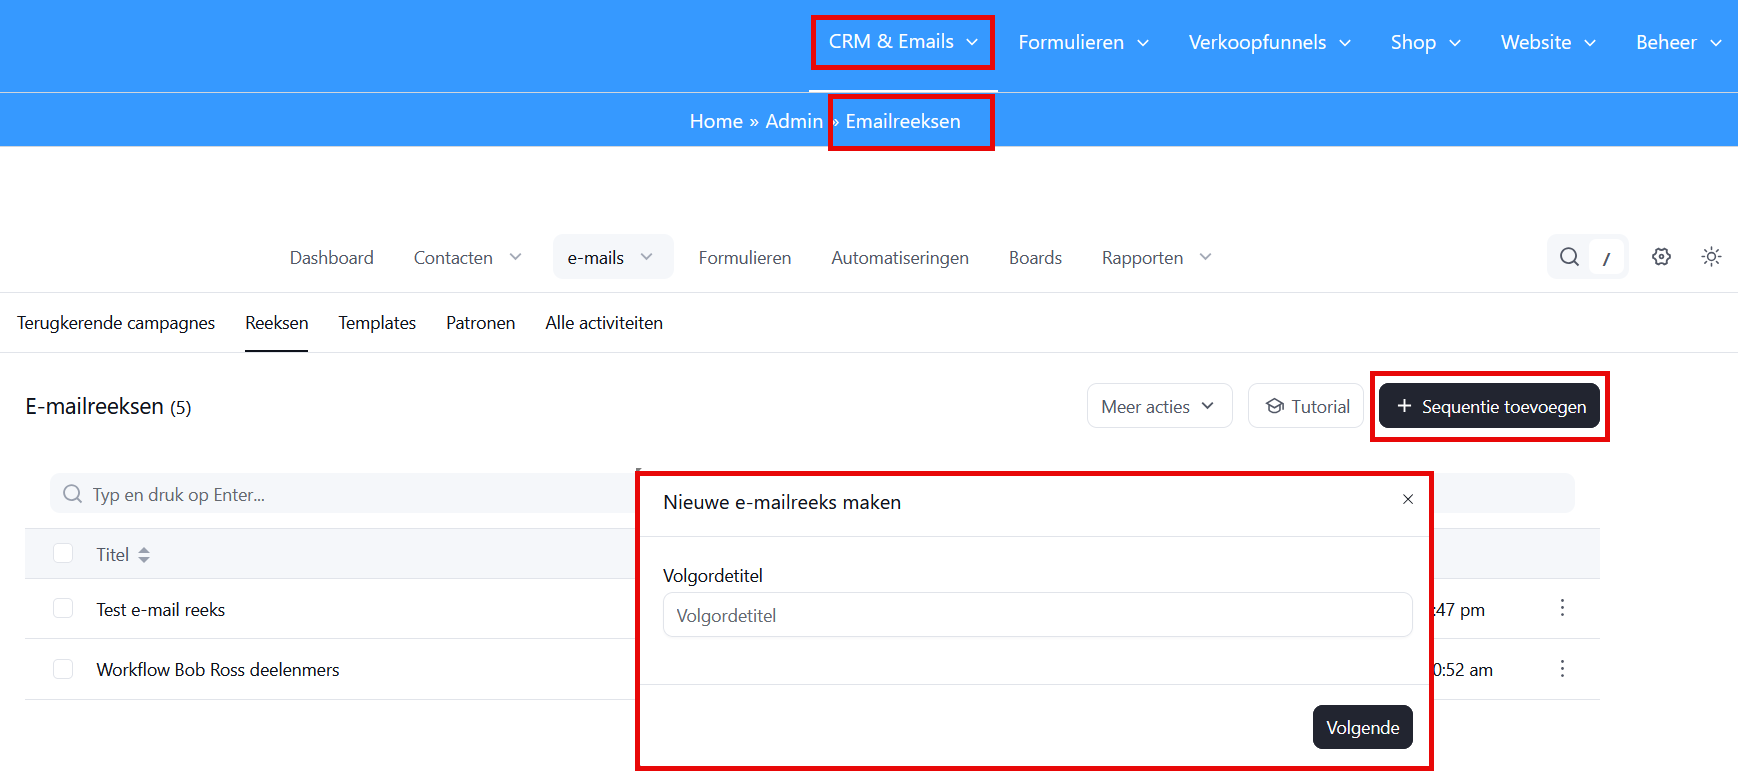
Creating a new email sequence #
In your Autorespond administration, go to CRM & Emails → Email Sequences and click ‘Add sequence’. In the popup window you set the title of the sequence. Give it a recognisable name (for example “Welcome series new customers” or “7 day email marketing course”). Click ‘Next’ and then ‘+ Create your first email sequence’. You arrive at the first email you can add.
Adding emails to your sequence #
In your Autorespond administration, go to CRM & Emails → Email Sequences and click the sequence you want to change. Click ‘Add an email’ at the top right to add a new email to your sequence.
Configuring and editing the emails in your sequence #
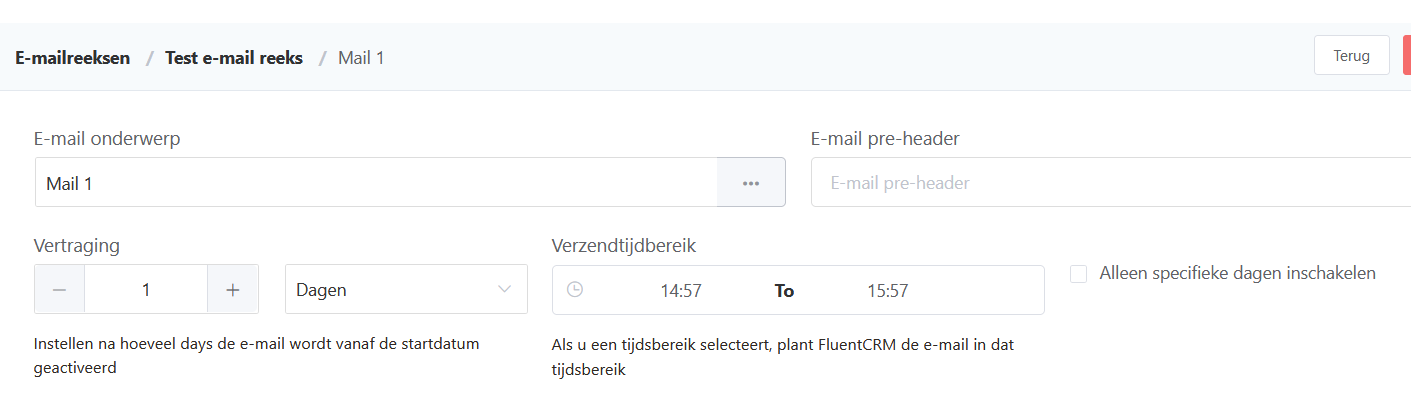
Once you have added an email you can configure it, or you can edit an existing email. For each email you set:
- Email subject: the subject line of the email
- Delay: how long after the start the email is sent (for example “Immediately”, “1 day later”, “2 weeks later”)
- Sending window: use this if you want the email sent within a particular time range. This setting is optional.
- If you only want the email sent on specific days, tick ‘Enable specific days only’ and choose the days the email may go out. If an email is due on a Wednesday, for example, but you have not ticked ‘Wednesday’, the email is sent on the next permitted day.
- Content: the full email content through the visual editor
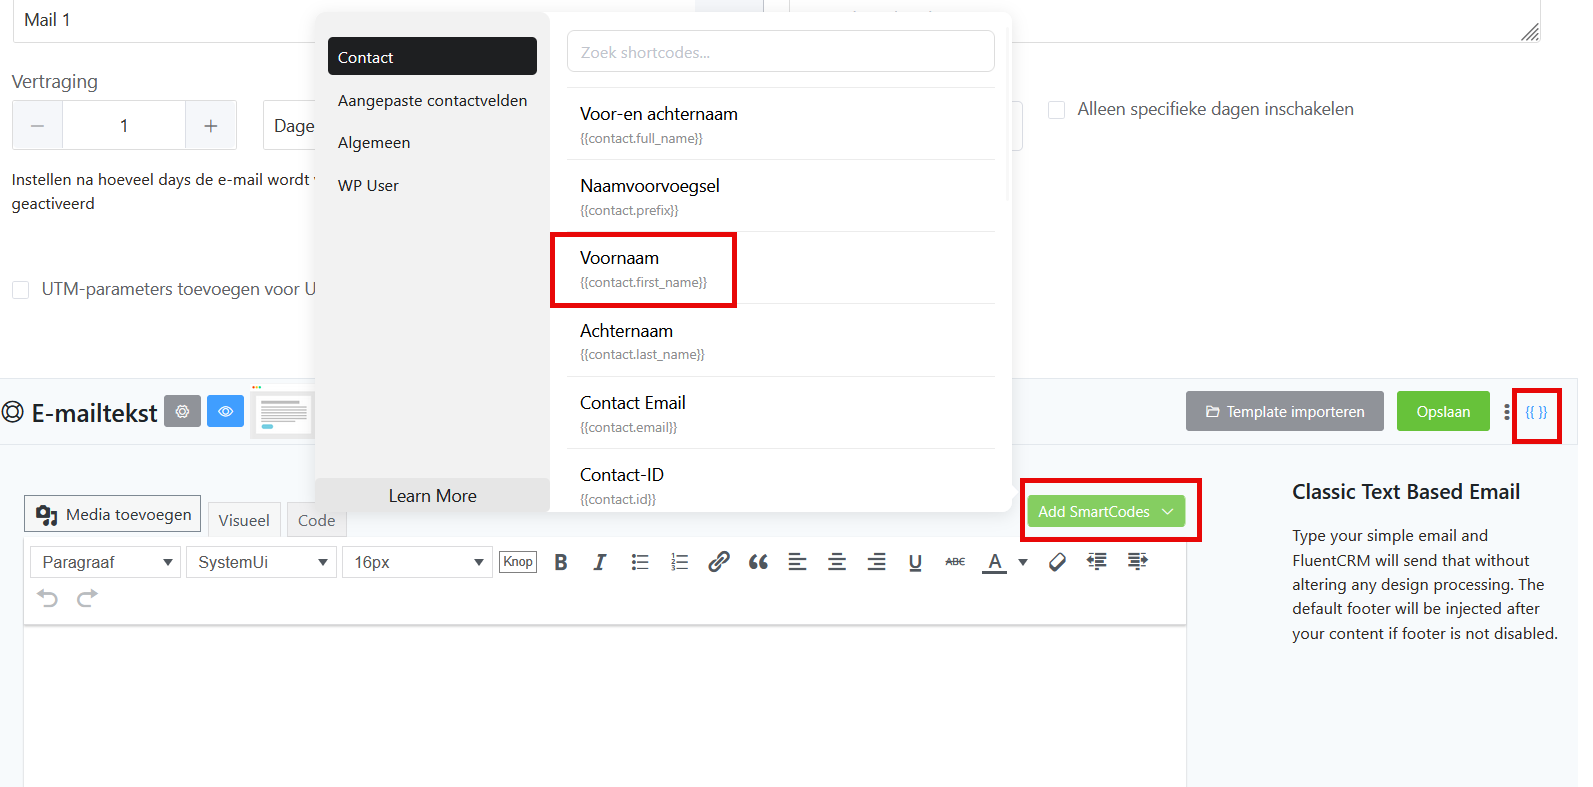
You can use smart codes in the subject as well as in the content to personalise emails. The smart codes are available through the green ‘Add Smartcodes’ button or the small button at the top right marked ‘{{ }}’. To add the contact’s first or last name, for example, choose {{contact.first_name}} or {{contact.last_name}}.
Setting delays and the order of your emails #
The delay on an email is always relative to the moment someone is added to the sequence. A few examples:
- Email 1: “0”, sent immediately on being added
- Email 2: “3 days”, sent 3 days after being added
- Email 3: “1 week”, sent 1 week after being added
- Email 4: “1 month”, sent 1 month after being added
Note that the order in which you create the emails does not necessarily determine the order they are sent in, the delay decides when each email goes out. The emails sort themselves into the right order in the overview.
Adding contacts to an email sequence #
There are several ways to add contacts to an email sequence:
Through an automation #
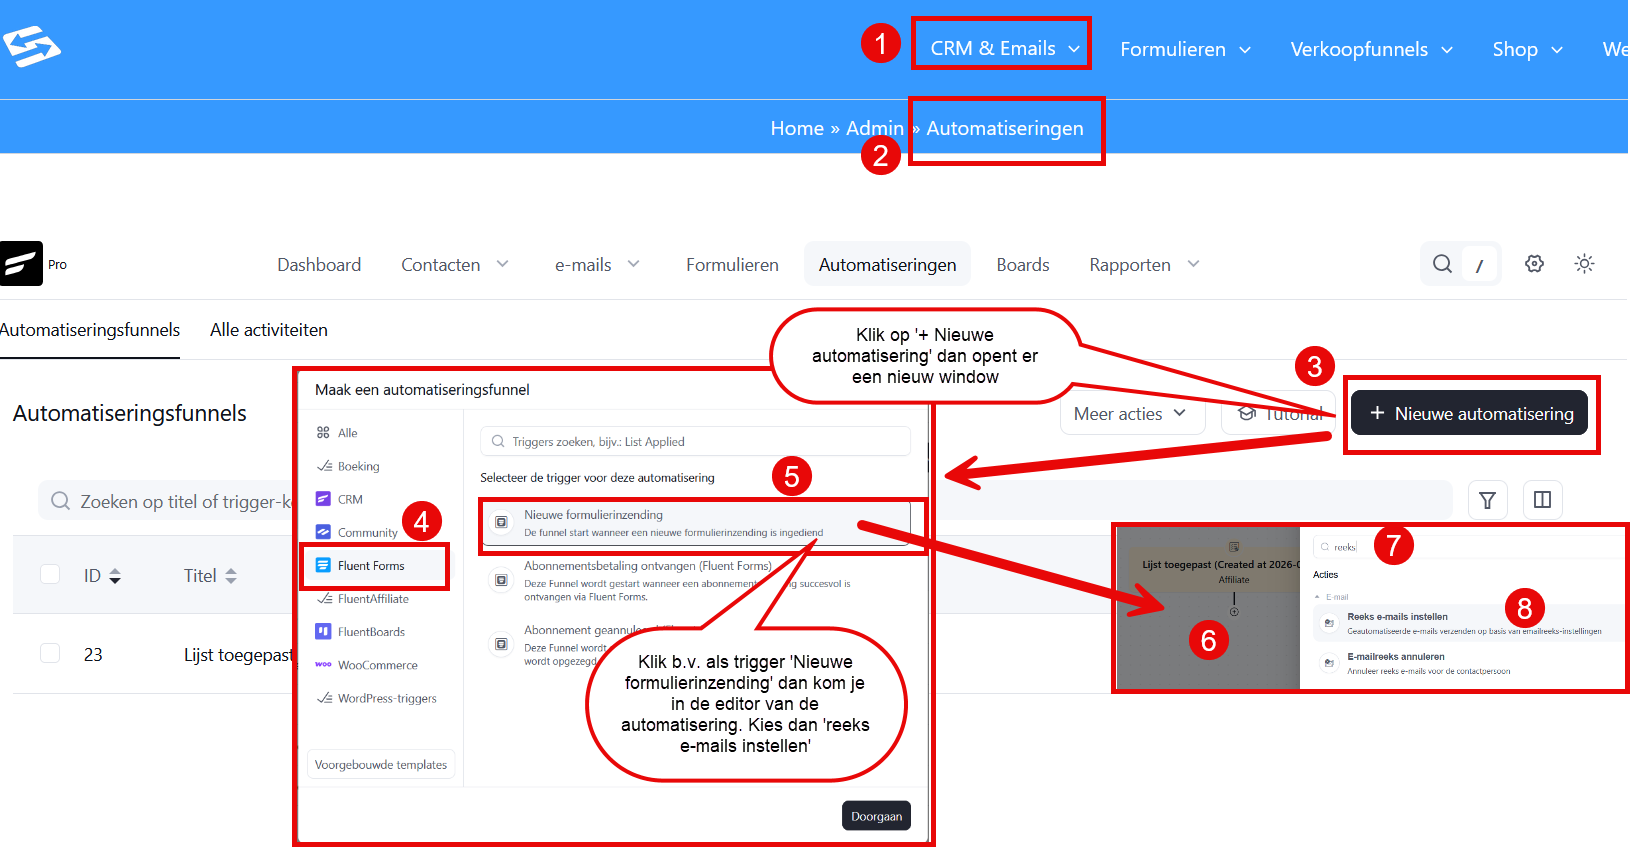
The most common method is through an automation. Create an automation with a trigger (for example “form submission”) and add the action “Set email sequence”. Then select the email sequence you want.
Read more about creating an automation in “Creating automations with the automation editor“
Adding contacts manually #
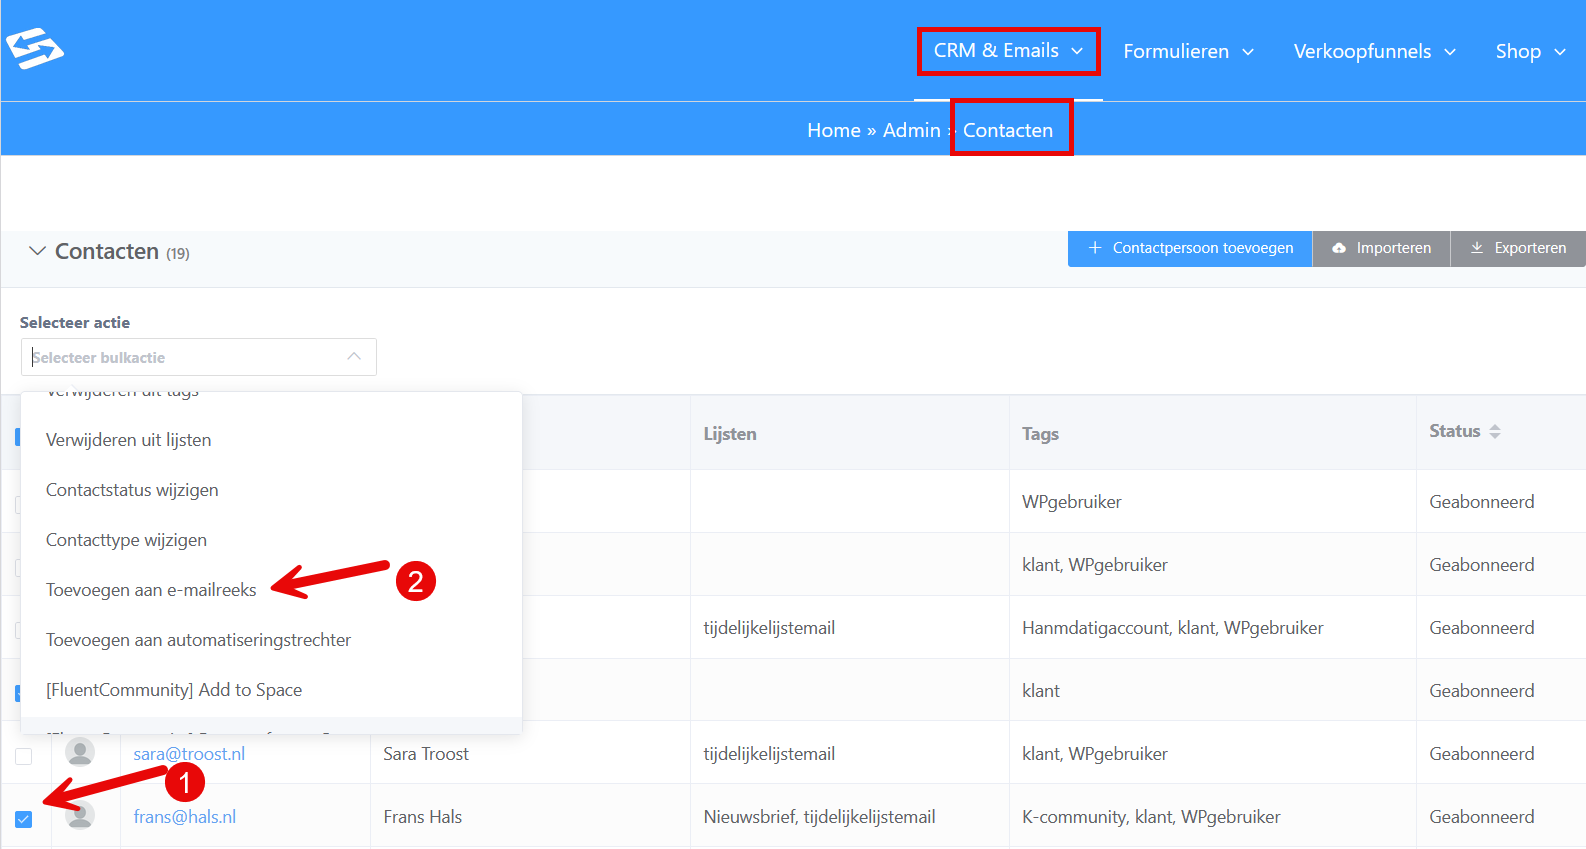
Go to CRM & Emails → Contacts, select the contacts you want and choose “Add to email sequence” from the bulk action menu. Then select the sequence.
Managing and monitoring a sequence #
The email sequences overview shows the key statistics per sequence:
- Subscribers: how many people are currently in the sequence
- Emails: the number of emails in this sequence
Click a sequence to see detailed statistics per email:
- Sent: how many people received the email in question
- Opened: what percentage of recipients opened the email
- Clicked: what percentage of recipients clicked a link in the email
- Unsubscribed: how many people unsubscribed from the sequence after opening this email
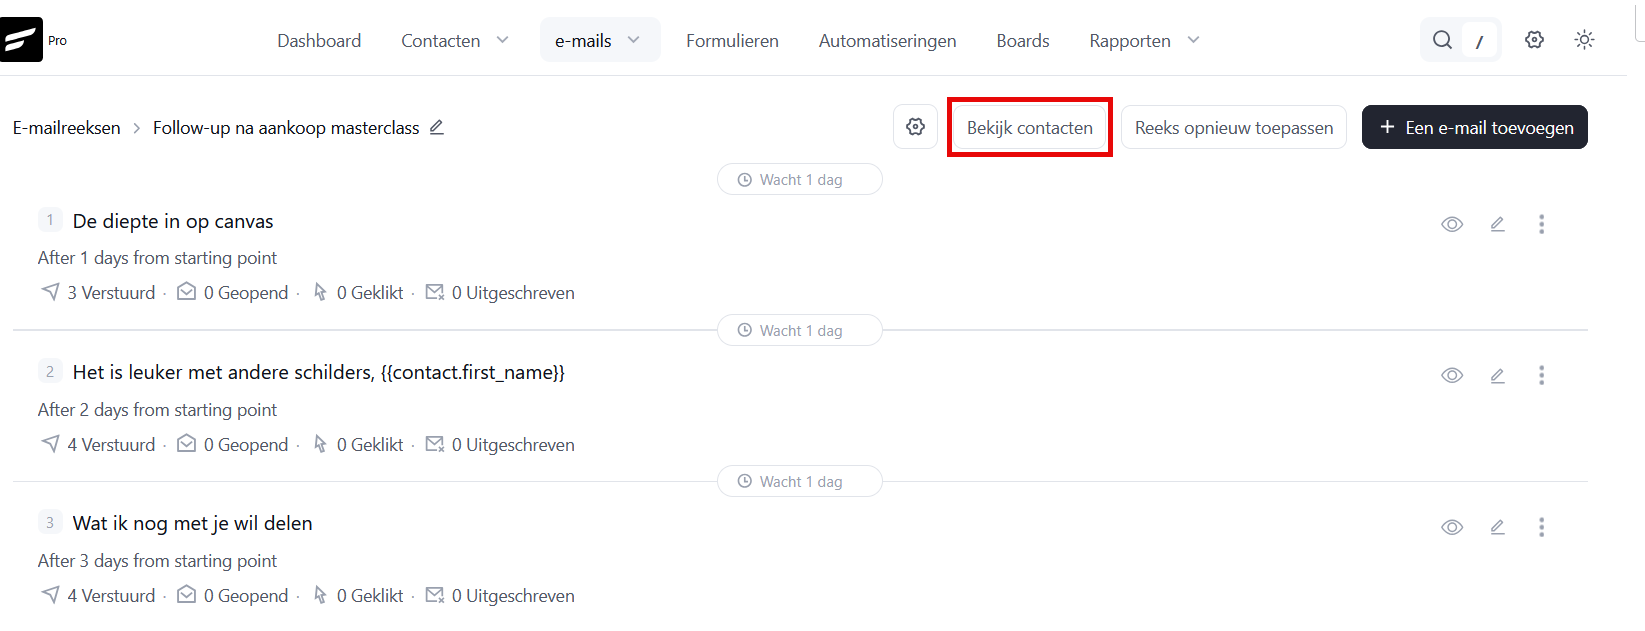
The ‘View contacts’ button shows you where each contact is in the sequence and when their next email is due.
Stopping or resuming a contact #
Sometimes you want to remove a contact from a sequence, or add them back in:
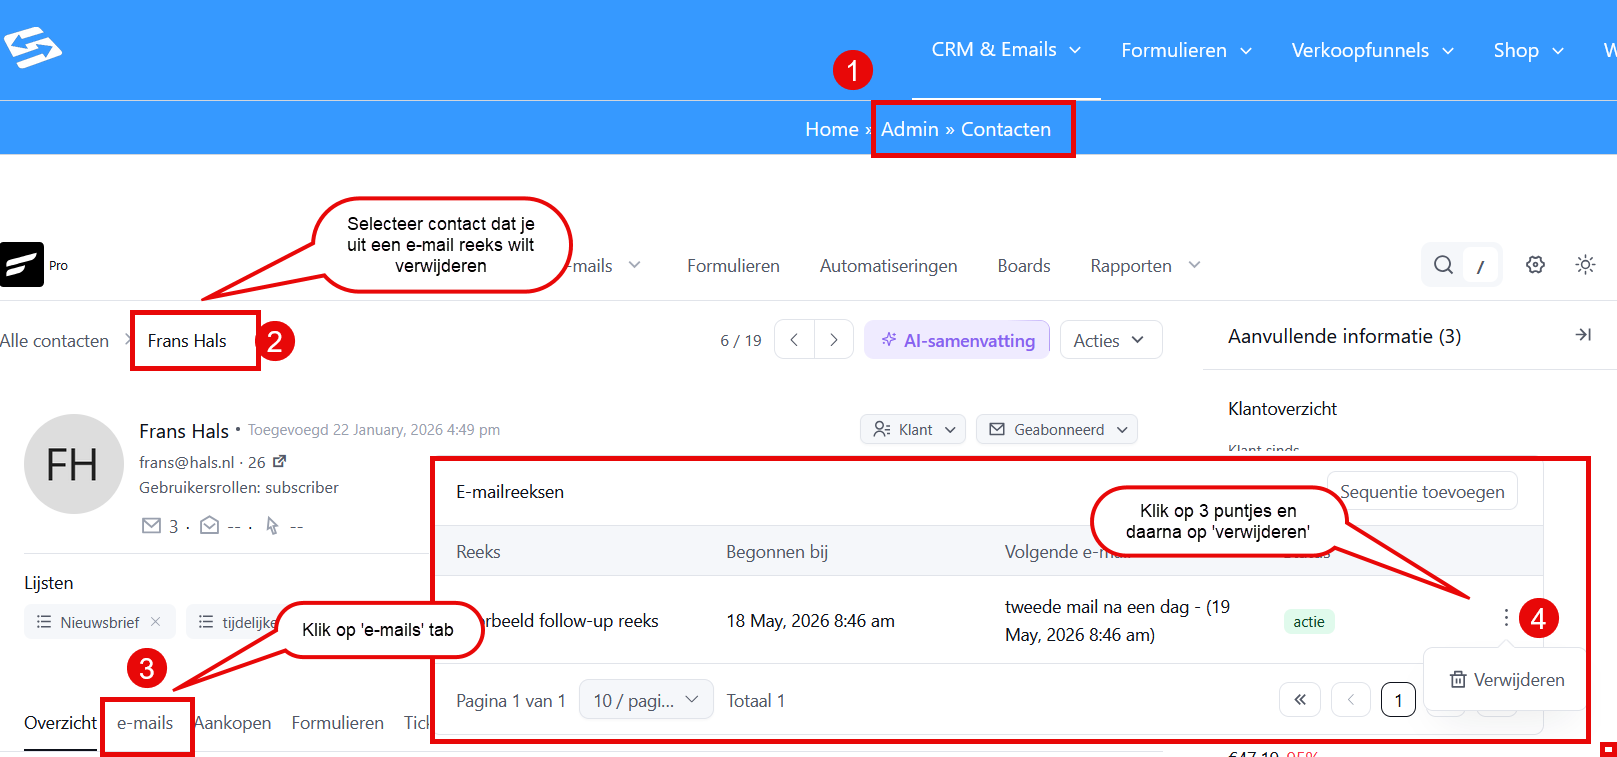
- Remove: go to the contact, click the “email” tab, click the three dots to the right of the sequence and then “remove”
- Add: in the “email” tab, click the “Add sequence” button at the top right, choose the sequence and select “add to sequence”
Tips for effective email sequences #
Build a logical structure with worthwhile content in every email. Start with a warm welcome message and work gradually towards your main message. Test different subject lines and measure which perform best. Do not make your sequences too long, 3 to 7 emails is often more effective than a very long series.
Pay attention to the timing between emails too. In a welcome series you can schedule the first few emails closer together (day 1, day 3, day 7) and use longer gaps after that. For educational content, weekly intervals usually work well: send on fixed days and at fixed times where you can.
Email sequences in Autorespond are based on FluentCRM, which is included in your package. Read the English documentation


