Setting up the Zapier integration for WooCommerce #
Zapier lets your webshop communicate automatically with external tools such as accounting packages, CRM systems or other software. Autorespond uses WooCommerce as the basis for the webshop, which works excellently with Zapier. We use the ‘Zapier Integration for WooCommerce’ integration for this (it is already included in your Autorespond shop module, so you do not need to buy it yourself):
https://woocommerce.com/products/woocommerce-zapier/
You will find the documentation for this plugin here:
https://woocommerce.com/document/woocommerce-zapier-integration/
Activating the Zapier connection #
You create the connection with the WooCommerce shop in your Autorespond administration from within Zapier: https://zapier.com/apps/woocommerce/integrations
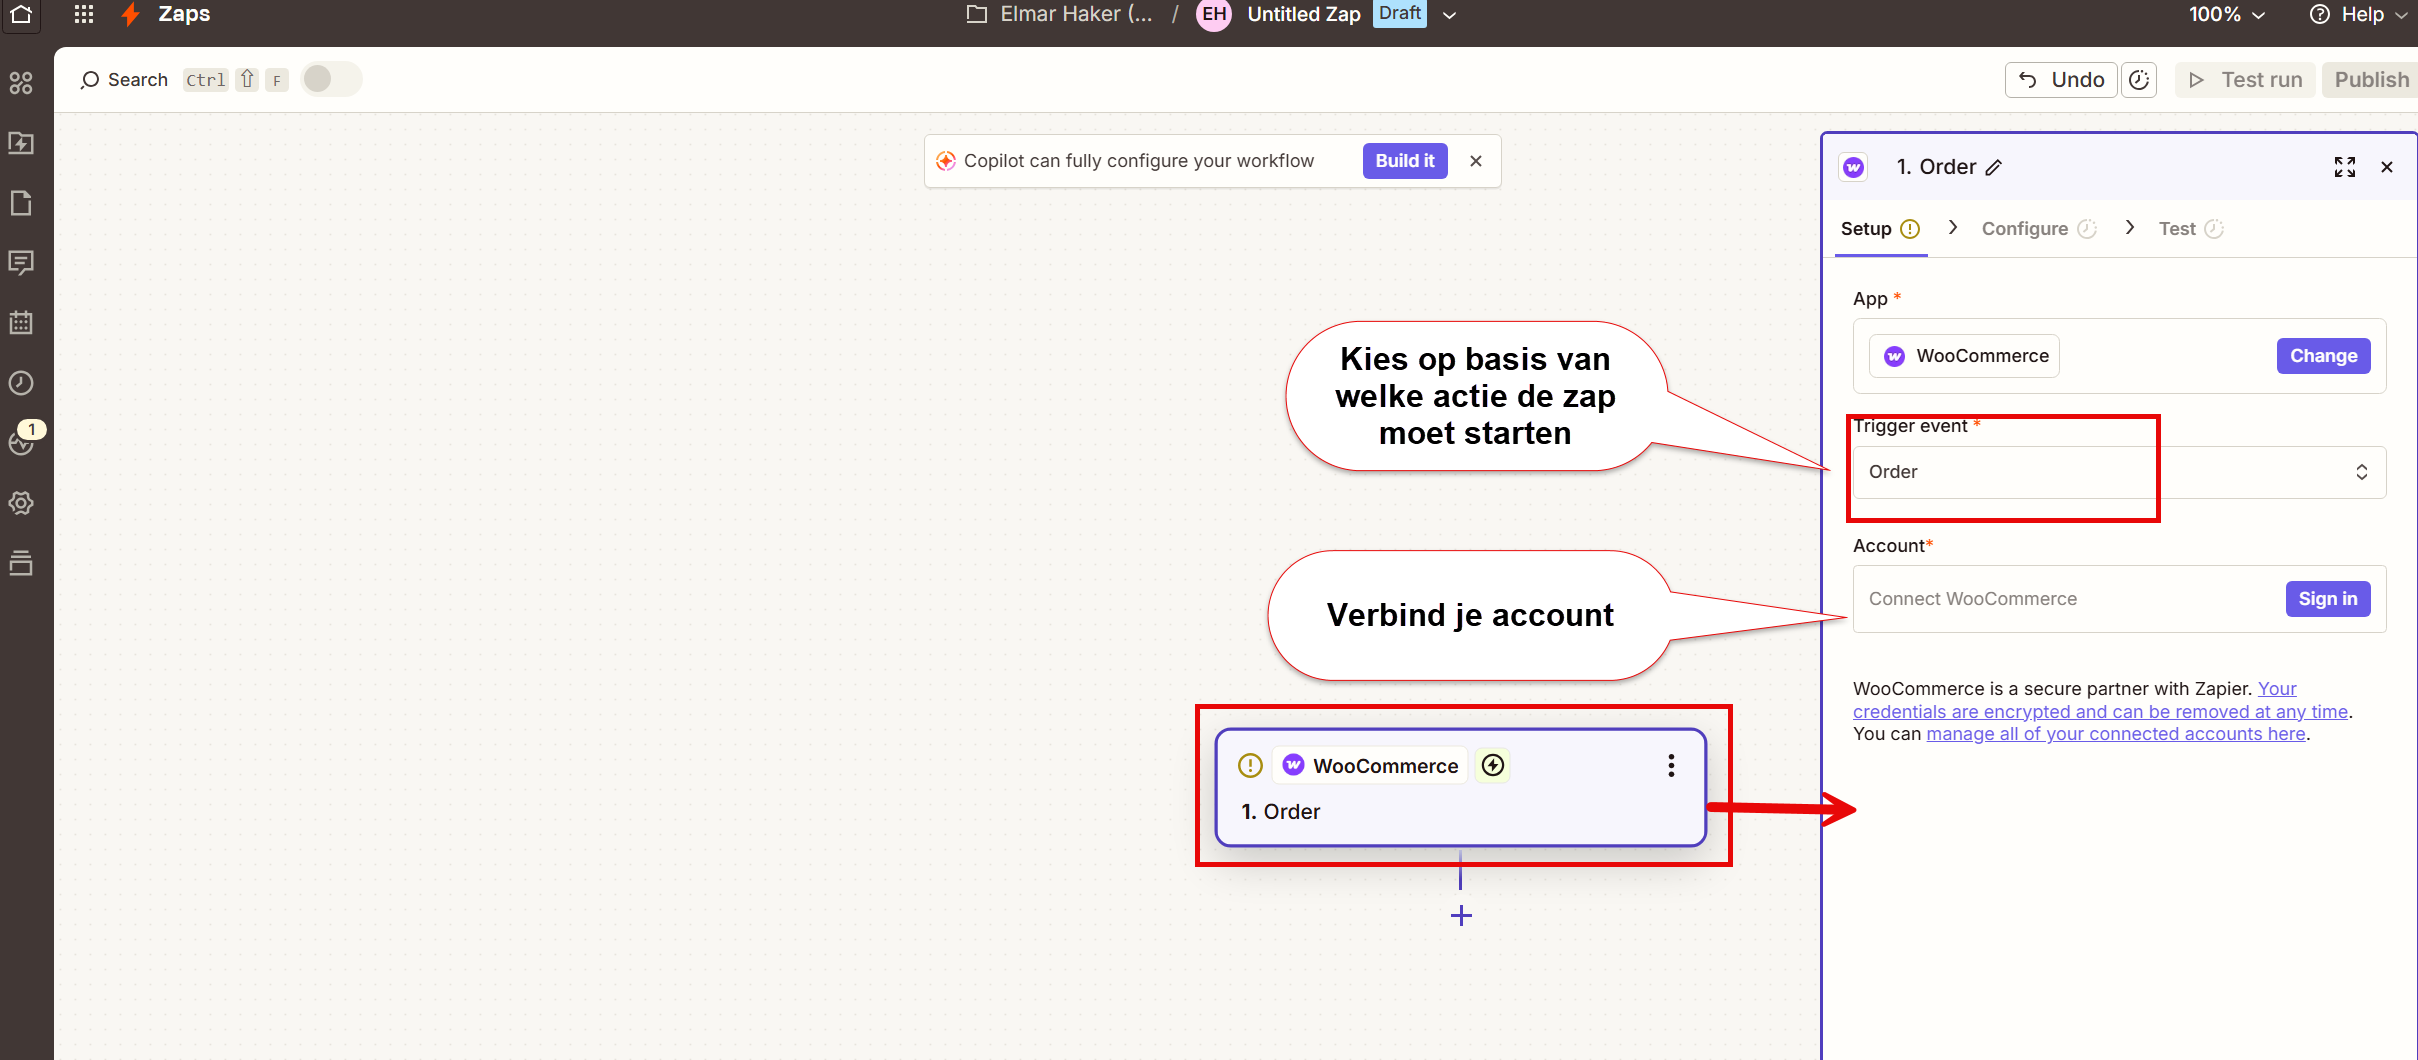
Once you choose WooCommerce as the app in Zapier, you can go through the steps to connect it to your Autorespond shop.
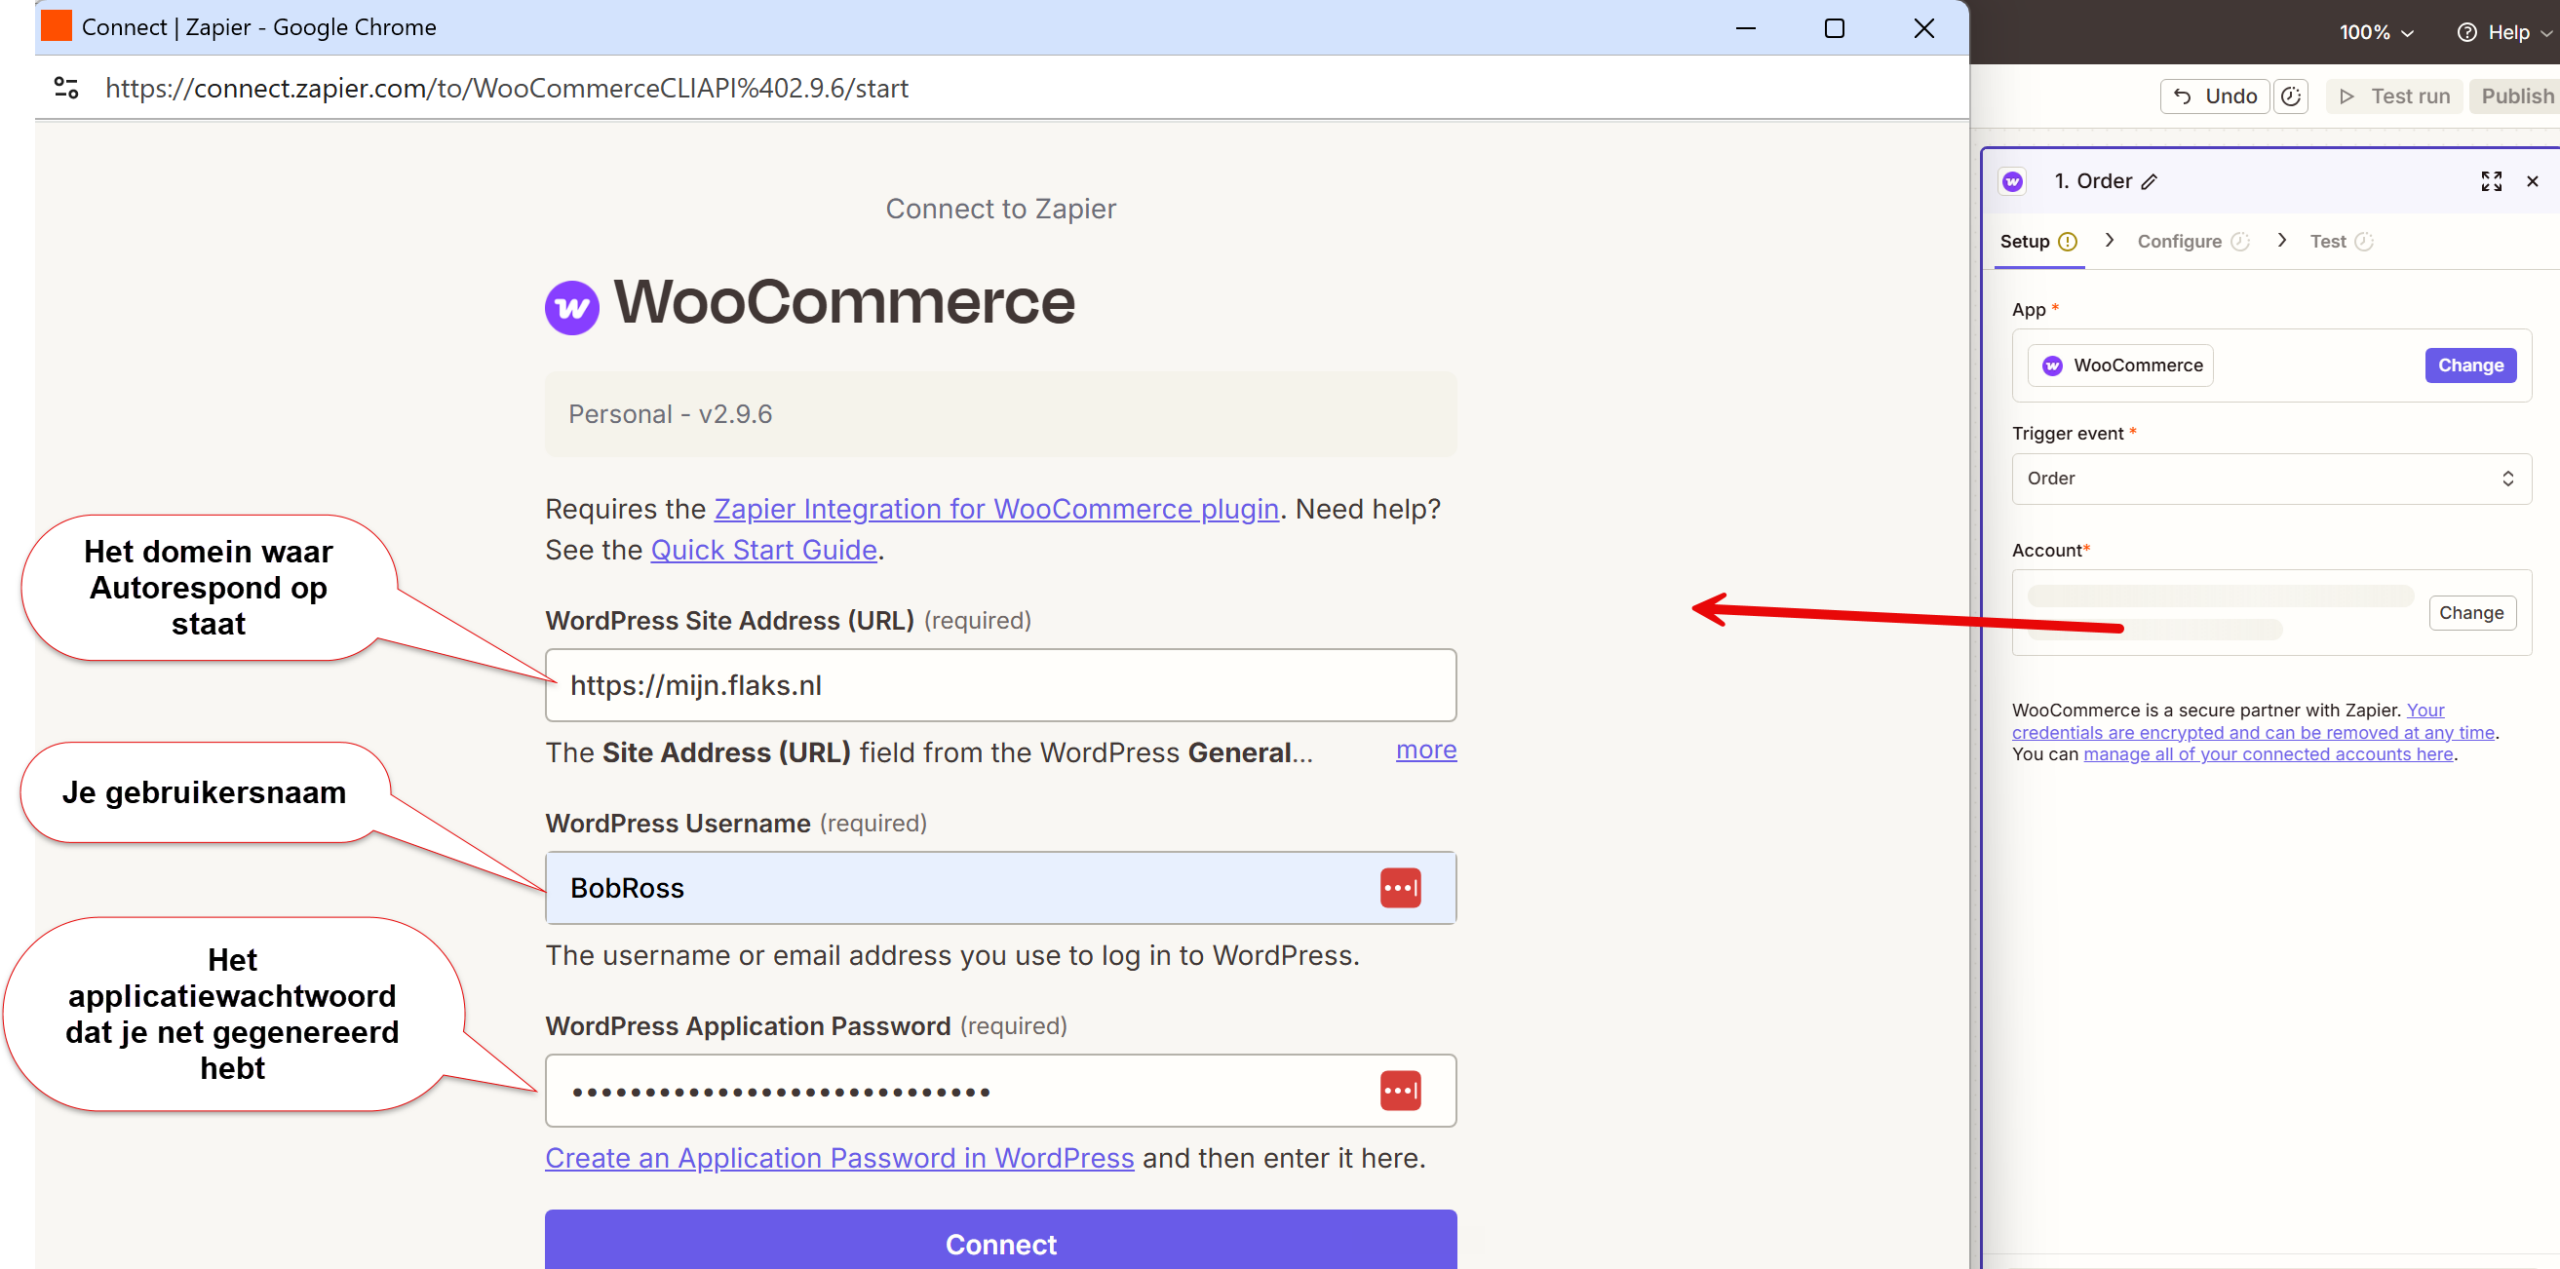
You need the following details:
- The website URL where your Autorespond website is located (for example https://my.yourwebsite.com)
- Your username
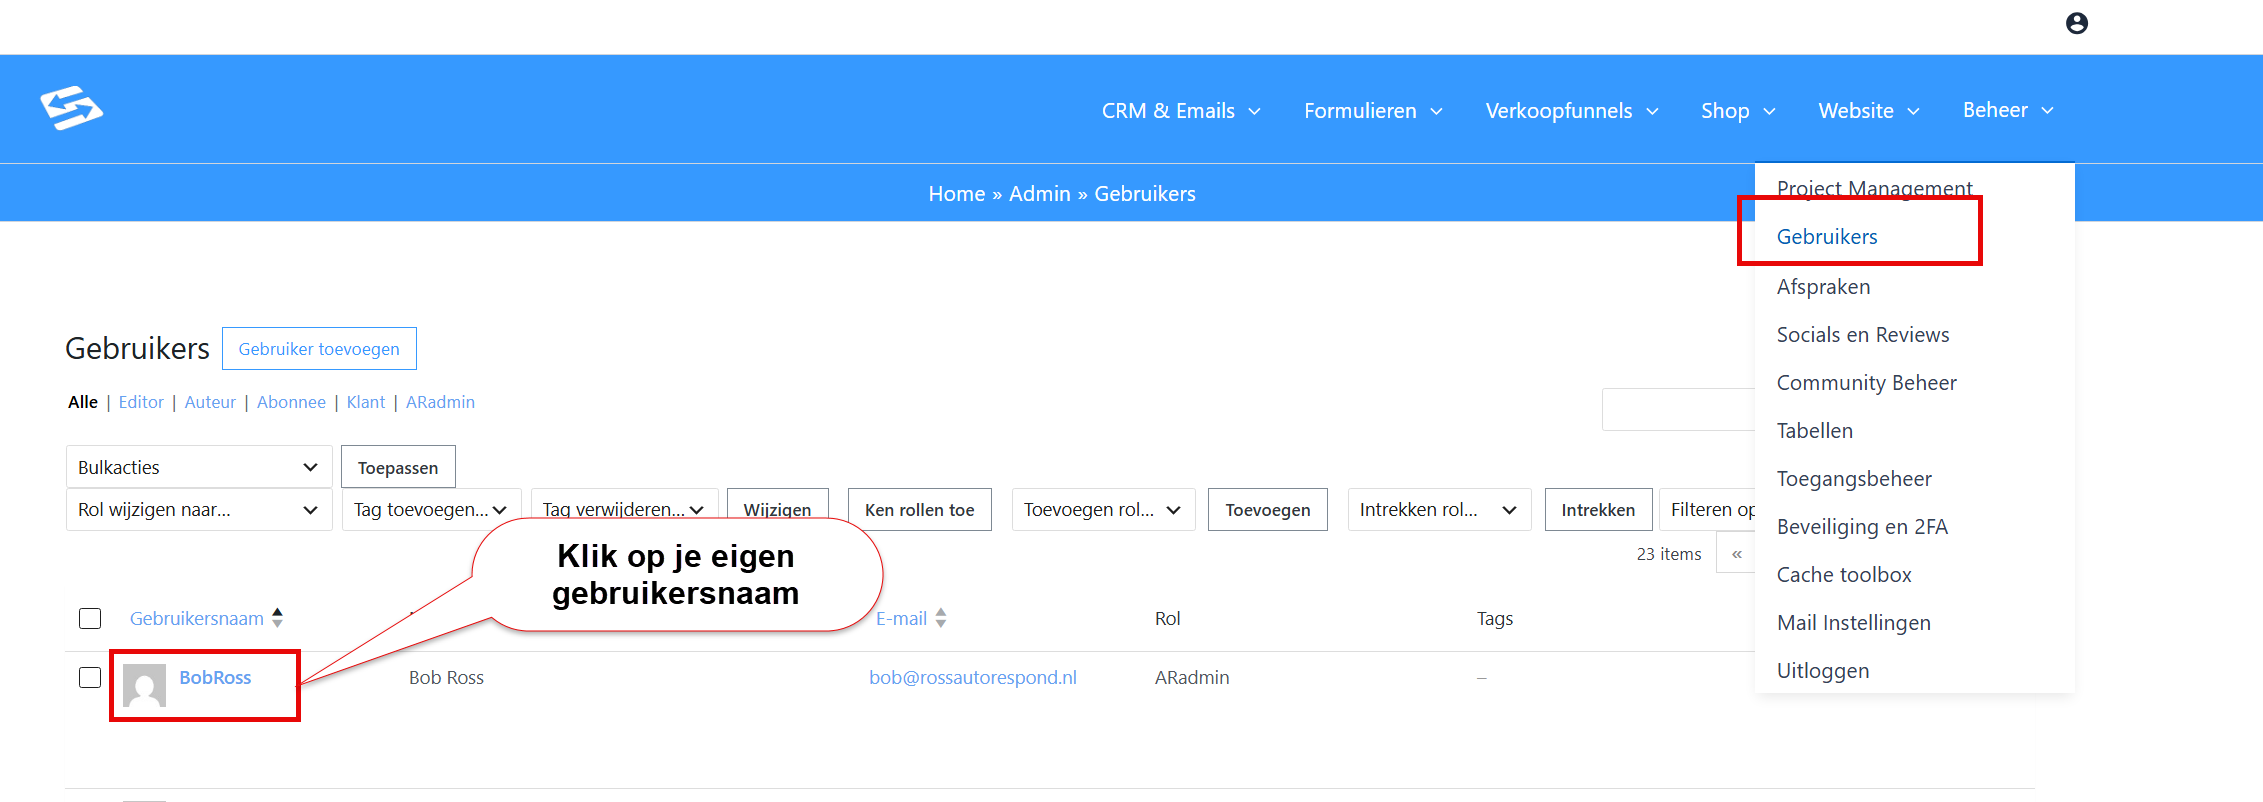
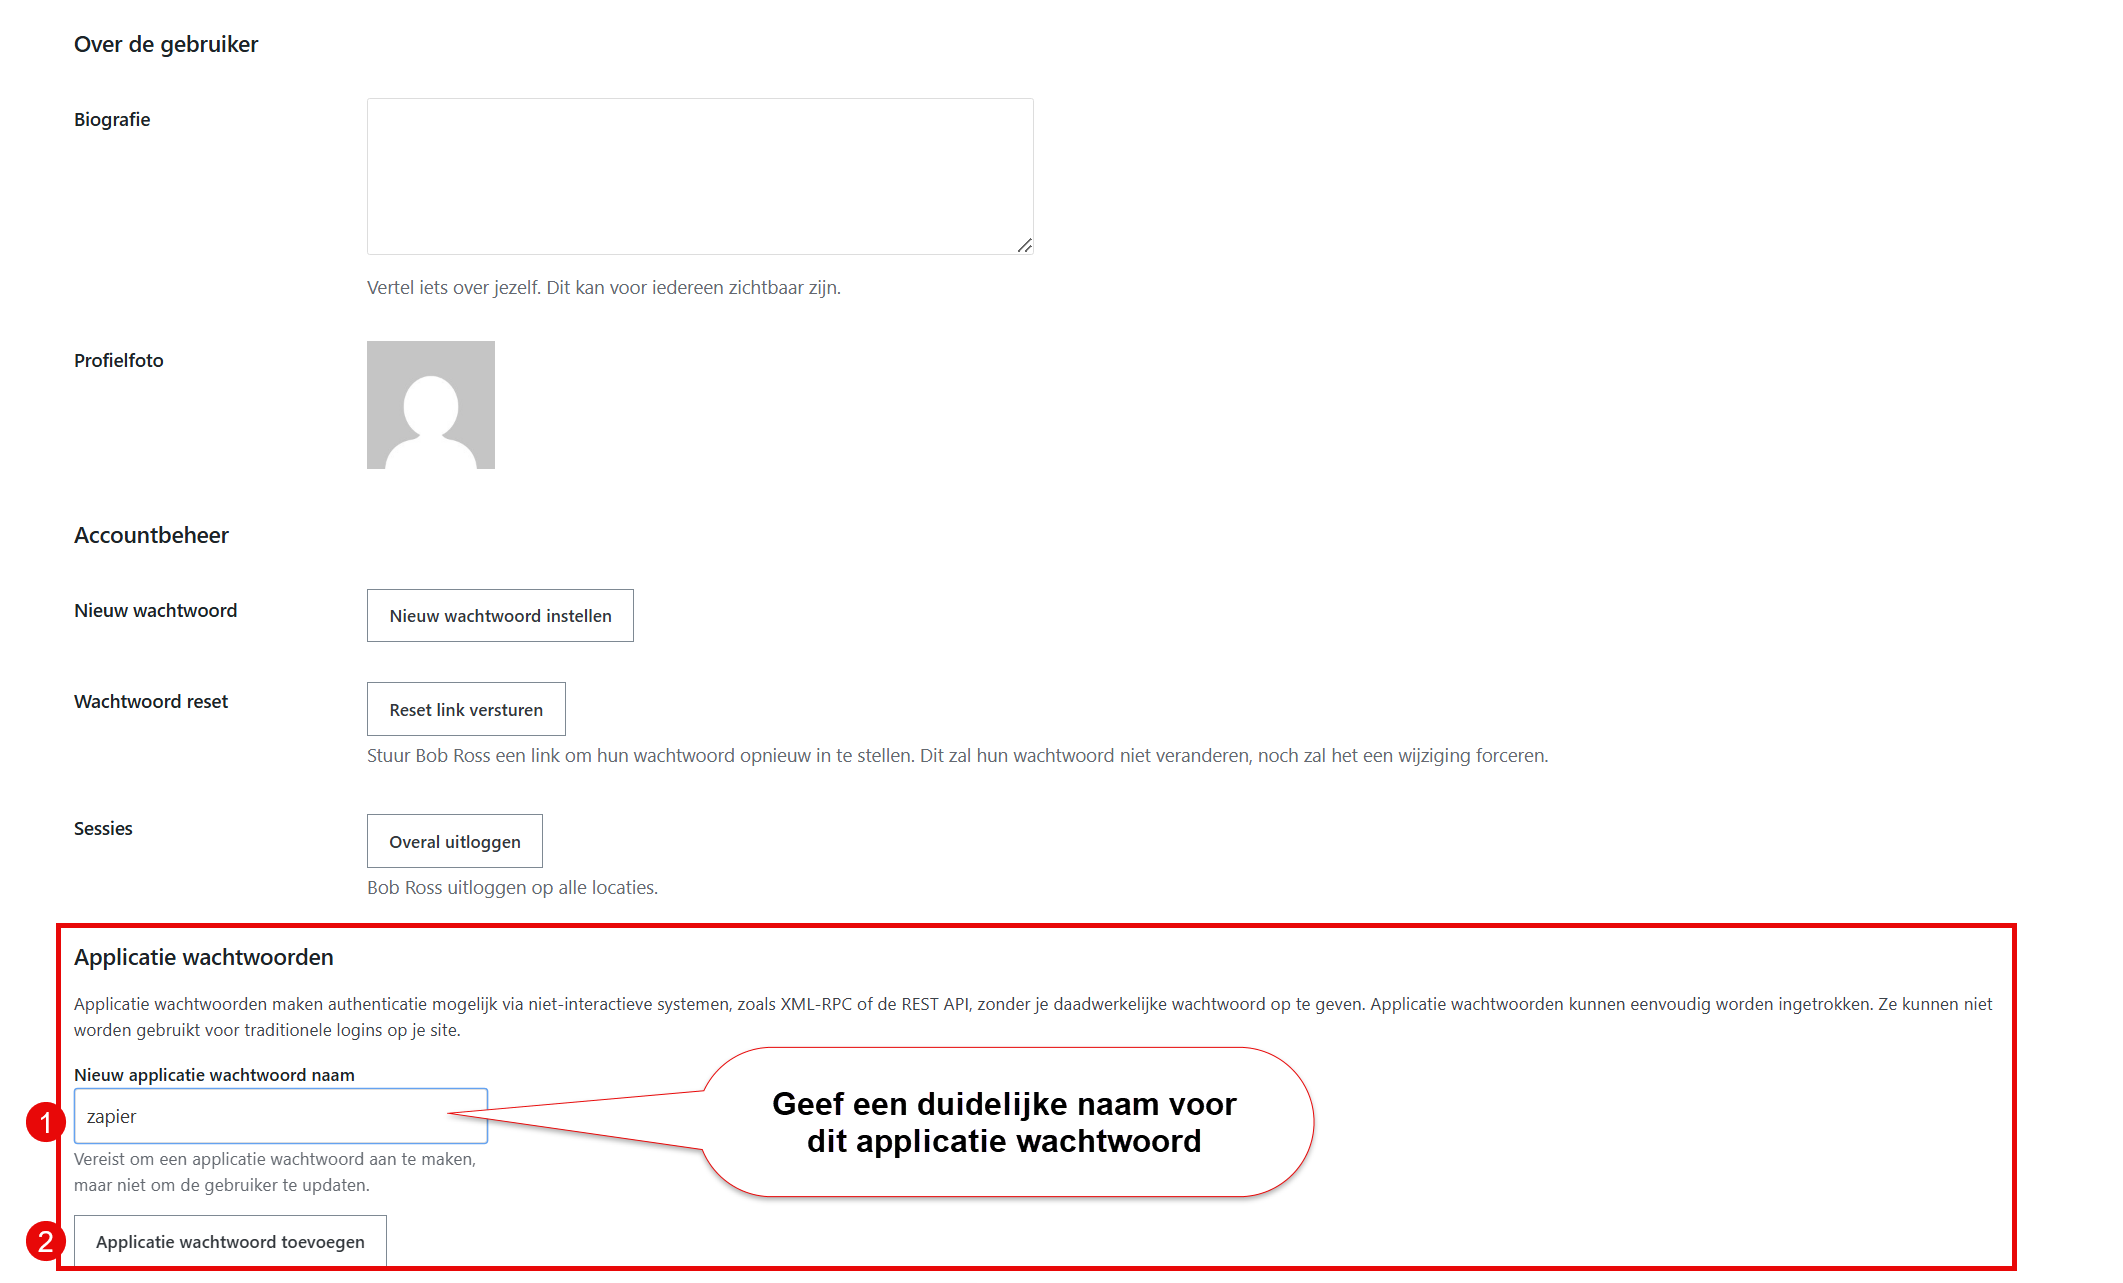
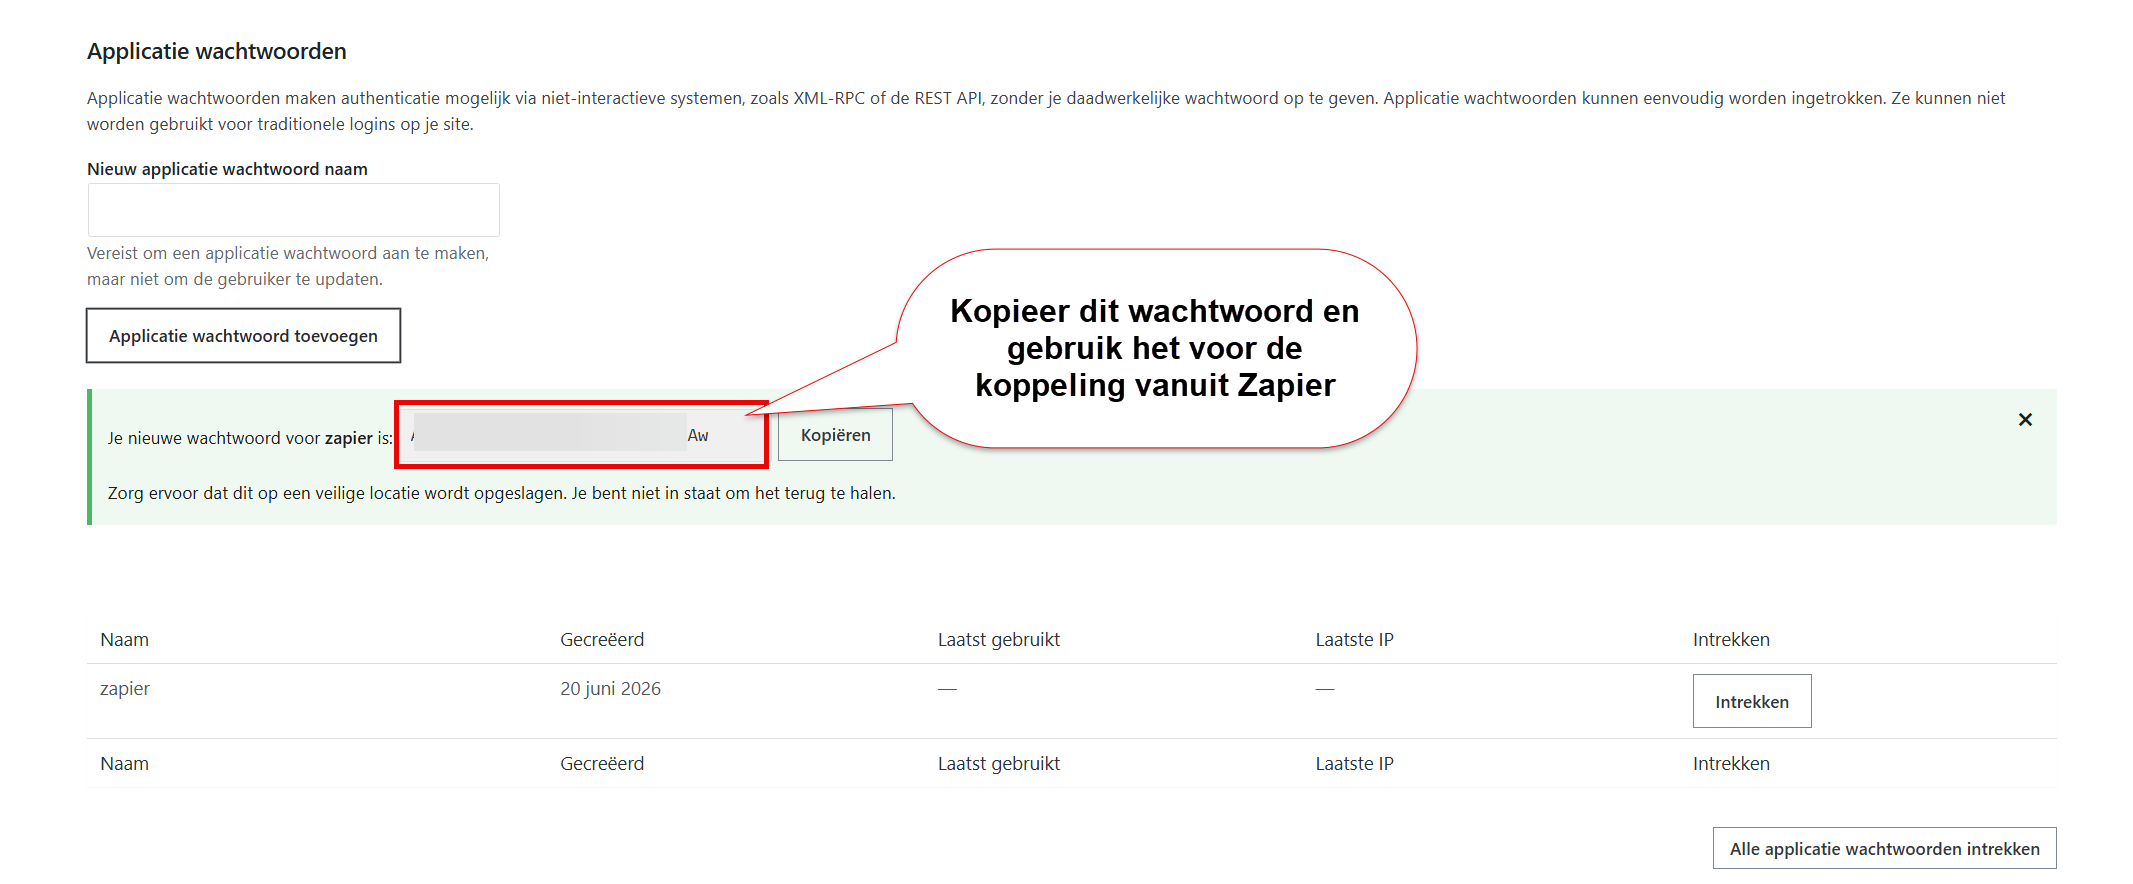
- A newly created, unique application password (which you create by editing your user account through the Administration > Users menu)
In Zapier:
Commonly used Zapier integrations #
The most popular integrations customers use are accounting packages, such as Billit, Exact Online, Yuki and Moneybird
Exporting orders manually #
As an alternative to an automatic integration, you can also export orders manually. Go to Shop → Export orders. Here you can filter orders by date, status or other criteria and export them to CSV, Excel or other formats.
You can then import these exported files into your external software.


