Capturing the relationship type during checkout with custom fields #
By adding a dropdown field to your checkout you can record the relationship type of the customer while they are ordering. This prevents people from unsubscribing because they receive newsletters that are not relevant to them.
Step 1: add a custom field to the checkout #
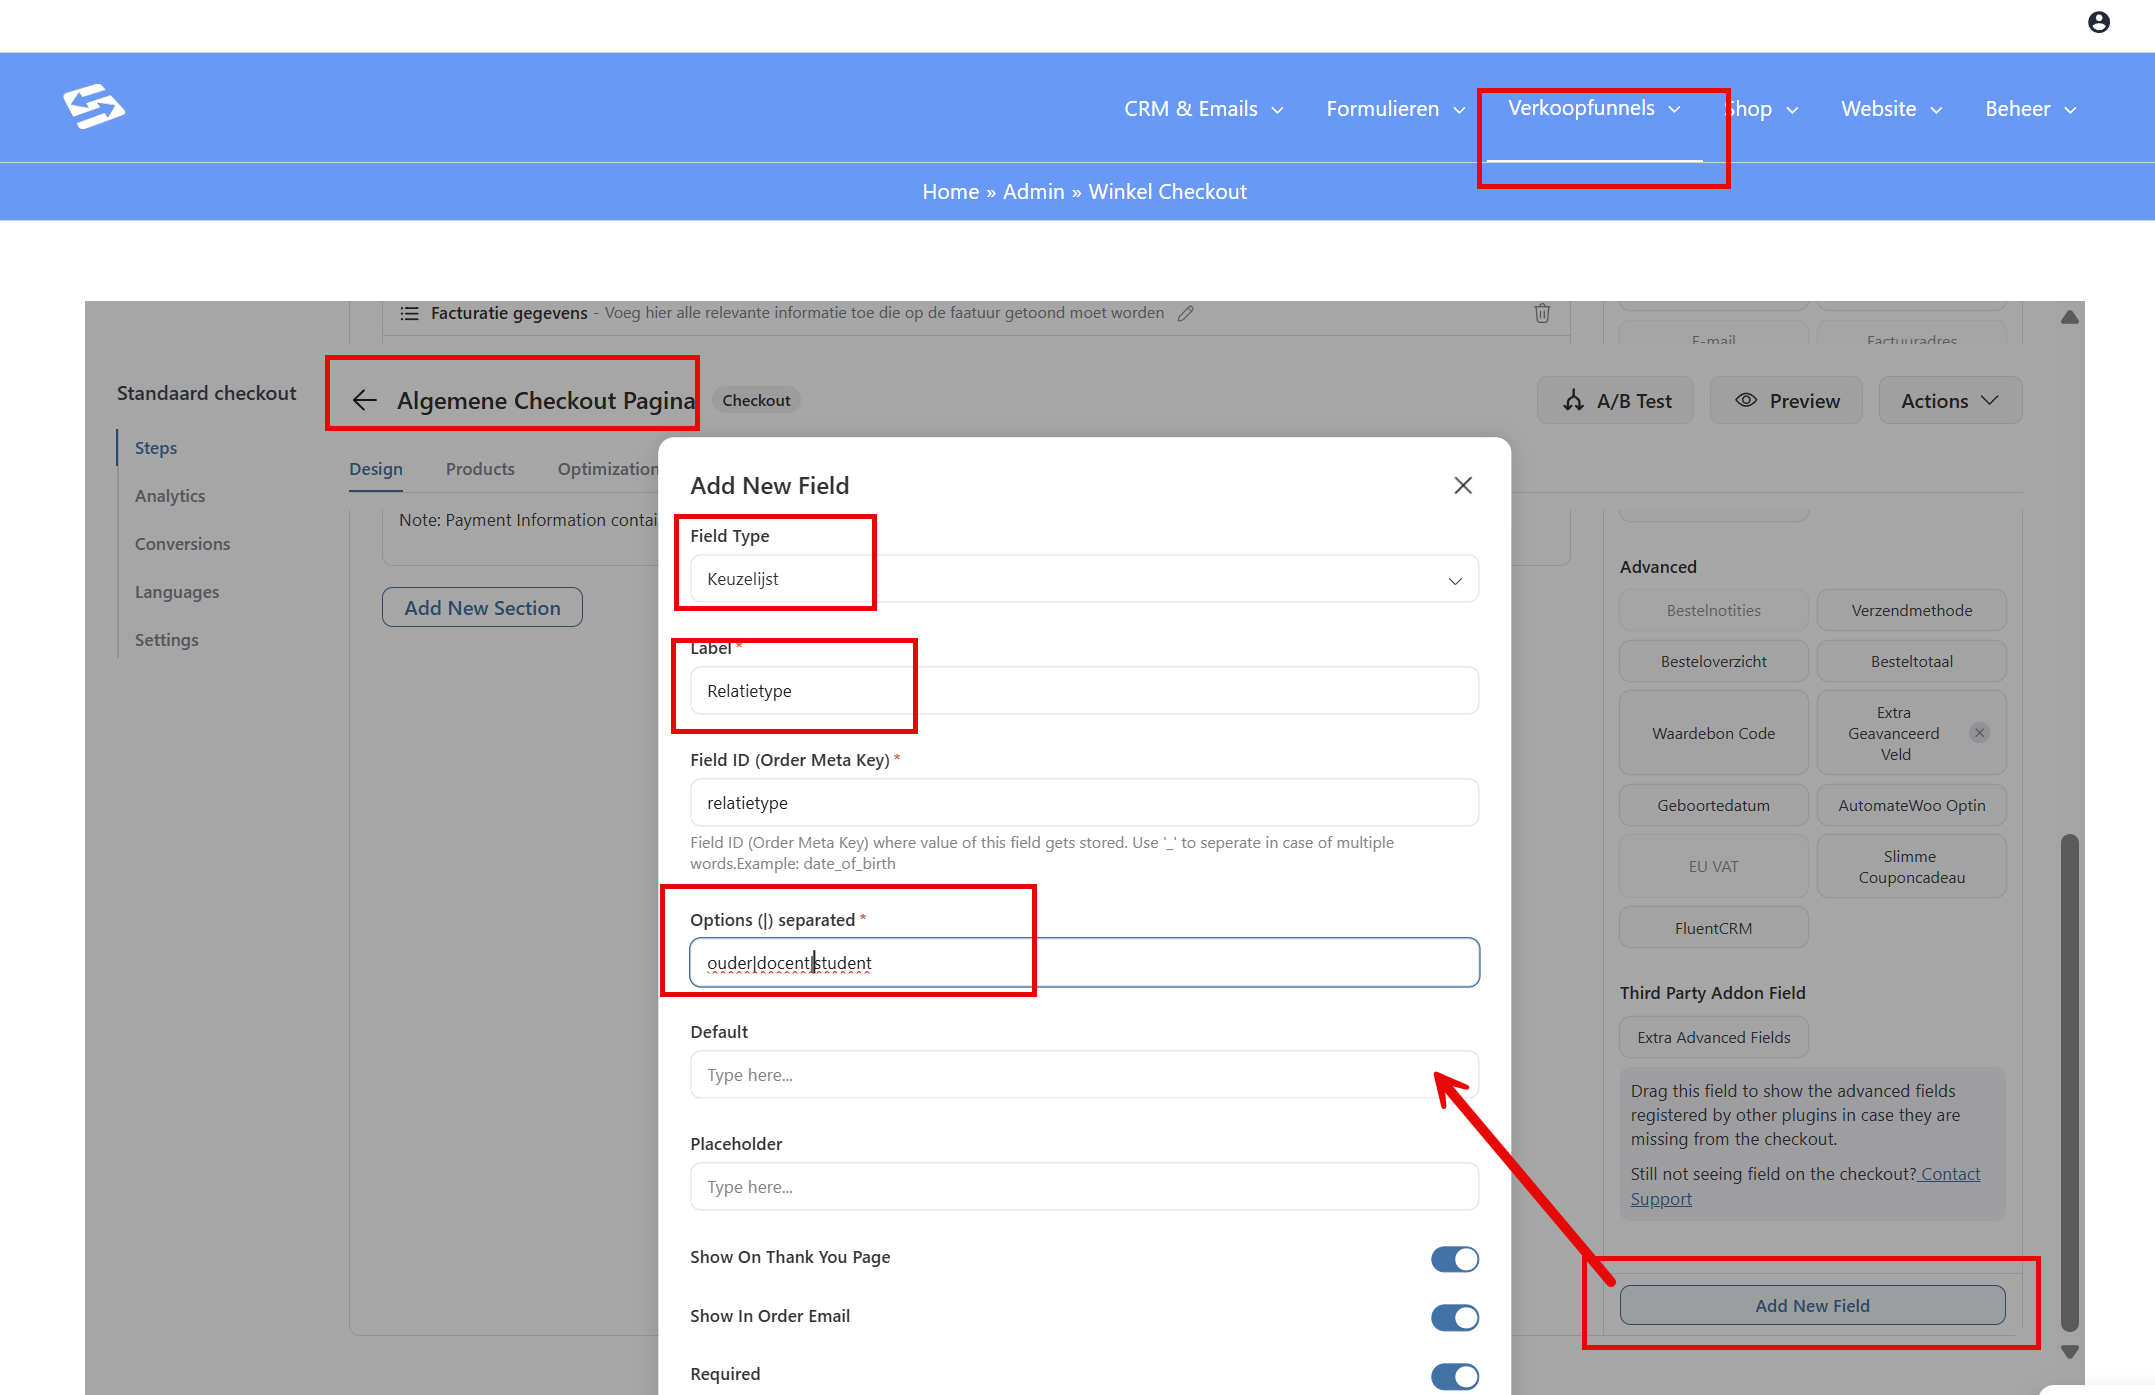
Go to Sales funnels → Store Checkout and open your checkout page for editing.
Add a new custom field of the type ‘dropdown’. Set up all the possible relationship types in it, for example:
- Parent
- Teacher
- Student
- Therapist
Important: pay close attention to the exact spelling and capitals of each option – they have to match the CRM field precisely later on.
Step 2: create the same field in the CRM #
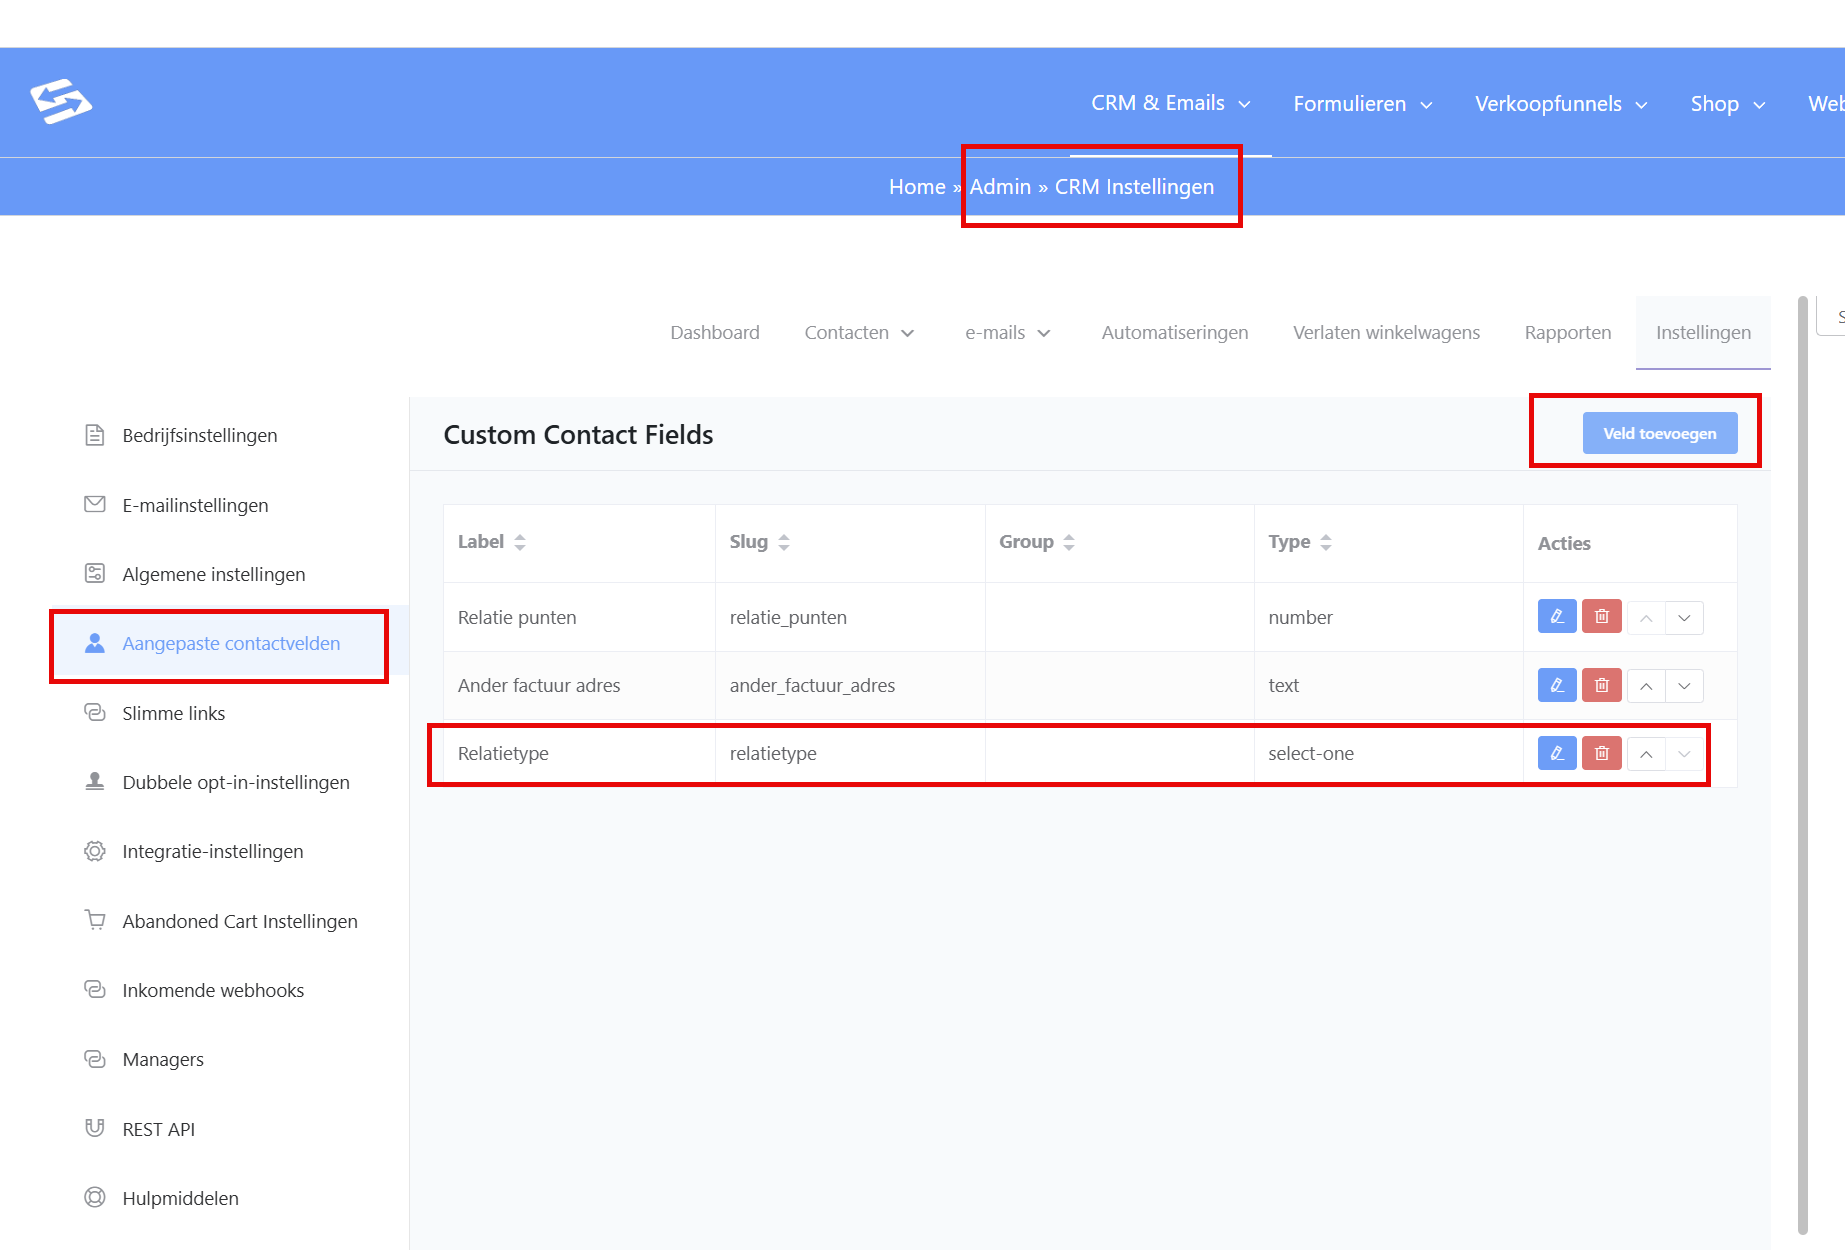
Go to CRM & Emails → CRM settings → Custom fields and create a new field.
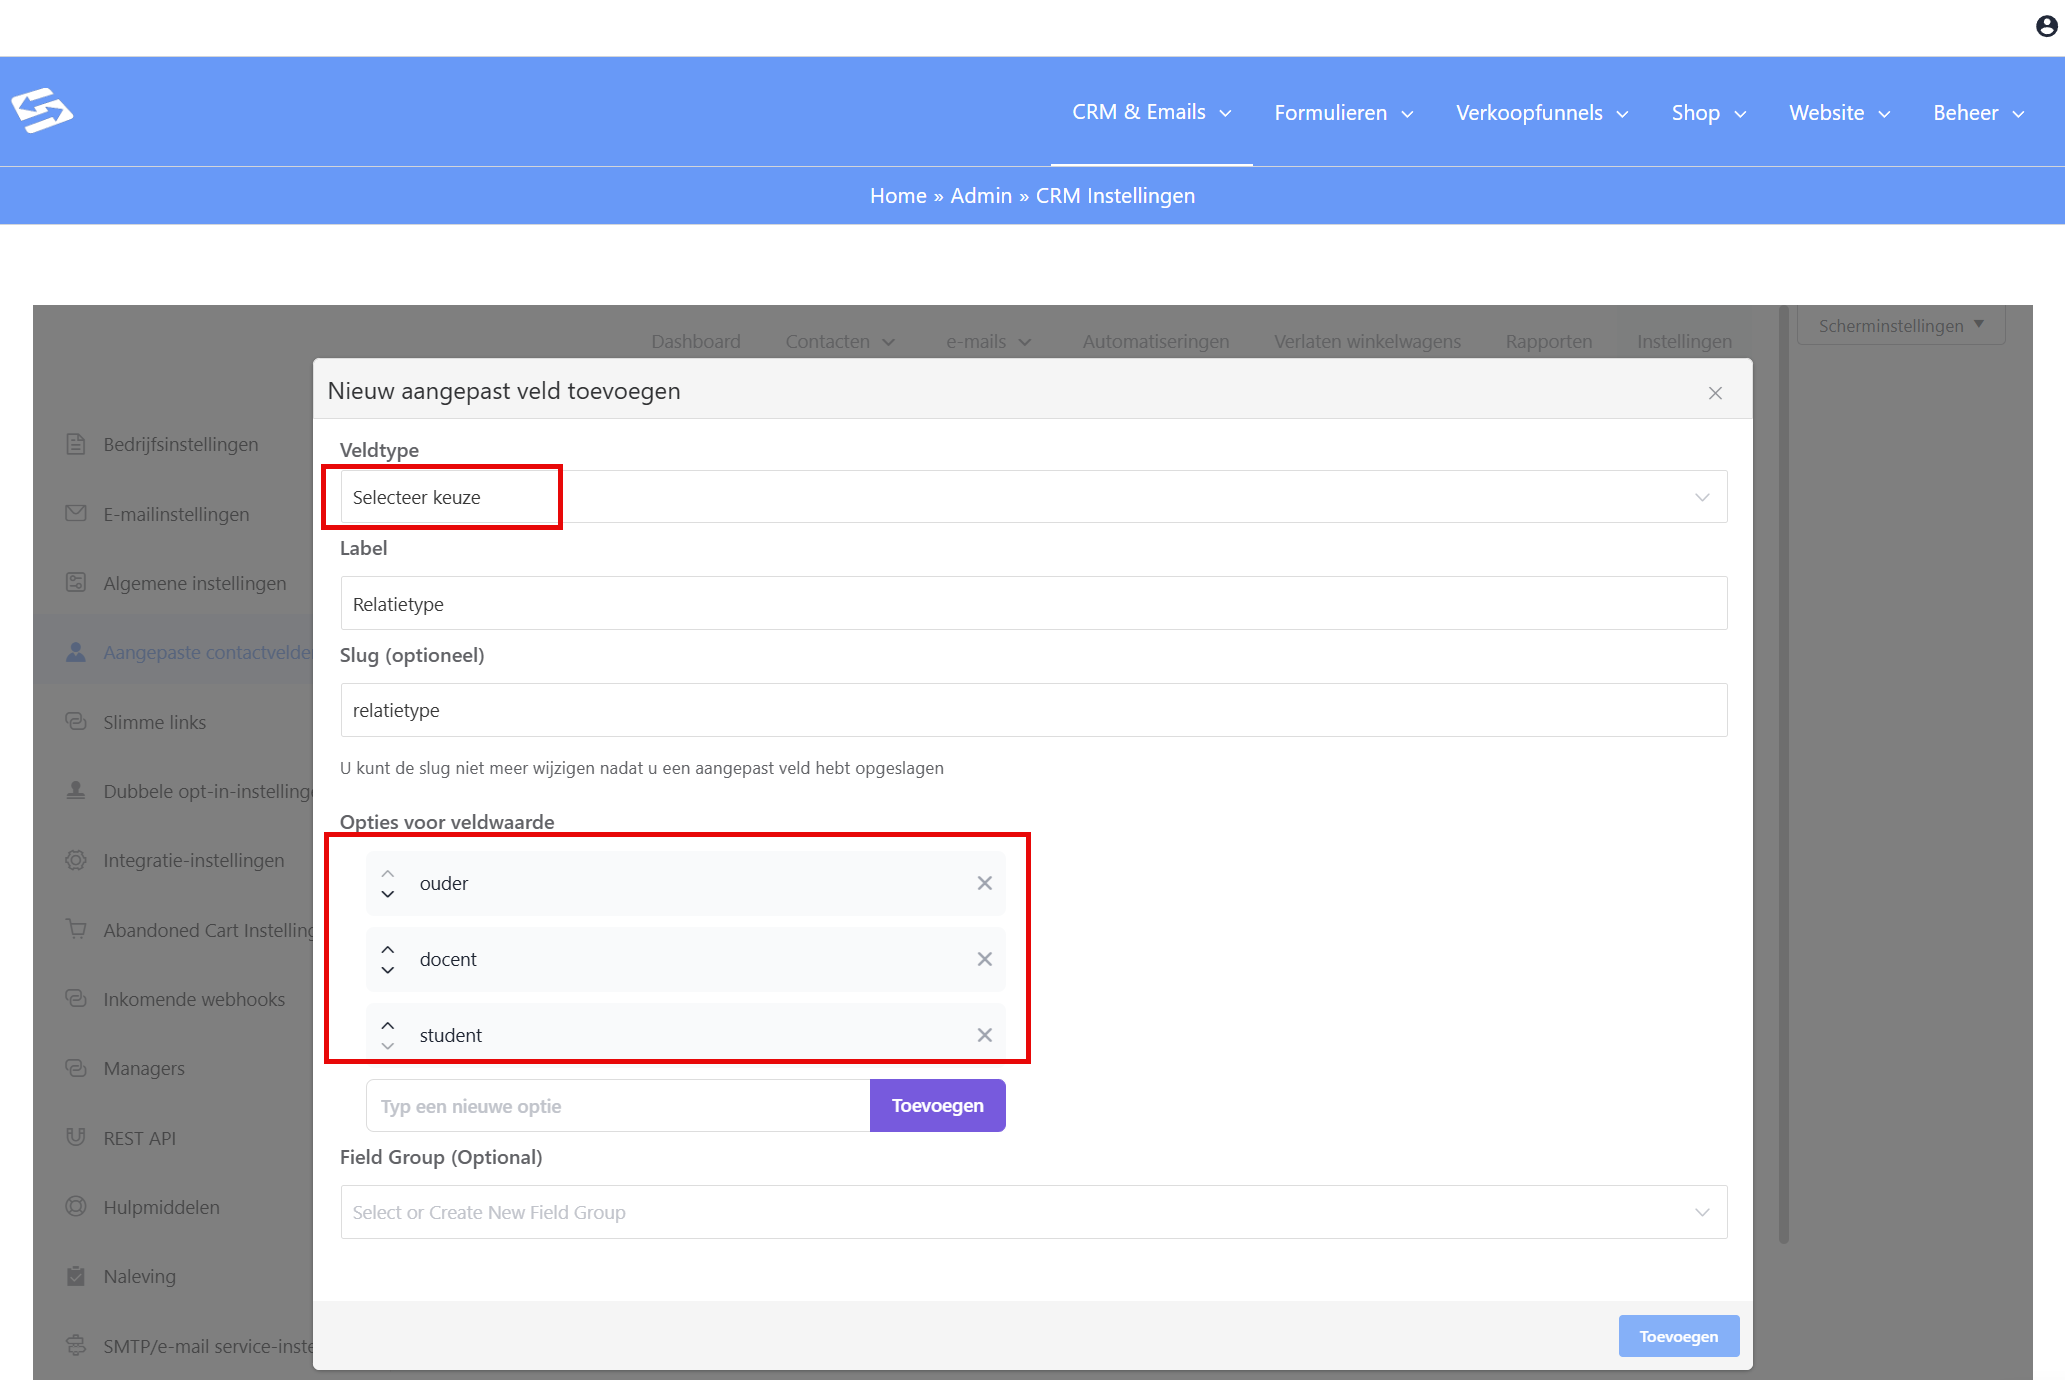
Choose ‘select choice’ as the field type and enter exactly the same options as in the checkout. The spelling and capitals have to match exactly.
Step 3: set up the link #
Go to Administration → Access management (these are the WP Fusion settings) and click ‘refresh available tags and fields’.
Then refresh the page and go to the ‘contact fields’ tab.
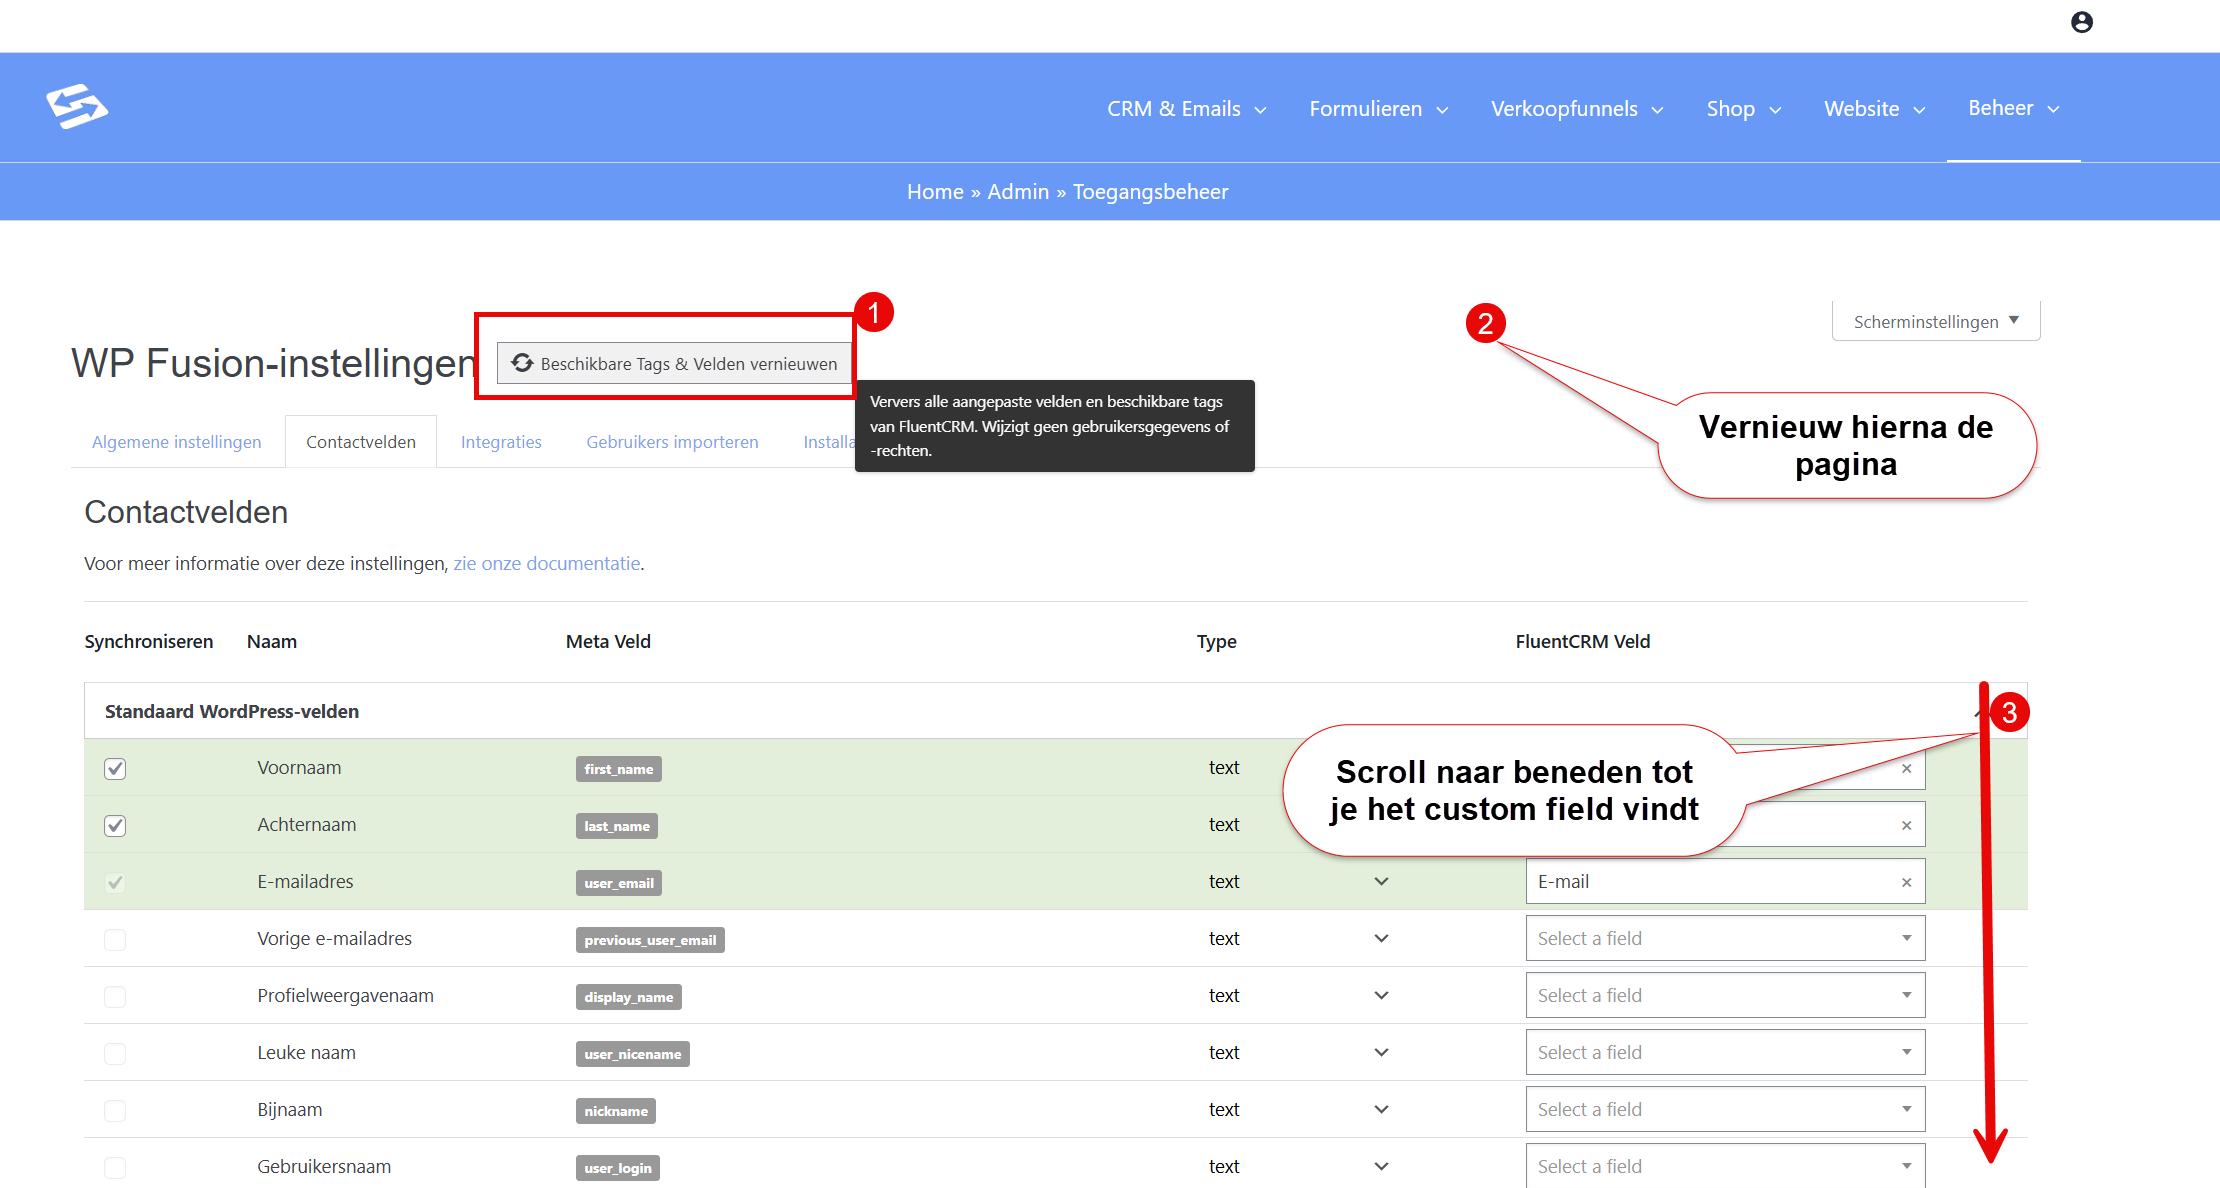
Find the custom field you created in the checkout in the left-hand column. On the right, set the matching CRM field that you created in step 2.
Save this setting.
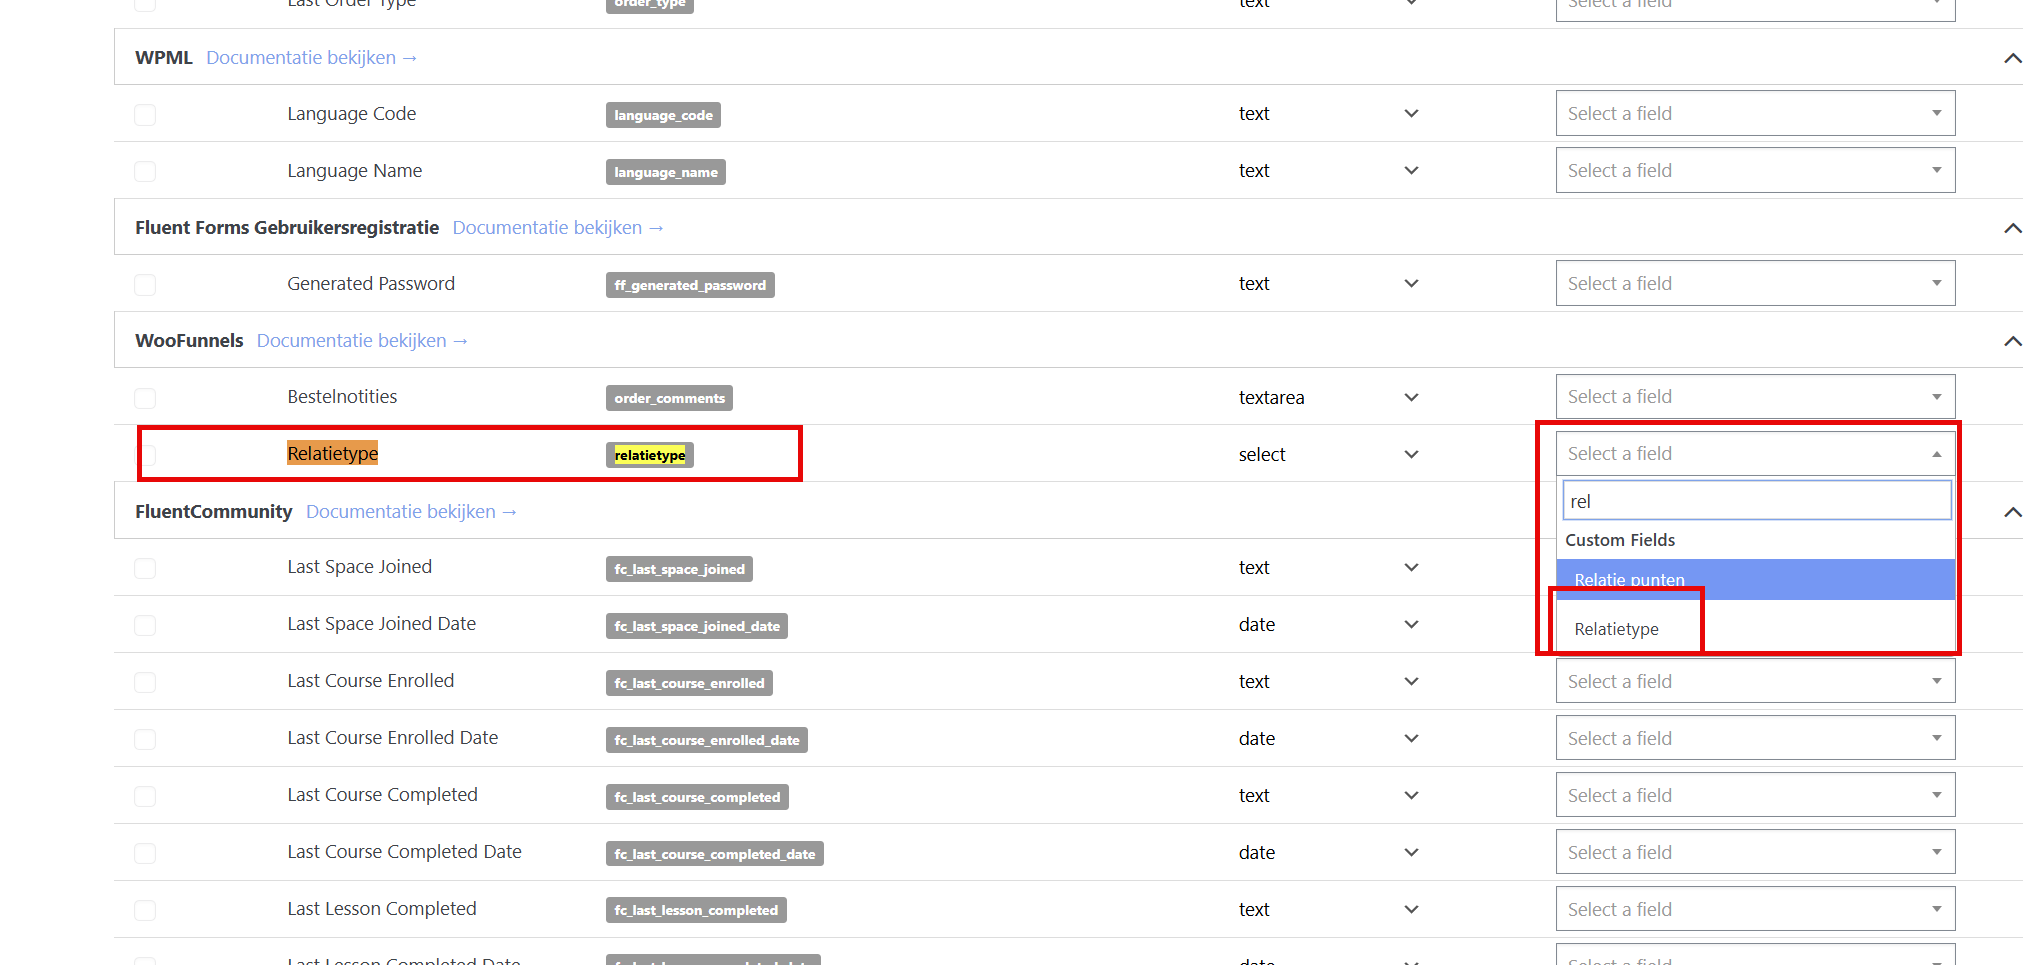
Step 4: filter on relationship types #
Go to CRM & Emails → Contacts and tick ‘advanced filter’. You can then filter on this custom field:
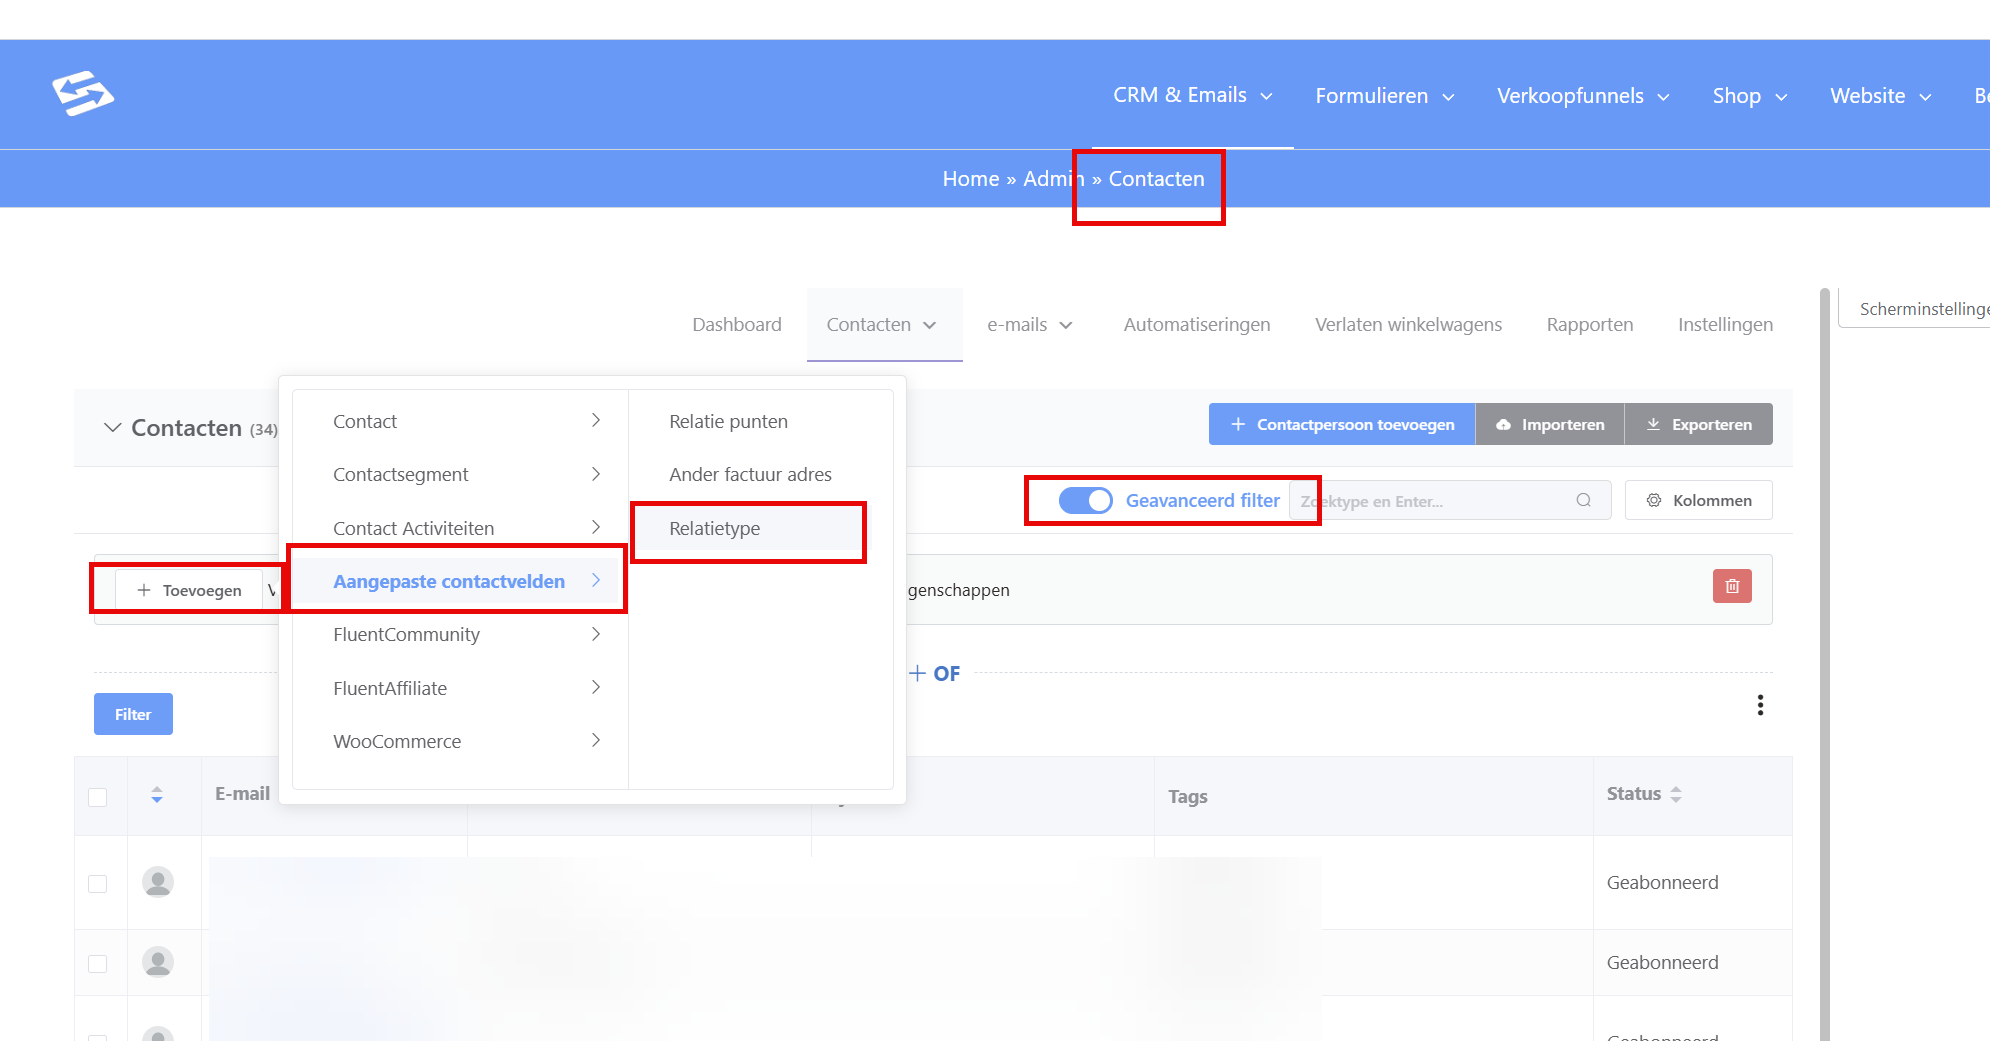
Set the condition: ‘Custom field [field name] is equal to [relationship type]’.
Result #
From now on, the relationship type chosen during each new order is passed on to the contact in the CRM automatically. You can then send targeted campaigns to the right audience, so people receive more relevant newsletters and are less likely to unsubscribe.
In this documentation we combine FunnelKit, FluentCRM and WP Fusion to synchronise data between the checkout and the CRM, included in your package.


