Connecting to Wishlist Member is very easy if you use the webhooks inside Wishlist Member.
Create two incoming webhooks in Wishlist Member #
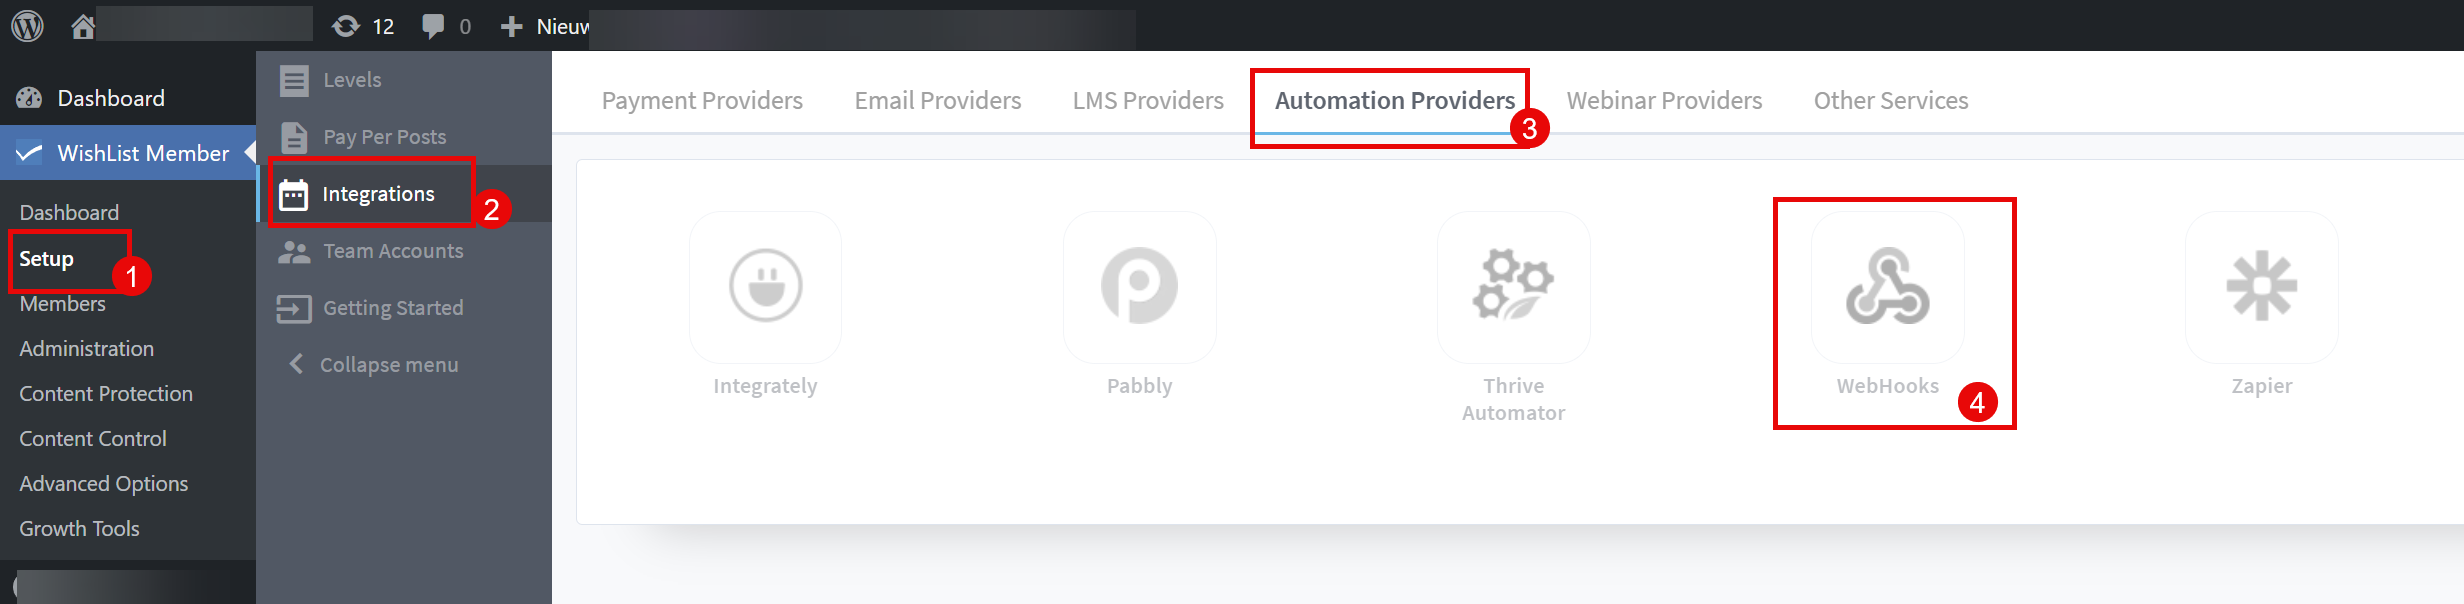
Inside your own WordPress website, go to Wishlist Member > Setup. Click the ‘Integrations’ tab and then the ‘Automation providers’ sub-tab. Click the Webhook icon there and tick the box to make it active:
Create an incoming webhook:
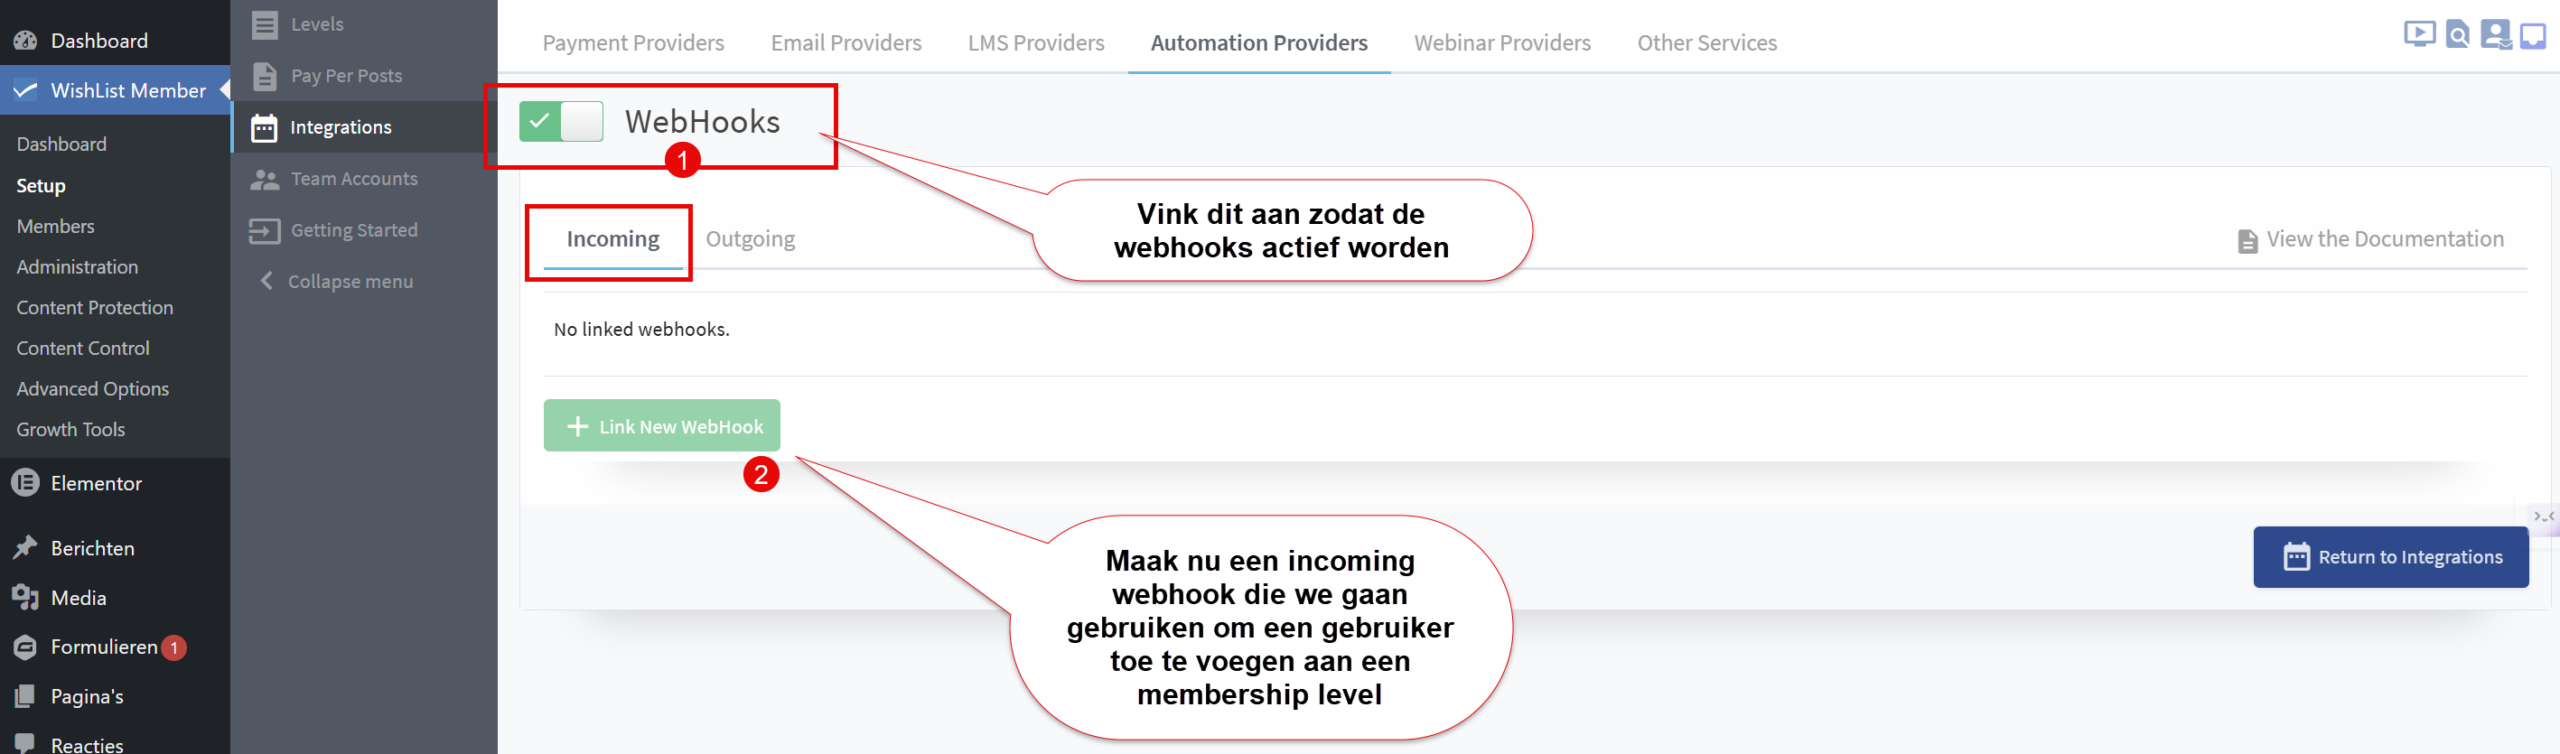
Create a new incoming webhook. We are going to use it to give a user access to the right membership level from Autorespond.
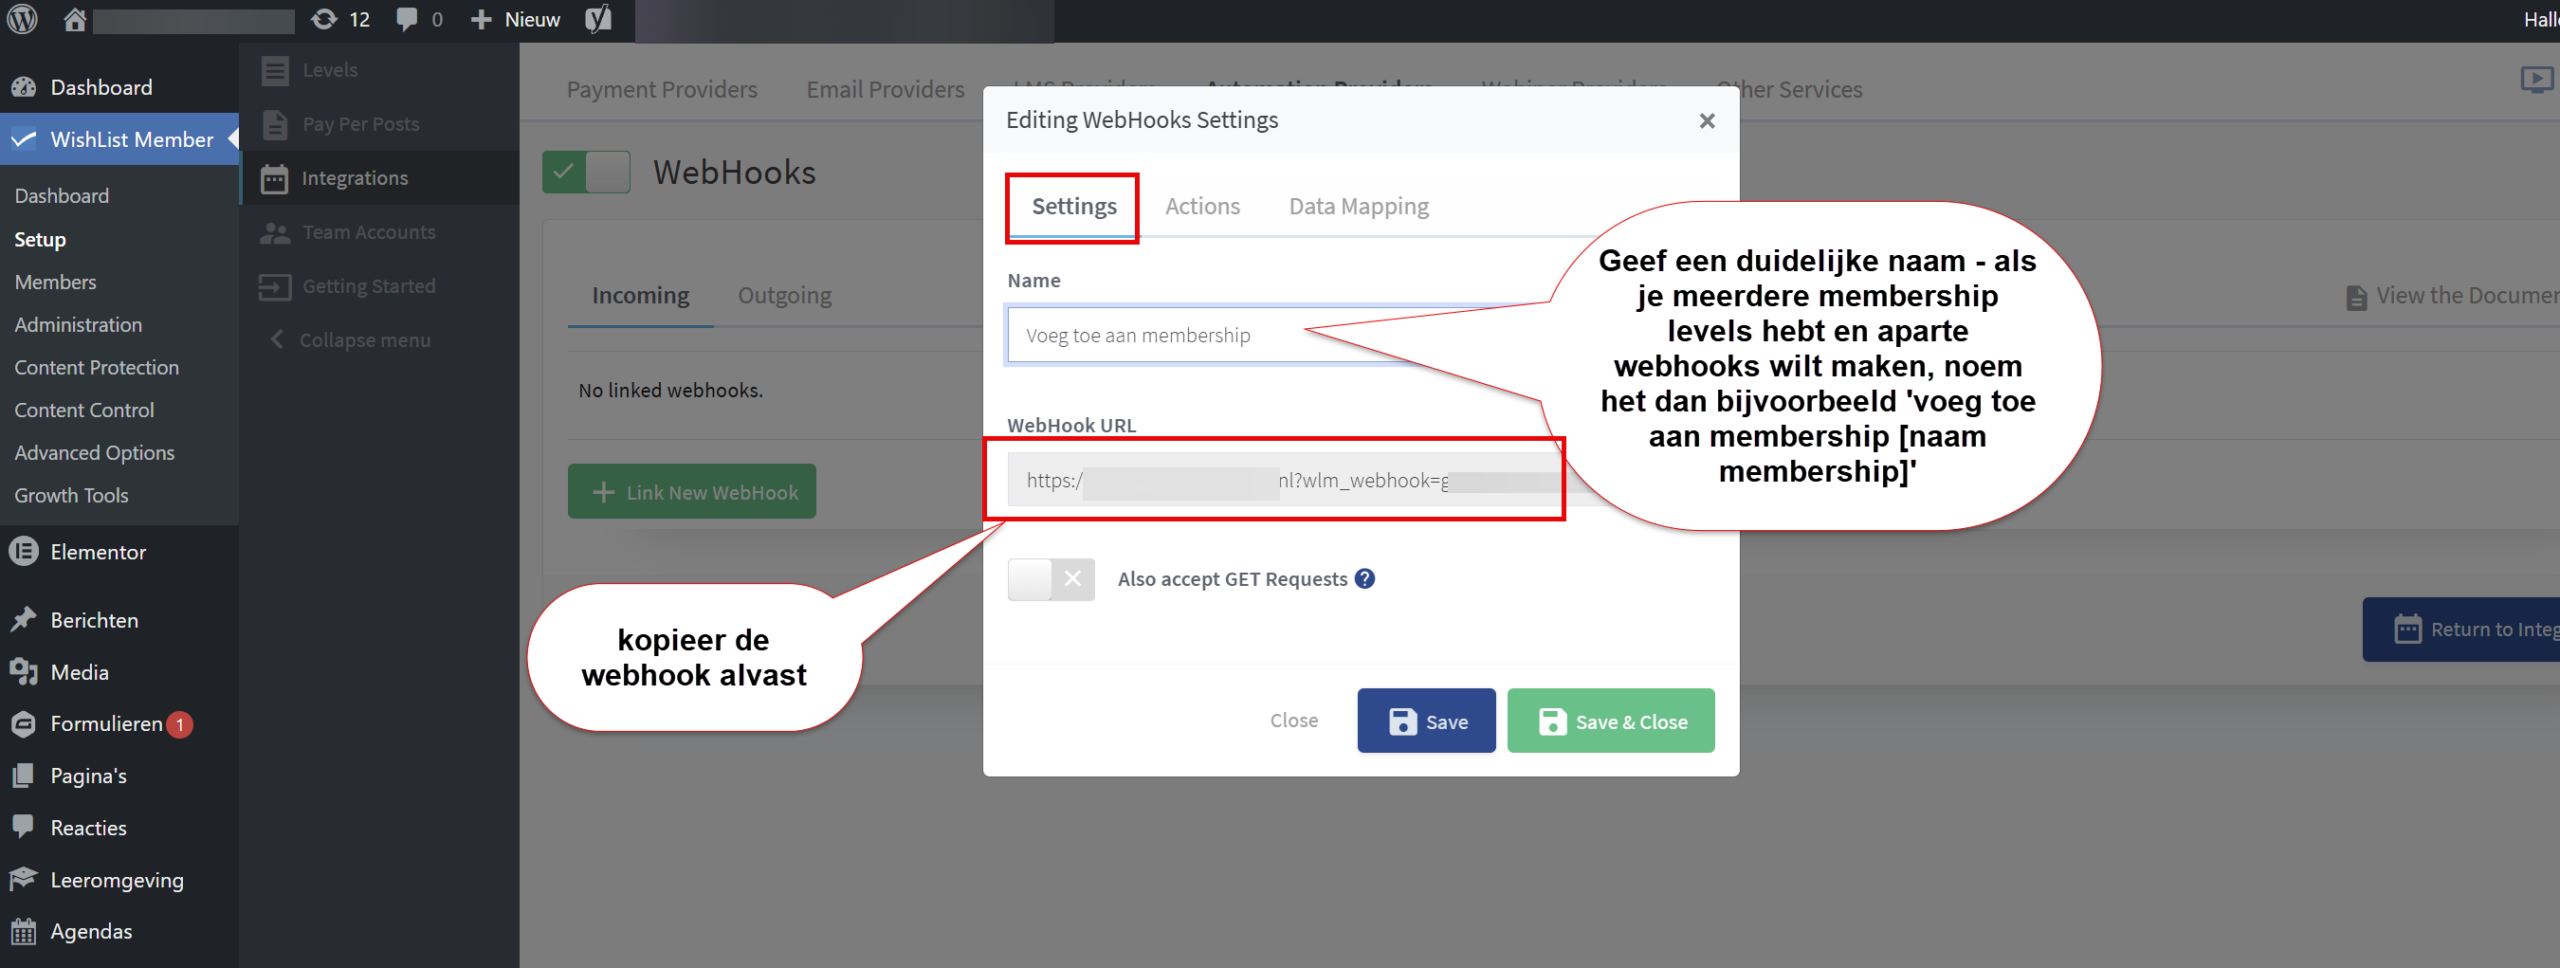
Give it a clear name. If you have several membership levels and want to create separate webhooks, call it something like ‘add to membership [membership name]’
Copy the webhook now:
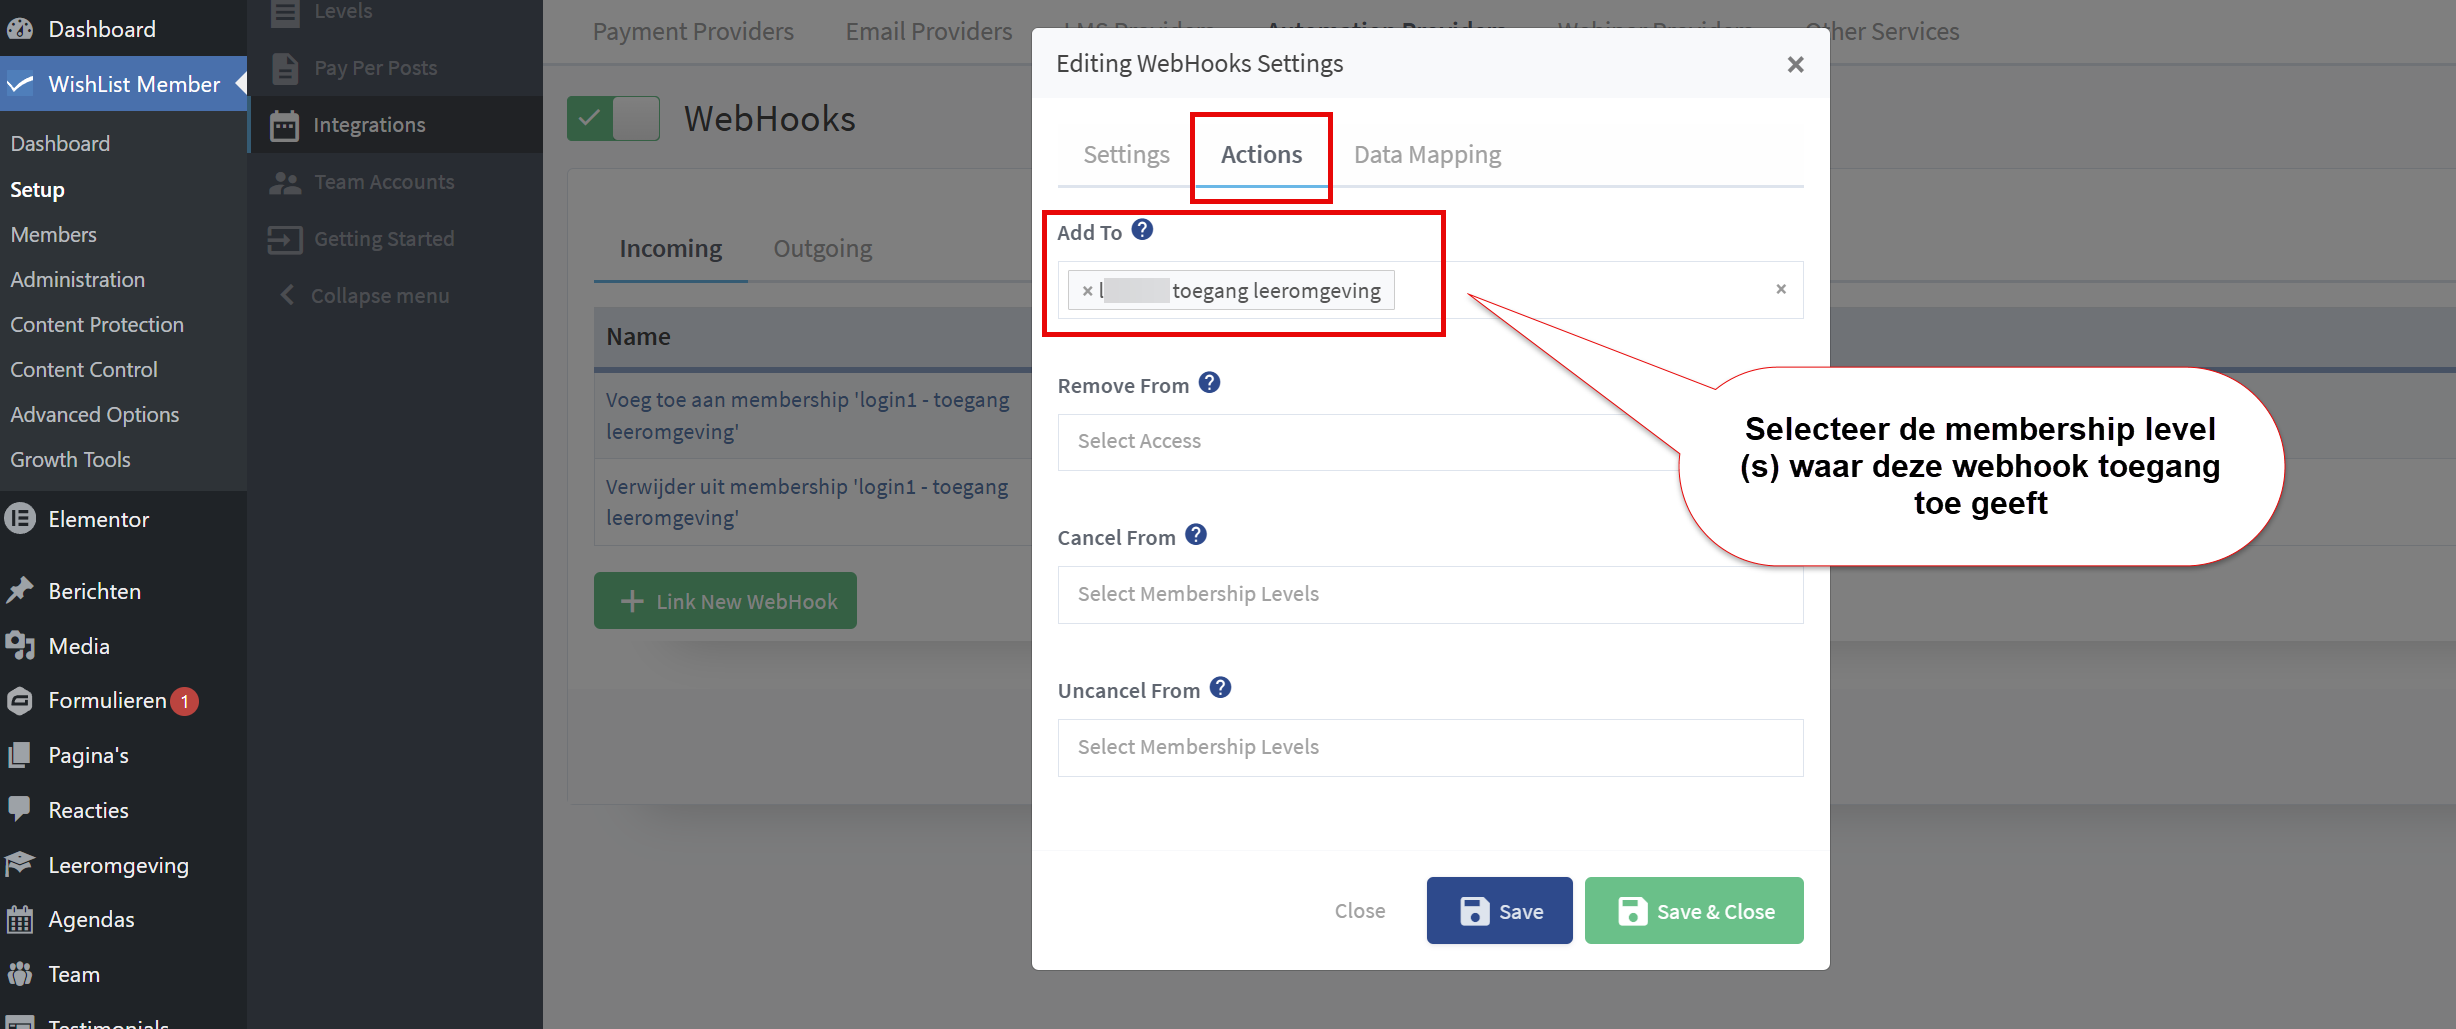
Then move on to the Action tab and select the membership level or levels this webhook gives access to. As you can see, you can also set access to be taken away here. We will use that for the second webhook that we still have to set up:
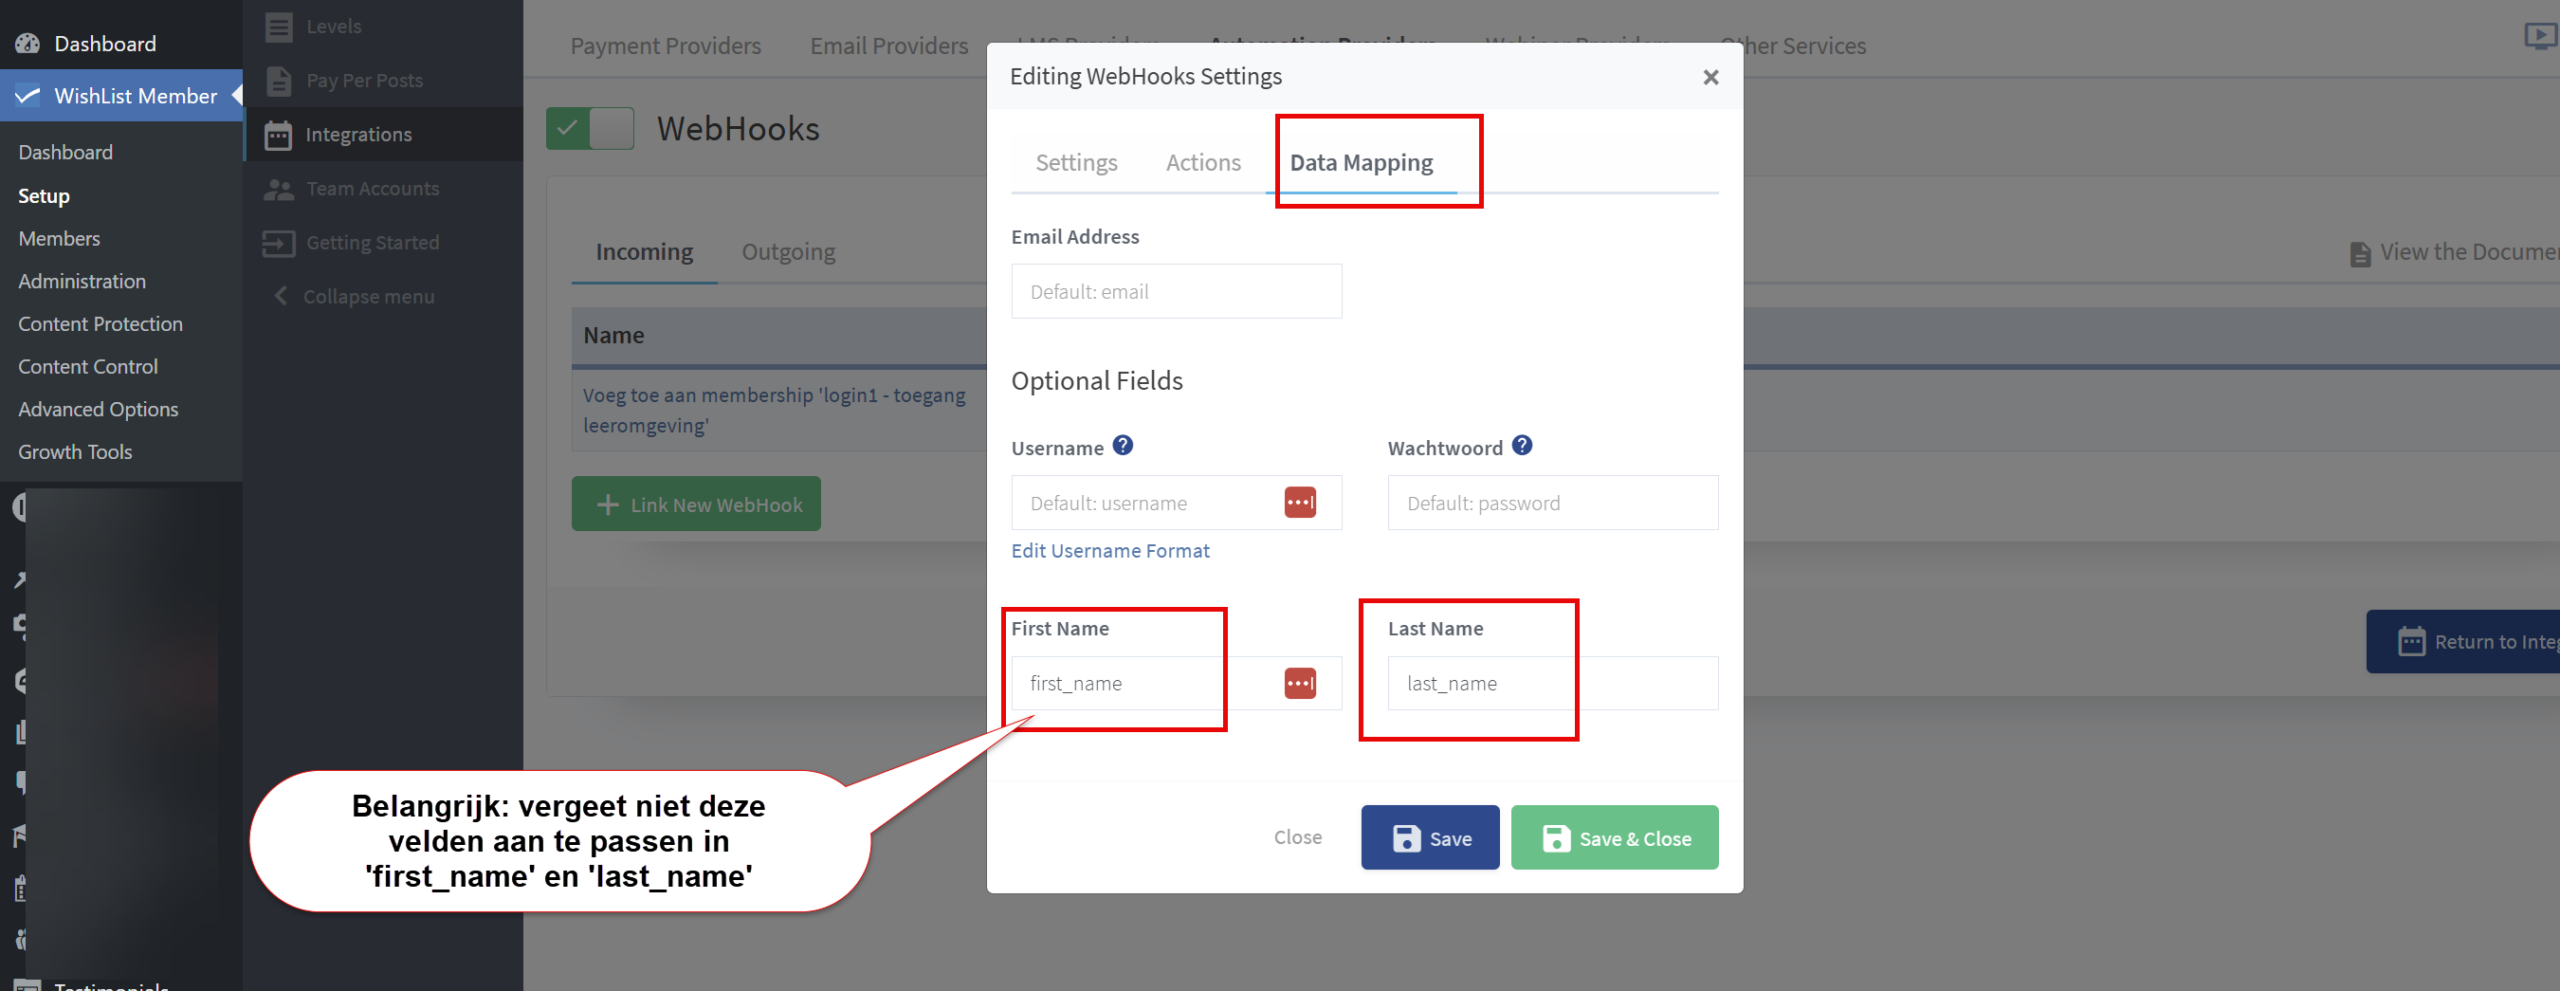
Finally, go to the ‘Data mapping’ tab and make sure the first name and last name fields are set up as follows, with ‘first_name’ and ‘last_name’:
Now create a second webhook that removes a user from the membership level, setting it under the ‘Actions’ tab so that the user is removed from the level.
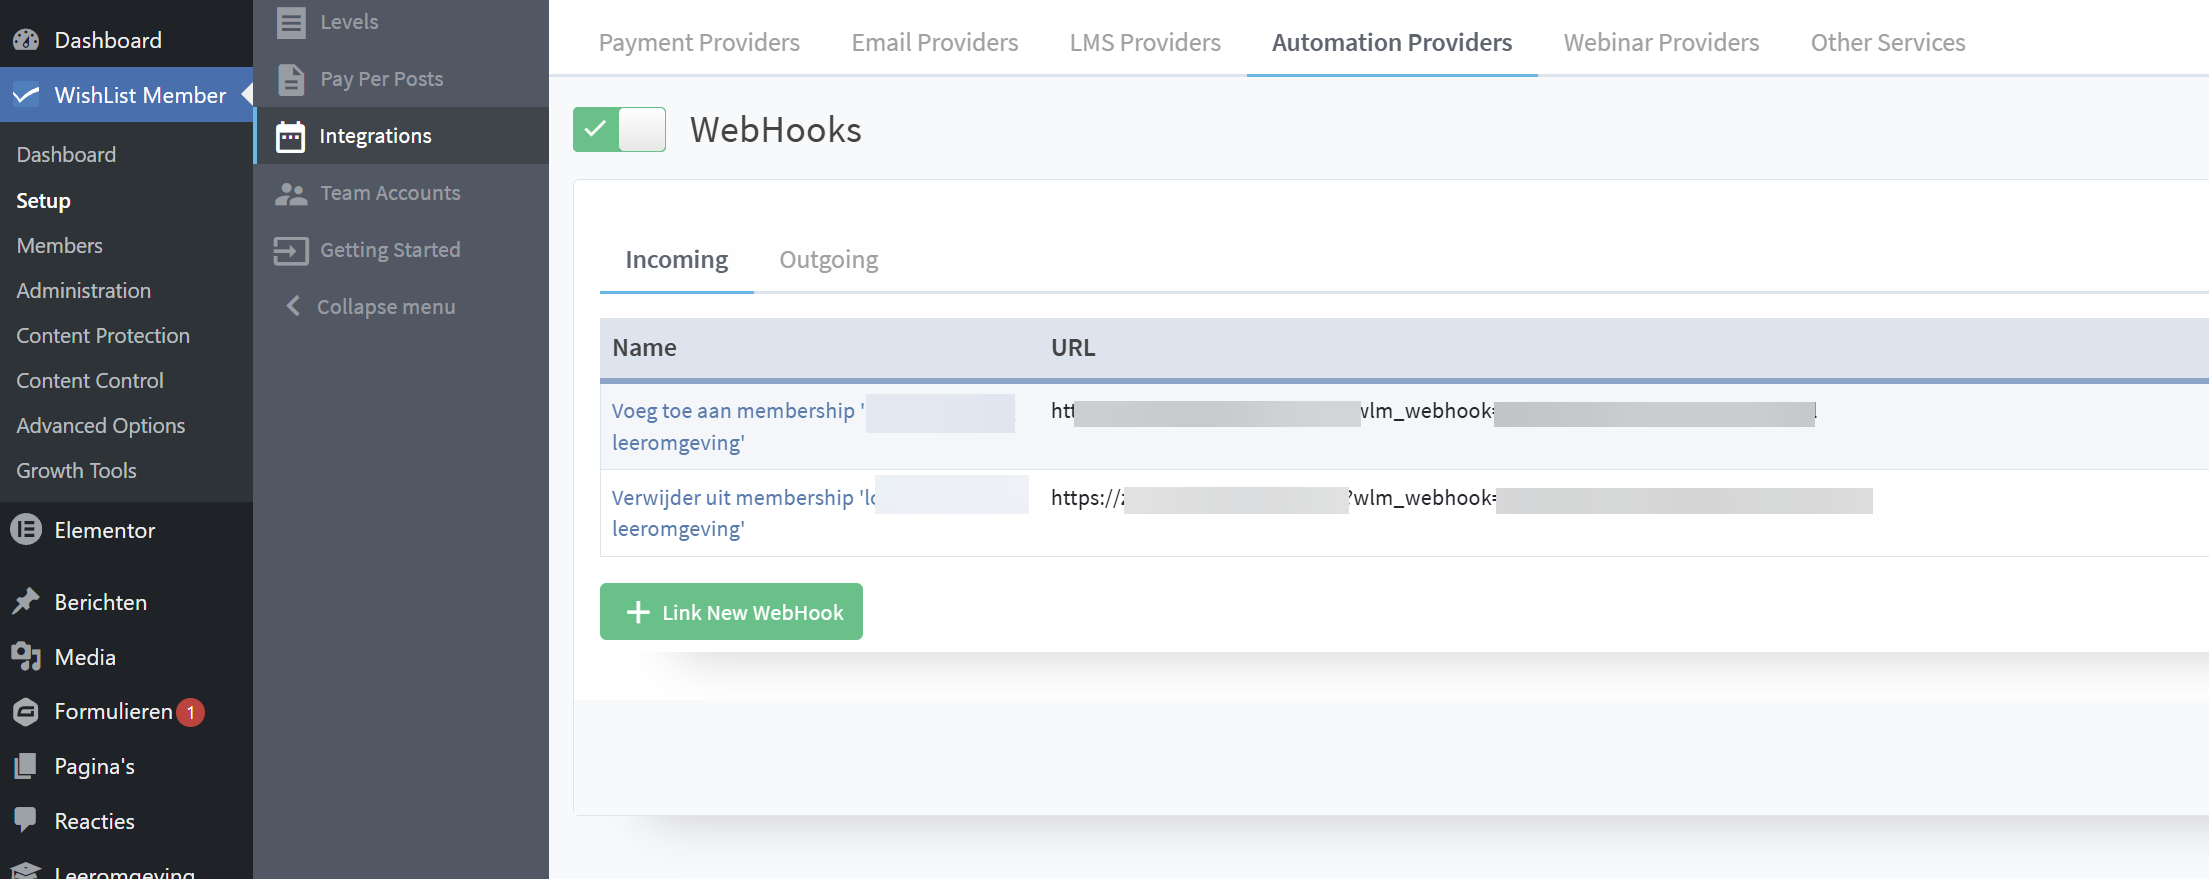
You now have two webhooks that you can copy and use in an automation in FluentCRM:
Create a tag and two automations in FluentCRM in your Autorespond administration #
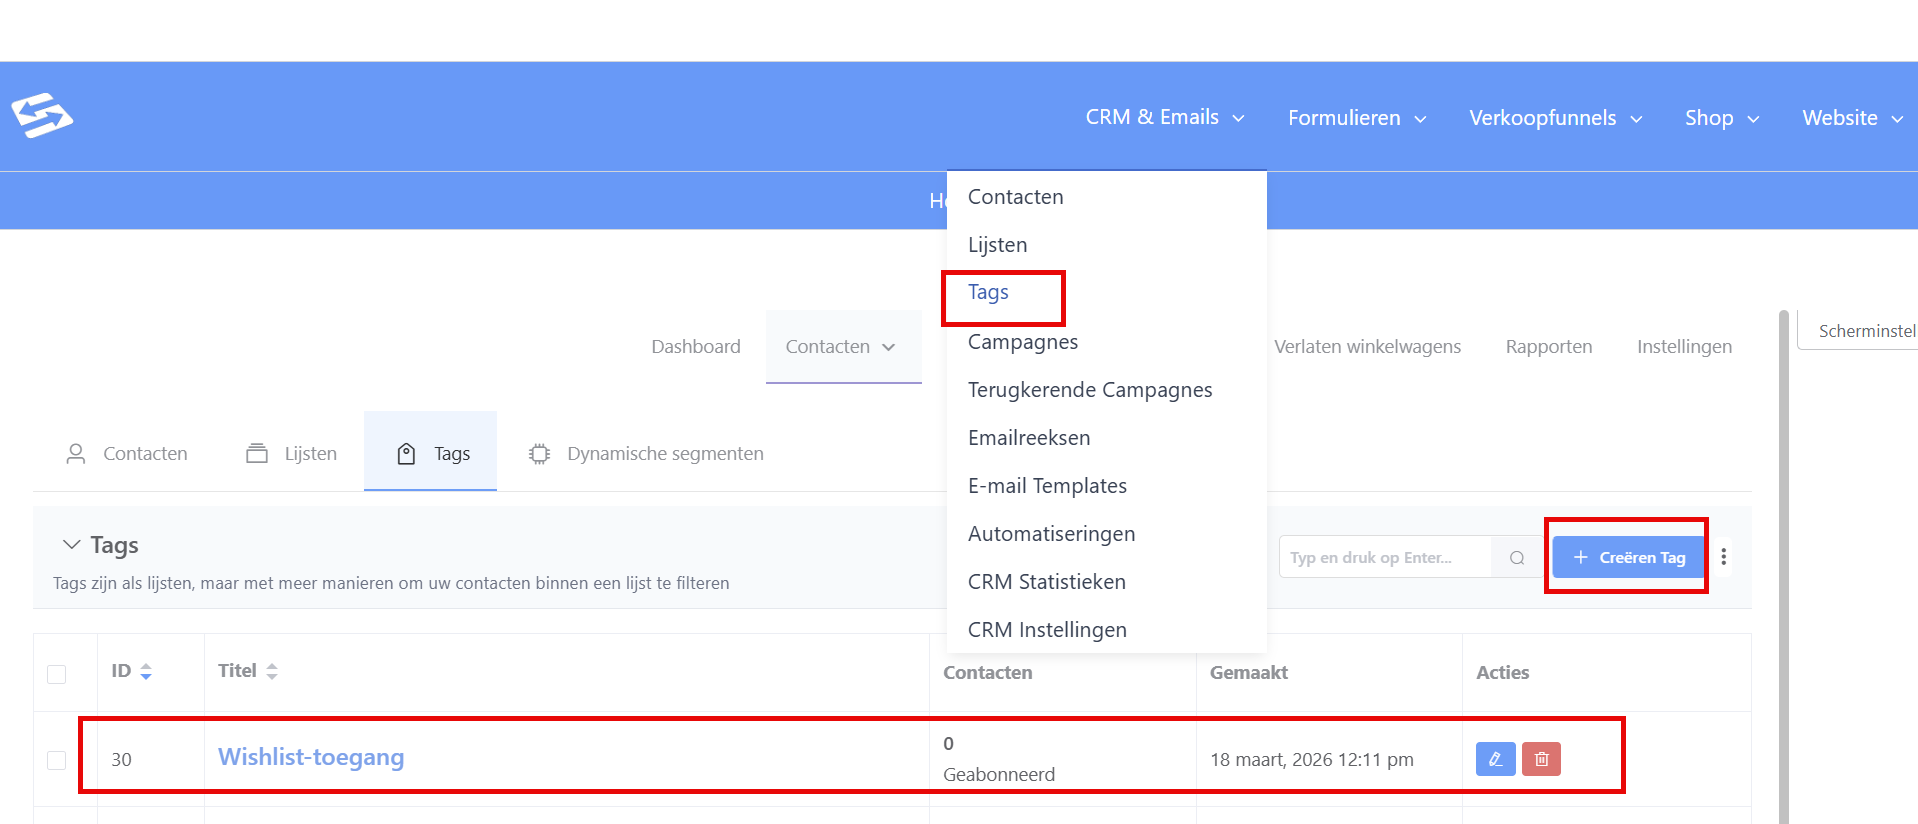
In Autorespond you first create a new tag, which you could call ‘wishlist-access’, for example. We are going to make sure that everyone who gets this tag in the CRM immediately gains access to your Wishlist Member environment and the membership level you have set (through the first webhook). And also that everyone who loses the tag loses access to the membership level (through the second webhook).
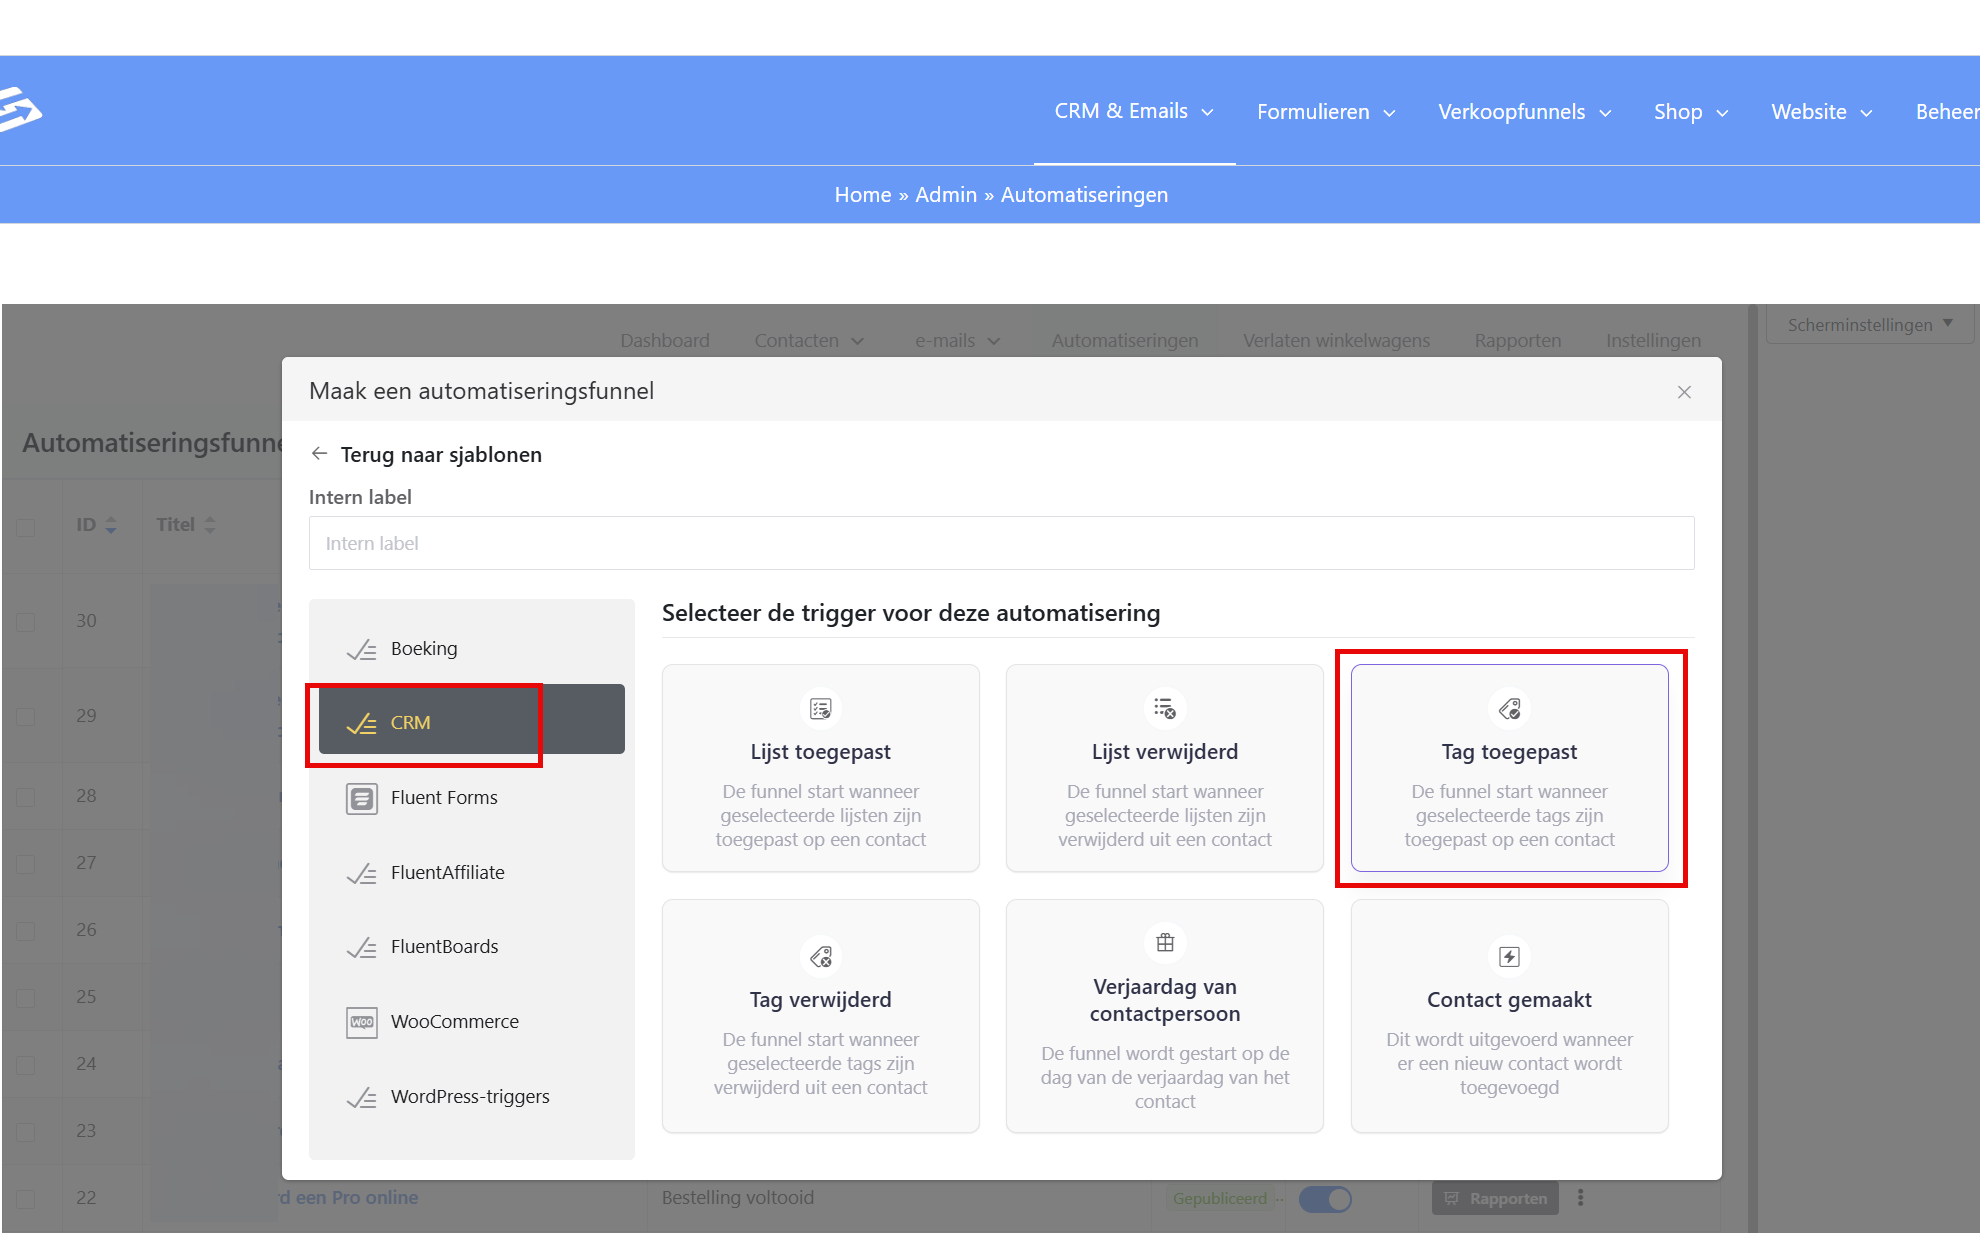
Now create two automations. The first automation has ‘added to tag’ as its trigger step, and then the tag ‘wishlist-access’ that we just created. After the trigger step we add a webhook action and paste the first webhook into it. You do not have to set anything else.
Add to wishlist membership automation #
Set ‘tag applied’ as the trigger step and select the wishlist tag:
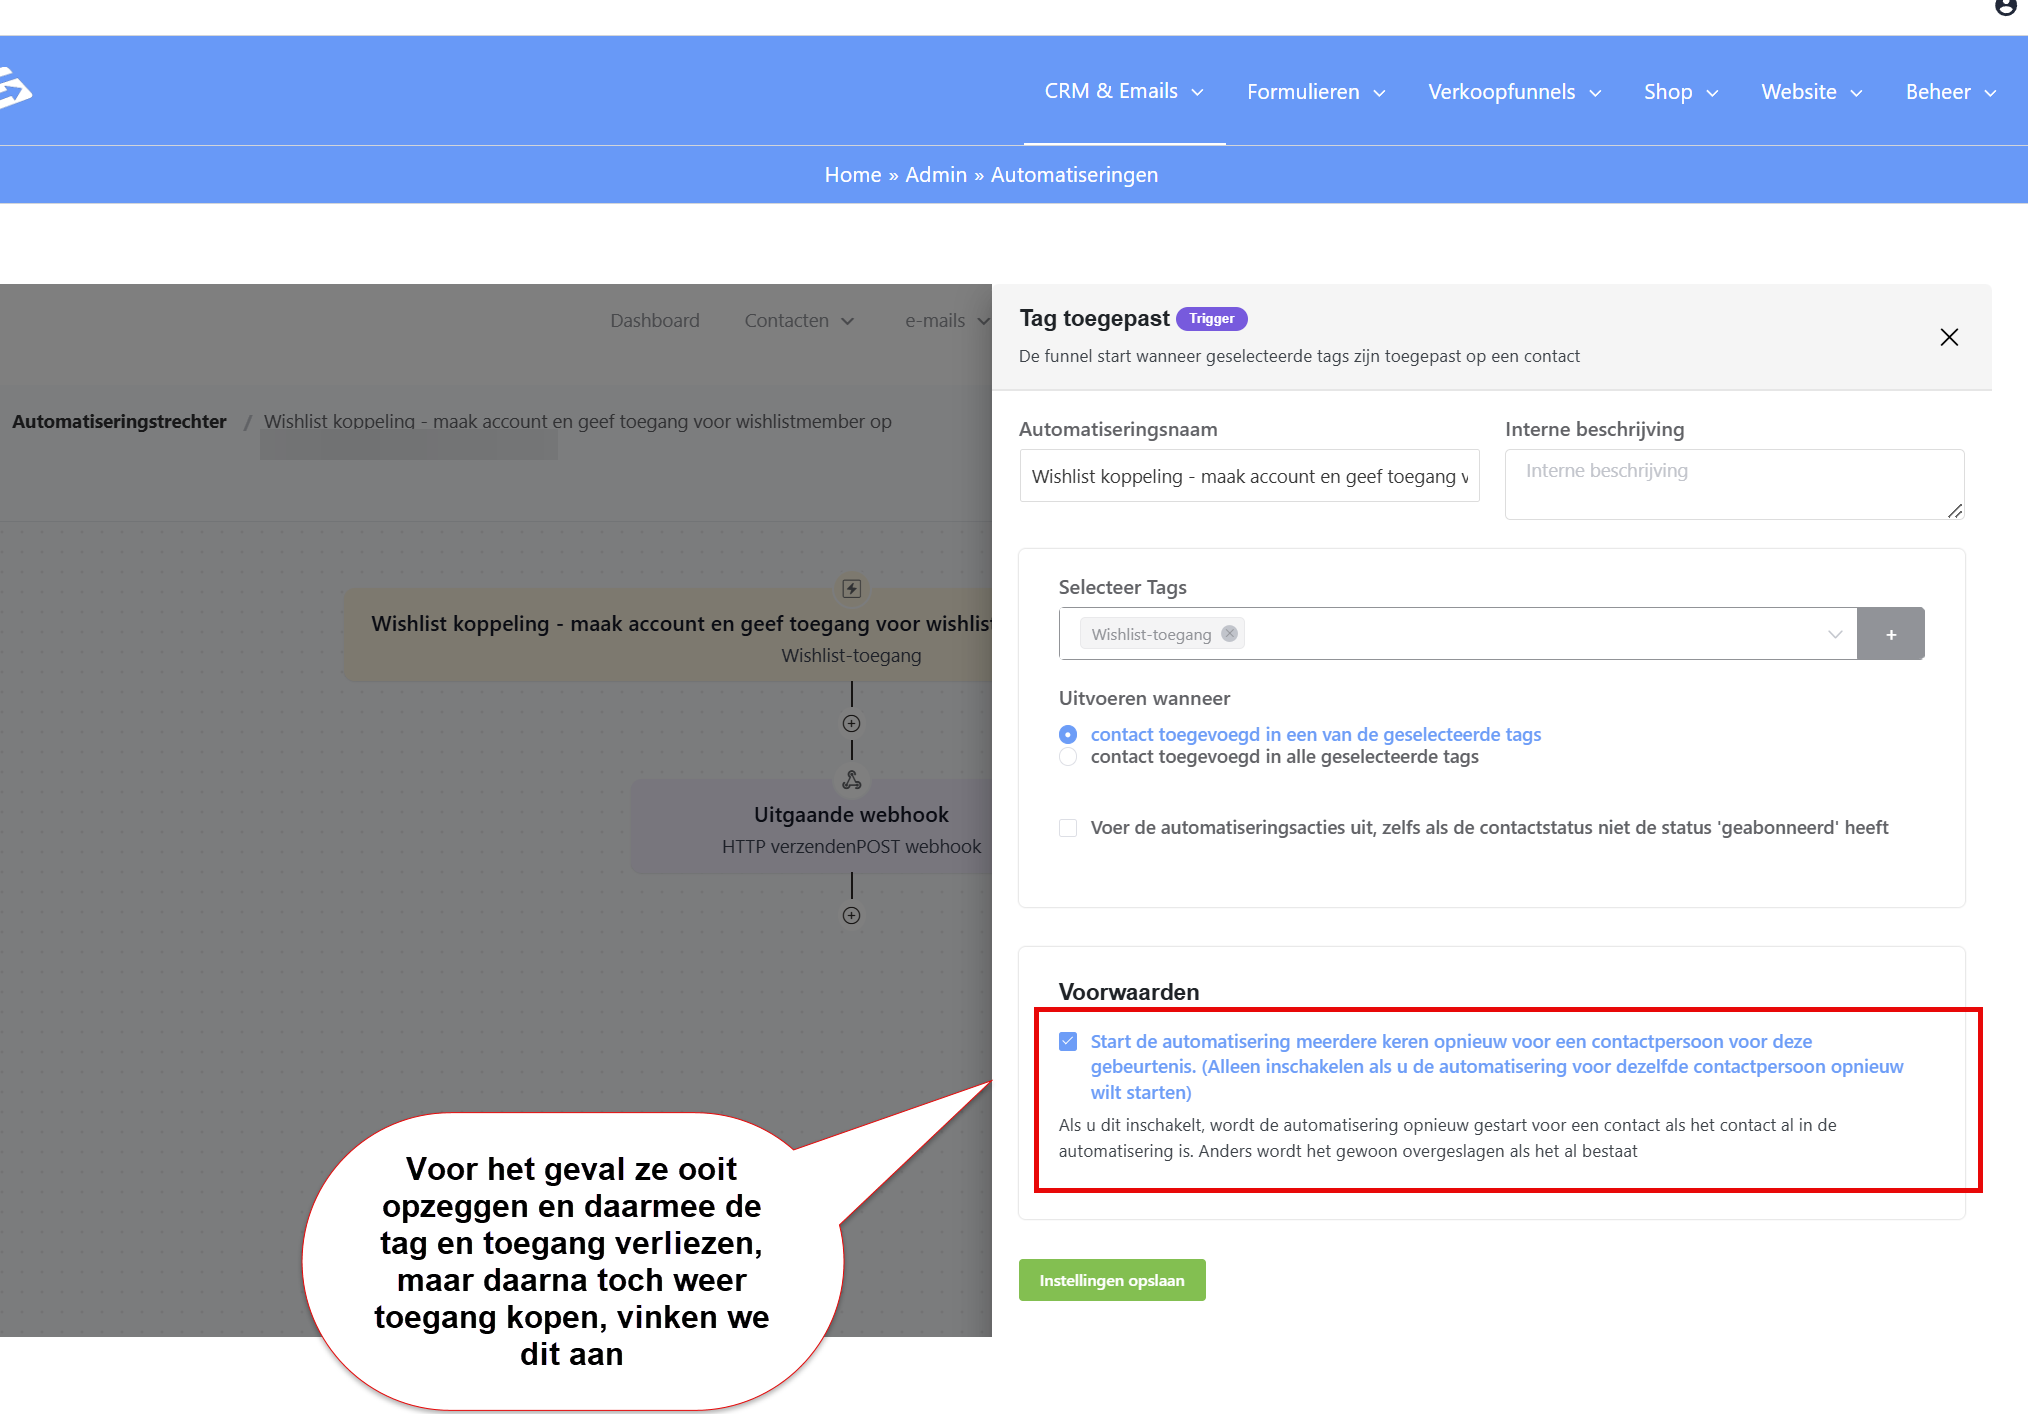
In case they ever cancel and so lose the tag and their access, but then buy access again afterwards, we tick the box at ‘run the automation multiple times.
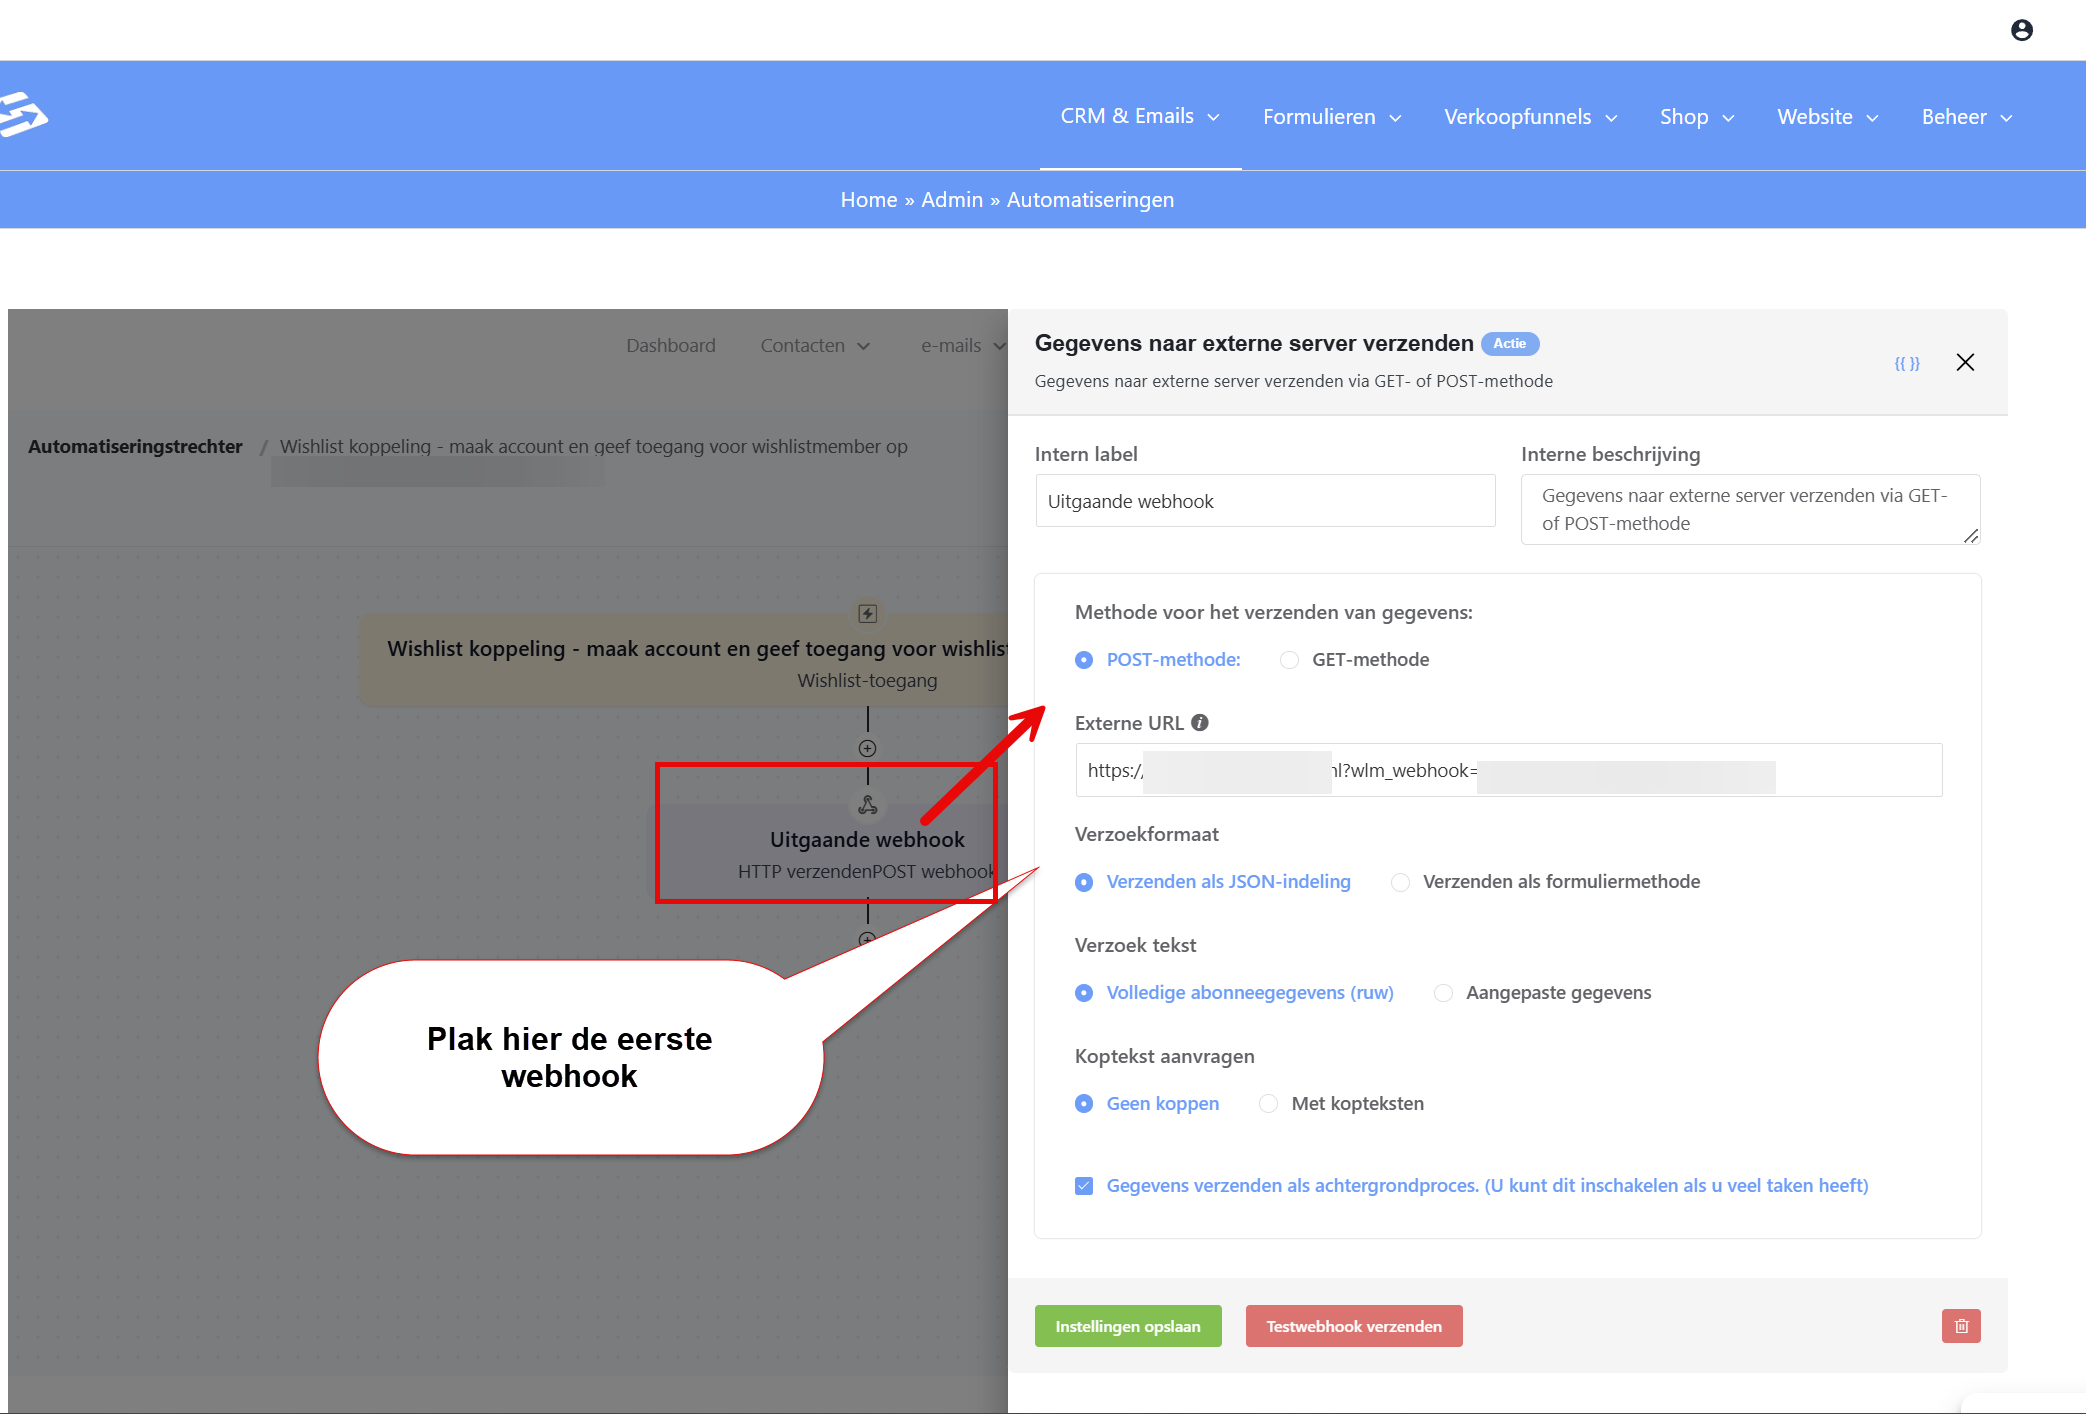
Now add the webhook action step and paste the first webhook:
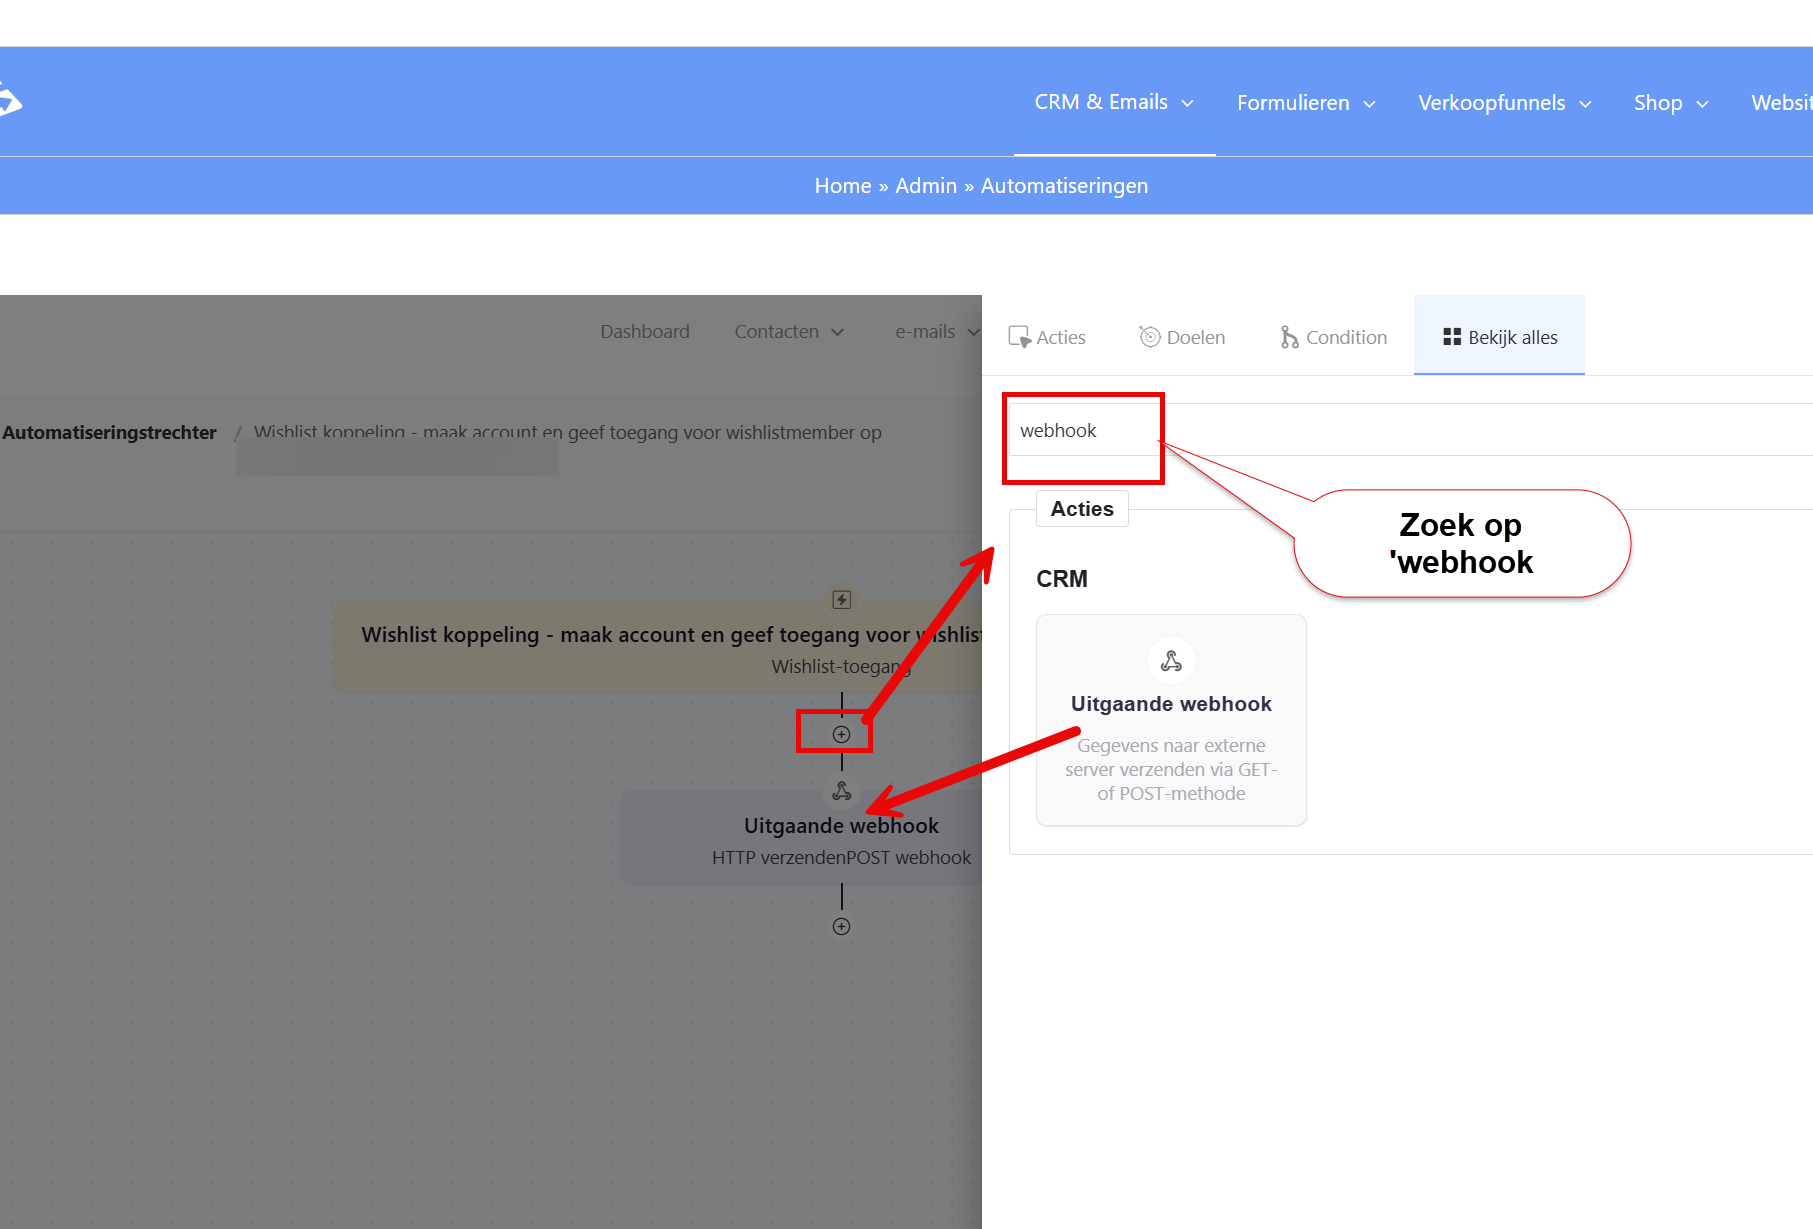
You do not have to change anything in the settings. Pasting the webhook and saving the settings is enough.
Set the automation to ‘published’:
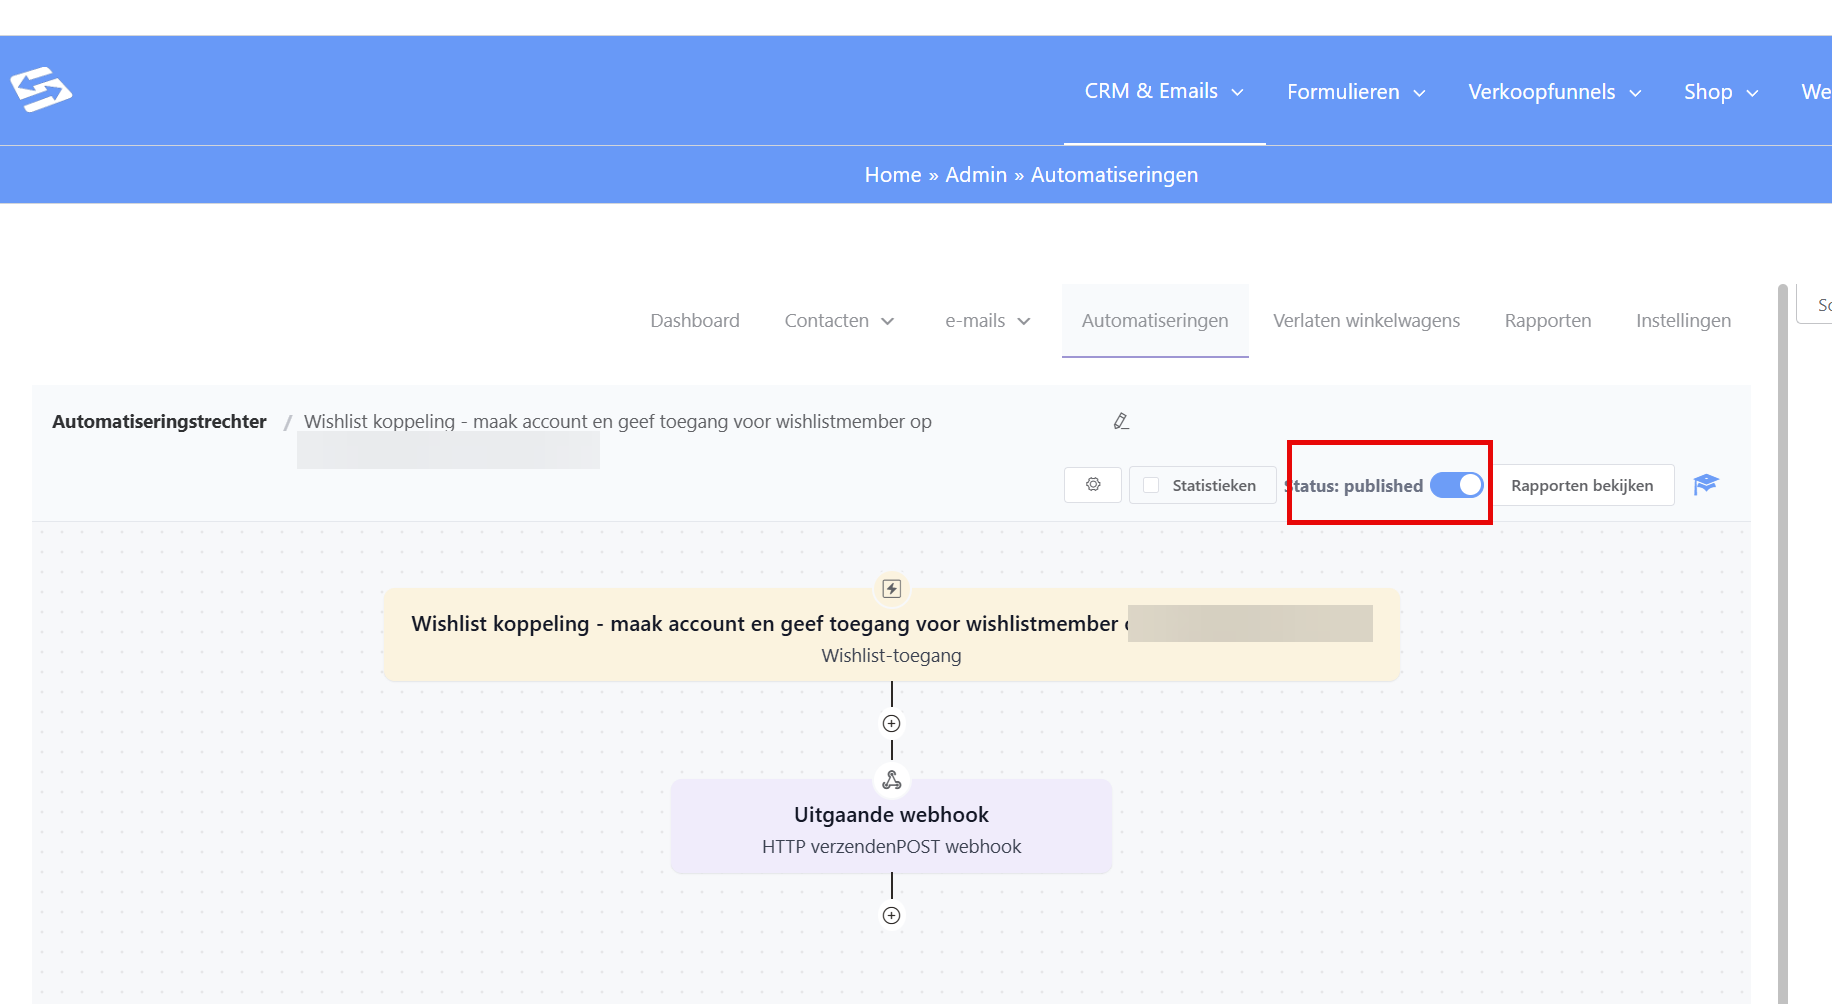
From now on the integration is active. Every contact who gets the ‘wishlist-access’ tag is added automatically as a user on your WordPress website and gains access to the Wishlist Member membership level you have set.
Remove from wishlist membership automation #
Now create a second automation, but set ‘tag removed’ as the trigger step:
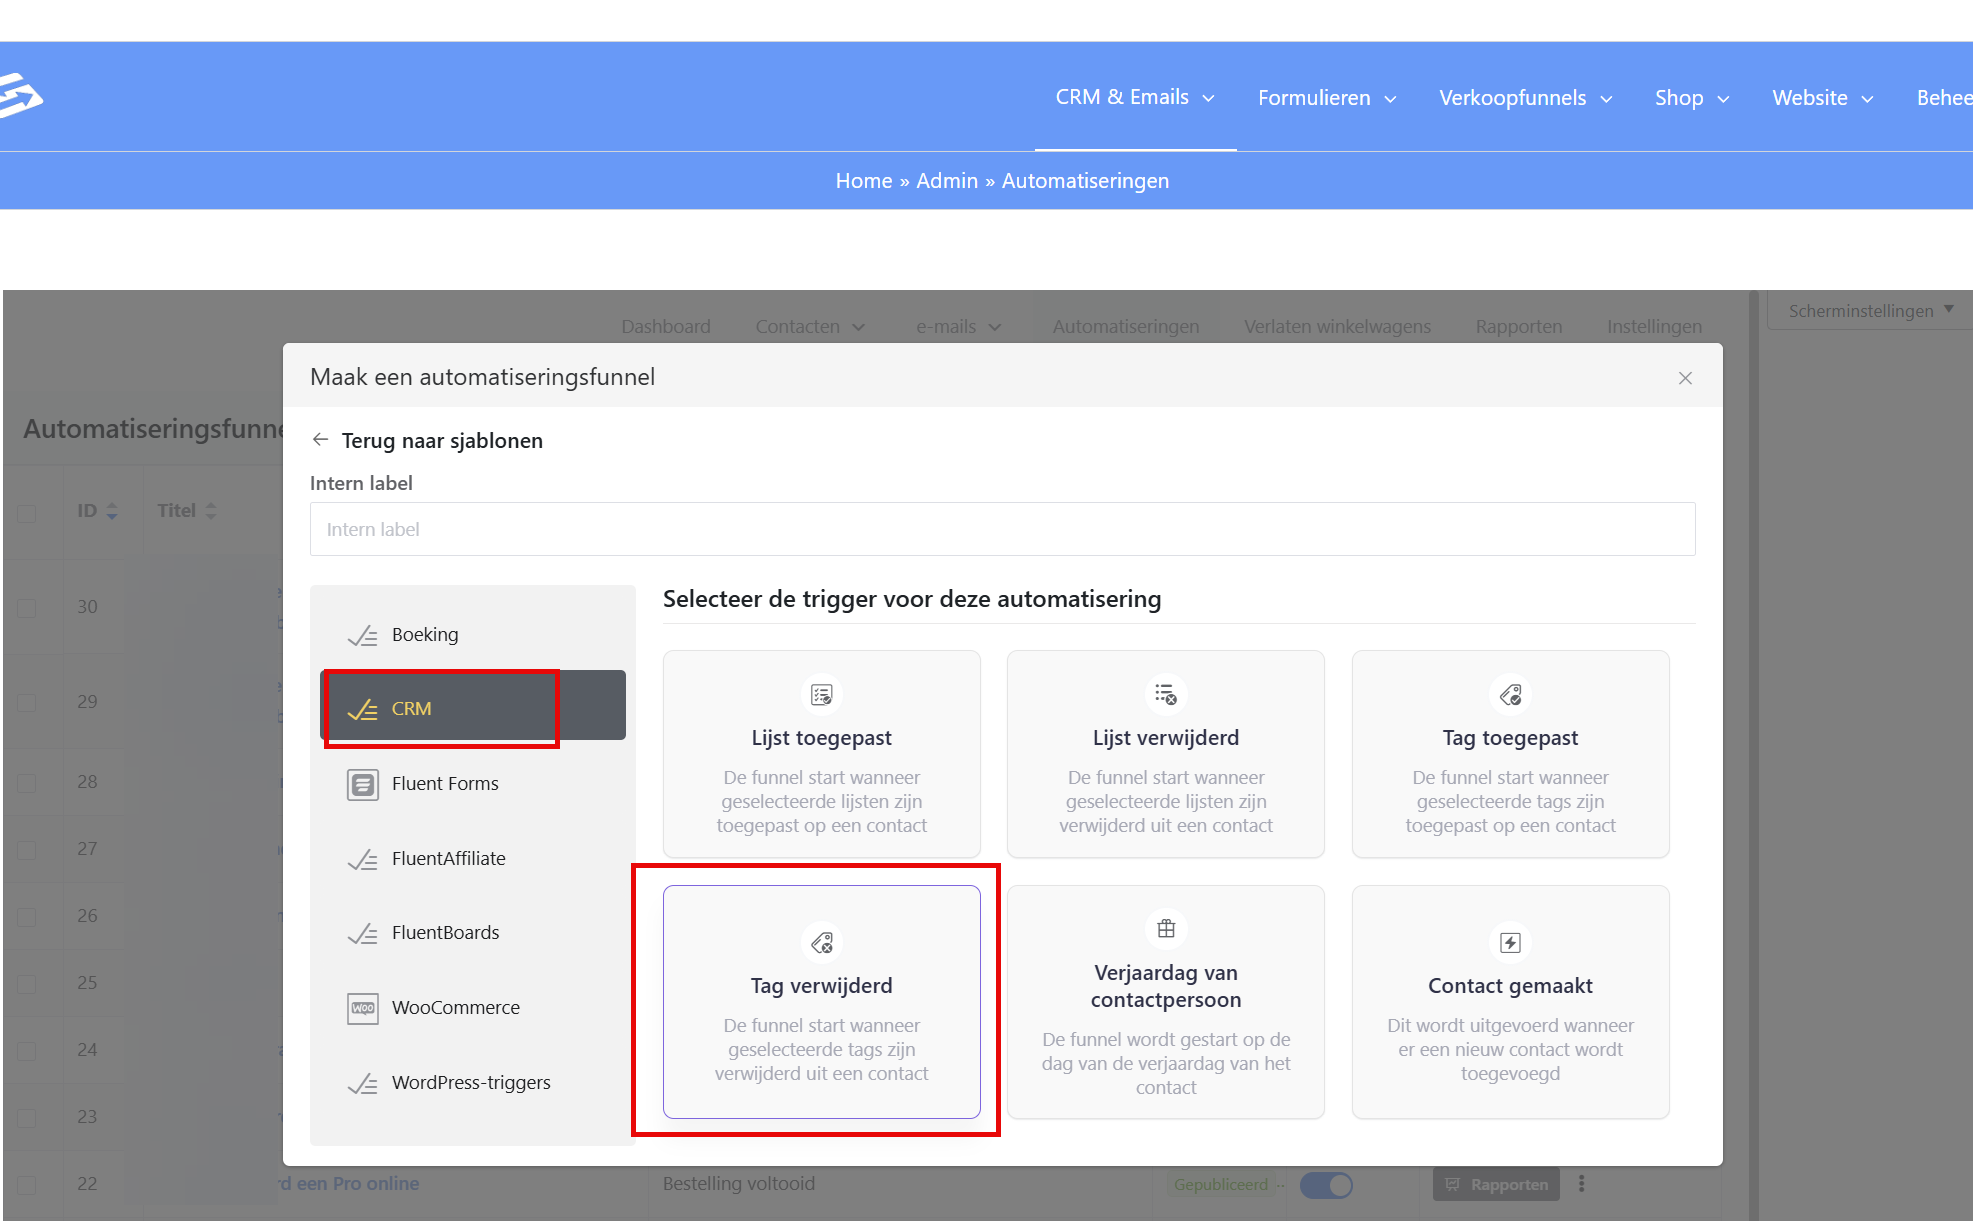
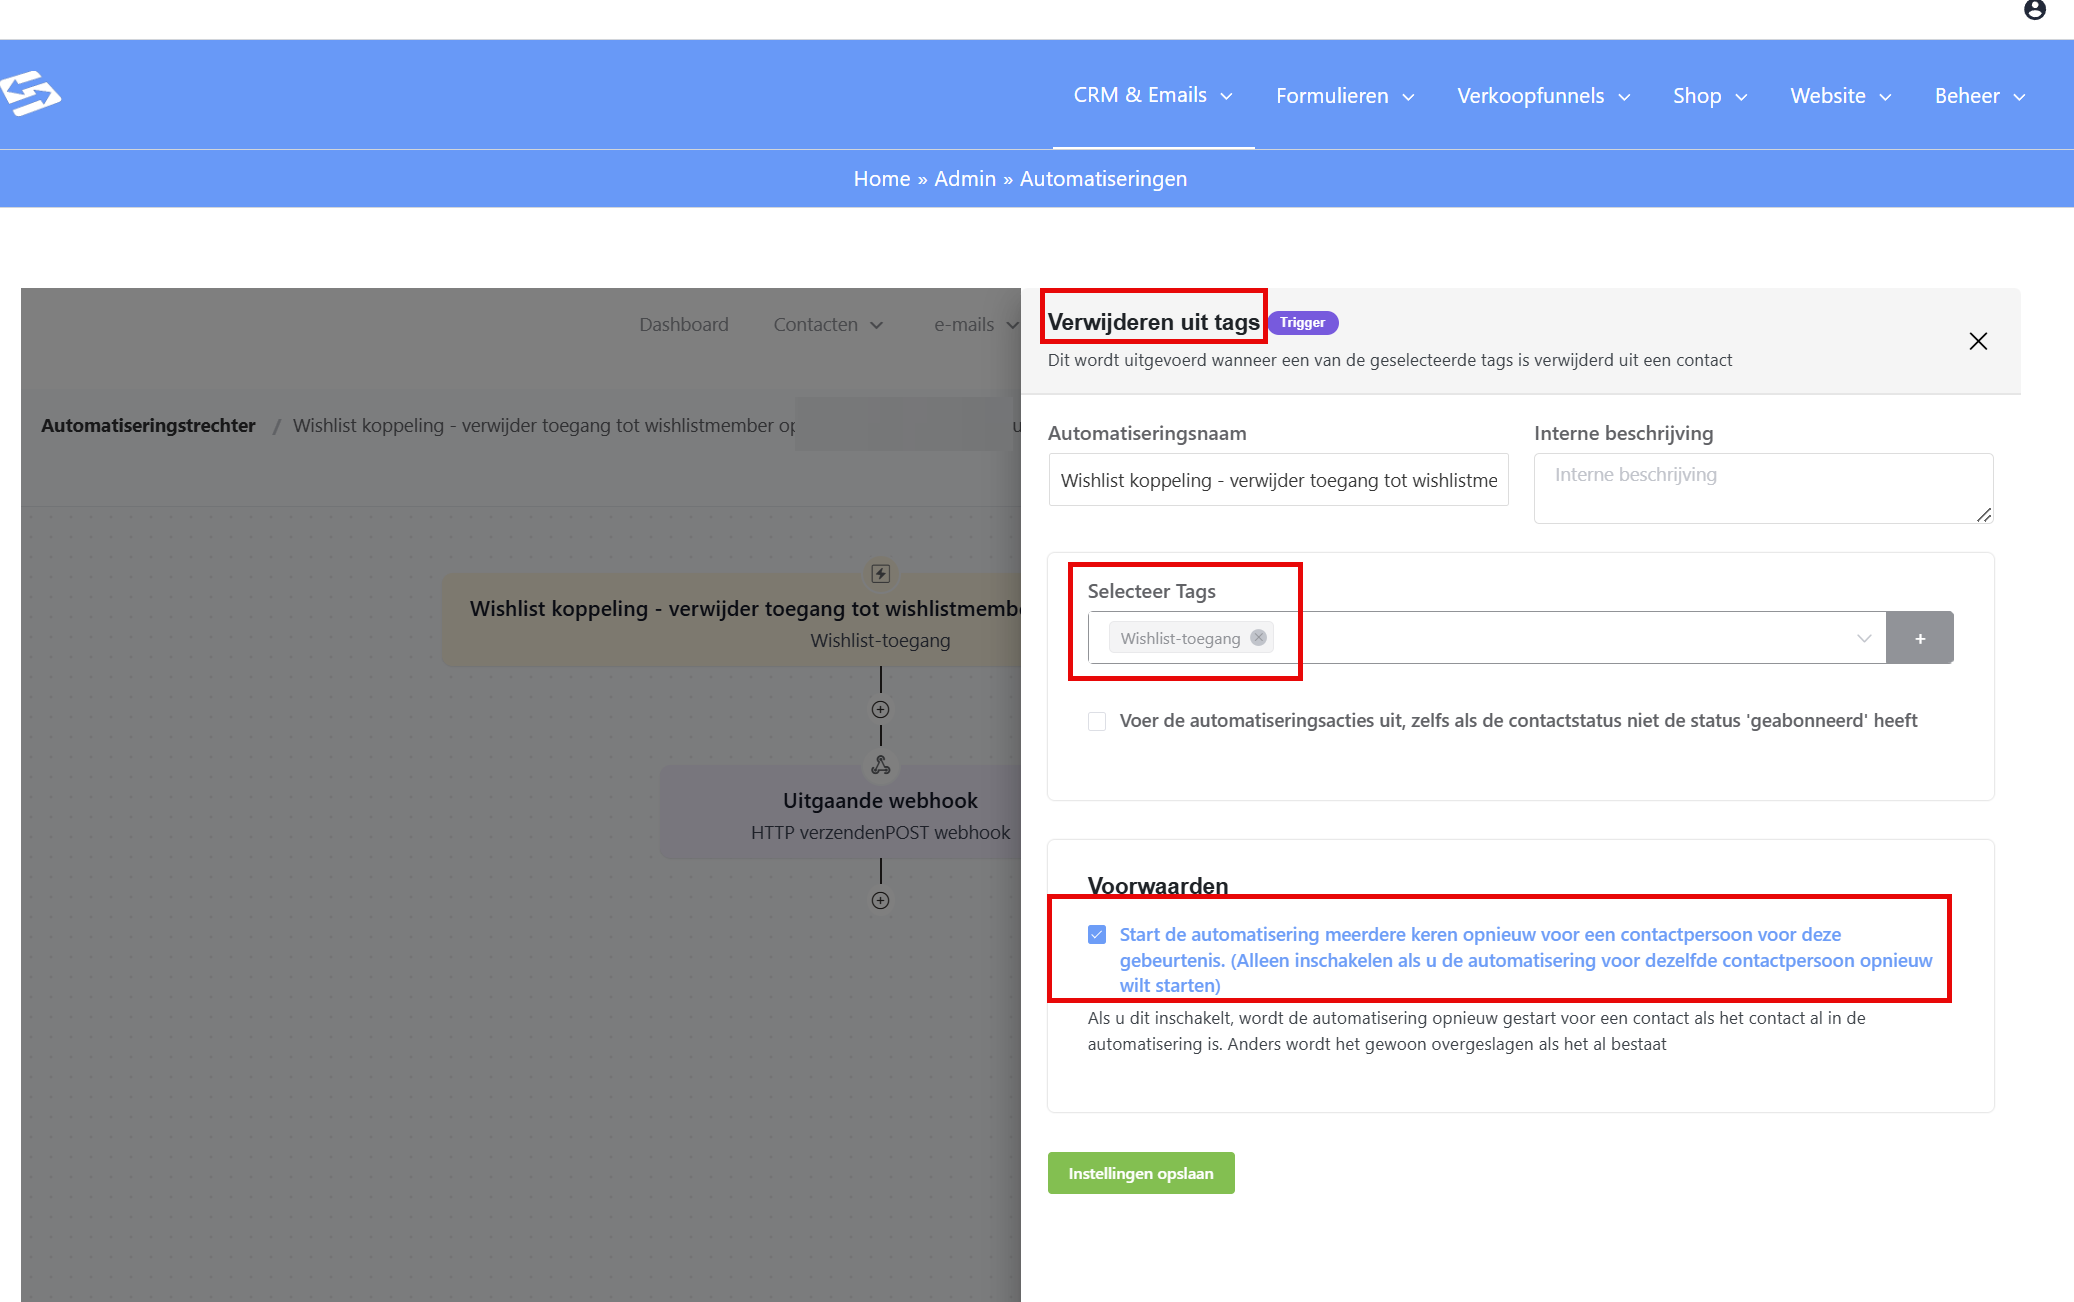
Here too, add the webhook action as the second step and paste in the second Wishlist webhook, the one that removes the user from the membership again.
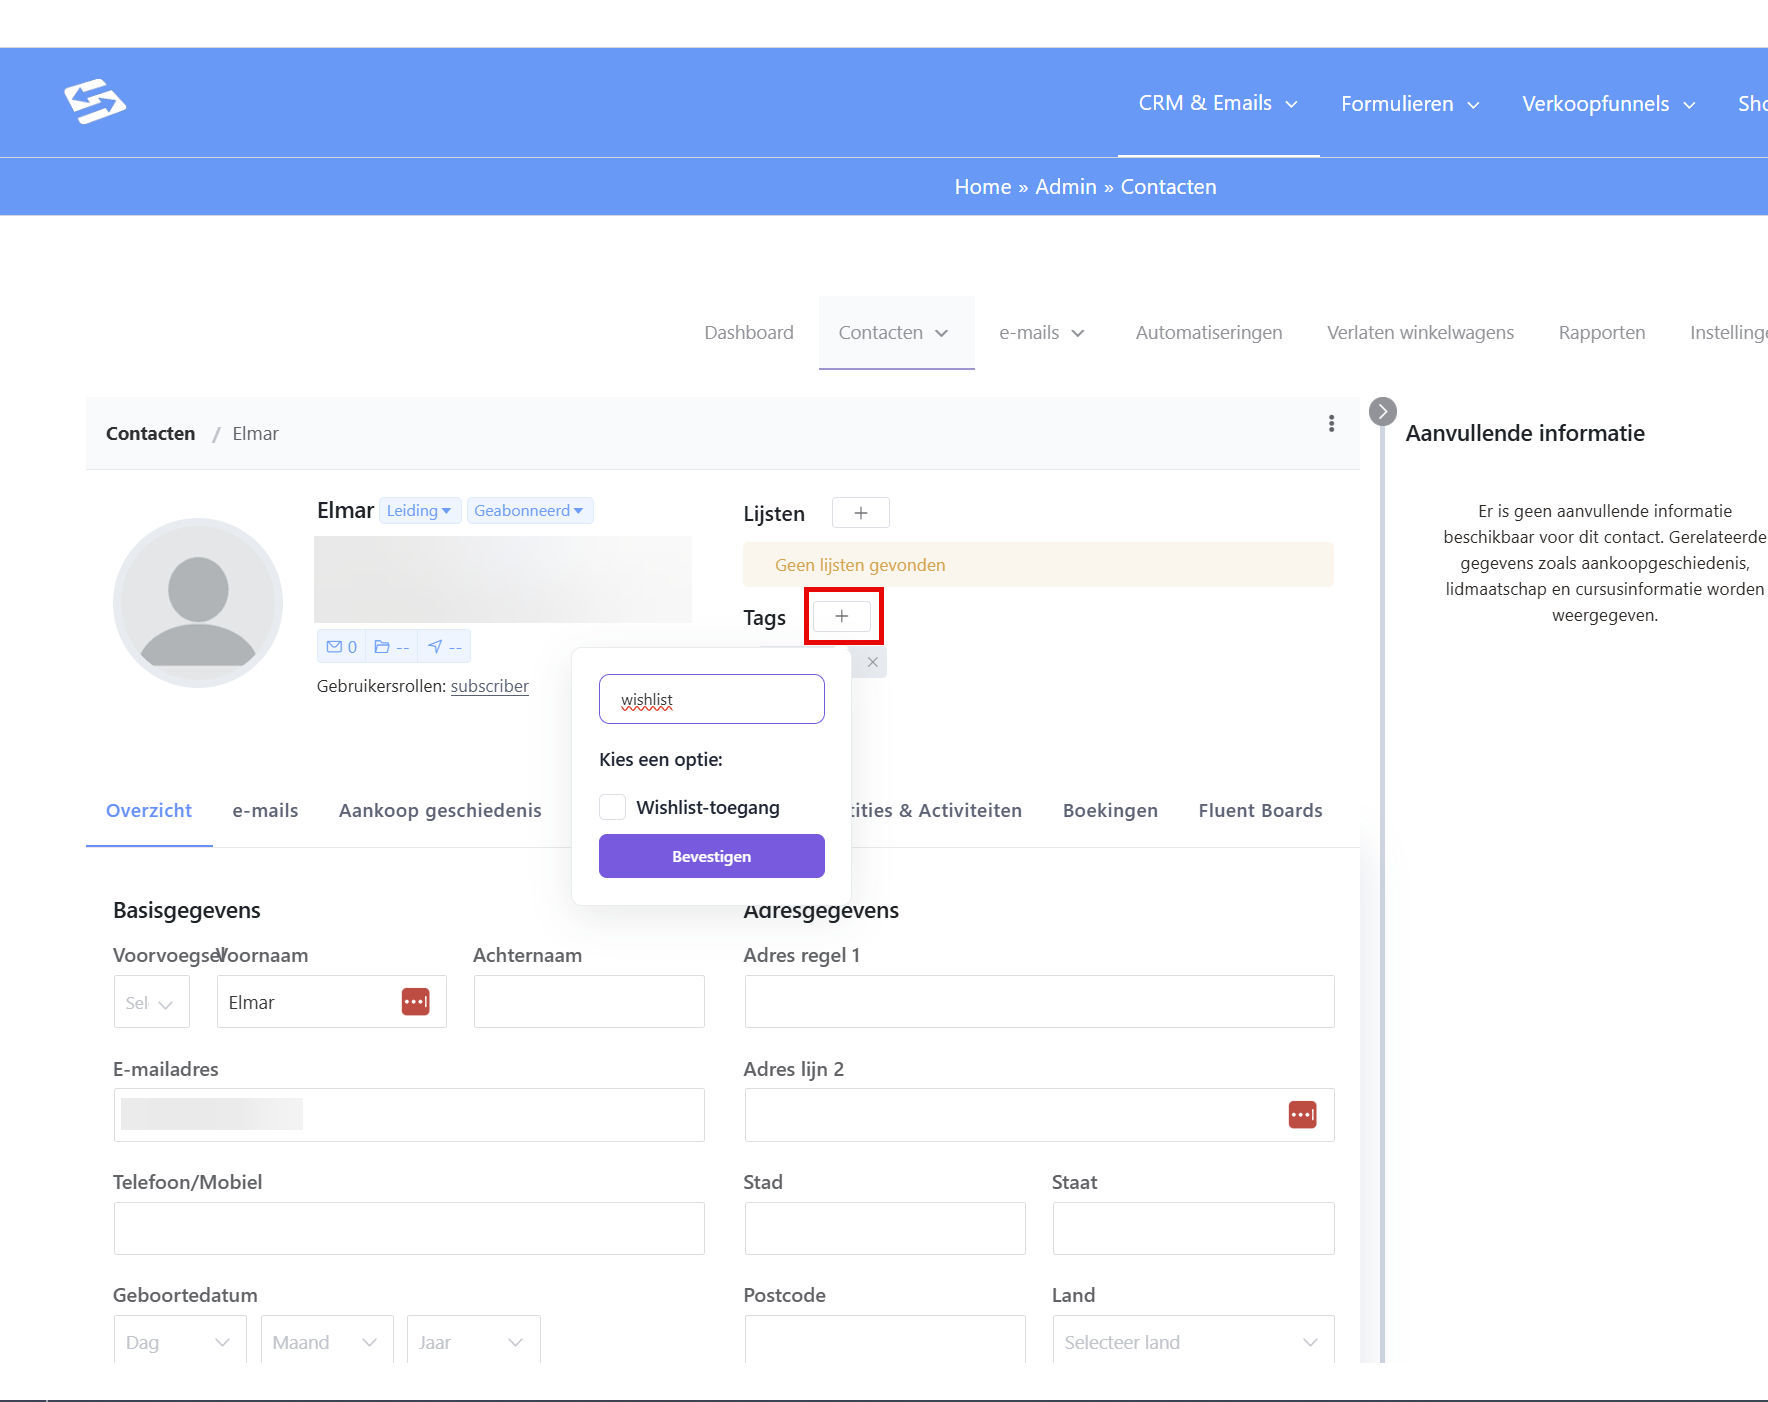
That’s it: from now on you have a direct connection from your Autorespond administration to your Wishlist Member membership through a tag. Add the tag to a contact in the CRM and they gain access; remove the tag and they lose access:
Several courses or membership levels? #
The tag name ‘wishlist-access’ above is an example for one membership. If you have several courses or levels, create a separate tag for each course (‘nmo-access’ and ‘nmb-access’, for example) and repeat the two automations for each course, each with the webhooks of that membership level. With one shared tag you cannot tell the courses apart.
You then give someone access by adding the tag of the right course to the contact. If someone may follow both courses, you give them both tags. That works manually from the CRM as well: every time a contact gets such a tag (by hand, through a form or after a purchase) the matching automation starts and the webhook arranges the access.
Linking the email sequence to the access #
Often you want a new participant not only to gain access, but also to receive the matching email sequence straight away (the lessons or welcome emails of the course). Wishlist does not handle that itself: the webhook only gives access to the membership level. You start the email sequence in the same automation, with an extra step.
First make sure the email sequence exists (menu Emails → Email sequences). Then open the first automation (the one with the trigger step ‘tag applied’), click the plus below the webhook step and choose the action Set email sequence. Select the email sequence that belongs to this course there. The automation then looks like this:
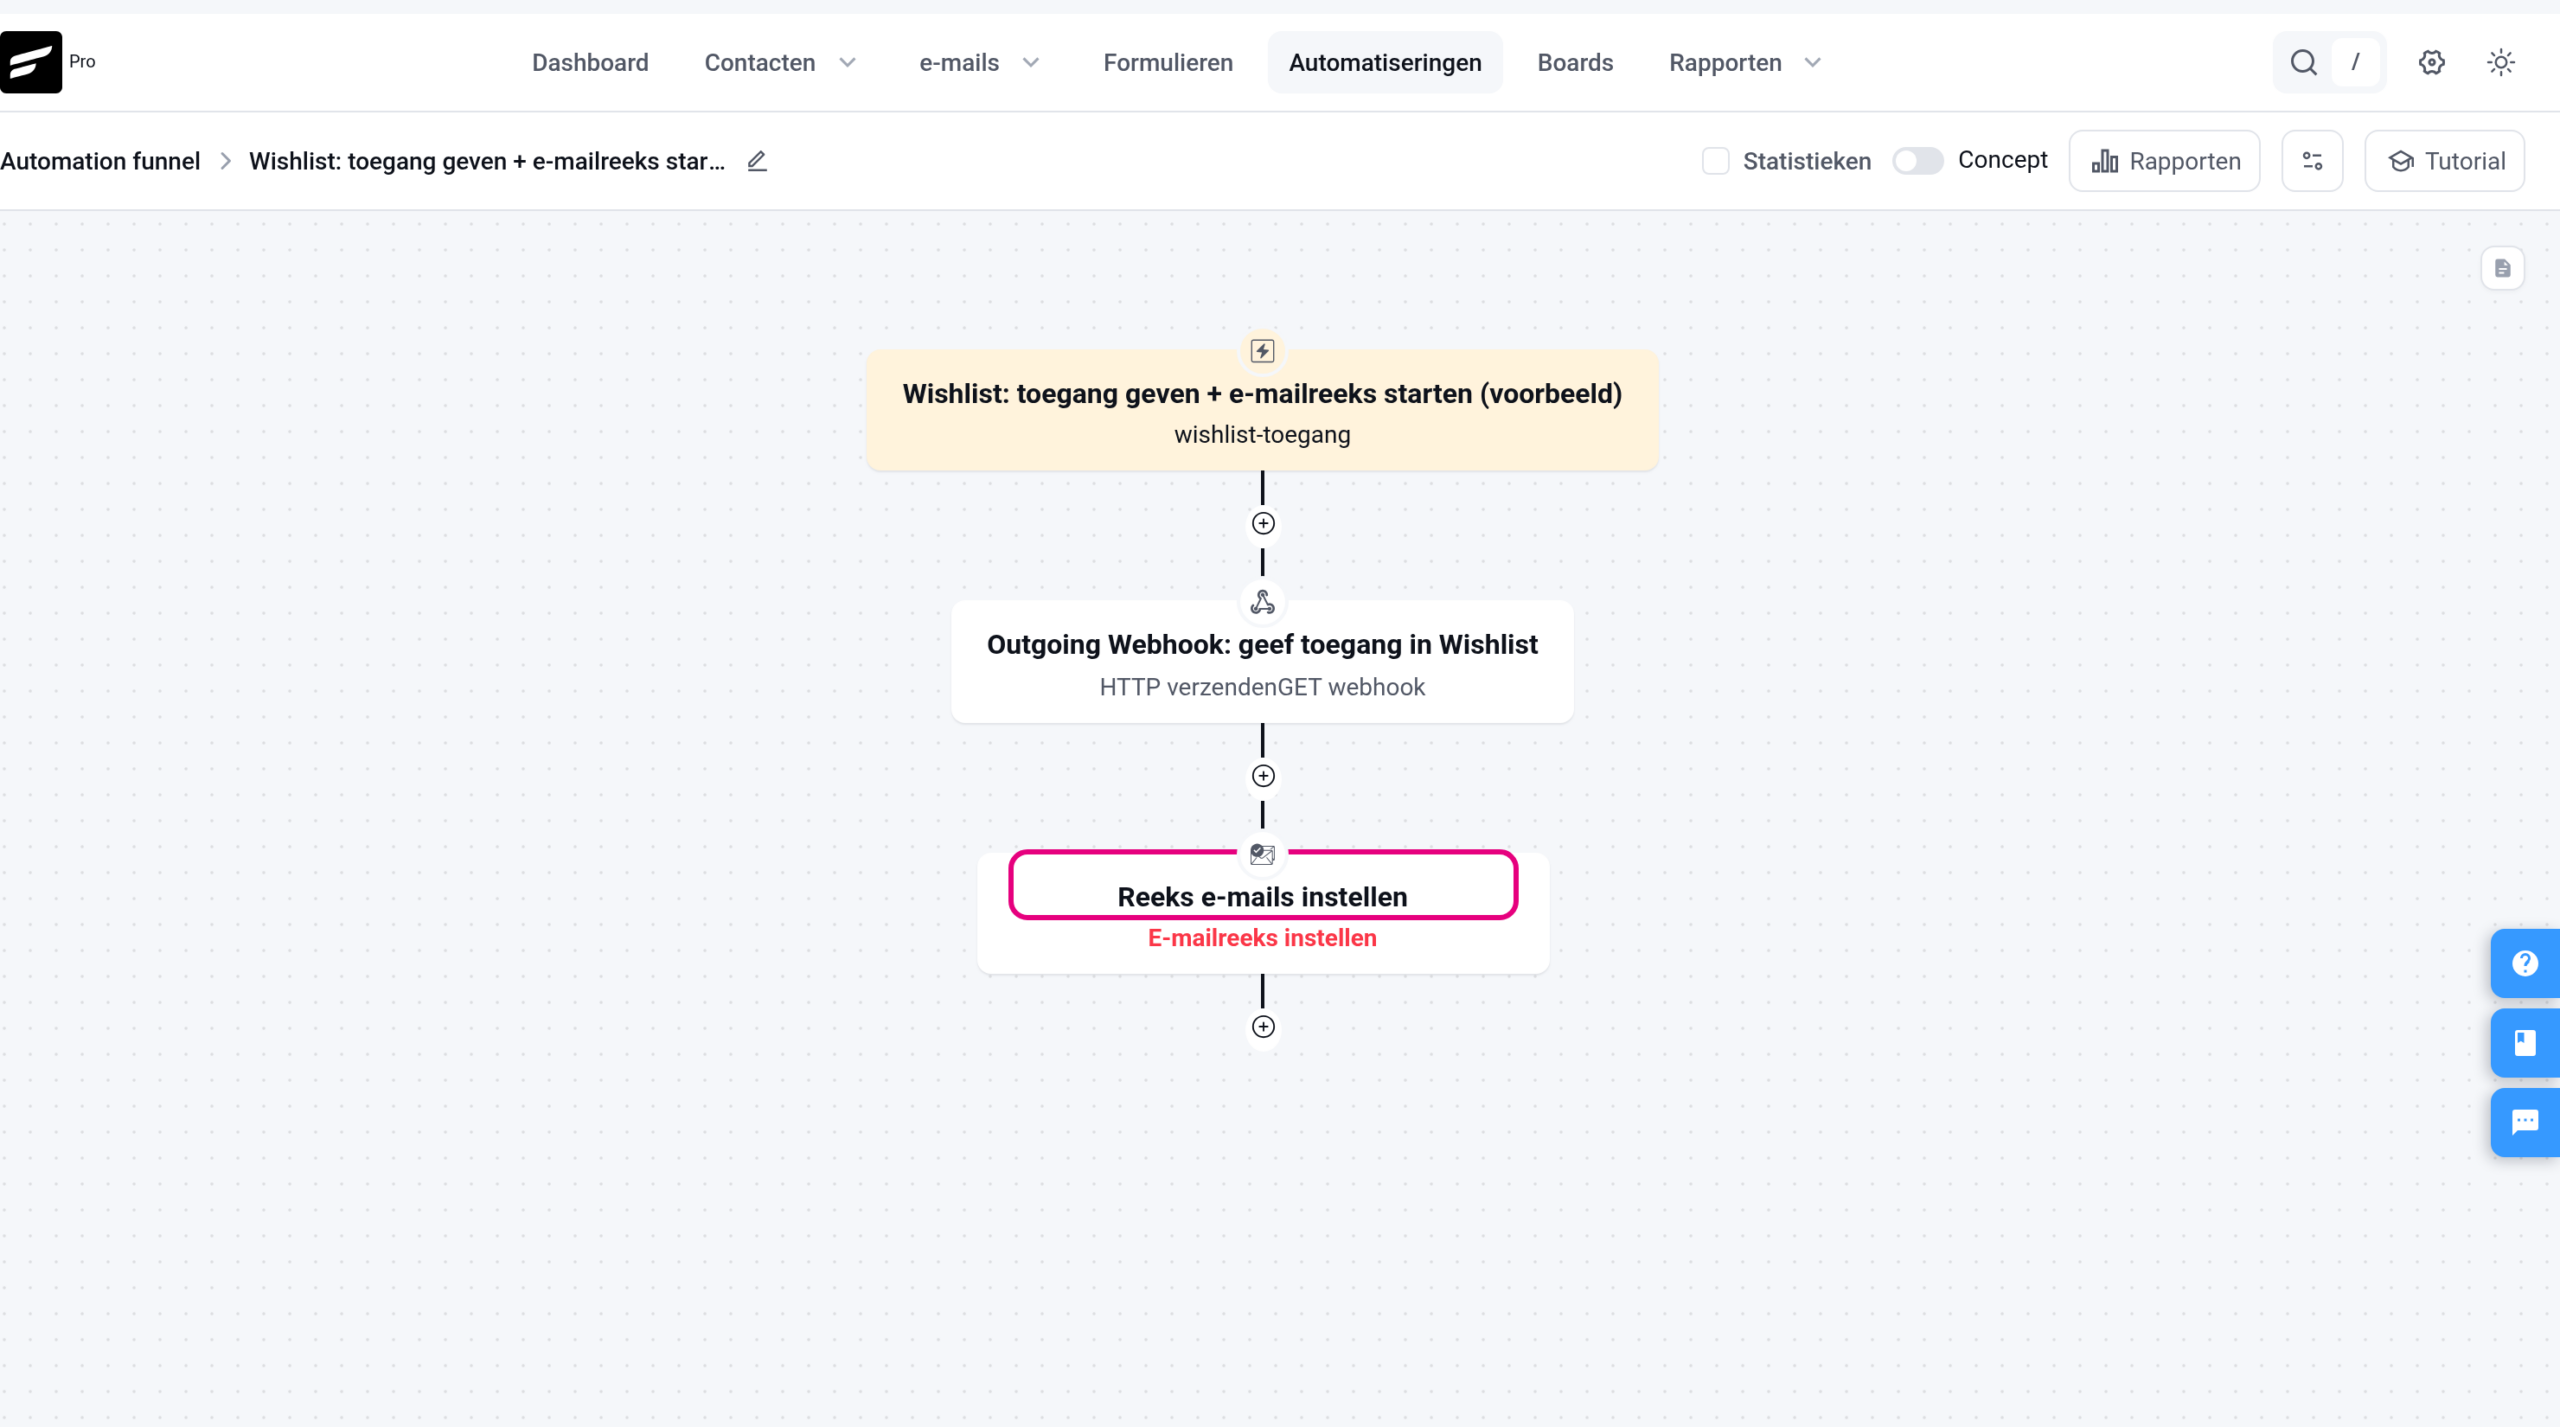
As soon as a contact gets the tag, two things now happen at once: the webhook gives access in Wishlist, and the sequence step starts the email sequence. Do you have several courses? Then repeat this for each one: a separate tag and a separate automation with the matching webhook and email sequence. A tag applied by hand (when you add someone in the CRM yourself, for example) also starts this automation, so this is an easy way to test the whole chain with your own test contact.
The email with login details comes from your own website, not from Autorespond #
A participant’s account and password exist on the WordPress website where Wishlist Member runs. Only that website creates the password and sends the email with the login details. Through the webhook, Autorespond only passes on who gains access. The password is not sent to Autorespond, so Autorespond does not send that login email either. That is a deliberate choice for security reasons. In the old Autorespond (e-act) that email was still sent from Autorespond, so anyone who has migrated will notice this difference.
Your Wishlist website therefore has to be able to send email itself. That is necessary in any case: the “forgotten password” email, the notifications to the administrator and the security notices of that site all come from that WordPress installation. Testing it is easy: on the login page of your Wishlist website, request a new password for your own account. If that email does not arrive, the site is not sending email and the login details of new participants will not arrive either.
You have the mail sending from that website set up by the hosting provider or the web developer of that site; for them it is a routine request. A common solution is to connect the free plugin FluentSMTP to your own mail server (the mailbox of your company domain, for example). Because that website is not managed by Autorespond, we cannot set this up for you and we do not provide support on it. As soon as the site sends email again, new participants receive their login details automatically, and you do not have to change anything in the integration in Autorespond.


