You have built a good-looking form, but the sign-up button is too small, the fields could do with being a bit larger, or there is unexpected white space in it. Do not worry: everything about the layout of your form can be adjusted, without you having to write any code. In this article we walk through the options step by step.
Forms in Autorespond are based on Fluent Forms Pro, included in your package. All the changes you make below apply automatically everywhere the form is shown: on the landing page and in embeds on your website.
1. Adjusting the sign-up button (text, size, colour) #
The sign-up button has its own settings panel in the form editor:
- Go to Forms → Forms and click Edit next to your form.
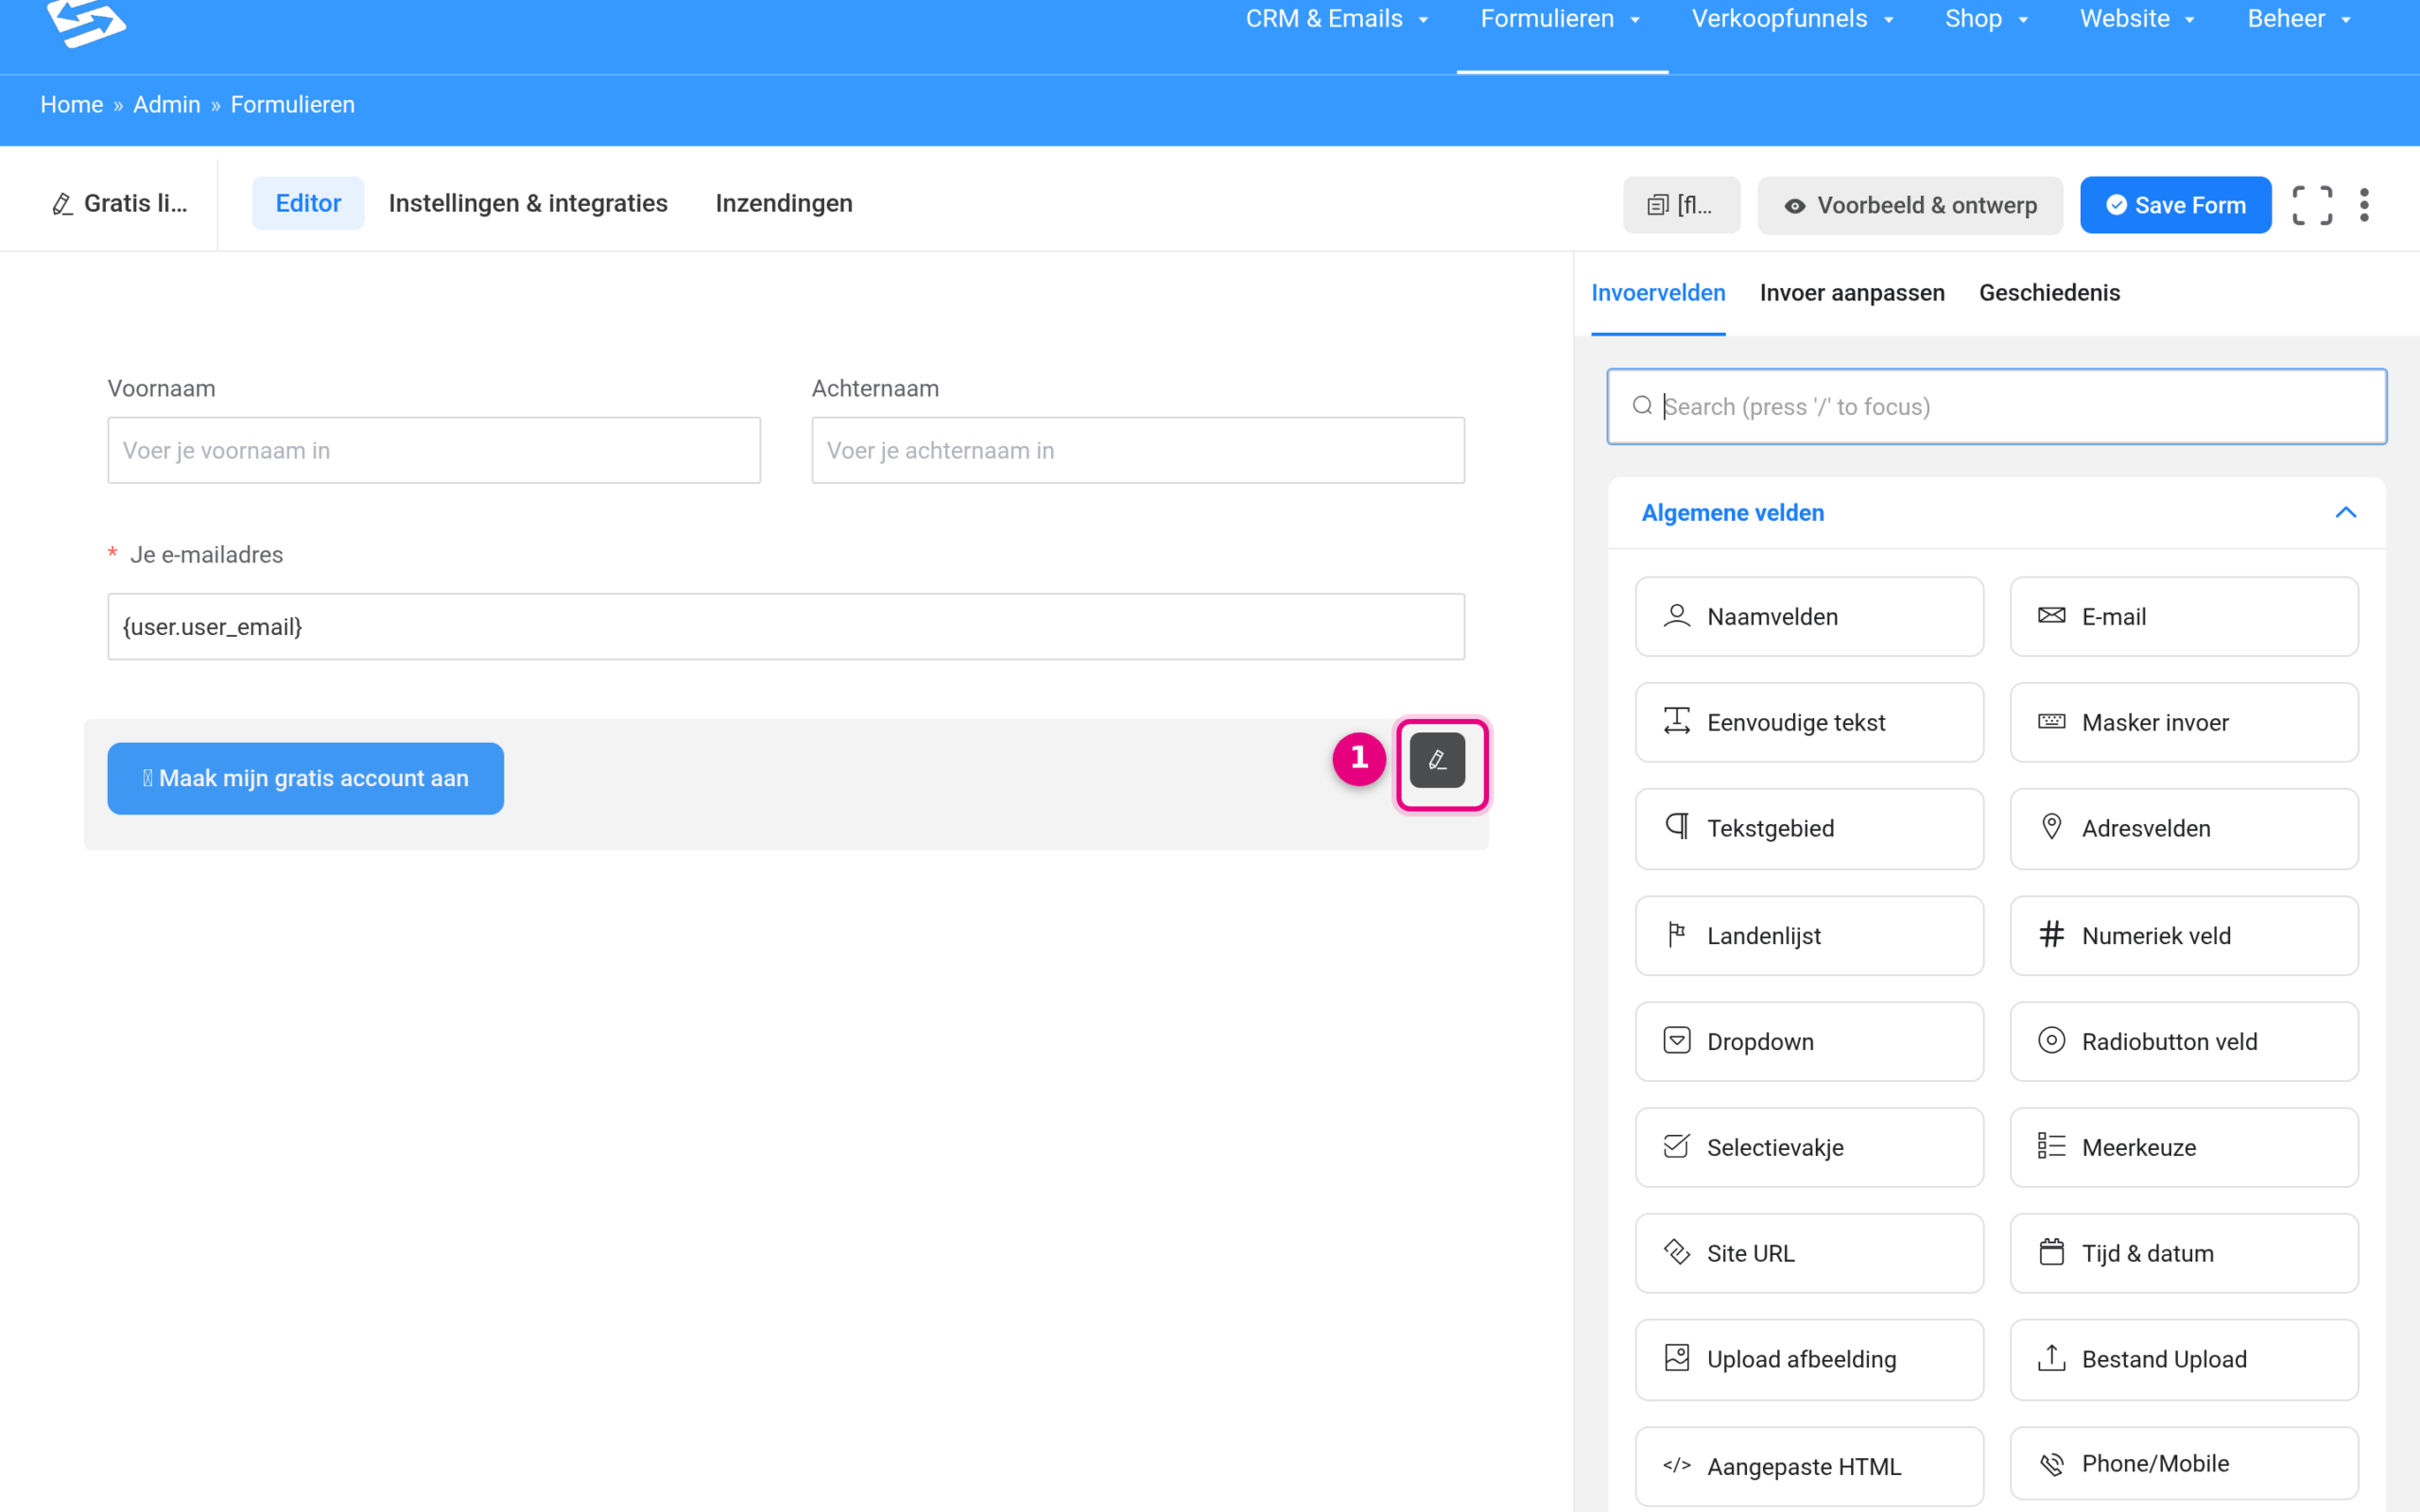
- Move your mouse over the sign-up button at the bottom of the form. A pencil icon appears next to the button.
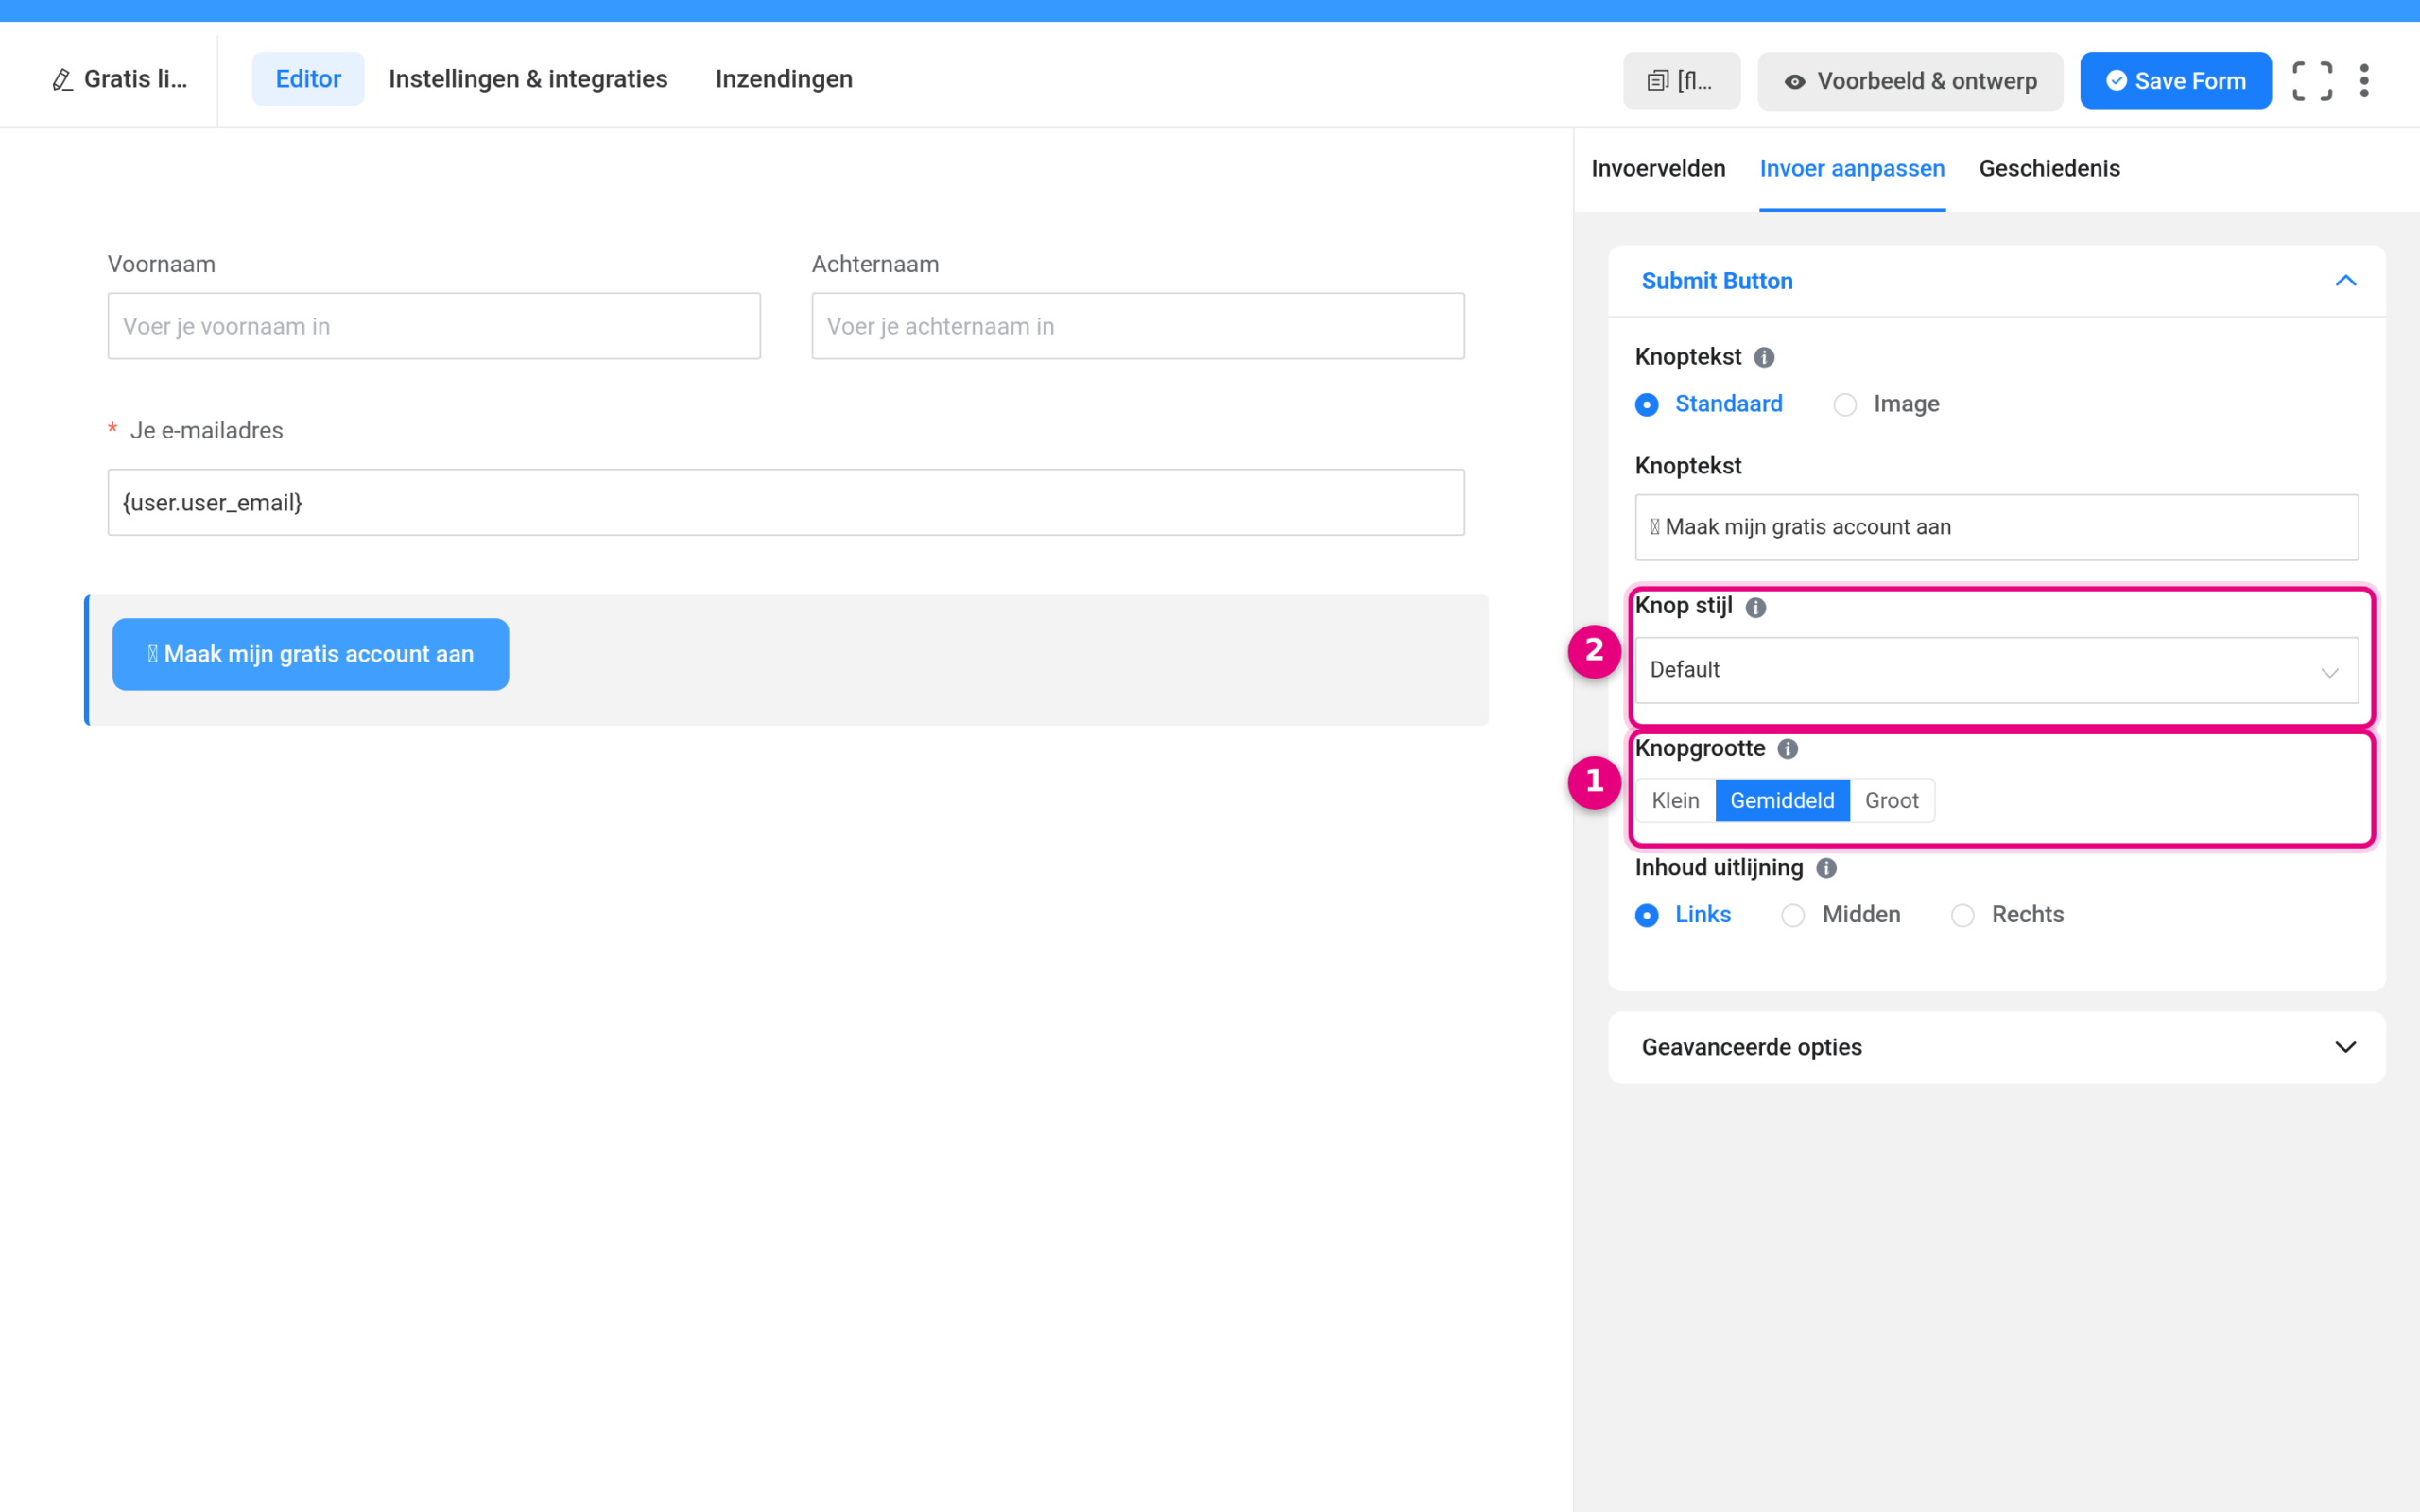
- Click the pencil icon. The Customise input panel now opens on the right with all the button settings.
- Adjust whatever you want:
- Button text: the text on the button (or choose an image as the button).
- Button size: choose Small, Medium or Large. This is the quickest way to make the button bigger.
- Button style: background colour, text colour, border colour and border radius (rounded corners). You can set this separately for the normal state and for the moment a visitor moves the mouse over it (hover).
- Min. width: if you want a wide button, enter
100%here, or a fixed number of pixels. - Content alignment: button on the left, in the middle or on the right.
- Click Save Form at the top right to save.
2. Adjusting fields (labels and layout) #
Every field has its own settings in the same way:
- Move your mouse over the field and click the pencil icon.
- In the Customise input panel you set, among other things:
- the label and the placeholder text of the field;
- Label placement: label above, to the left, to the right or below the field, or hide the label entirely;
- under Advanced options, extra settings such as field width and CSS classes.
3. Styling the whole form in one go: Preview & design #
Do you want to make the fields bigger, adjust colours or give the complete form a different look? Then use the built-in styler:
- Open the form through Forms → Forms → Edit.
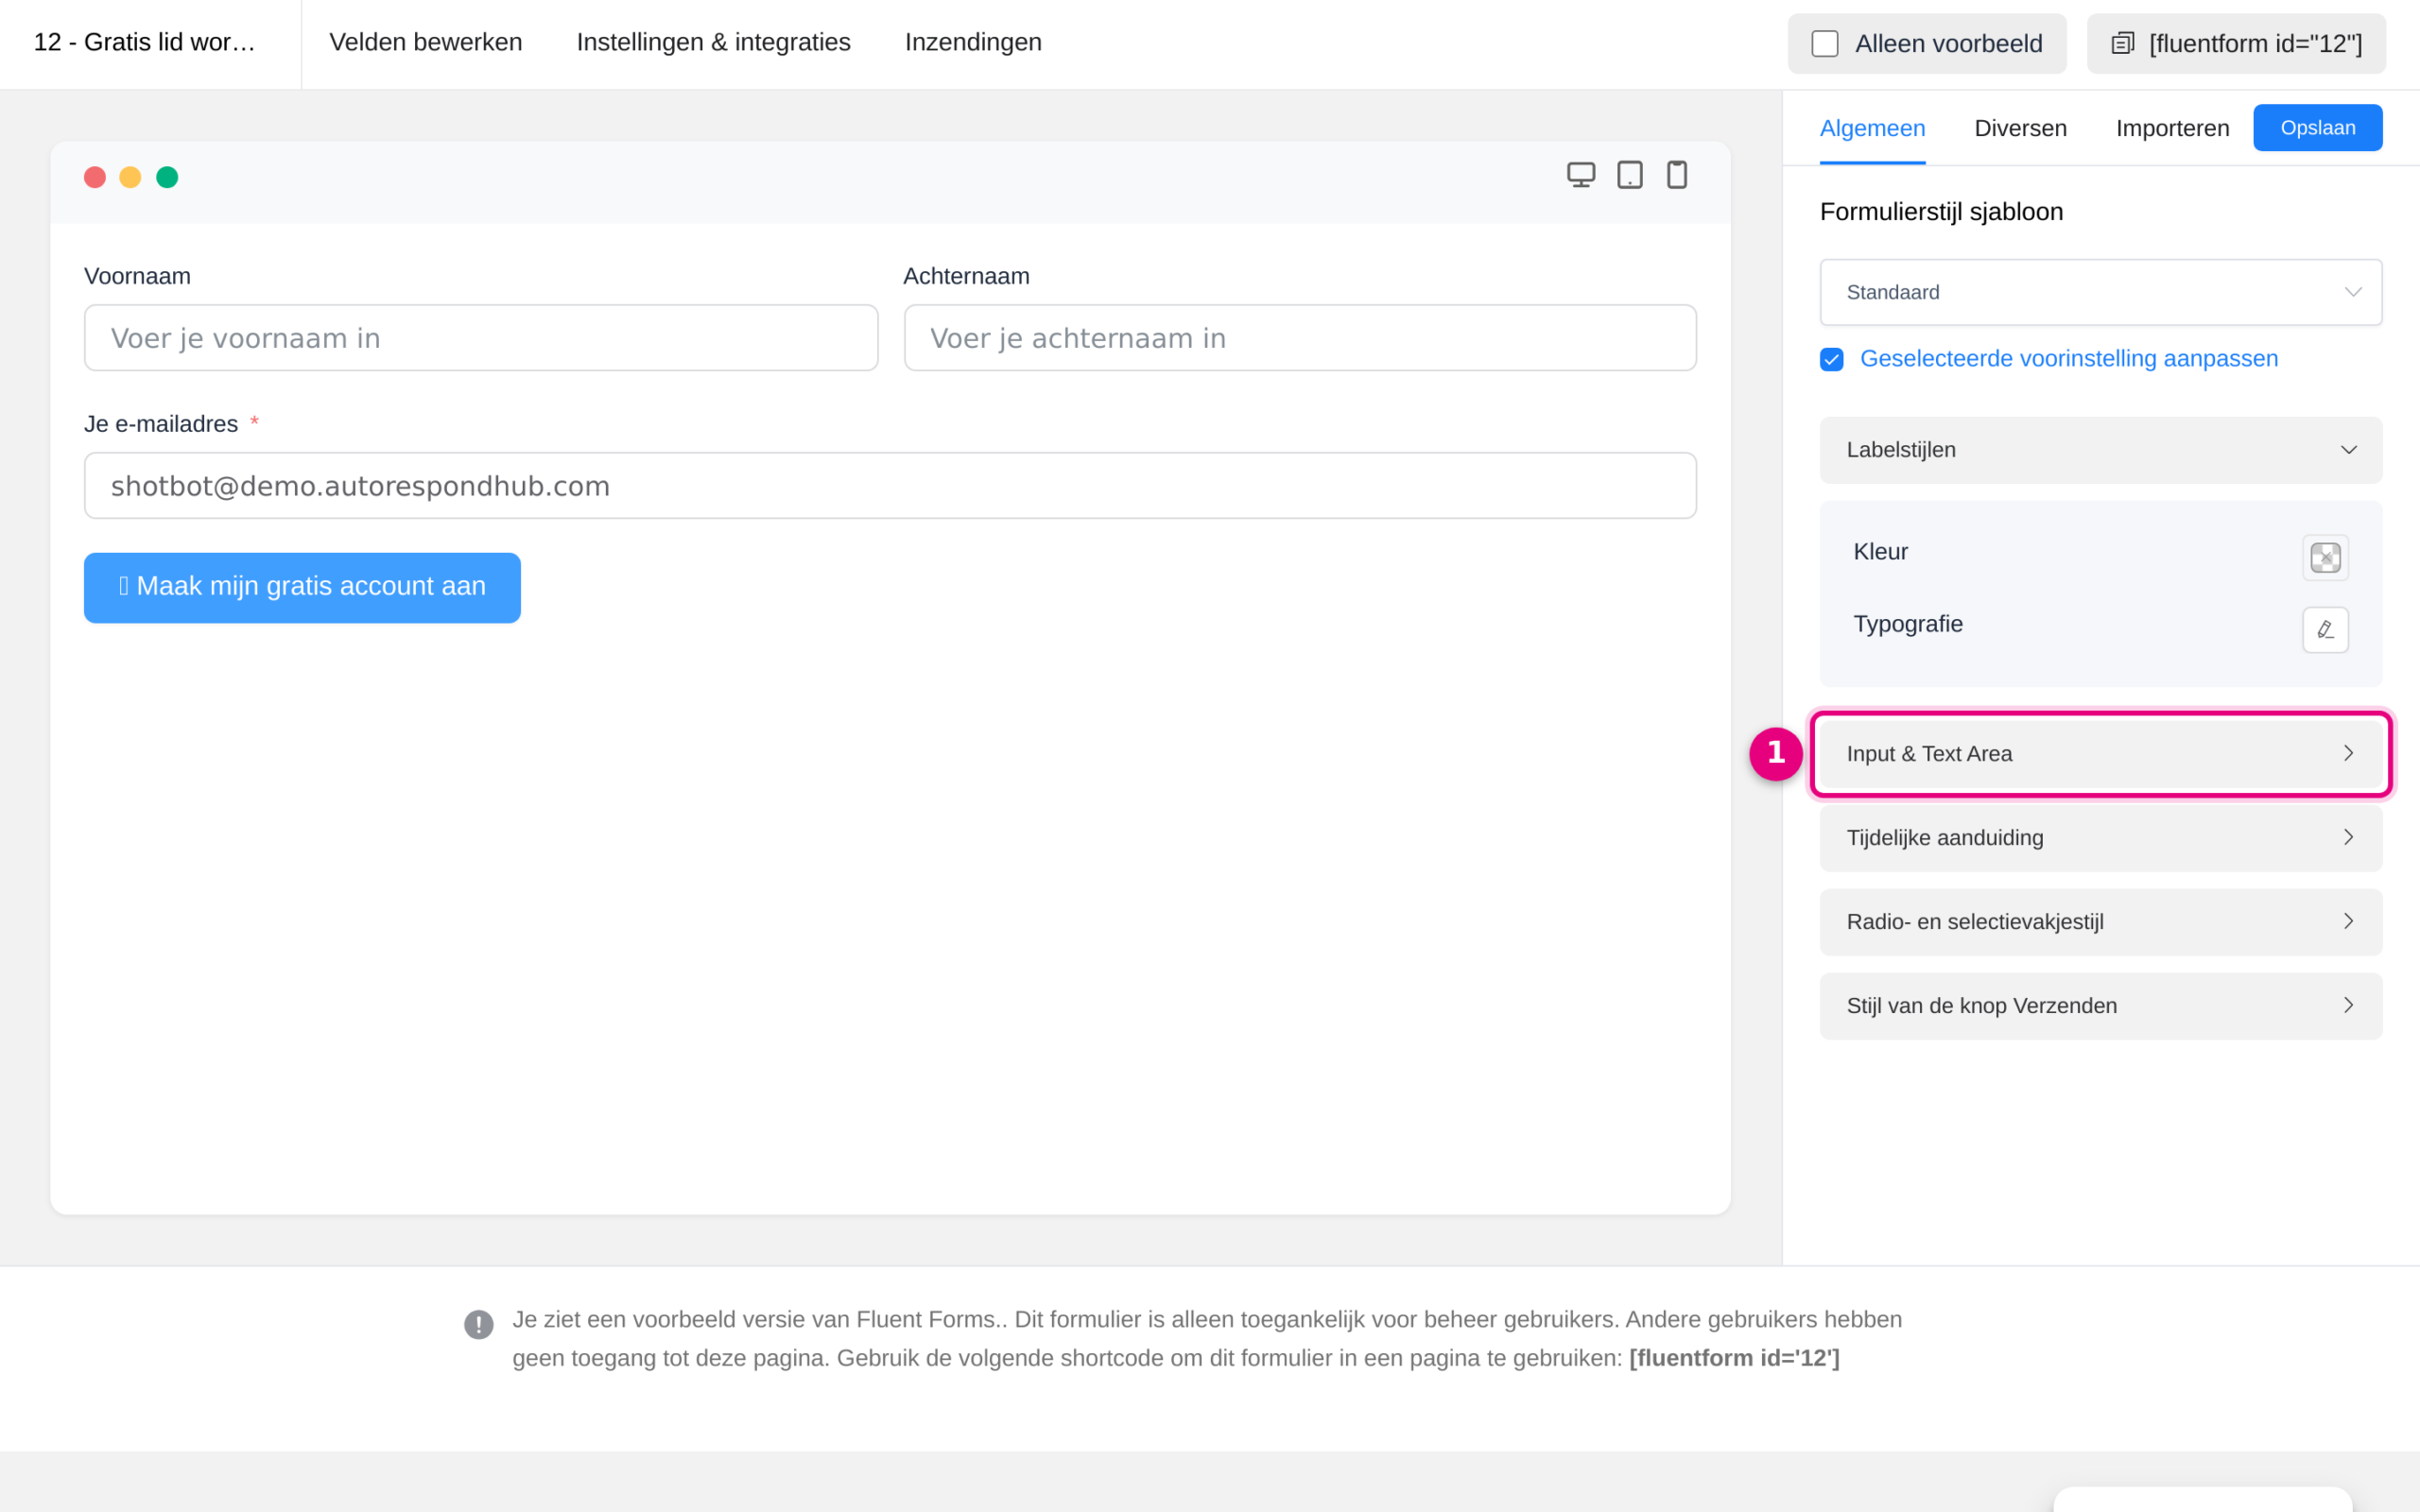
- Click Preview & design at the top right. You now see a live preview of your form with the design settings on the right.
- At Form style template you can choose a ready-made template as a starting point.
- Tick Customise selected preset. Sections now appear that let you style each part separately:
- Input & Text Area: this is where you make the input fields bigger. Adjust the padding, text size, colours and borders of all fields in one go.
- Style of the Submit button: the same button settings as in step 1, but with a live preview next to them.
- Label styles and Placeholder: colour and typography of the field labels and of the grey example text in the fields.
- Click Save at the top right: the styling applies immediately everywhere the form appears.
Frequently asked questions #
How do I make the sign-up button bigger? #
In the form editor, move your mouse over the button, click the pencil icon and choose Large at Button size. If you want it even bigger or at a specific size, use Min. width or the Submit button section in Preview & design.
How do I make the input fields bigger? #
Click Preview & design at the top right of the editor, tick Customise selected preset and open the Input & Text Area section. Increase the padding and the text size there, and all fields grow along with it in one go.
Why do I not see my changes on my website straight away? #
This is almost always caching. First clear the cache through Administration → Cache toolbox and then do a hard refresh in your browser (Ctrl+F5 or Cmd+Shift+R). If the form is on an external website, clear the cache there as well.
Do my changes also apply to my other forms? #
No, all the settings in this article work per form. That way you can give each form its own look. If you want the same style on several forms, apply it per form through Preview & design.
I have accidentally deleted the actual sign-up button, what now? #
There is no need to worry. In the editor, click History (at the top right of the side panel) to restore an earlier version, or get in touch through the support portal and we will put it back together with you.


