Courses are the backbone of most communities: structured lessons in which you pass on your knowledge step by step, with the community around them for questions and motivation. In this article you build a complete course: from creating it and dividing it into sections and lessons, to video lessons, featured images and publishing it for the right members.
The community and course features in Autorespond are based on FluentCommunity, included in your package. Read the English documentation
1. Creating a new course #
- Open your community portal, go to Courses and click New course. (If you do not see that button, check under Settings → Features & add-ons whether the course module is switched on.)
- Give the course a title that promises the result (“Painting landscapes in oils” says more than “Course 1”) and a short, appealing description.
- Upload a cover image. This determines how attractive your course overview looks; use the same format for all courses (landscape, for example 1200×675) for a calm, professional appearance.
- Choose the course type: self-paced (all lessons available immediately) or structured (lessons are released in a fixed order or at fixed moments). Not sure? Start with self-paced, that creates the fewest barriers.
- Save the course as a draft, you only publish once the content is in place (step 4).
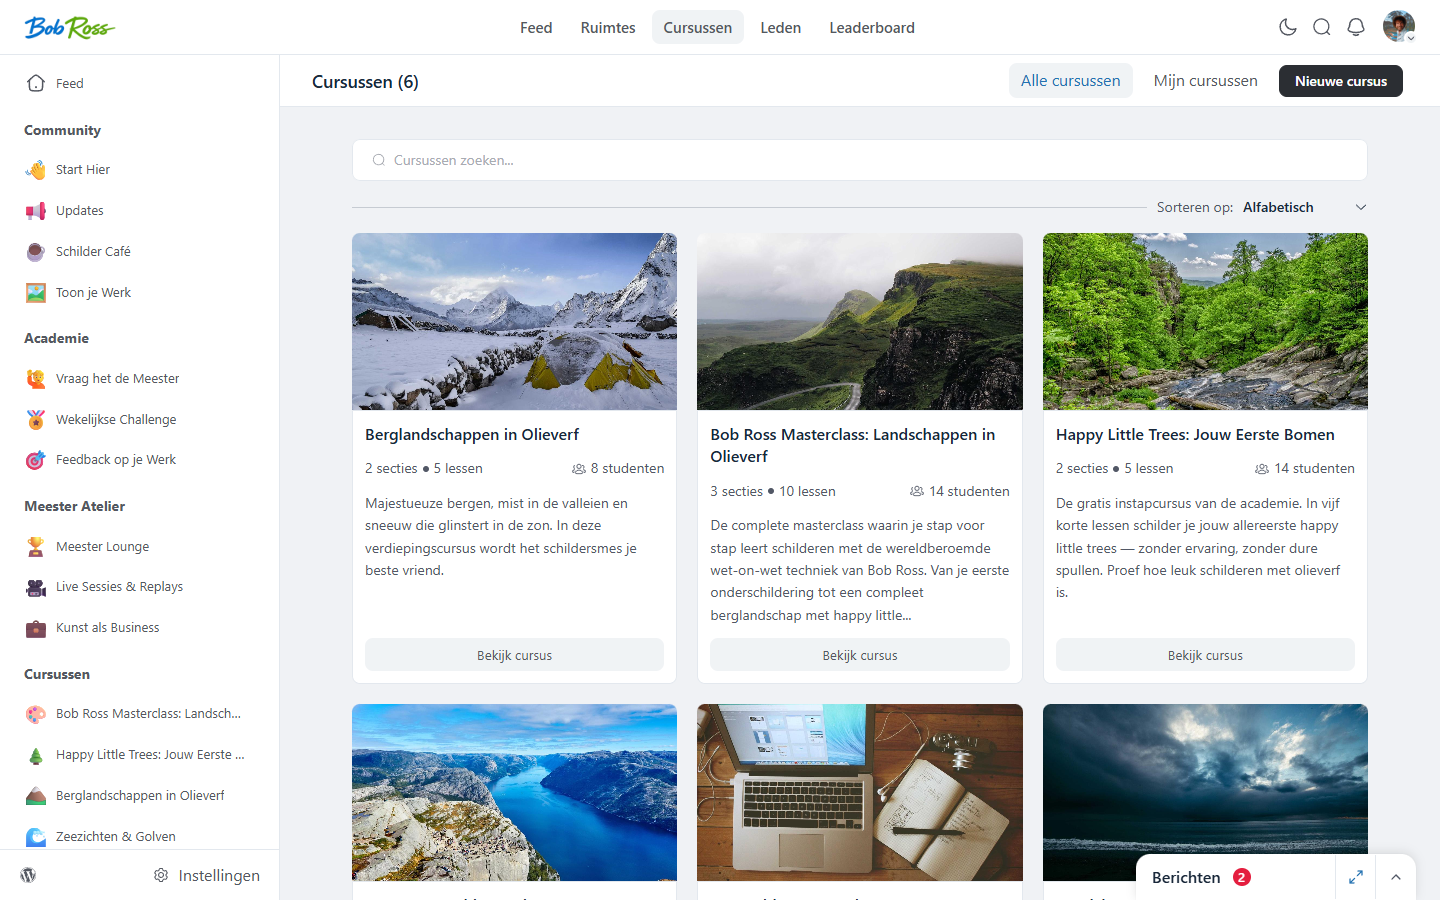
2. Adding sections and lessons #
A course consists of sections (chapters) containing lessons. Keep sections short and logical: three to five lessons per section reads like a manageable chapter.
- Open the course in course management and add your first section, for example “Before you start”.
- Add lessons within the section. Every lesson has a title and content that you build up in the block editor: text, images, lists and video.
- For a video lesson: paste the video URL (for example from YouTube or Vimeo) into the media option of the lesson, and the video appears at the top of the lesson. Set your videos to unlisted or private at the video platform, so they can only be watched through your course.
- Give every lesson a featured image. It appears as a recognisable thumbnail in the lesson overview and makes the difference between a dull list and an inviting curriculum.
- Decide per lesson whether comments are switched on. Recommended: on. Questions underneath the lesson are worth their weight in gold for your students (and for you as feedback), and every question is visible to the students who follow.
- Drag lessons and sections until the order is right. Students see the first lesson first, so make that your strongest opener.
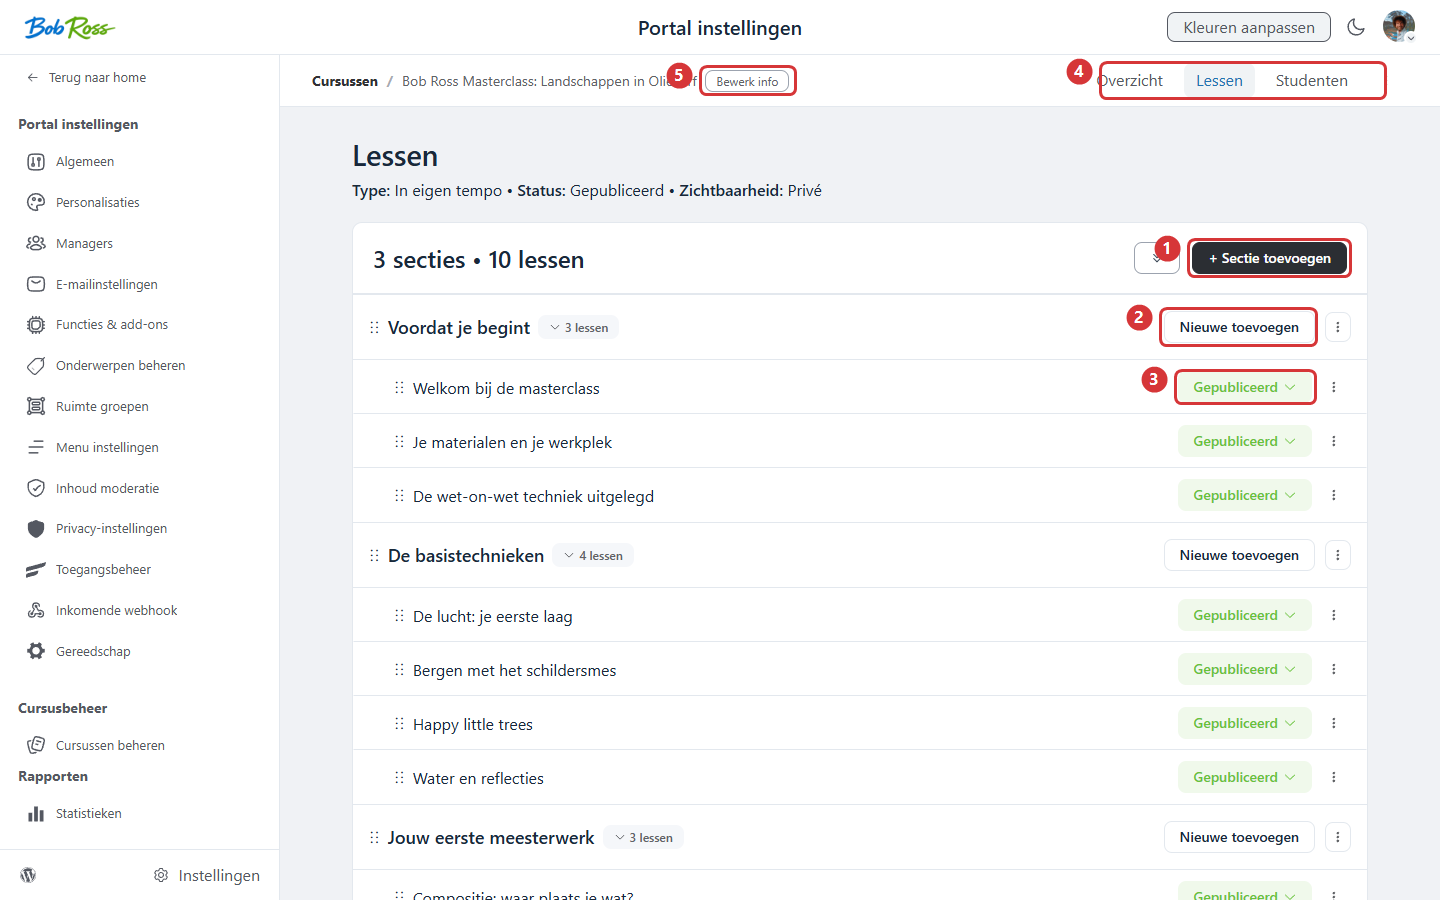
In the screenshot: 1) adding a section · 2) adding a lesson within a section · 3) the status per lesson · 4) the Overview, Lessons and Students tabs · 5) editing the course info.
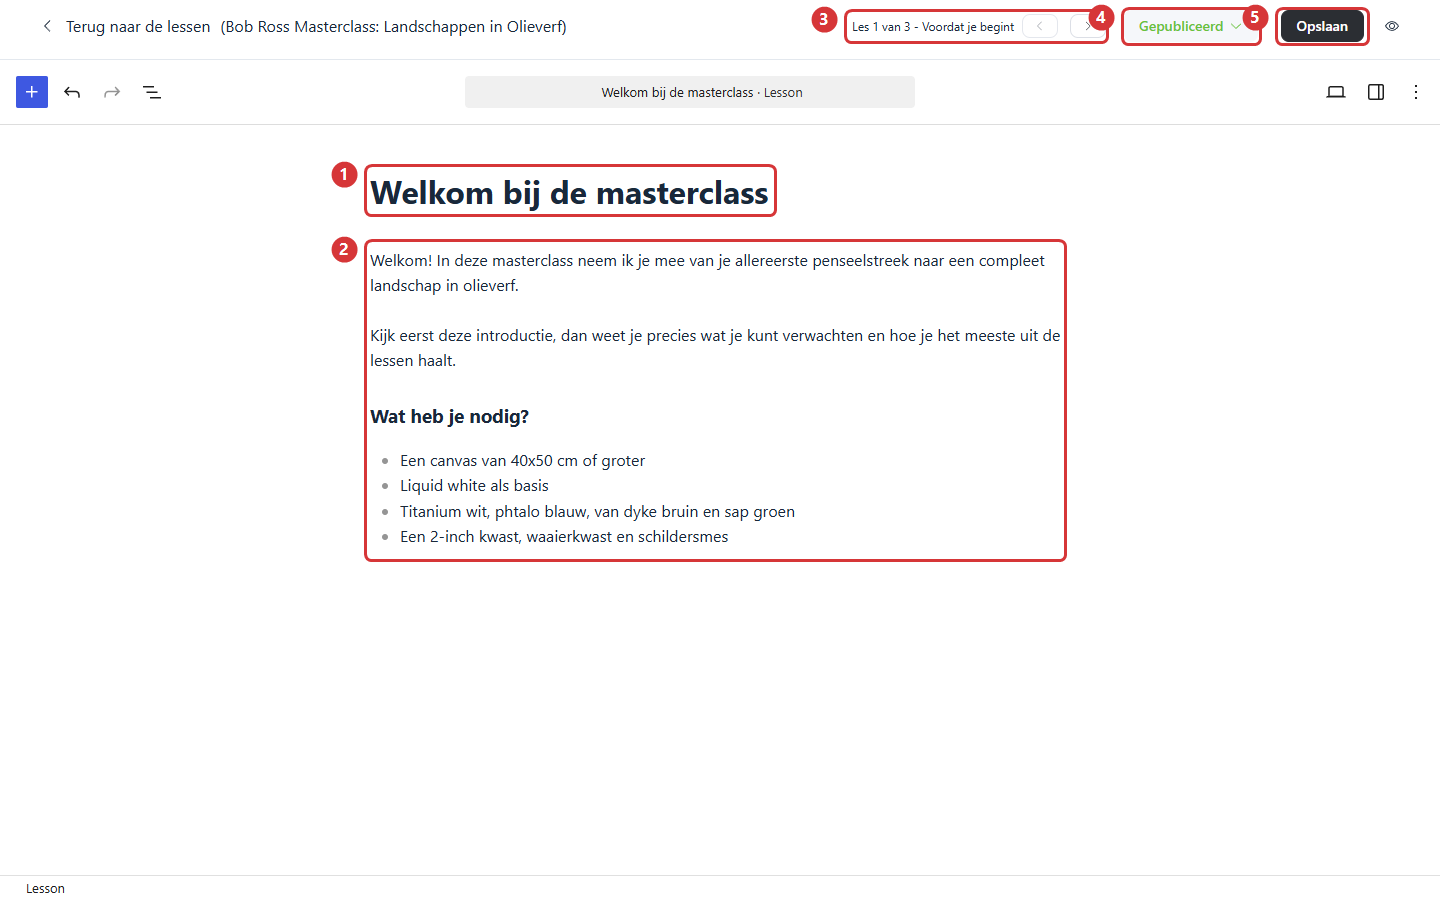
In the screenshot: The lesson editor: 1) the lesson title · 2) the lesson content in the block editor · 3) navigation between lessons · 4) the publication status · 5) saving.
3. Decide who gets access #
In the course settings, set the privacy: public (anyone can take part, ideal for a free taster course that brings in leads) or private (only for enrolled students). For paid courses it is best to work with tags: link the course to your level tag under Settings → Access control, so that a purchase enrols someone automatically and a cancellation unenrols them automatically. Also switch on the course lock screen with a button to your sales page, including the lesson overview as a teaser. The full explanation is in the article on access control (related articles).
4. Publishing and checking #
- Go through all the lessons one more time (spelling, videos that play, images that load).
- Set the course to Published.
- Check the course as a student: open it with a test account (or in an incognito window for the lock screen) and work through the first lesson, including ticking it off.
- Announce the course: a post in your announcement space plus an email to the right audience, see Creating and sending an email campaign.
5. Adding students #
There are three routes, from manual to fully automatic:
- Manually, add individual members as students in course management. Fine for the occasional exception or a reviewer.
- Through a tag, with the tag link from step 3, a tag enrols someone automatically. Handy for existing customers: select them in your CRM and apply the tag.
- Through a purchase or automation, the purchase applies the tag, the tag grants access, and the onboarding automation sends the welcome email. Everything then runs by itself; see the automations article in the related links.
Frequently asked questions #
Can I release lessons in stages (dripping)? #
Yes, choose a structured set-up instead of “self-paced” for the course type. Lessons then become available in the order you determine or at fixed moments.
Can students talk to each other within a course? #
Yes. Comments under lessons are on by default, and you can create a separate space alongside the course for discussion and sharing results. That combination, learning and sharing, is exactly where a community platform makes the difference compared with a standalone course environment.
Can I duplicate or move an existing course? #
You can drag lessons within a course and put courses in order in the overview. For copying a complete course, contact support and we will look at the most practical route with you.
Do students lose their progress if I add or change lessons? #
No. Existing progress stays in place; new lessons count towards the progress percentage from that moment on. Students who were already “finished” then see the course as almost complete again, a natural moment to bring them back with an email.


