Adding radio buttons to your form #
Radio buttons in Autorespond forms are based on FluentForms Pro, included in your package. Read the English documentation
Radio buttons are ideal when you want visitors to make a single choice from several options. Unlike checkboxes, radio buttons let visitors select only one option. That makes them perfect for questions such as “Which package do you want?”, “How did you find us?” or “What is your preference?”.
Adding radio buttons to your form #
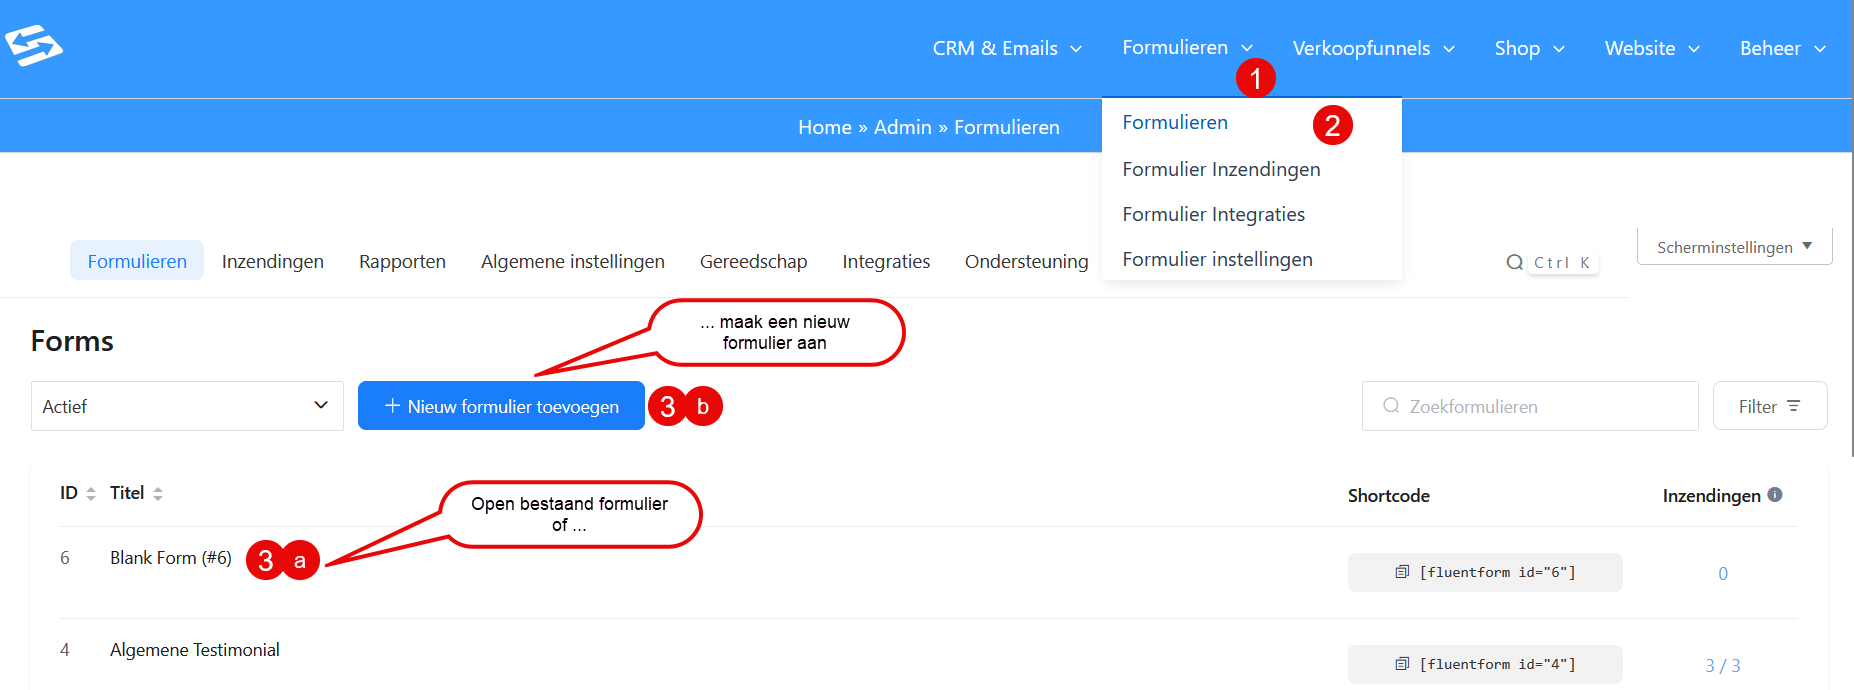
Go to Forms → Forms and open an existing form or create a new one. In the form editor you will find the radio button field under ‘General fields’.
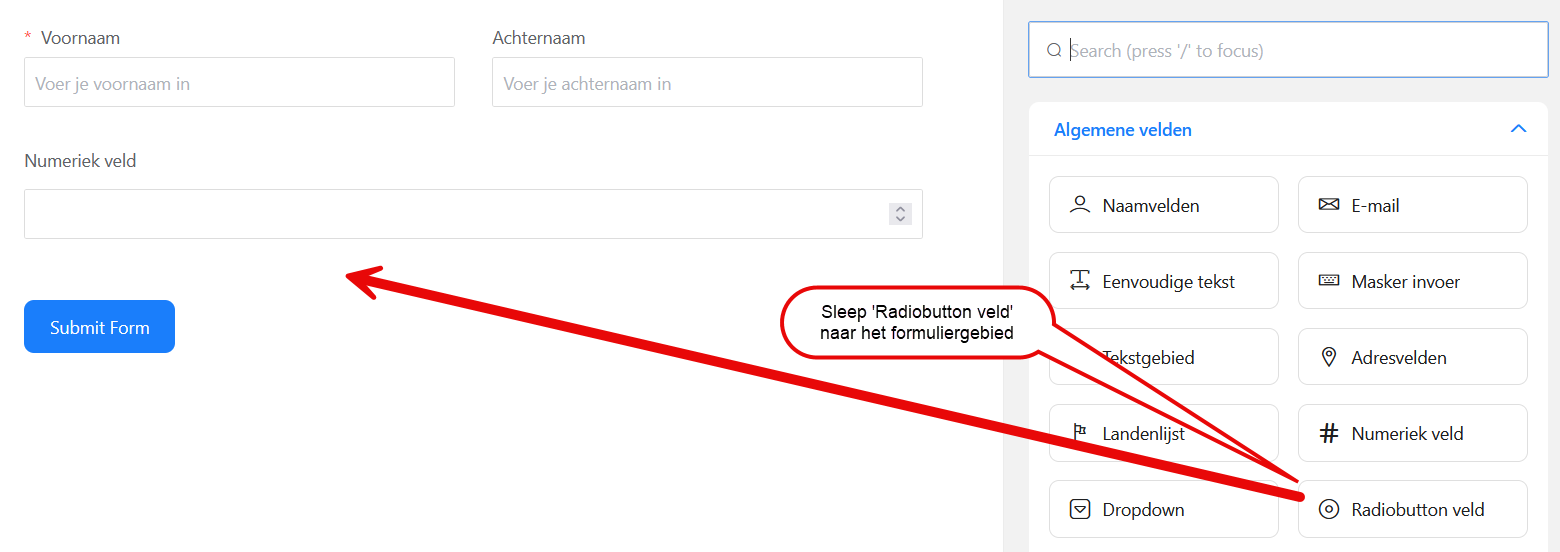
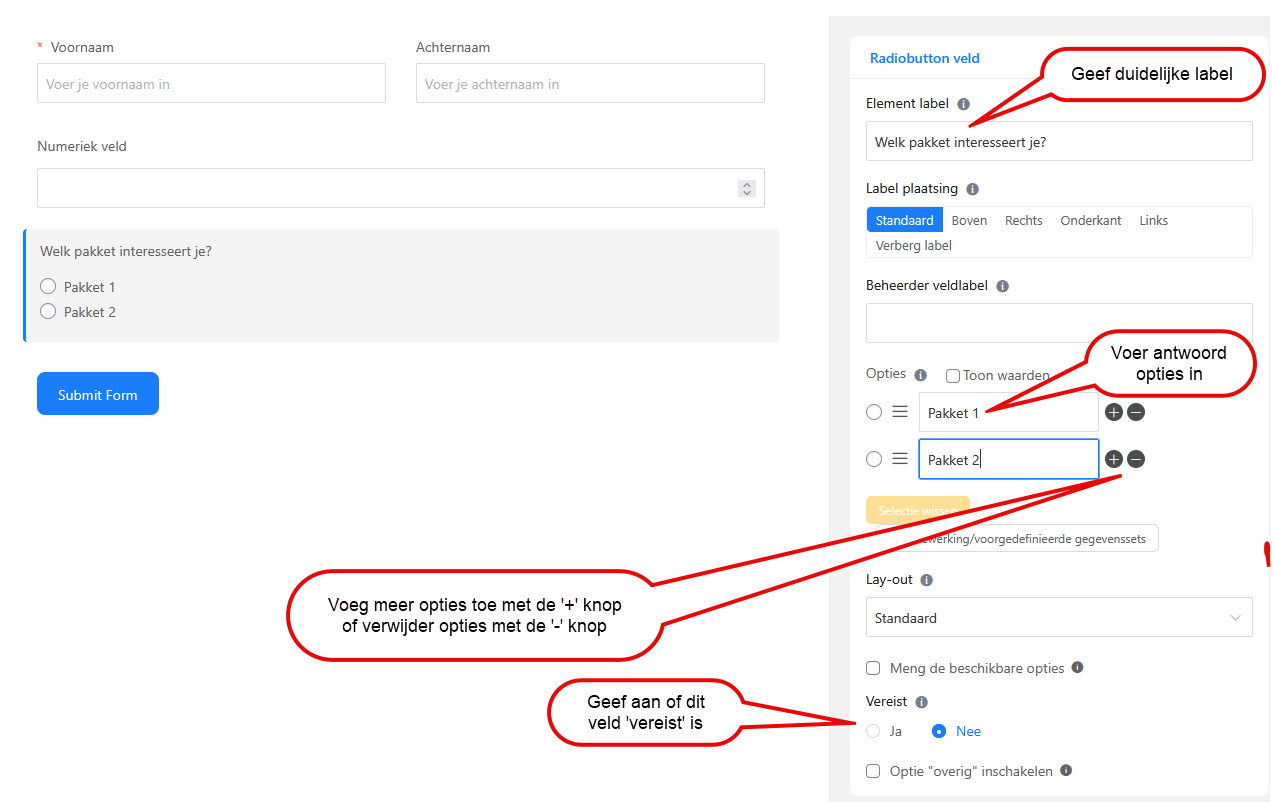
- Drag the ‘Radio Button’ field from the sidebar into your form
- Click the pencil icon on the field to open its settings
- Give the field a clear label such as “Which package are you interested in?”
- Add your answer options under ‘Options’
- Indicate whether or not this field has to be filled in
Configuring the choices #
When setting up your radio buttons, you can give each option both a label (what the visitor sees) and a value (what is stored). This is useful if you use different names internally from the ones you communicate to visitors.
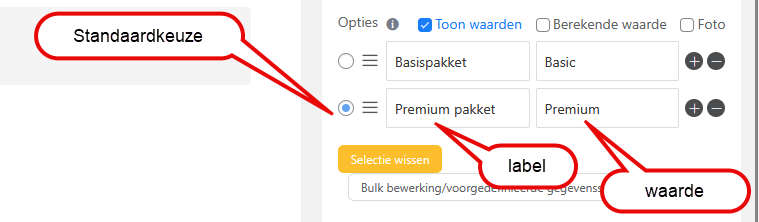
For example:
- Label: “Basic package (€39/month)”, value: “basic”
- Label: “Premium package (€79/month)”, value: “premium”
- Label: “Enterprise package (€149/month)”, value: “enterprise”
You can also set one of the options as the default choice by ticking the circle in front of that option.
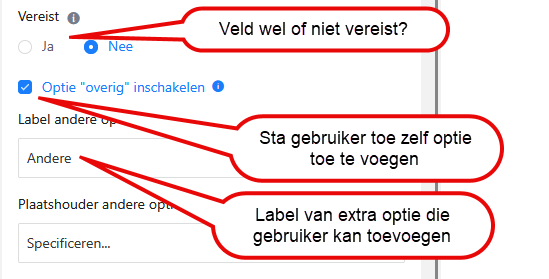
You can also let users add an option themselves. In that case tick “Enable the “other” option” and adjust the label if you want to.
You can indicate as well whether or not this radio button field has to be filled in.
Advanced settings for radio buttons #
Besides the options you specify, you can adjust the layout. You can choose between a vertical and a horizontal layout, depending on how many options you have and how much space is available. For longer lists of options a vertical layout usually works better, while short lists (2 to 3 options) can also be shown horizontally.
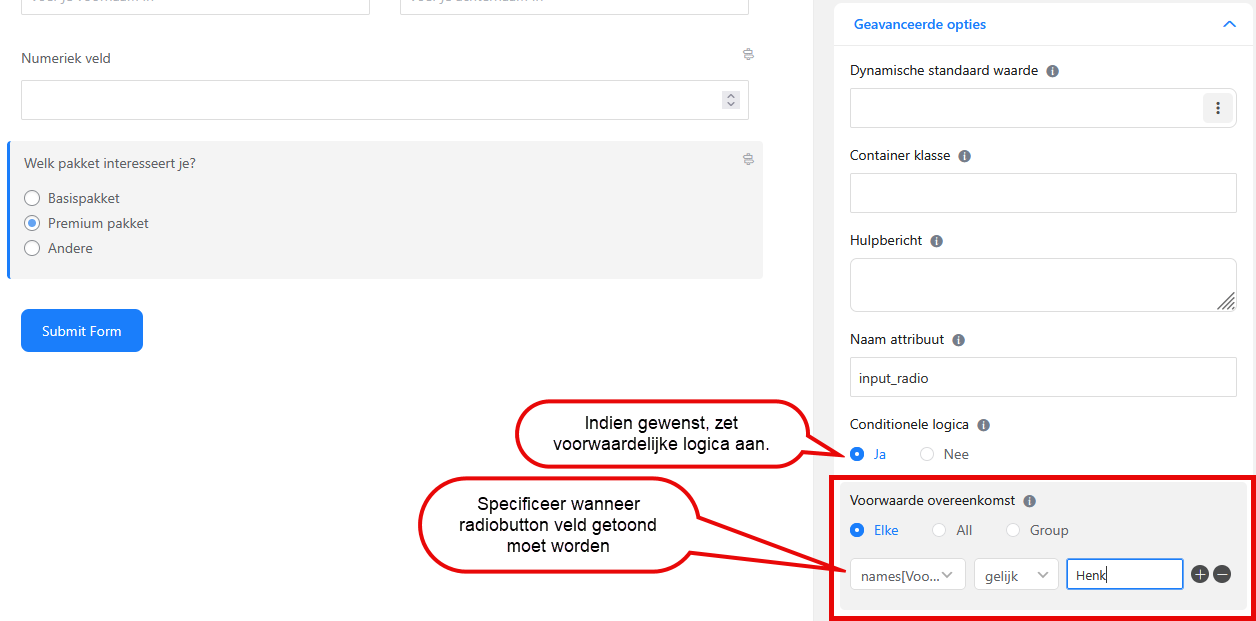
On the ‘Advanced options’ tab you can add a help text that is shown as a tooltip. You can also create conditional logic there, which means that the radio button field is only shown when the other fields in the form meet certain conditions, for example when the first name has to be equal to John.
Using radio buttons in automations #
You can use the value a visitor selects in the radio buttons to start different actions. Based on the option chosen, you can add different tags, place contacts in specific lists, or trigger other automations.
For linking form data to your CRM, see also linking form sign-ups to the CRM.
Best practices for radio buttons #
Use radio buttons when you want exactly one choice out of several options. For situations where more than one answer is possible, use checkboxes. Limit the number of options to a maximum of 7 or 8 choices to keep the form easy to use.
Make sure the options are mutually exclusive and that together they cover every possible answer. Consider adding an “Other” option with a text field for situations you have not anticipated.
Frequently asked questions #
What is the difference between radio buttons and checkboxes? #
Radio buttons allow only one selection from several options, whereas checkboxes make several selections at once possible. Use radio buttons for exclusive choices such as “Yes/No” or “Small/Medium/Large”.
Can I make radio buttons required? #
Yes, in the field settings you can mark the radio button field as required (tick the option ‘yes’ for the ‘required’ field). Visitors can then no longer submit the form without making a choice.
How do I use the value of radio buttons in automations? #
The selected value is saved as form data and can be used in conditional logic within automations. You can start different actions depending on which radio button has been selected.


