Adjusting confirmation texts in forms #
After filling in a form, visitors see a confirmation. You can adjust these texts entirely to your own wishes. There are two kinds of confirmation you can set up:
Confirmation message on the page #
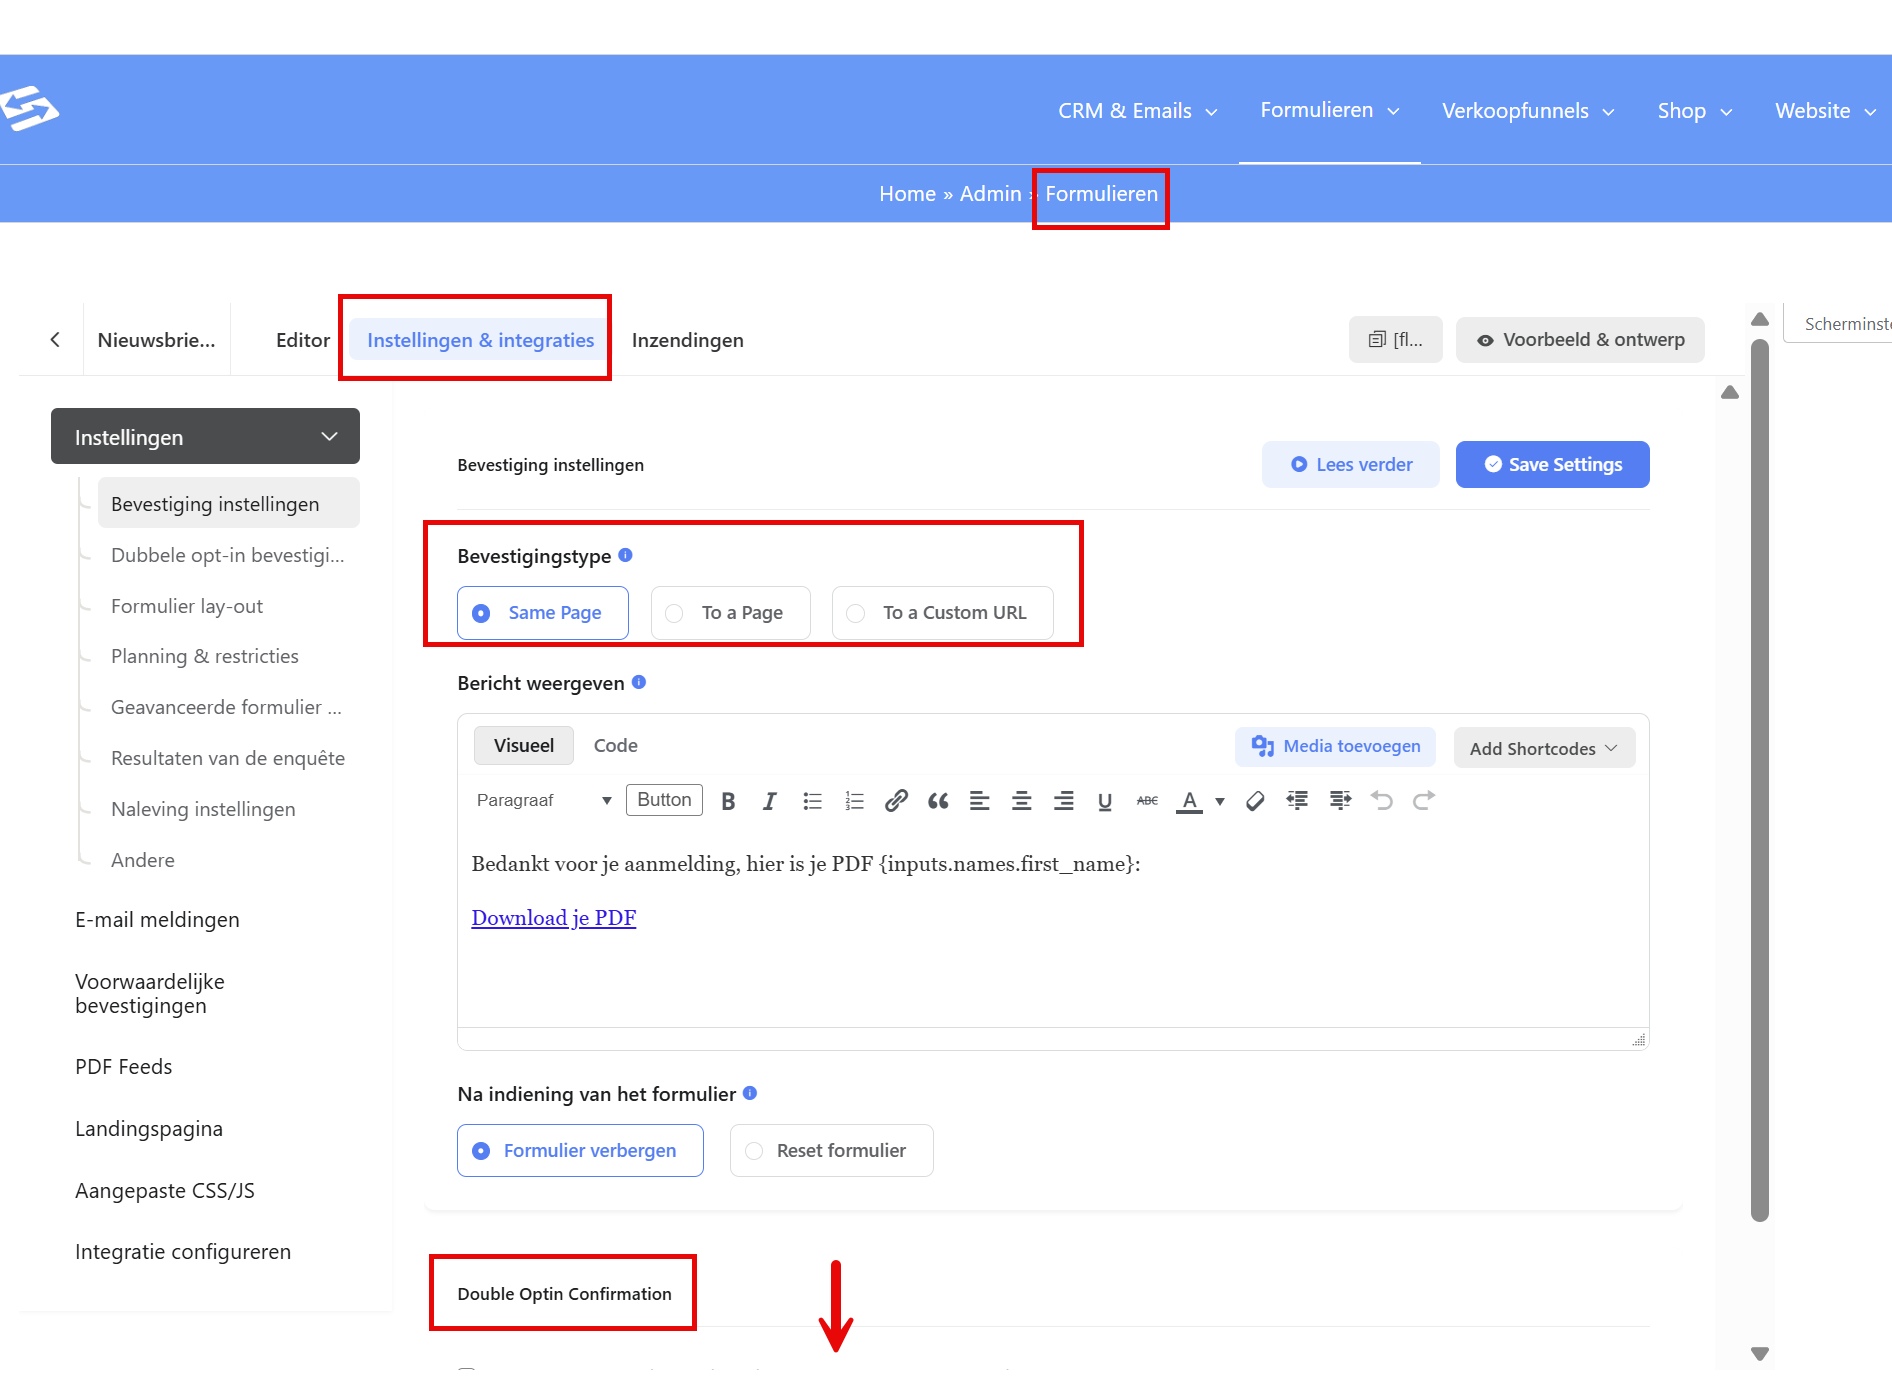
This is the text visitors see immediately after submitting the form, on the same page.
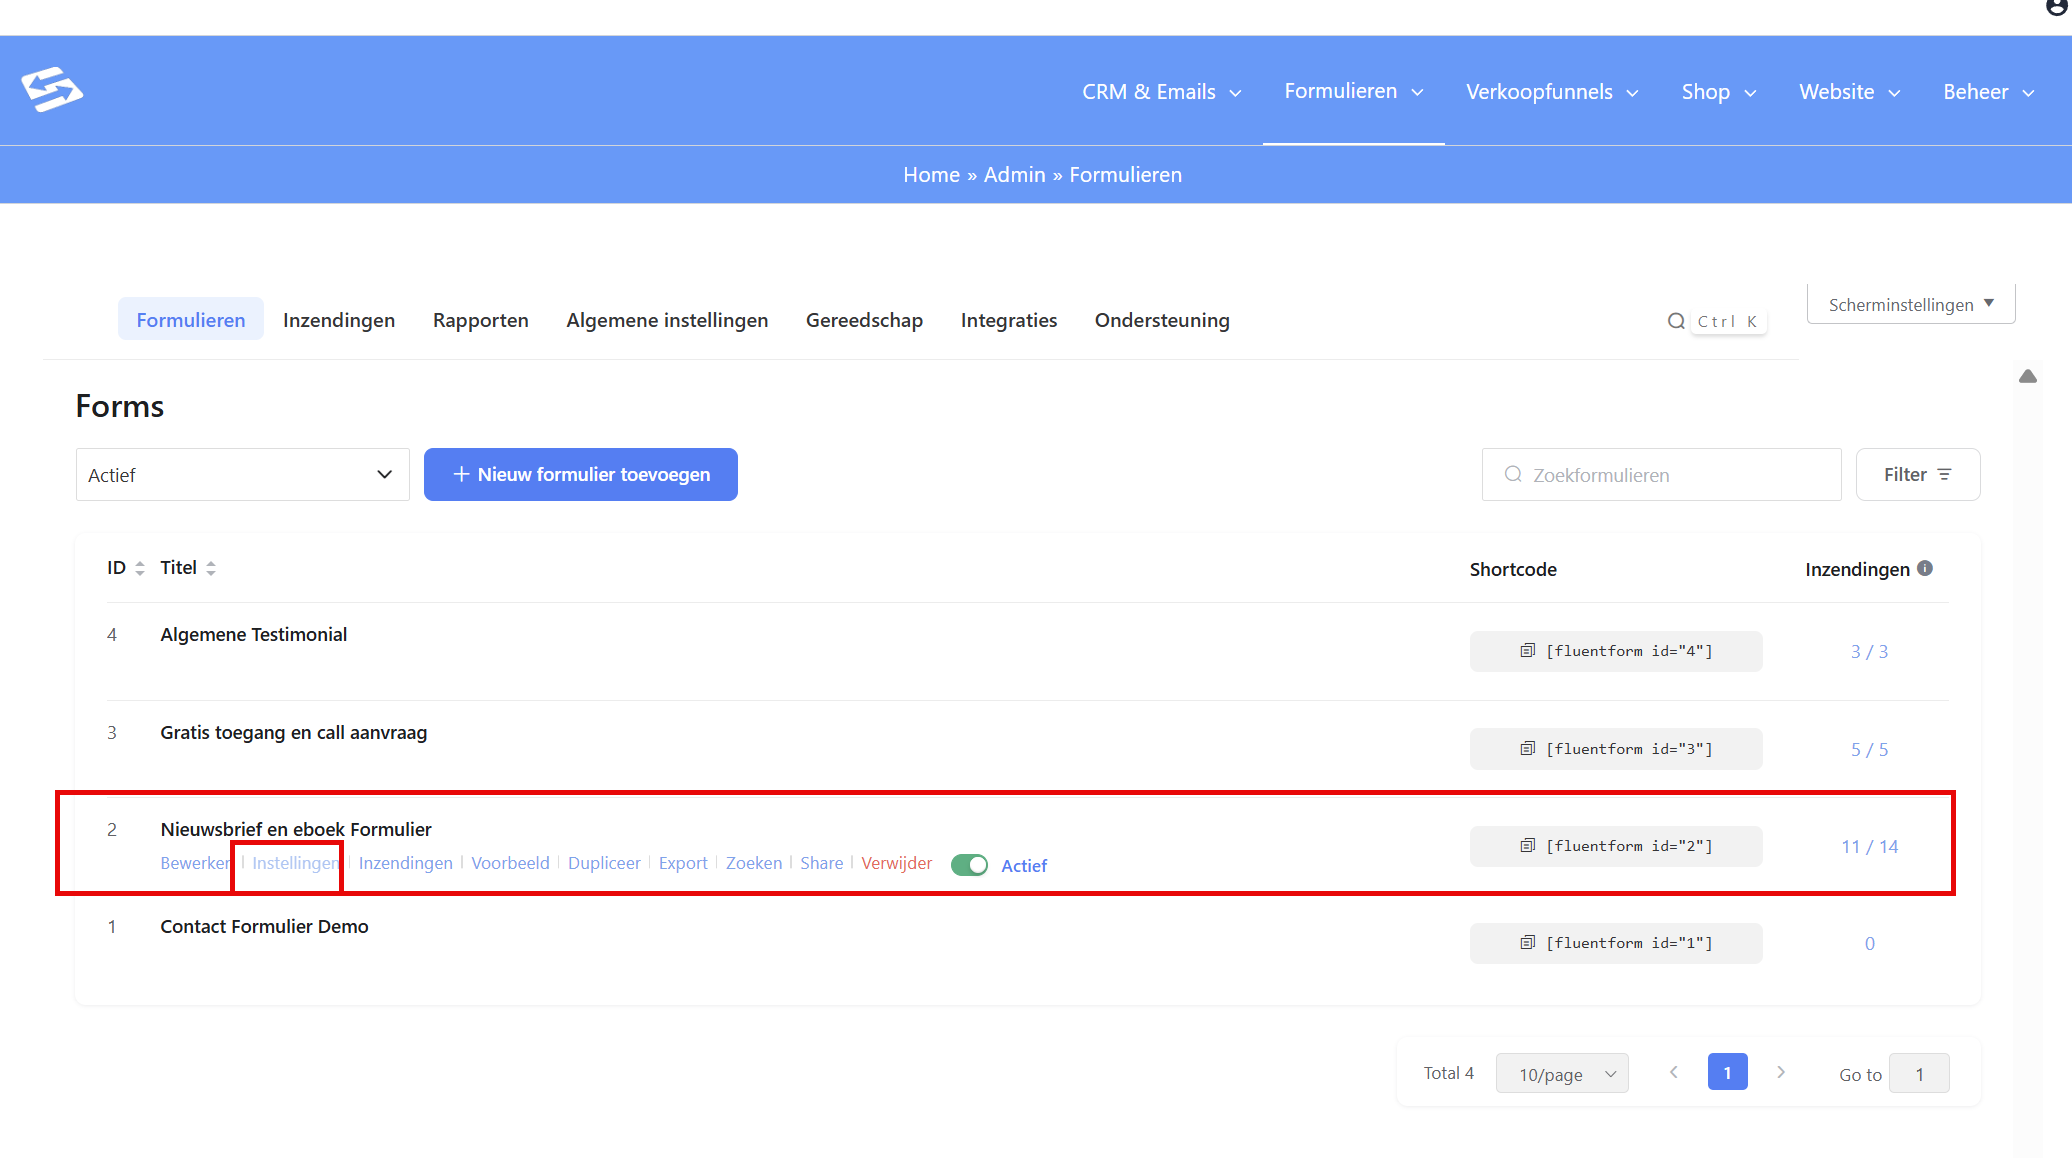
- Go to Forms → Forms
- Open the form you want to edit
- Click Settings & Integrations
- Click Confirmation message settings
- Adjust the text under ‘Confirmation message’
- Save the form
Double opt-in confirmation email #
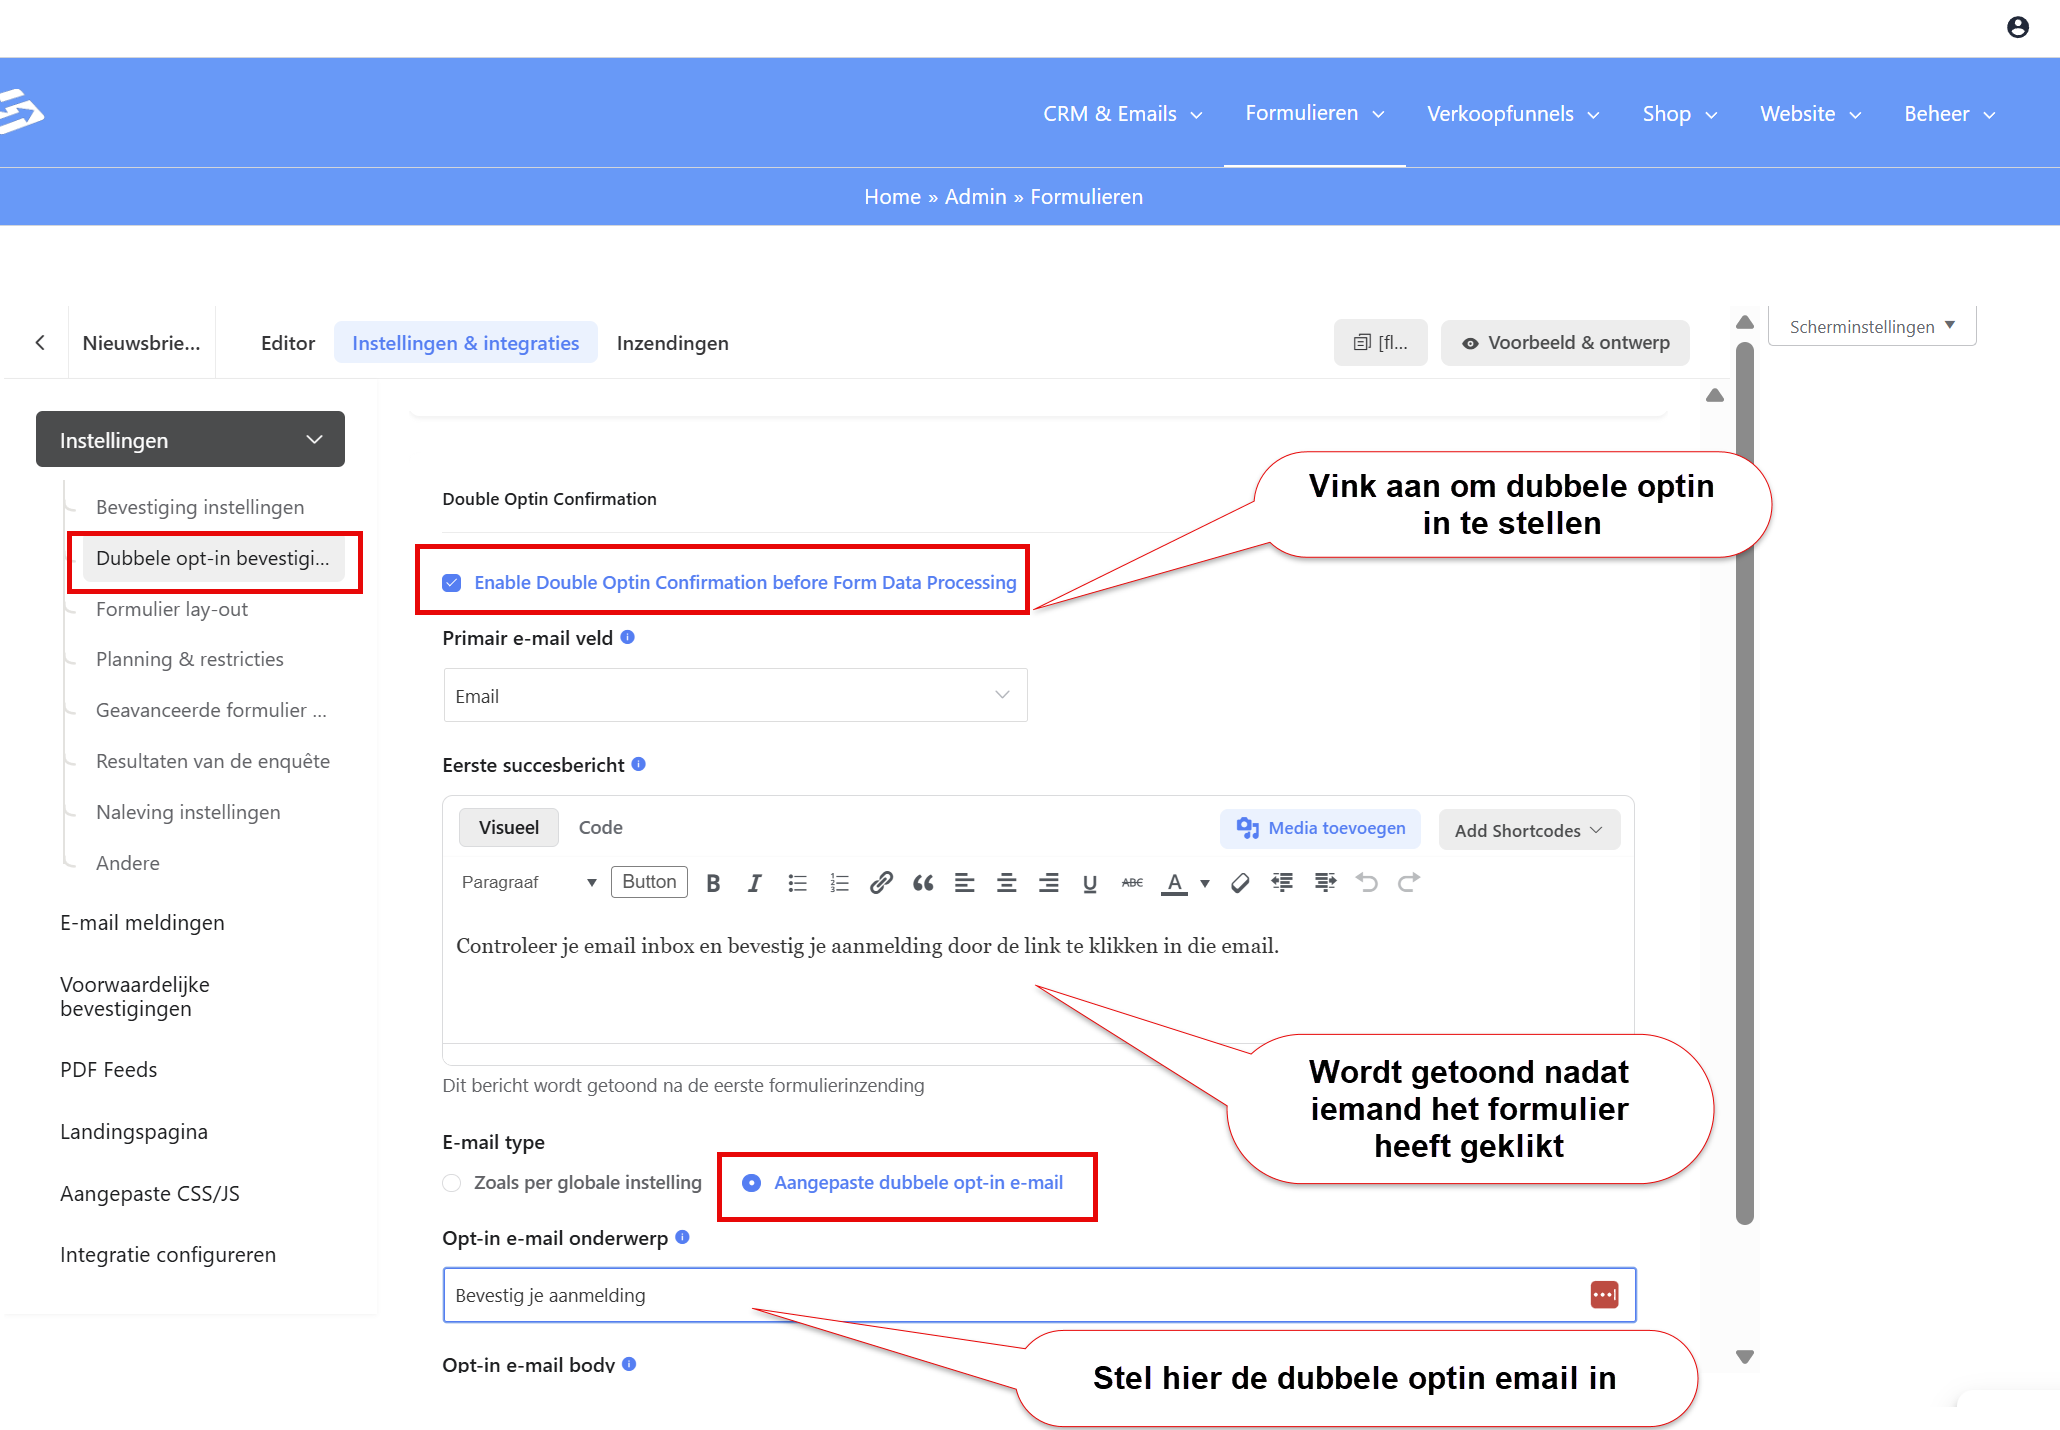
If you have switched on double opt-in, people who sign up receive an email asking them to confirm their registration.
- Go to Forms → Forms
- Open the form you want to edit
- Click Settings & Integrations
- Click Integration Configuration
- Open the Email marketing integration
- Scroll down to ‘Double Opt-in Settings’
- Adjust the text under ‘Email Subject’ and ‘Email Body’
- Save the settings
Setting up a thank-you page #
Instead of a confirmation message you can also redirect visitors to a dedicated thank-you page.
- First create a new page via Website → Pages
- Go back to the form and open Confirmation message settings
- Choose ‘Redirect to a page’ instead of ‘Show success message’
- Select the thank-you page you created
- Save the form
The confirmation texts become active as soon as you save the form. Always test your form to check that the text is displayed correctly.


